


27 Kitchen Vent Hood Ideas for a Stylish Focal Point Above the Stove
If your Pinterest folder is full of range hood pins that look either like a plain stainless appliance or a six-figure showroom kitchen, that gap is real; most photo roundups never bridge it. This...

If your Pinterest folder is full of range hood pins that look either like a plain stainless appliance or a six-figure showroom kitchen, that gap is real; most photo roundups never bridge it. This list sorts 27 kitchen vent hood ideas by material, shape, and budget, so you can match a look to your actual stove wall instead of guessing what’s realistic.
This works best for homeowners mid-planning a remodel who already have a rough stove wall width and budget range in mind. It won’t help if you’re starting from zero and haven’t measured your kitchen yet — grab a tape measure first, then come back.
Every idea below includes a grounding detail: approximate kitchen size it suits, whether it needs ducting, rough budget tier, and whether it’s DIY-friendly or needs a pro.
Kitchen vent hood ideas refers to the material, shape, color, and placement choices that turn a stove’s exhaust hood into a visible design feature instead of a hidden appliance. The mechanical job — pulling smoke, grease, and heat away from the cooktop — stays the same. The design layer is what changes how the wall reads.
How to Choose the Right Vent Hood Material for Your Stove Wall
To choose the right vent hood material for your stove wall, follow these steps:
- Measure your stove wall’s width and ceiling height to see how much hood you can realistically build.
- Decide whether you’re keeping your current duct route or starting fresh, since that affects both material options and cost.
- Pick one dominant material — plaster, wood, tile, or metal — and use a second material only as a thin accent band.
Ducted vs Ductless Hood Basics
Ducted vs ductless: Ducted hoods work better for serious daily cooking because they vent smoke, grease, and heat fully outside through ductwork. Ductless hoods work better when you’re renting or can’t run new ducting, since they recirculate filtered air back into the room through a filter. The key difference is ducted needs a clear path outside; ductless needs a filter you swap regularly.
One caveat worth saying upfront: none of the ideas below replace correct CFM sizing for your cooktop. A hood that looks stunning but is undersized for a six-burner range will look the part without doing the job — confirm CFM with whoever installs it before you settle on a material.
Plaster and Stucco Hoods That Feel Hand-Made
Plaster reads as the most-saved texture in current stove wall pins, and it’s easier to retrofit over an existing hood box than most people expect.
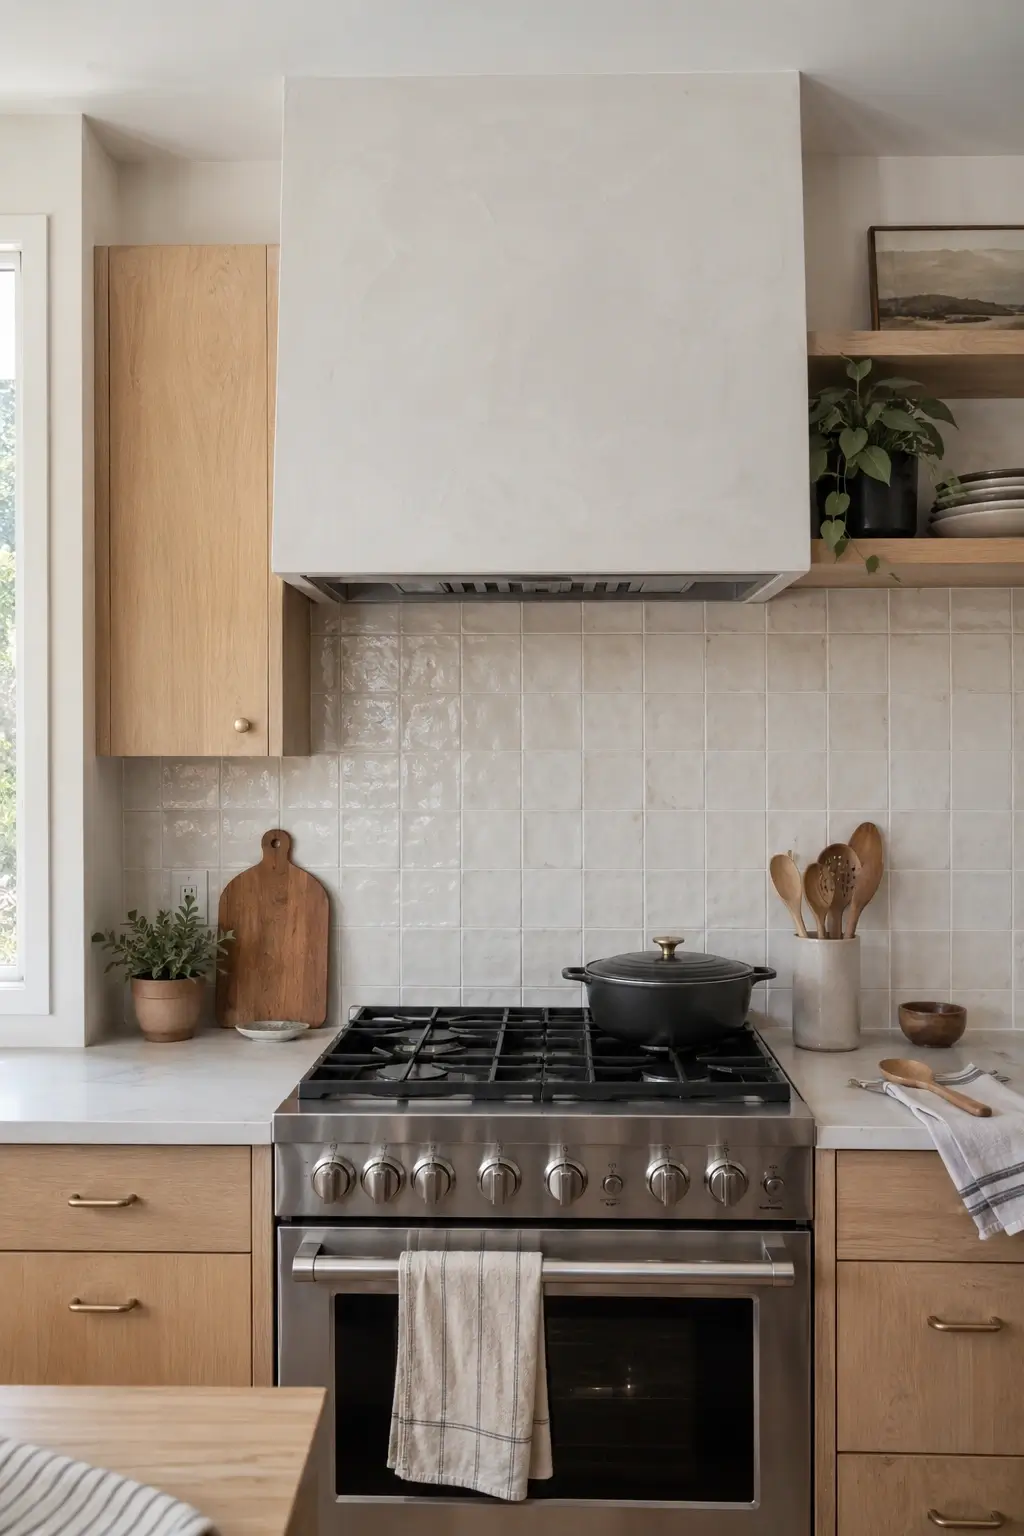
1. Trowel a Soft Putty-Plaster Hood With Visible Hand Strokes for an Artisan Stove Wall
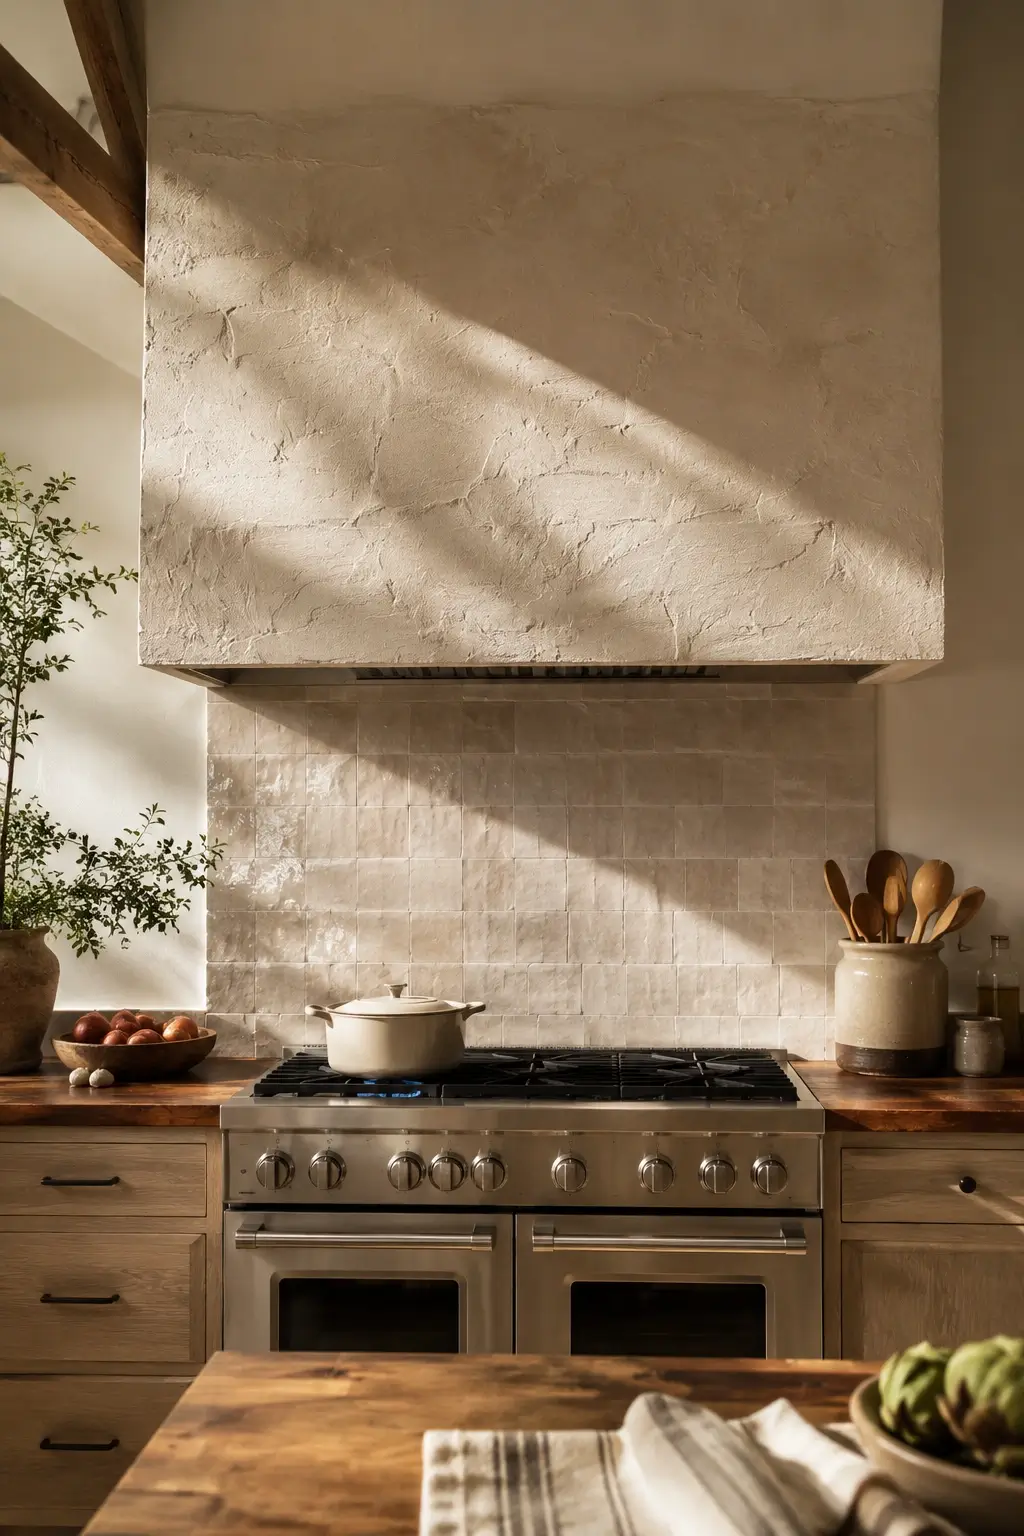
Stainless slide-in hoods do the job, but they rarely feel like part of the room. Trowel a plaster finish over the hood box in a soft putty tone and leave the hand strokes visible instead of sanding them flat. The texture catches light the way stainless never can, and it lands in the warm-neutral direction the NKBA 2026 Kitchen Trends Report flags as the current default over cooler grays.
My read is this works best on a stove wall at least 30 inches wide, since a narrow hood loses the texture’s impact. It’s a ducted build a plasterer can finish over your existing liner in roughly a day, typically $800–$2,500 depending on region.
2. Curve a Plaster Hood Into a Gentle Arch So the Stove Wall Feels Sculpted, Not Boxy
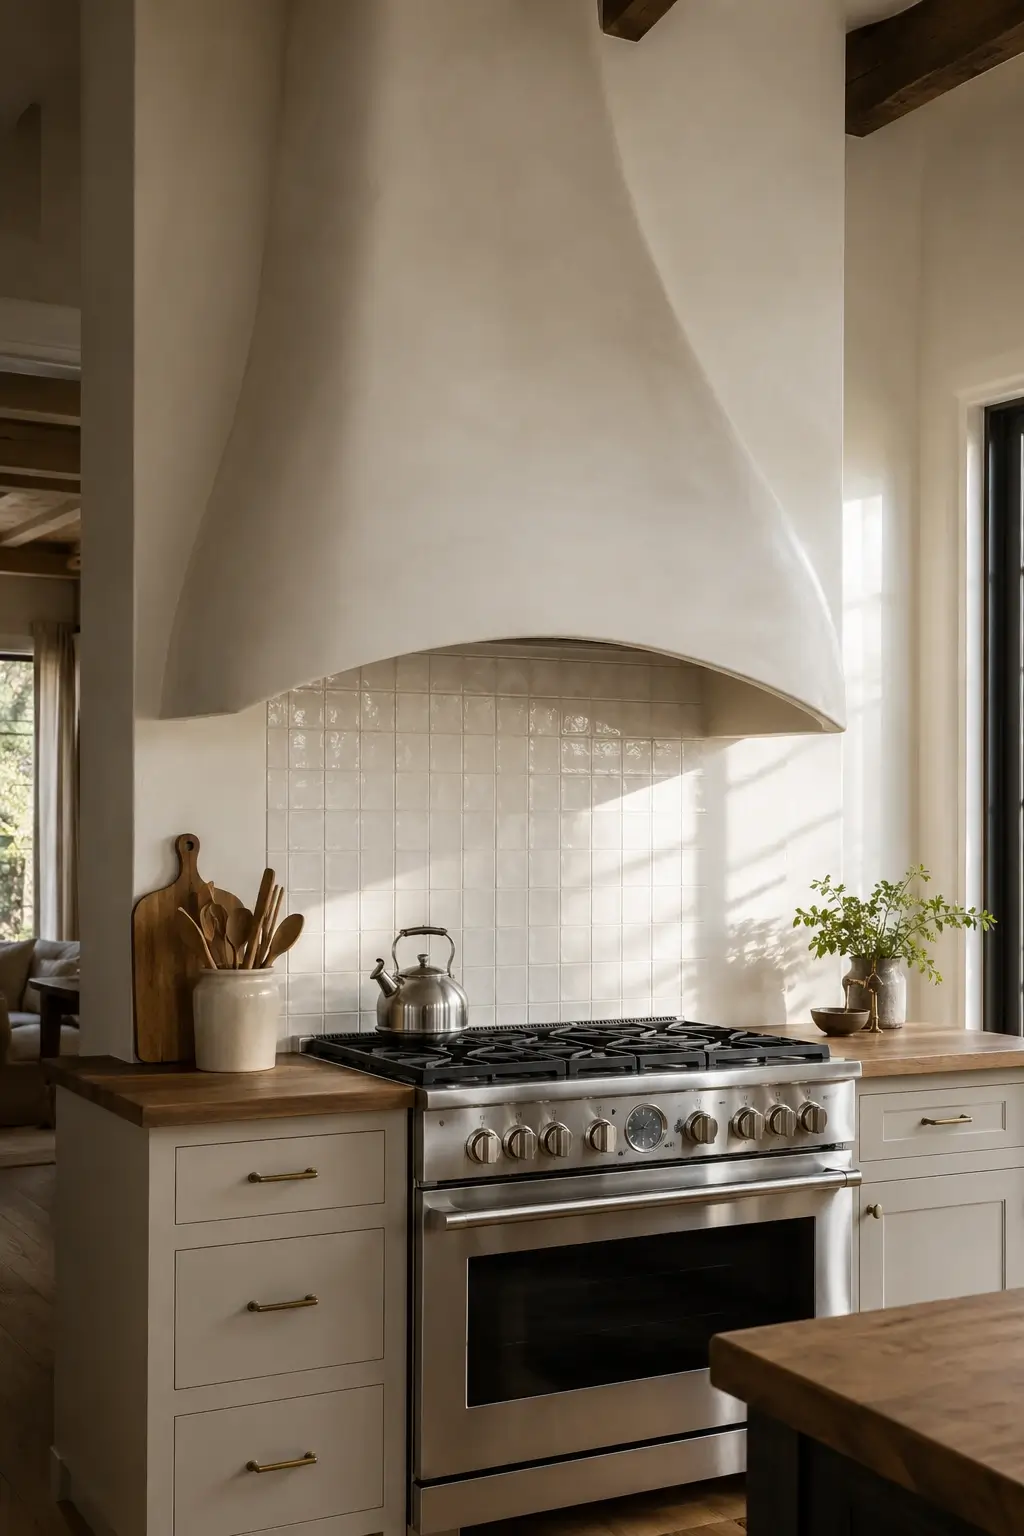
Boxy hoods read heavy and appliance-like no matter the color. Curve the bottom edge of a plaster hood into a soft arch instead, so the wall feels carved rather than built. The arch softens every hard line around it and pulls the eye up naturally.
I’d only splurge here if your ceiling is at least 8.5 feet, since a low ceiling crowds the curve and flattens the effect. It needs a pro to frame the curved substrate before plastering, mid-to-higher budget tier, ducted.
3. Pair a Mushroom-Toned Plaster Hood With a Matte Black Vent Strip for Quiet Contrast
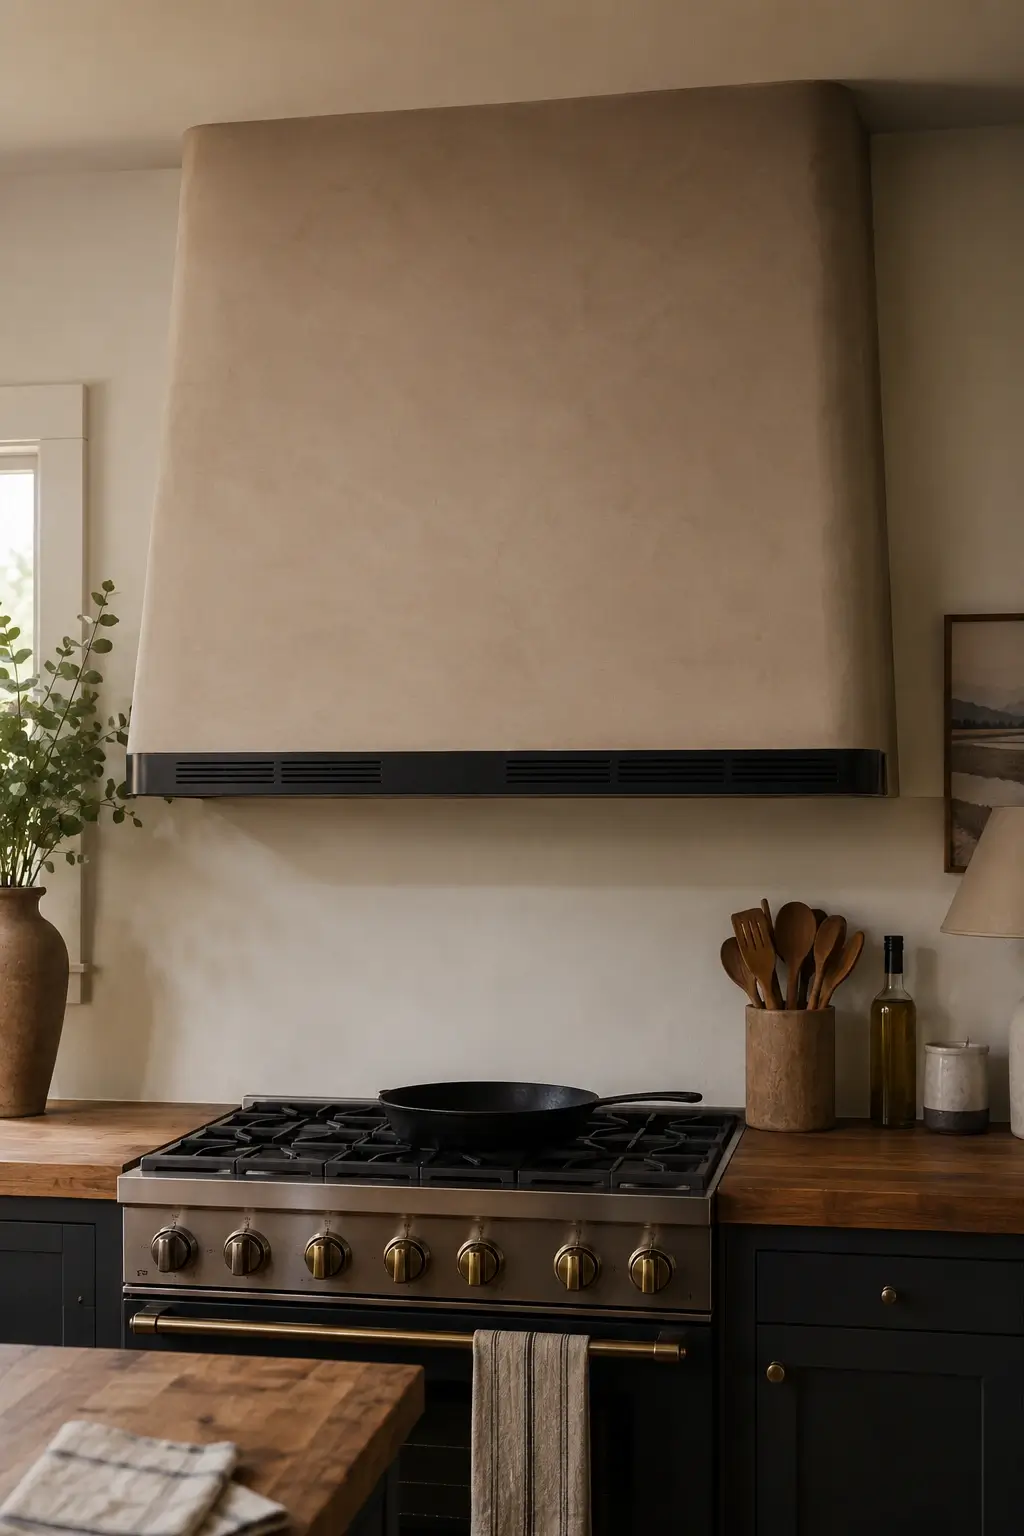
A fully soft, textured hood can disappear into a neutral wall. Add one thin matte black vent grille strip along the base so the function stays visible and the contrast grounds the piece. It’s a small move that keeps the plaster from reading flat.
This is a ducted detail since the strip sits over the real grille. It’s DIY-friendly if the hood box already exists — you’re only adding trim — low-to-mid budget.
4. Texture a Plaster Hood With Fine Sand Finish to Catch Afternoon Light Like Stone
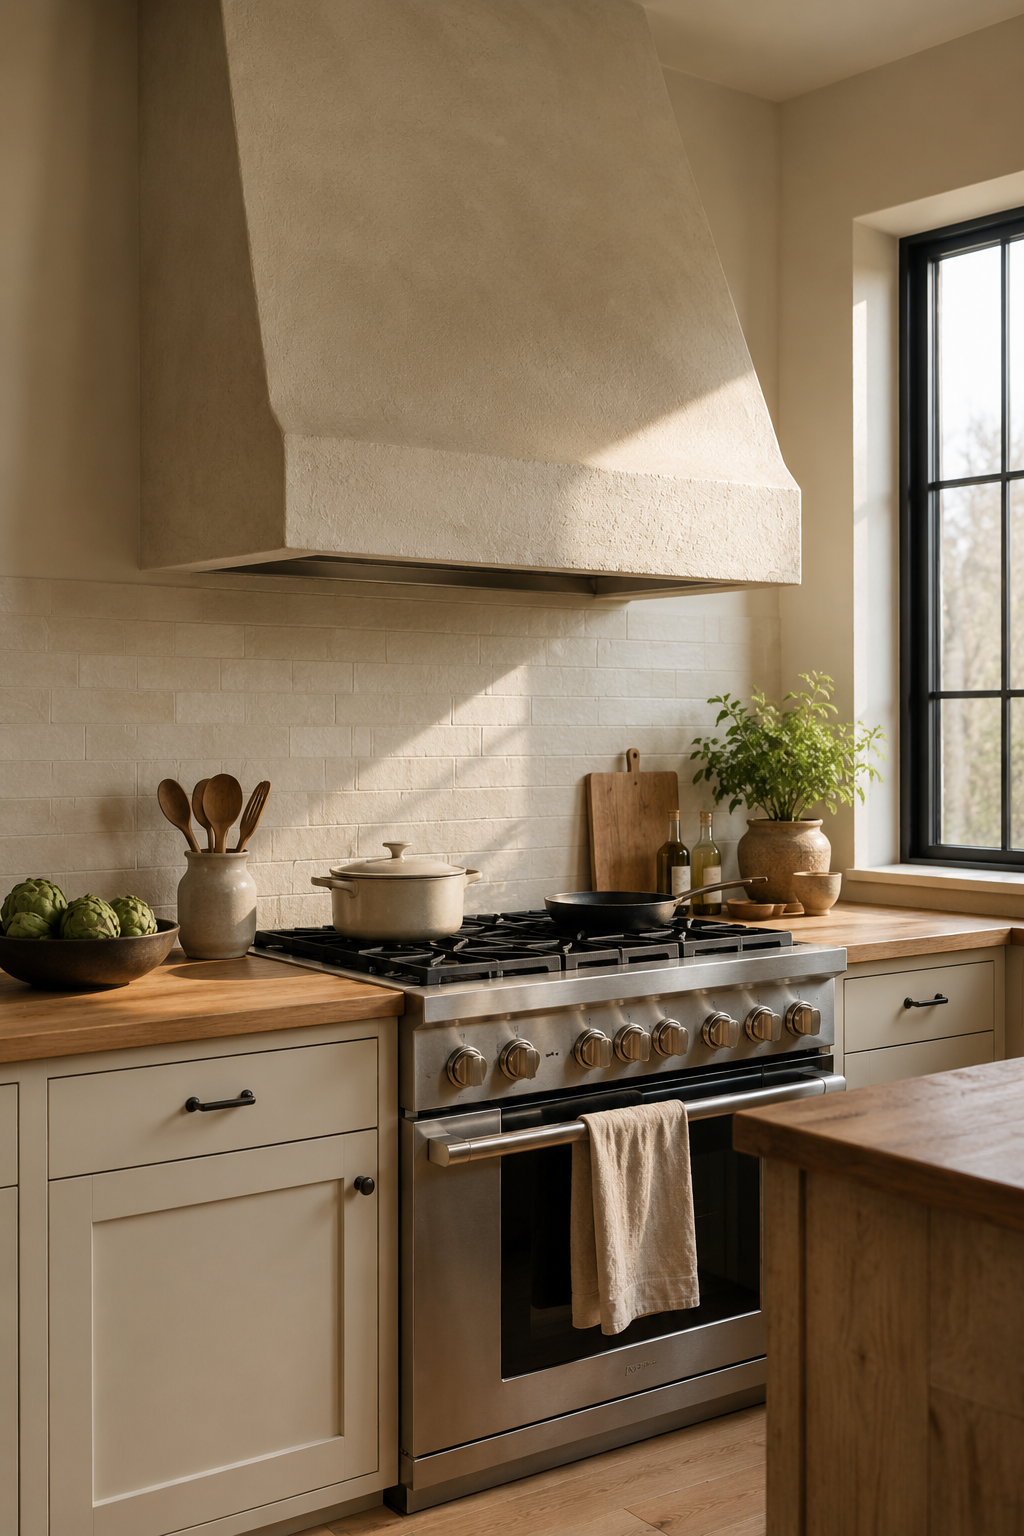
Smooth plaster looks fine in photos but flat in person. Ask for a fine sand finish instead, which holds a faint grain that catches light the way real limestone does, at a fraction of the cost. It only shows up properly with a window nearby.
This suits a stove wall that gets direct afternoon light through a nearby window. Pro install, mid budget tier, ducted behind the finish.
Wood-Wrapped Hoods for Warmth and Texture
Wood softens a kitchen the way plaster does, but it leans furniture rather than sculpture, a strong fit if your cabinets or floors already run warm.
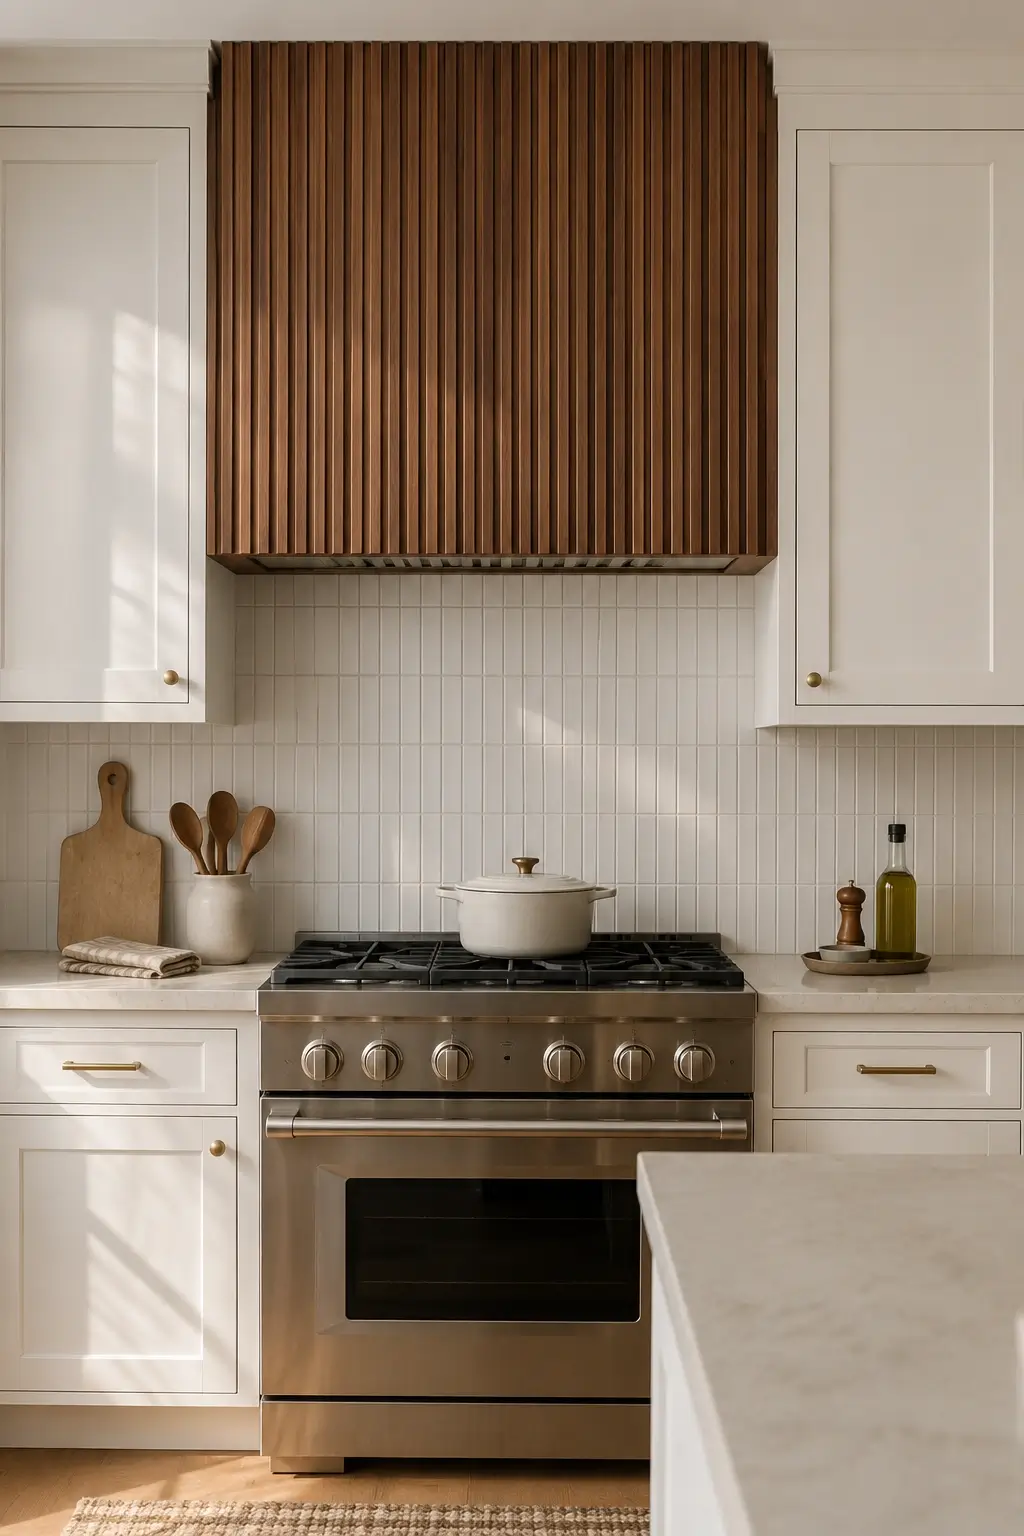
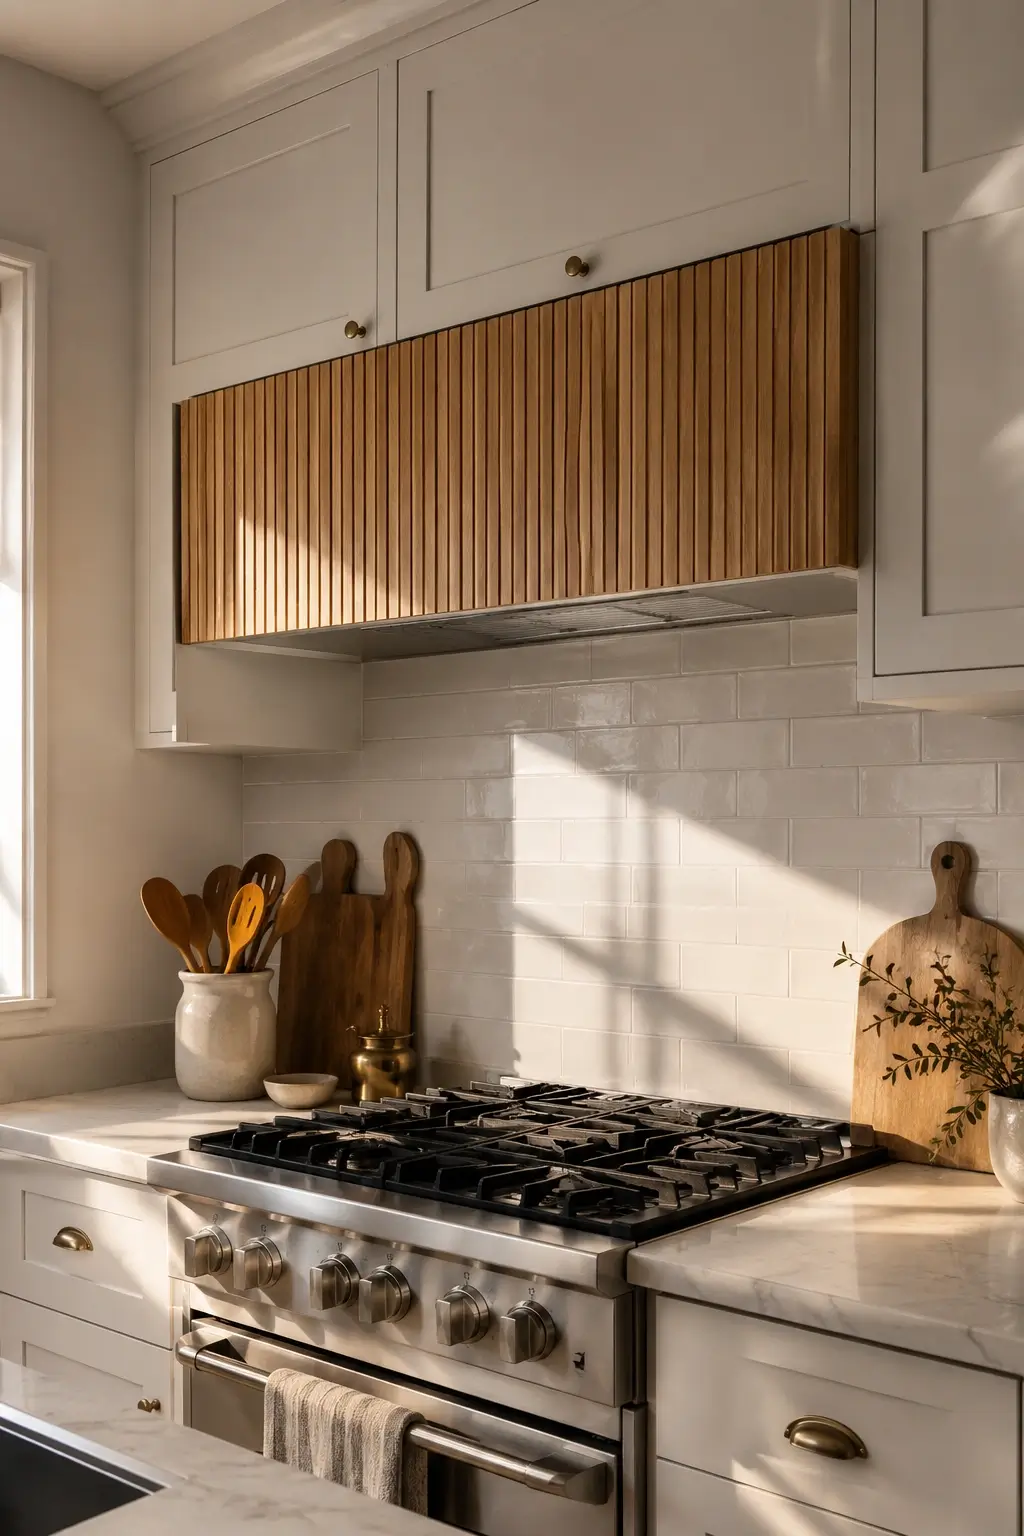
5. Wrap a Walnut Hood in Vertical Slats to Add Warmth Without Heavy Bulk
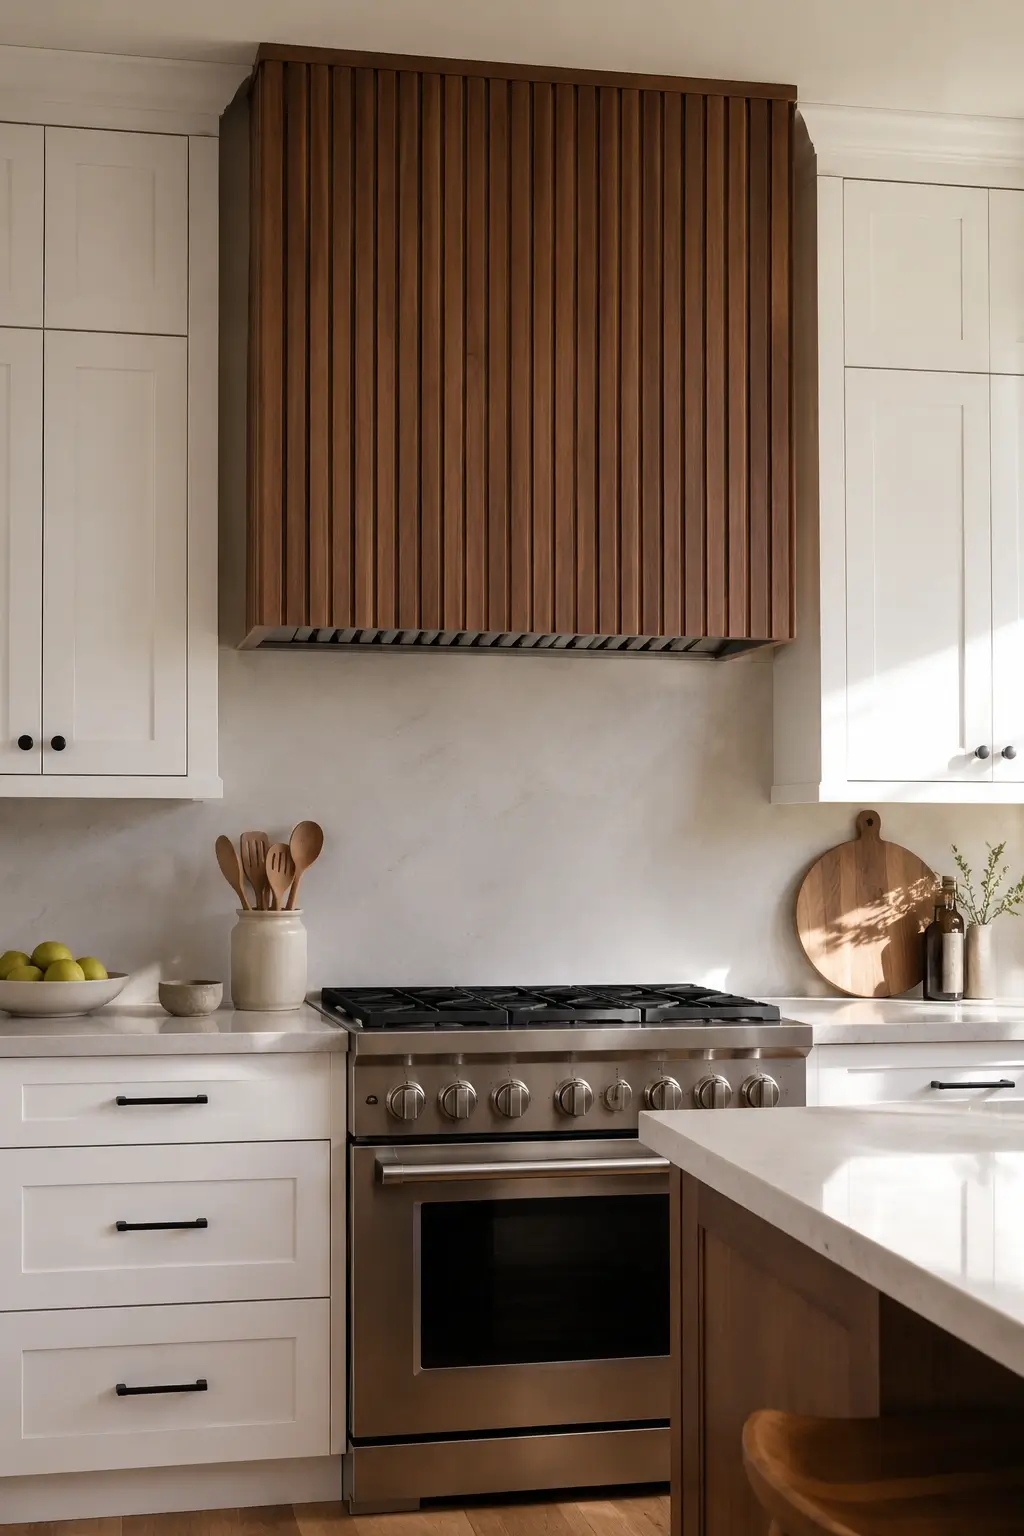
A solid wood box can look heavy fast. Wrap it in narrow vertical walnut slats instead, which break up the mass and add rhythm without adding visual weight. ZLINE’s wall-mount wood hoods are a useful reference point for this exact look if you want a pre-built option to show your contractor.
These pre-built inserts can go DIY over an existing liner in a weekend in a small-to-mid kitchen, mid budget tier, ducted.
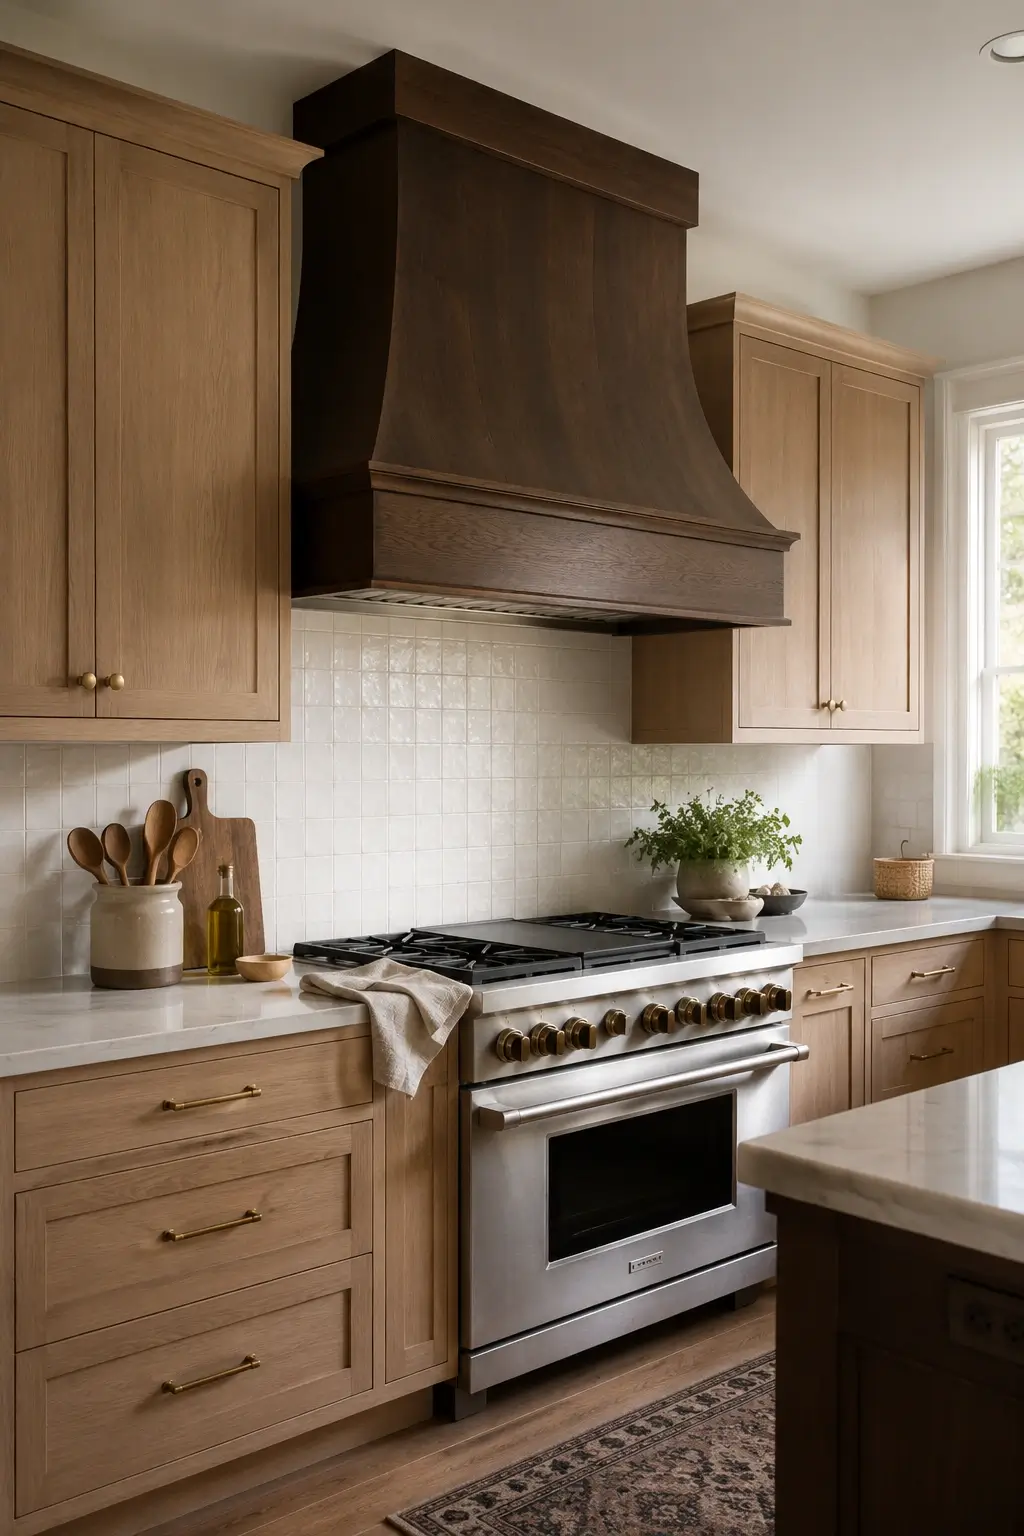
6. Build an Oak Wood Hood With Visible Grain to Echo Open Shelving Nearby
A hood that matches nothing else on the wall reads like an afterthought. Build it in oak with the grain left visible so it speaks the same language as open wood shelving or wood floors already in the room. The repetition is what makes it feel intentional.
This works best when the kitchen already has wood elements to echo. Custom build needs a pro, mid-to-higher budget depending on whether you use a kit or full custom millwork.
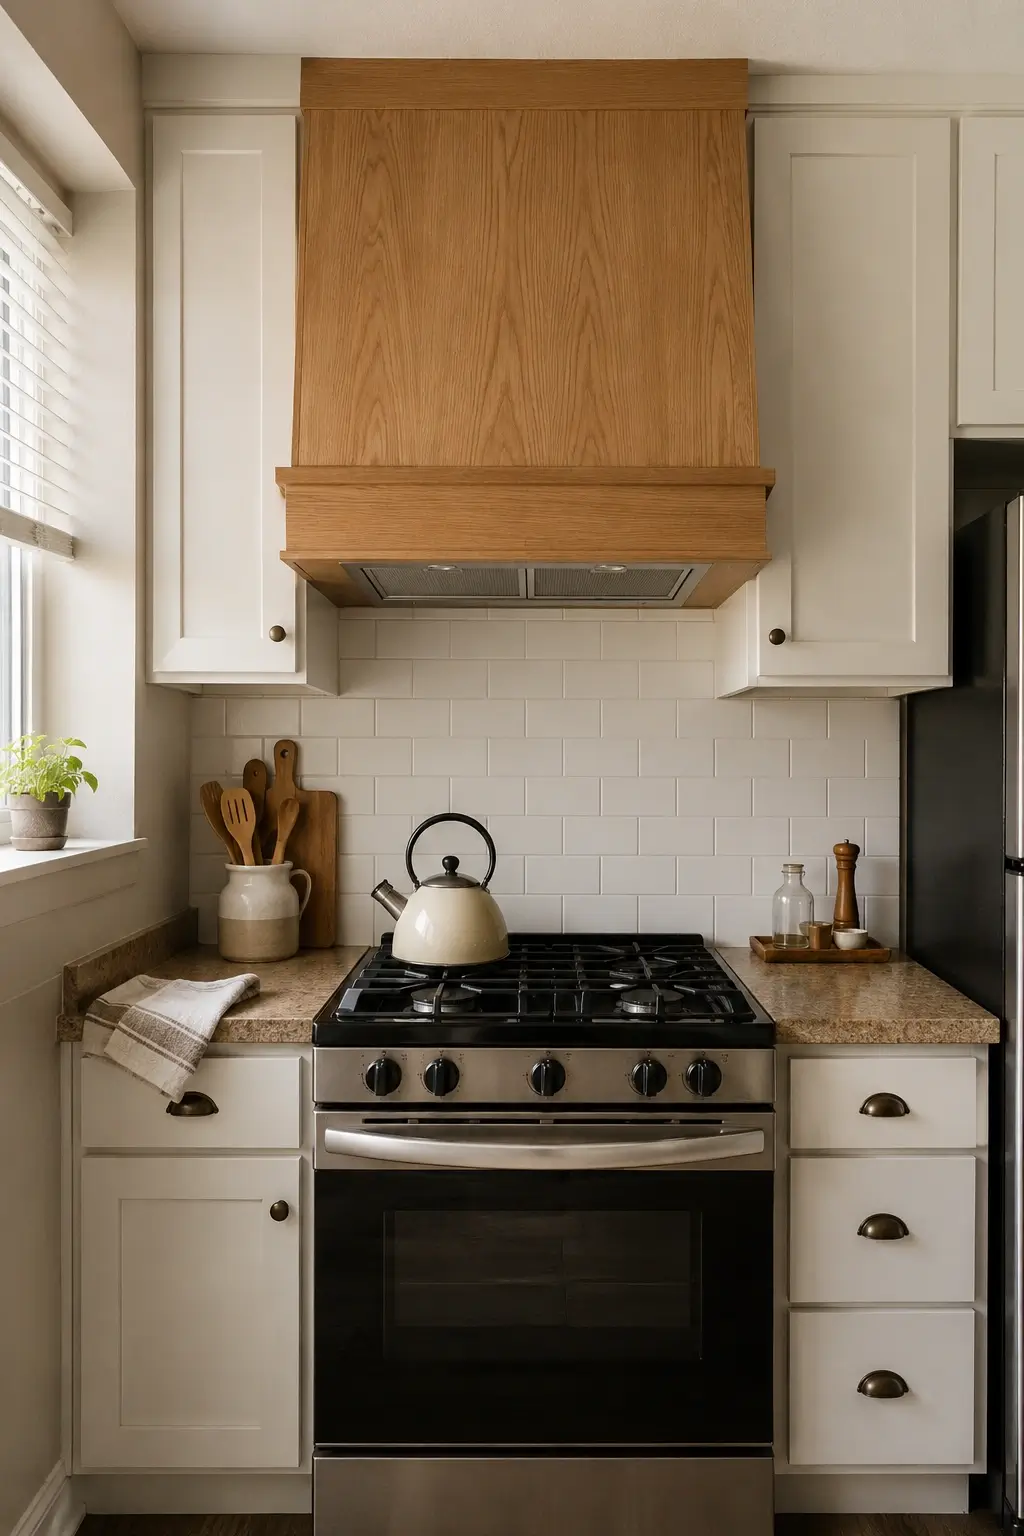
7. Box In a Slim Wood Hood Over a Narrow Stove for a Galley Kitchen That Reads Custom
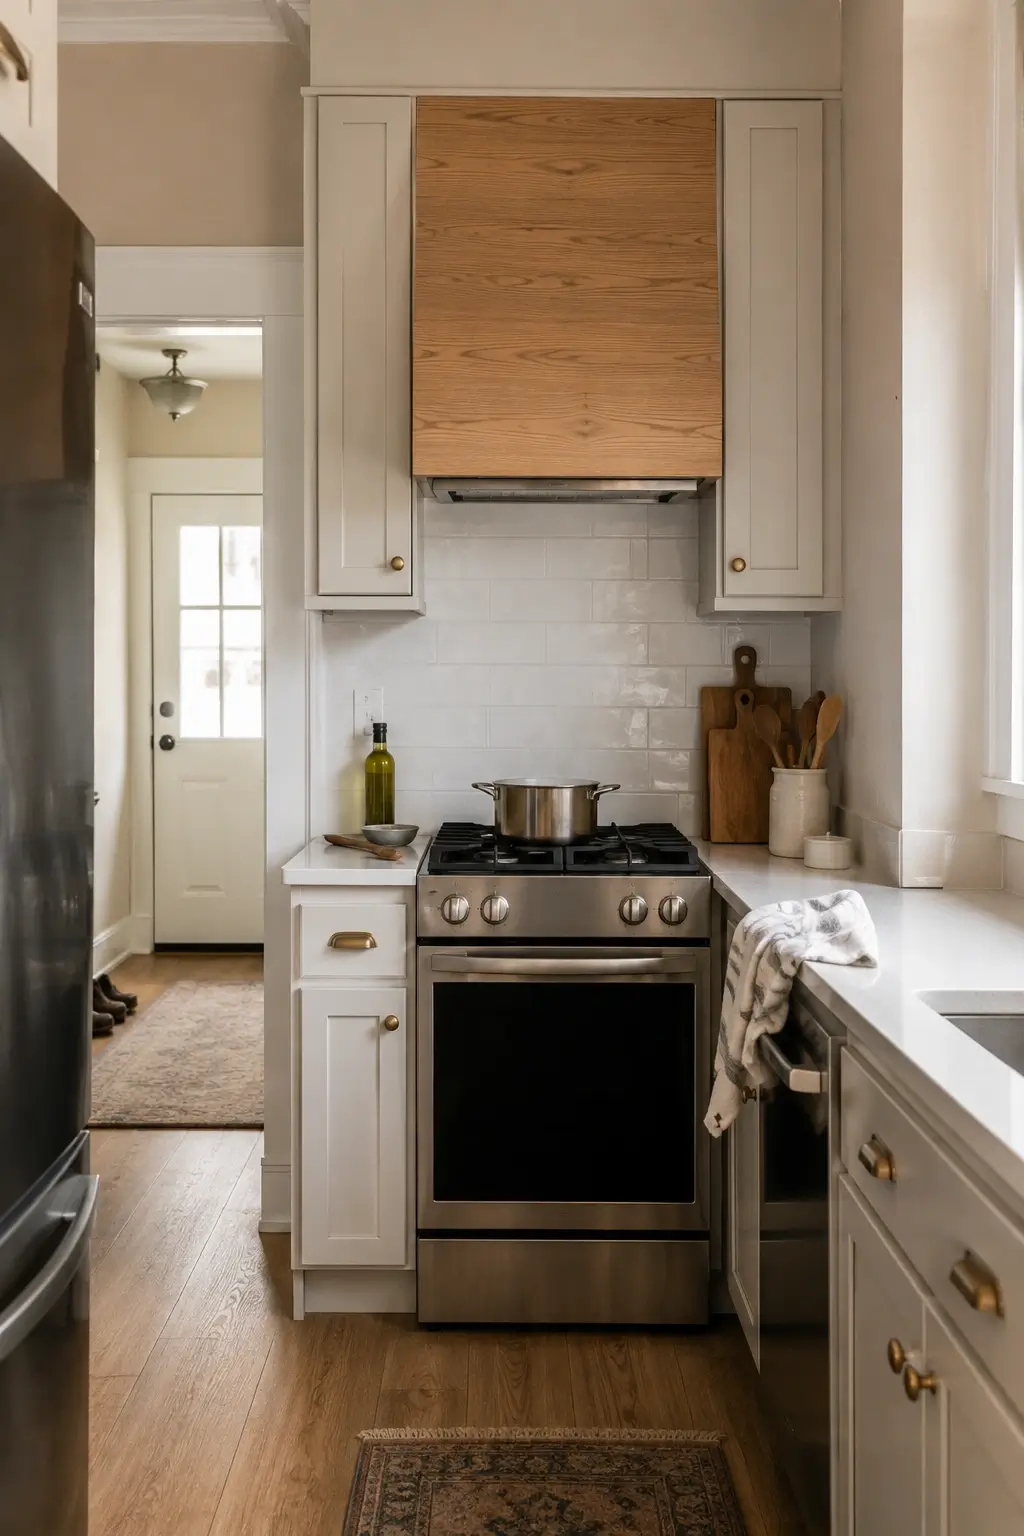
Galley kitchens often get the smallest, most generic hood available because the wall feels tight. Box a slim wood hood instead, sized to the exact width of the stove, so it reads as built rather than purchased off a shelf.
This fits stove walls under about 30 inches, common in galley layouts. Ducted, DIY-friendly with a basic insert kit, low-to-mid budget.
8. Stain a Wood Hood Two Shades Darker Than Cabinets So It Reads as Furniture, Not Appliance
A wood hood that matches cabinets exactly can vanish into the wall instead of standing out. Stain it two shades darker than the surrounding cabinetry so it reads as a distinct furniture piece, the same logic as an island in a contrasting tone.
Low-cost refinish if the hood is already wood, DIY stain job over a weekend, works in any kitchen with existing wood cabinetry.
Tiled Hoods That Disappear Into the Backsplash
Tile solves a different problem than plaster or wood: instead of standing apart, it lets the hood vanish into the same surface as the backsplash.
9. Tile the Hood in Zellige to Blur the Line Between Backsplash and Stove Wall
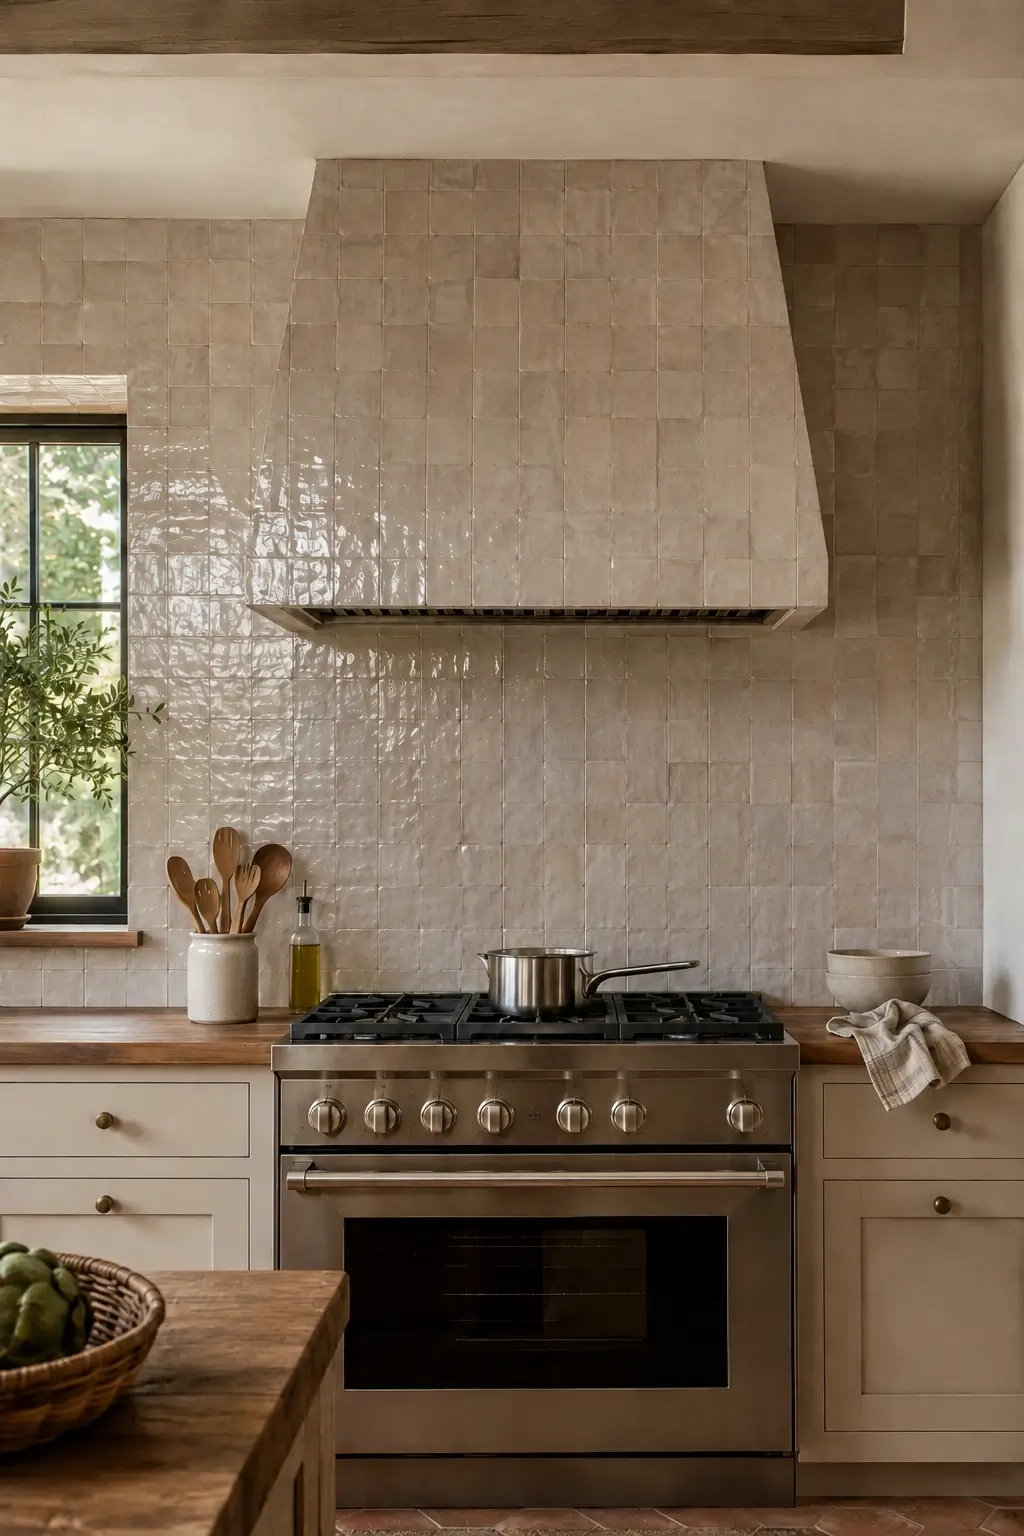
A hood that’s a different material than the backsplash always reads as two separate decisions. Carry the same zellige tile straight up the hood body so the eye can’t find a seam between wall and appliance. The slight glaze variation in zellige does the rest of the work.
This suits kitchens already planning a zellige or similar handmade tile backsplash. Pro install for the curved or angled hood faces, mid-to-higher budget, ducted underneath.
10. Run Vertical Subway Tile Up a Slim Hood to Make a Low Ceiling Feel Taller
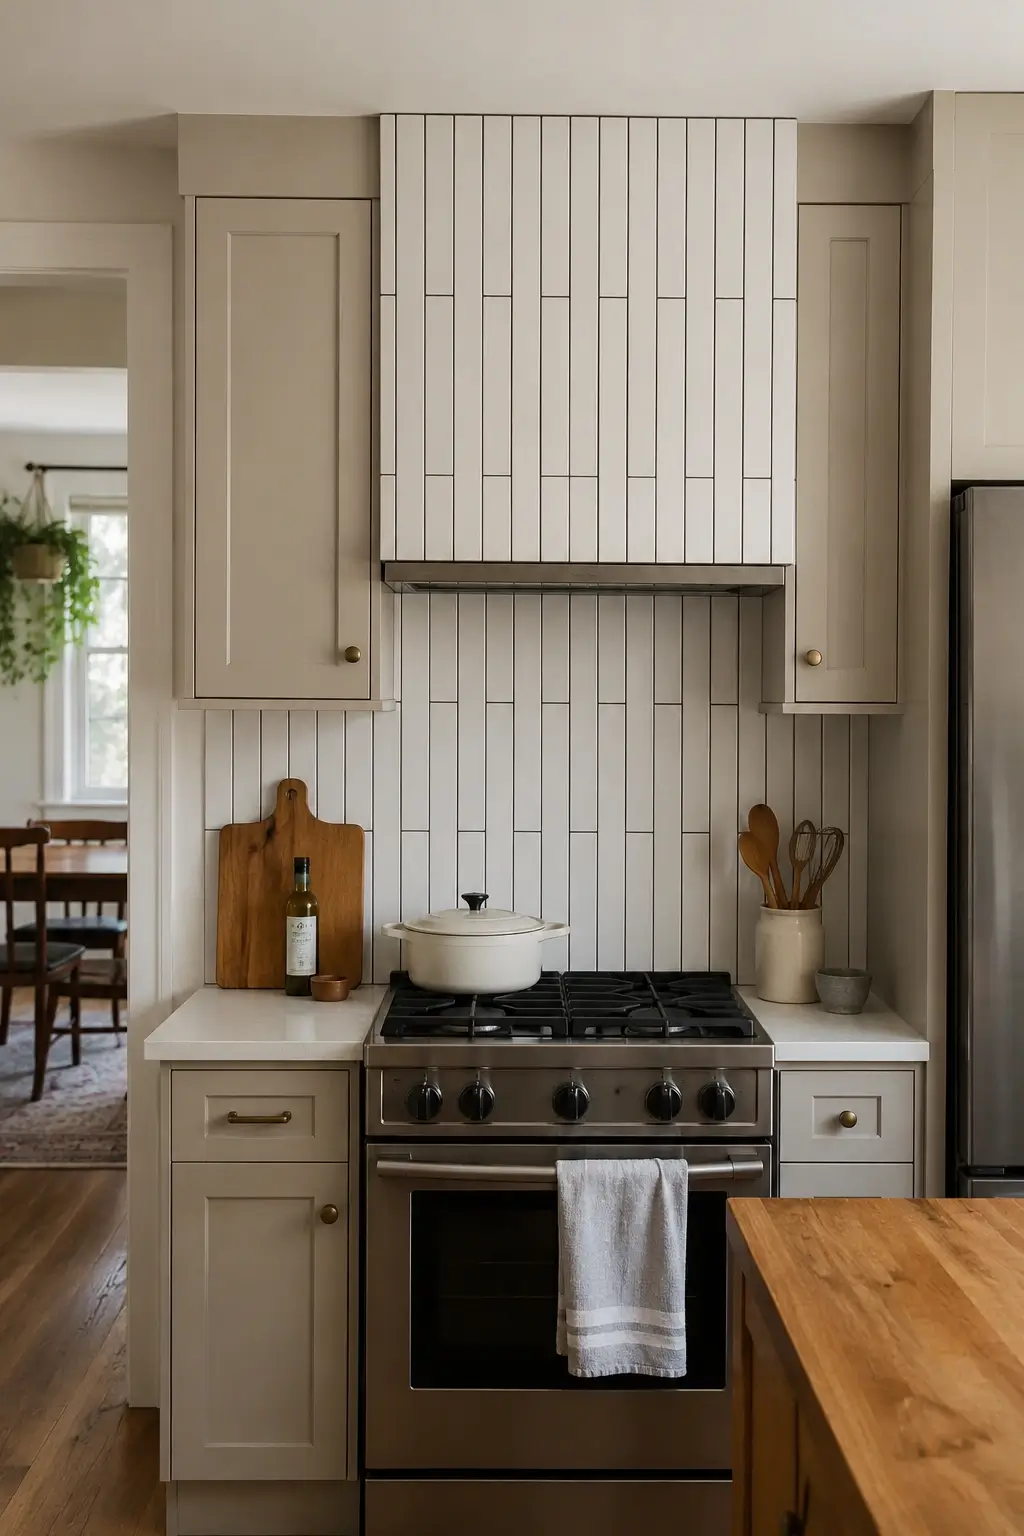
Low ceilings make a boxy hood feel even more cramped. Set subway tile vertically instead of in the usual horizontal running-bond pattern, carrying it straight up the hood front. The vertical lines pull the eye upward and the wall reads taller than it is.
Best for kitchens under 8-foot ceilings where height feels tight. DIY-friendly for a confident tiler, low-to-mid budget, ducted.
11. Set a Mosaic Border Around a Plain Hood Body for a Pattern Pop Without Full Coverage
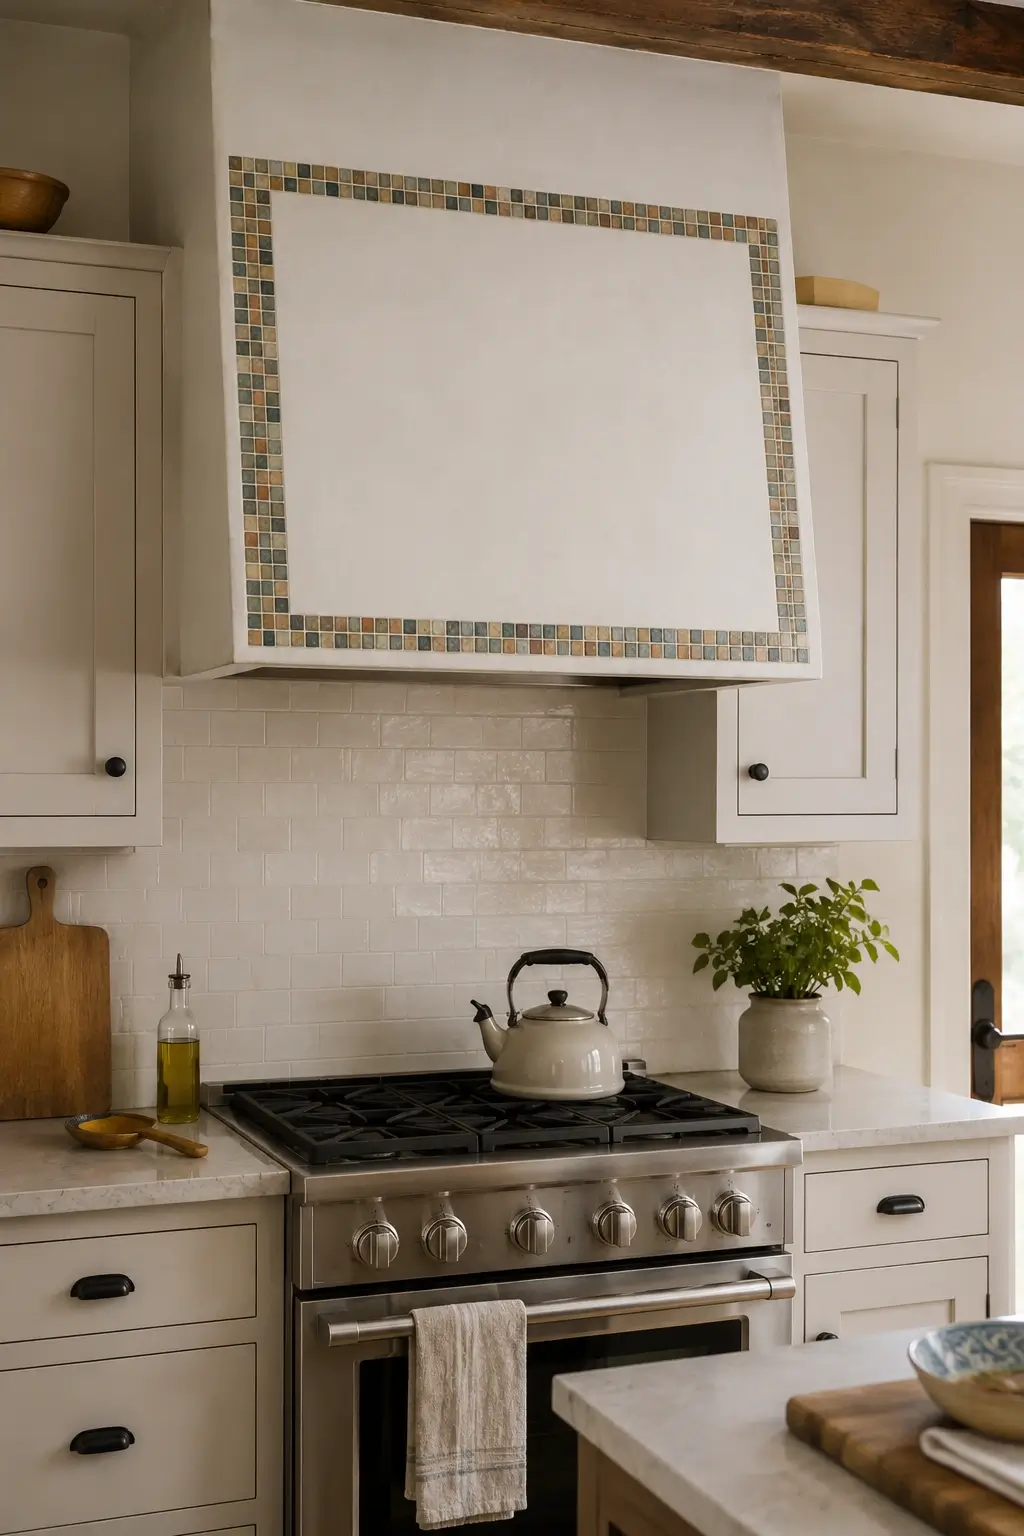
Full mosaic coverage on a hood can overwhelm a small kitchen fast. Keep the hood body plain plaster or paint, then run a narrow mosaic border just around its outer edge, like a picture frame. You get the pattern moment without the visual weight of covering the whole surface.
Works in kitchens of almost any size since the border scales down easily. DIY-friendly for the border alone, low budget tier.
12. Tile a Hood in the Same Grout Line as the Backsplash So the Wall Reads as One Surface
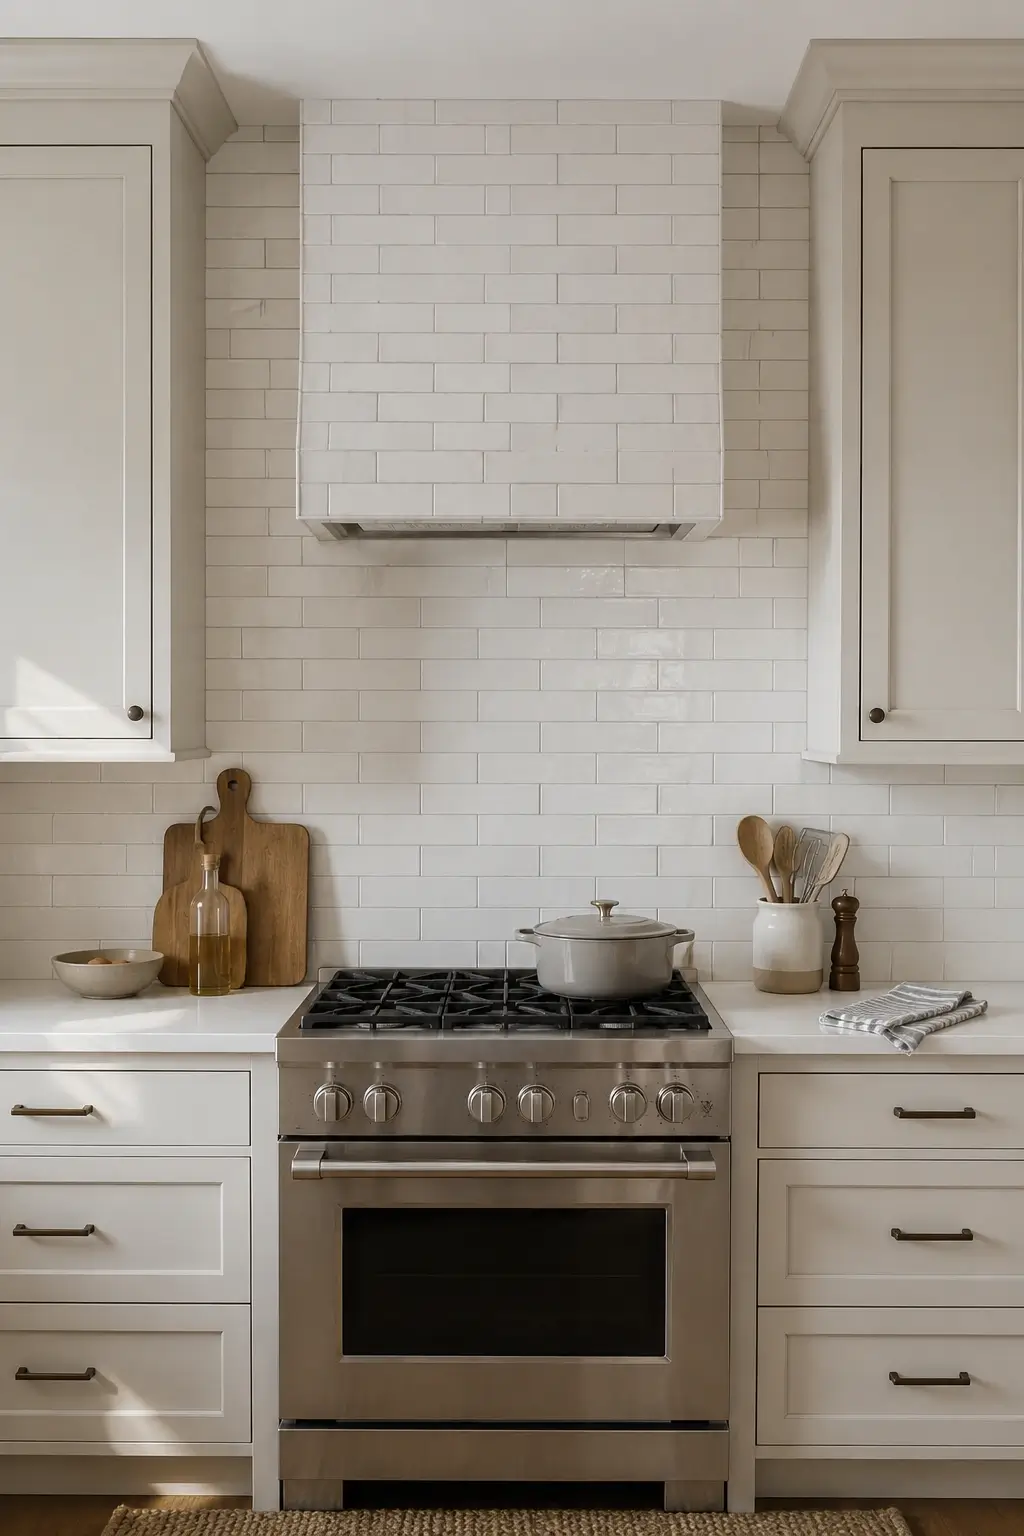
Mismatched grout lines between hood and backsplash are a small detail that quietly breaks the illusion of one continuous wall. Match the grout width and spacing exactly when tiling the hood, so the eye reads a single uninterrupted surface from counter to ceiling.
This is a planning detail more than a material choice, so it works at any budget tier where you’re already tiling both surfaces, ducted, pro install for clean alignment.
Quick Comparison: Core Hood Materials
| Option | Best For | Key Benefit | Limitation |
|---|---|---|---|
| Plaster/Stucco | Warm, soft-modern kitchens | Organic texture, fully customizable shape | Needs a skilled plasterer; can chip if bumped |
| Wood-Wrapped | Kitchens with existing wood tones | Warmth, often available as DIY-friendly kits | Needs proper heat clearance from the cooktop |
| Tiled | Kitchens wanting backsplash continuity | Blends hood into the wall, very durable | Grout lines need regular cleaning near grease |
| Metal Accent | Kitchens wanting a tailored, modern edge | Easy to add in small doses, ages well | Can feel cold if used as the only material |
Metal Accent and Mixed-Material Hoods
Some pros will tell you a plain stainless canopy hood is the safer resale choice, and there’s some truth in that for buyers who want to picture their own style fast. But a thin metal accent on a textured hood gives you that same neutral resale safety while still reading as designed, which is the better trade if you’re staying in the home for a few years.
13. Wrap a Plaster Hood Edge in a Thin Brass Band for One Warm Metallic Line
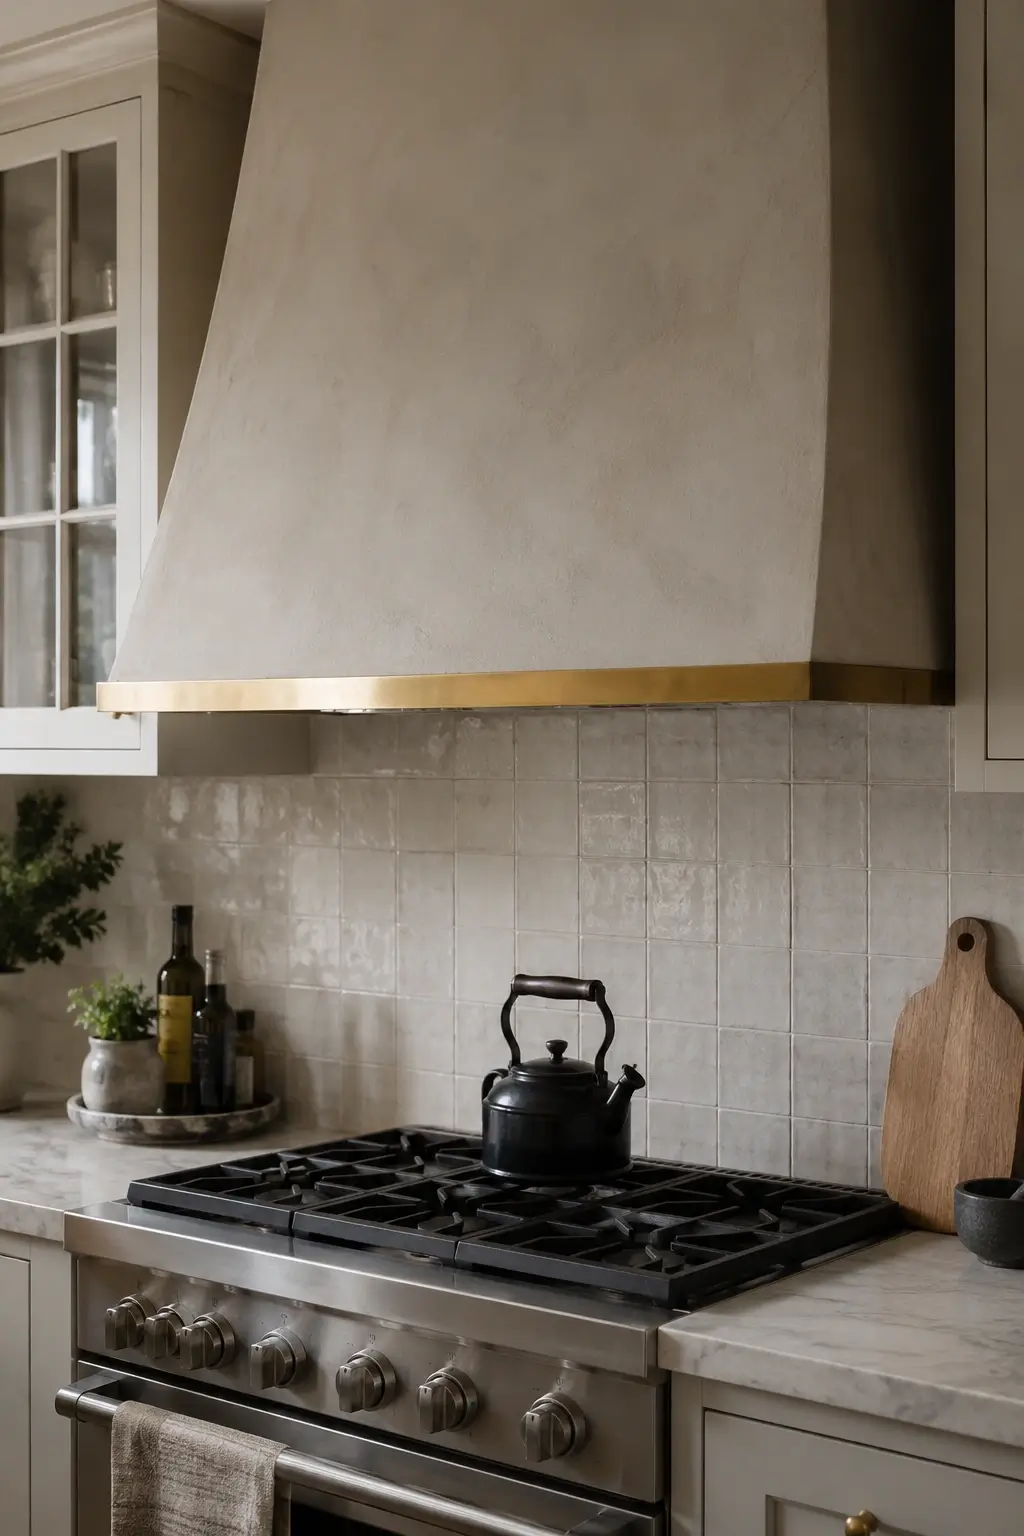
A fully matte hood can read a little flat under artificial light. Wrap just the bottom edge in a thin brass band, about an inch wide, so there’s one warm metallic line to catch light without turning the whole piece shiny.
DIY-friendly to add after the plaster is finished, low budget for the band itself, works at any kitchen size.
14. Frame a Black Hood Body With a Brass Strip Along the Bottom Edge for a Tailored Look
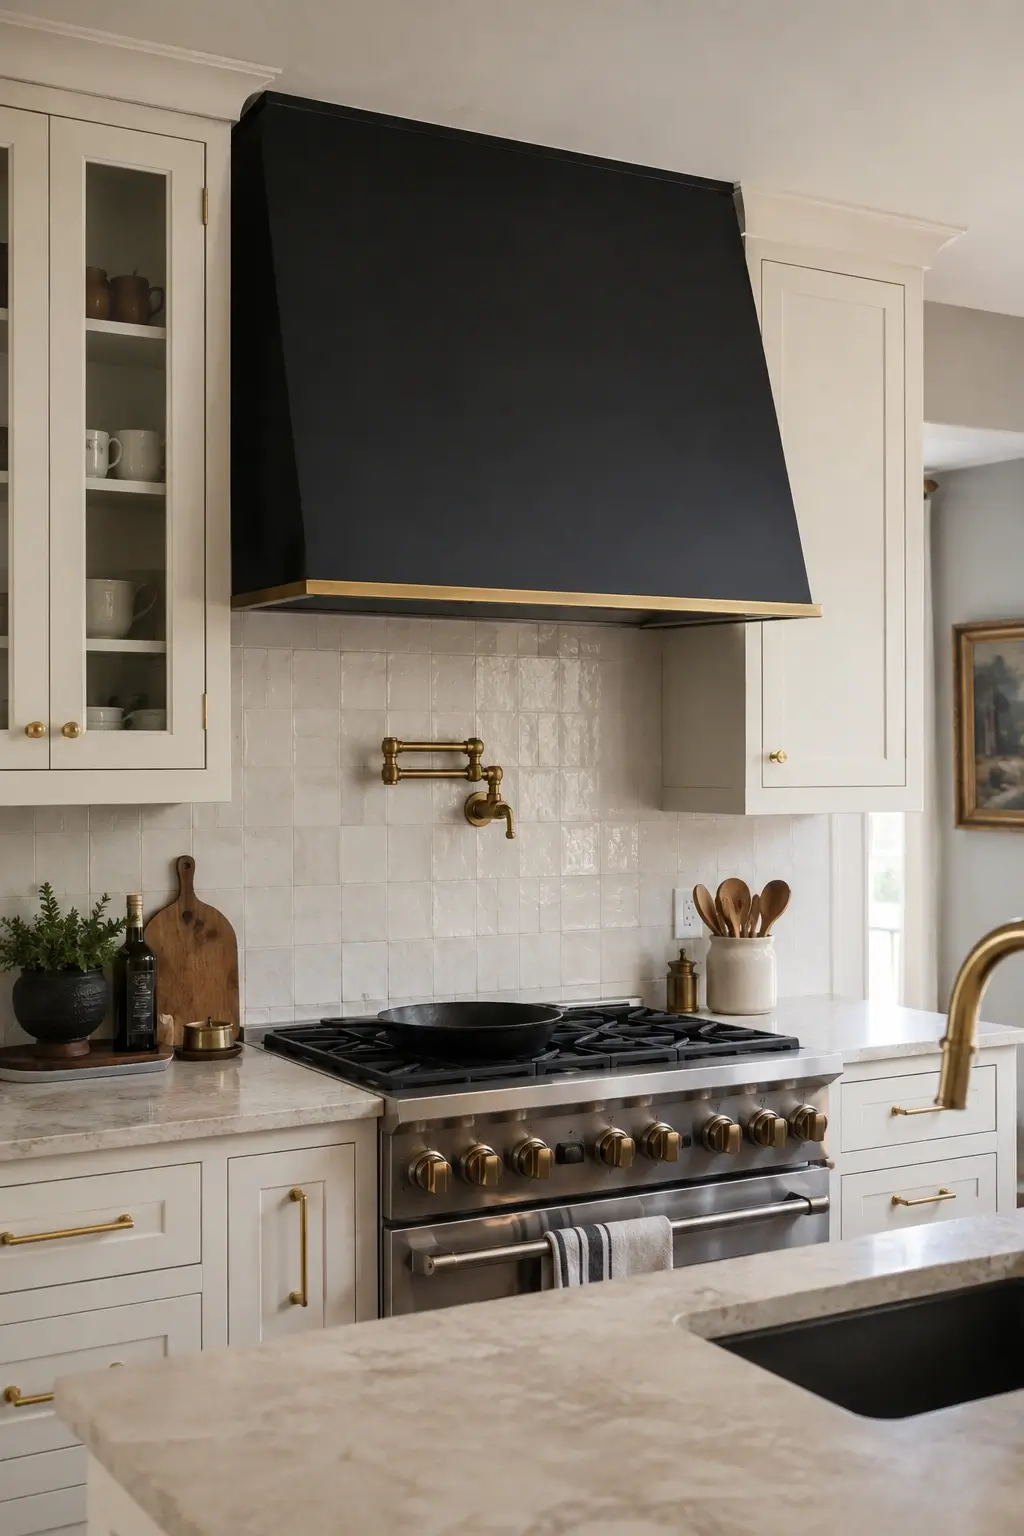
A solid matte black hood can look heavy on its own. Frame the bottom edge in a slim brass strip so the dark body reads tailored instead of blunt, the same trick as piping on a dark jacket.
Suits kitchens already running black-and-brass hardware elsewhere. Pro or DIY depending on the hood material underneath, low-to-mid budget for the trim.
15. Choose a Curved Black Stainless Hood Over an Island Cooktop for a Soft Modern Anchor
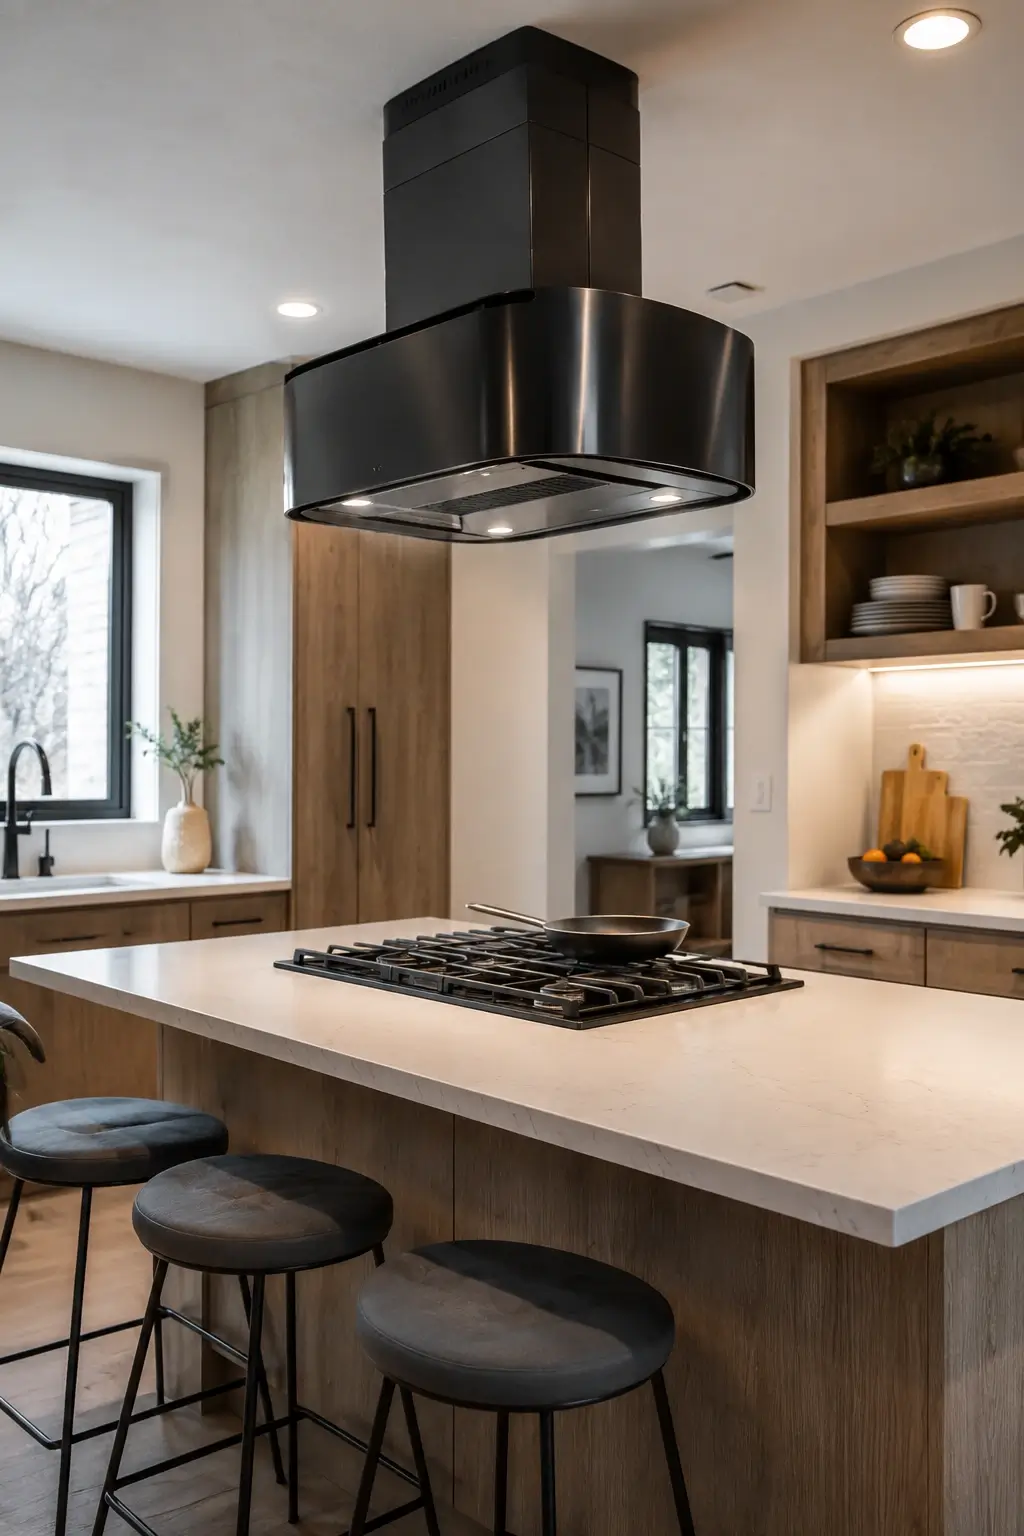
A square hood over an island cooktop can look like a box floating in open space. Choose a curved black stainless hood instead, like the curved glass and black stainless island hoods Whirlpool makes, so the rounded shape softens the appliance from every angle in the room.
Best for kitchens with an island cooktop and open sightlines from multiple sides. Pro install, mid budget tier, ducted down through the ceiling.
16. Hammer-Finish a Copper Hood Cone to Catch Light Like a Lantern Over the Stove
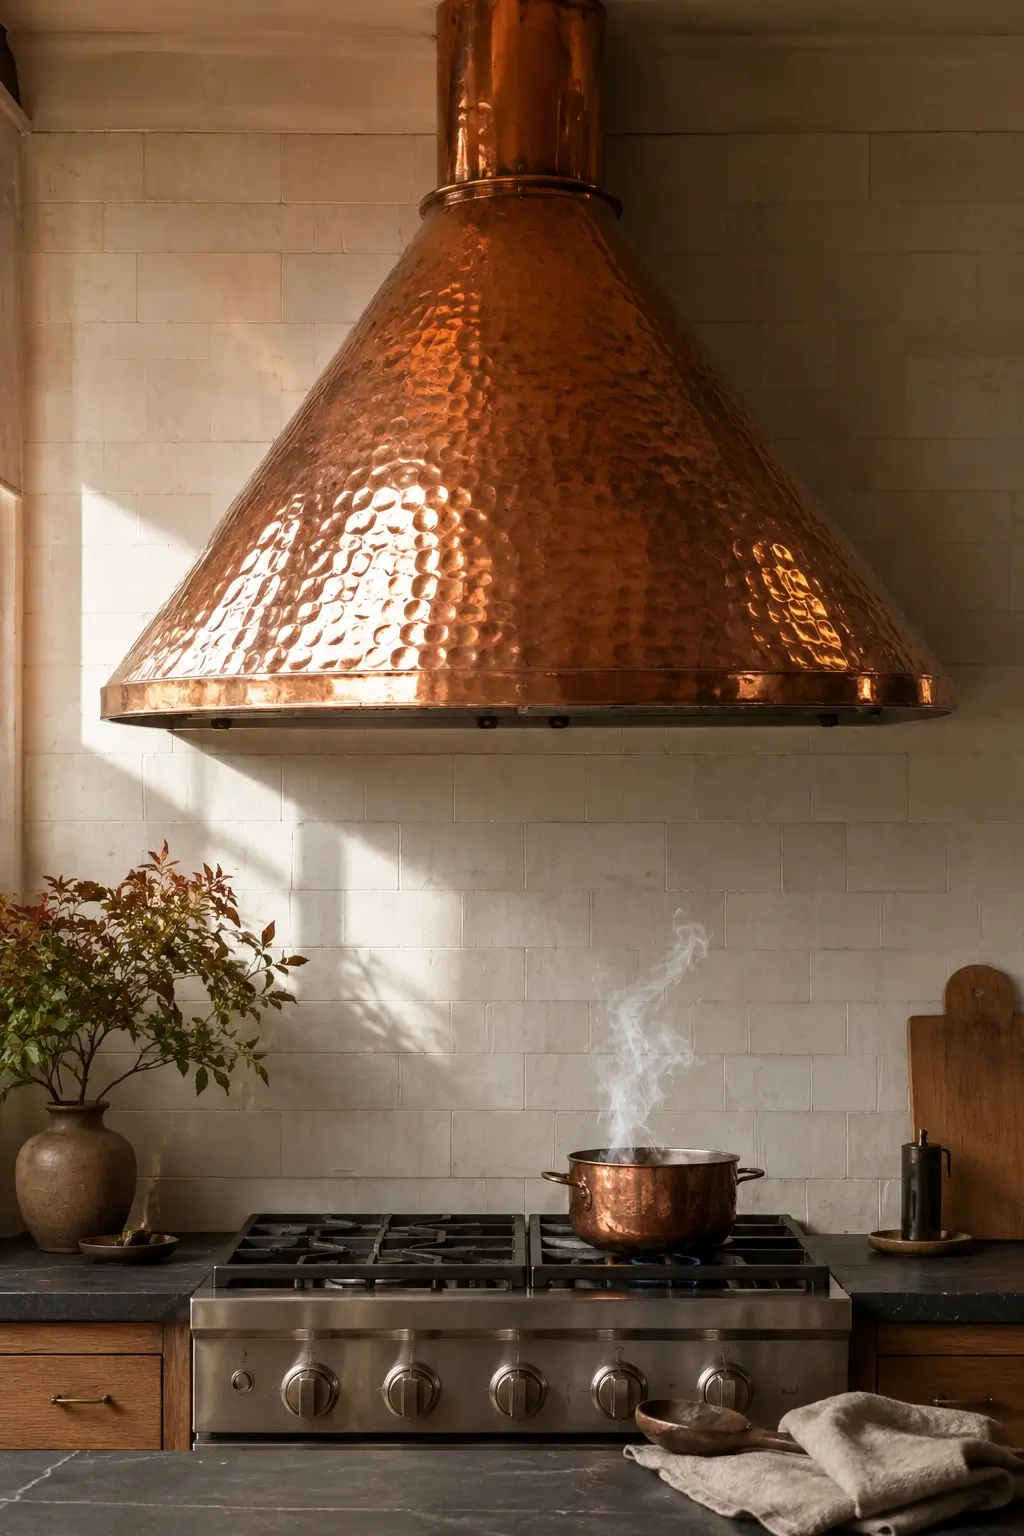
A flat metal hood can sit dead under kitchen lighting. A hand-hammered copper cone, like the handcrafted custom hoods Fobest Appliance builds, catches light in dozens of small facets instead of one flat plane, so it glows more like a lantern than an appliance.
I’d only splurge here if the stove wall is a true focal point with little else competing for attention. Pro install, higher budget tier, ducted.
17. Pair a Matte Black Hood Body With Brushed Brass Knobs Nearby to Tie the Metals Together
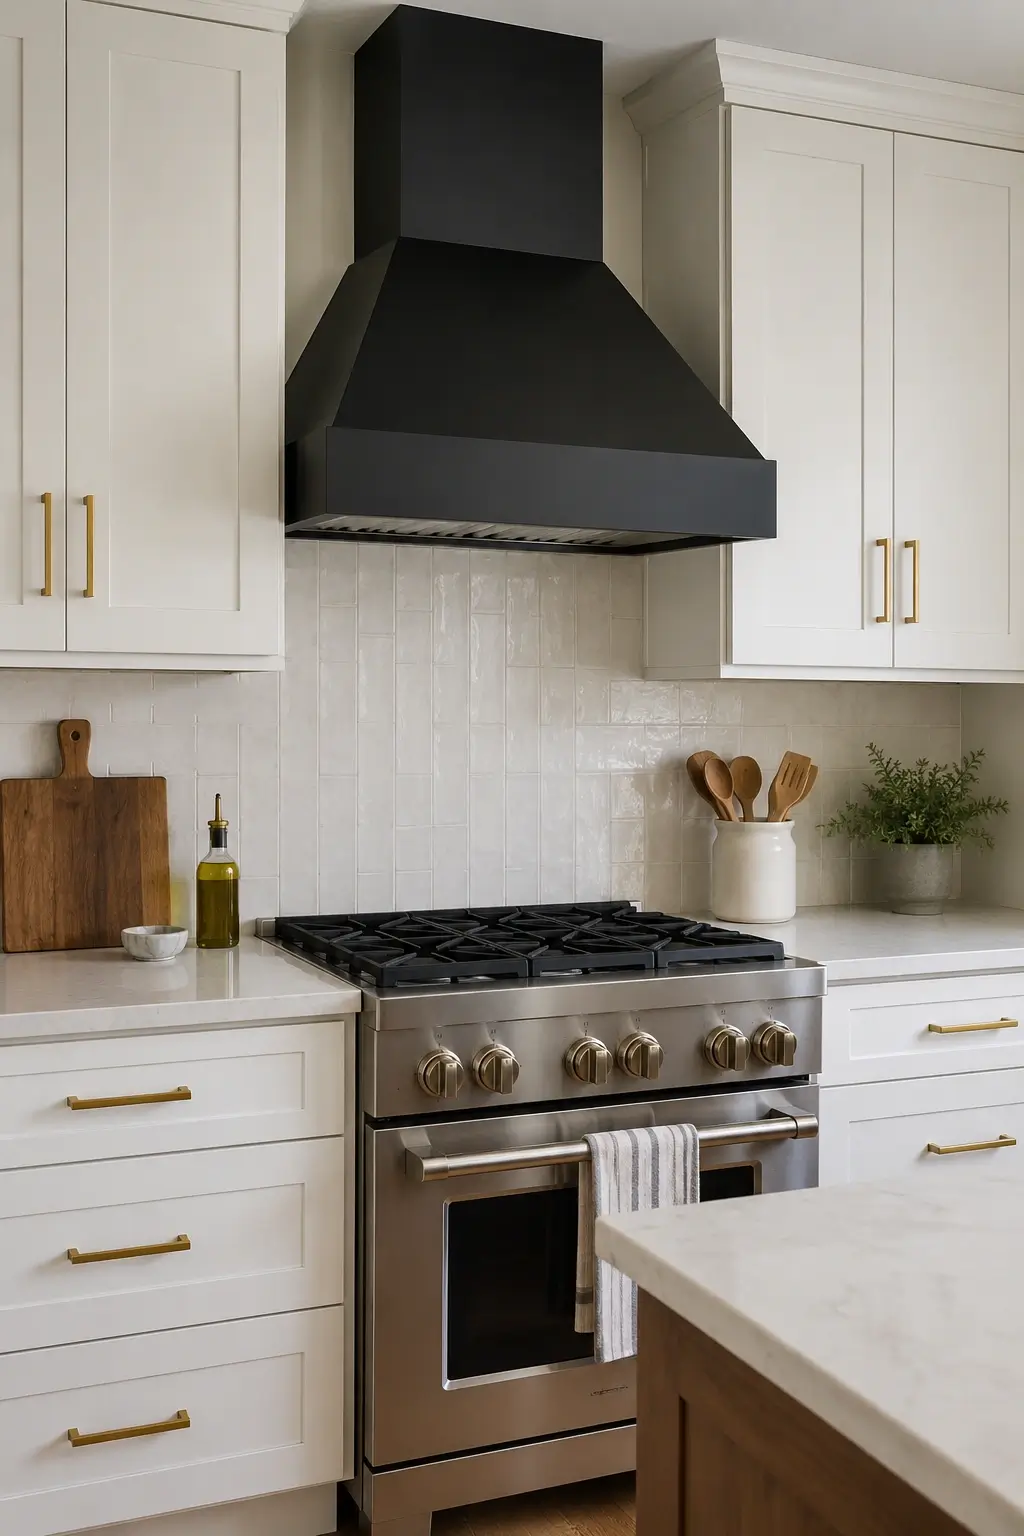
A black hood can feel disconnected if every other metal finish in the kitchen is silver. Swap nearby cabinet knobs and pulls to brushed brass so the warm metal repeats in small doses around the hood instead of standing alone.
Low budget, fully DIY hardware swap, works in any kitchen size as a finishing touch.
Oversized Chimney and Architectural Shapes
Here’s the part that surprises most people: the most dramatic-looking hoods on Pinterest usually aren’t the most expensive ones. Scale comes from shape and ceiling height, not from a bigger motor or a pricier duct run.
18. Build an Oversized Chimney Hood From Floor to Ceiling for a True Architectural Anchor
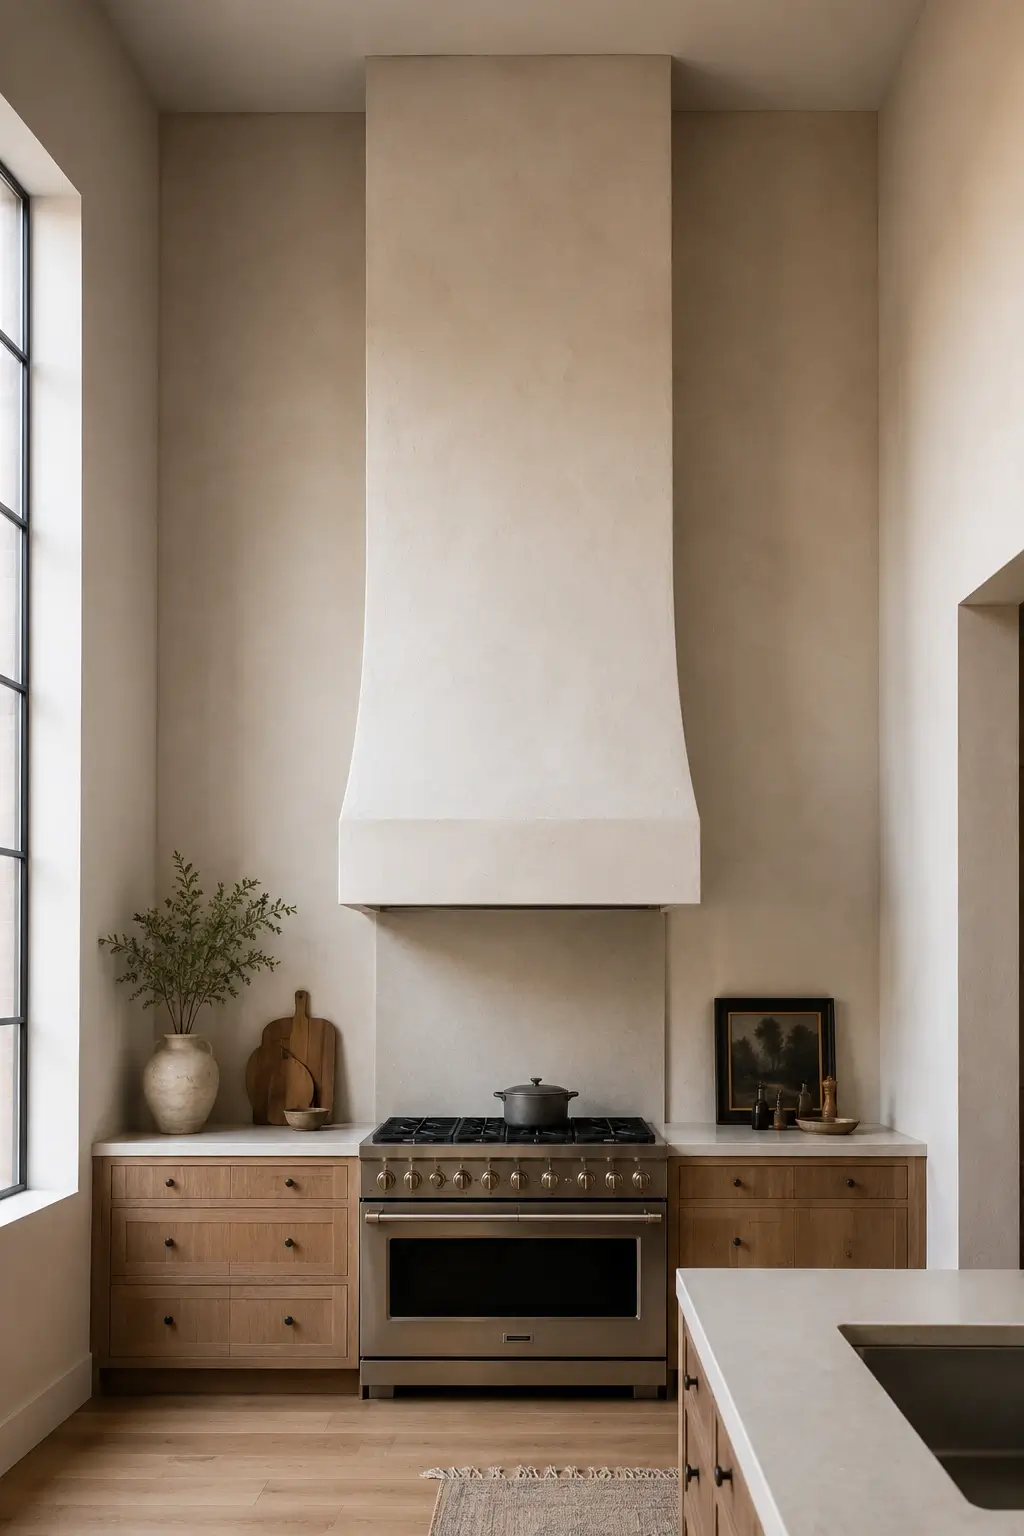
A standard-size hood floats in the middle of a tall wall and never quite anchors it. Build the hood as a full chimney shape running from countertop to ceiling instead, so it functions like a fireplace surround for the cooking zone.
I’d only splurge here if the ceiling is at least 9 feet and the stove wall has no upper cabinets competing for space. Pro build, higher budget tier, ducted with a real chase.
19. Frame the Hood Inside a Plastered Arch Alcove for a Built-In Fireplace Feel
An exposed hood on a flat wall can feel like it’s just sitting there. Recess it instead into a shallow plastered arch alcove, so the stove wall borrows the same logic as a fireplace surround and the hood looks built into the architecture rather than added on top of it.
Best in kitchens with at least a few inches of wall depth to recess into. Pro build, mid-to-higher budget, ducted.
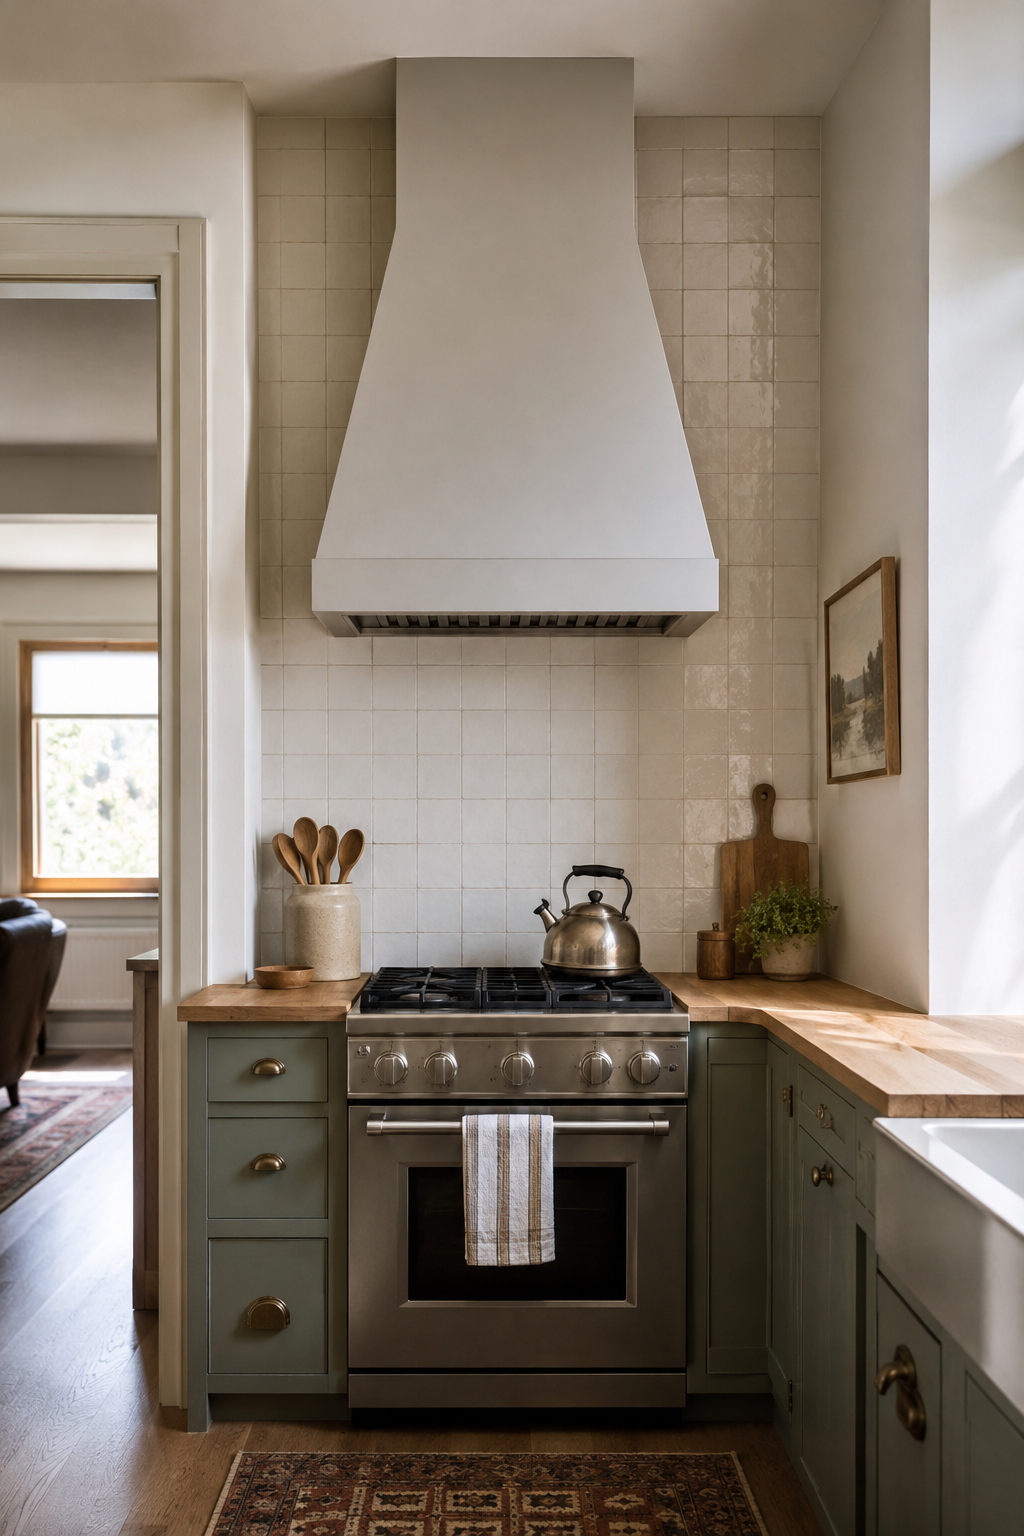
20. Taper a Hood From Wide Base to Narrow Top for a Slimming Visual Trick
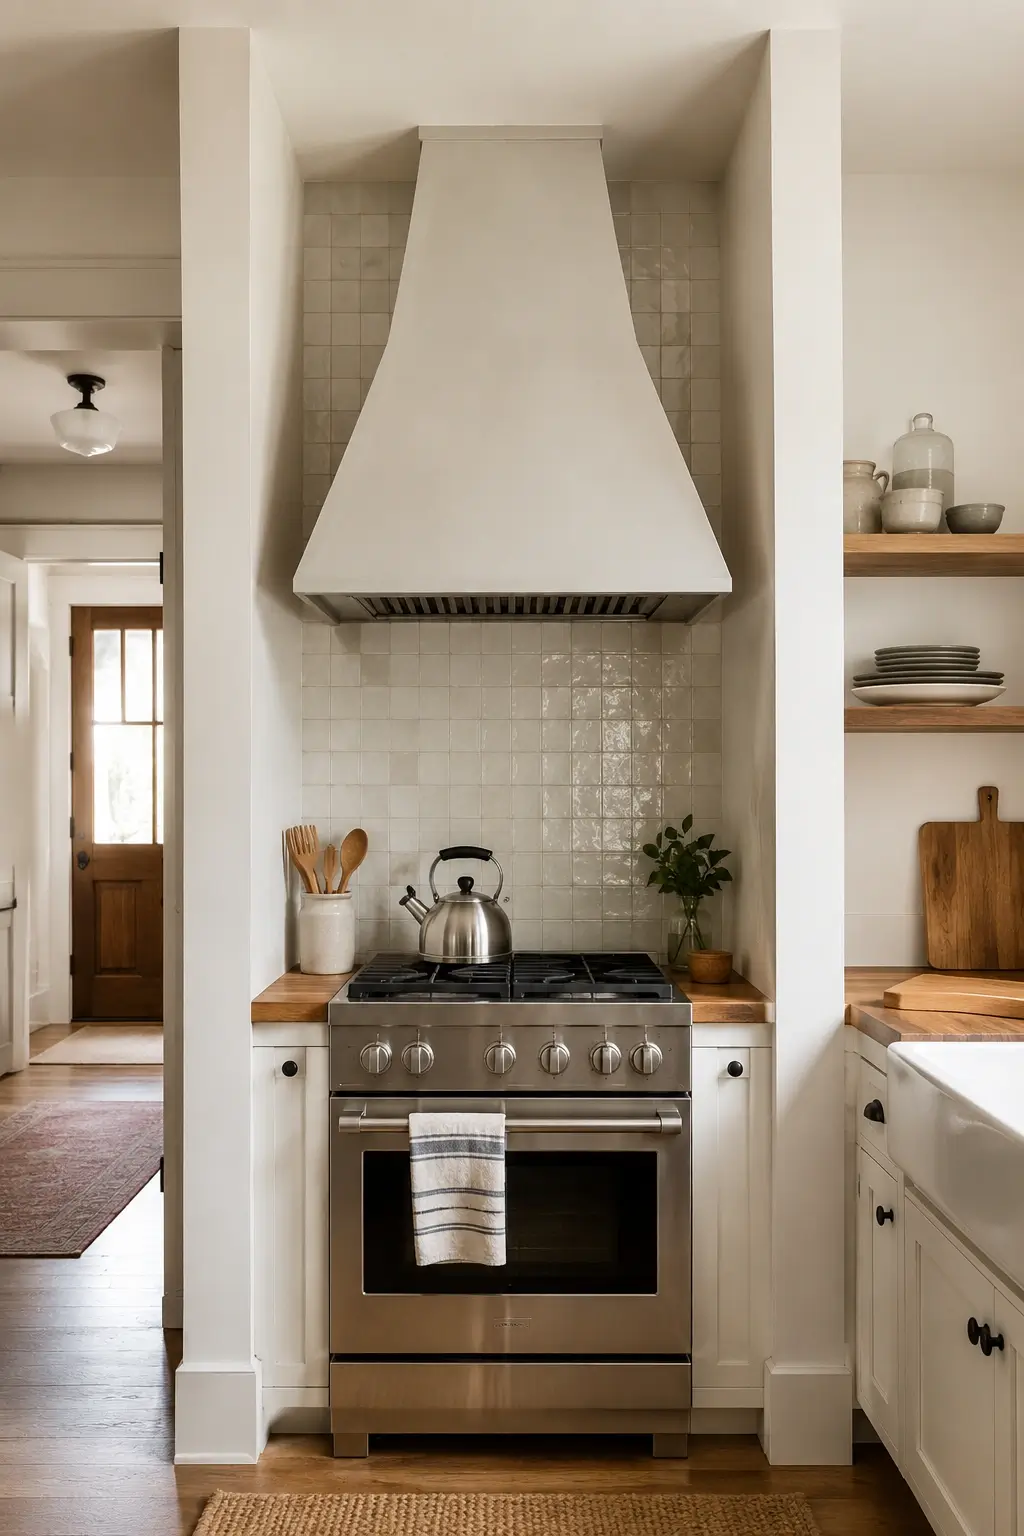
A hood that’s the same width top to bottom can look like a heavy block on a narrow wall. Taper it instead, wide at the base near the cooktop and narrower as it rises, the same trick a tapered lamp shade uses to look lighter than it is.
Works especially well on narrower stove walls under about 30 inches. Pro build for the taper framing, mid budget, ducted.
21. Flank the Hood With Open Wood Shelves to Balance Its Visual Weight

A wide hood alone on an empty wall can look unbalanced, like the room is leaning to one side. Add a single open wood shelf on each side at roughly the same height as the hood’s base, so the eye reads the wall as one composed grouping instead of one heavy object.
Works in kitchens with at least a foot of wall space on either side of the hood. Fully DIY, low budget.
22. Center the Hood Under a Row of Warm Pendant Lights for a Glowing Cooking Nook
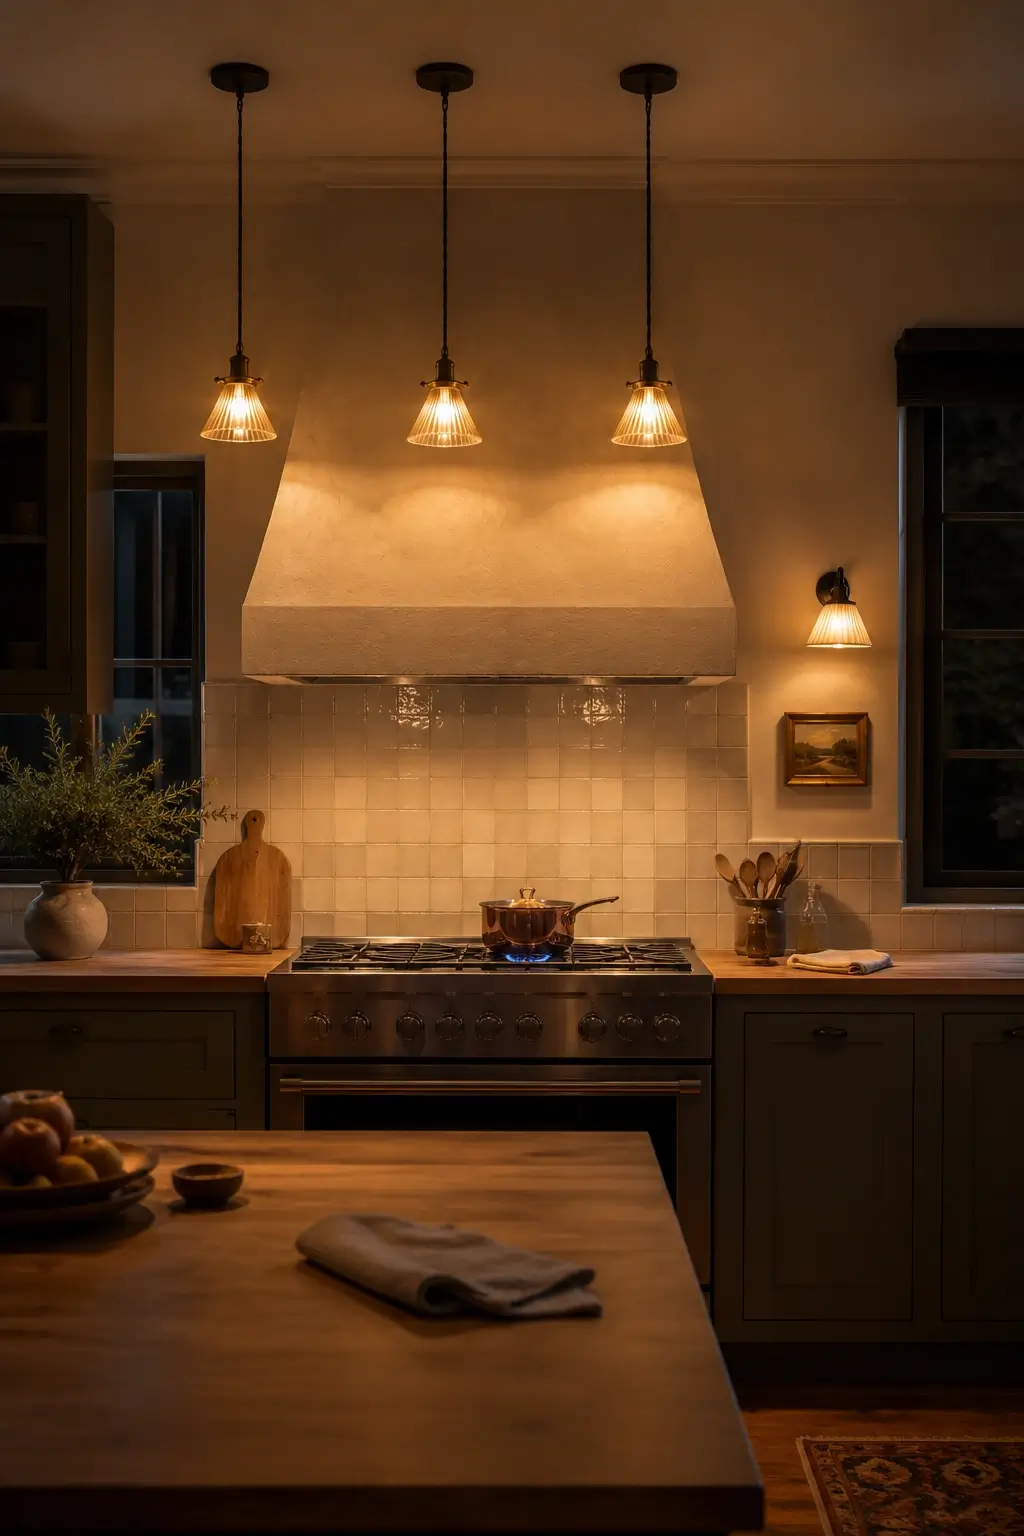
Most kitchens light the stove wall with one flat overhead can light, which leaves the hood looking dim and unfinished after dark. Center two or three small warm pendant lights just in front of the hood instead, so the cooking zone gets its own glow separate from the rest of the room.
Works alongside almost any hood material. Pro electrical work for new fixtures, mid budget for the lighting alone.
Budget-Smart, Renter-Friendly, and Small-Kitchen Solutions
Not every stove wall needs a rebuild. These five work with what’s already there.
23. Skin an Existing Stainless Hood in a Plaster-Look Paneling Kit for a Weekend Facelift
Replacing a working hood just to change its look is rarely worth the cost. Skin the existing stainless shell in a lightweight plaster-look paneling kit instead, so the function and ducting stay exactly as they are while the surface gets a completely different feel.
This is the most renter-friendly option on the list if your lease allows surface changes. Fully DIY, low budget, no ducting changes at all.
24. Paint a Boxy Builder-Grade Hood the Same Color as the Cabinets to Make It Disappear
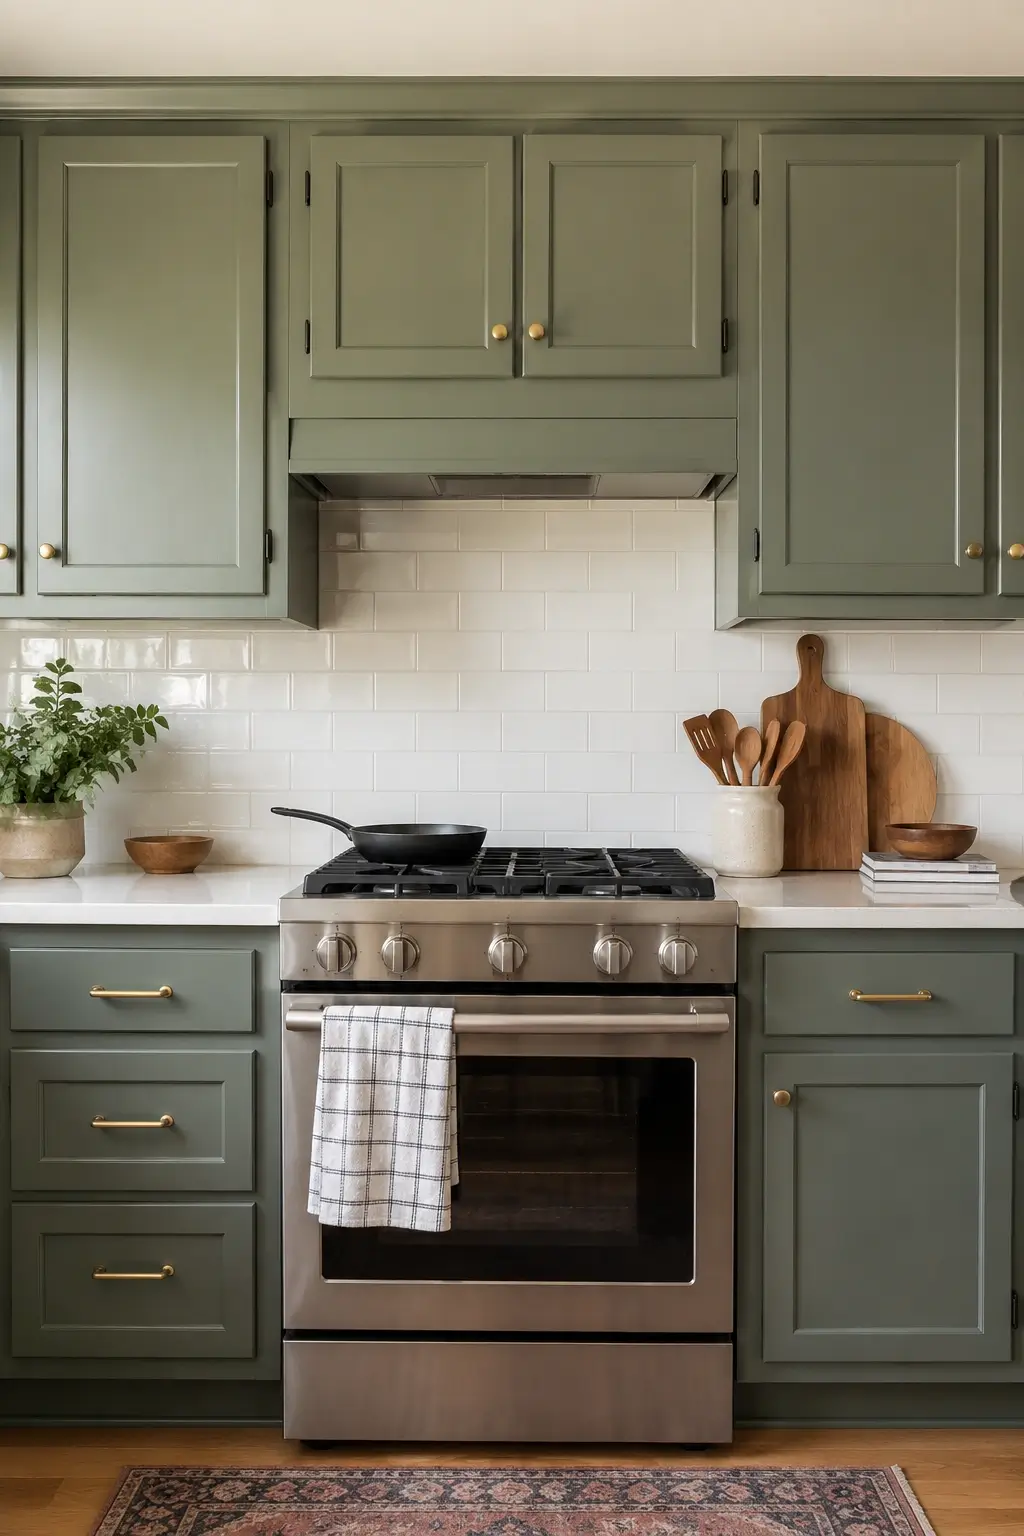
A boxy stainless or white hood can be the single ugliest object in an otherwise nice kitchen, and replacing it isn’t always an option. Paint it the exact same color as the surrounding cabinets instead, using appliance-safe paint, so it stops standing out and just recedes into the cabinetry line.
Lowest budget option on this list, fully DIY in an afternoon, works in any kitchen size.
25. Choose a Ductless Recirculating Hood With a Wood Shell for an Apartment Kitchen Upgrade
Apartments and rentals rarely have access to outside ducting, which usually means settling for a bare stainless ductless unit. Choose a ductless hood with a wood shell built around the same recirculating mechanism instead, so the look upgrades even though the function stays purely filtered.
Best for apartment or rental kitchens with no exterior wall access. DIY-friendly to mount, low-to-mid budget, ductless.
26. Add Fluted Wood Panels Over a Flat Hood Front for Texture Without a Full Rebuild
A flat hood front under existing cabinetry can look unfinished even when it’s brand new. Add pre-cut fluted wood panels directly over the flat face instead of rebuilding the whole shape, so the ridged texture does the visual work without touching the duct or the box underneath.
Works on most standard flat-front hoods. DIY-friendly with basic tools, low-to-mid budget.
27. Tuck a Slim Vent Hood Into a Floating Cabinet Box So It Reads as Built-In Storage
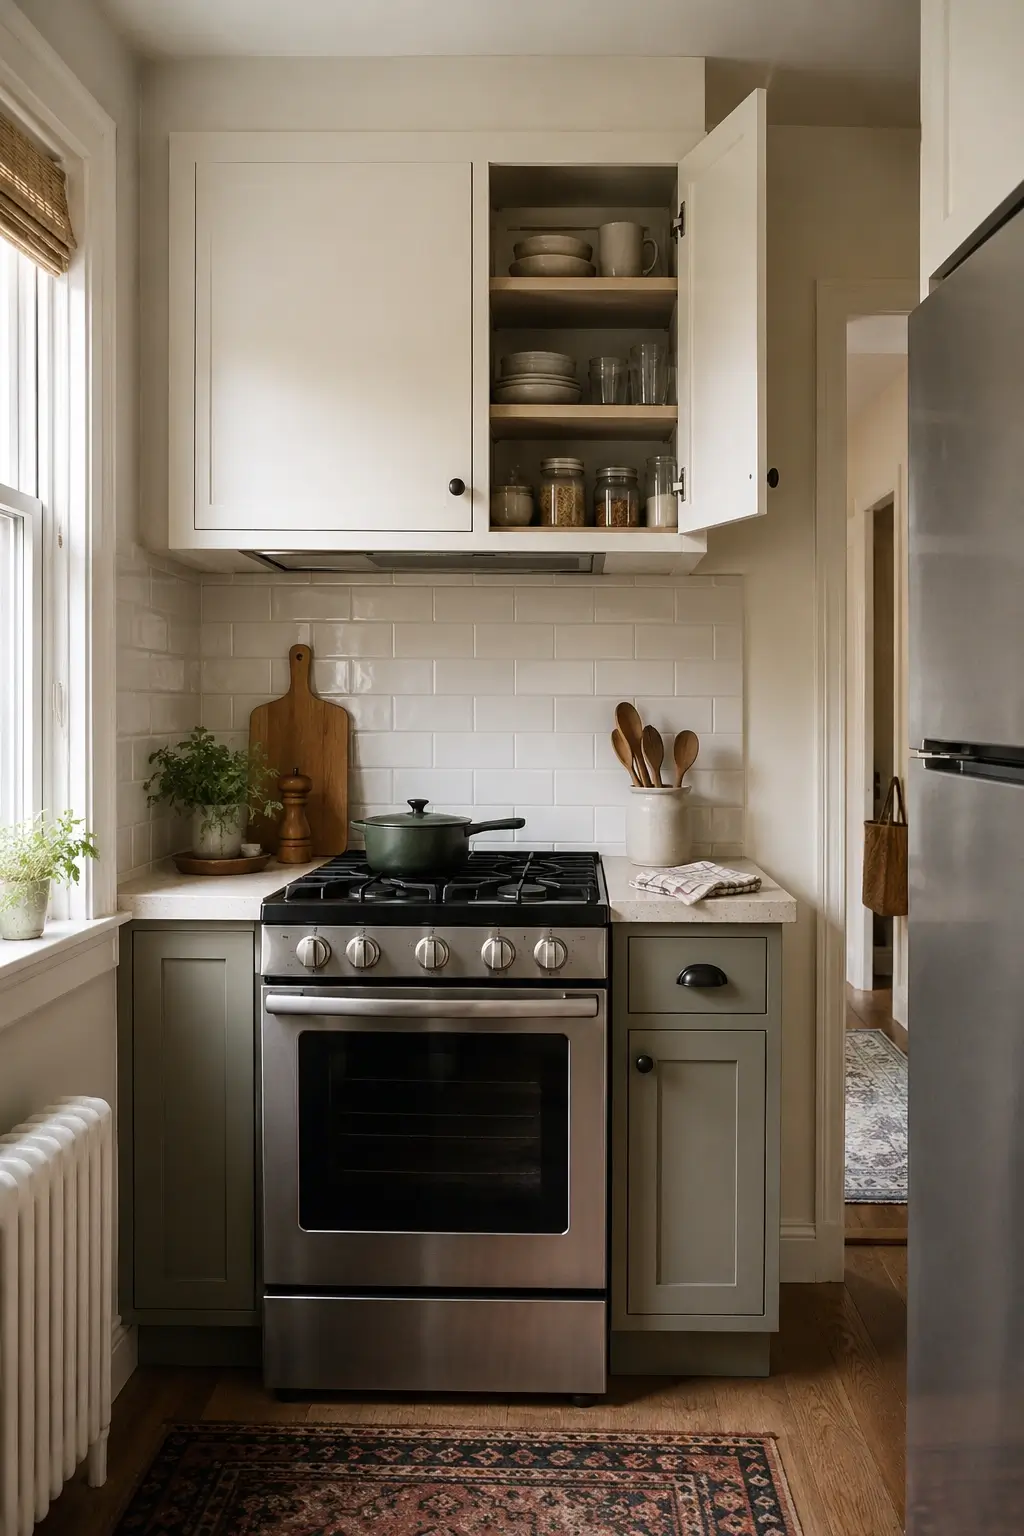
A small kitchen rarely has wall space to spare for a hood that does nothing but vent. Tuck a slim vent insert into the bottom of a floating cabinet box instead, so the same footprint that holds the hood also holds usable storage above it.
Best for small kitchens under roughly 100 square feet where every inch of wall has to earn its place. Pro install for the cabinet build, mid budget, ducted through the cabinet back.
Quick Answers Before You Start Planning
What is the most popular kitchen vent hood style right now?
Plaster and wood hoods in warm neutral tones are leading, replacing the all-stainless look as the default choice for new builds and remodels.
Do I need a ducted hood or can I use ductless?
Ducted works best if you cook often and can route to the outside. Ductless suits renters or kitchens without exterior wall access.
How much does a custom vent hood cost?
Budget roughly $800–$2,500 for a plaster or wood-wrapped build over an existing liner, more for full custom metal or copper work.
Can I make a plain stainless hood look custom without replacing it?
Yes, skin it in a paneling kit, paint it to match your cabinets, or wrap it in wood slats over the existing shell.
What size kitchen wall fits an oversized chimney hood?
Chimney hoods read best with ceilings of 9 feet or more and a stove wall wide enough that the hood clears the side cabinets.
None of this replaces a conversation with whoever installs your hood — CFM sizing, exact duct routing, and local code requirements are specific to your kitchen and worth confirming with a pro before you commit to a material. What this list gives you is a way to walk into that conversation already knowing what you want the stove wall to look like, sorted by what actually fits your size and budget instead of just what photographs well. Save the ideas that matched your kitchen, skip the rest, and bring the short list to your contractor instead of a folder of fifty random pins.


No Comment! Be the first one.