


22 Rustic Kitchen Design Hacks So Stylish and Clever, You’ll Wish You’d Found Them Sooner
Every rustic kitchen roundup seems to star a $60,000 remodel — a barn wood island, exposed brick, a wood stove tucked into what used to be a wall. Gorgeous, sure. Useless if you’re renting,...

Every rustic kitchen roundup seems to star a $60,000 remodel — a barn wood island, exposed brick, a wood stove tucked into what used to be a wall. Gorgeous, sure. Useless if you’re renting, stuck with builder-grade cabinets, or just don’t have remodel money sitting around this year.
This list skips the big-ticket features and goes straight for the small, specific moves that actually shift a kitchen from cold and generic to warm and lived-in: a hardware swap, one styled shelf, a rug, a pendant light, a paint trick that changes how a whole wall reads. Every hack below is something you can price out and finish in a weekend or less.
This works best for kitchens with decent bones — solid cabinets, a workable layout — that just need warmth and texture. It won’t help if your kitchen needs new appliances, plumbing, or a layout change; that’s a renovation, not a hack.
Rustic kitchen design hacks refers to small, budget-friendly styling and material swaps — hardware, lighting, texture, paint, and storage changes — that add warm, handmade character to a kitchen without structural work. The focus stays on visual impact per dollar spent, not on gut renovations or custom builds.
For the first time in nearly a decade, wood cabinetry edged out white as the most popular choice, with medium wood tones leading the pack. That’s not a niche farmhouse trend anymore — it’s the mainstream direction kitchens are already moving.
Renter-Friendly Swaps You Can Undo Anytime
These moves involve zero permanent changes. Keep the original parts in a labeled bag and you can put everything back exactly as it was on move-out day.
1. Swap Flat Cabinet Knobs for Aged Black Iron Cup Pulls
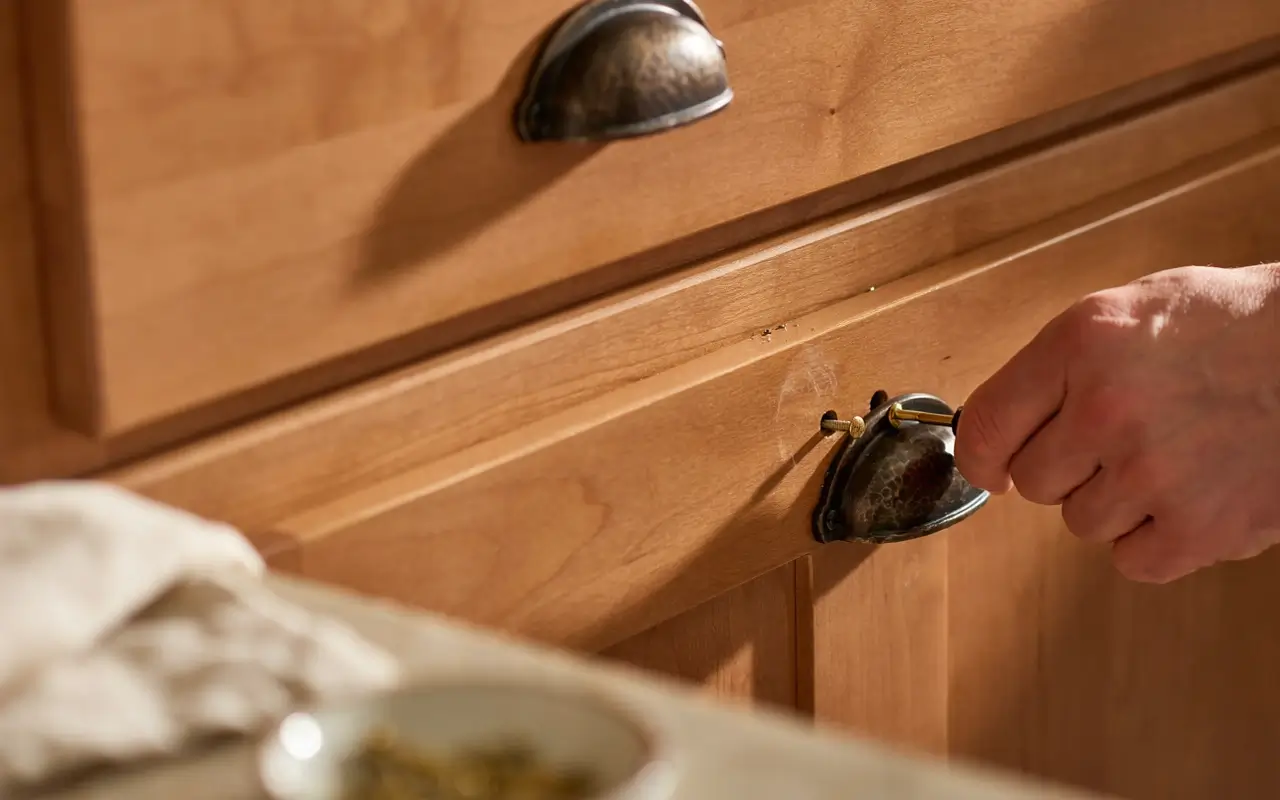
Builder-grade knobs are the single biggest thing quietly flattening a kitchen’s personality. Swapping them for cup-style pulls in aged iron or oil-rubbed bronze adds instant hand-forged texture without touching a single cabinet box.
It works because hardware sits at eye level on every door you open — it’s the detail your hand and eye both register first. Keep the original screws; most cup pulls use the same spacing.
My read is this is the highest-impact, lowest-effort hack on this entire list.
2. Style One Open Shelf With Clustered Pottery and Wood Bowls

A whole wall of open shelving is a commitment. One shelf is not. Clear a single shelf, remove the cabinet door if there is one, and group three to five pieces: a stoneware crock, a wood bowl, a stack of two mismatched plates.
Odd numbers and mixed heights read as collected-over-time instead of staged. Skip anything symmetrical — that’s what makes it feel showroom instead of homey.
I’d only do this on a shelf you actually pass by daily, so it stays a real vignette and not a dust trap.
3. Remove One Upper Cabinet Door for an Instant Open-Shelf Nook
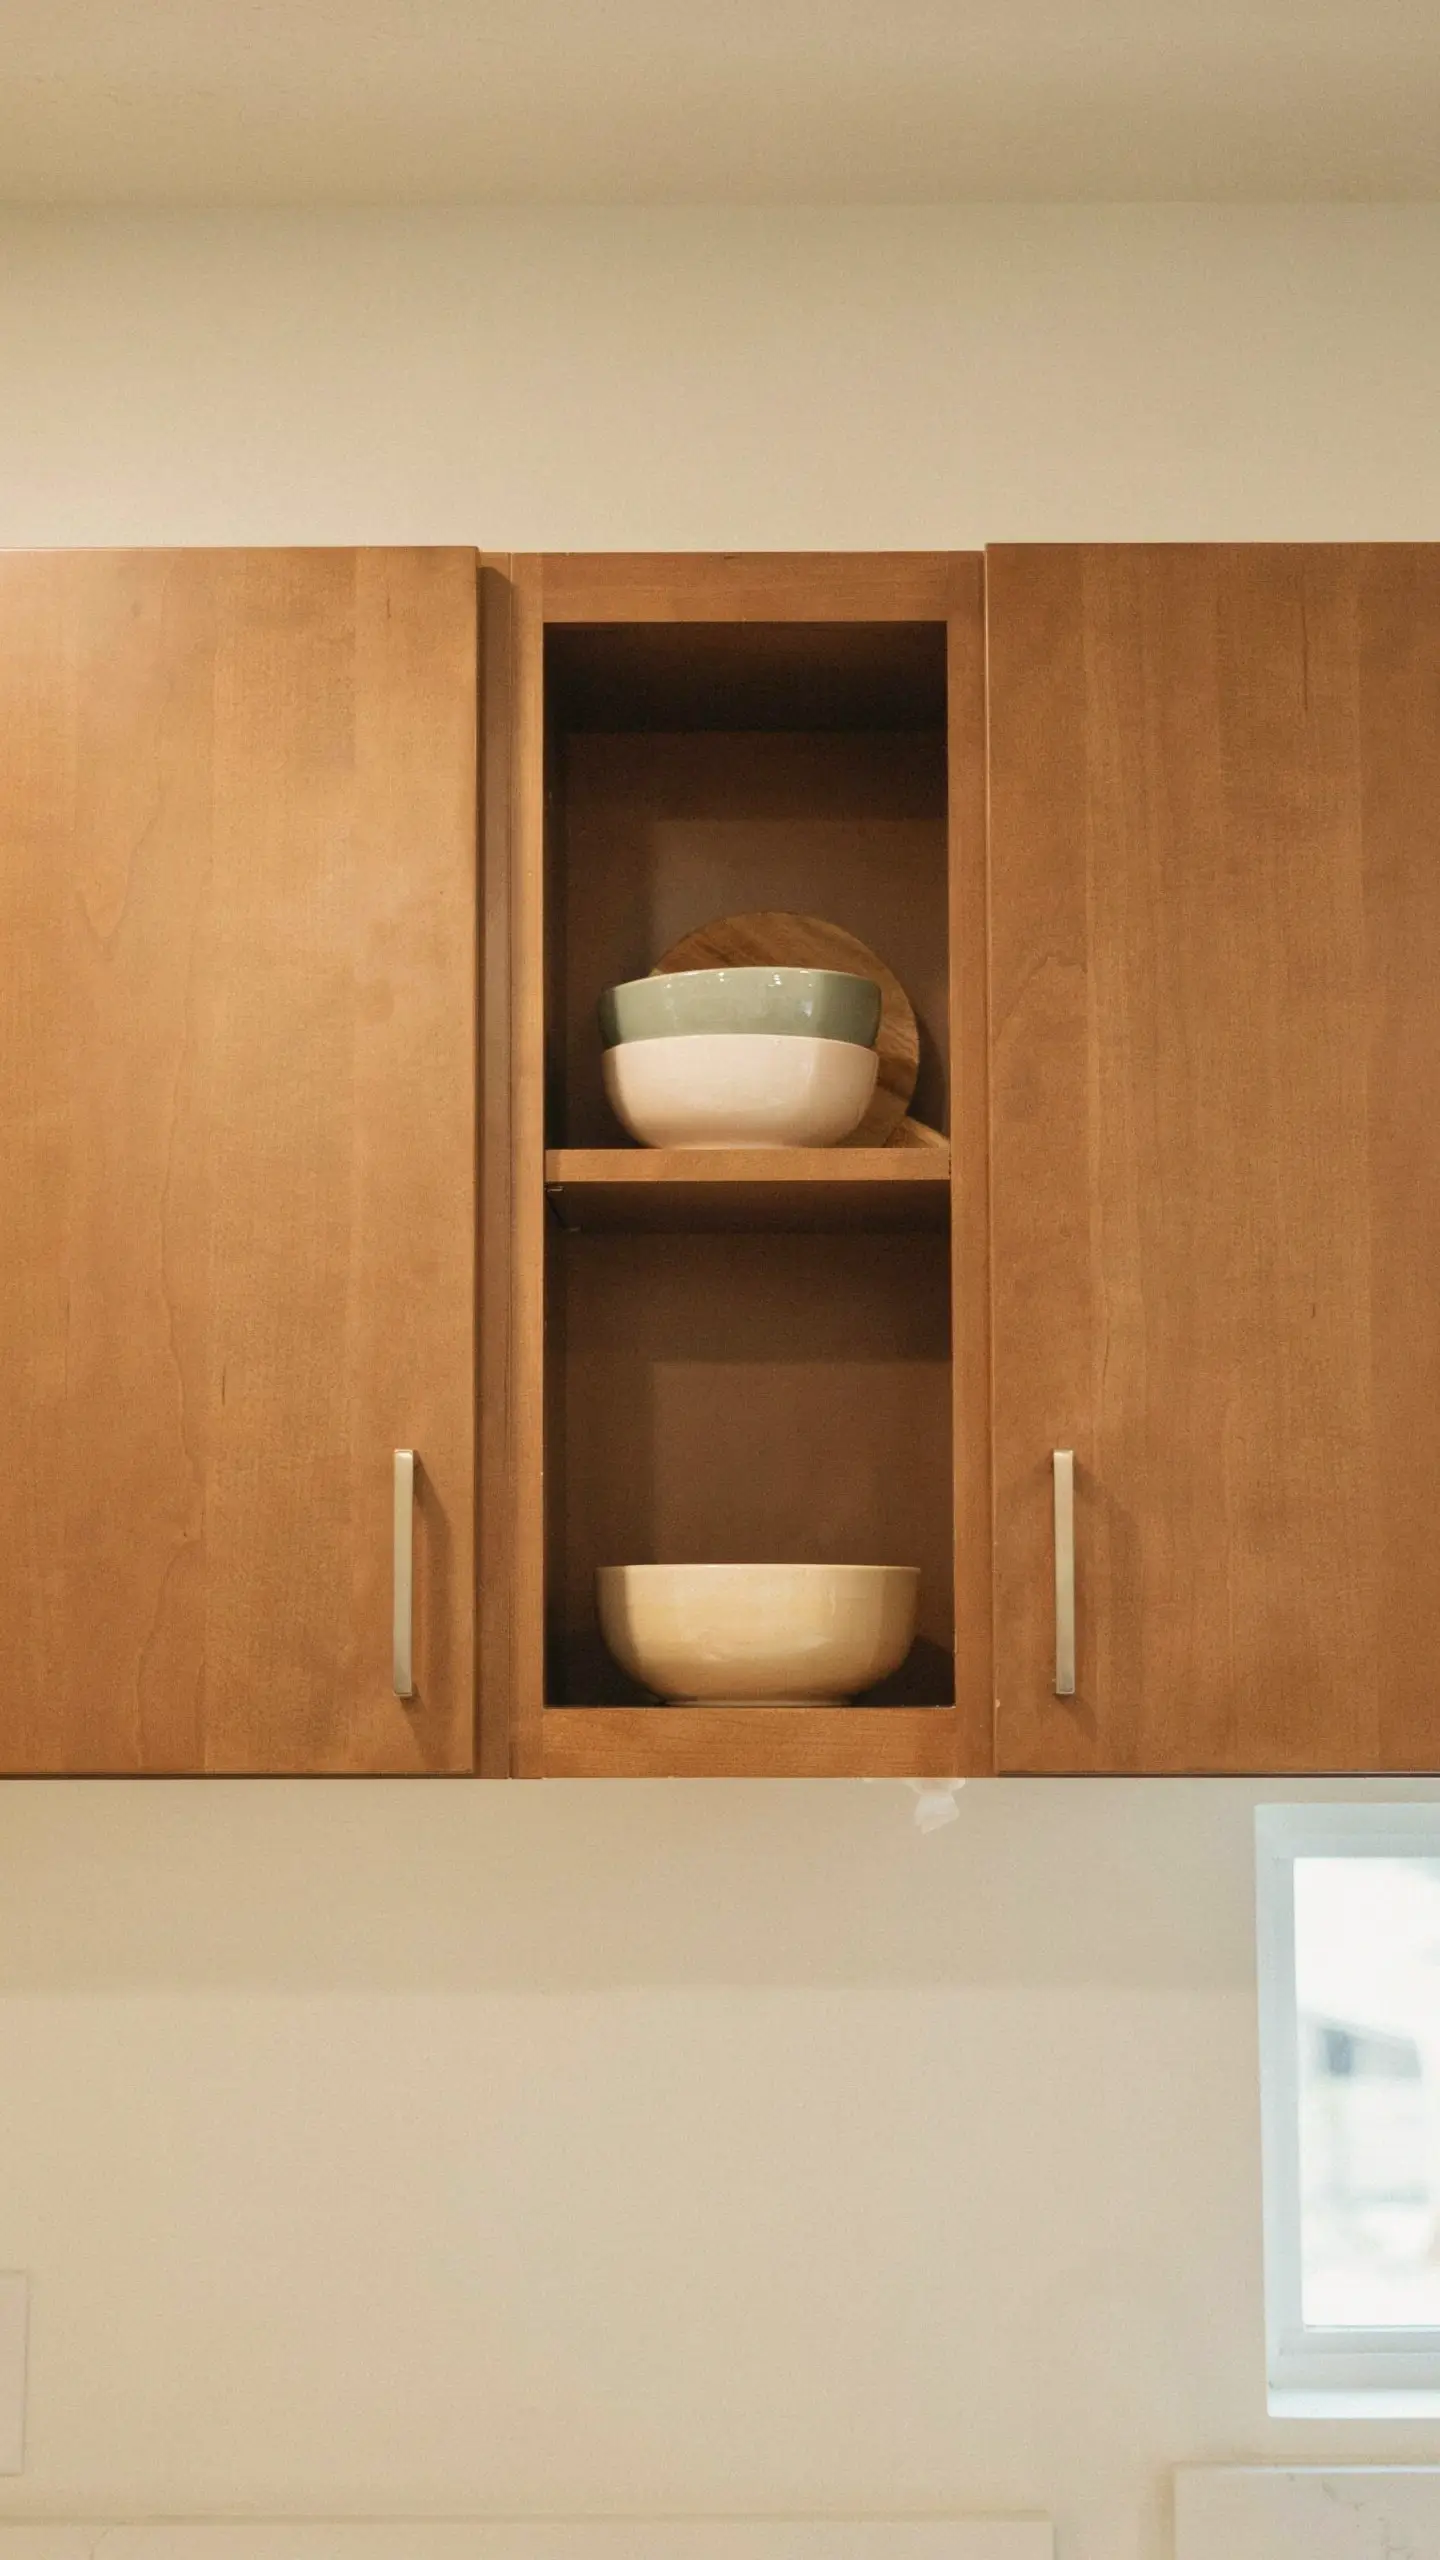
Full open shelving feels risky to a renter. One converted cabinet does not. Take the door off a single upper cabinet — most hinges unscrew in minutes — and you’ve created a display nook without losing storage anywhere else in the kitchen.
The remaining closed cabinets stay tidy while the one open space gets to show off texture. Style it lighter than a full shelf: two or three pieces max, so it doesn’t compete with the closed cabinets around it.
Some designers will tell you open storage always looks cluttered — that’s only true if you fill it like a closed cabinet instead of a display case.
4. Swap Plastic Pulls for Braided Leather Drawer Straps
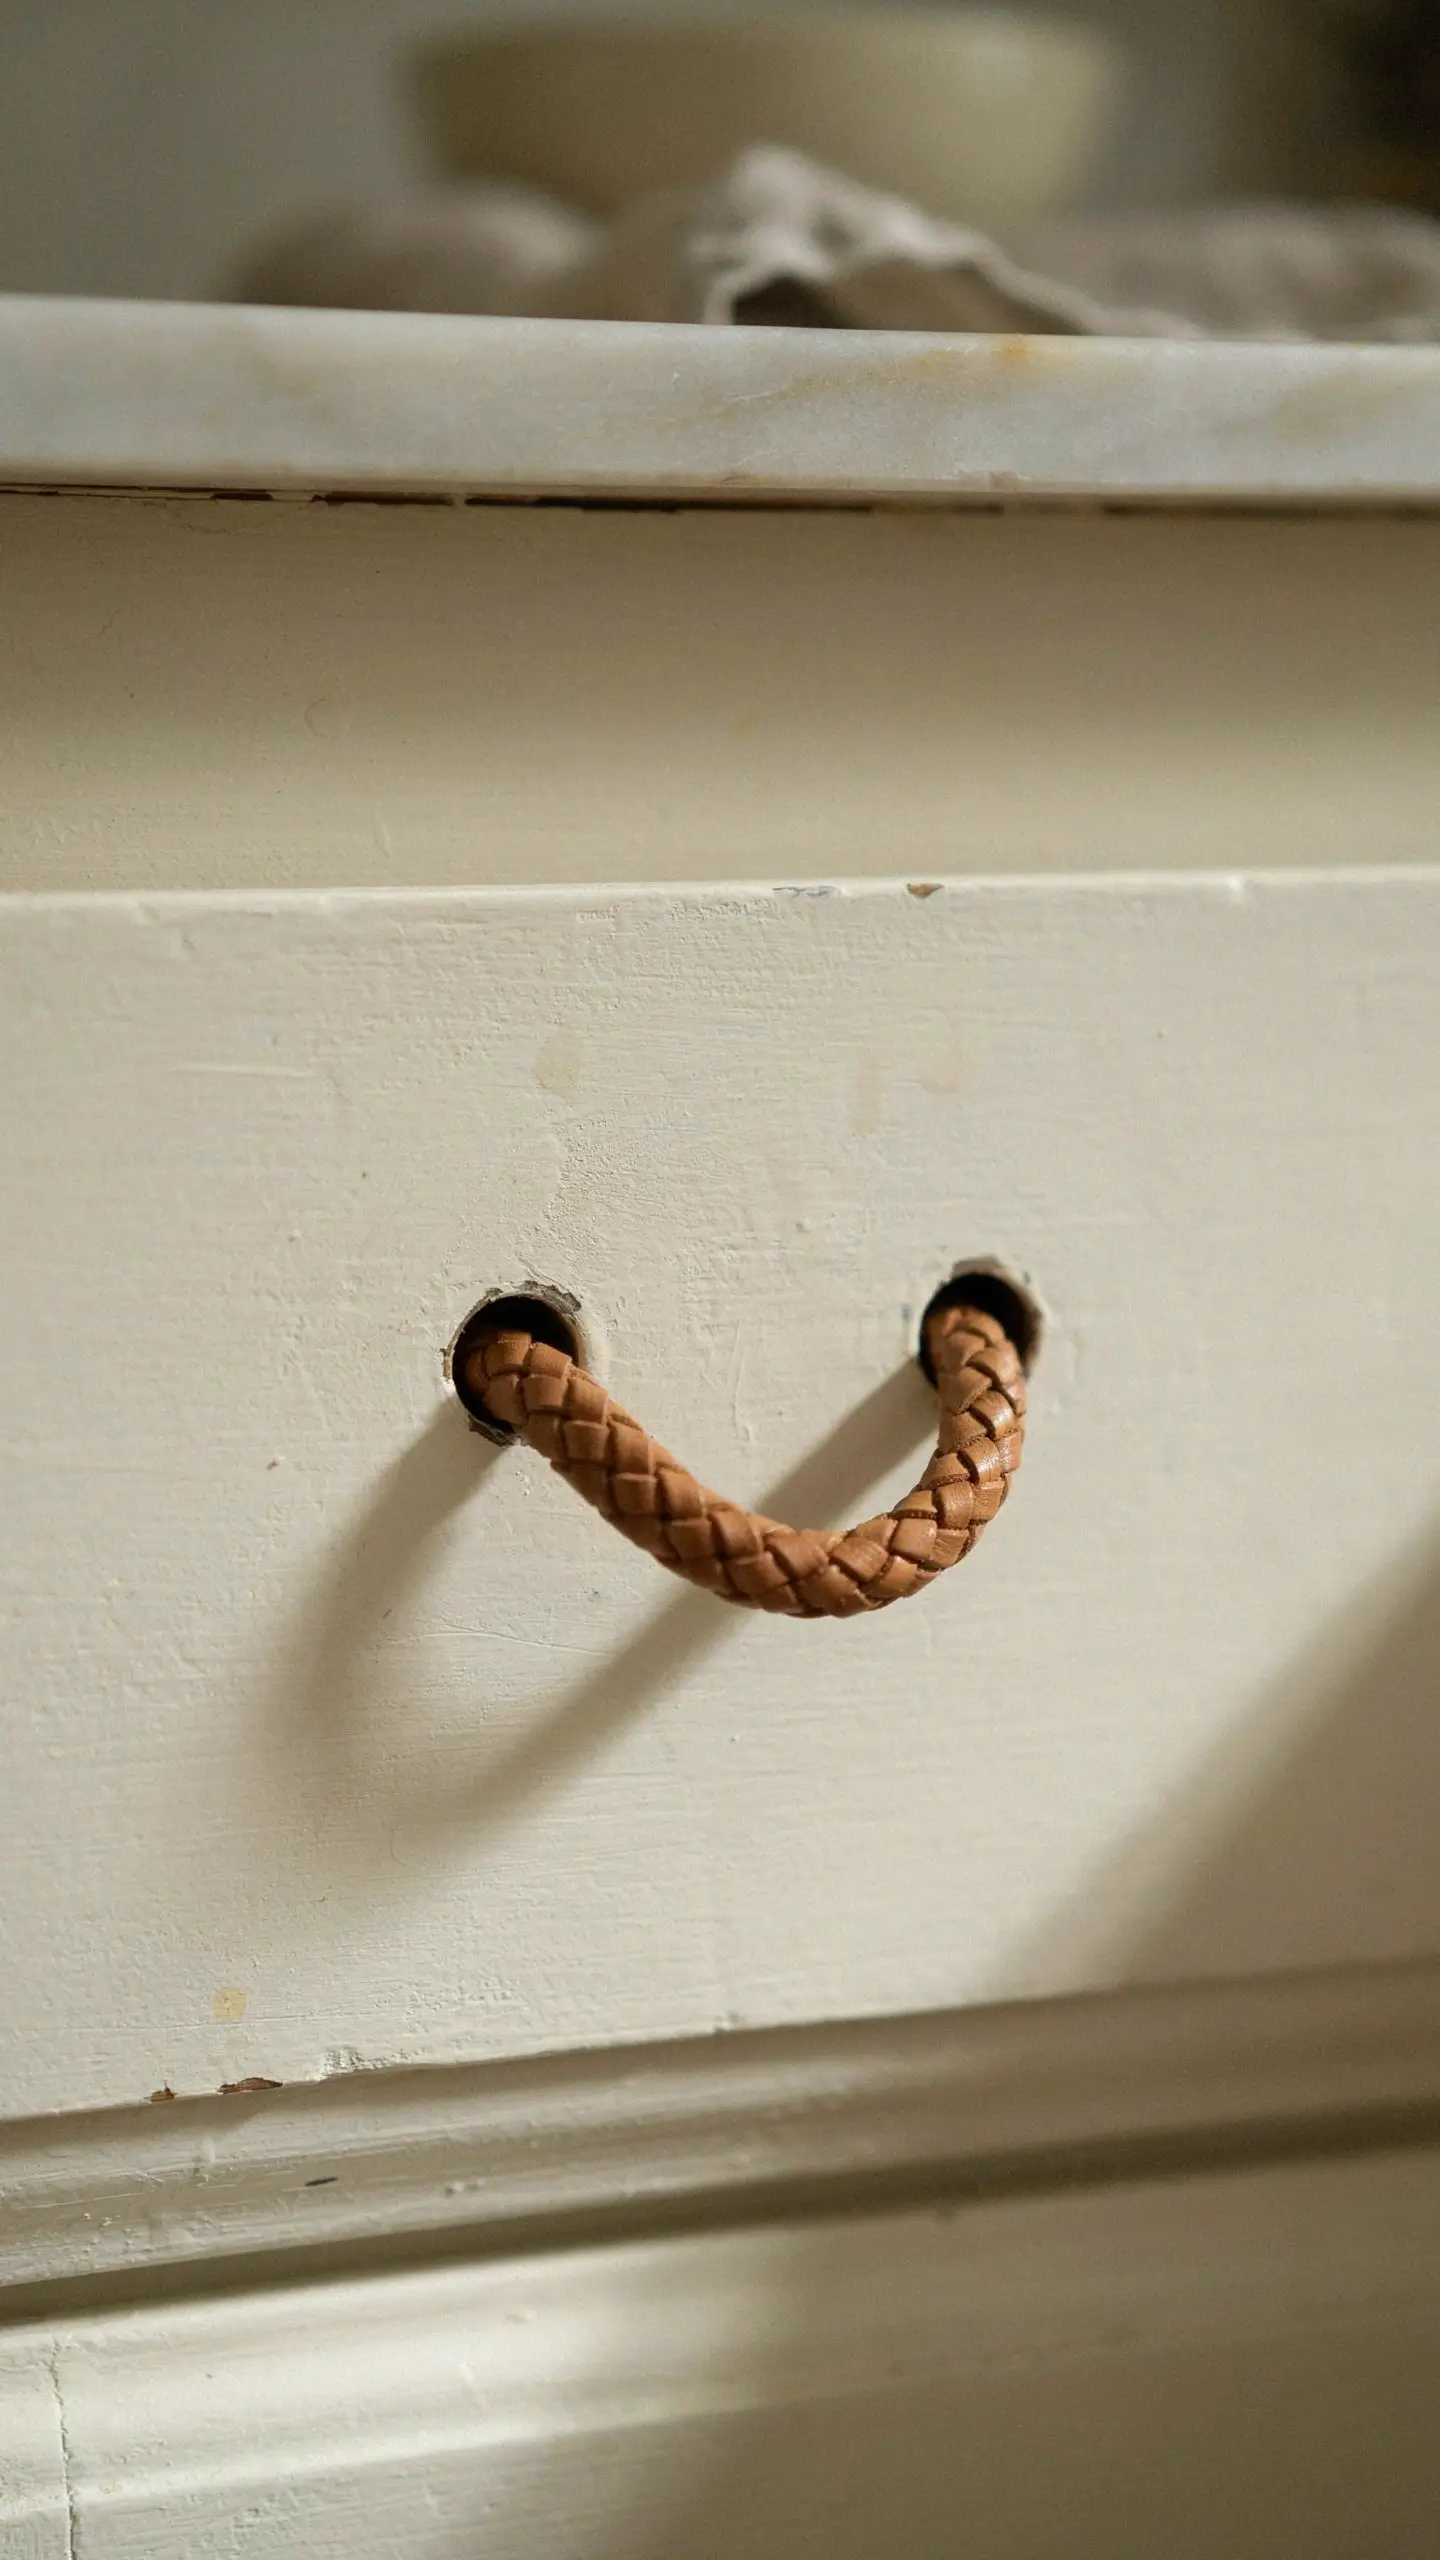
If your cabinets have simple bar pulls, loop-tie a braided leather strap through the existing holes instead of buying new hardware. It’s the cheapest possible texture upgrade and it comes off in seconds.
Leather against painted or laminate cabinets reads instantly rustic-warm rather than industrial, and it costs a fraction of metal hardware.
I’d skip this on cabinets with recessed or flush pulls where there’s no gap for a strap to loop through.
5. Trade Shiny Switch Plates for Oil-Rubbed Bronze Covers
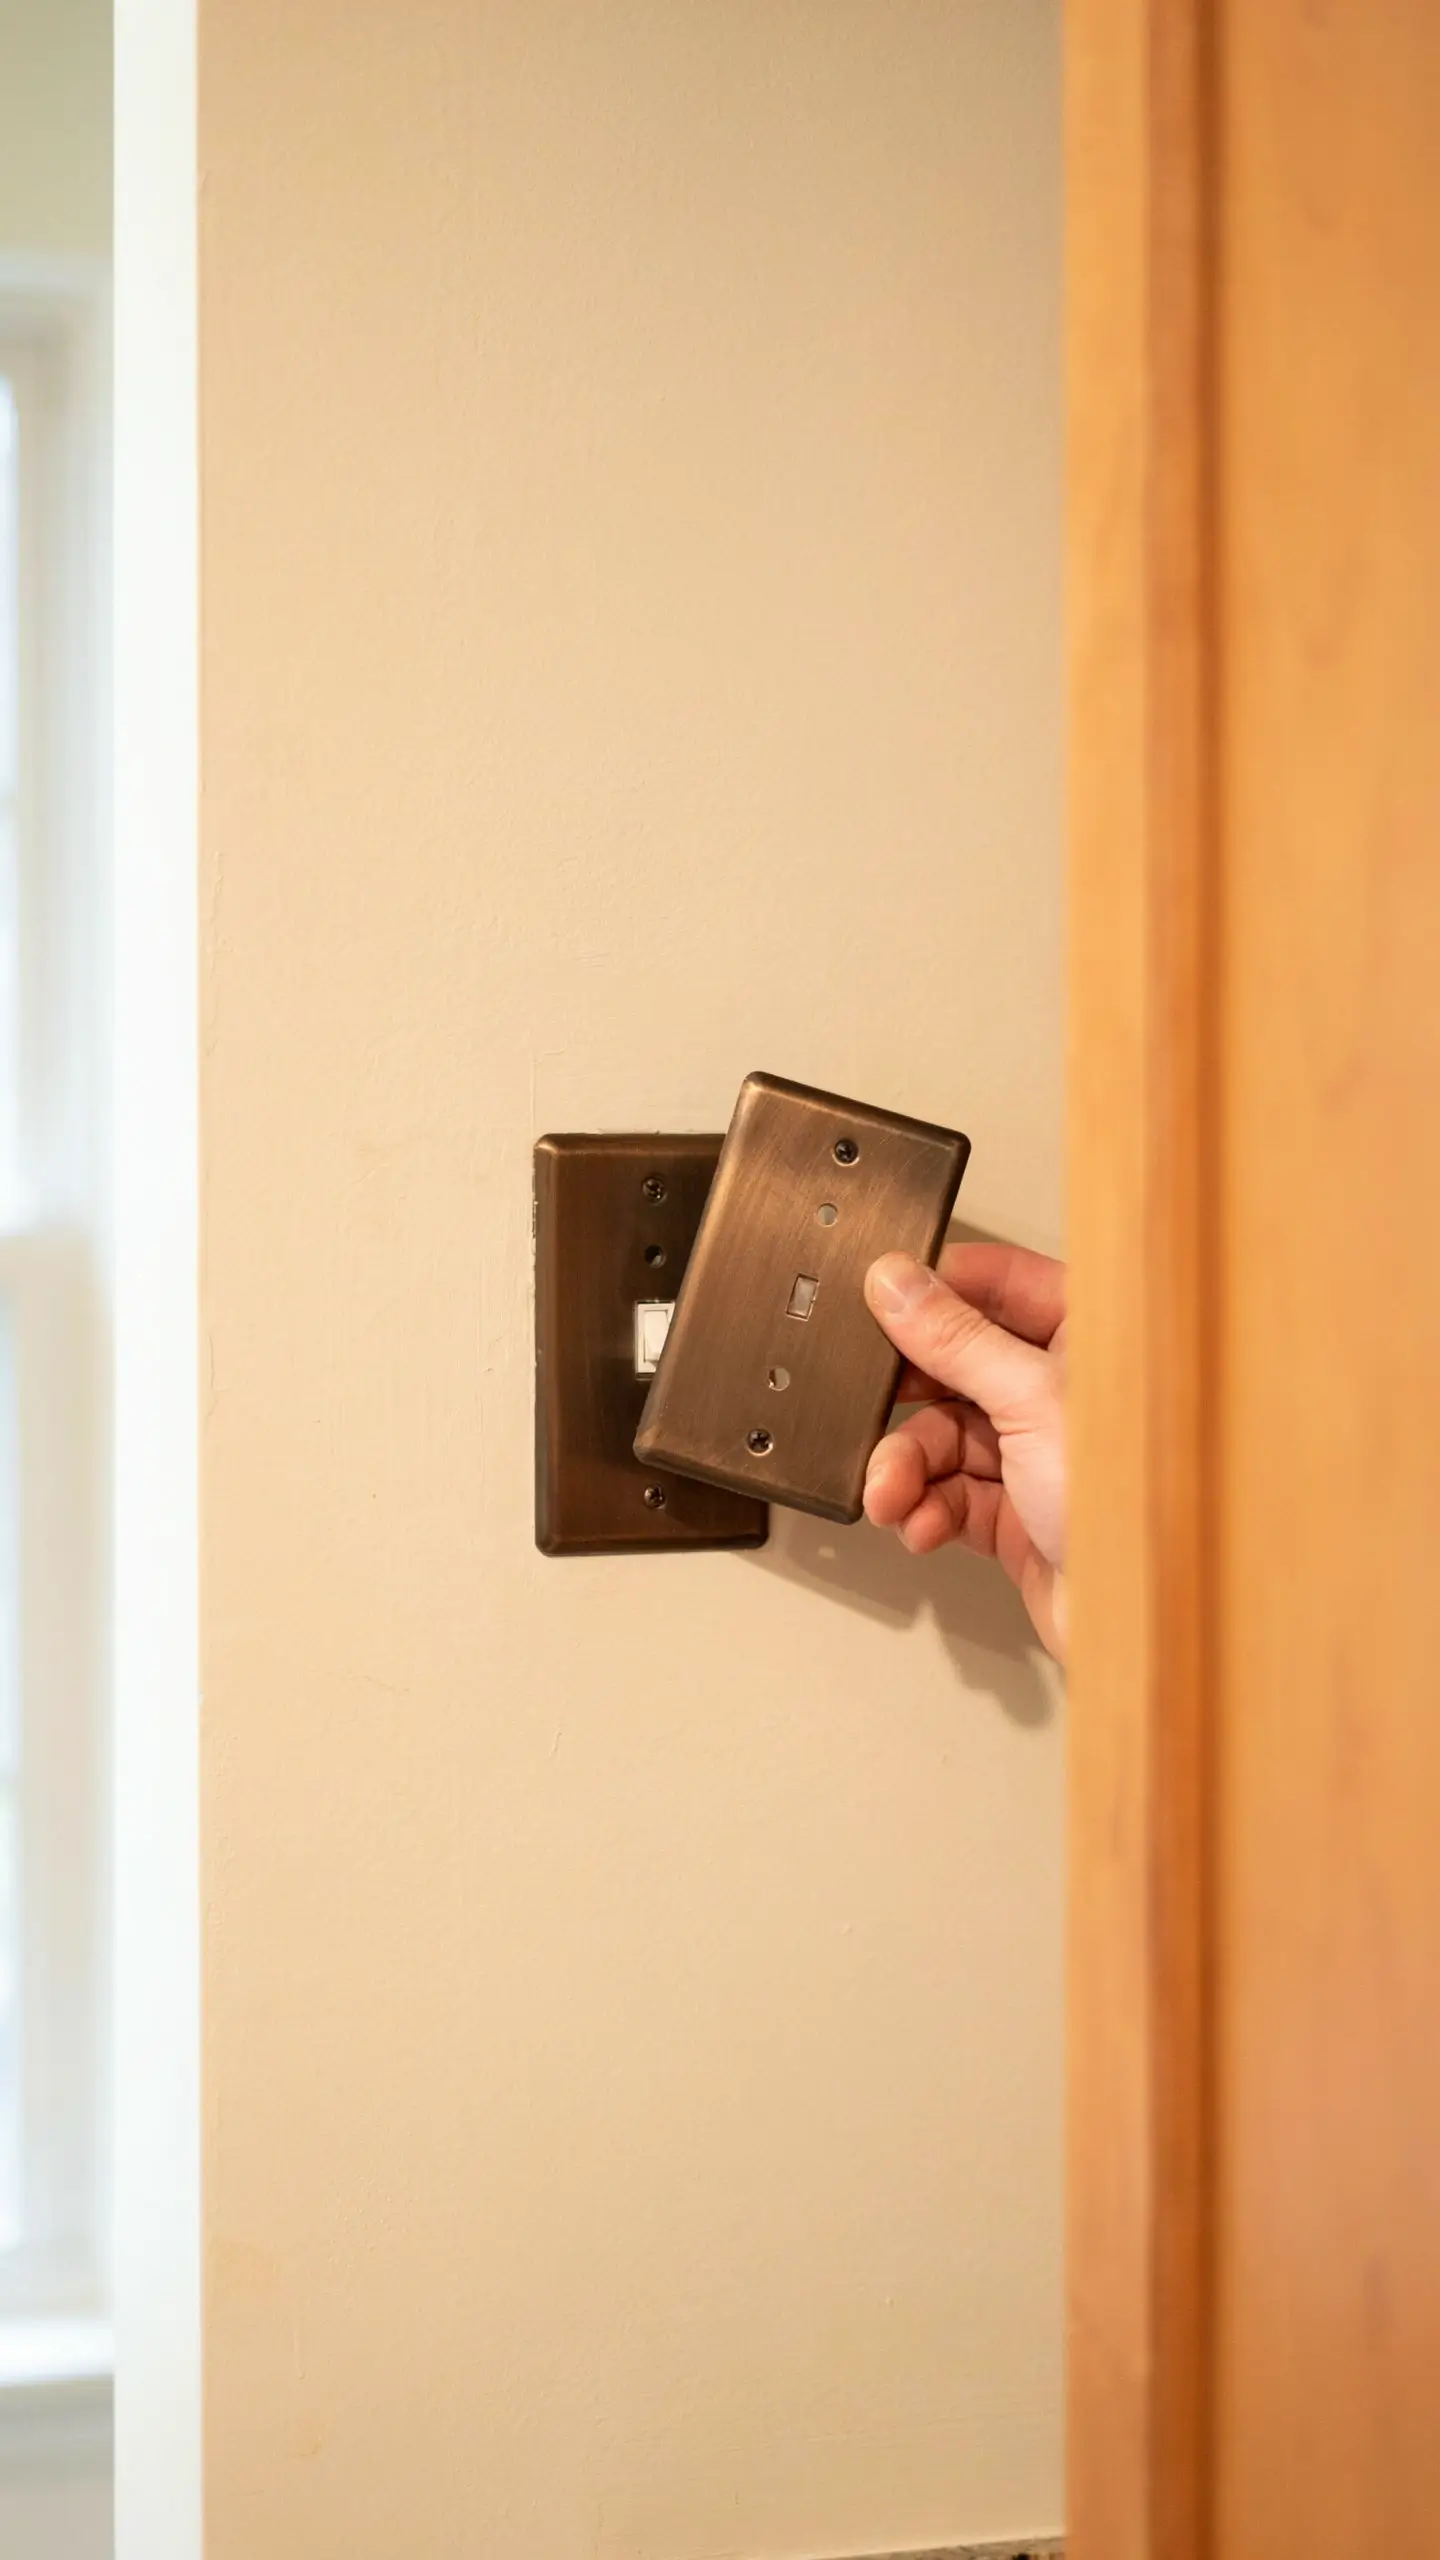
Nobody notices switch plates until they’re wrong. Plain white plastic covers next to warm wood cabinets create a small but constant visual jolt every time the eye passes them.
Swapping to oil-rubbed bronze or matte black covers costs a few dollars per plate and takes a screwdriver, not a contractor. It’s a detail that quietly tells the room “this was considered,” even though most guests never say a word about it.
This one’s easy to forget, which is exactly why it stands out once it’s done.
6. Tuck a Vintage Step Stool Into the Corner as a Plant Perch
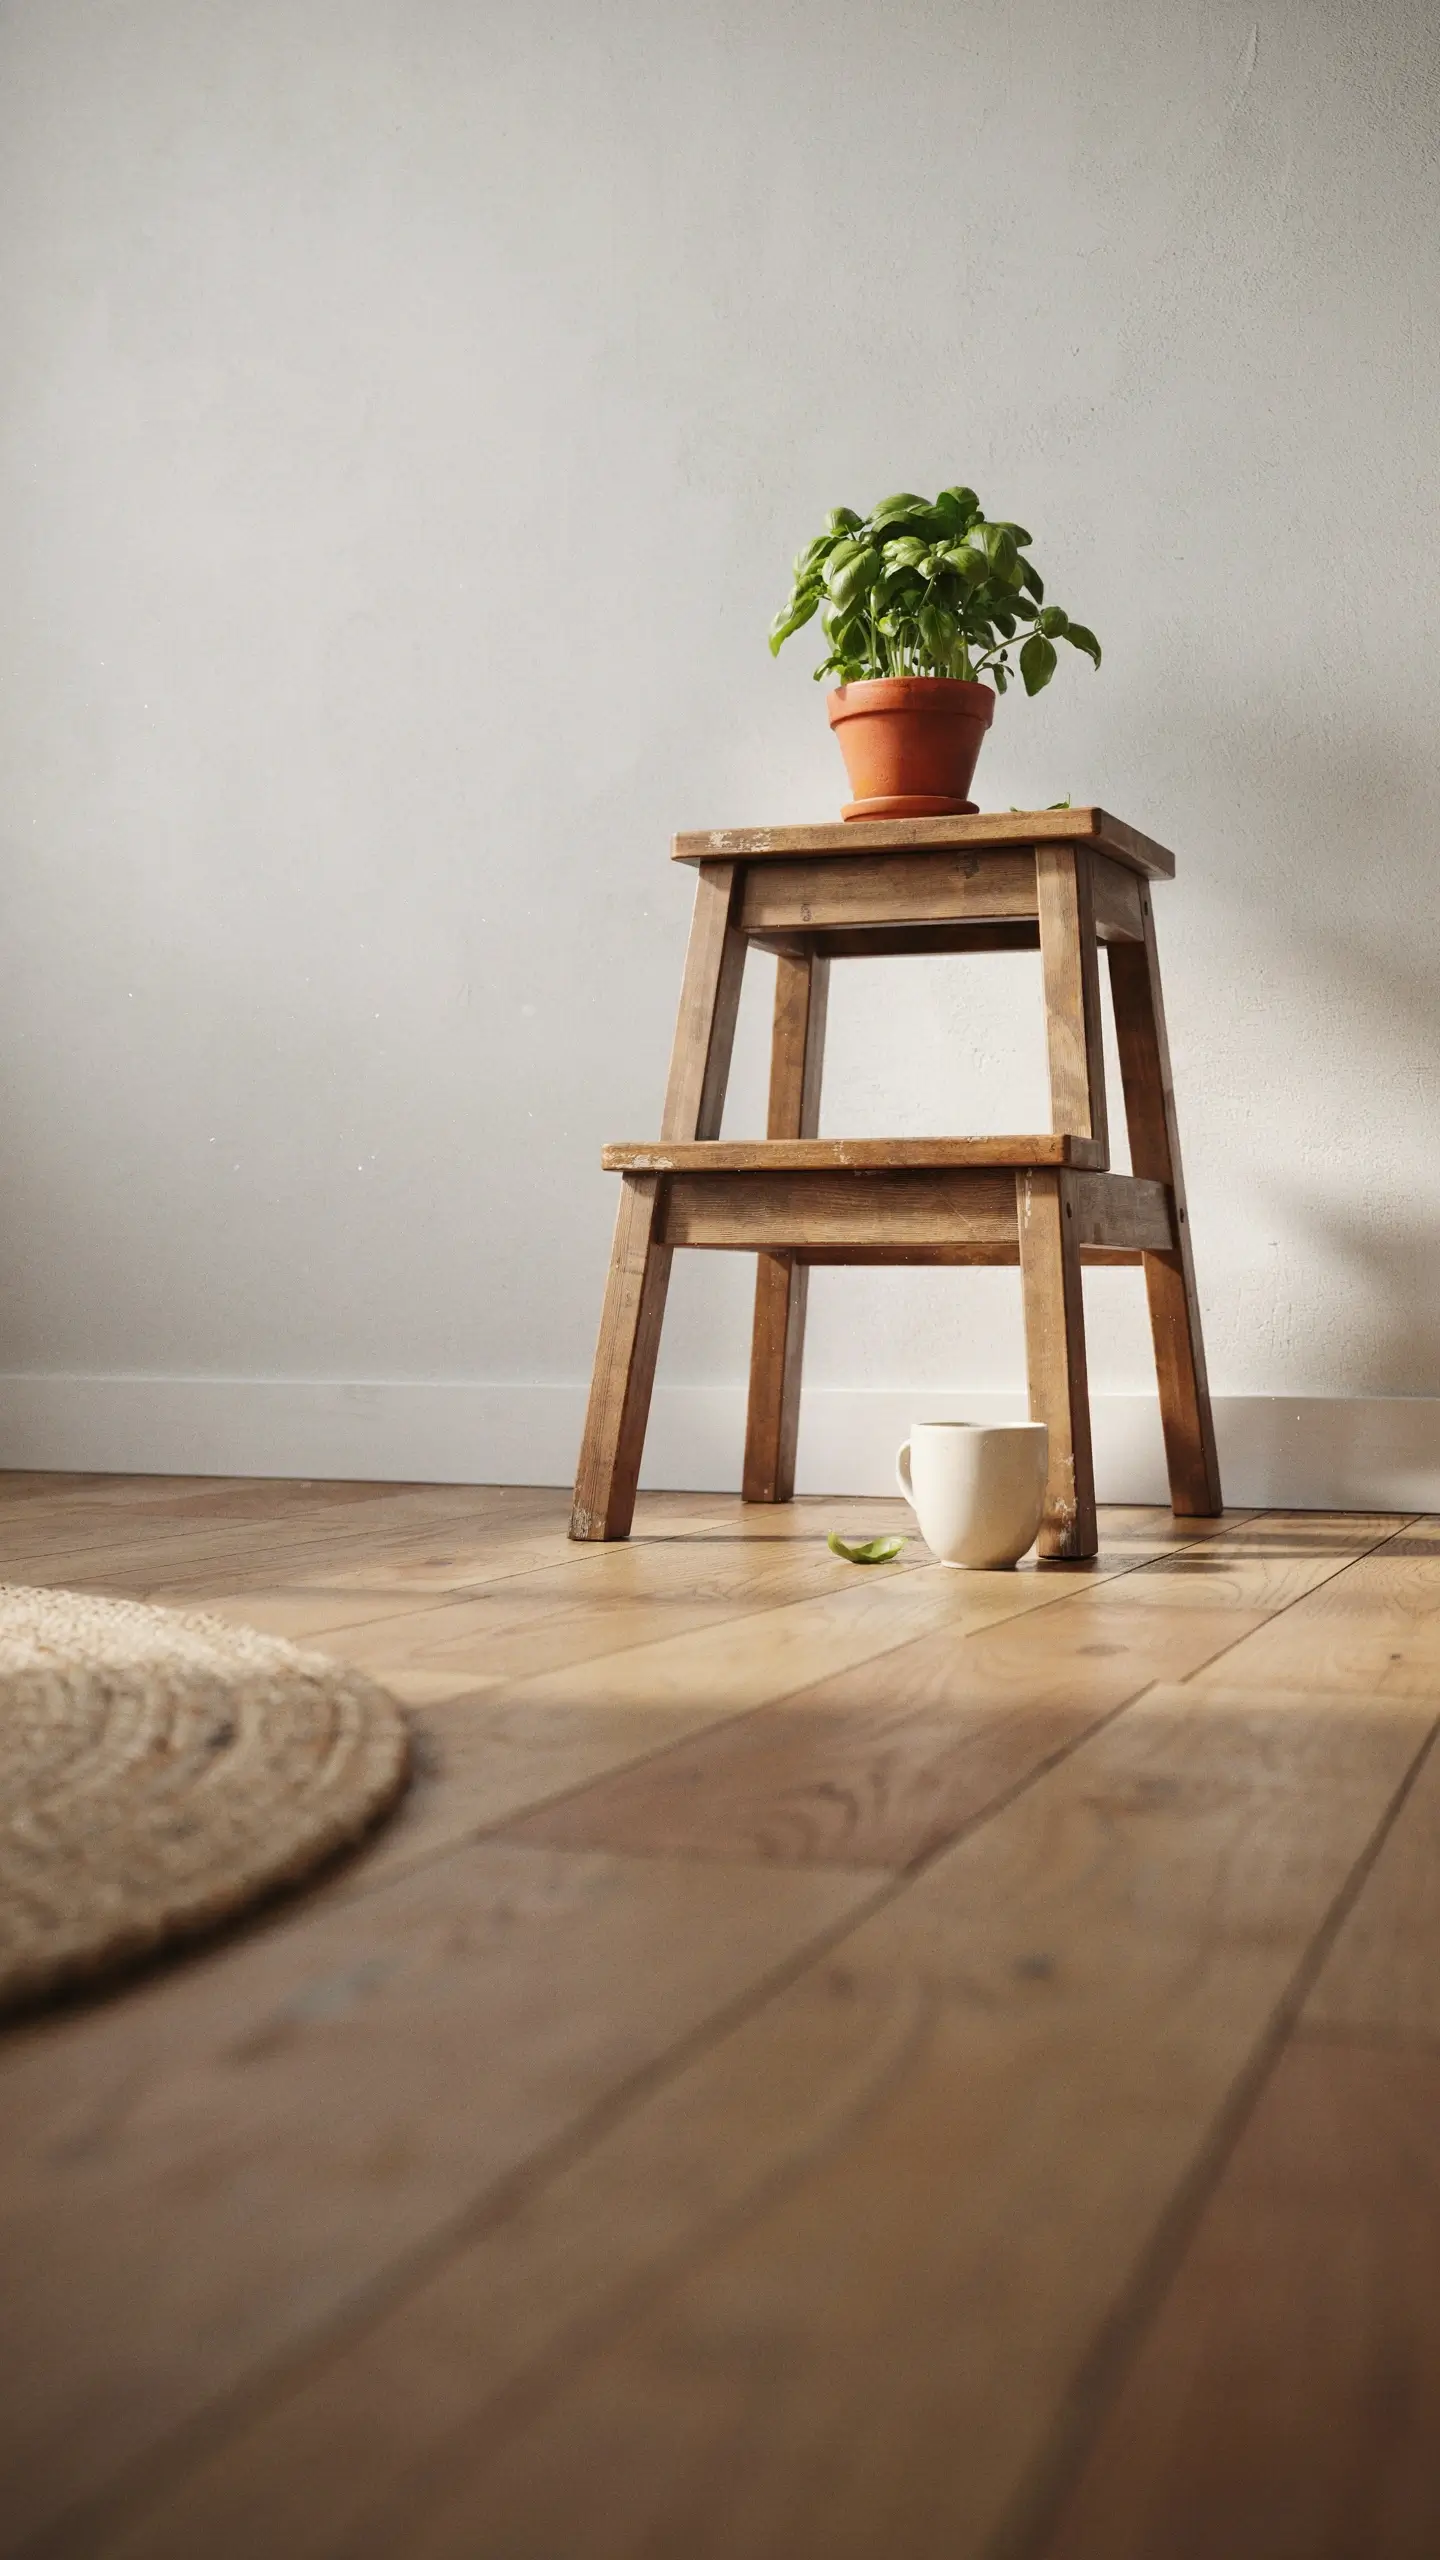
Empty floor corners in small kitchens usually stay empty because nothing fits. A small wood step stool solves that — set flat or on its side, it becomes a low pedestal for one plant or a stack of linen napkins.
It reads as a found object rather than a store display, which is exactly the rustic, lived-in feeling this whole list is chasing.
I’d only place this somewhere it won’t get kicked — a true dead corner, not a walking path.
To swap cabinet hardware without damaging your cabinets, follow these steps:
- Unscrew the existing knob or pull and save the screws in a labeled bag.
- Measure the hole spacing before ordering new hardware so it lines up without new drilling.
- Install the new pull using the original screws, or the included ones if the spacing matches exactly.
Small-Budget Texture and Storage Fixes
This group runs roughly $20 to $80 per item — enough to change how a whole zone of the kitchen feels, without touching cabinets or walls.
7. Run a Woven Jute Runner Down the Galley Aisle
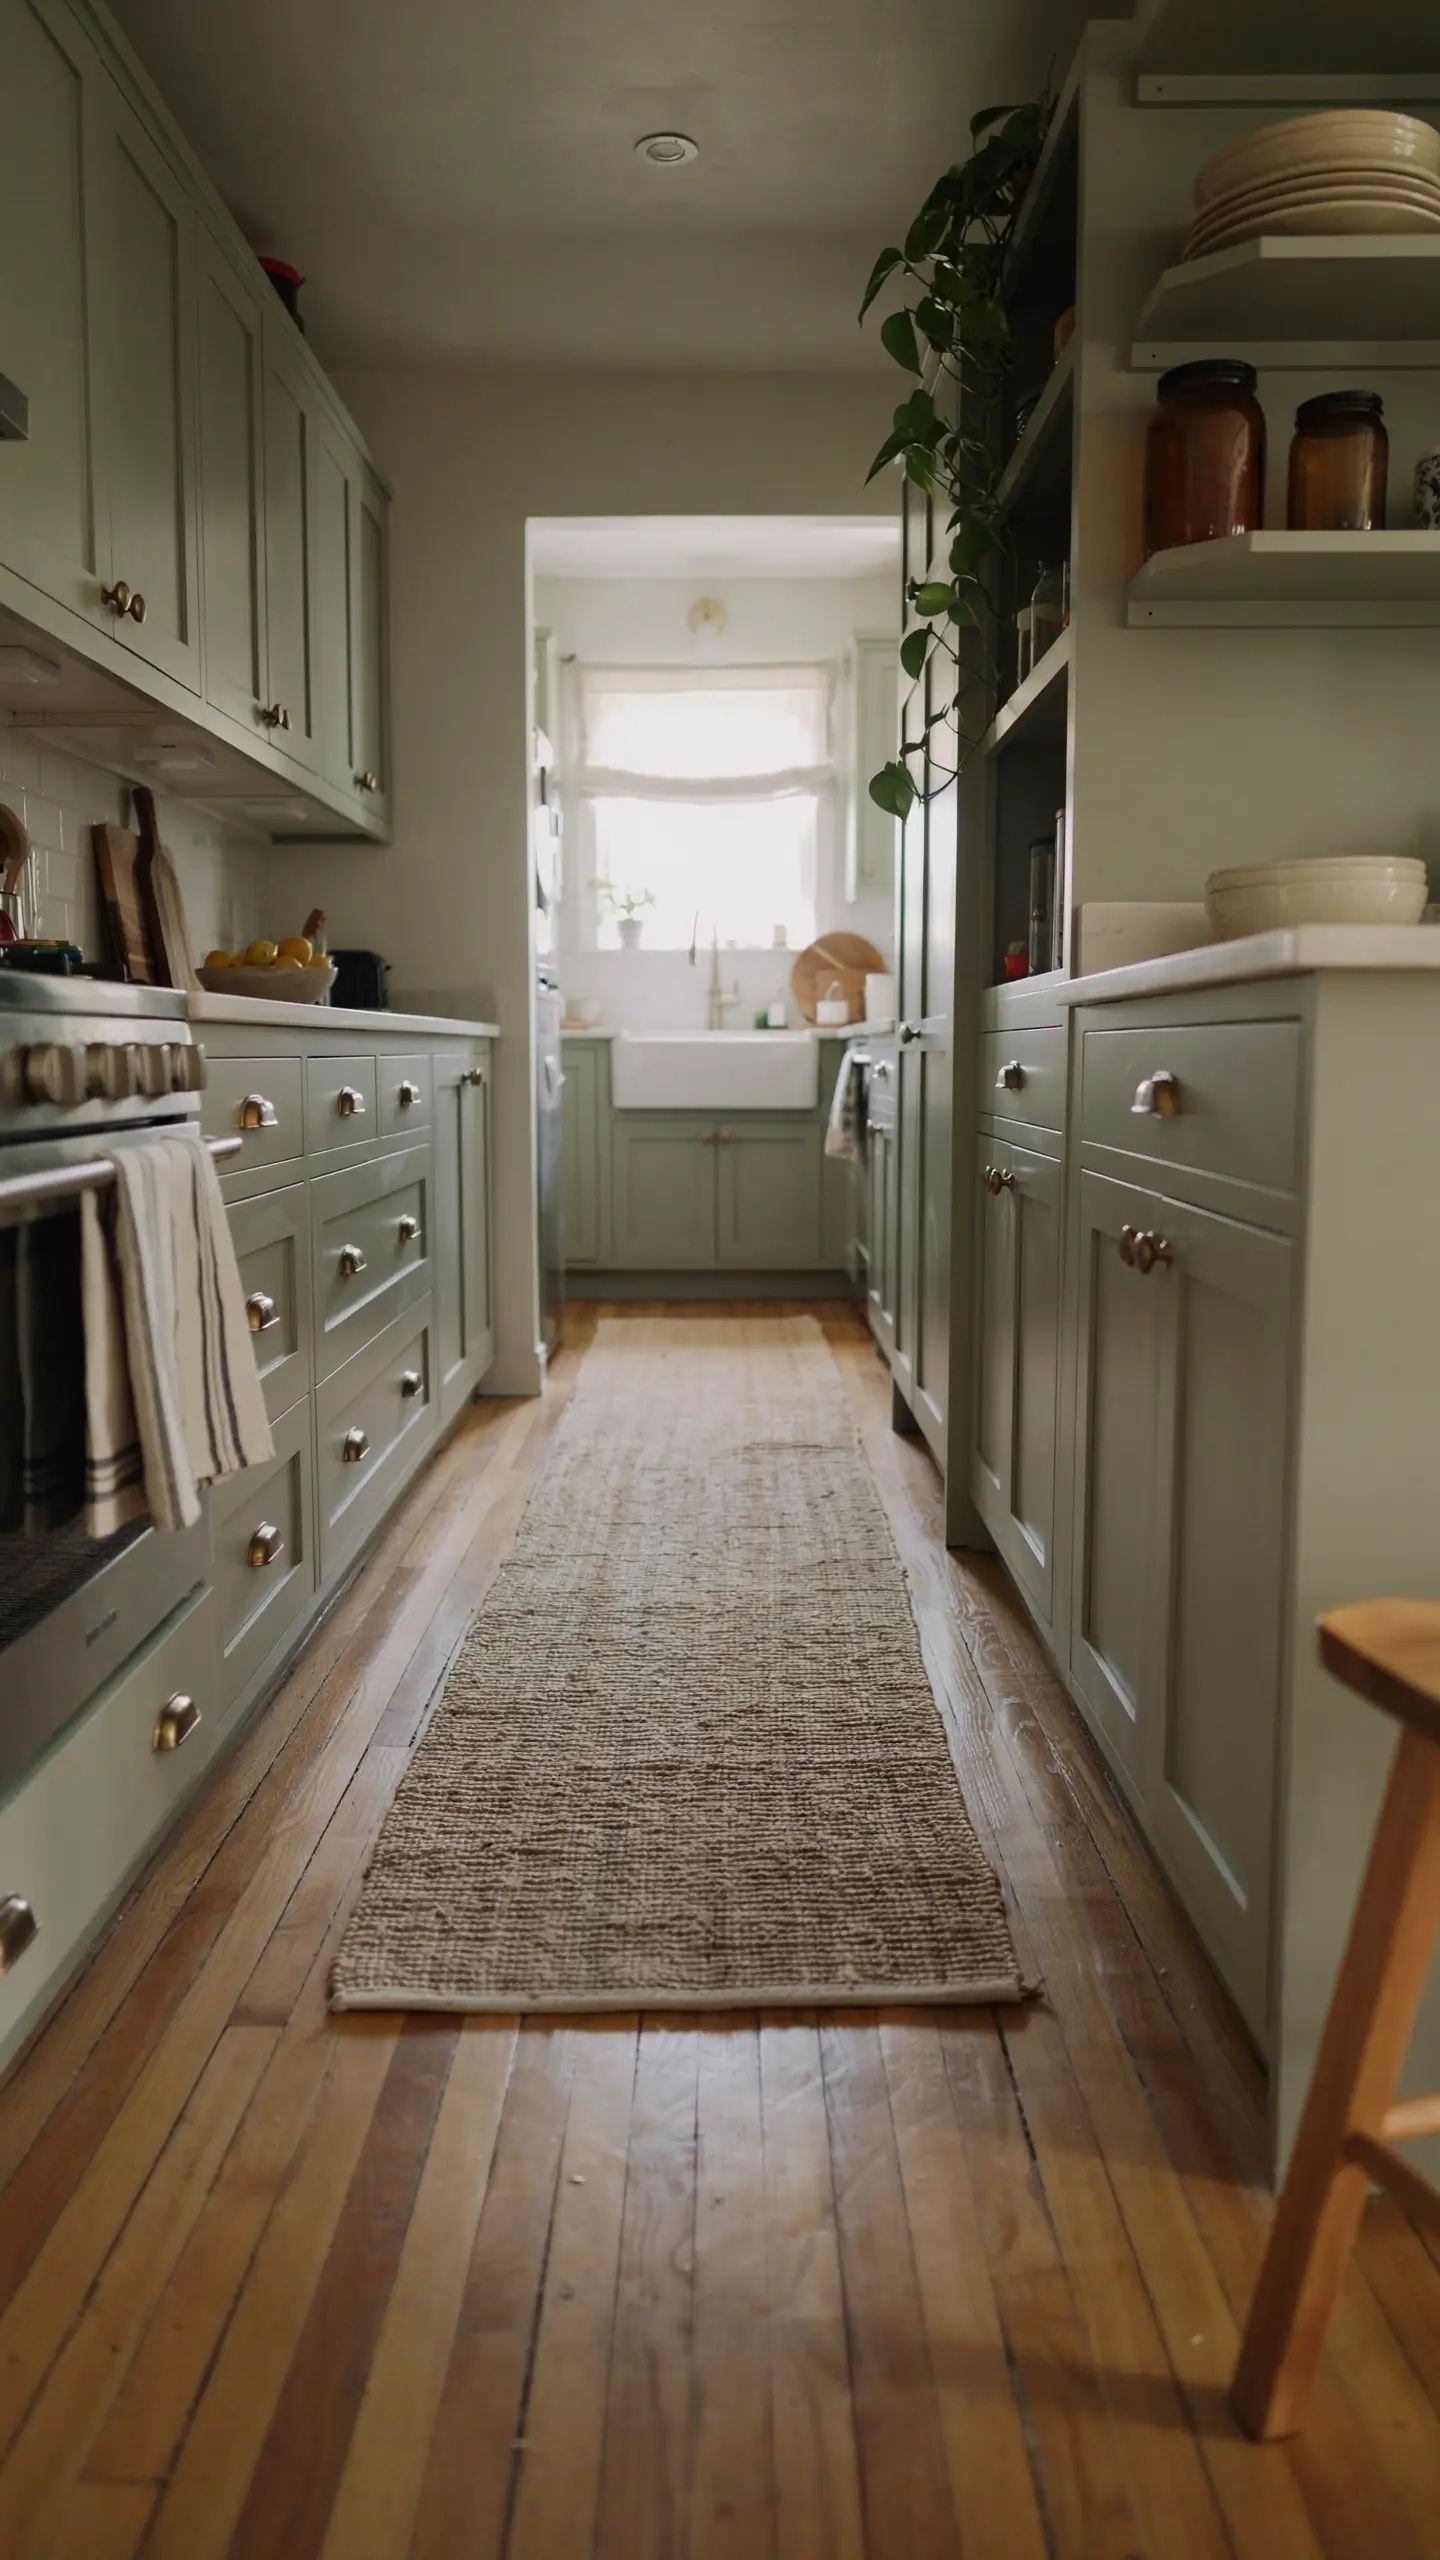
A bare tile or vinyl floor in a narrow kitchen reads utilitarian, not warm. A woven jute or wool-blend runner laid down the main walking aisle turns that strip of floor into a designed path instead of leftover space.
Choose a natural fiber weave over a printed pattern — the texture is what reads as rustic, not the print. Tuck a thin rug pad underneath so it doesn’t slide underfoot.
My read is this single swap does more for “warm and lived-in” than almost anything else on a tight budget.
8. Hang a Rattan Roman Shade Over the Sink Window
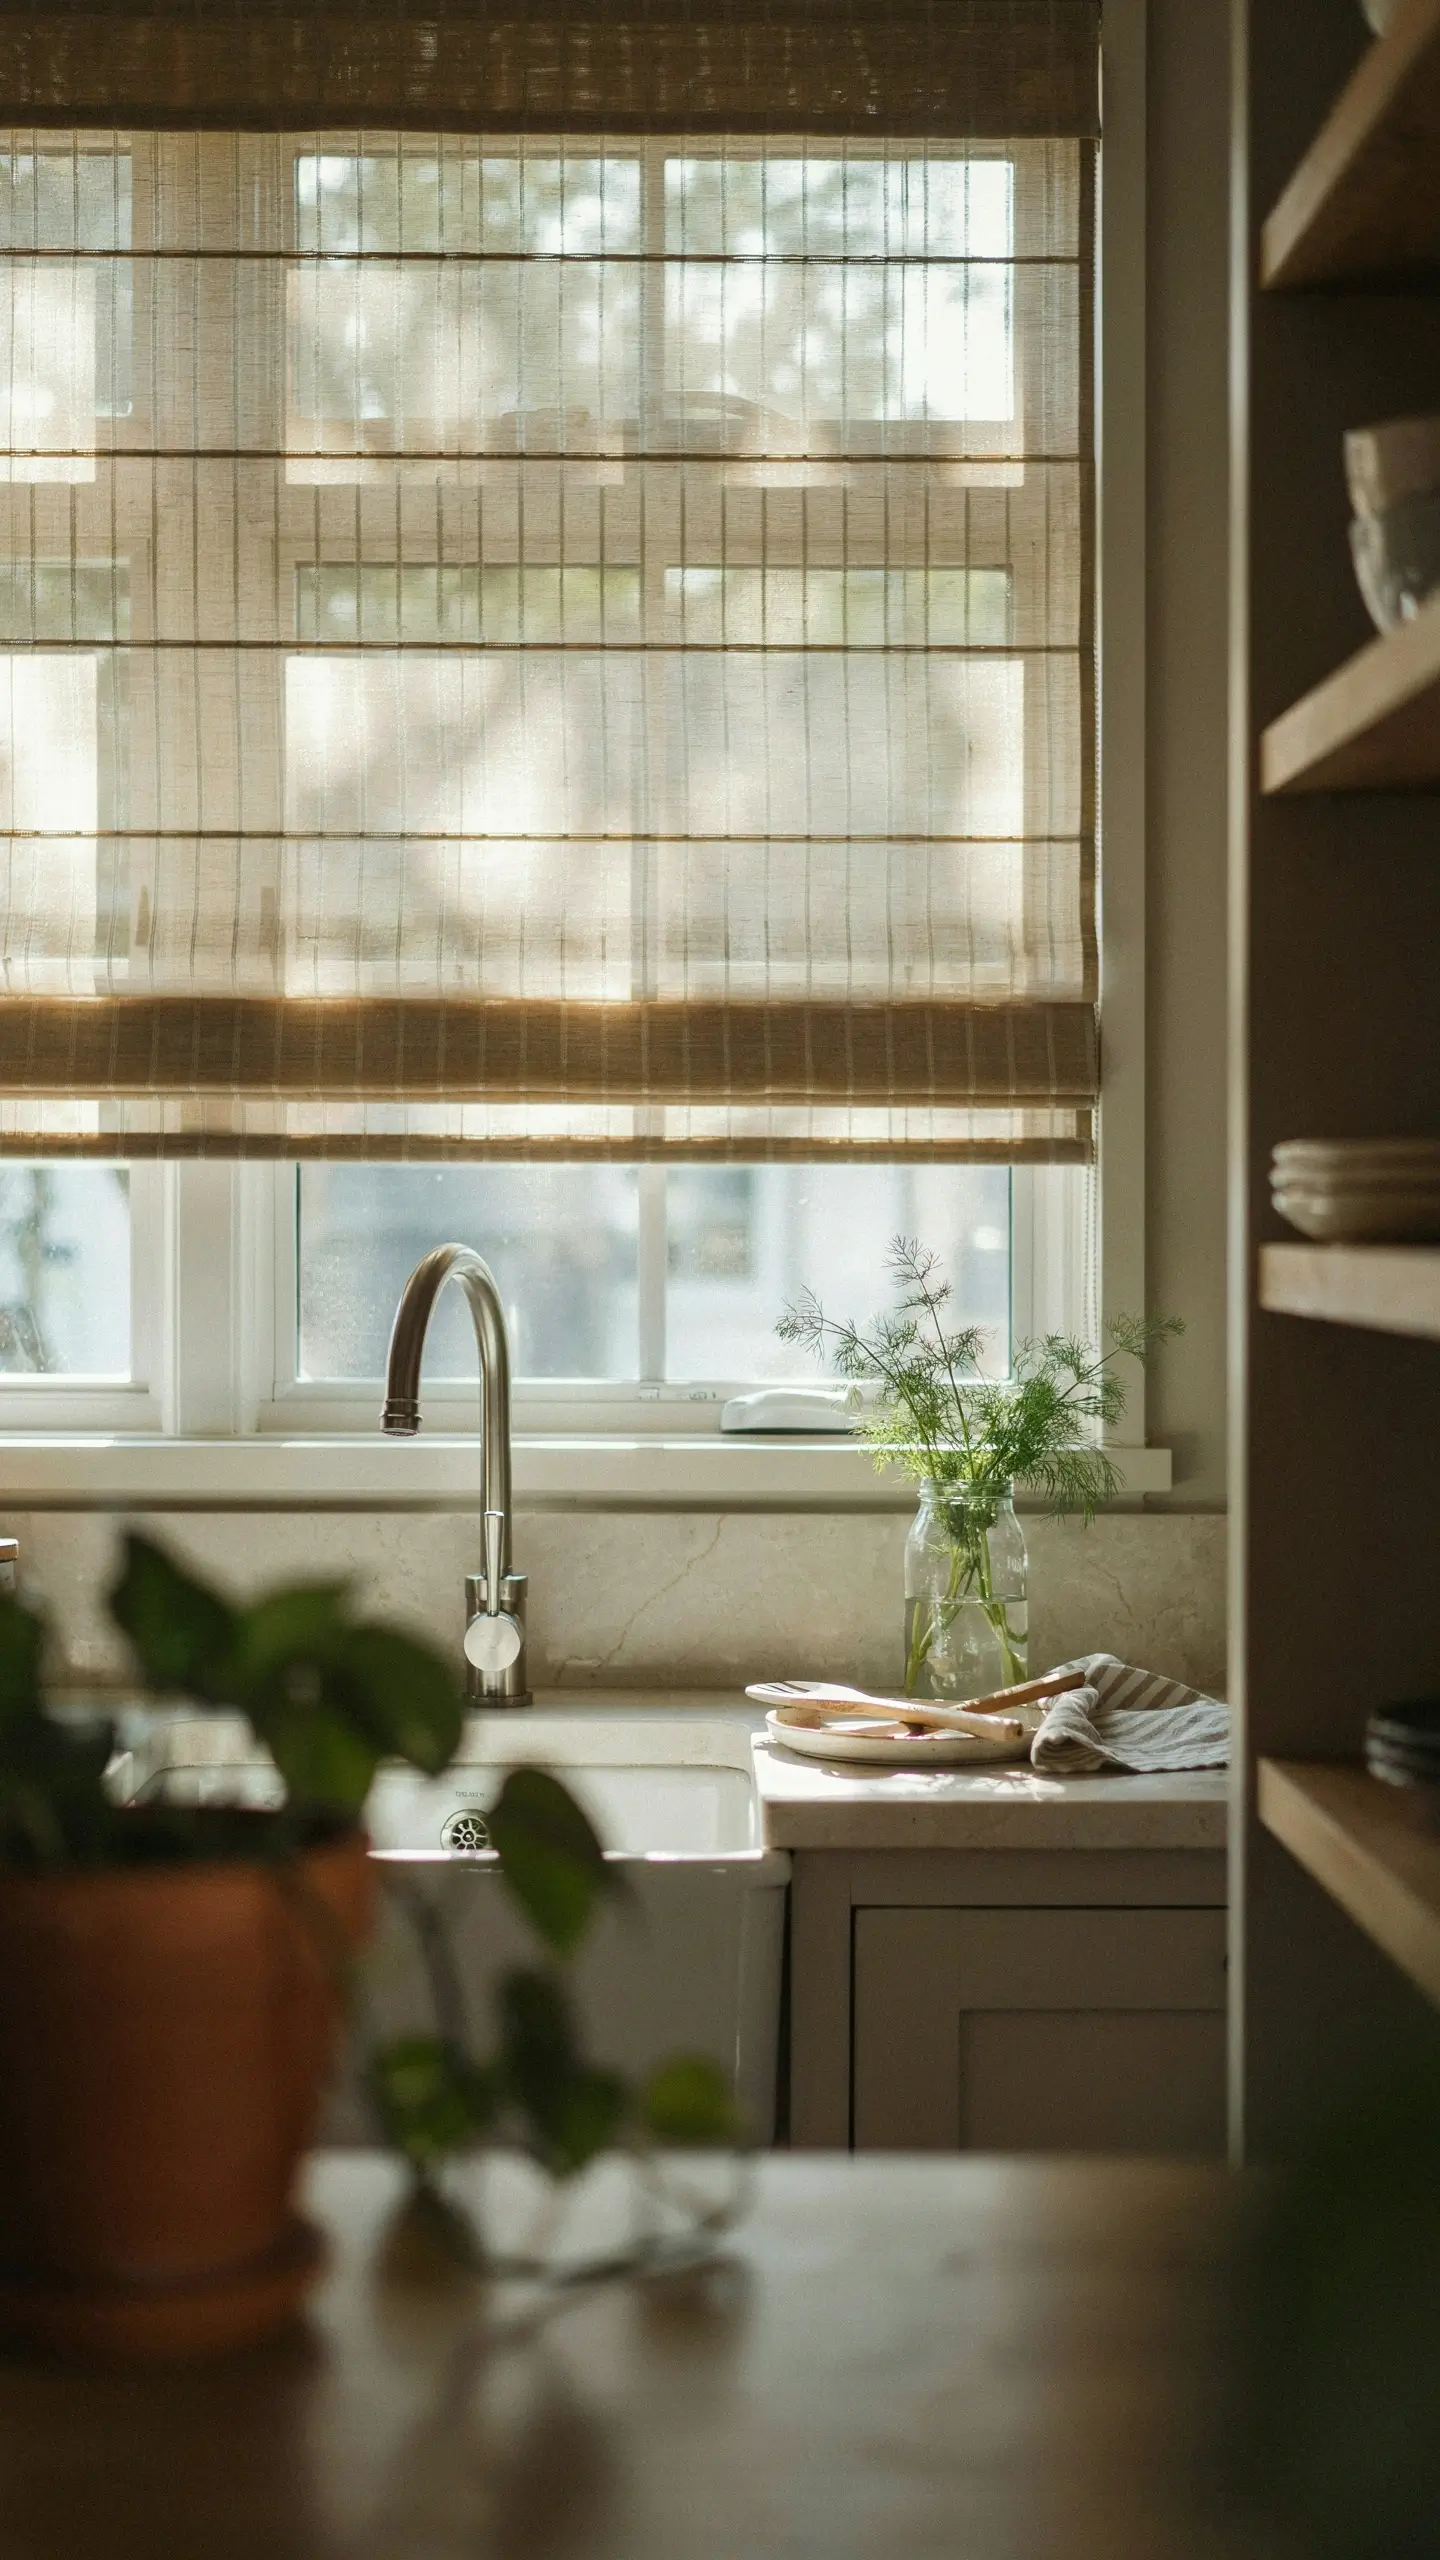
Bare blinds or a plain curtain over the sink window is one of the most overlooked flat spots in a kitchen. A woven rattan or bamboo roman shade adds texture right at eye level, exactly where you stand for dishes.
It filters light in a warmer, softer way than vinyl blinds, and it pairs naturally with the wood-and-linen palette rustic kitchens lean on.
I’d choose a cordless version if there are kids or pets nearby.
9. Slide Woven Bins Onto Open Shelving for Hidden Texture Storage

Open shelves look great until they’re storing dish towels and takeout menus. Woven baskets or bins on the lower shelves hide the unglamorous stuff while keeping the same rustic material language as everything above them.
This solves the real problem with open shelving — that it forces everything to be pretty — by giving you one honest place for the not-pretty items.
A source like World Market carries small stoneware and woven pieces sized for exactly this kind of shelf styling.
10. Mount an Iron Utility Rail With S-Hooks Under a Shelf
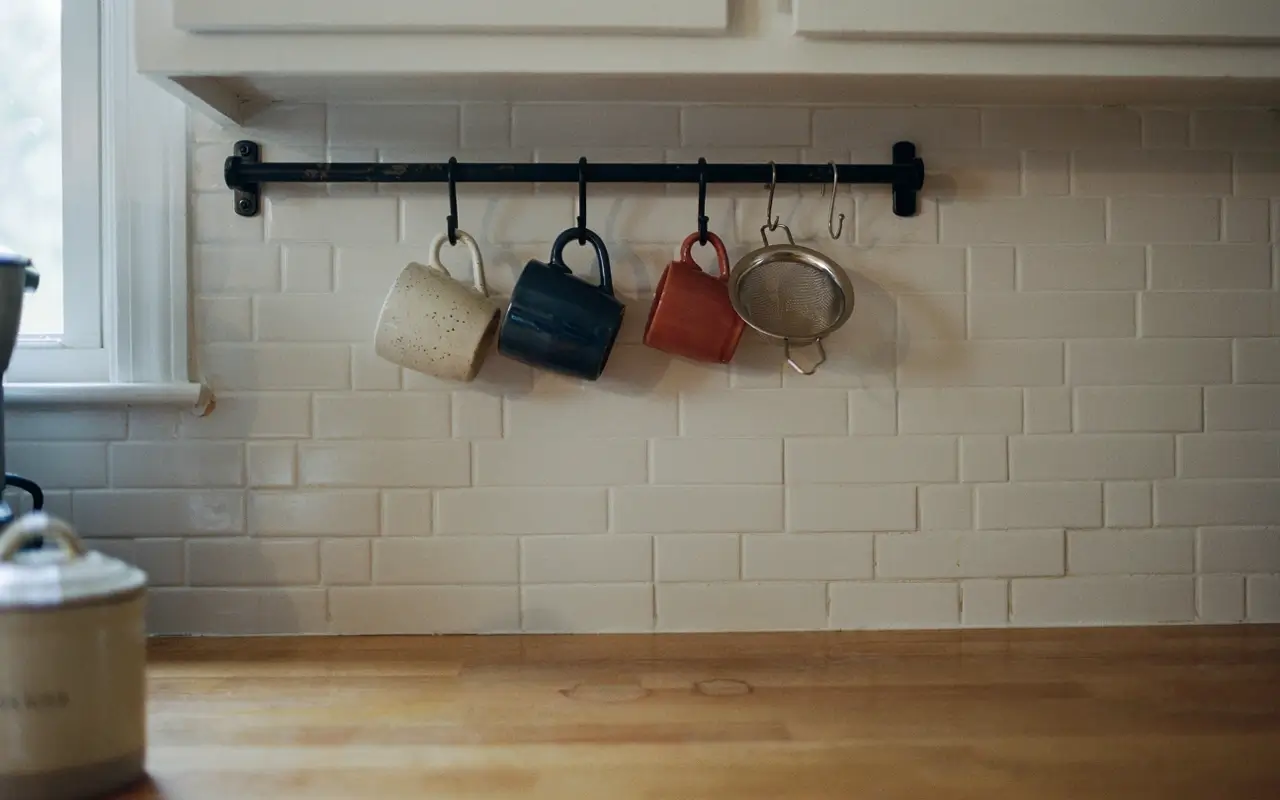
A blank stretch of wall between the counter and an upper cabinet is wasted space in most kitchens. A slim black iron rail mounted there, hung with S-hooks for mugs, a strainer, or a small pan, turns dead wall into working storage with real farmhouse texture.
It works because it’s function you can see — nothing here is purely decorative, which keeps it from feeling staged.
I’d hang no more than four or five items so it reads curated, not cluttered.
11. Add a Magnetic Wood-Backed Knife Strip Beside the Stove
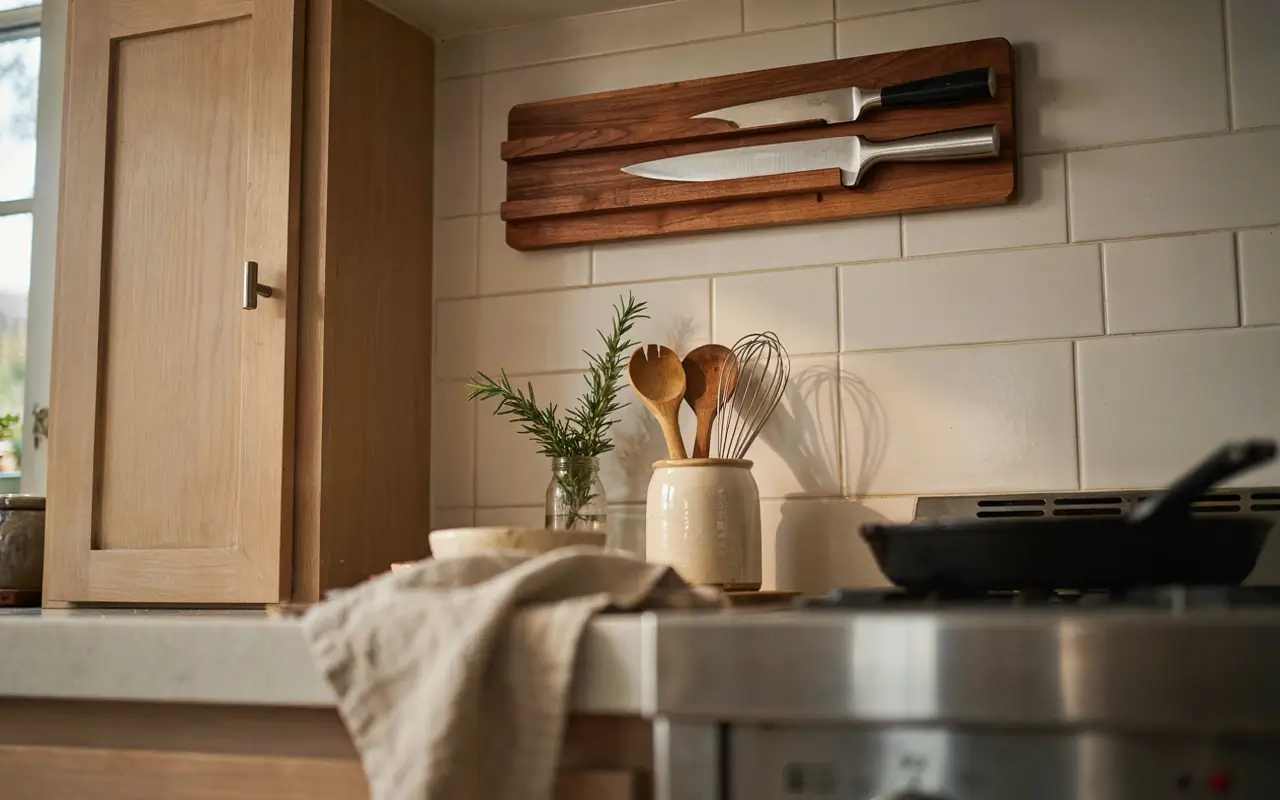
Knife blocks eat counter space that a small kitchen can’t spare. A magnetic strip with a wood backing mounted beside the stove clears the counter and turns your knives into a small, intentional-looking display instead of clutter in a drawer.
Wood backing is the detail that keeps this from reading like a hardware-store gadget — it matches the same warm material palette as the rest of the room.
12. Slide a Narrow Pull-Out Spice Rack Beside the Fridge
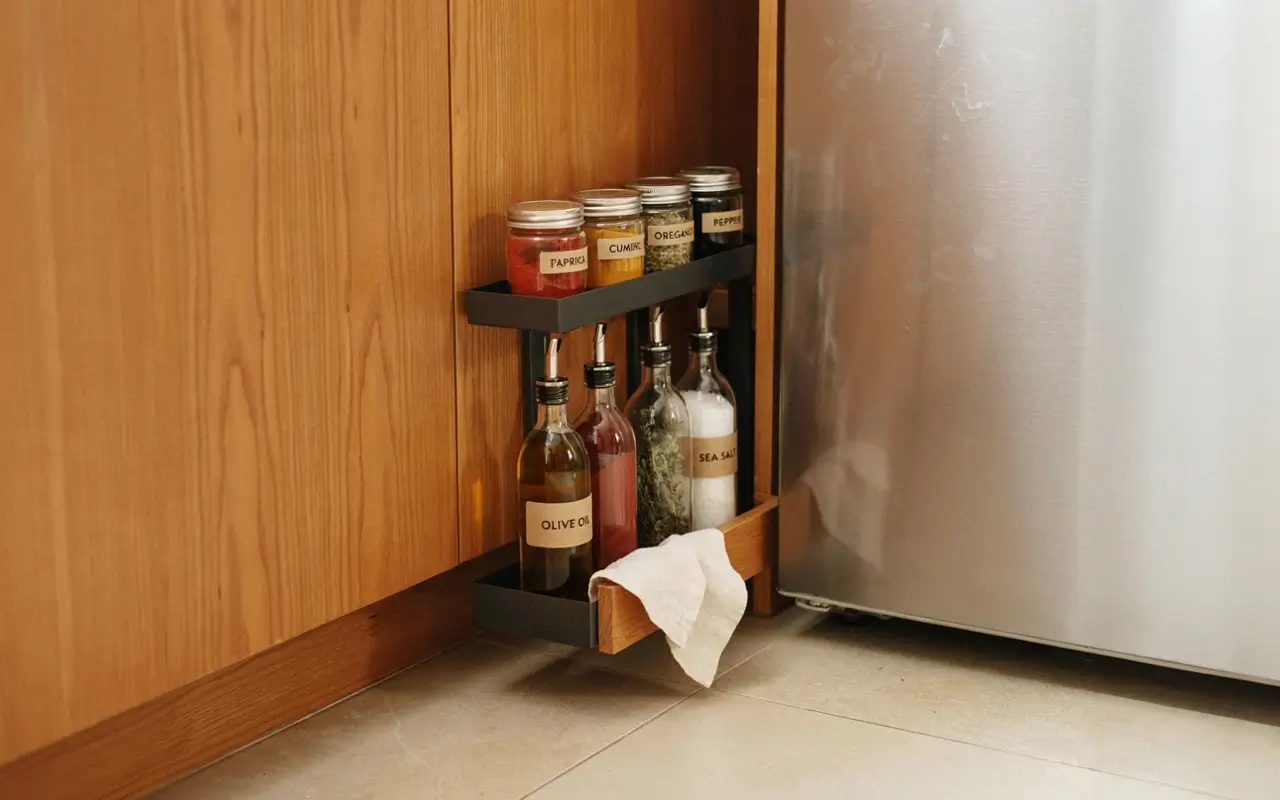
That thin gap beside the fridge in most kitchens sits empty because nothing standard fits it. A narrow pull-out spice rack, sized for six-inch gaps, turns that sliver of dead space into real storage for oils, spices, and small jars.
It’s a clever fix because it adds capacity without removing a single inch of existing cabinet or counter space — genuinely useful for anyone who’s out of room and out of walls to add shelves to.
Cabinet and Wall Upgrades That Look Custom
This is the group with the most visual payoff per dollar — enough to change how the whole kitchen photographs, without a single cabinet coming out.
13. Wrap Flat White Cabinet Fronts in a Wood-Grain Vinyl
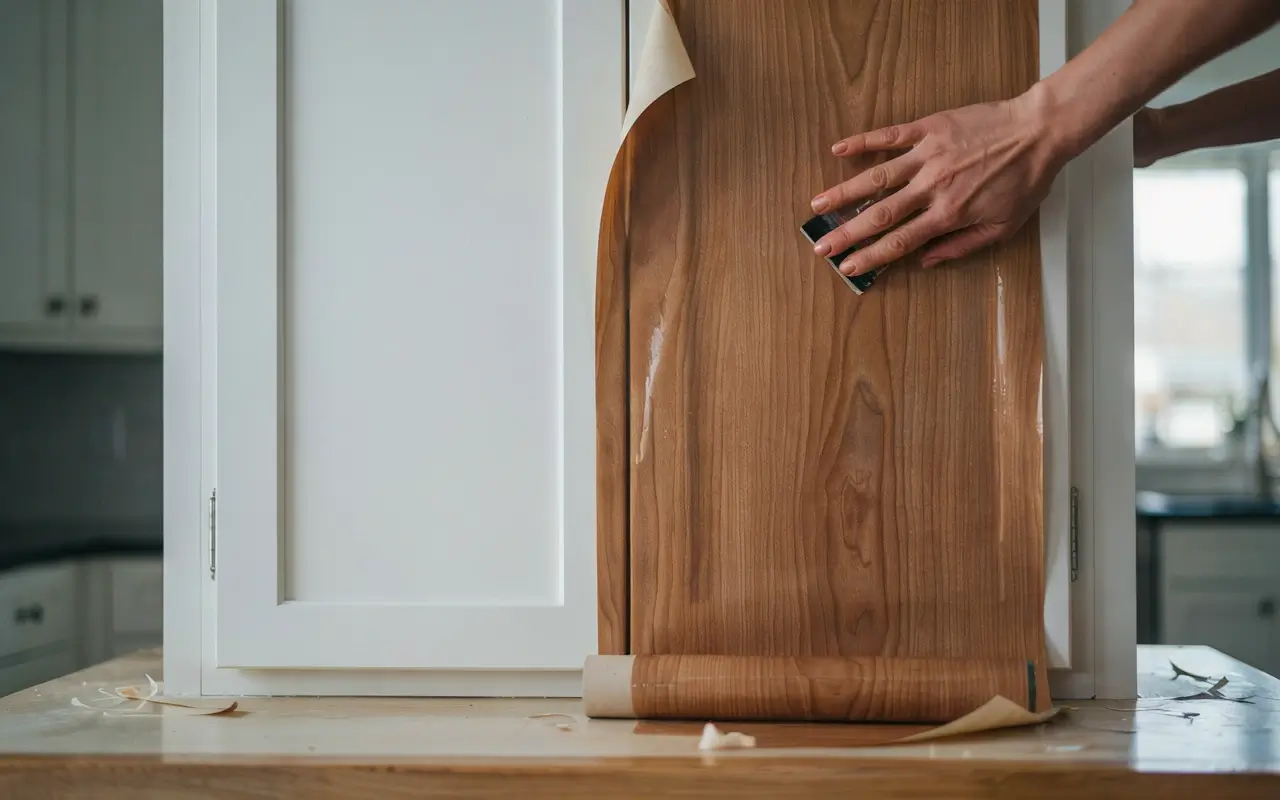
Solid-color laminate or painted MDF cabinets are the flattest, least rustic surface in most kitchens. A wood-grain vinyl wrap applied over the flat fronts adds convincing grain and warmth without replacing a single door.
It’s removable, which matters if you’re renting or just not ready to commit to real wood. Order a sample swatch first — grain patterns vary a lot between brands.
I’d skip this on cabinets with a lot of texture or paneling already; wraps only look convincing on flat surfaces.
14. Two-Tone the Cabinets: Wood Lowers, Creamy Painted Uppers
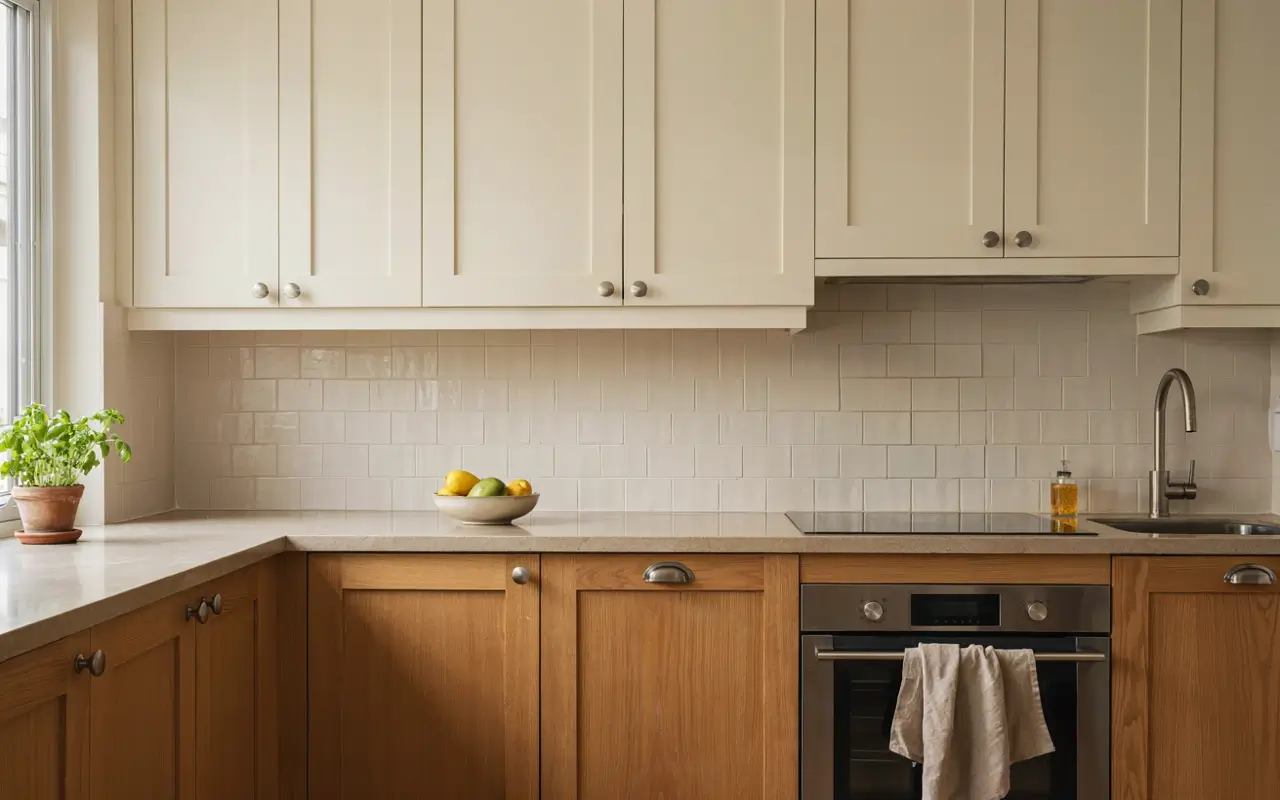
An all-one-color kitchen, whether all white or all wood, reads flat under normal daylight. Painting just the upper cabinets a warm cream or off-white while leaving the lower cabinets in natural or stained wood creates the two-tone look that’s driving a lot of current kitchen photos.
It works because it splits the visual weight — wood grounds the room at eye level down, while the lighter uppers keep the ceiling from feeling heavy.
Two-tone paint vs. full wood-grain wrap: two-tone paint is better for kitchens that already have real wood lower cabinets, because you’re only painting the uppers. Wood-grain wrap works better when all your cabinets are flat white or laminate. The key difference is one changes color, the other changes material appearance entirely.
15. Apply Peel-and-Stick Shiplap Panels Behind the Range
The wall behind a stove is usually the most-viewed, least-decorated surface in the whole kitchen. Peel-and-stick shiplap panels, sold at Home Depot in ready-cut kits, add real dimensional texture there in an afternoon, with no nails or contractor involved.
Keep it to one wall — shiplap on every surface starts to look like a theme rather than a detail.
I’d only recommend this on a wall without existing outlets or vents in awkward spots, since cutting around those adds real difficulty.
16. Add a Peel-and-Stick Terracotta Backsplash Above the Counter
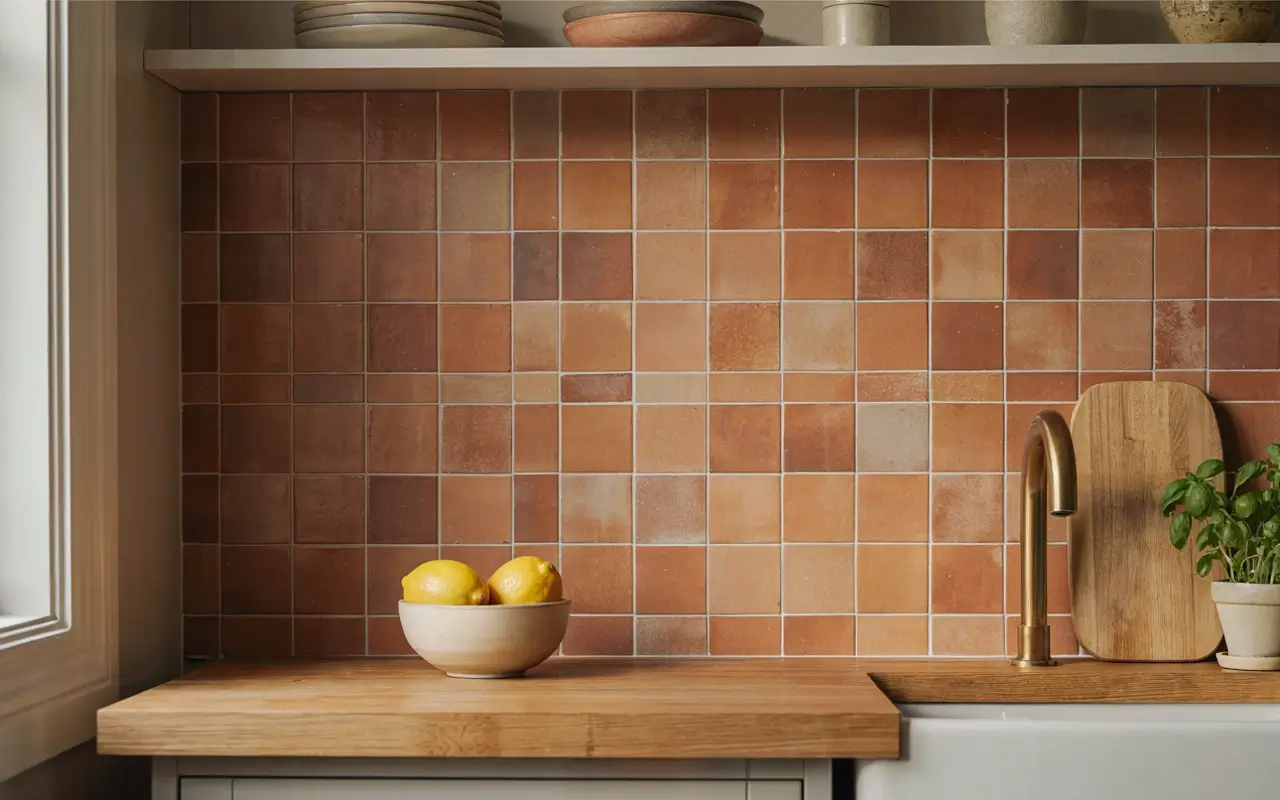
A plain painted wall above the counter is one of the biggest missed opportunities for rustic warmth. Peel-and-stick terracotta or warm-clay tile panels install directly over that wall in a few hours and instantly bring in the earthy tone rustic kitchens depend on.
This is a good middle option between doing nothing and hiring a tile installer — real grout lines, real texture, none of the labor cost.
Some readers worry peel-and-stick tile looks fake up close; the fix is choosing a matte, textured finish over a glossy one, which reads far more convincingly as real tile.
17. Paint the Inside of One Glass-Front Cabinet a Deep Color
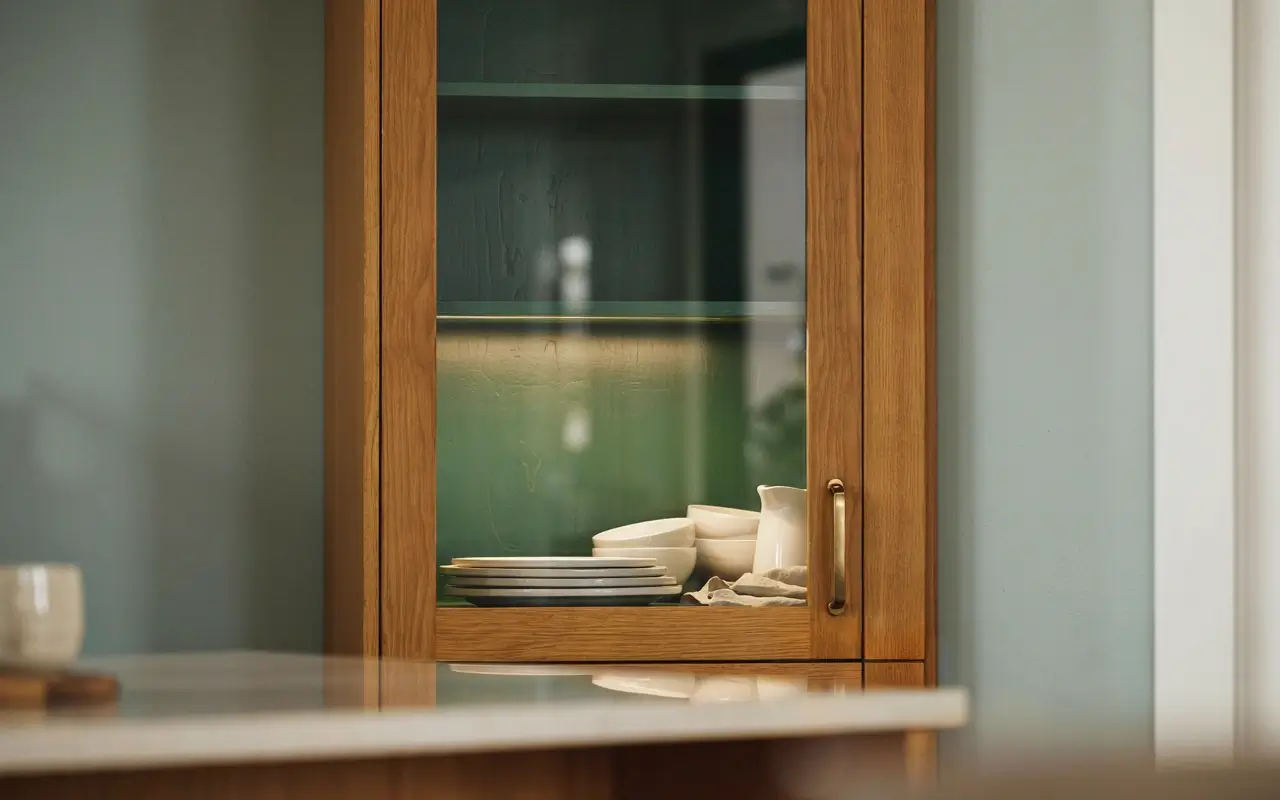
If you have even one glass-front cabinet, painting the interior a deep green or black instead of leaving it white adds instant depth and drama behind the glass. It’s a strange one to recommend, but it works — a dark interior makes the contents pop forward visually, so the cabinet reads as a lit display case rather than flat storage.
Counter-intuitively, dark cabinet interiors often make a small kitchen feel larger, not smaller, because they create a sense of depth instead of a flat, boxed-in wall of white.
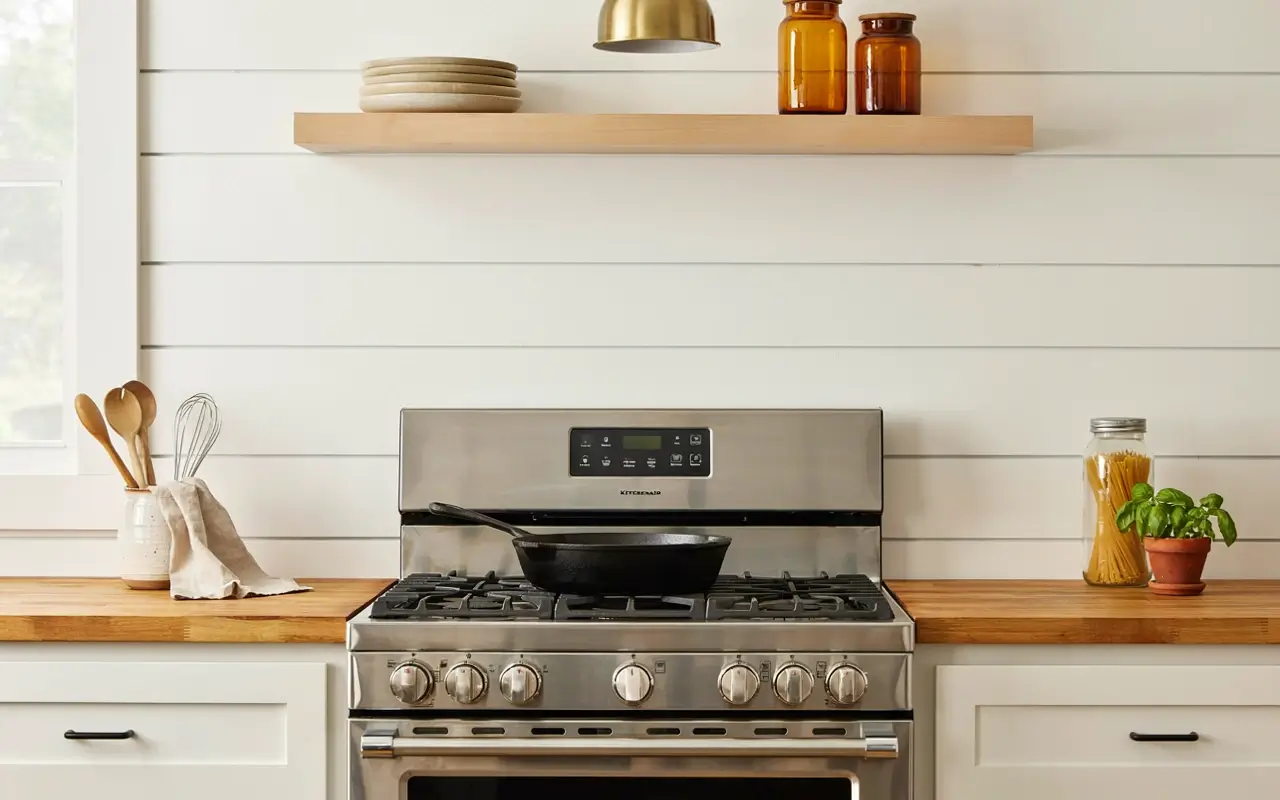
18. Mount a Floating Wood Shelf Above the Stove for Cast Iron
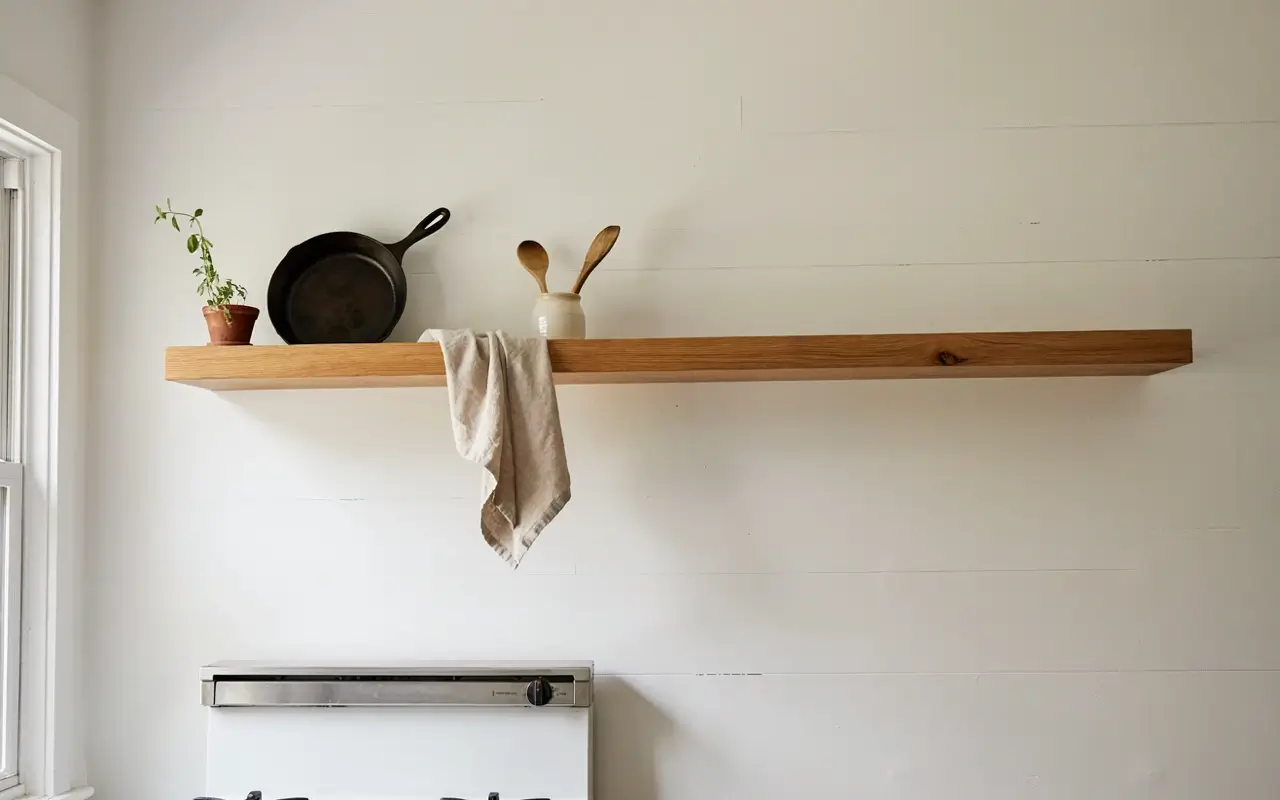
The wall above a stove often sits empty because it feels too hot or too awkward for cabinets. A single floating wood shelf mounted just above range-hood height solves that, giving you a spot to display a cast iron skillet or a couple of copper pans standing upright.
It’s genuinely useful, not just decorative — this is where your most-used cookware lives, in easy reach, doubling as texture on the wall.
I’d mount it a few inches higher than feels natural, just to keep steam and grease from stove use off the wood.
Quick Comparison
| Option | Best For | Key Benefit | Limitation |
|---|---|---|---|
| Cup pull hardware swap | Renters, tightest budgets | Instant texture, fully reversible | Small visual impact alone |
| Wood-grain vinyl wrap | Flat white or laminate cabinets | Big visual change, no demo | Won’t work over textured doors |
| Two-tone cabinet paint | Kitchens with real wood lowers | Splits visual weight, modern-rustic look | Requires existing wood cabinets |
| Butcher block counter overlay | One island or peninsula section | Real material upgrade, no full remodel | Higher cost, needs careful sealing |
Lighting and Counter Moves Worth the Extra Effort
These take a bit more budget and a little more effort, but they change how the whole kitchen reads under actual daylight and evening light.
19. Swap the Sink or Island Fixture for a Black Iron Pendant
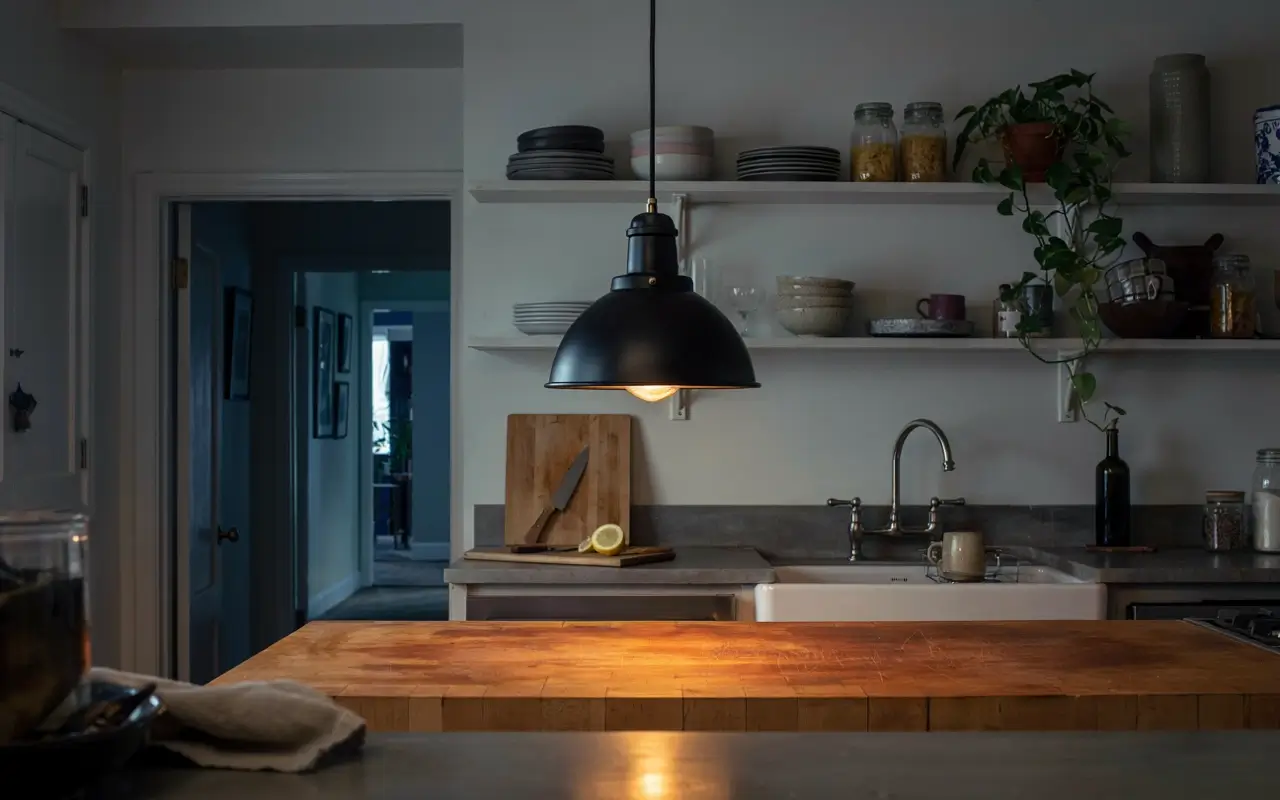
A single builder-grade flush-mount light is one of the fastest ways to make a kitchen feel generic. Swapping it for a black iron or schoolhouse-style pendant, the kind sold by retailers like Rejuvenation, adds real ironwork character exactly where the eye lands over a sink or island.
It works because pendant light creates a warm pool of light rather than flat overhead glare, which is a huge part of what makes rustic kitchens photograph so well.
I’d only take this one on if your existing fixture is on a standard junction box; anything requiring new wiring crosses into contractor territory.
20. Hide a Warm LED Strip Under One Floating Shelf
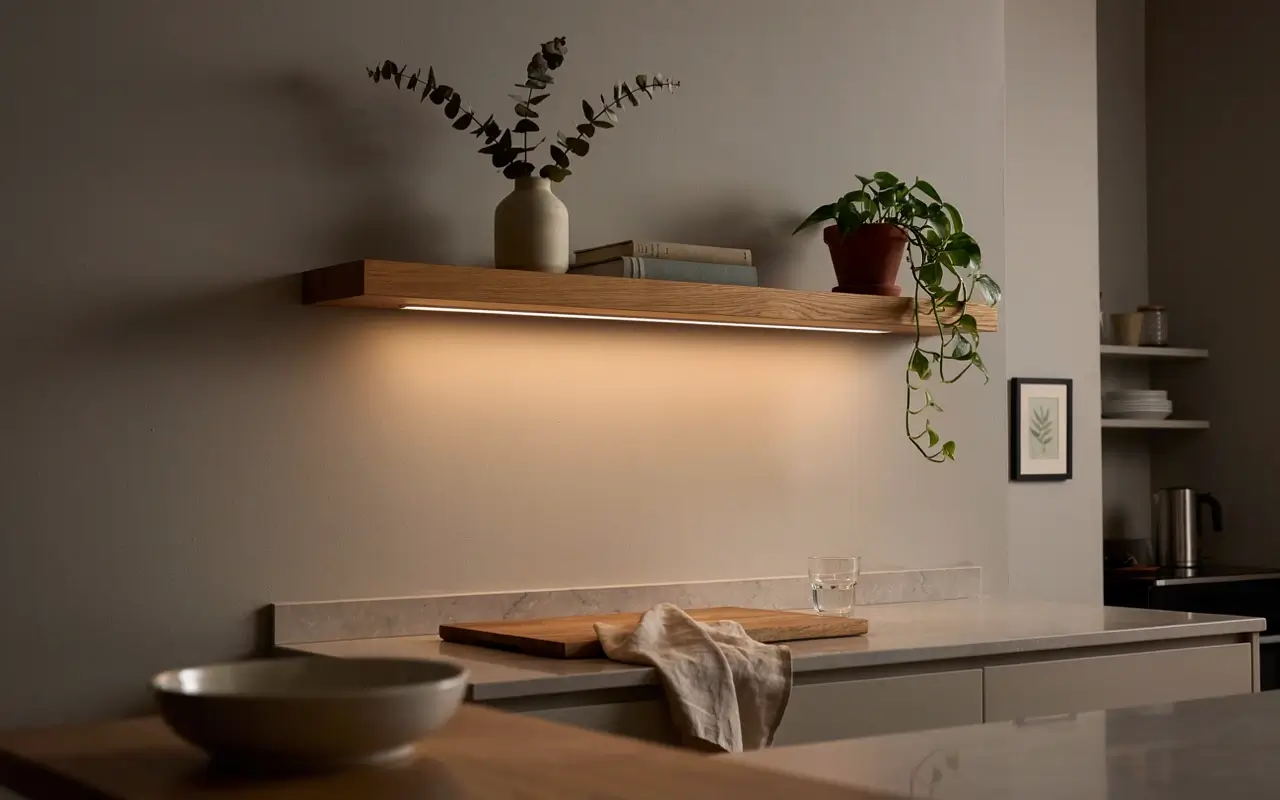
Flat overhead lighting is the enemy of a cozy kitchen. Running a warm-toned LED strip along the underside of one floating shelf or upper cabinet adds a soft glow low in the room, closer to how a small café lights its counter at night.
Stick to warm white, never cool white or color-changing strips — the wrong color temperature undoes the whole effect instantly.
This is a small thing that photographs disproportionately well, which is exactly why it keeps showing up in kitchen after-shots online.
21. Top One Section of Counter With a Butcher Block Overlay
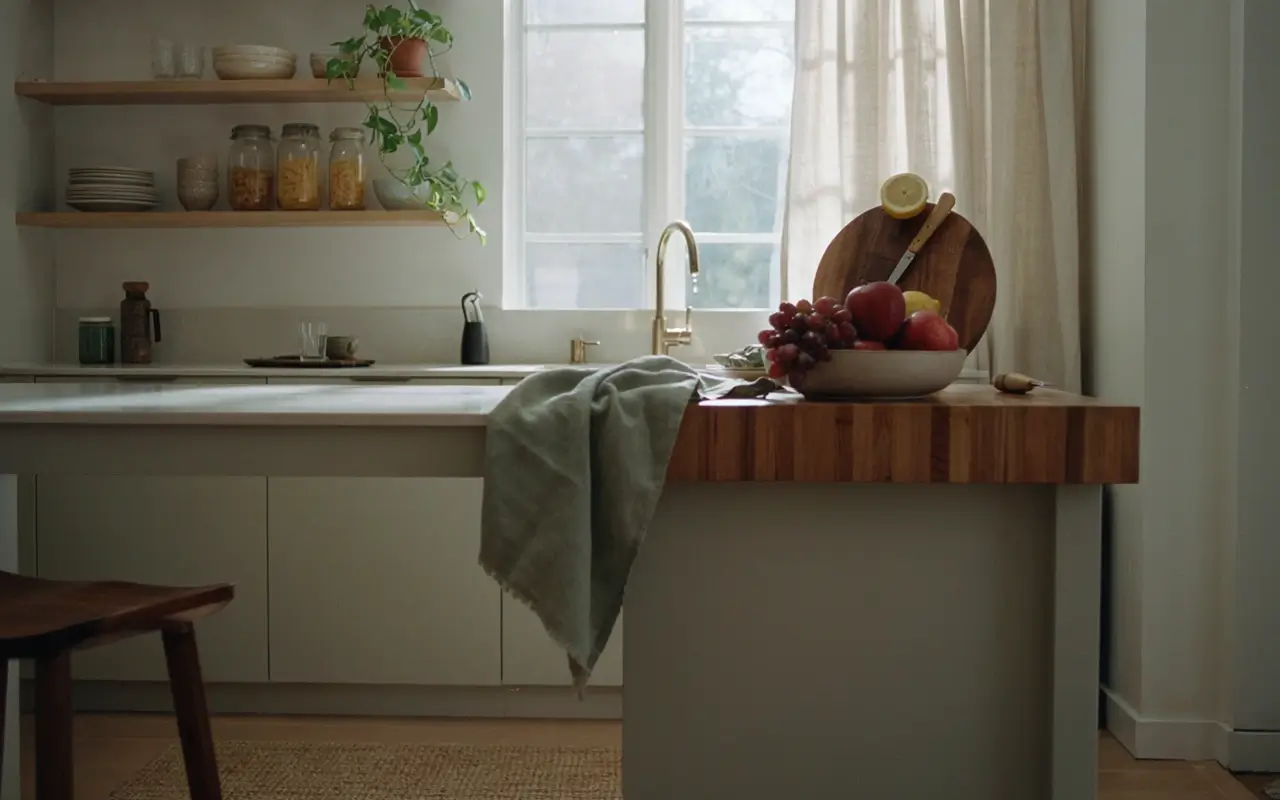
Replacing an entire countertop is a real renovation. Topping just one section, an island or a peninsula, with a butcher block overlay kit is not. Home Depot sells pre-cut kits sized for standard counter widths, and most install with basic tools in a weekend.
It works because wood counter texture is one of the most reliable rustic signals there is, and the Houzz study backs that up: wood-toned surfaces are now the mainstream preference, not a niche look.
I’d only splurge on this if the section gets light use — heavy daily chopping needs more sealing maintenance than most people expect.
The One Splurge Actually Worth It
22. Swap the Faucet for a Matte Black or Aged Brass One
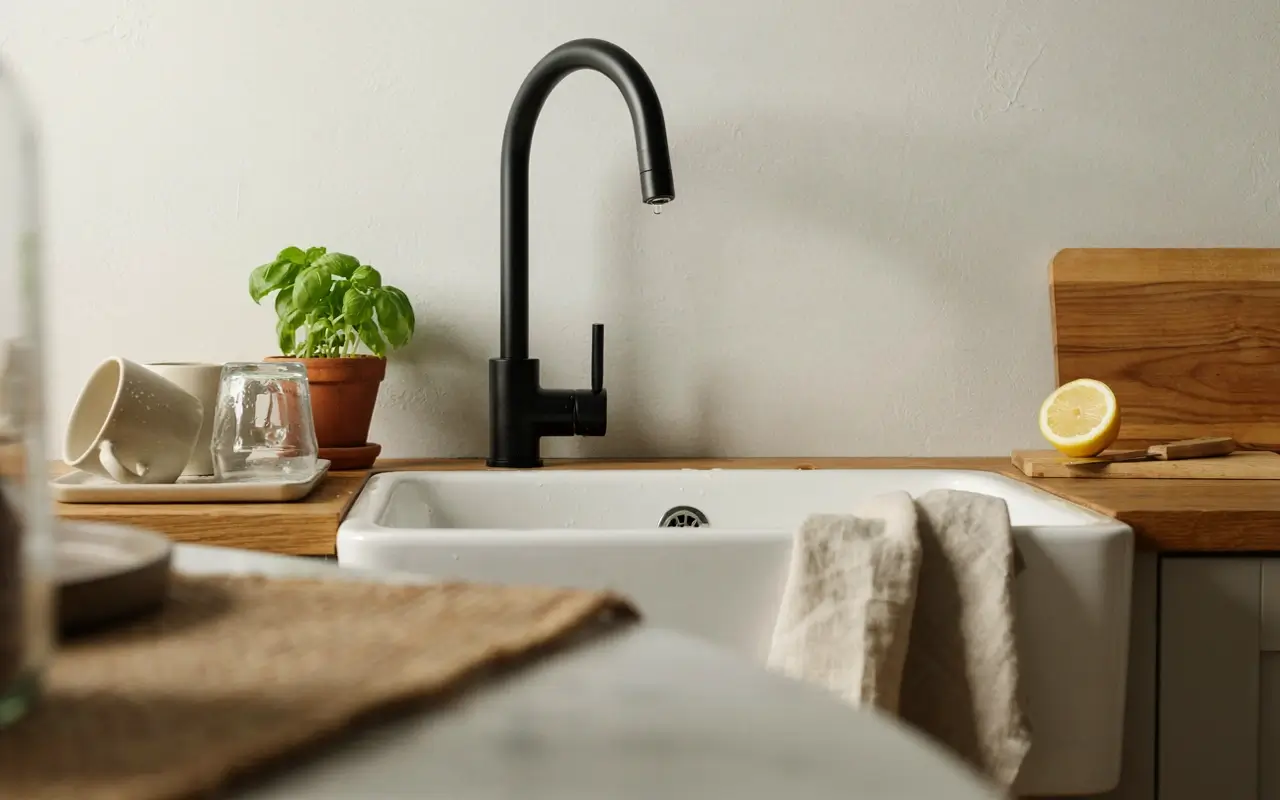
Most kitchen hacks stay under $100. This is the one exception worth making. A matte black or aged brass faucet sits at the visual center of the sink area, and a chrome or polished nickel faucet next to warm wood and iron accents will always look slightly out of place.
It’s a real plumbing swap, not a five-minute job, so budget for either doing it yourself carefully or paying for an hour of install labor.
I’d only splurge here if you’re staying in the space long enough to actually enjoy it — for a short-term rental, this is the one hack I’d skip.
Common Questions About Rustic Kitchen Hacks
What’s the cheapest way to make a kitchen look rustic?
Swap cabinet knobs for iron or leather pulls and add a woven runner. Both cost under $50 total and need no tools beyond a screwdriver.
Can you get a rustic kitchen look while renting?
Yes. Stick to reversible swaps: hardware, peel-and-stick panels, rugs, shades, and open-shelf styling. Skip anything requiring drilling into structural walls.
Do rustic kitchens need real wood cabinets?
No. A wood-grain vinyl wrap or two-tone paint job on existing cabinets creates a similar warm effect for far less cost.
Is open shelving practical in a small kitchen?
Yes, if limited to one or two shelves styled with a few pieces. Full open shelving in a small kitchen can look cluttered fast.
What’s one thing to avoid in a budget rustic kitchen?
Avoid mixing too many wood tones at once. Pick one warm wood tone as the anchor and repeat it across shelves, counters, and accents.
The Bottom Line
None of this requires a contractor, a loan, or a gutted kitchen. The Houzz data makes it clear warm wood tones have already gone mainstream, and the fastest way into that look is through the small, specific swaps above, not a full remodel.
Pick two or three from the renter-friendly group first, live with them for a week, then decide what’s next. Scope-wise, this list won’t fix a genuinely broken layout or outdated plumbing — that’s a different project entirely. For everything else, these hacks get you most of the way to that warm, collected-over-time kitchen feeling, for a fraction of the cost.


")
No Comment! Be the first one.