


32 Kitchen Island Ideas That Actually Work for Daily Cooking
Most kitchens have the same problem. Counters fill up fast — the air fryer claims one corner, the coffee machine takes another, and the cutting board lives permanently near the sink because...

Most kitchens have the same problem. Counters fill up fast — the air fryer claims one corner, the coffee machine takes another, and the cutting board lives permanently near the sink because there’s nowhere else to put it. By the time dinner prep starts, you’re already 10 minutes behind just from clearing space.
That’s the problem a well-designed island solves. Not just extra counter space — a dedicated prep zone that keeps tools within reach and leaves the perimeter counters free. According to the 2025 Houzz Kitchen Trends Study, 52% of renovating homeowners now choose islands exceeding 7 feet in length, a 10-percentage-point jump from 2024, driven by the shift toward using the island as both a prep hub and an entertainment anchor.
Below are 32 ideas drawn from what’s working in real kitchens right now — ranked not by visual drama, but by how much daily friction each one removes.
Kitchen island ideas describes the range of design, layout, storage, and appliance configurations that transform a central kitchen structure into a dedicated prep and gathering zone. The best islands combine one workflow feature — prep sink, deep storage, or cooktop — with one social feature, like seating or pendant lighting, to serve both daily cooking and casual gathering.
What Actually Makes an Island Useful for Prep
Kitchen islands that reduce daily prep friction share three consistent features: one dedicated workflow function (prep sink, cooktop, or deep storage), 42 inches of clearance on all sides, and a countertop surface built for cutting — not just display. According to the 2025 Houzz Kitchen Trends Study, 52% of renovating homeowners now specify islands exceeding 7 feet, a shift driven by the growing desire for a combined prep and entertaining hub rather than simple counter extension.
Here’s the thing: most island guides lead with aesthetics. Waterfall edges, pendant light clusters, color-contrasting bases — all of which matter — but none of which help if the island blocks traffic flow or lacks a single useful drawer.
Two functional rules set the ceiling before any design decision.
The clearance rule: The National Kitchen and Bath Association (NKBA) recommends at least 42 inches of clear walkway on every side of an island in a single-cook kitchen, and 48 inches for two-cook households. This limits island size more than floor plan footage does. Many homeowners add an island without measuring clearance first, then find the kitchen moves worse than before.
The primary function rule: Decide on one main purpose — prep sink, cooktop, or deep drawer storage — before adding secondary features. A prep sink and built-in cooktop on a 6-foot island sounds efficient; in practice it splits the prep surface into two cramped zones instead of one clean one.
Quick Comparison: Island Feature vs. Prep Impact
| Feature | Best For | Key Benefit | Limitation |
|---|---|---|---|
| Prep sink | Daily-cooking households | Keeps rinsing at the prep zone | Requires plumbing rough-in |
| Seating overhang | Families and social kitchens | Combines prep and dining zones | Reduces storage beneath overhang |
| Built-in cooktop | Open-concept layouts | Cook faces the room, not the wall | Requires a ventilation solution |
| Deep drawer stack | Every kitchen type | Eliminates cabinet rummaging | Slightly reduces countertop storage |
| Beverage/wine fridge | Entertaining-focused kitchens | Moves drinks off the main counter | Minor prep footprint trade-off |
Countertop and Surface Ideas
Choosing a kitchen island size starts with aisle clearance, not total floor space. The NKBA recommends 42 inches on all sides for one cook, 48 for two. Subtract that from your kitchen’s shortest dimension to find your actual maximum island footprint — regardless of how large the kitchen looks overall.
Surface material affects every single prep session. Hardness, heat tolerance, maintenance requirements, and how the island ages visually all differ significantly between options.
To size a kitchen island correctly:
- Measure from cabinet face to cabinet face on your kitchen’s shortest side.
- Subtract 84 inches total (42 inches on each side).
- The remaining measurement is your maximum island length.
- For depth: plan 24–30 inches for prep-only; 36–40 inches if adding seating.
1. Waterfall Quartz Countertop Island

A waterfall edge runs the countertop material straight down the island’s side panels to the floor, creating one continuous surface with no visible cabinet door or end grain. It anchors an open-concept kitchen visually because the island is seen from three sides, not one. Caesarstone quartz is the most commonly specified material for this application per NKBA 2025 designer surveys — it handles knife prep, hot pans, and daily wear without annual sealing.
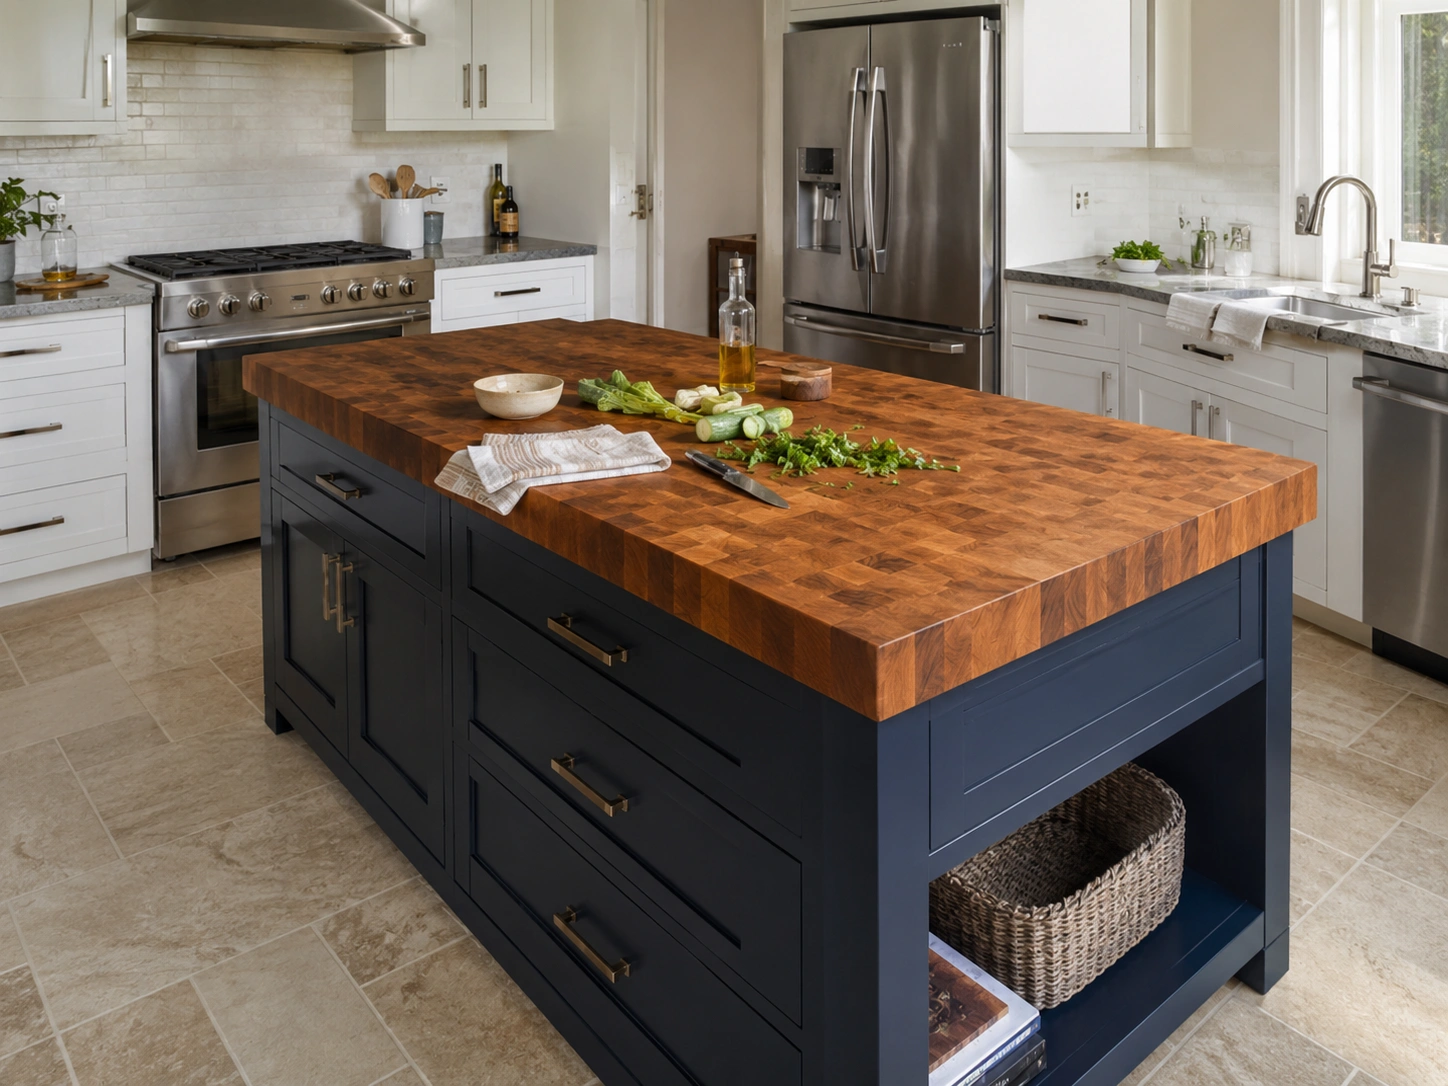
2. Butcher Block Top Island
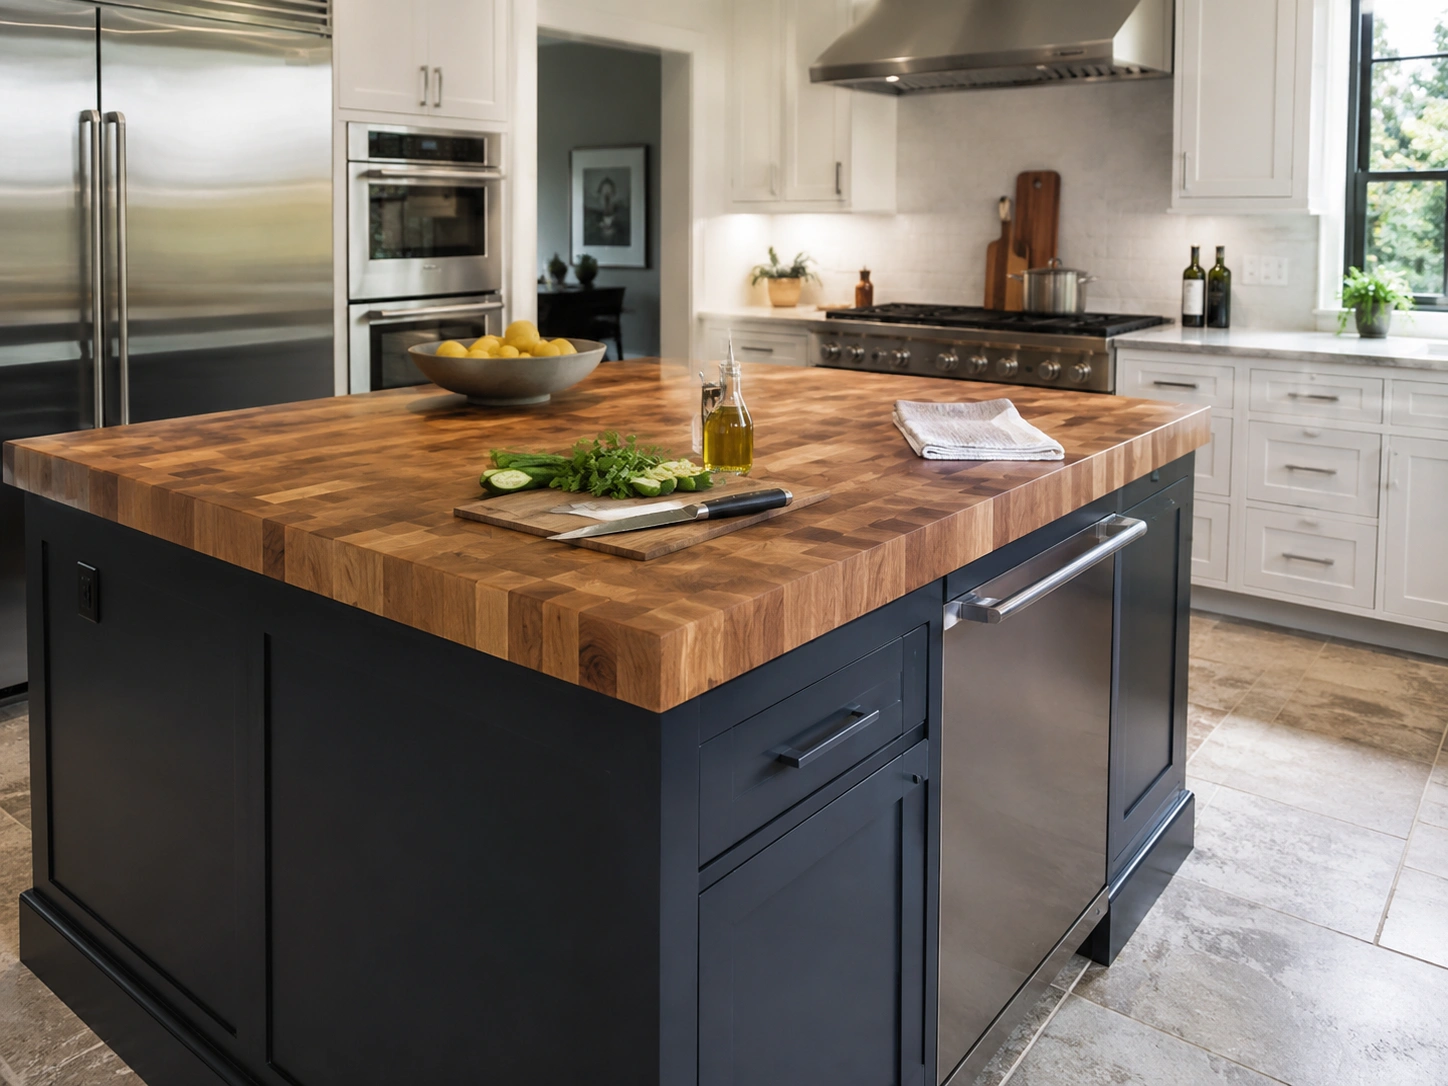
Butcher block brings warmth into kitchens that run cold and minimal — white cabinetry, stainless appliances, stone floors. It’s a working surface, not just a visual one: end-grain hardwood handles direct cutting and self-heals over time with periodic oiling. Pair it with a deeply painted base — navy, forest green, or dark charcoal — so the contrast keeps the look current rather than farmhouse-default.
3. Marble-Look Quartz Countertop
Real marble is soft, porous, and stains with citrus, olive oil, and red wine — most of what cooking involves. Marble-look quartz gives you dramatic Calacatta or Statuario veining without the maintenance: non-porous, scratch-resistant, no annual sealing required. Or maybe I should say it this way: marble lookalikes have become so refined that designers are now specifying them ahead of natural stone for prep-heavy surfaces. Caesarstone’s Calacatta Gold remains one of the most-specified versions.
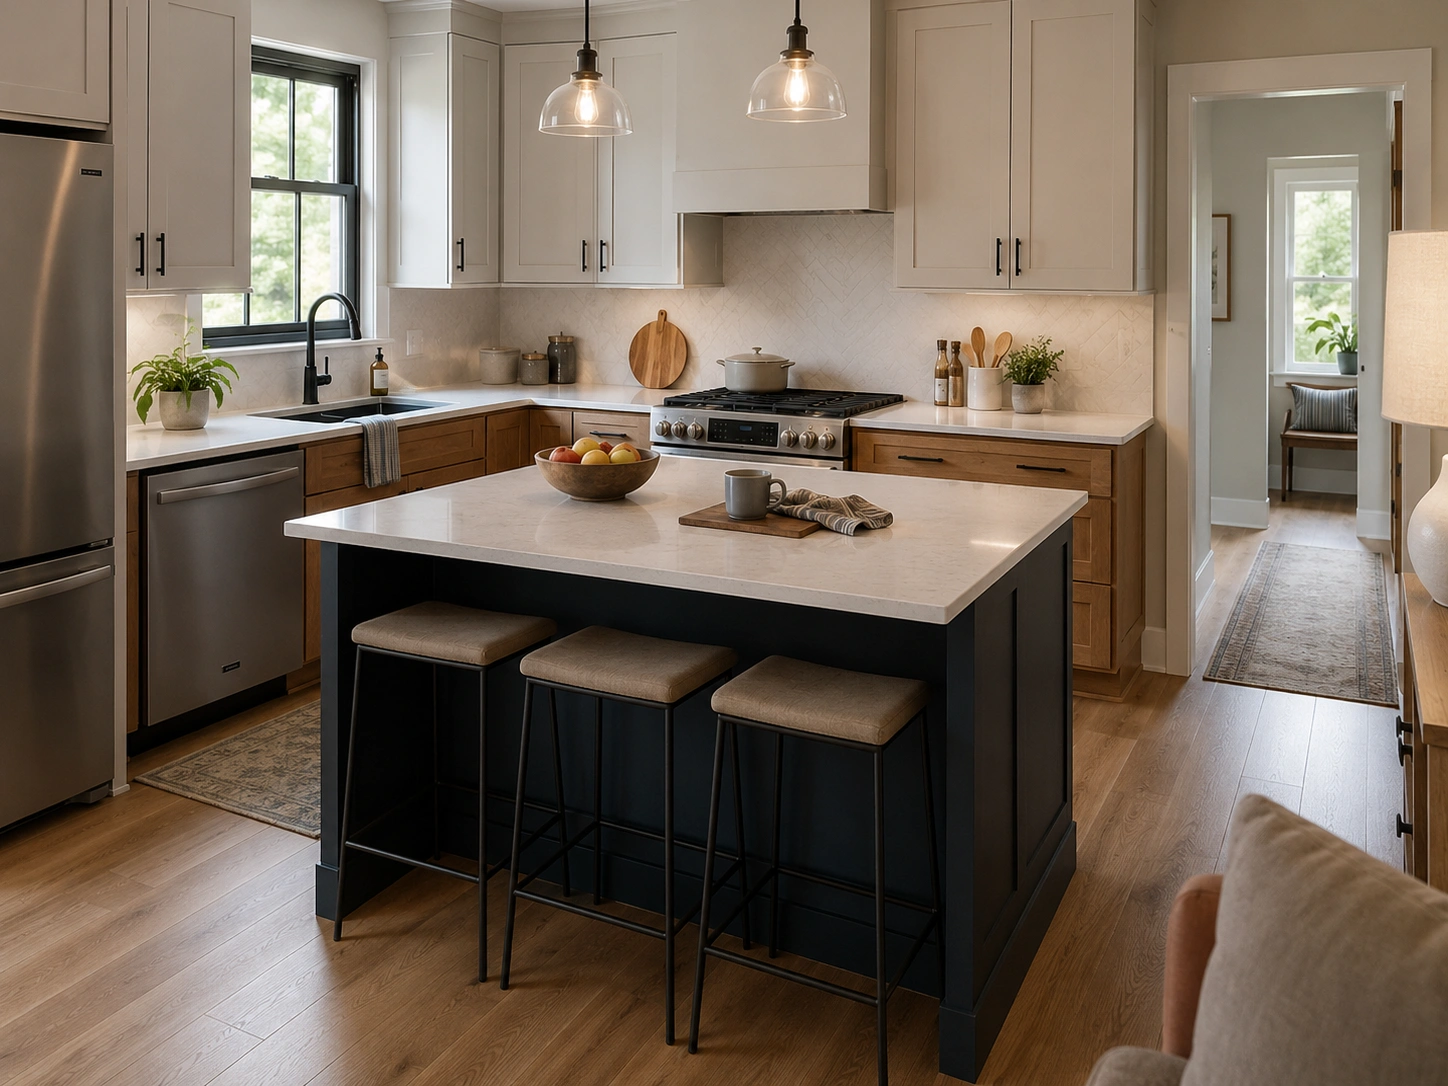
4. Two-Tone Island with Contrasting Base and Top
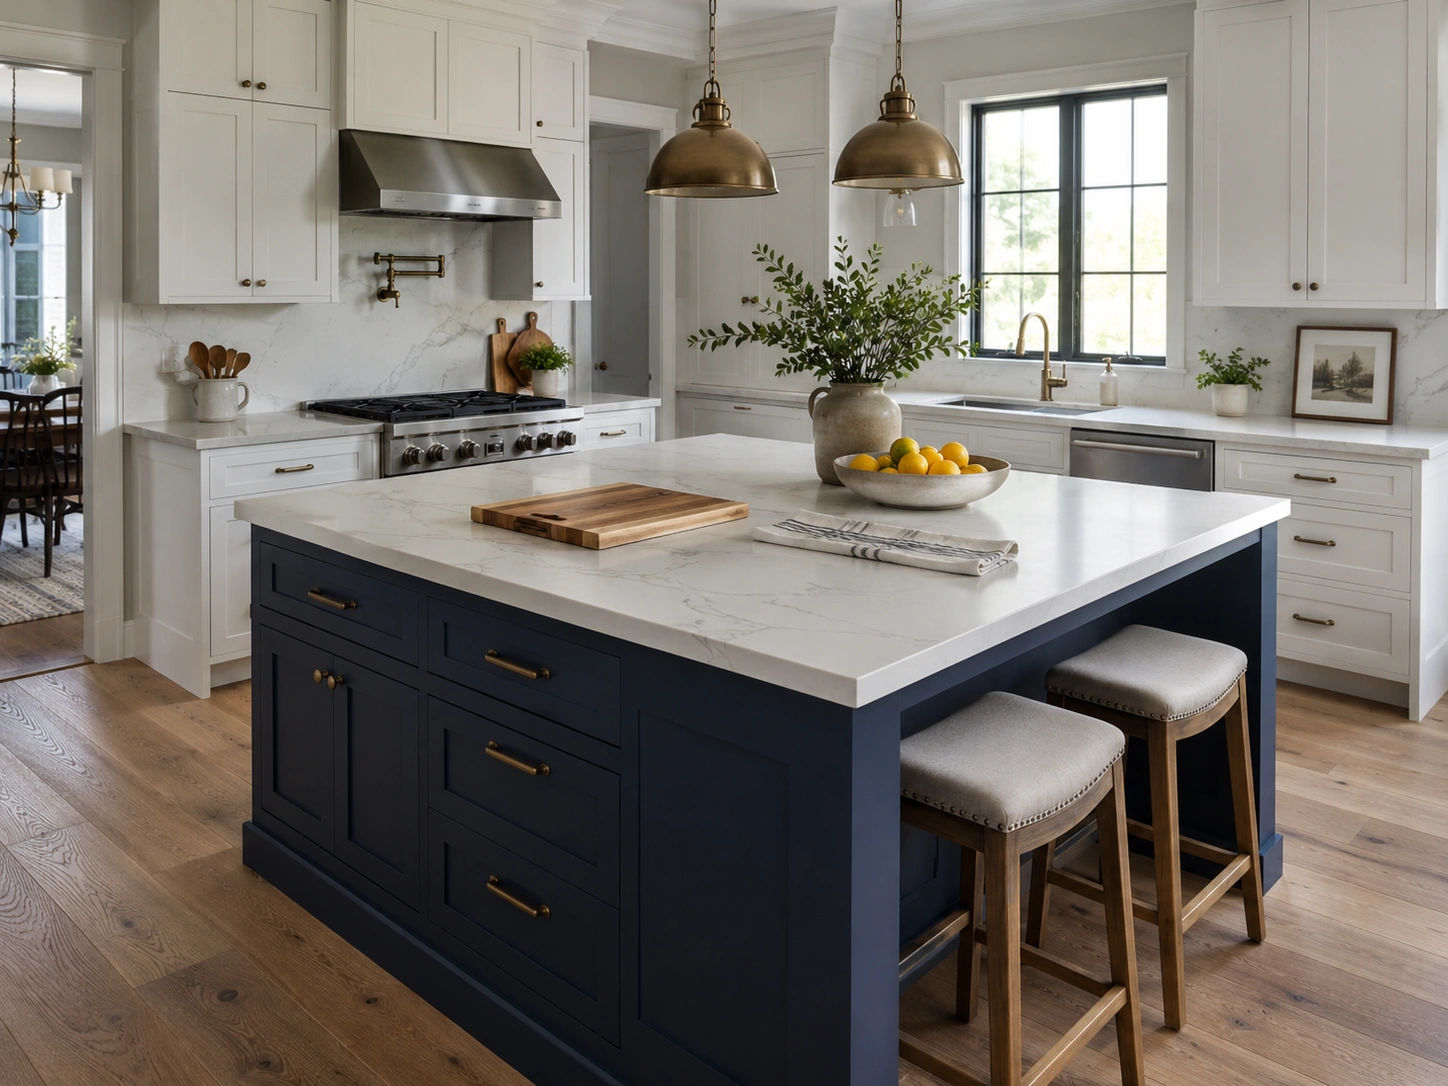
The island base is painted a different, darker color than the perimeter cabinetry; the countertop picks up a material used elsewhere in the kitchen. This is the most replicated island styling approach on Pinterest because it makes the island read as intentional furniture rather than an added-on afterthought. Keep the island base two to three shades darker than the perimeter cabinets, and let the countertop material appear in at least one other spot in the kitchen to tie the zones together.5. Built-In Baking Station at Lowered Counter Height
5. Built-In Baking Station at Lowered Counter Height
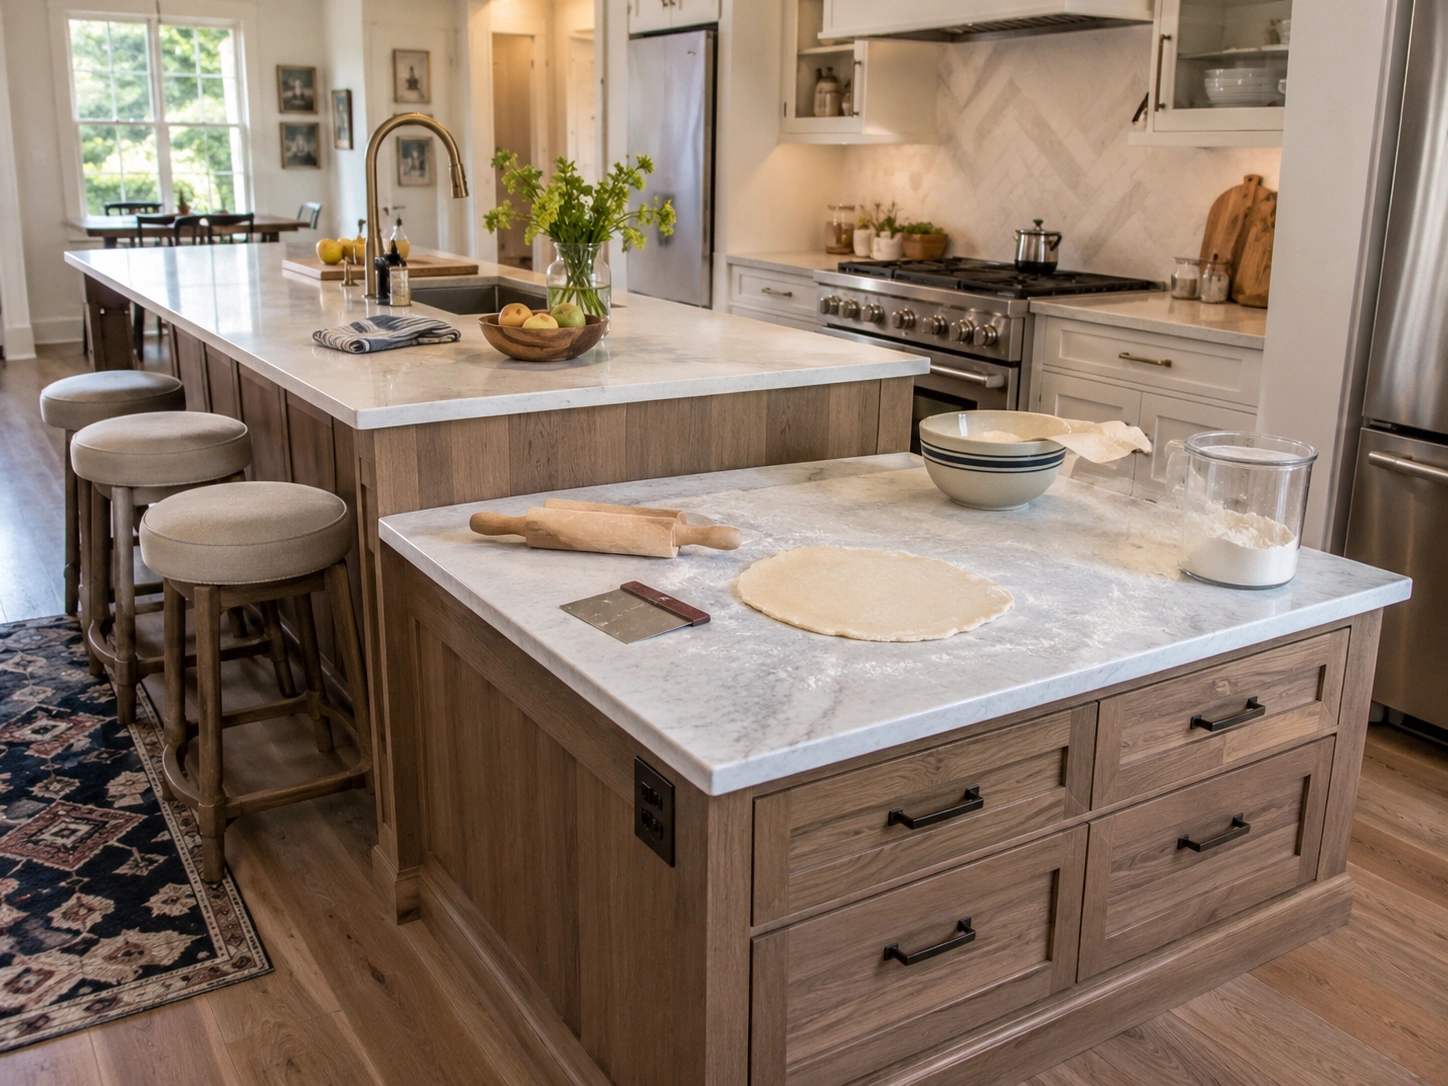
Standard counter height is 36 inches. Comfortable dough-rolling height for most people is 30 to 32 inches. A dedicated lower section built into one end of an island — topped with cool quartz or marble — removes the awkward forward lean that causes lower-back strain during long baking sessions. Works best on islands over 5 feet long, where the lower section doesn’t crowd the main prep area or feel like an accident.
Layout and Seating Ideas
How an island is positioned — and how seating is arranged — determines whether the kitchen feels social or isolated. These ideas focus on getting orientation and proportion right before features are added.
Seating is the second most-requested island feature after additional countertop surface, with the majority of renovating homeowners now specifying at least two seats at the island, according to Houzz 2025 data.
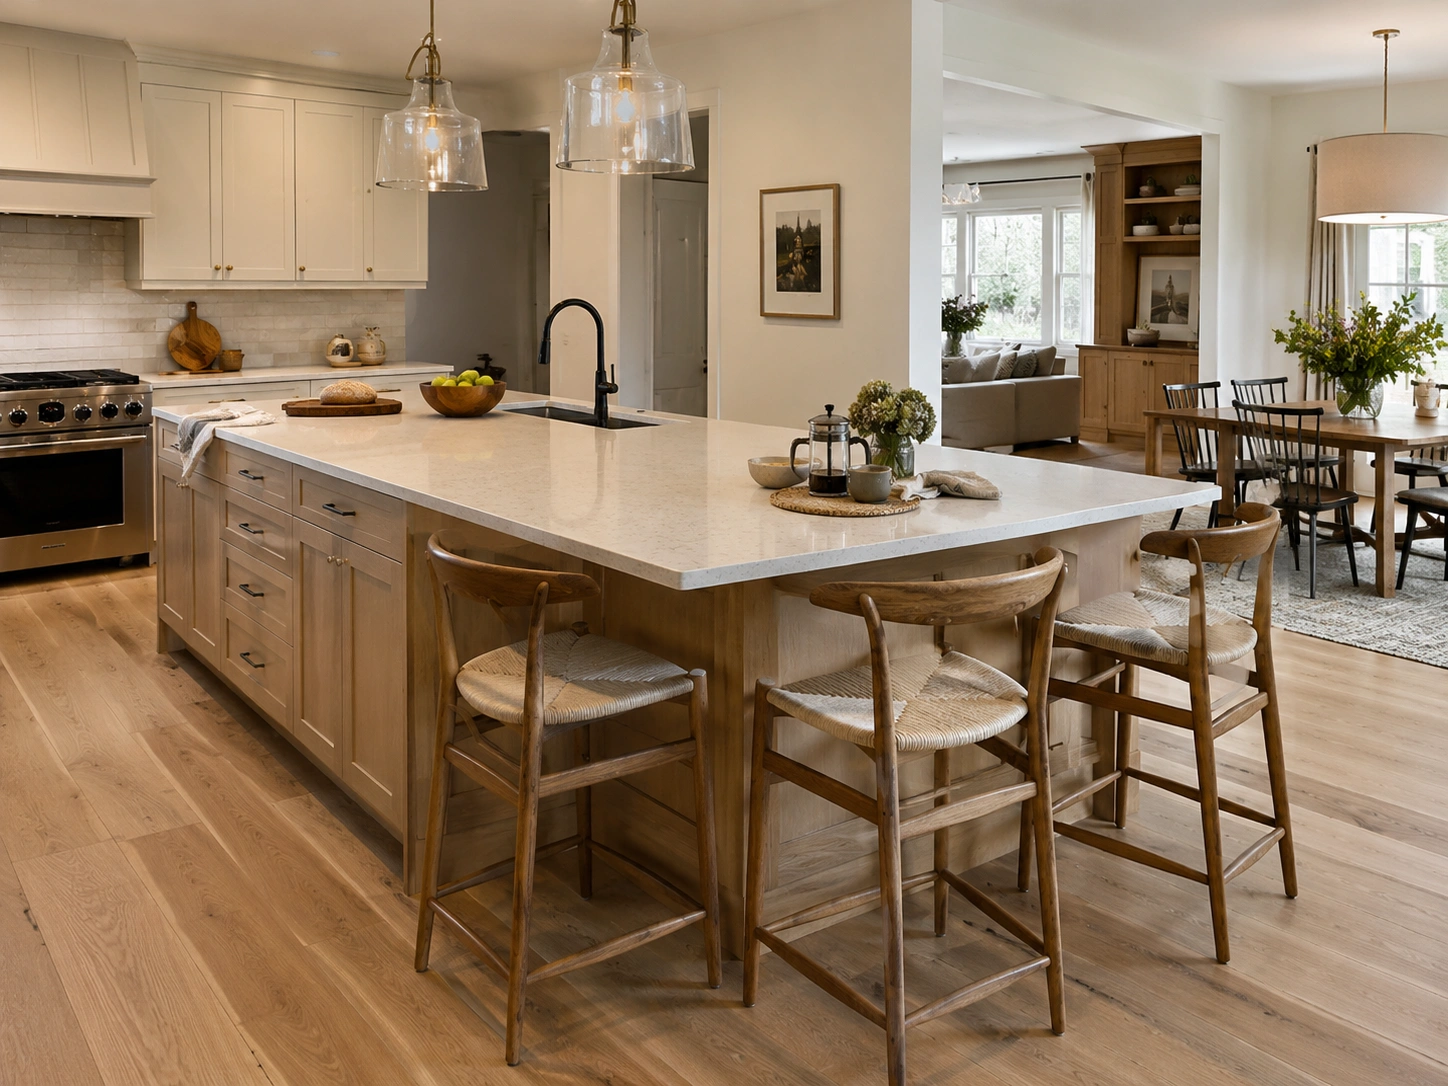
6. Bar Overhang with Counter-Height Seating on One Side
A 12- to 15-inch overhang on one long side, with counter-height bar stools, is the most practical seating configuration for kitchens under 200 square feet. Slim-profile stools that tuck completely under the overhang keep the visual weight low and the walkway clear. You lose drawer storage in the overhang zone — a trade-off worth making for kitchens where the island doubles as the primary dining surface for daily meals.
7. Seating on Both Long Sides of the Island
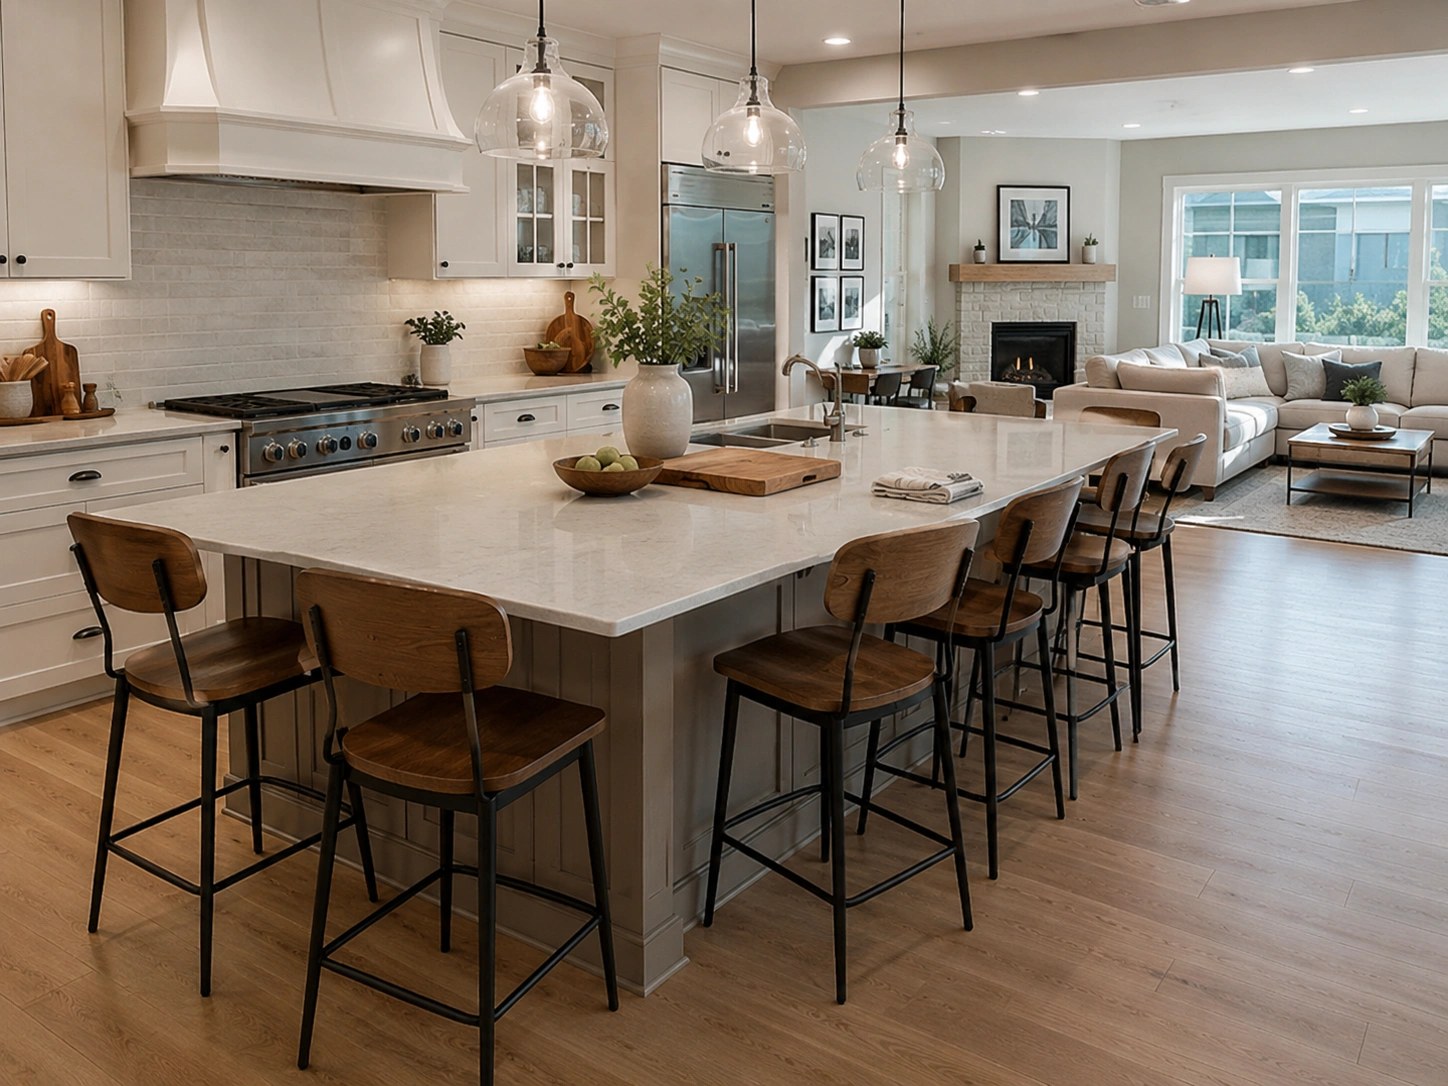
On islands 8 feet or longer, a 10- to 12-inch overhang on both long sides seats four to six people without a separate dining table. Space bar stools at 24-inch centers to avoid elbow crowding. This layout works especially well in open-plan homes where the kitchen and living room share one connected footprint — the island becomes the room’s social anchor rather than a strictly functional prep station.
8. L-Shaped Seating Overhang for a Corner Breakfast Area
An end-cap overhang on the short side of the island adds two to three seats without extending the main footprint into the traffic aisle. It creates a visual break between the kitchen workspace and the seating zone and reads like a built-in breakfast nook rather than stools bolted to a cabinet. Useful in kitchens where the island meets an adjacent dining or living area at an angle.
9. Narrow Island for Galley Kitchen Layouts

Look — if your kitchen runs as a galley or measures under 150 square feet, a full-depth island isn’t an option without crushing the 42-inch aisle minimum. A narrow island — 18 to 24 inches deep — still delivers extra prep counter and drawer storage without blocking movement. Pair it with a waterfall countertop edge on the visible end to make the slim profile look deliberate, not like a compromise forced by the floor plan.
10. Rolling or Mobile Island for Small or Rental Kitchens
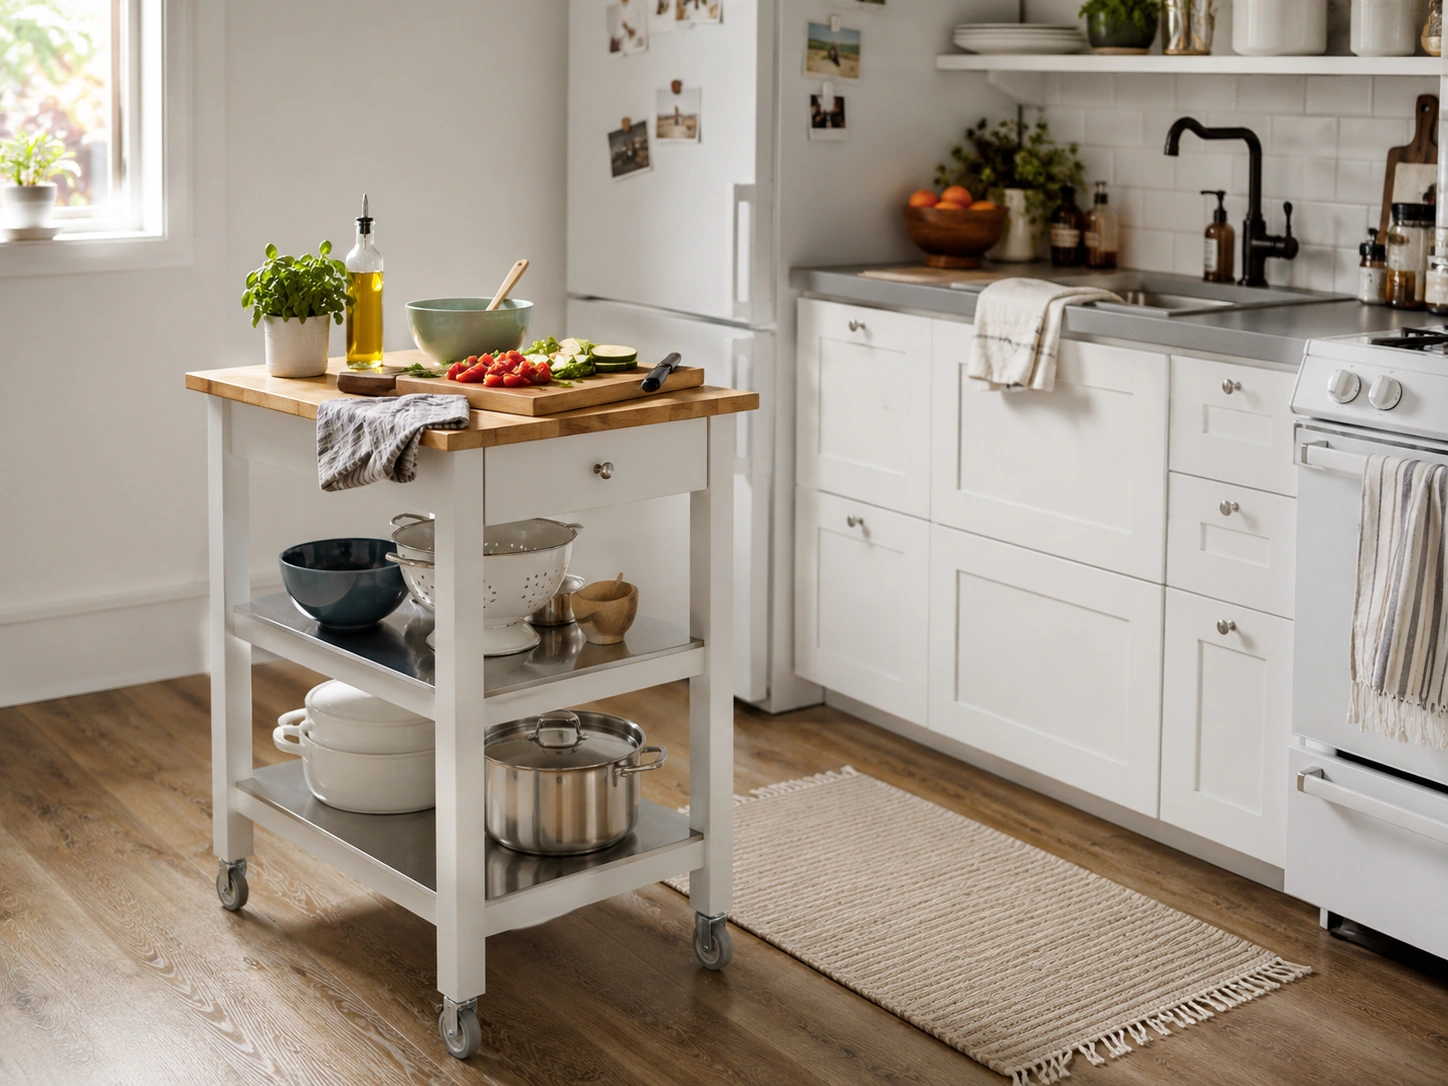
A mobile island rolls to the best prep spot while cooking, then tucks to the wall when floor space is needed. IKEA’s STENSTORP kitchen island is the most-cited example — lower shelf, small drawer, butcher block top, starting under $500. For rental kitchens where cabinet modification isn’t possible, a rolling island is the only practical option that requires no contractor and no plumbing rough-in.
Storage-First Island Ideas
This is where islands earn their floor space. A well-configured island can house everything from pots to trash bins to spice collections without touching the perimeter cabinets. These ideas prioritize function. Most of them photograph well too.
11. Deep Pull-Out Drawer Stack for Pots and Pans
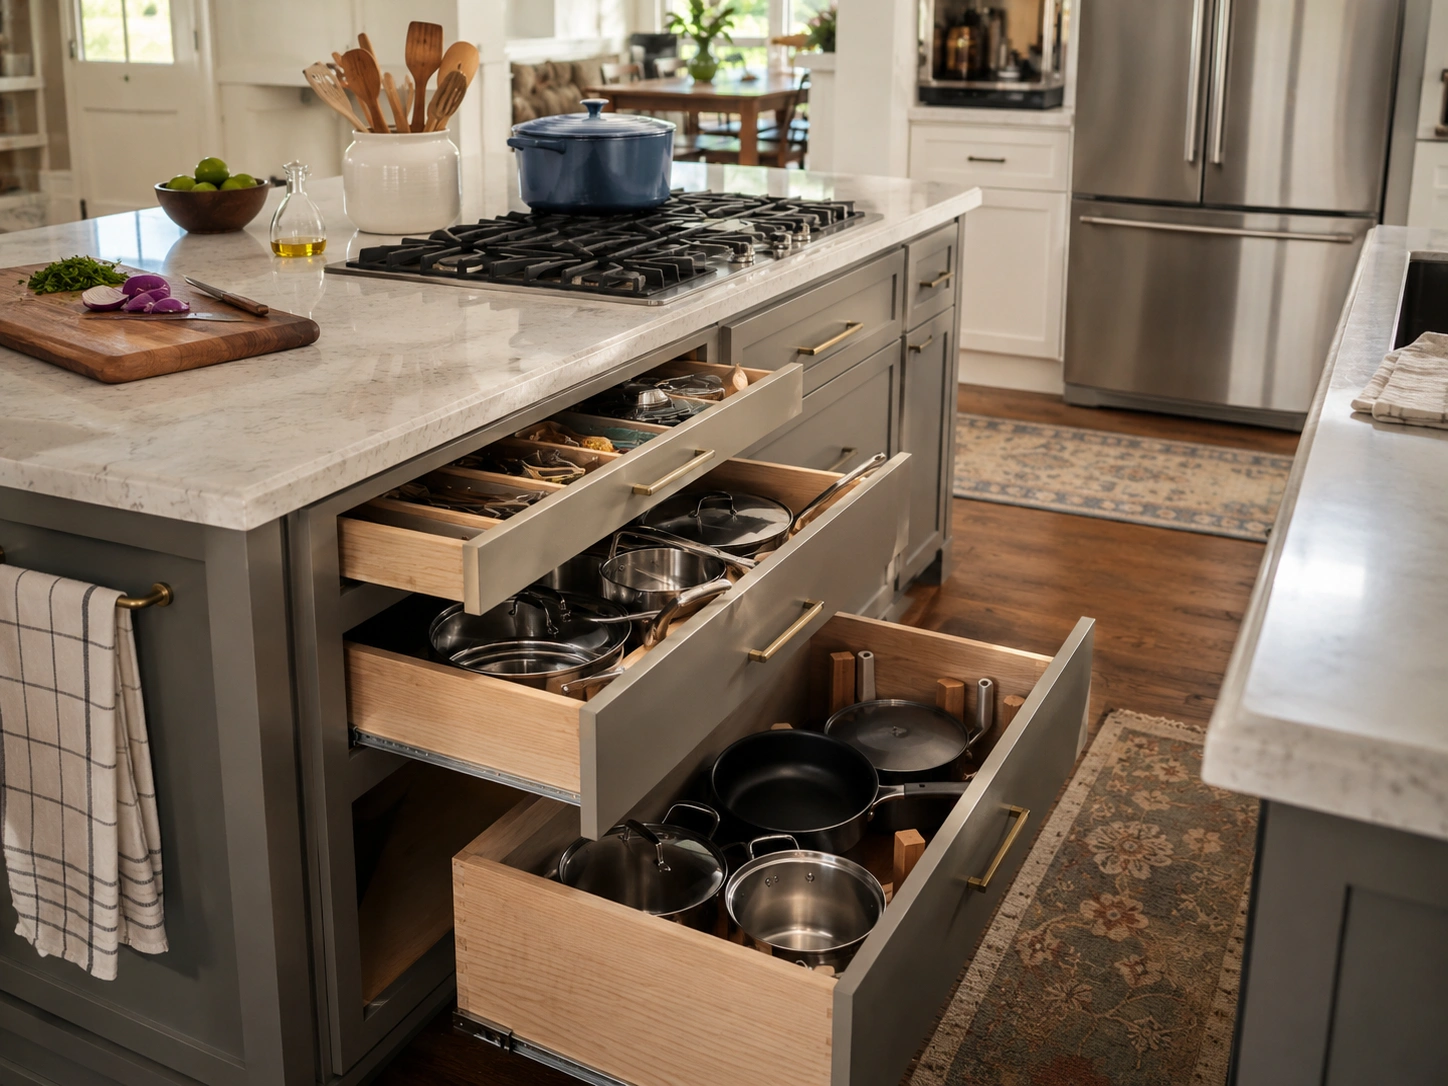
Three-drawer stacks — one 6-inch-deep top drawer, one 9-inch middle, one 18-inch bottom — with full-extension, soft-close hardware eliminate the cabinet-floor crouch entirely. Deep drawers outperform cabinet doors for pots and pans because everything is visible and reachable from above. Position the stack on the side of the island closest to the cooktop so the path from drawer to burner stays under two steps.
12. Integrated Trash and Recycling Pull-Out Cabinet
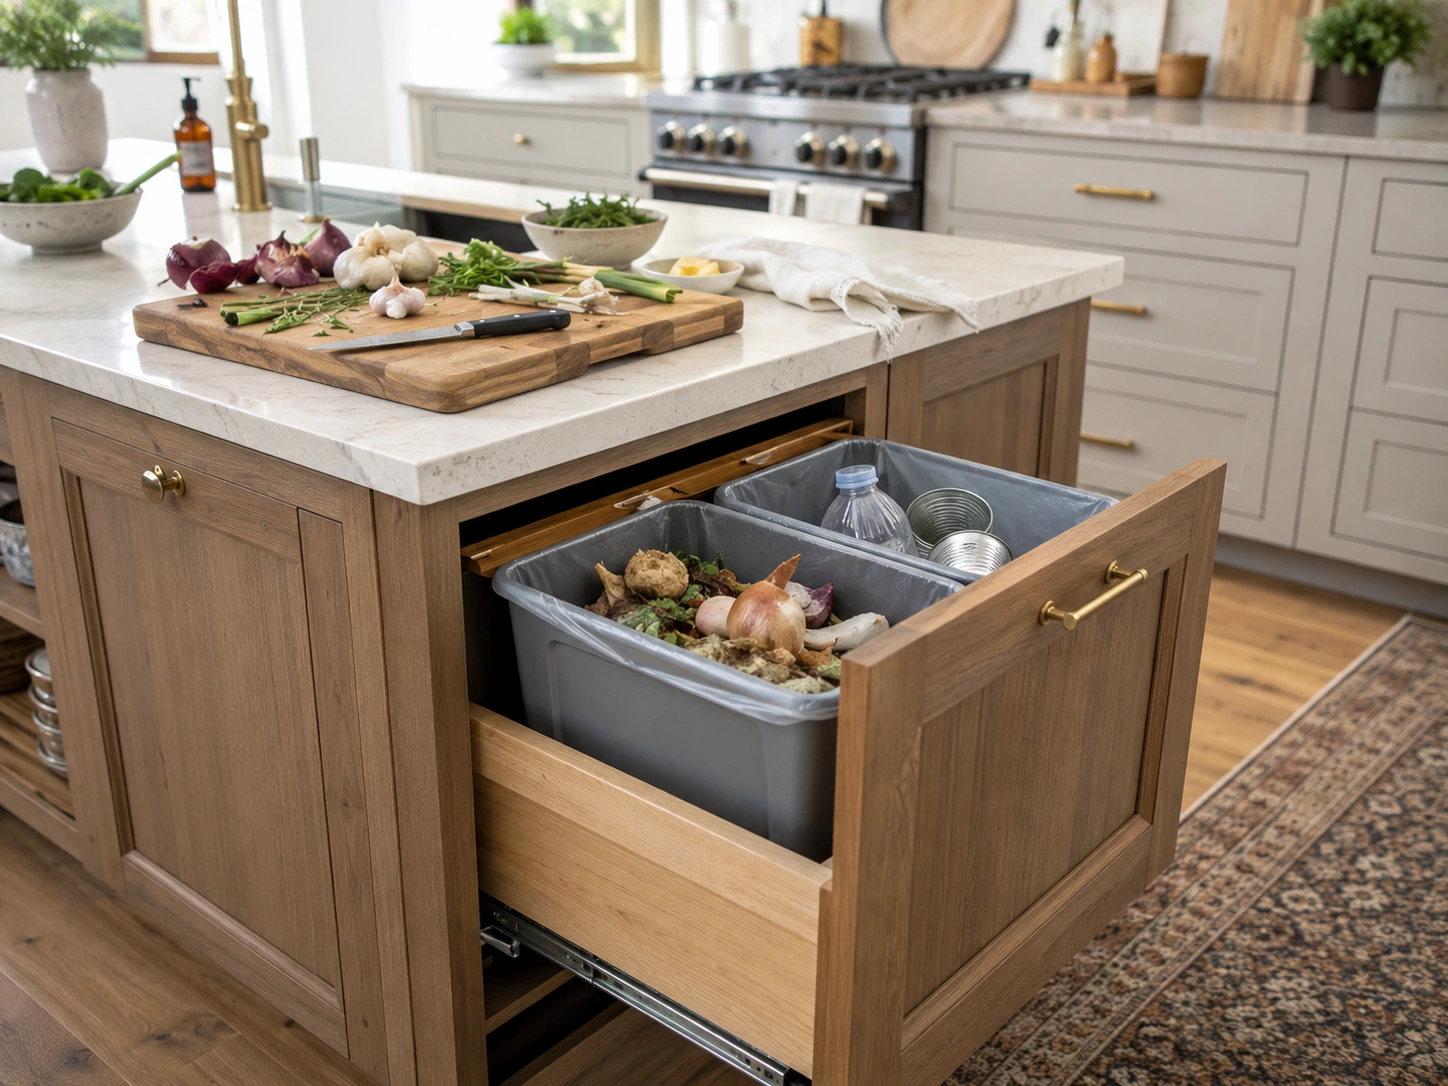
Moving trash and recycling from under the kitchen sink into an island pull-out places the bin directly at the prep zone, so every peel, trim, and scrap goes in without turning away from the cutting board. A two-bin pull-out separating trash from recycling fits inside a standard 18-inch cabinet opening and stays invisible when the door is closed.
Single change. Removes the most common mid-prep interruption.
13. Spice Pull-Out Drawers Flanking the Cooktop
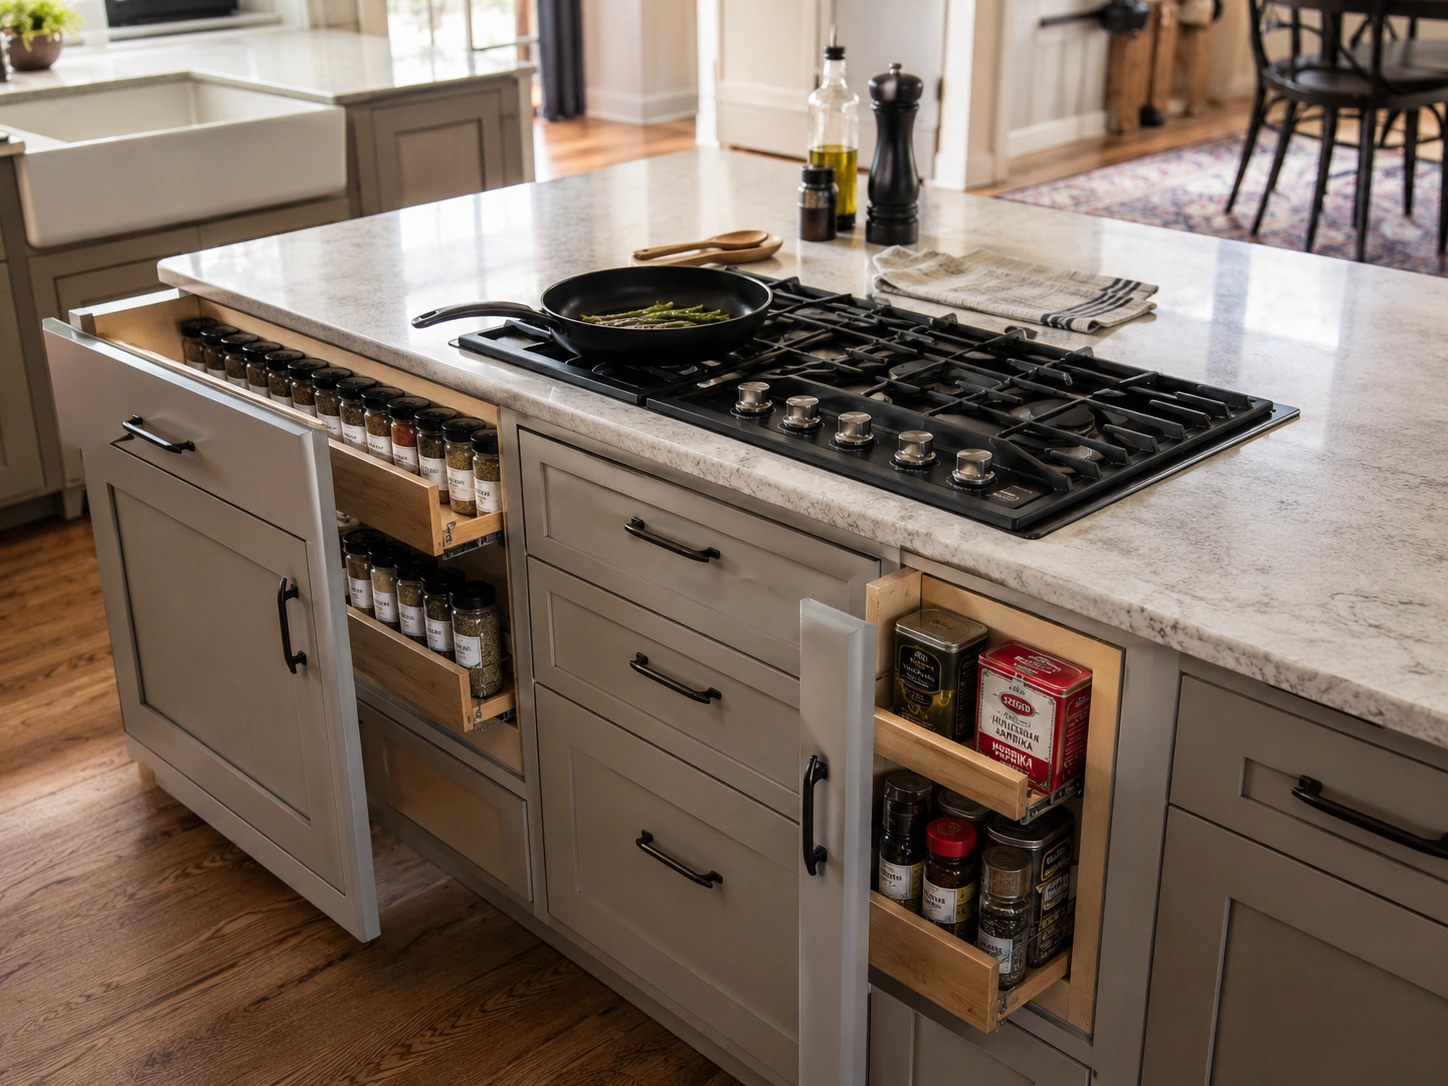
Narrow pull-out spice drawers — 3 to 6 inches wide, installed on either side of a built-in island cooktop — keep the 12 to 15 spices you reach for daily within arm’s reach of the burners without a cabinet search mid-cook. Standard spice jars fit in a single-layer pull-out; larger tins need a two-tier version. Rev-A-Shelf and Hafele make ready-to-install inserts for most standard cabinet openings.
14. Open Shelf End Cap for Cookbooks and Daily Items
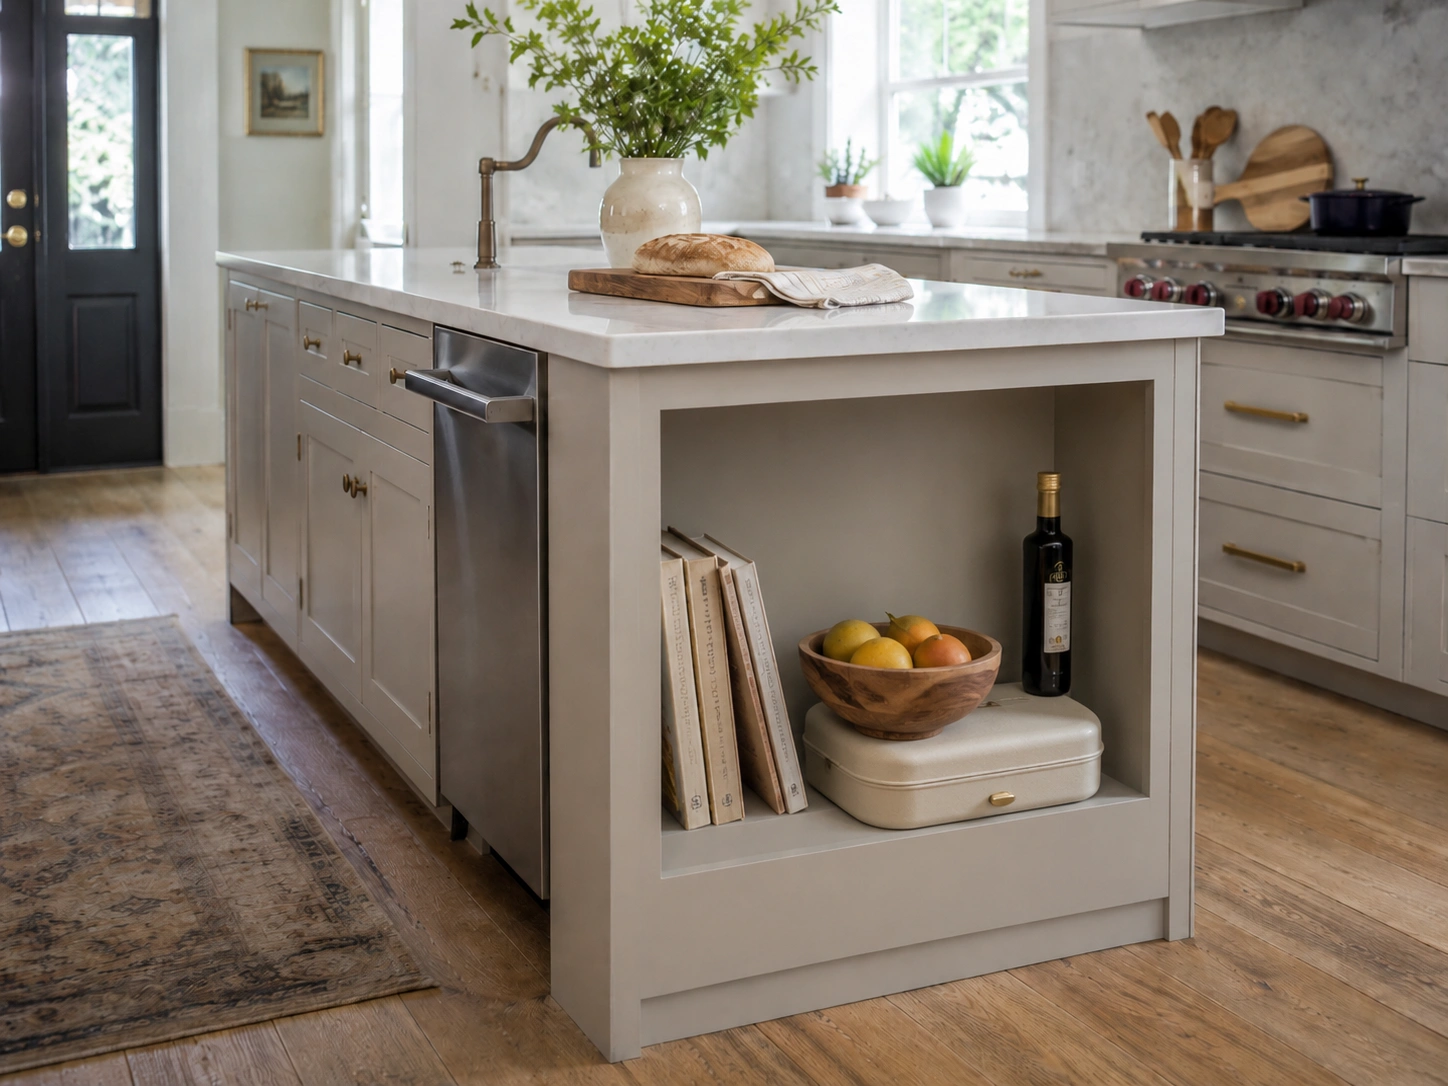
An open shelf on one or both island end caps keeps daily items — cookbooks, a fruit bowl, olive oil, a bread box — off the counter and within reach during prep. It softens the boxy profile of a standard island and breaks up what can otherwise be an uninterrupted cabinet wall. Style loosely: overfilling the shelf negates the effect and makes the island look cluttered rather than curated.
15. Slim Vertical Pull-Out for Wrap, Foil, and Parchment
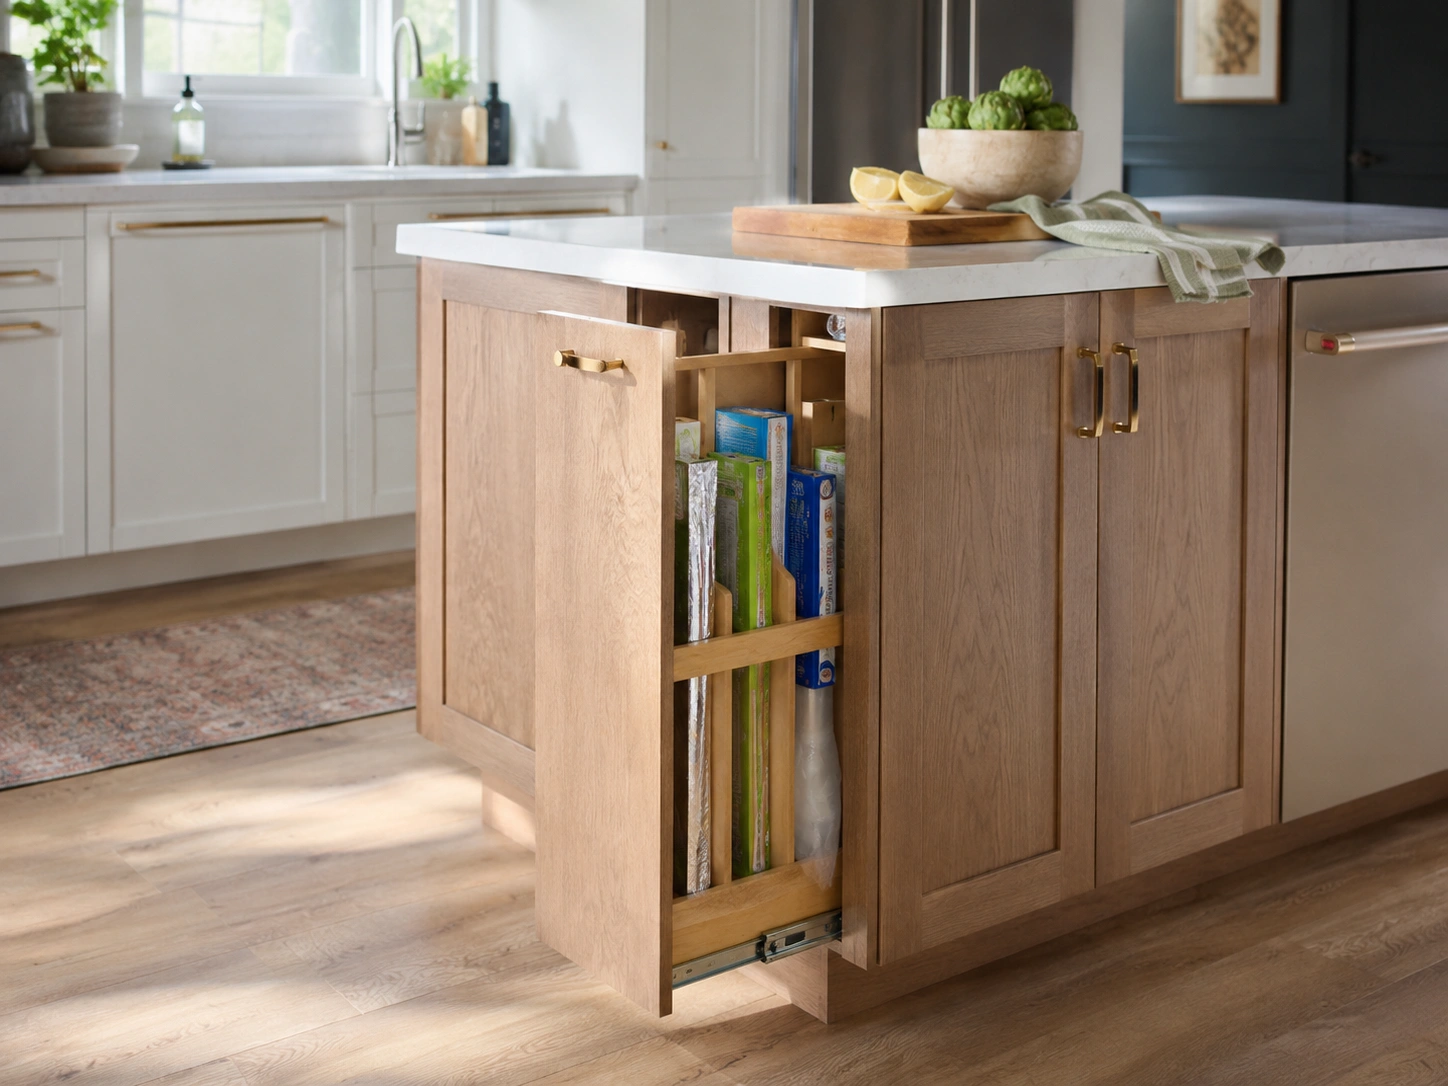
A 3- to 4-inch-wide vertical pull-out cabinet — at one end of the island or beside the trash pull-out — stores foil, plastic wrap, parchment paper, and produce bags upright and separated. These items are almost universally stuffed into a drawer where they tangle and fall behind other things. The vertical format solves this without taking up meaningful shelf or drawer space. Rev-A-Shelf makes a version purpose-built for this use.
16. Built-In Knife Block Drawer Insert
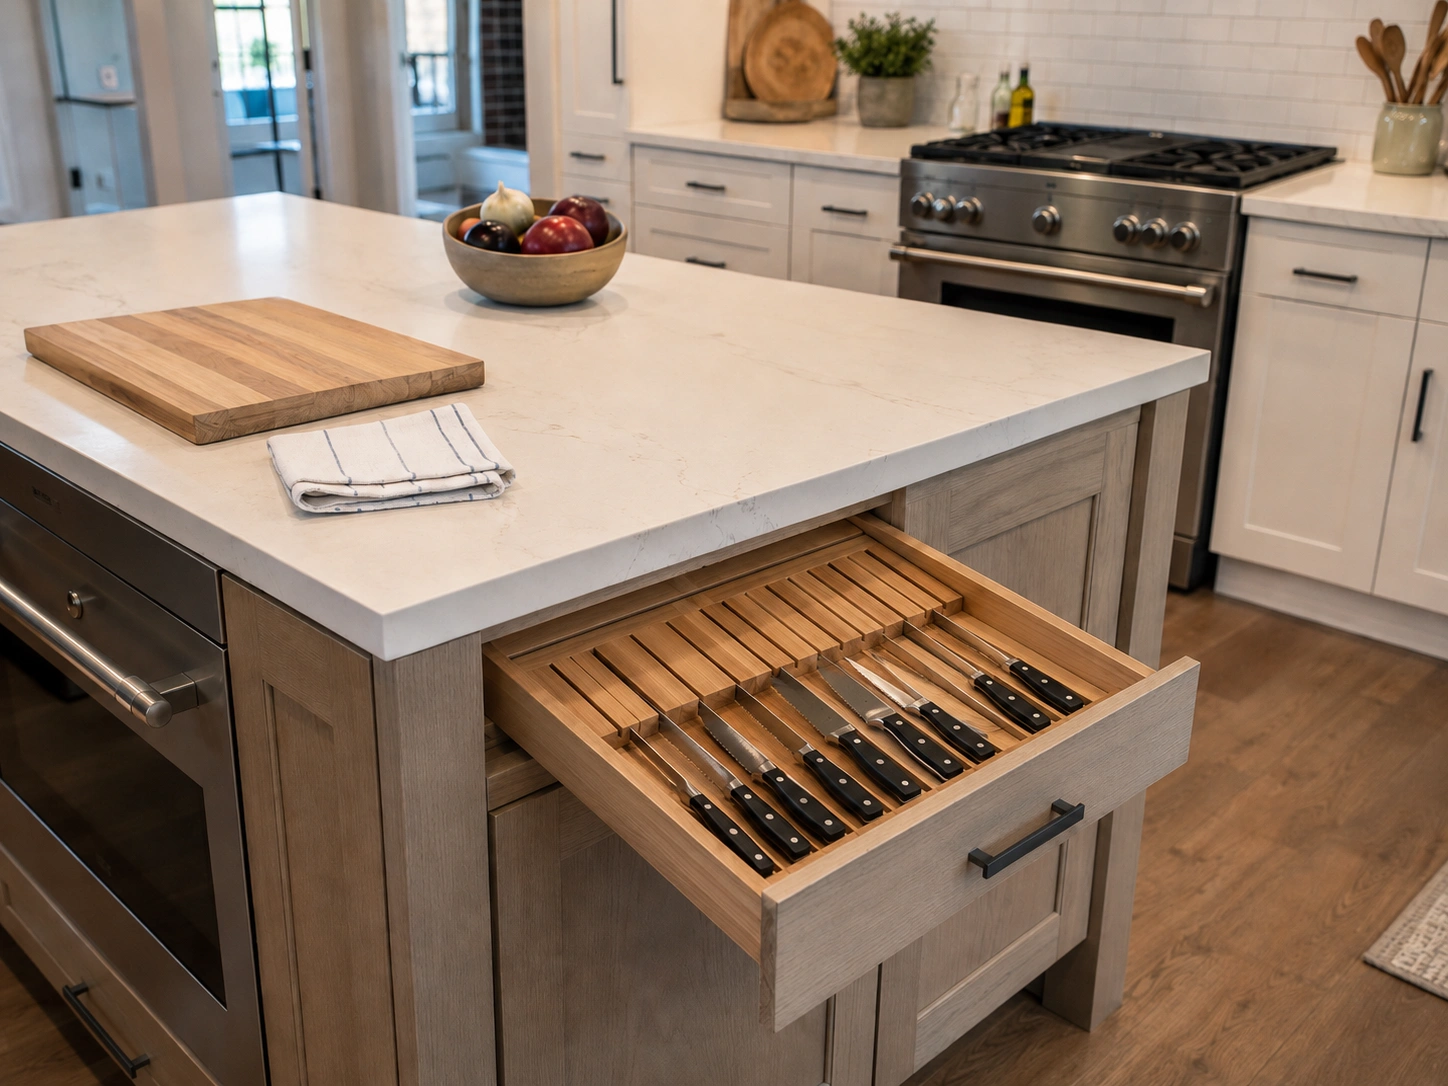
A drawer insert with angled knife slots — cut into a 3-inch-deep top drawer — replaces the countertop knife block and removes blades from the prep surface entirely. Knives stay organized, protected, and within reach without occupying an inch of counter space. Woodcraft and KnifeNest make custom inserts sized to order; RSVP and Rev-A-Shelf offer off-the-shelf versions for most standard drawer widths.
17. Fitted Drawer Divider System for Utensils
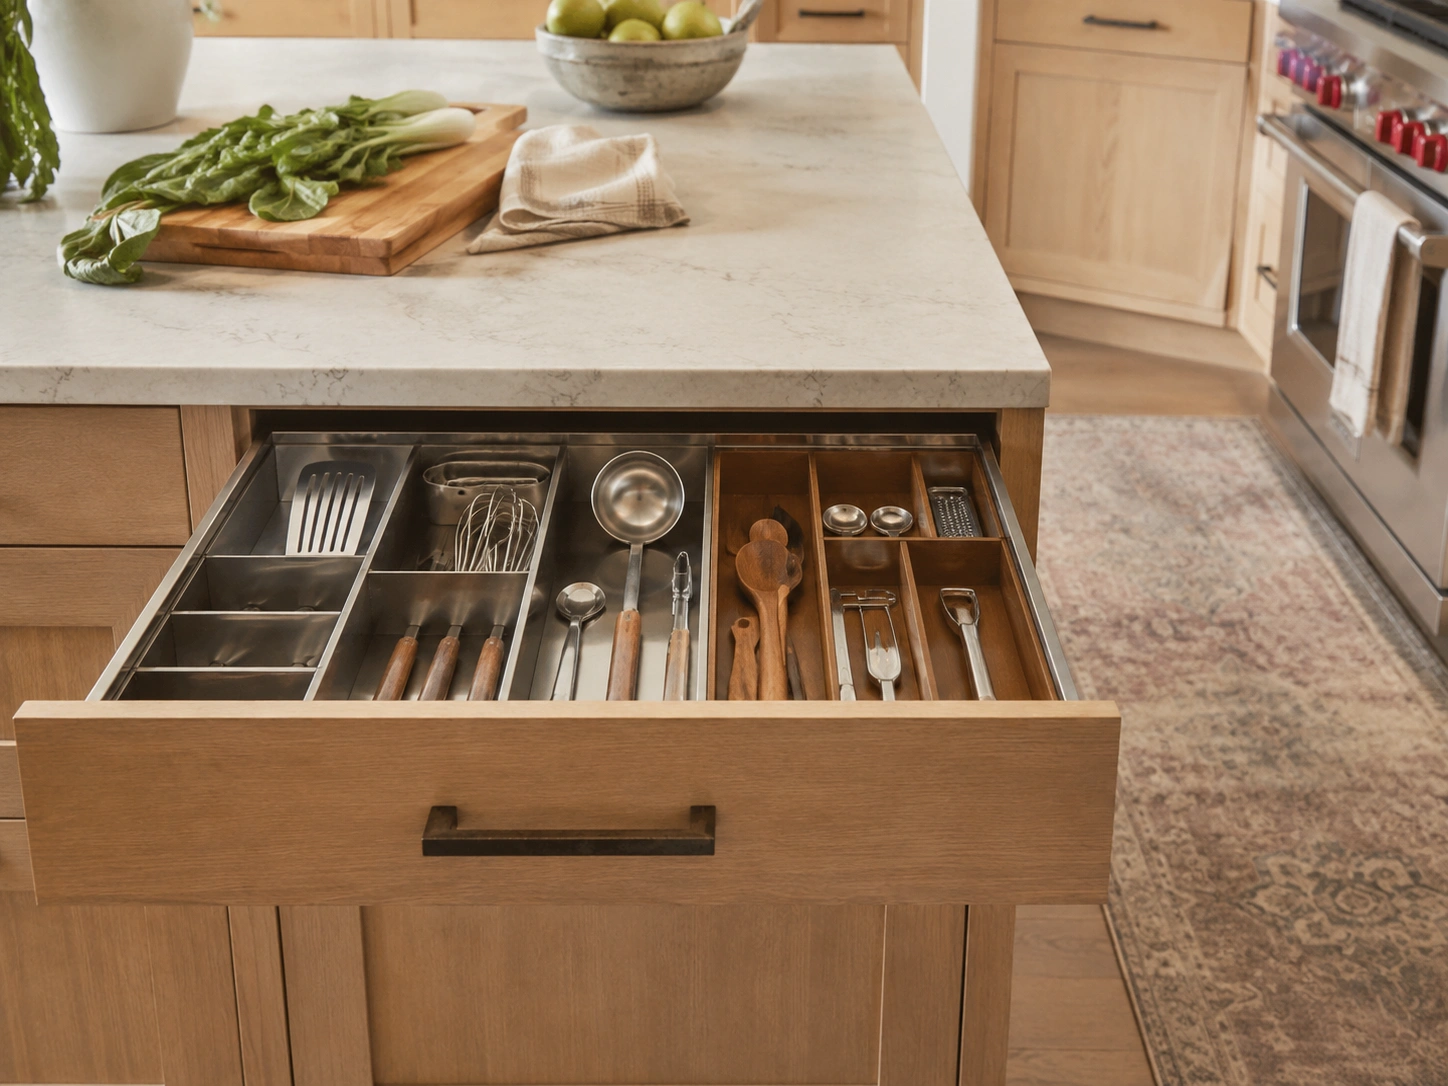
A proper drawer organizer — modular inserts that match the drawer’s exact dimensions rather than a generic tray that shifts — keeps every utensil in a fixed position. Blum Orgaline and Hafele make fitted stainless and wood systems that lock into the drawer sides. When every spatula, ladle, and peeler has a fixed slot, the drawer closes flat and opens ready to use.
Small detail. Real impact.
Appliance Integration Ideas
Built-in appliances are where islands shift from useful to genuinely transformative. The right one, placed correctly, eliminates a major workflow interruption. The wrong one — oversized, poorly positioned, chosen for aesthetics — splits the prep surface into two cramped zones.
I’ve seen conflicting data on this: some kitchen designers rank the prep sink as the highest single-ROI island addition; others point to the dishwasher drawer as the change most reported by homeowners as genuinely life-changing. My read is that the prep sink wins for households that cook nearly every night, while the dishwasher drawer wins for households that cook and entertain frequently. They solve different frustrations.
18. Built-In Prep Sink at the Island Center
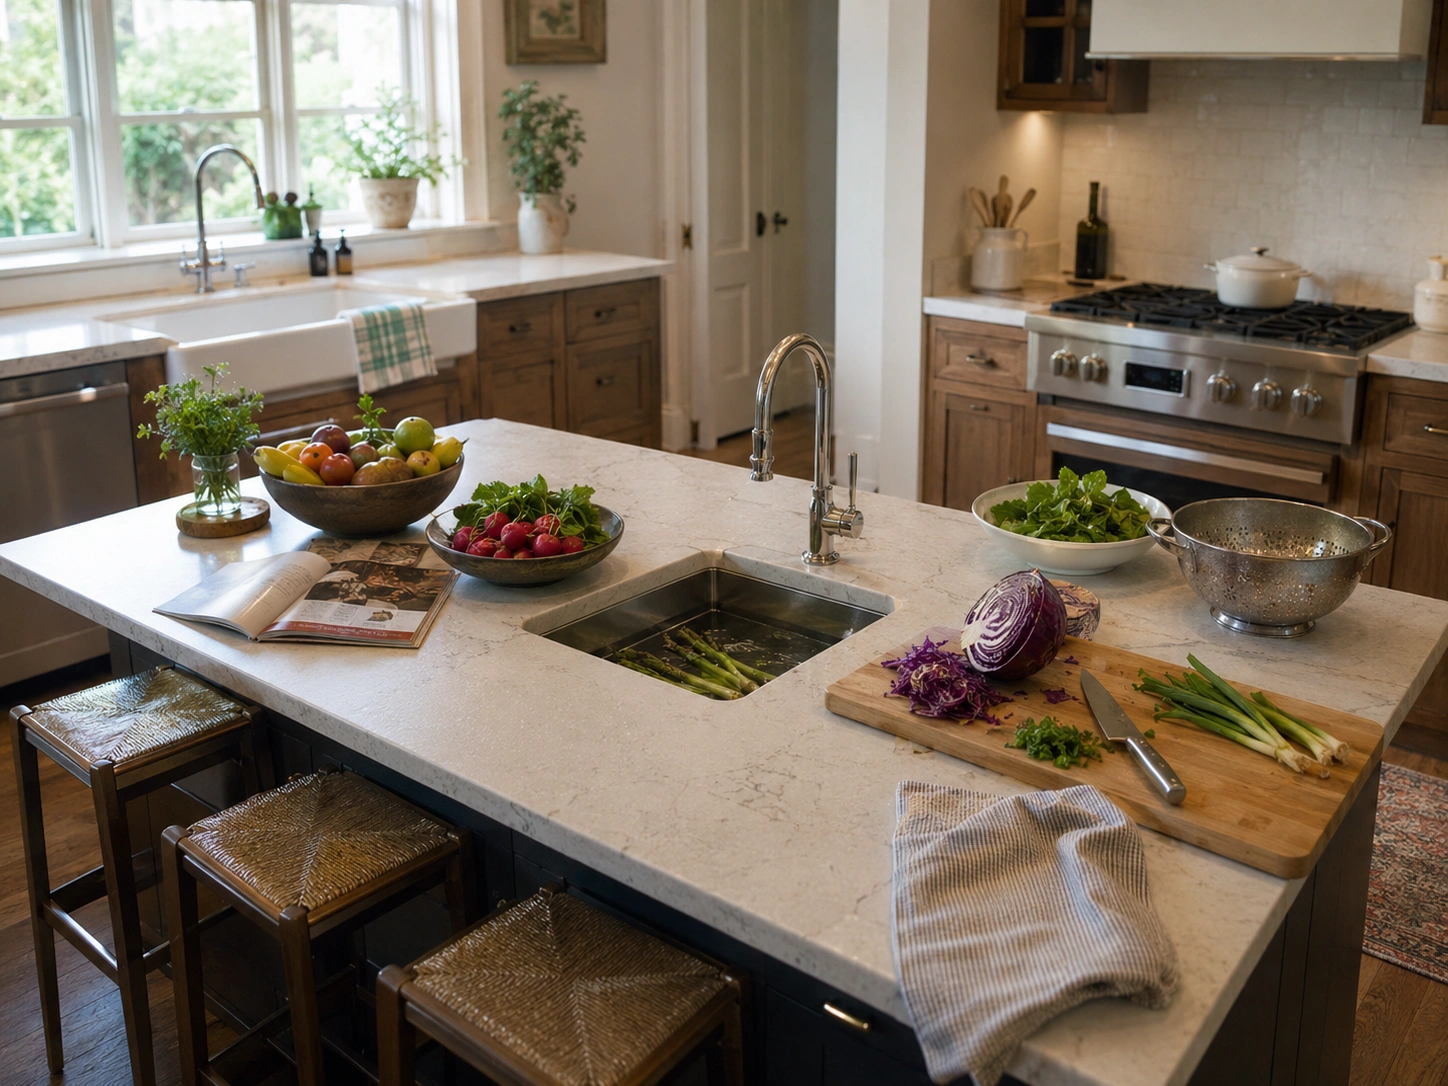
A prep sink — typically 15 to 18 inches wide — positioned in the center third of the island keeps vegetable washing, pasta draining, and quick rinses at the prep zone rather than the perimeter sink. It doesn’t need to handle large pots; that remains the perimeter sink’s job. What it eliminates is the constant back-and-forth that breaks prep momentum. Requires plumbing rough-in — budget $800 to $2,000 for installation depending on your kitchen’s layout.
19. Apron-Front Farmhouse Prep Sink in the Island
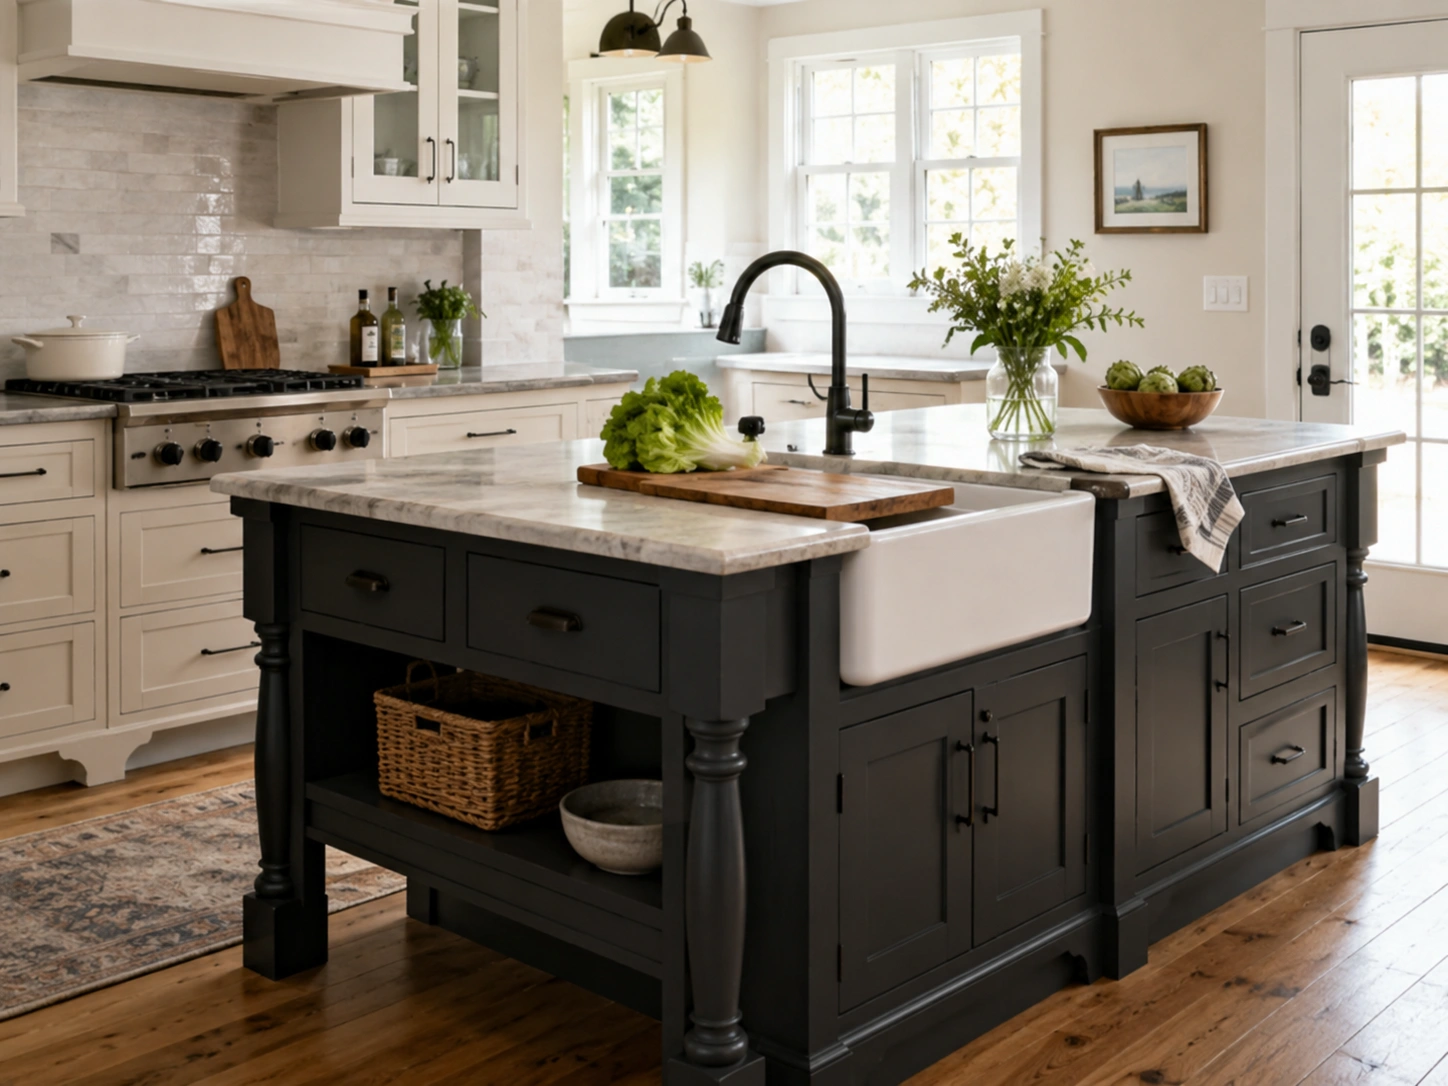
An apron-front sink built into the island gives you a deeper, wider basin — useful for rinsing large cutting boards, washing full heads of lettuce, and flower arranging without the basin lip interrupting reach. The farmhouse profile makes the island read more like furniture, especially in transitional or traditional kitchens. Pair it with an unlacquered brass or matte black faucet to keep the look from reading as a catalog default.
20. Built-In Cooktop with Overhead Statement Hood
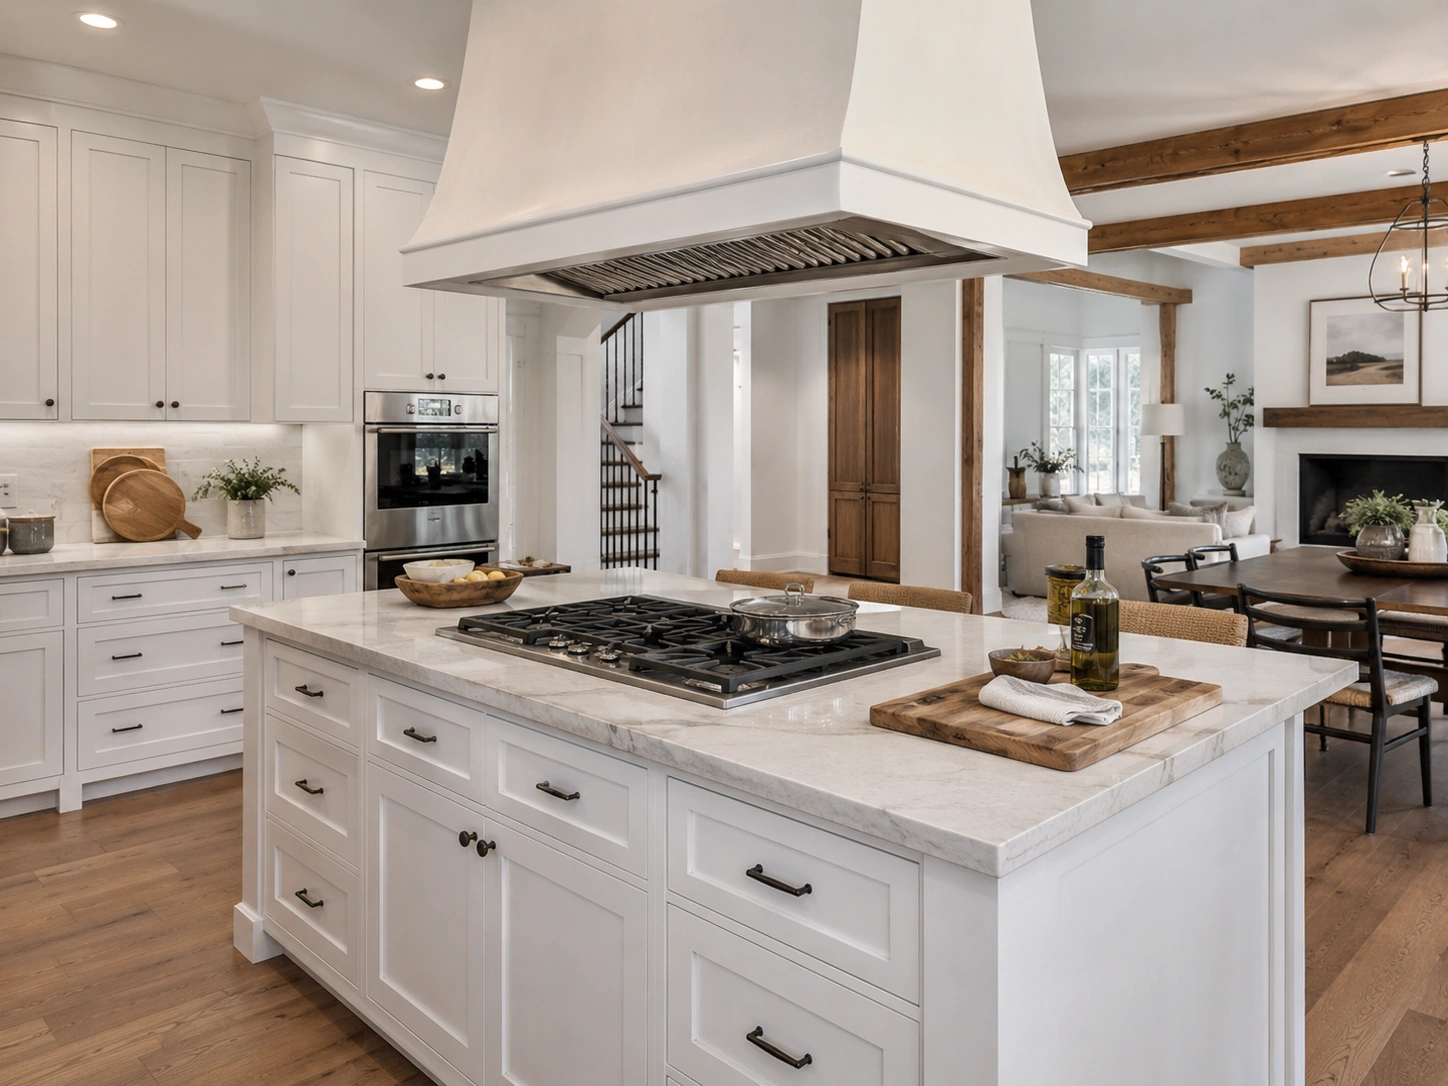
Moving the cooktop from the perimeter wall to the island puts the cook facing the room instead of a backsplash — an obvious advantage in open-concept kitchens where staying in the conversation while cooking matters. The non-negotiable: a properly sized range hood above the island, at least as wide as the cooktop, vented to the exterior. Required for air quality and local building code compliance in most municipalities.
21. Downdraft Ventilation for a Clean Ceiling Profile
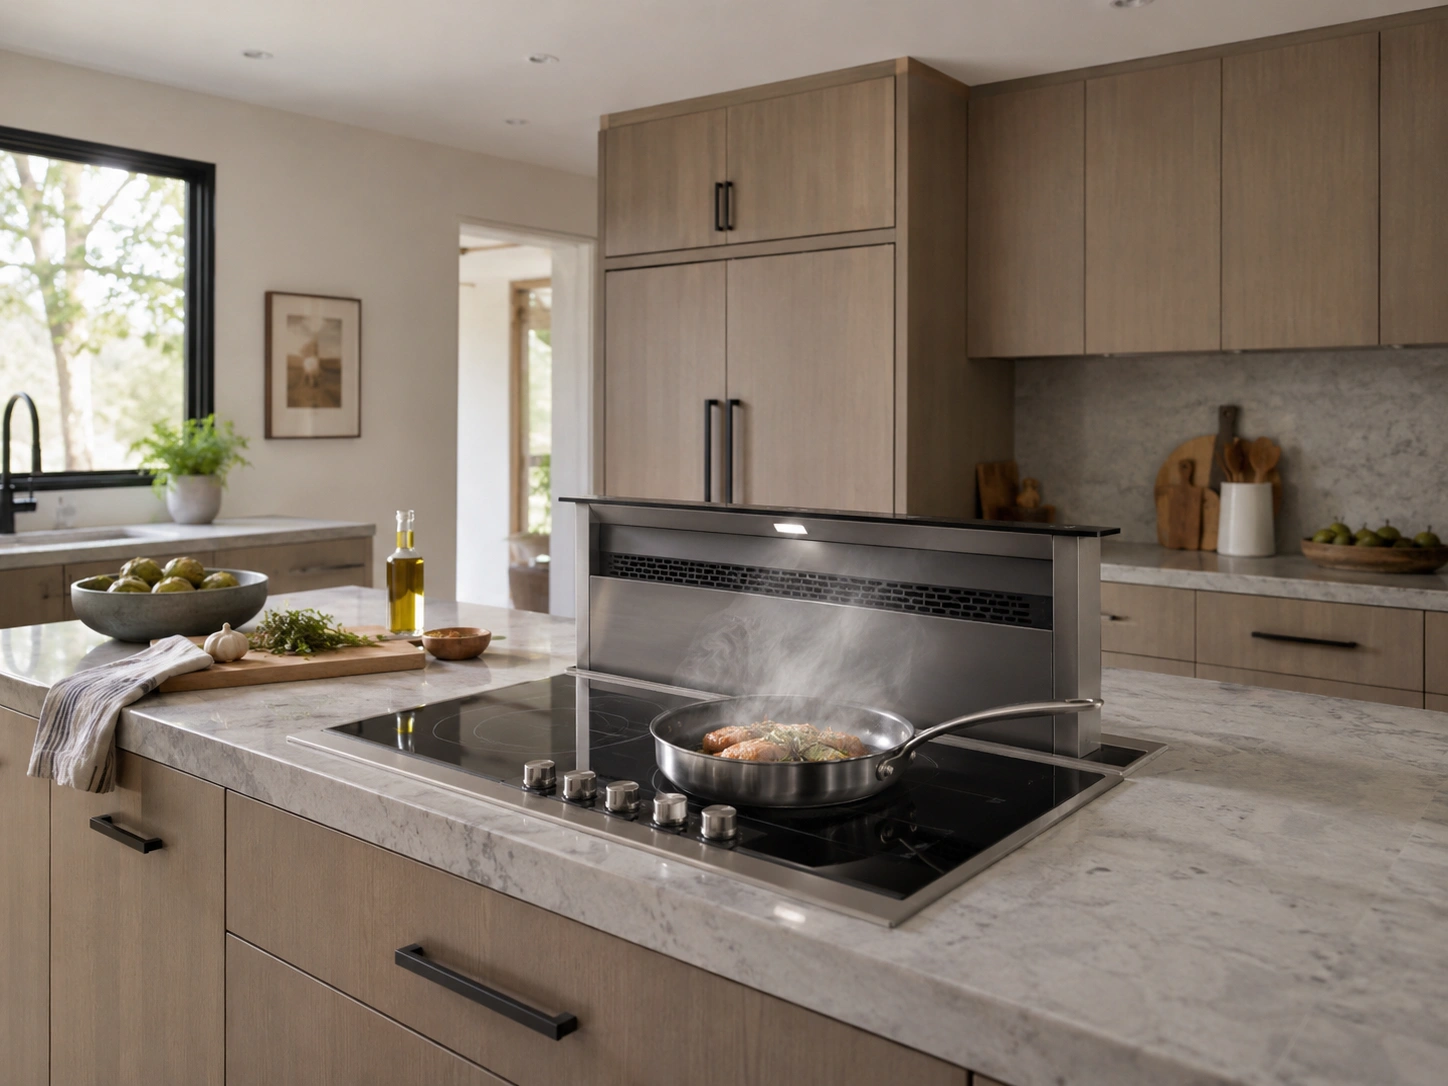
If an overhead hood isn’t possible — structural beam in the way, ceiling too low, or rental unit restrictions — a downdraft ventilation system pulls steam and smoke downward rather than up. Units from Broan and Elica rise from the counter when the cooktop is active and retract flush when it’s off. Less dramatic than a hood visually. Fully functional for everyday cooking loads. A legitimate design solution, not a workaround.
22. Built-In Microwave Drawer Beneath the Countertop
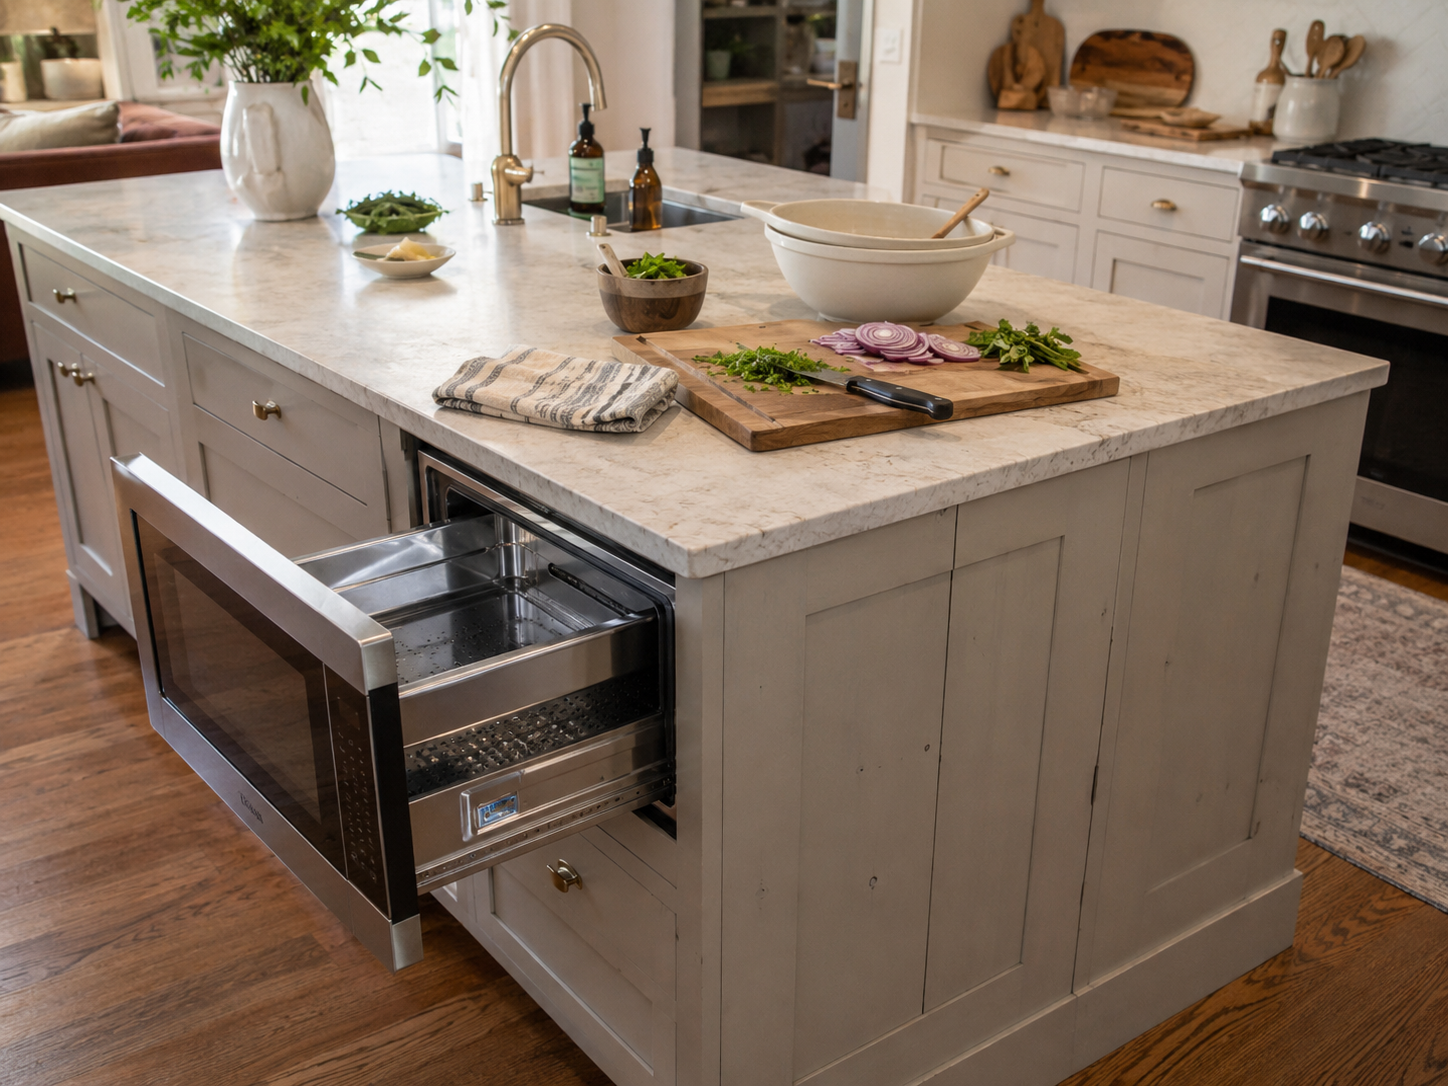
A microwave drawer installed at or below counter height removes the appliance from the perimeter counter entirely, reclaiming one to two linear feet of working surface. The drawer-style door opens downward, eliminating the over-the-shoulder reach required with countertop models. Sharp and Wolf make the most commonly specified versions. Position it adjacent to the prep zone — not tucked at the far end of the island where it requires a walk mid-cook.
23. Under-Counter Dishwasher Drawer at the Island
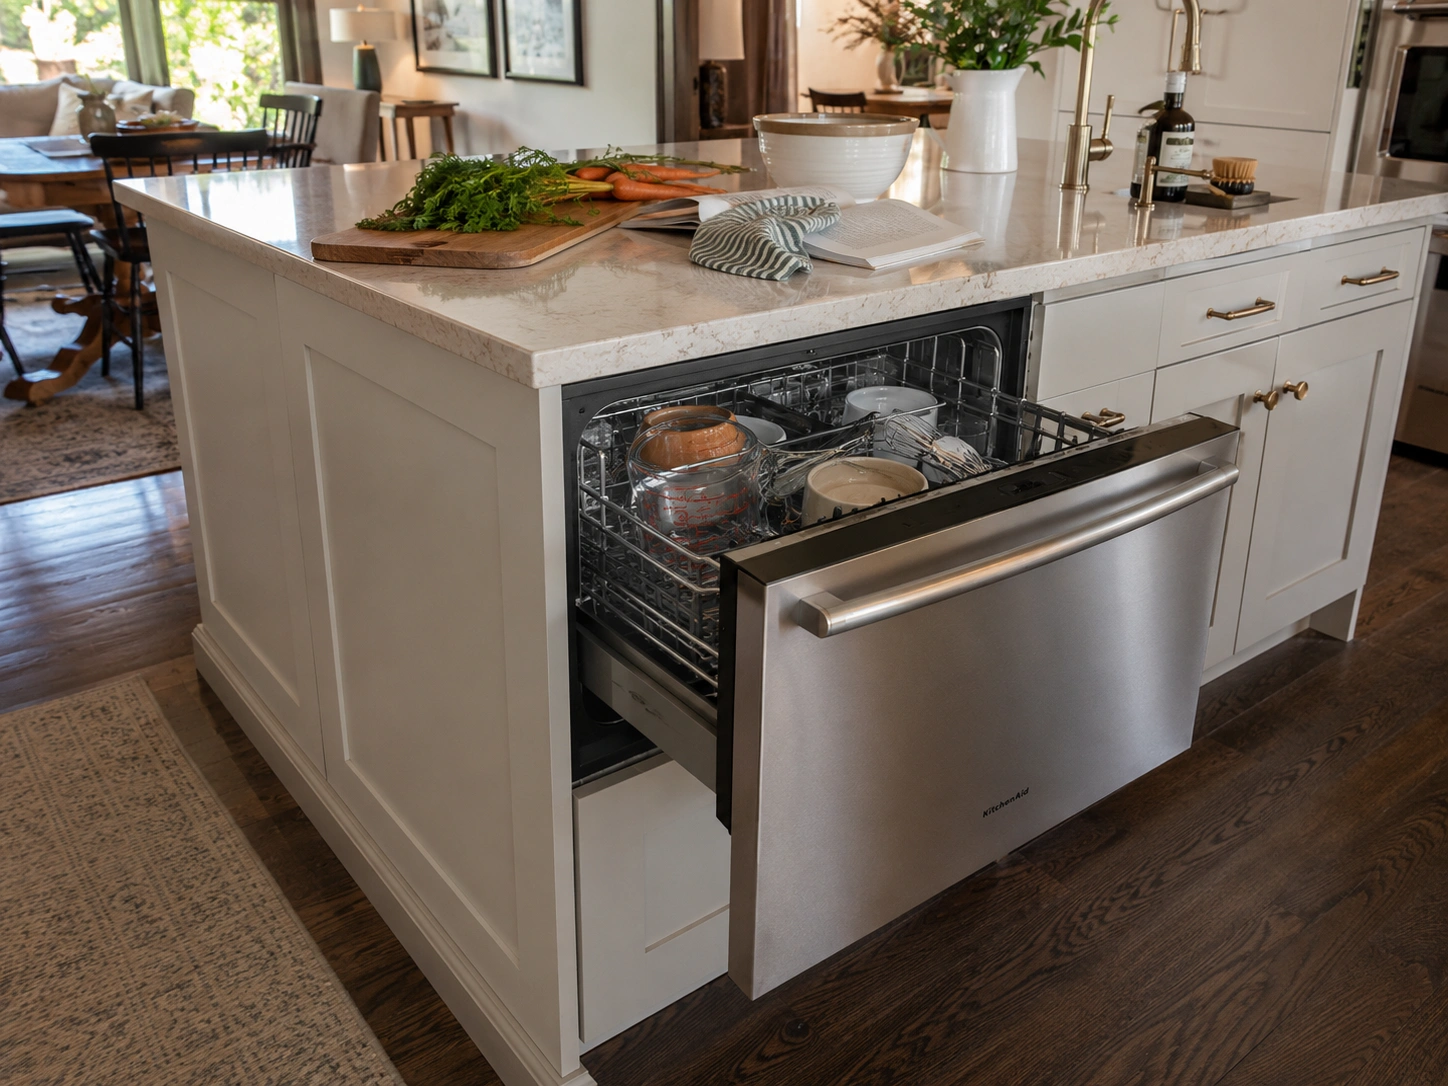
KitchenAid’s under-counter dishwasher drawer is the most frequently integrated island appliance in upgraded kitchens per 2025 Houzz data. It handles smaller loads without waiting for a full machine to accumulate, runs quietly enough for mid-meal cycles, and fits in a standard 24-inch cabinet opening. For households that cook and entertain regularly, a second dishwasher drawer dedicated to prep bowls and utensils is one of the fastest post-meal workflow improvements available.
24. Under-Counter Beverage or Wine Fridge
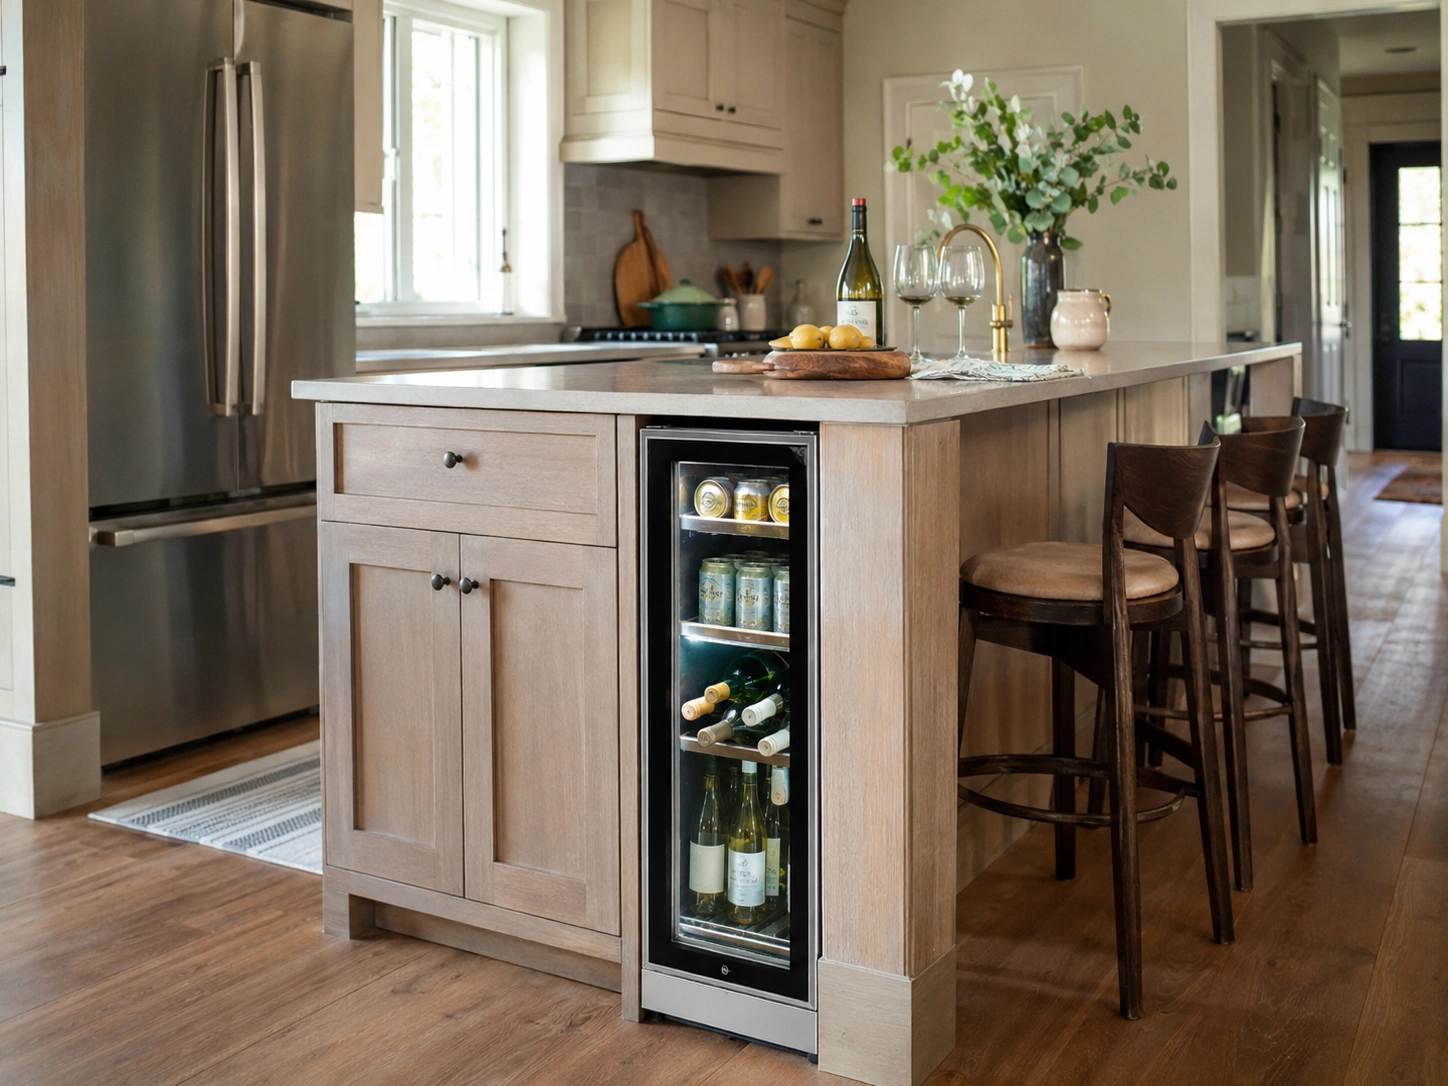
A 15- to 18-inch beverage or wine fridge built into the island end moves drinks out of the main refrigerator and into the social zone where guests are already gathering. For daily use, it frees a full shelf in the main fridge for food storage. Freestanding under-counter units from Allavino and U-Line install in a standard cabinet opening without custom millwork or a plumber.
Lighting, Style, and Finishing Touches
These details make a functional island feel designed rather than assembled. Most are finish-level decisions that cost significantly less than structural changes — and carry outsized visual impact.
25. Three Pendant Lights in a Row Over the Island
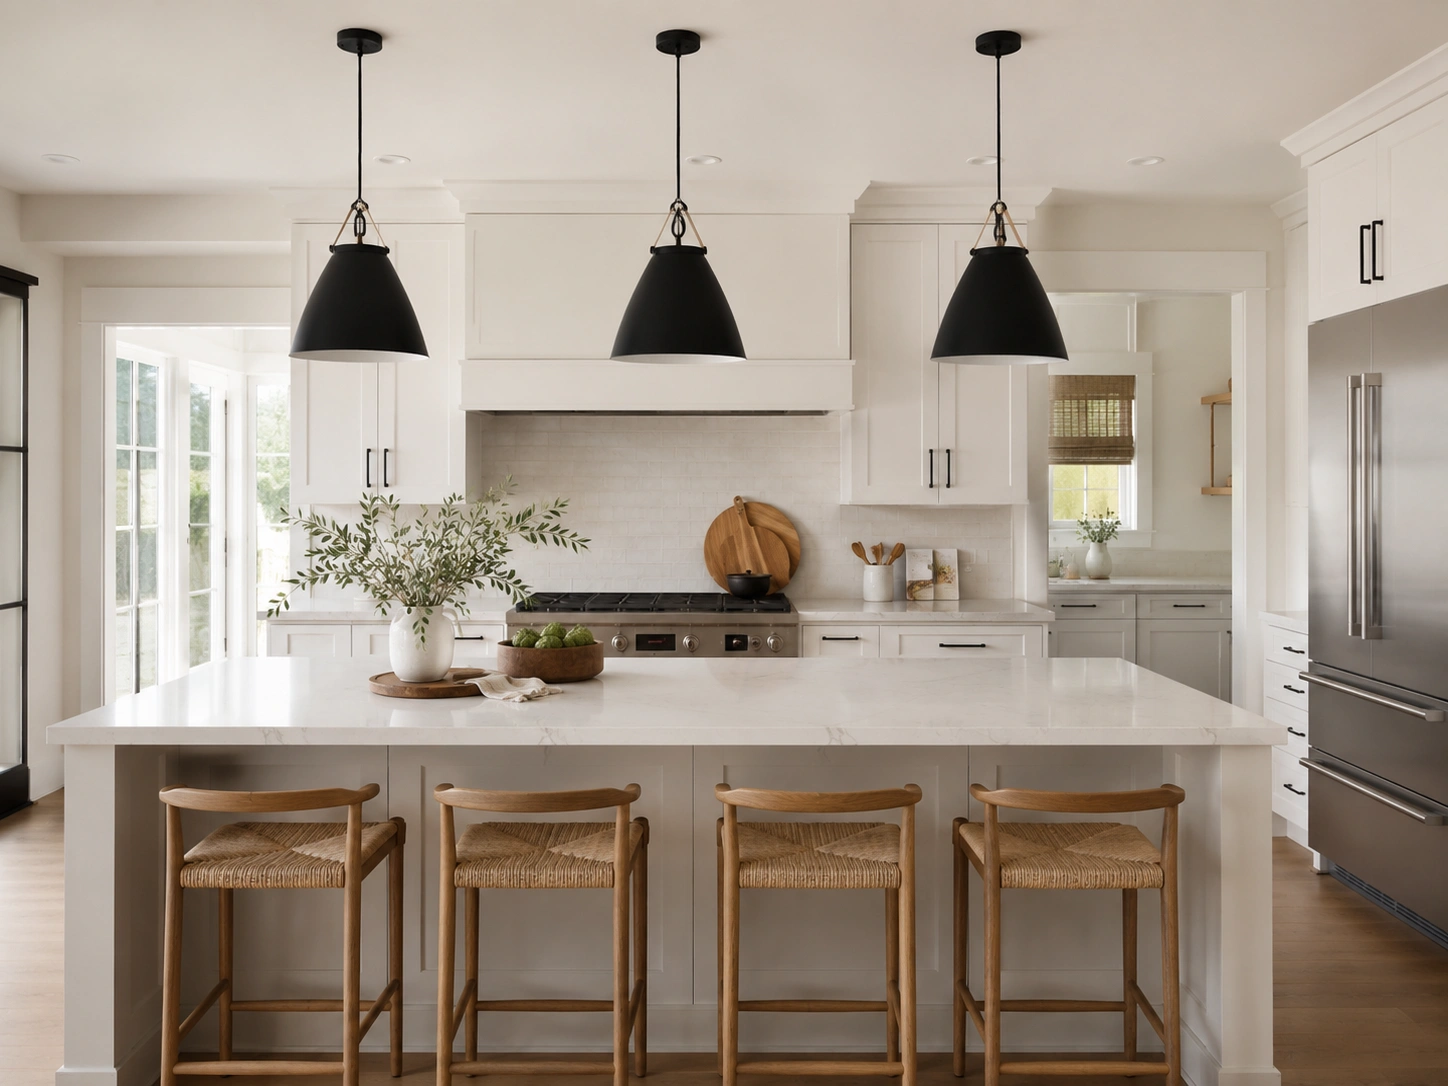
Three evenly spaced pendants over the island’s length is the most-replicated kitchen lighting layout on Pinterest for a reason: it distributes light across the full prep surface, creates a clear visual axis above the island, and photographs well from every angle. Space them 24 to 30 inches apart, hang them 30 to 36 inches above the countertop, and scale them to the island’s length — thin pendants over a long island disappear; oversized ones compete with the surface.
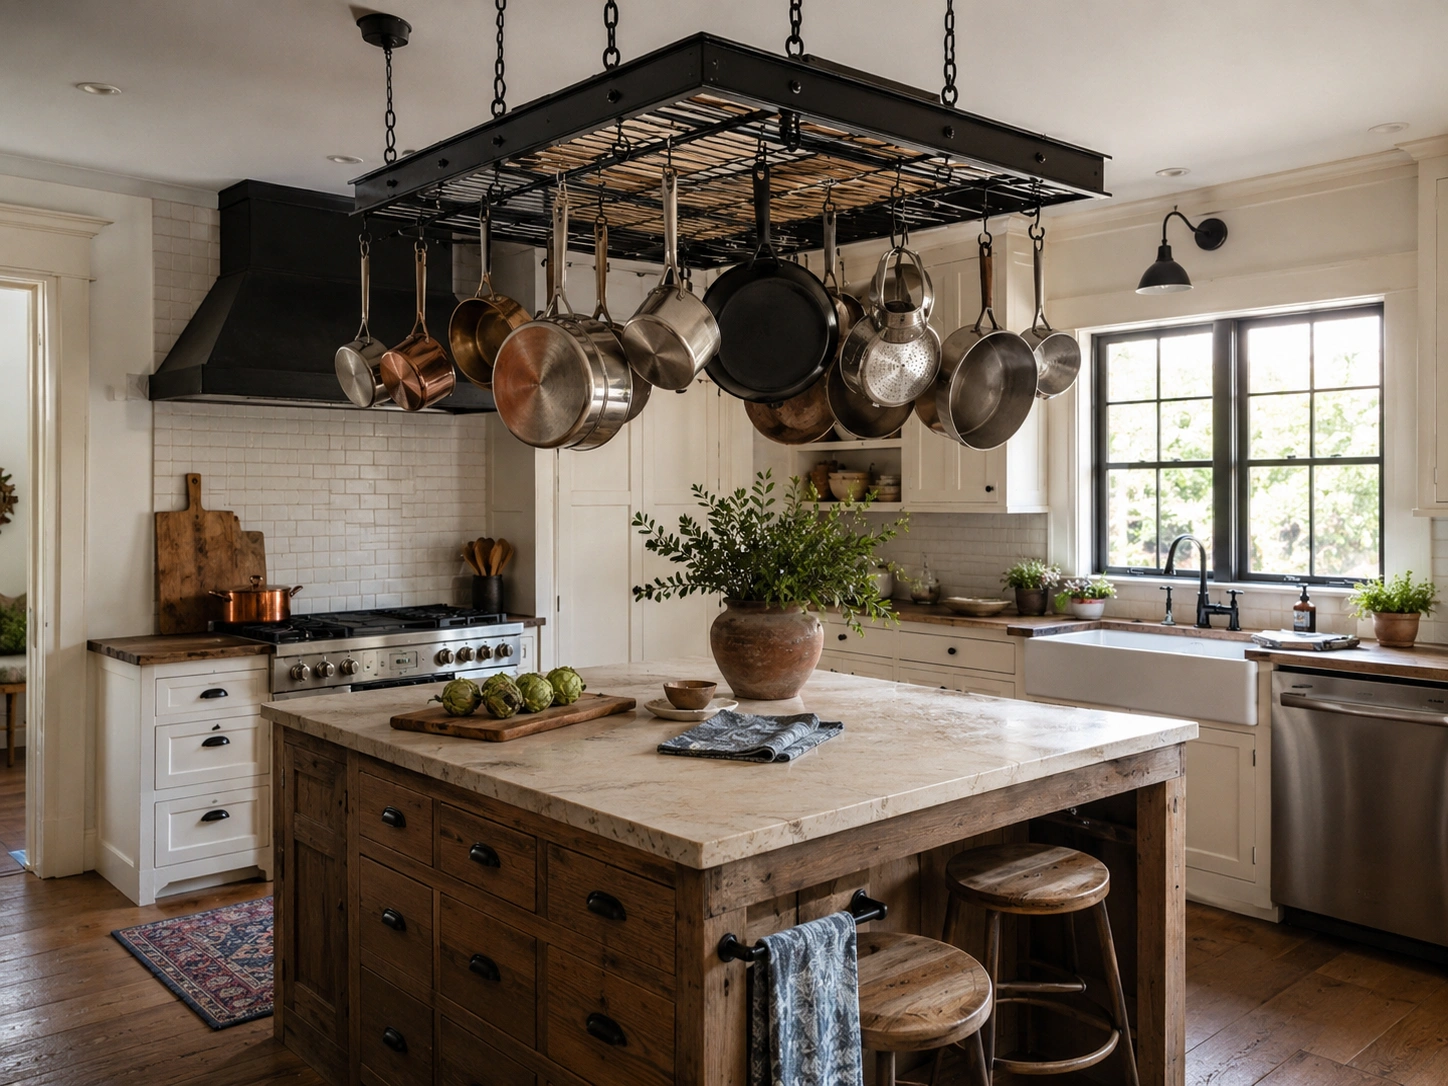
26. Ceiling Pot Rack Positioned Directly Above the Island
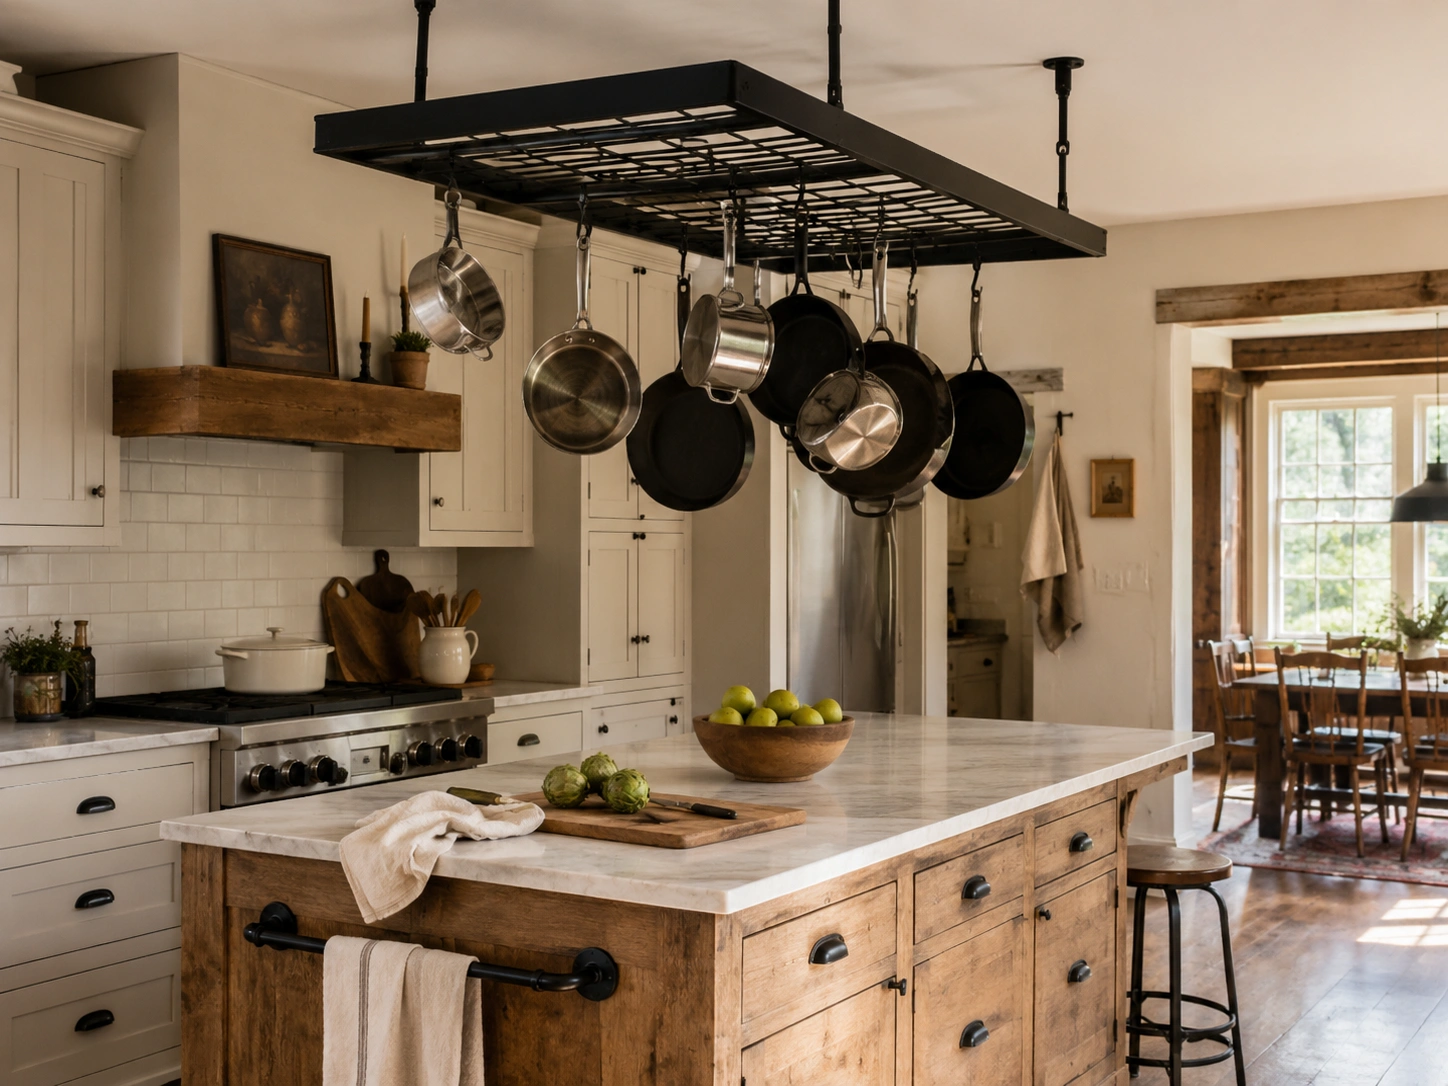
A ceiling-mounted pot rack above the island stores cookware exactly where it’s used, eliminating deep-cabinet storage entirely for pots and pans. It adds visual texture to what can otherwise feel like an empty ceiling plane above the countertop. Works best in kitchens with 9-foot ceilings or higher — anything lower brings the rack into active headroom. Choose matte black or brushed brass to coordinate with the island’s existing hardware finish.
27. Navy or Forest Green Painted Island Base
A deeply saturated island base — navy, hunter green, or near-black forest — makes the countertop appear to float and reads completely differently in person than in a photo. This has remained the most-pinned island color direction on home decor boards for three consecutive years because it works across traditional, transitional, and modern kitchens without tipping toward a passing trend. Benjamin Moore’s Newburyport Blue and Sherwin-Williams’ Cascades are the two most-specified colors in this category.
28. Shiplap Side Panels with a Floating Shelf End Cap
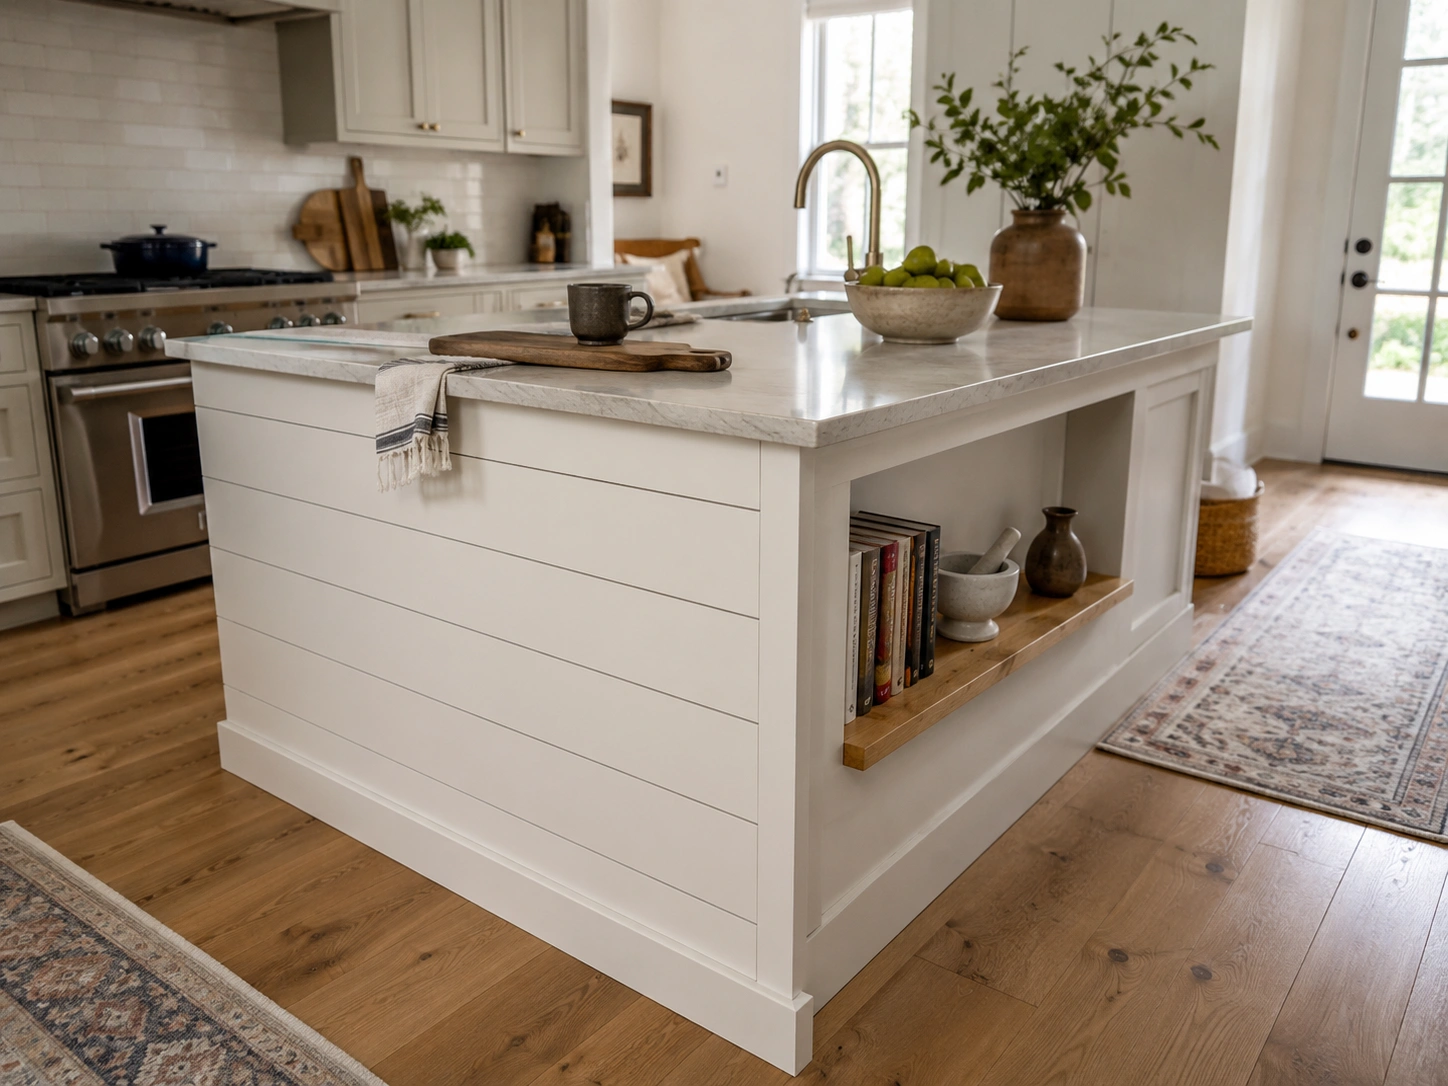
Horizontal shiplap planks applied to the island’s long side panel give it a furniture feel — something placed intentionally, not built into the kitchen. A single floating shelf at the end cap, 8 to 10 inches deep, adds a display or landing zone without cabinet bulk. This combination appears most often in transitional and modern farmhouse kitchens where the design language mixes clean lines with organic textures.
29. Shaker Cabinet Doors in a Contrasting Color
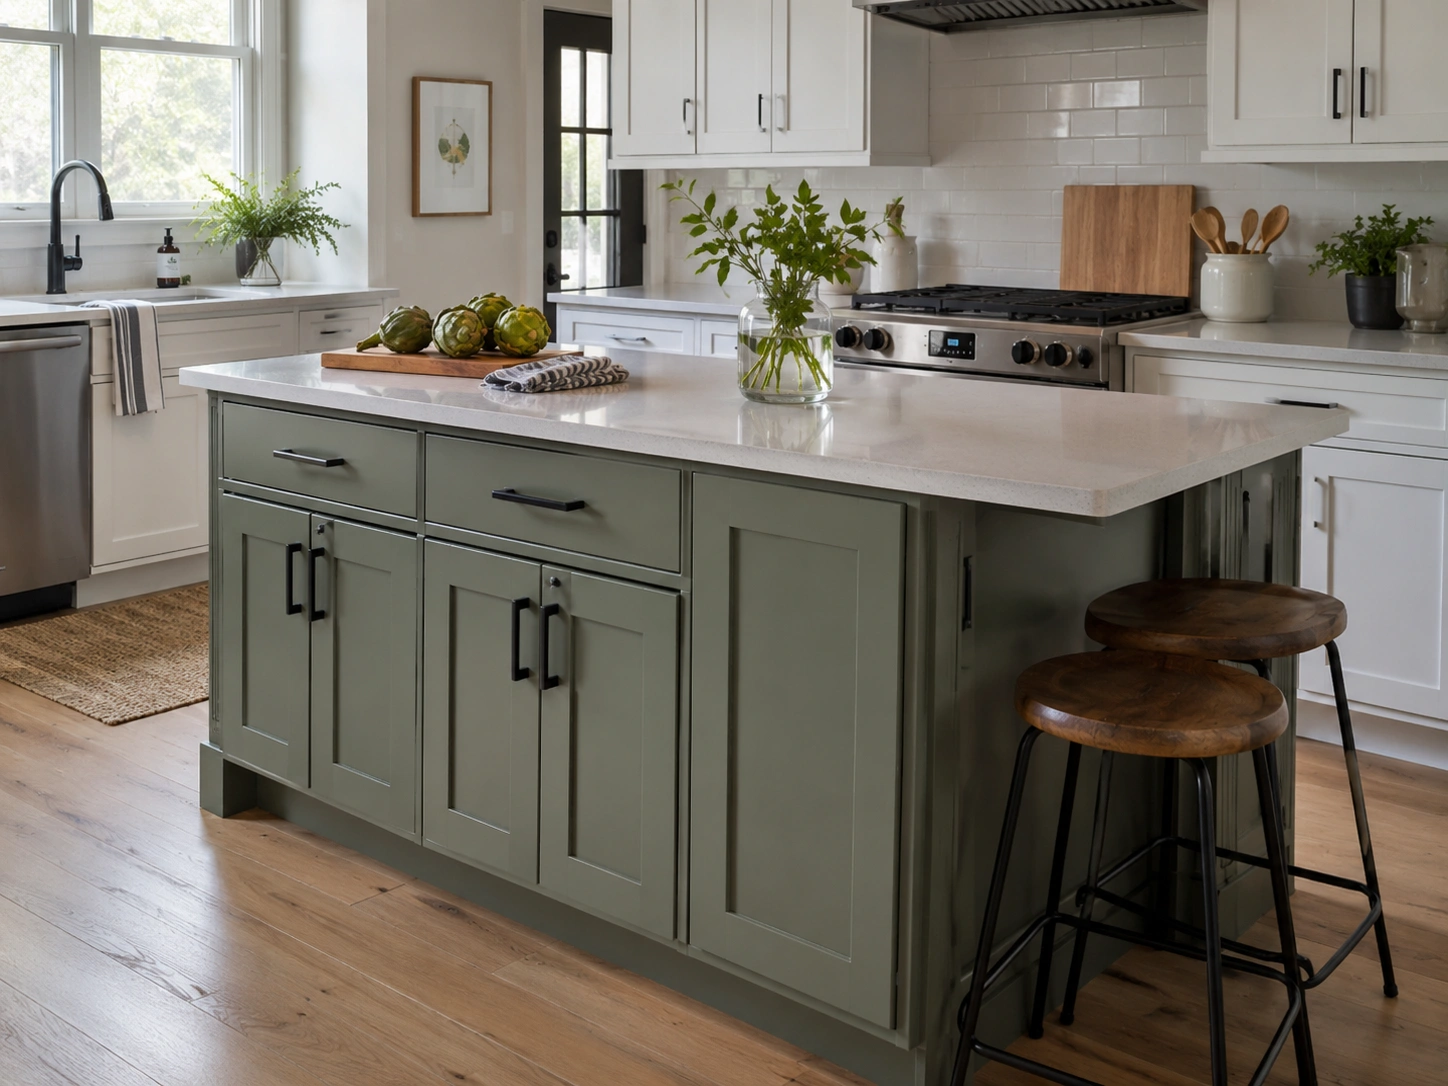
Shaker doors — recessed center panel, simple rail-and-stile frame — are the most versatile island cabinet style across every kitchen aesthetic from traditional to contemporary. They carry a contrasting color well because the frame detail gives the color something to anchor to visually. Current Pinterest-popular island-only colors include deep olive, dusty sage, and warm terracotta — all pairing with brass or matte black hardware without looking costumey.
30. Bold Contrasting Hardware as the Only Design Accent
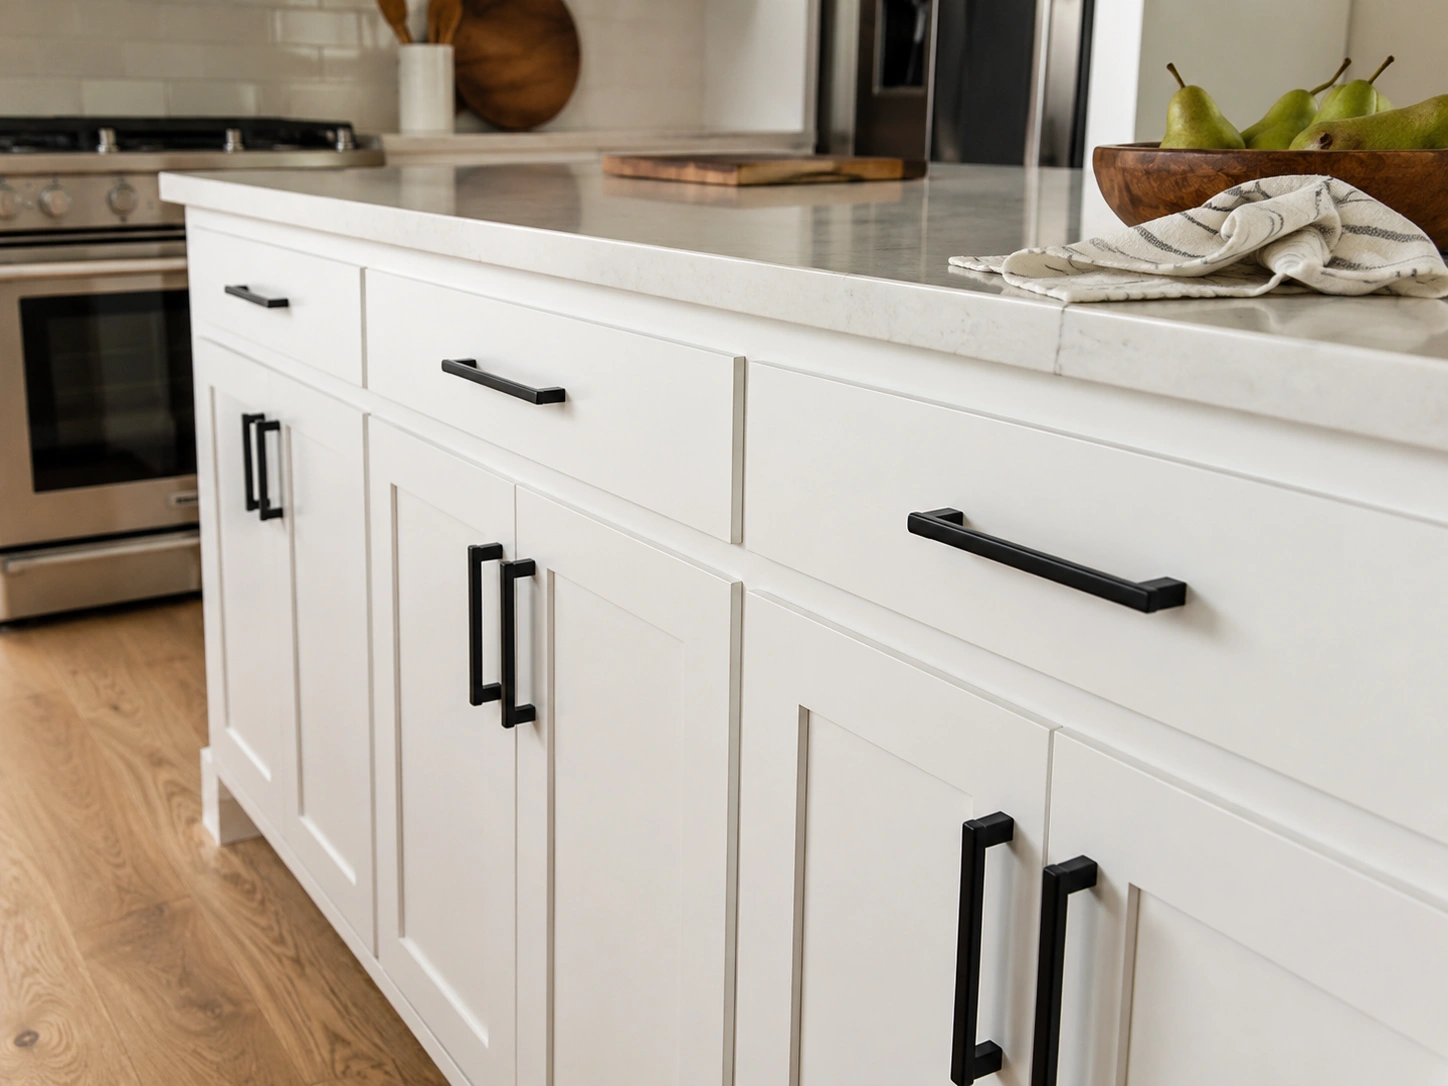
Swapping all island hardware to a single bold finish — matte black, unlacquered brass, or satin bronze — costs under $200 in most kitchens and reads as a deliberate design choice. It doesn’t cost much, you’re not rebuilding anything, and it’s done in an afternoon. Keep every piece the same finish and the same silhouette: mixed shapes in one finish look accidental, while one shape in one finish looks considered.
31. Jewel-Tone Island with Warm Brushed Gold Hardware
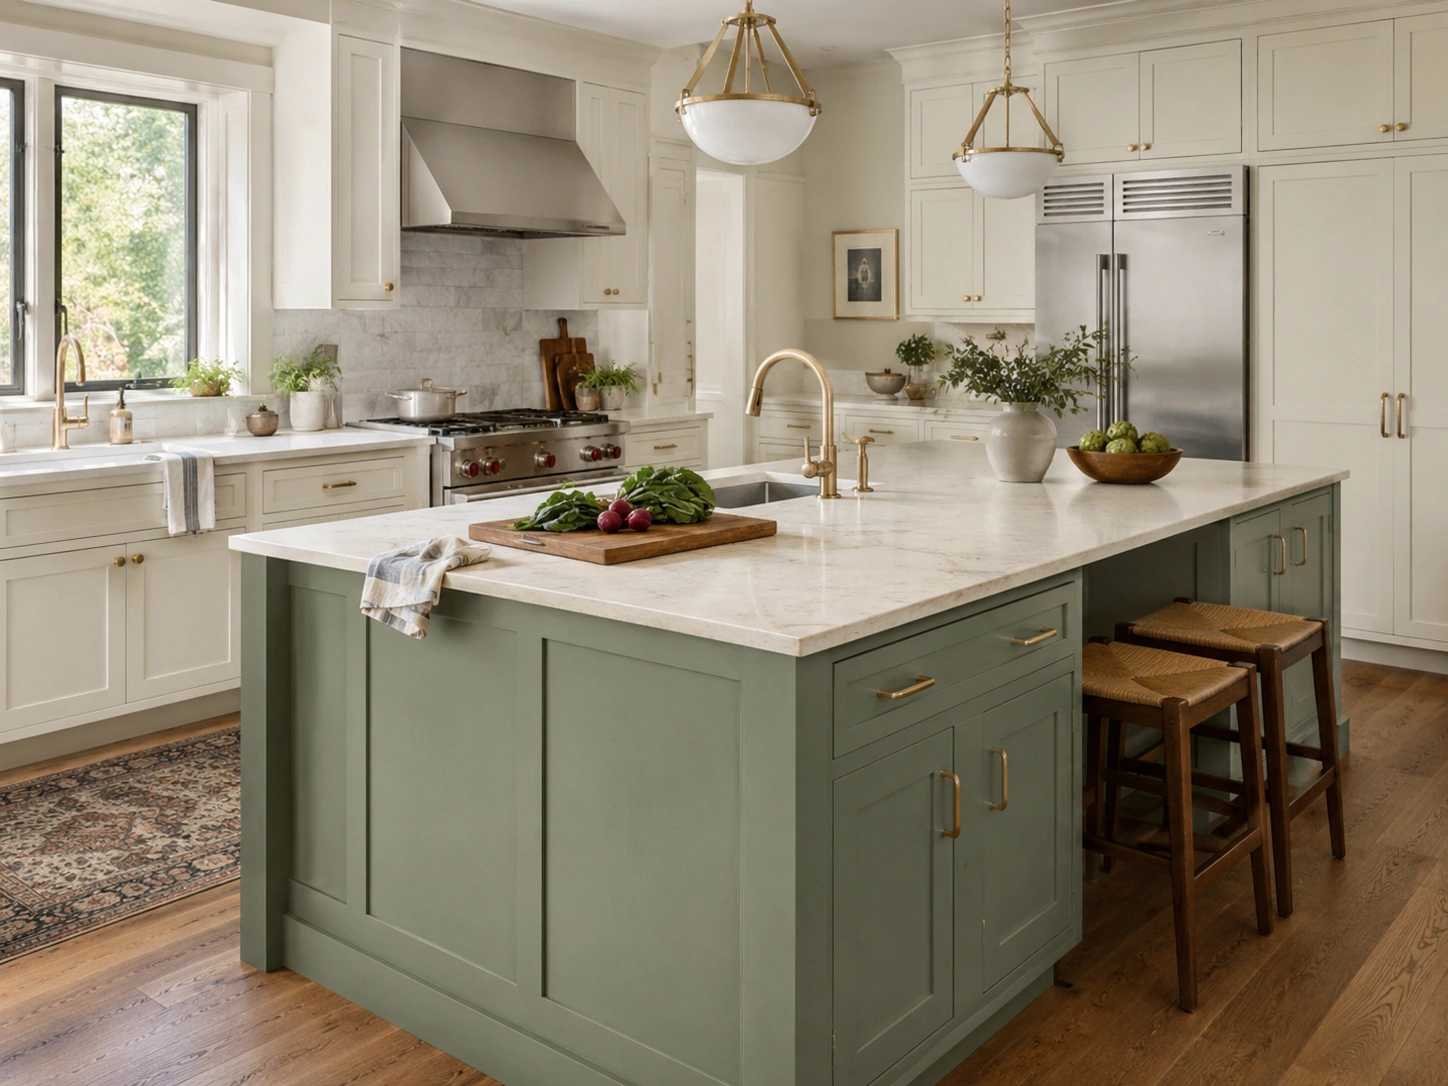
Sage green, dusty terracotta, smoky plum, and deep teal island bases paired with brushed gold or antique brass hardware represent the current iteration of the bold island trend — one step past the navy-and-brass combination that peaked around 2022. Pair with an off-white or cream countertop, not pure white: cool white reads too stark against warm base tones and the combination loses cohesion quickly.
32. IKEA KALLAX or STENSTORP Island Hack for Budget Builds
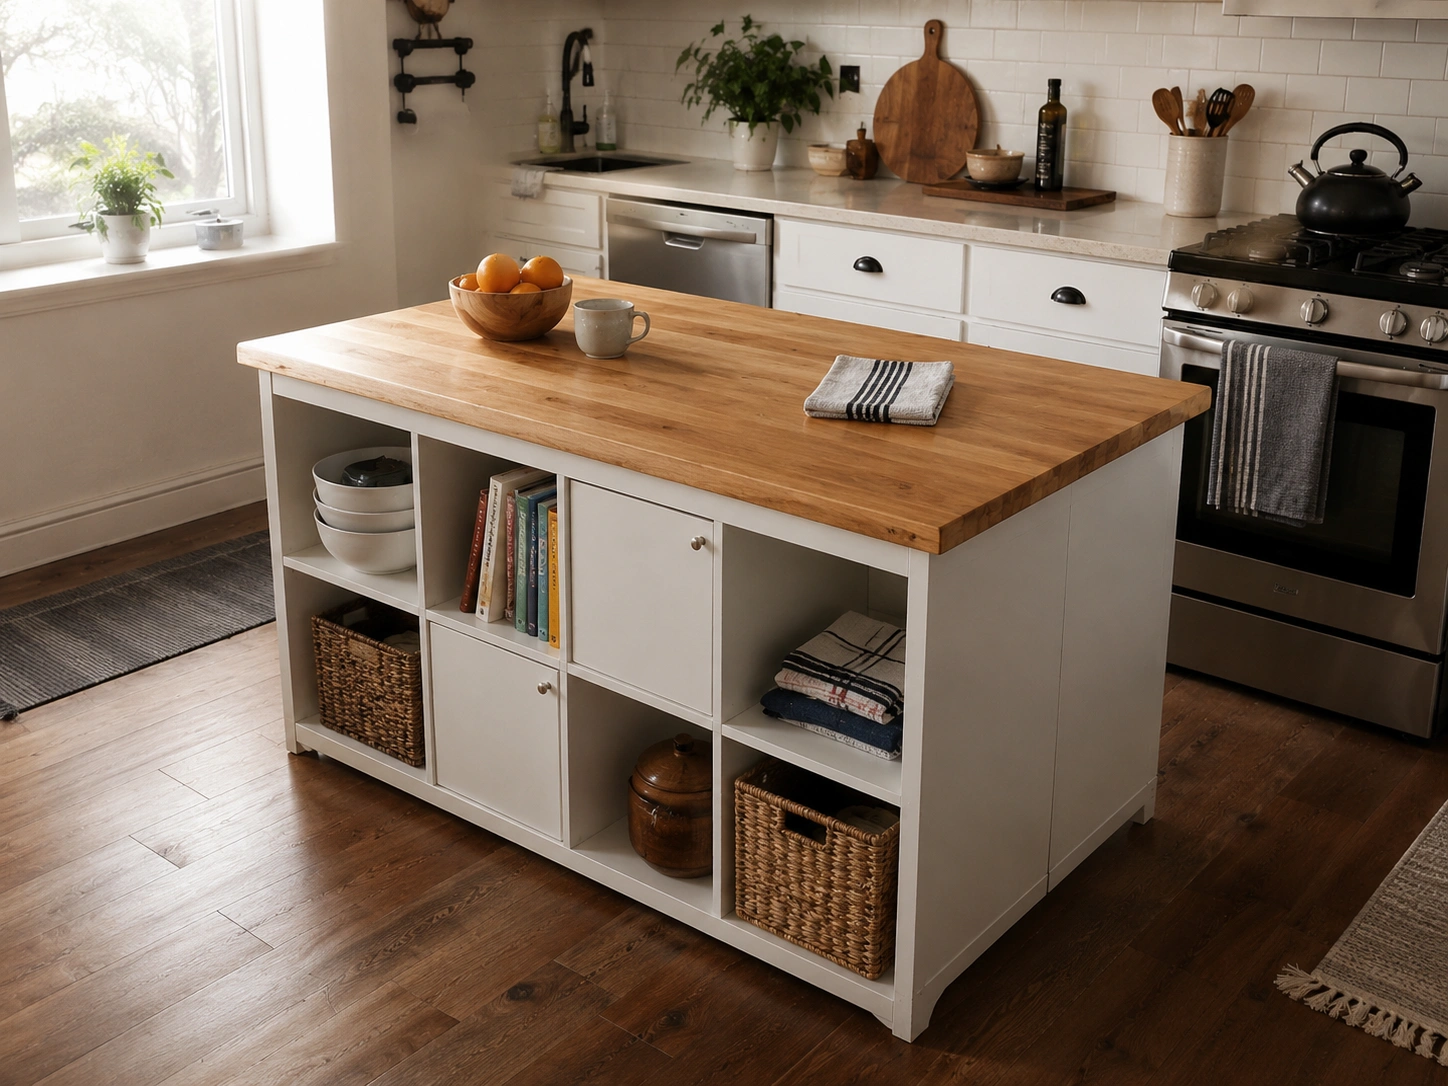
The IKEA KALLAX unit, configured with doors and a custom butcher block top cut to fit, is the most widely documented budget island build online — total cost from $300 to $600 depending on material and paint. The STENSTORP is IKEA’s purpose-built version with a lower shelf, a drawer, and a built-in butcher block top starting under $500. Both are realistic solutions for renters, small kitchens, or homeowners who want to test island size and placement before committing to custom millwork.
Quick Answers Before You Start Planning
What’s the minimum kitchen size for an island?
Most kitchens need at least 12 by 10 feet to fit an island with proper aisle clearance. Smaller kitchens can work with an 18-inch-deep narrow island or a rolling option that tucks away.
How deep should a kitchen island be for seating?
A 36- to 40-inch-deep island with a 12- to 15-inch overhang on one side provides enough knee clearance for standard counter-height bar stools without blocking the walking path.
Should I add a sink or a cooktop to my island?
A prep sink reduces friction for households that cook almost every night. A cooktop works better in open-plan kitchens where facing the room while cooking matters. Avoid adding both to an island under 7 feet long.
What countertop material holds up best on a kitchen island?
Engineered quartz handles daily cutting, heat, and food spills without sealing. Butcher block adds warmth but needs periodic oiling. Real marble stains too easily to serve as a practical prep surface.
When does a rolling island make more sense than a built-in?
In kitchens under 150 square feet, in rental units where you can’t modify cabinets, or when you’re uncertain about size and placement and want to test a configuration before investing in custom work.
The Island That Actually Gets Used
The most useful island isn’t the biggest one or the most photographed. It’s the one that fits the specific floor plan, has drawer depths matched to the pots you actually own, and leaves enough aisle clearance that two people can stand in the kitchen without getting in each other’s way.
Start with two non-negotiables: 42 inches of clearance on every side, and one primary function chosen before secondary features are added. Everything else — countertop material, color, hardware finish, pendant style — layers on top of that foundation without much effort or cost.
Choose two or three ideas from this list that match your floor plan and your specific prep frustrations. That’s enough to start a contractor conversation with a clear direction.


No Comment! Be the first one.