


22 Tiny Kitchen Design Ideas You’ll Want to Copy ASAP
Your countertop disappears the second you set down a grocery bag. Sound familiar? If you’re renting a studio or one-bedroom with a kitchen under 100 square feet, you’ve probably already...

Your countertop disappears the second you set down a grocery bag. Sound familiar? If you’re renting a studio or one-bedroom with a kitchen under 100 square feet, you’ve probably already tried the obvious fixes — a rolling cart, a hanging pot rack, maybe a coat of white paint. And you’ve probably noticed they didn’t fix much.
That’s not a personal failure. It’s a mismatch. Most small-kitchen advice gets written for kitchens in general, not for your specific layout. A trick that works beautifully in a one-wall studio kitchen can be useless, or actively in the way, in a narrow galley.
This guide sorts 22 real, renter-safe ideas by the layout they actually fit: galley, one-wall, and L-shaped.
This works best for renters and small-space owners with galley, one-wall, or L-shaped kitchens under 100 square feet. It won’t help much if your kitchen has an island or U-shape — that’s a different storage problem, and a different article.
Tiny kitchen design ideas are layout-specific storage, lighting, and styling strategies that make a kitchen under 100 square feet function well without a renovation. They prioritize vertical storage, slim-depth appliances, and removable fixtures — solutions that work whether you own the space or you’re renting it for a year.
Which Tiny Kitchen Layout Do You Actually Have?
Most tiny kitchens fall into three layouts: galley, one-wall, and L-shaped, with apartment kitchens averaging 70 to 100 square feet. A 2024 Fixr.com survey of 71 design experts found 83% rank storage as the top kitchen priority — meaning most renters are short on exactly what they need most.
To pick the right ideas for your kitchen:
- Measure your walkway width first.
- Identify your layout — galley, one-wall, or L-shaped.
- Match ideas to that layout only.
- Prioritize vertical storage over floor storage.
- Test renter-safe options before anything permanent.
Galley vs. one-wall kitchens: galley layouts work better when you want separate prep and cooking zones, since two walls double your usable counter and storage. One-wall layouts work better in true studios with one continuous run. The key difference is walkway width versus total wall length — galley needs at least 42 inches of clearance to function.
Galley Kitchen Ideas Two Walls, One Narrow Walkway
Galley kitchens work best when both walls stay clear below counter height. According to NKBA design guidelines, a working galley needs at least 42 inches of walkway clearance — which rules out floor-standing carts, pot racks, and furniture pieces that several popular small-kitchen guides still recommend.
Look — if you’re working with a galley under 70 square feet, skip island carts and freestanding furniture entirely. They will not fit, no matter how many times Pinterest tells you otherwise.
1. Add a No-Drill Tension Shelf Above the Sink
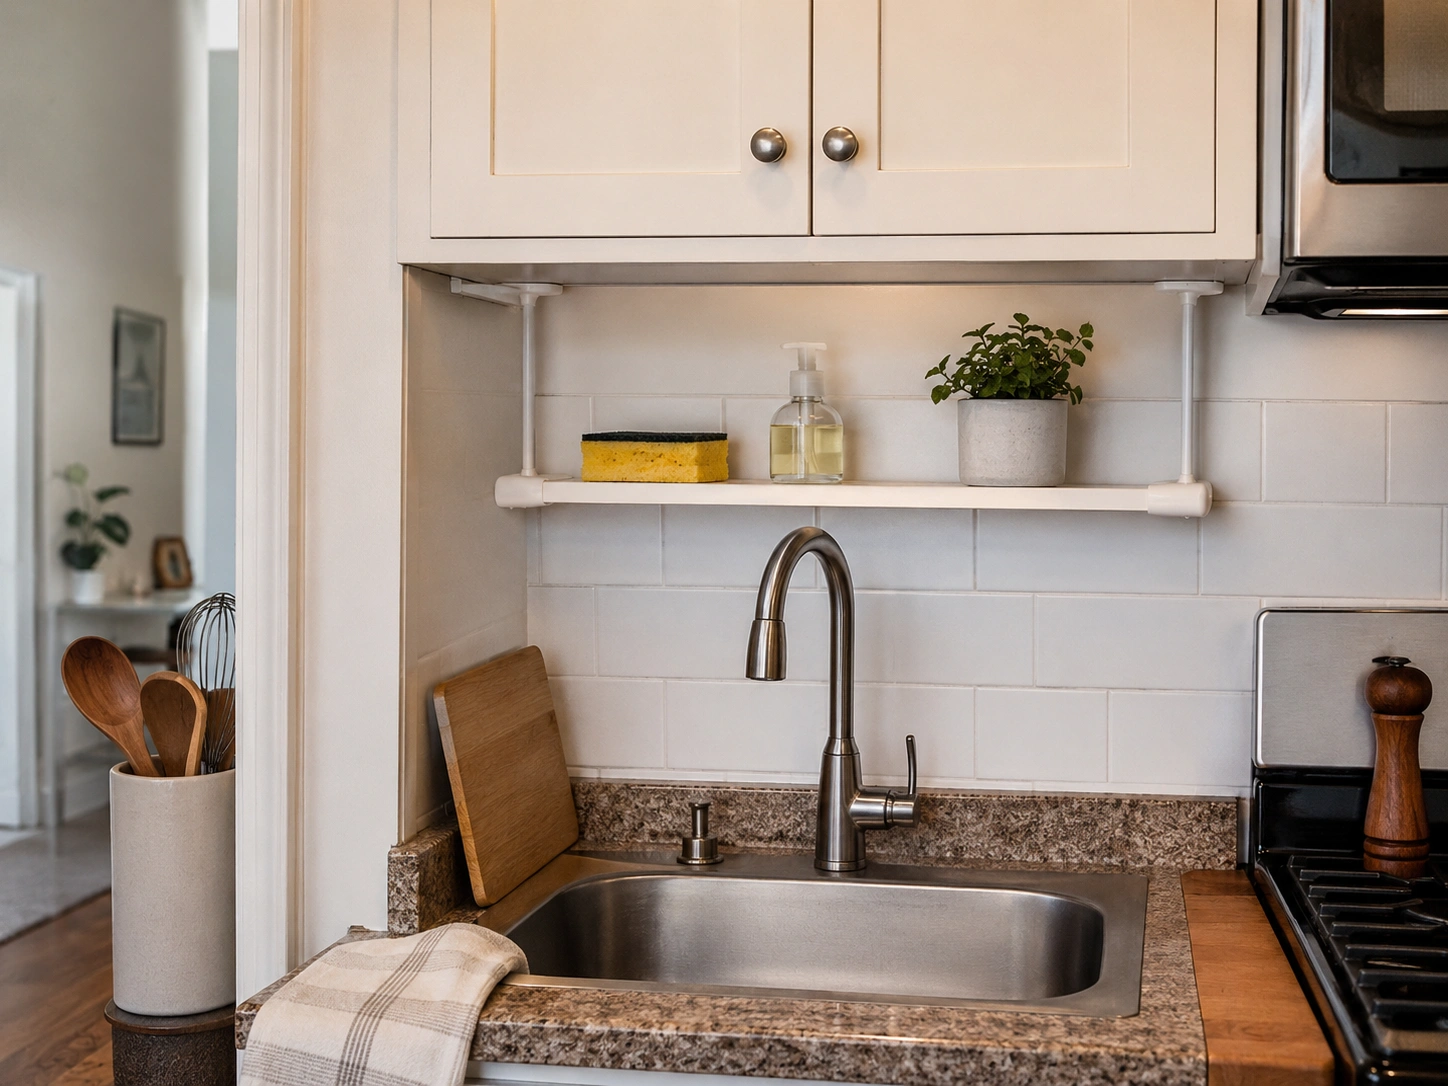
A spring-tension shelf wedges between the upper cabinet and the backsplash without a single screw, giving you a shelf for sponges, soap, and a small plant. It claims dead vertical space that’s otherwise empty air. Stick to lightweight items only — these shelves aren’t rated for stacks of dishes.
2. Mount a Magnetic Knife Strip and Spice Tin Rail
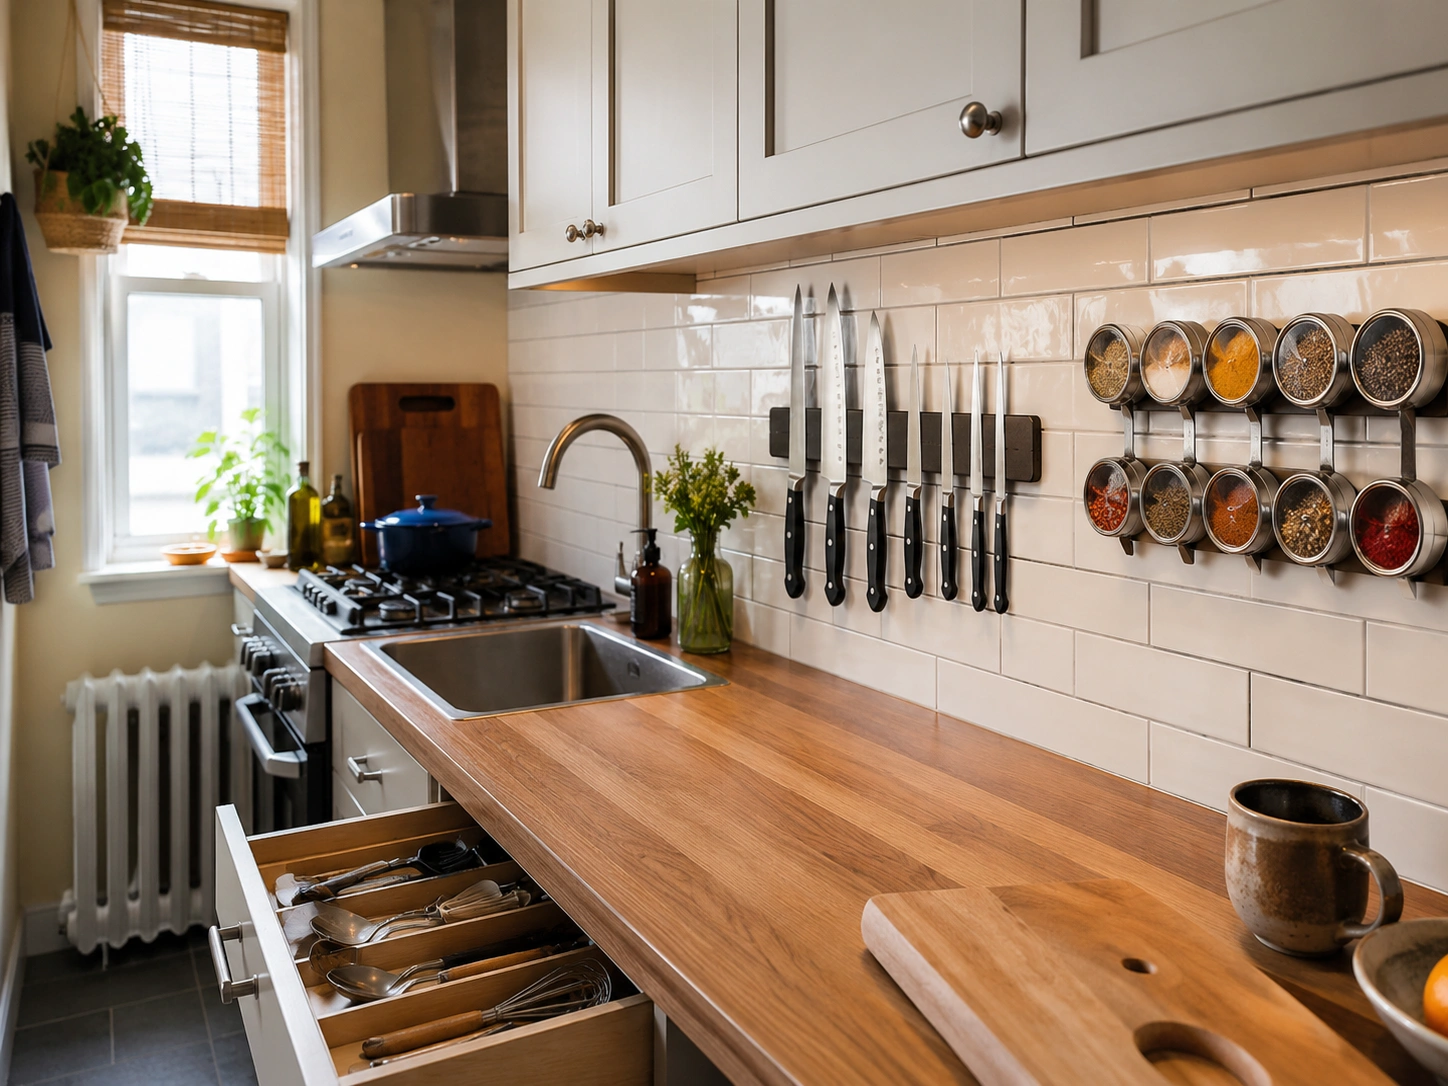
Skip the knife block and spice drawer. A magnetic strip on one galley wall holds knives flat against the tile, and a slim rail beside it holds magnetic spice tins upright. It frees an entire drawer for utensils instead. Use tins with flat magnetic backs — round spice jars tend to slide off.
3. Install a Slim Pull-Out Pantry Beside the Fridge
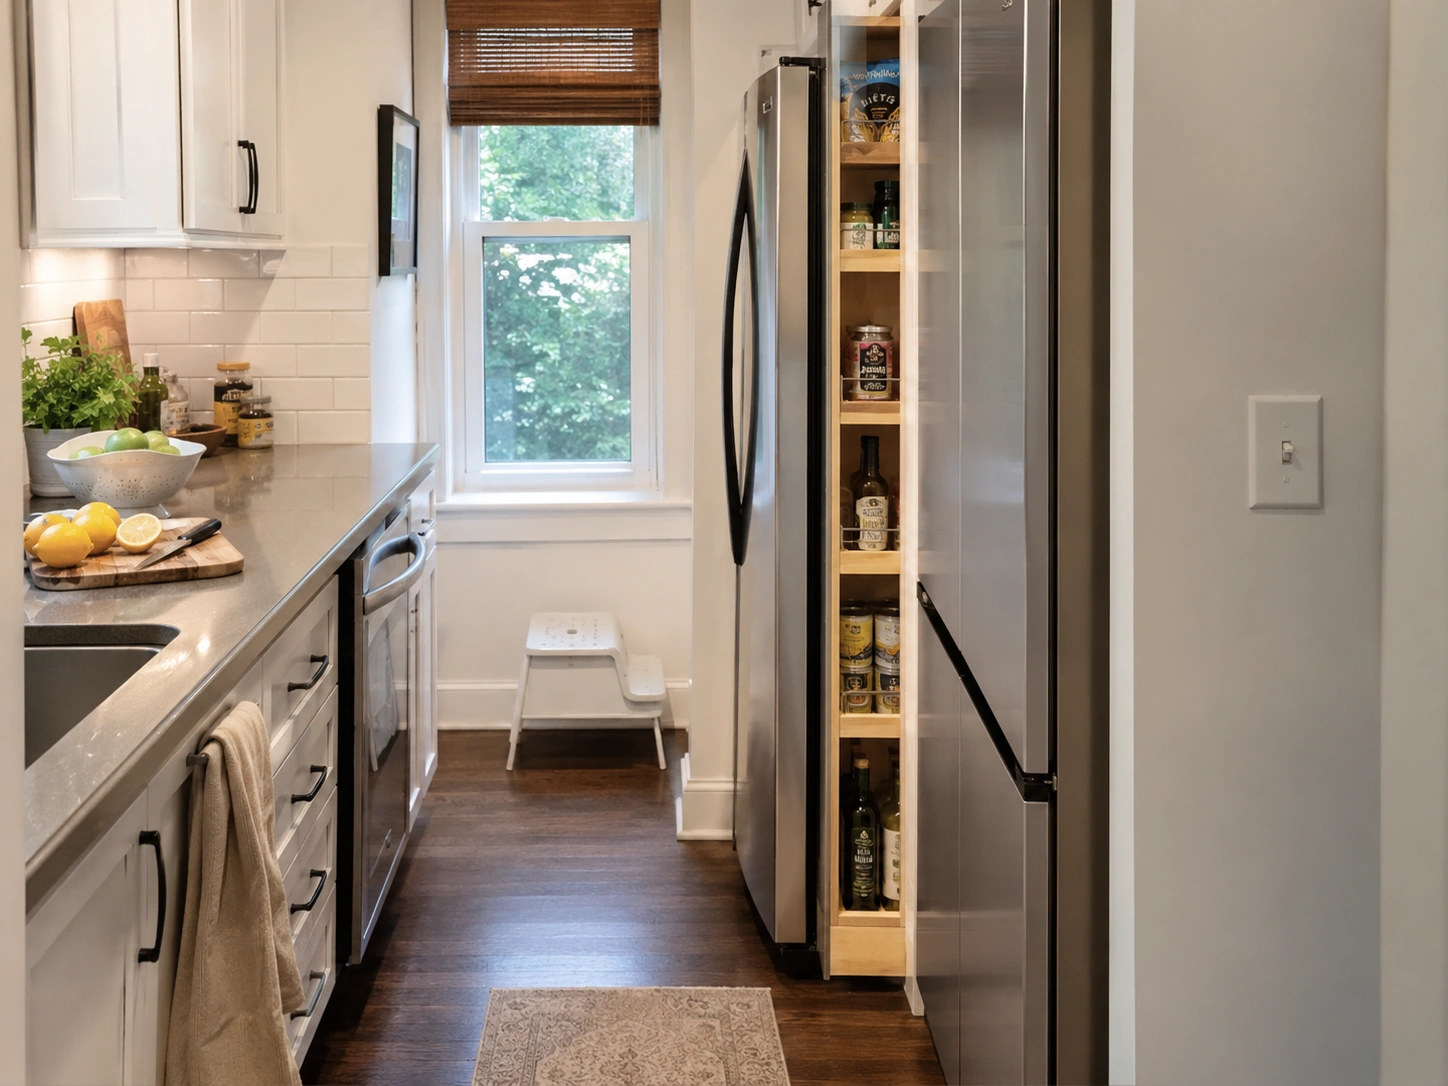
Most galley kitchens have a 6- to 9-inch gap beside the fridge that goes completely unused. A narrow pull-out pantry insert fits there and holds oils, cans, and snack bags on shelves you can see at a glance. It’s one of the few “extra cabinet” upgrades that doesn’t touch existing cabinetry.
4. Swap the Hanging Pot Rack for a Wall-Mounted Pegboard
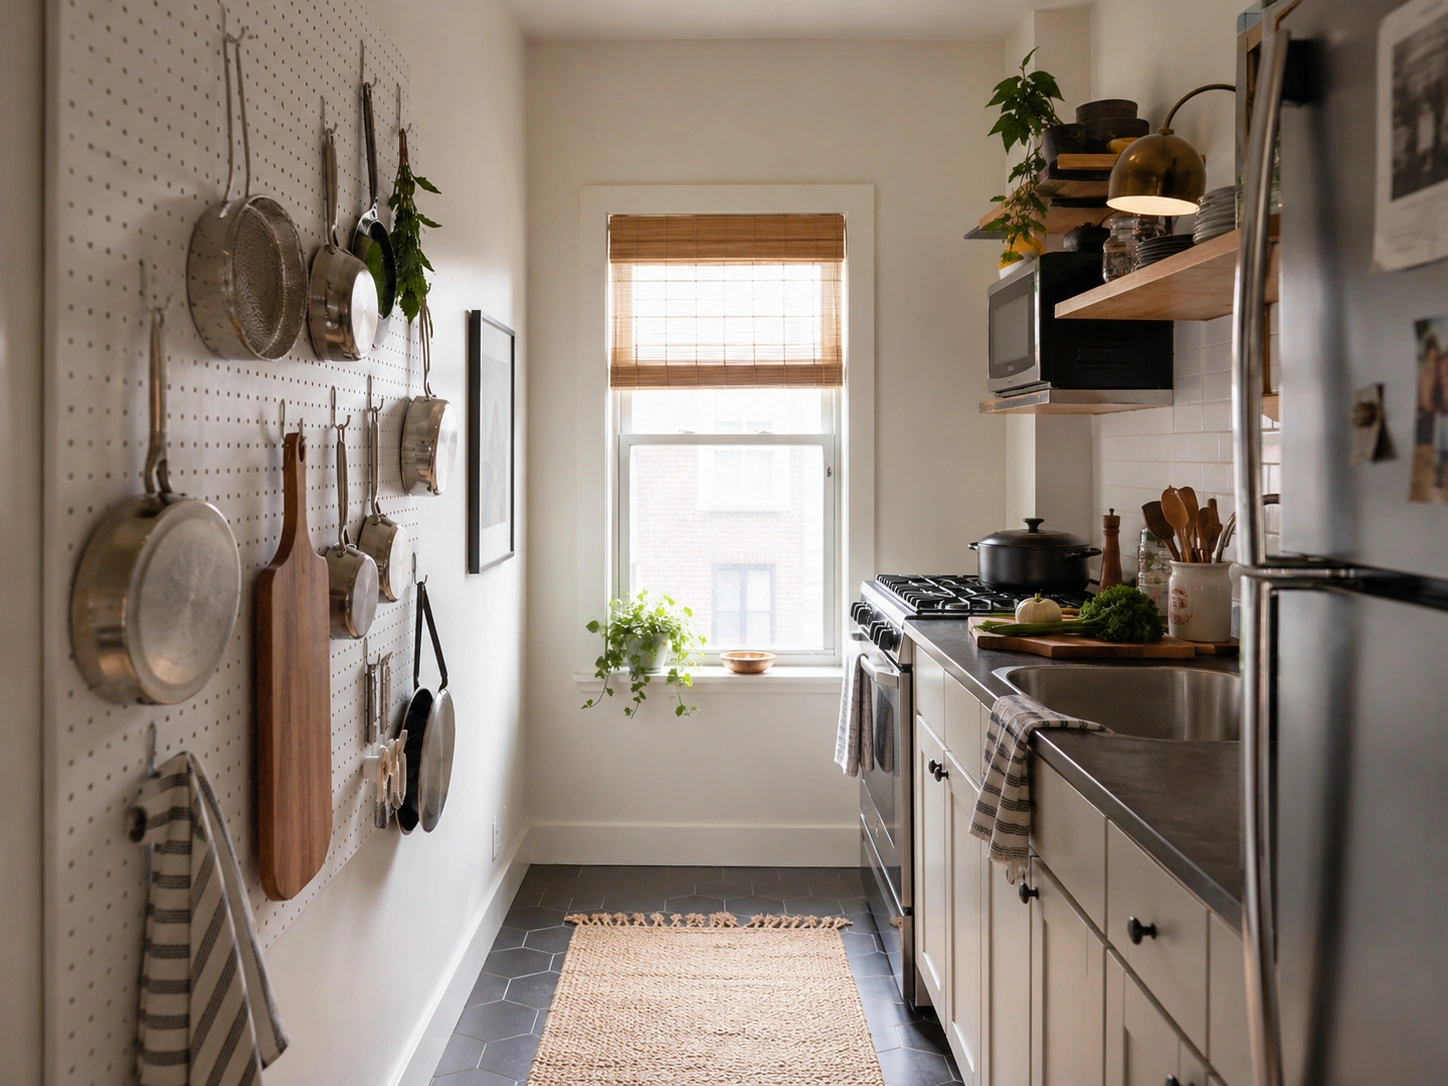
A ceiling pot rack in a galley makes a low ceiling feel lower — you’ve probably felt this already. A pegboard mounted on one wall holds the same pots and pans at eye level instead, and you can rearrange the hooks as your cookware changes. Paint the pegboard to match your wall and it nearly disappears.
5. Run LED Strip Lighting Under the Upper Cabinets
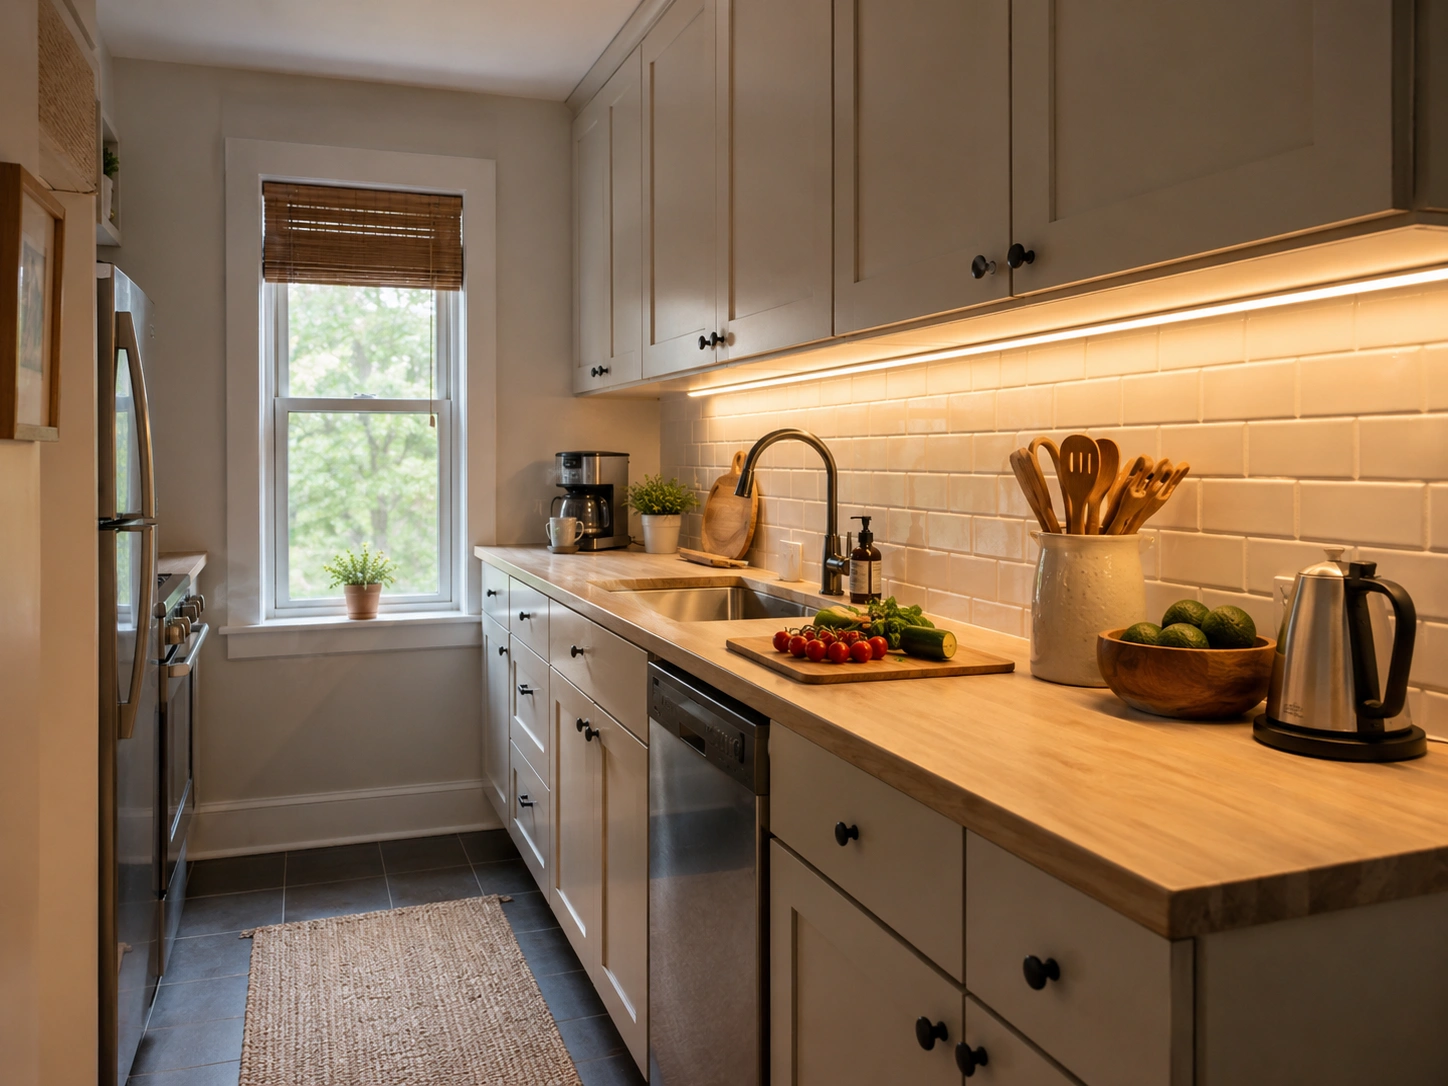
Stick-on LED strips tuck under the upper cabinets and light the counter directly below, which matters in galleys where the walkway blocks overhead light from reaching the work surface. Choose warm white (2700K–3000K) — cool white reads as clinical in a small space.
6. Add a Fold-Down Shelf at the Dead End of the Run
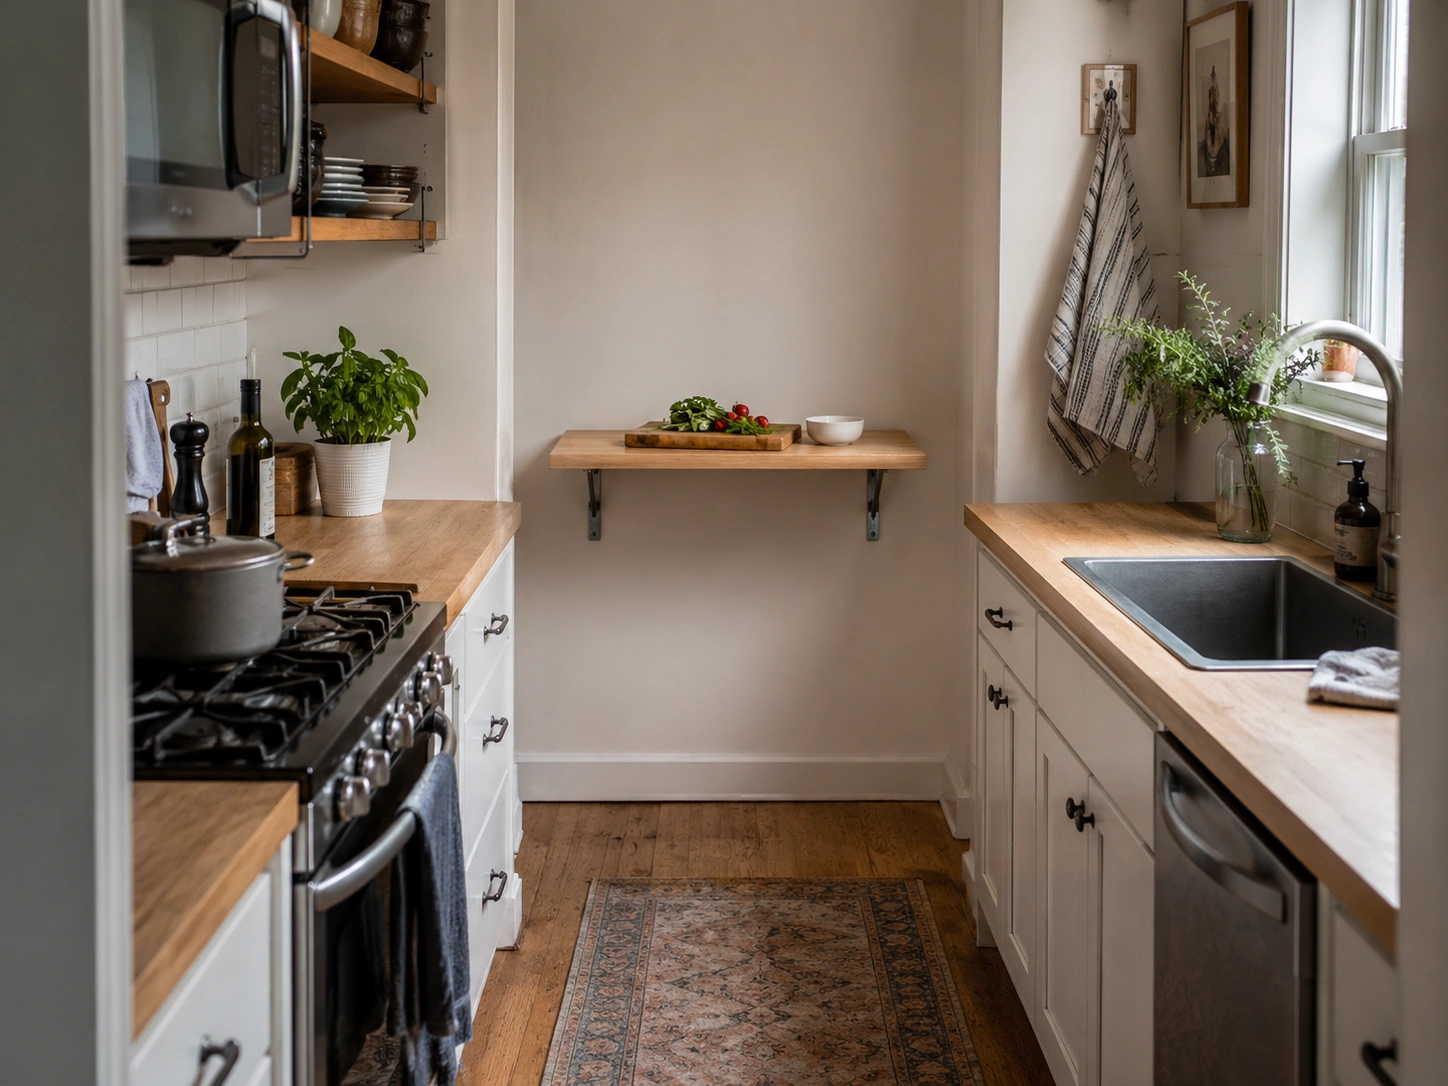
If your galley ends in a blank wall, a hinged, fold-down shelf gives you several extra inches of prep space exactly when you need it, then folds flat against the wall the rest of the time. It’s especially useful for kitchens too narrow for a permanent end table.
7. Use a Glossy or Mirrored Backsplash on One Wall
A glossy tile or mirrored backsplash on just one galley wall bounces light down the corridor and visually doubles the perceived width — the same trick yacht designers use in cramped galleys. Stick to one wall only; mirroring both sides creates a disorienting tunnel effect.
One-Wall Kitchen Ideas Single Run, Built for Studios
Here’s the thing: one-wall kitchens have no second wall to fall back on, so every fix has to either save floor space or add storage without adding bulk. These seven ideas do both.
8. Replace a Full-Size Fridge With a Slim-Depth Compact Model
Summit Appliance makes refrigerators and ranges built specifically for sub-8-foot kitchen footprints, with depths several inches shallower than standard units. Swapping in one reclaims floor space along the entire run, not just at the fridge. This is the one splurge idea on this list — expect to spend more than a standard-size unit.
9. Install a Wall-Mounted Rail System With S-Hooks

IKEA’s SUNNERSTA rail system mounts directly to the wall and holds S-hooks for pots, strainers, and oven mitts, all within arm’s reach of the stove. It keeps everyday tools off the counter without committing to permanent shelving. Group items by how often you use them — daily tools go closest to the stove.
10. Use an Over-the-Sink Cutting Board to Double as Counter Space
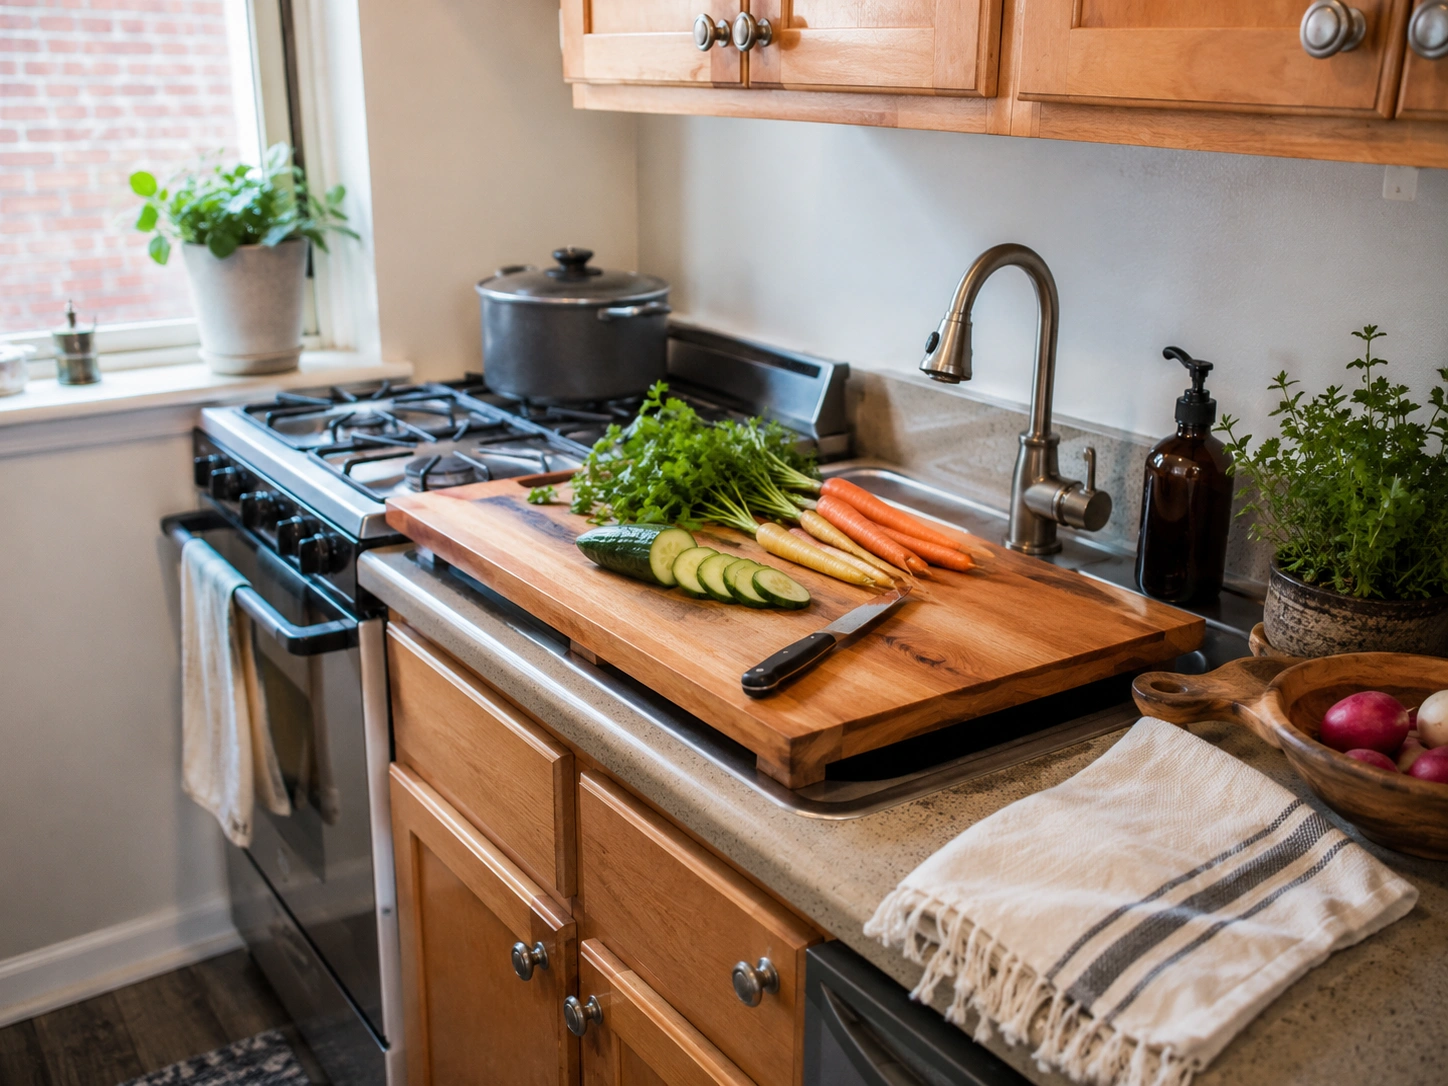
A cutting board sized to rest on the sink rim turns dead space into temporary prep area the second you need it, then lifts away when you need the sink back. It solves the exact problem of having nowhere to prep without moving five things first.
11. Add Stackable Pull-Out Bins Inside Lower Cabinets
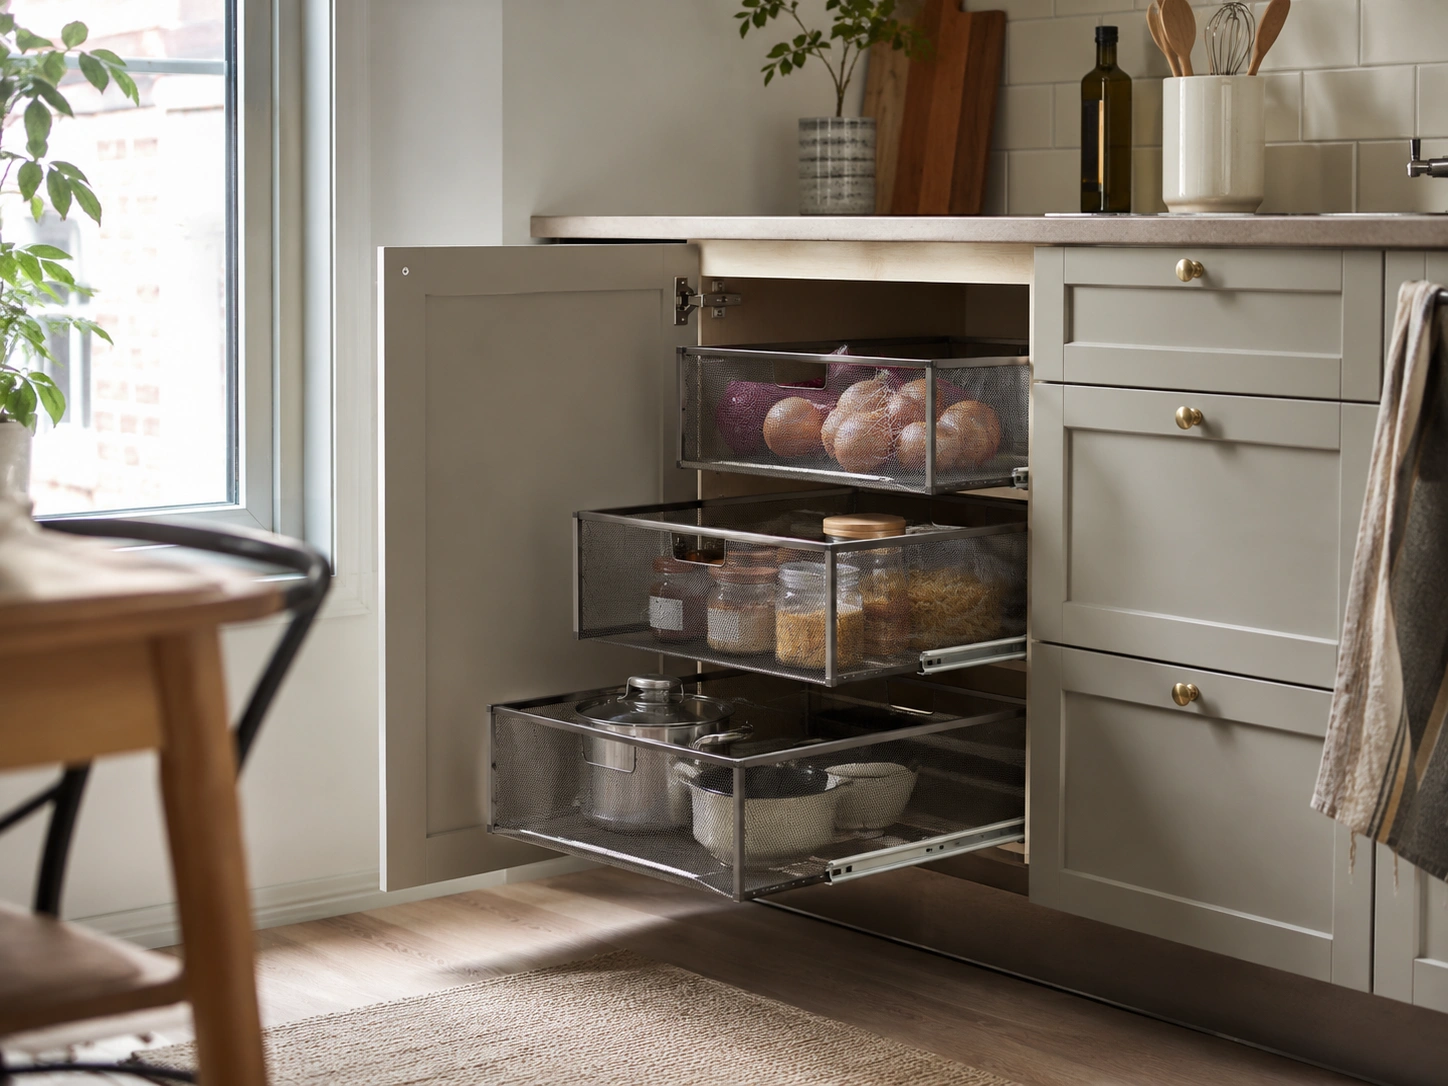
The Container Store’s elfa system includes modular pull-out bins that stack inside a single lower cabinet, turning one deep, hard-to-reach space into two or three accessible layers. Most people assume more shelves mean more storage. The data from professional organizers says otherwise: depth, not height, is what wastes space in a one-wall kitchen.
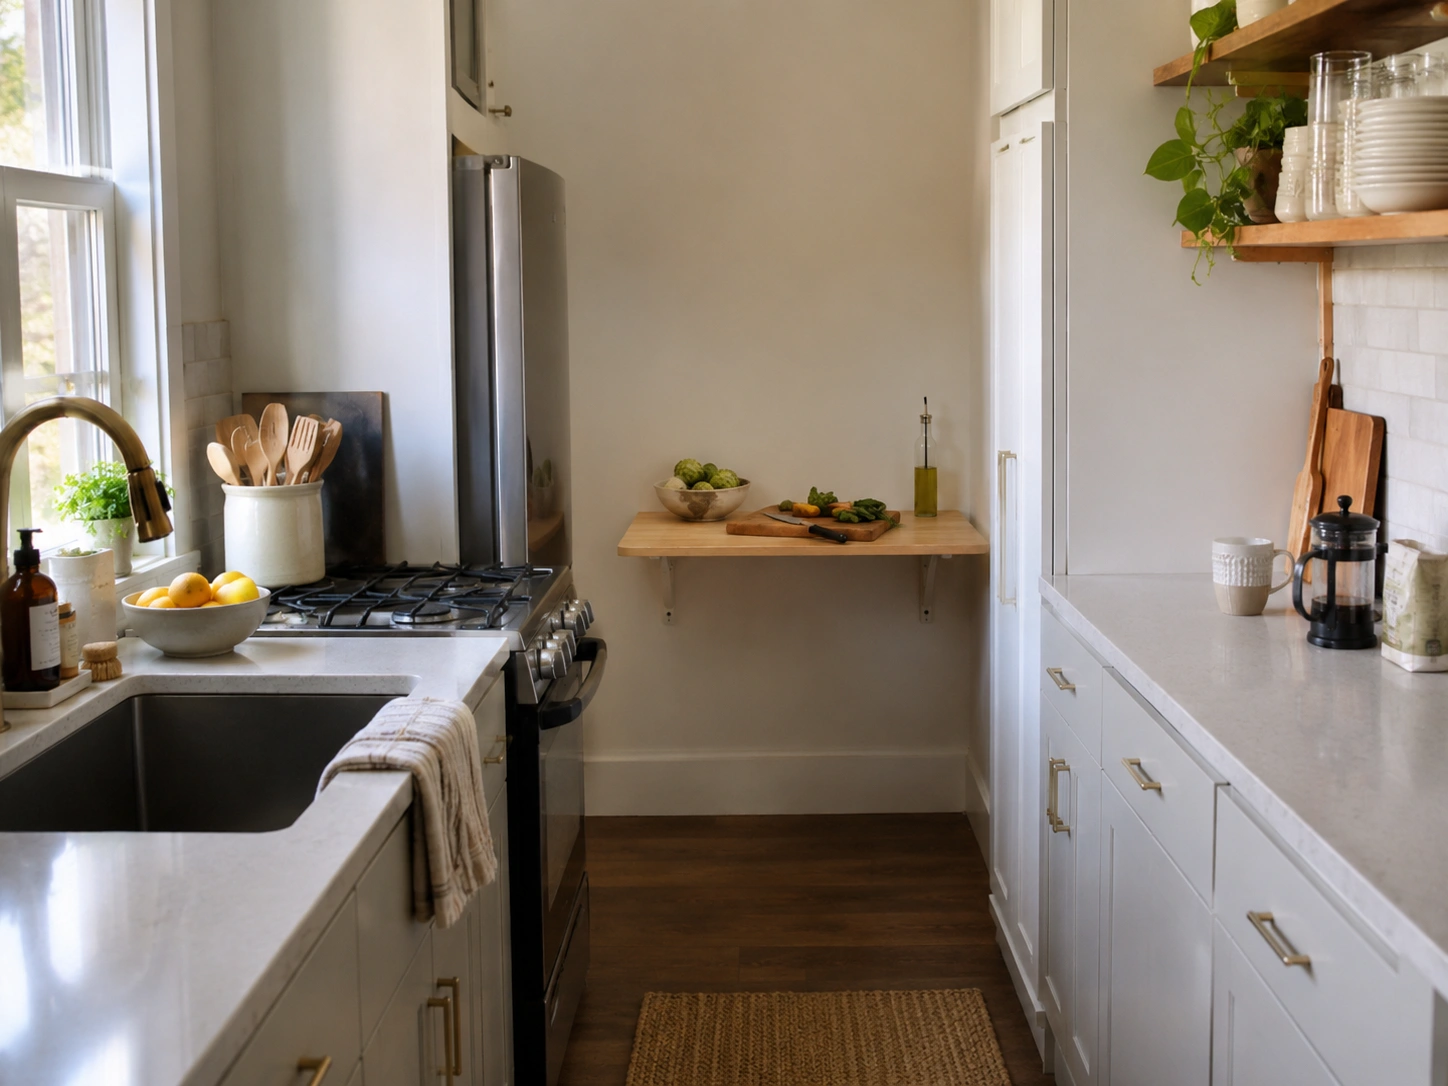
12. Mount a Fold-Out Shelf as a Second Counter
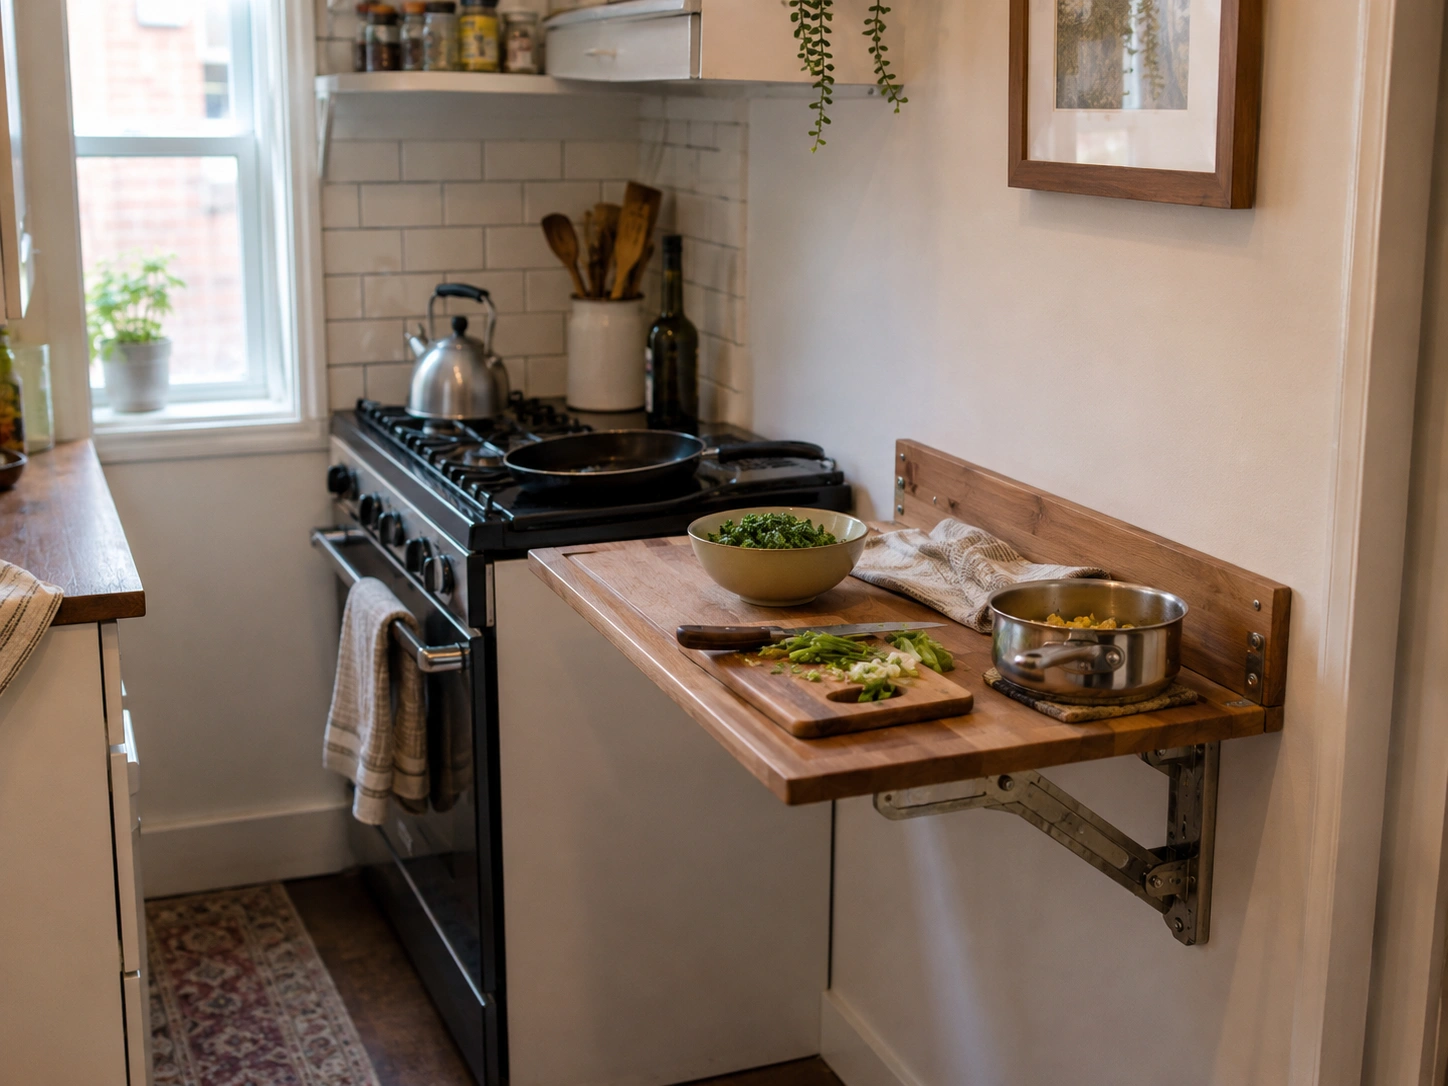
A hinged, wall-mounted shelf installed beside the stove drops down for extra landing space during meal prep and folds flat against the wall when you’re done. Look for one rated to hold at least 15 pounds if you plan to set hot pans on it.
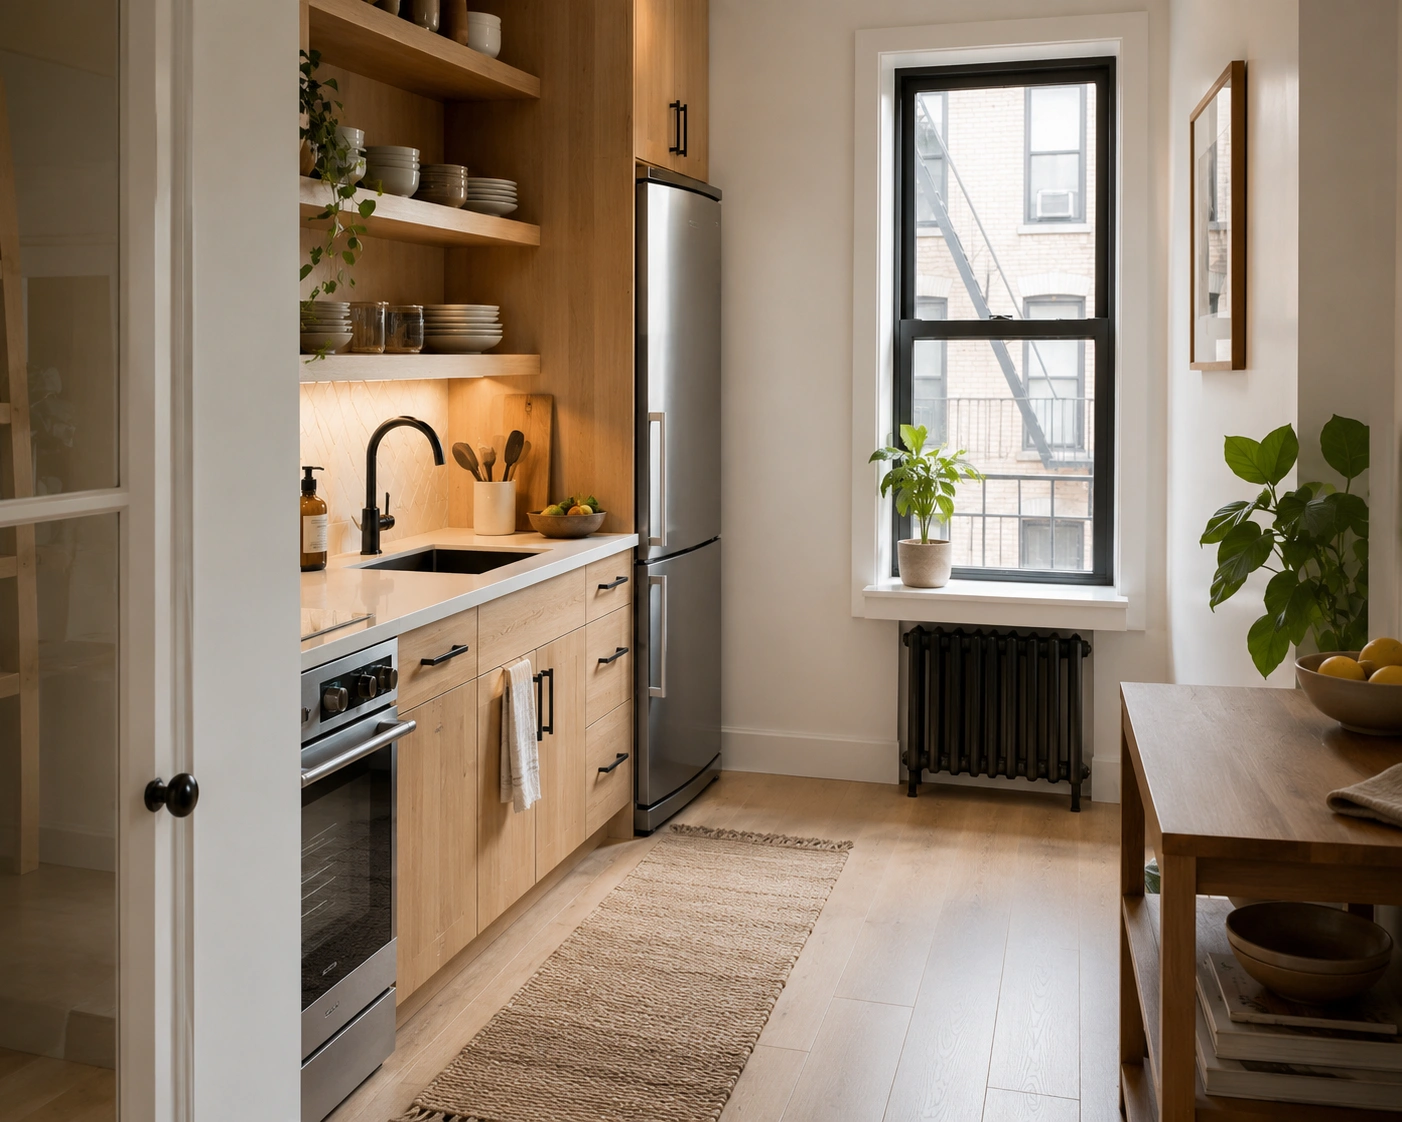
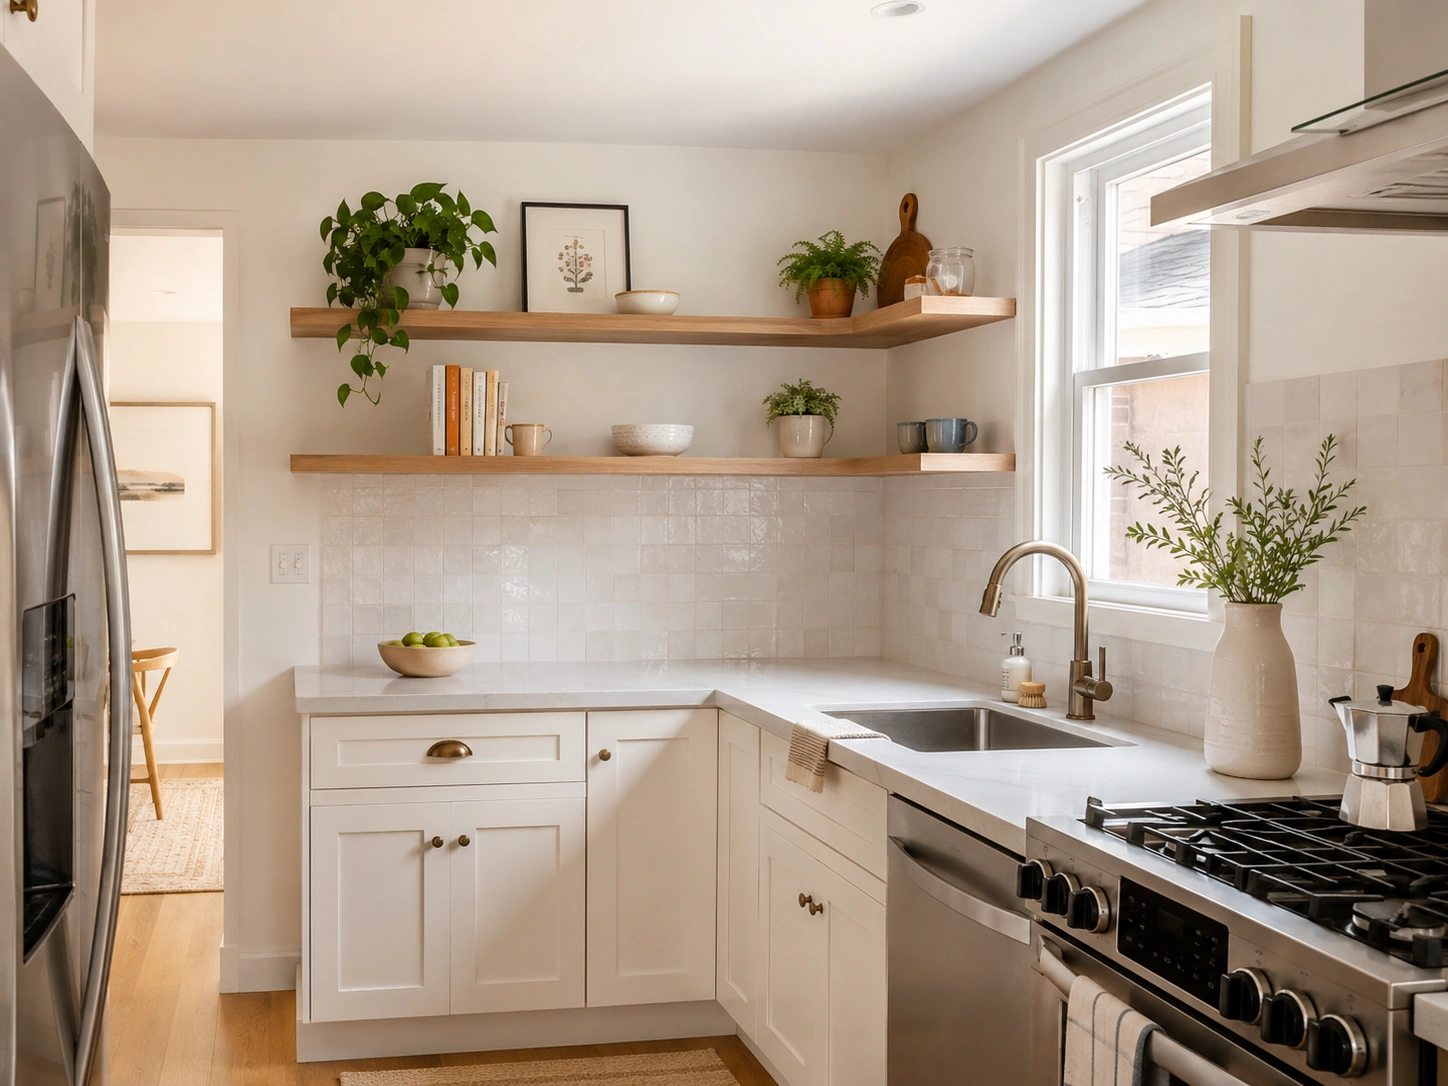
13. Use Floating Shelves Instead of More Upper Cabinets — Styled Sparingly
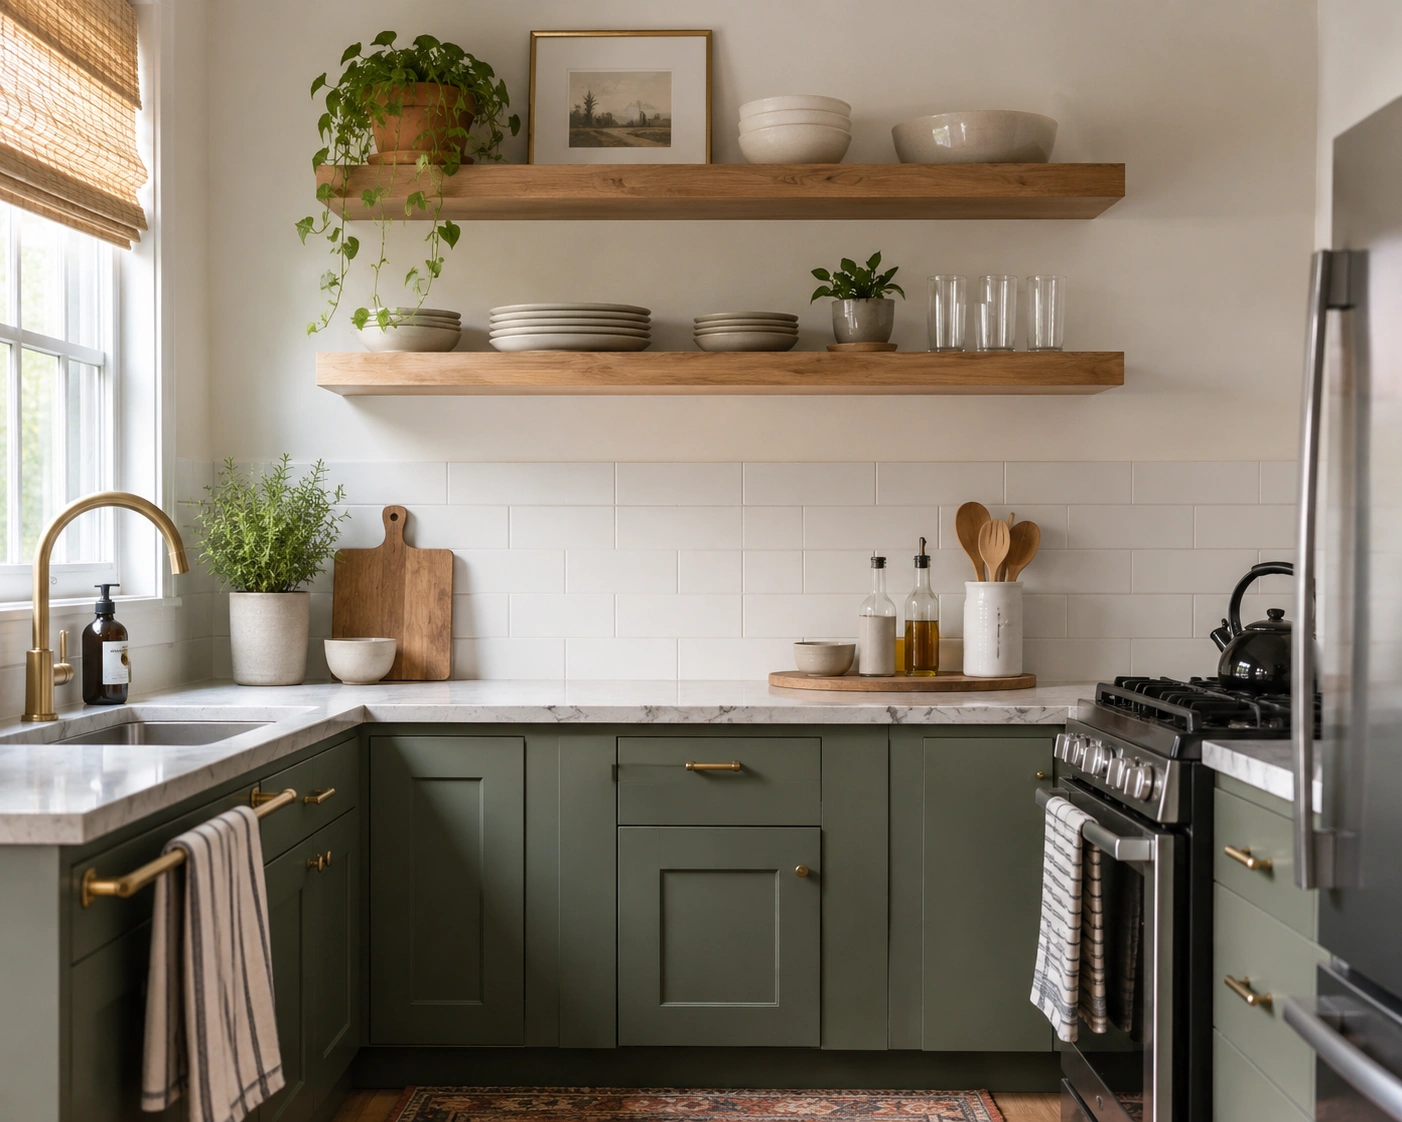
Some experts argue removing upper cabinets entirely opens a small kitchen up visually. That’s valid if you own the unit and plan to stay for years. But if you’re renting, swap in floating shelves above part of the run instead — you keep storage and the visual lightness. Style with no more than 8 to 10 items, repeated in color, or it reads as clutter.
14. Stack a Narrow Shelving Unit at the End of the Run as a Pantry Tower
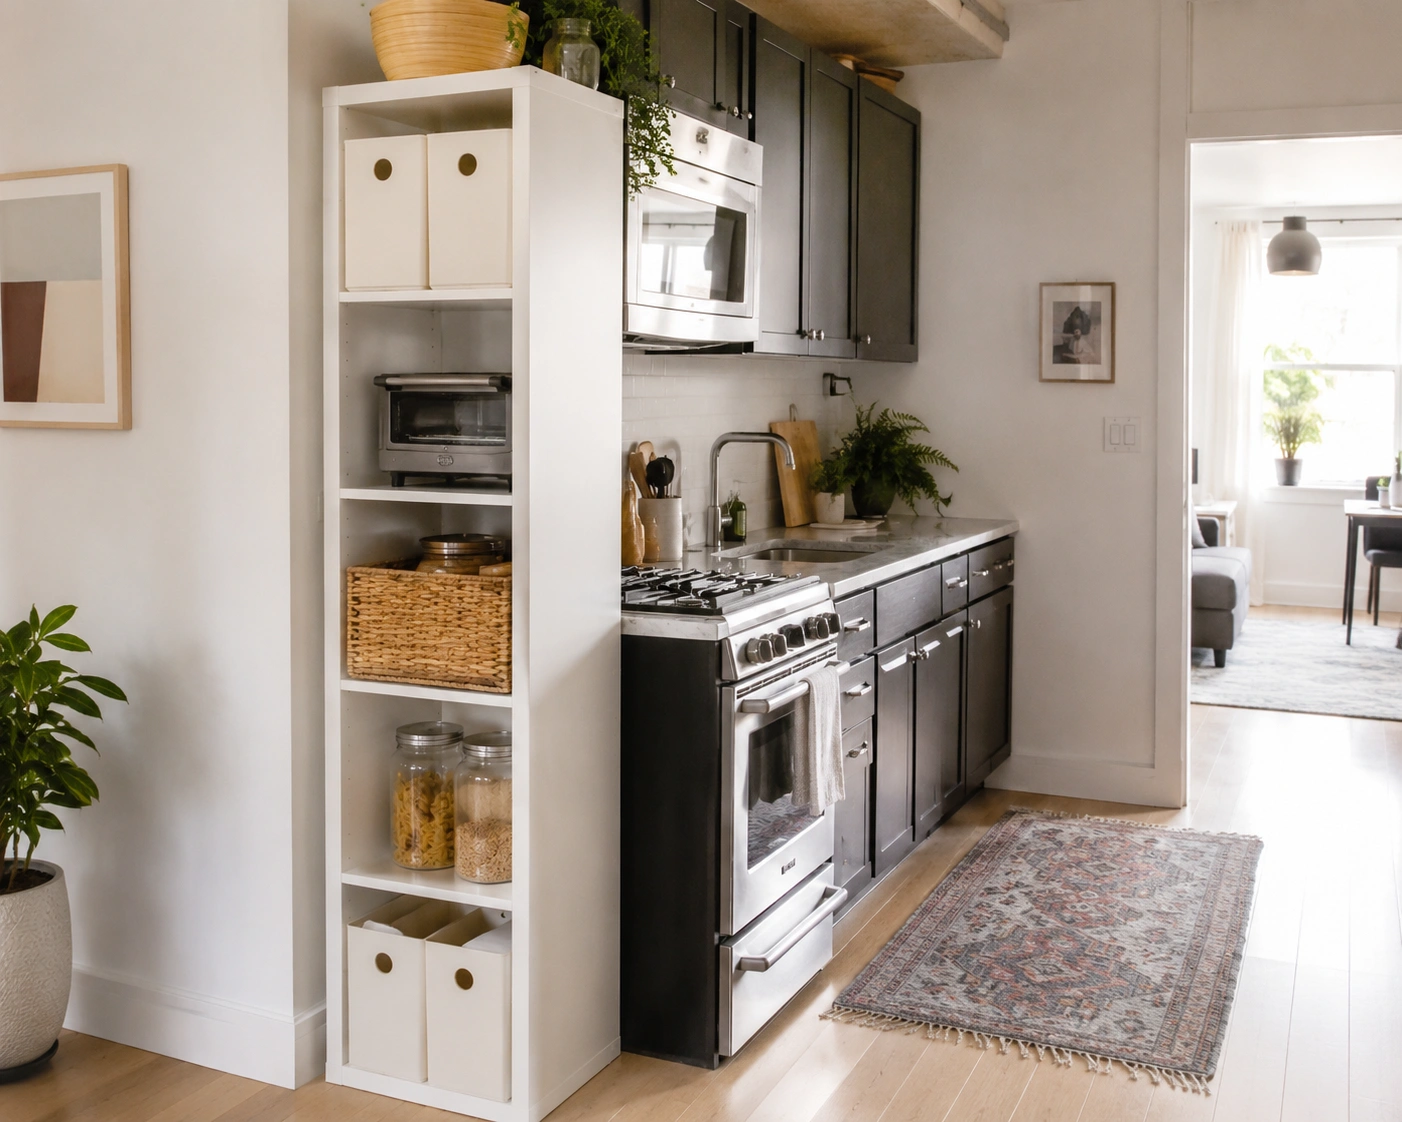
IKEA’s KALLAX unit, used vertically, fits neatly at the end of a one-wall run and holds bins, small appliances, or canned goods that don’t fit in the kitchen proper. Face it so the cubbies run vertically — horizontal cubes tend to look like a bookshelf that wandered into the kitchen.
L-Shaped Kitchen Ideas Corner Layouts With Room to Breathe
L-shaped kitchens are the easiest of the three to live with. Or maybe I should say it this way: they’re the easiest once you solve the blind corner, which is where most of the wasted space hides.
15. Install a Lazy Susan or Pie-Cut Organizer in the Blind Corner
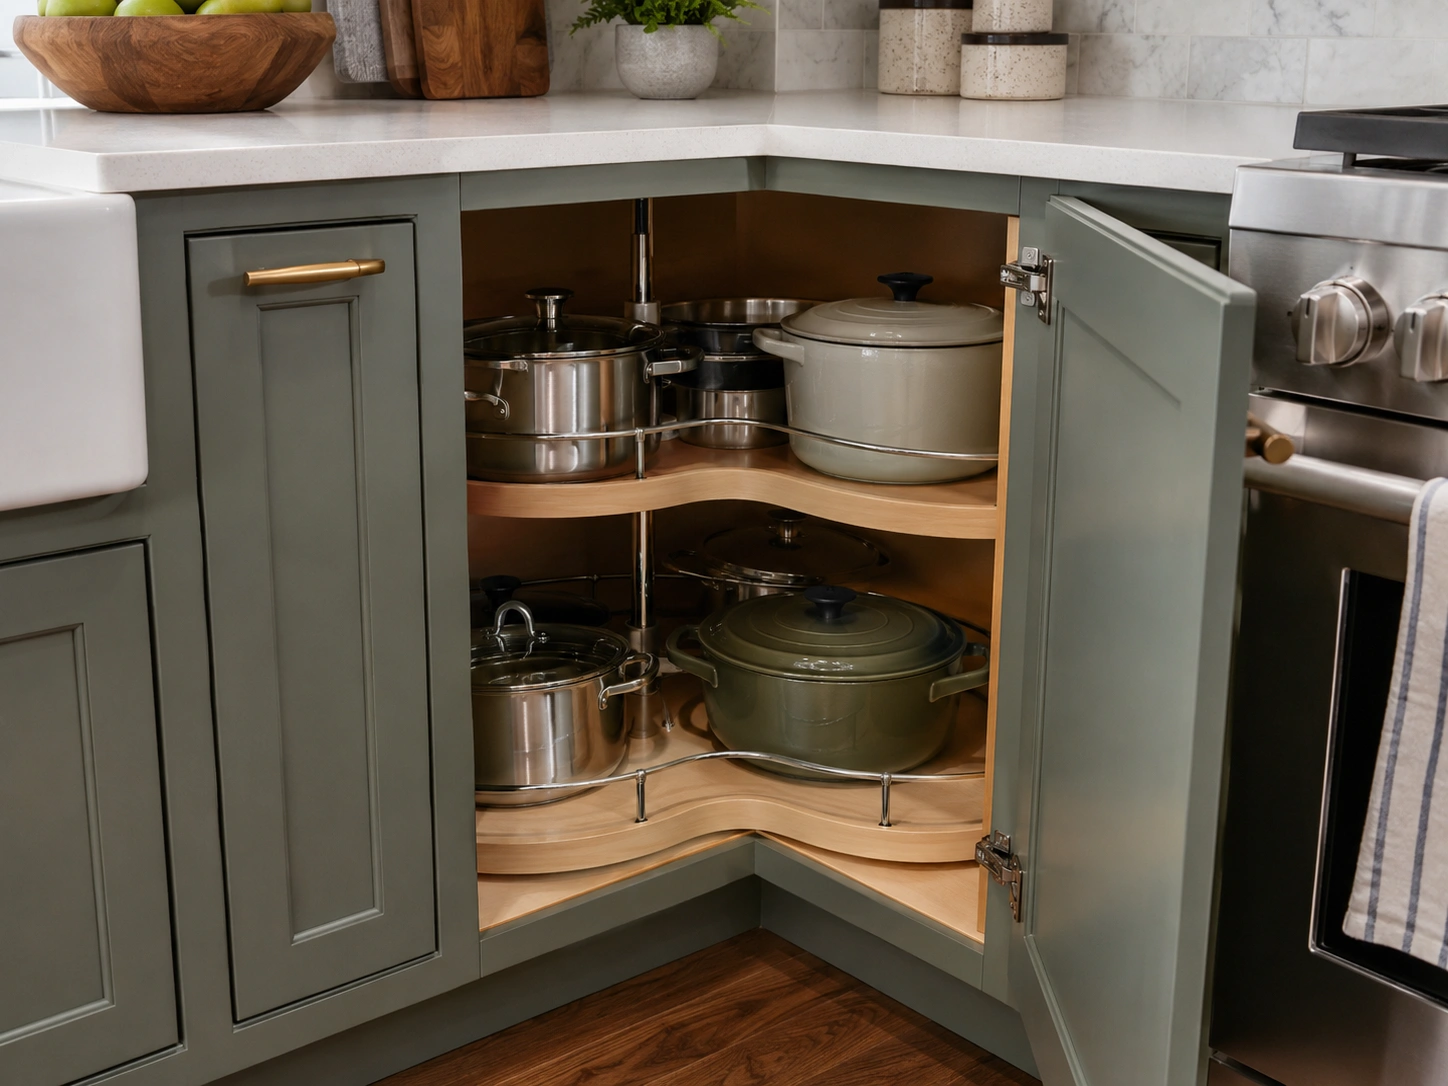
The inside corner of an L-shaped cabinet run is notoriously hard to reach without a rotating tray. A pie-cut lazy Susan turns that dead corner into usable, visible storage for pots and bulk items. Measure your cabinet opening before buying — pie-cut inserts come in several diameters and don’t universally fit.
16. Add a Small Drop-Leaf Counter Extension at the Inside Corner
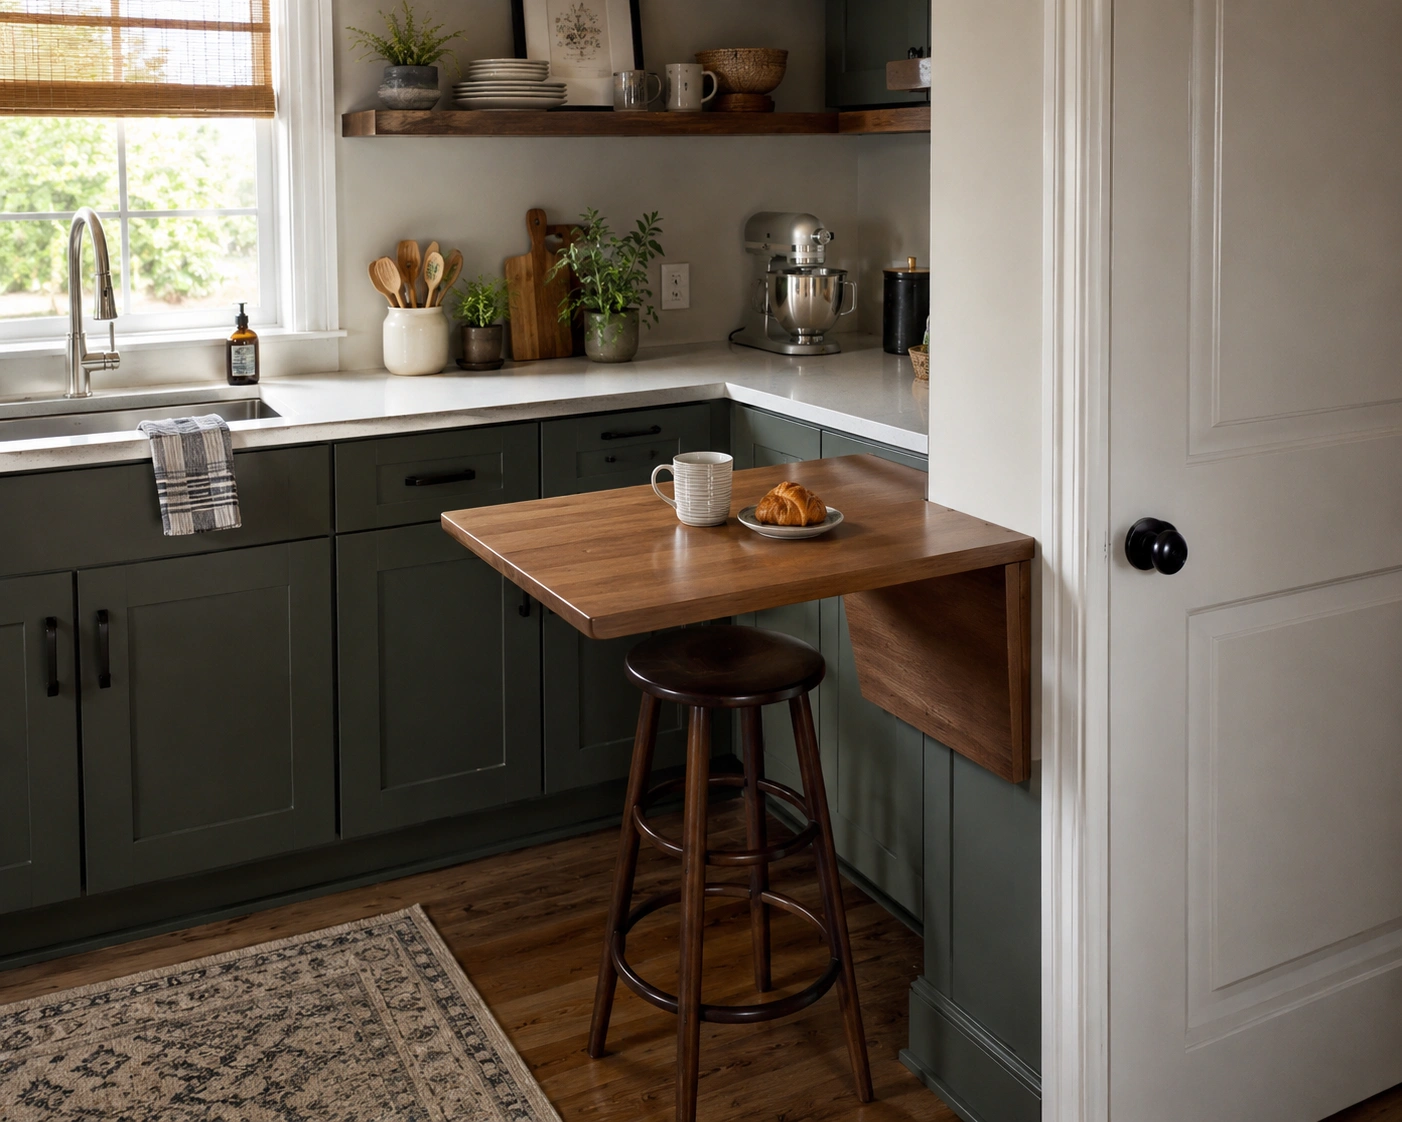
A hinged drop-leaf surface mounted at the inside corner of the L gives you a few extra square feet of standing counter, or even casual bar seating, without permanently extending the cabinetry. Fold it down and it’s flush against the cabinet face — no permanent footprint.
17. Install a Vertical Pull-Out Rack Beside the Range
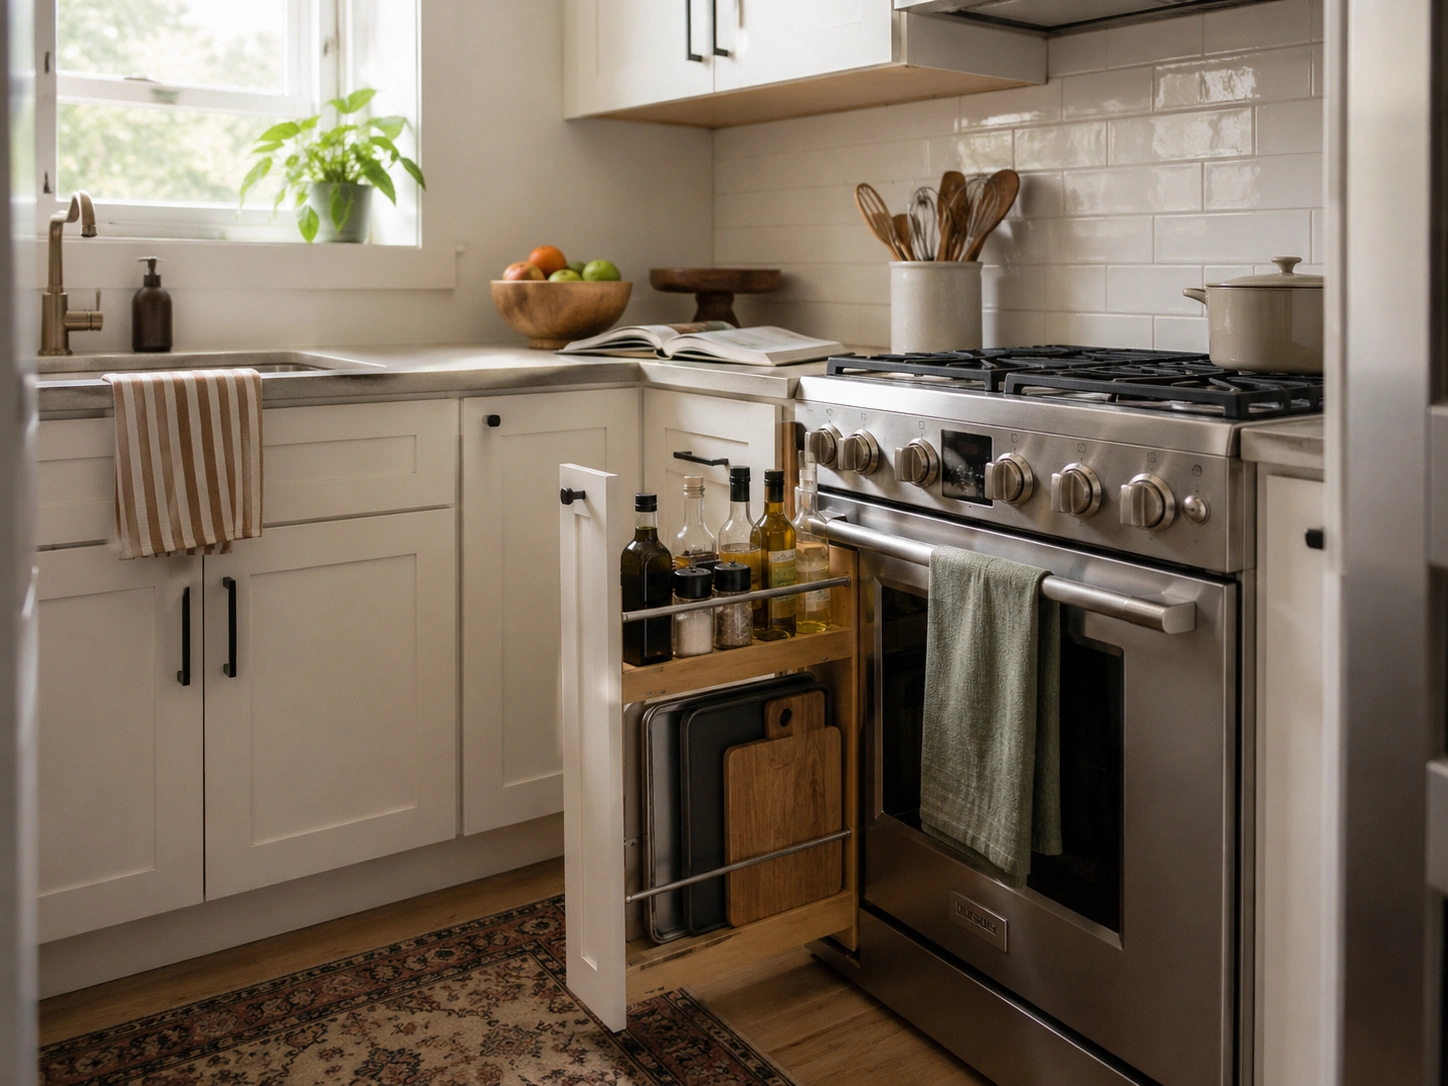
The narrow gap that often sits beside the range in an L-shaped kitchen fits a slim vertical pull-out rack for oils, cutting boards, and baking sheets stored on edge. It keeps flat items upright and visible instead of stacked and forgotten.
18. Use the Corner Under-Sink Cabinet for Hanging Cleaning Storage
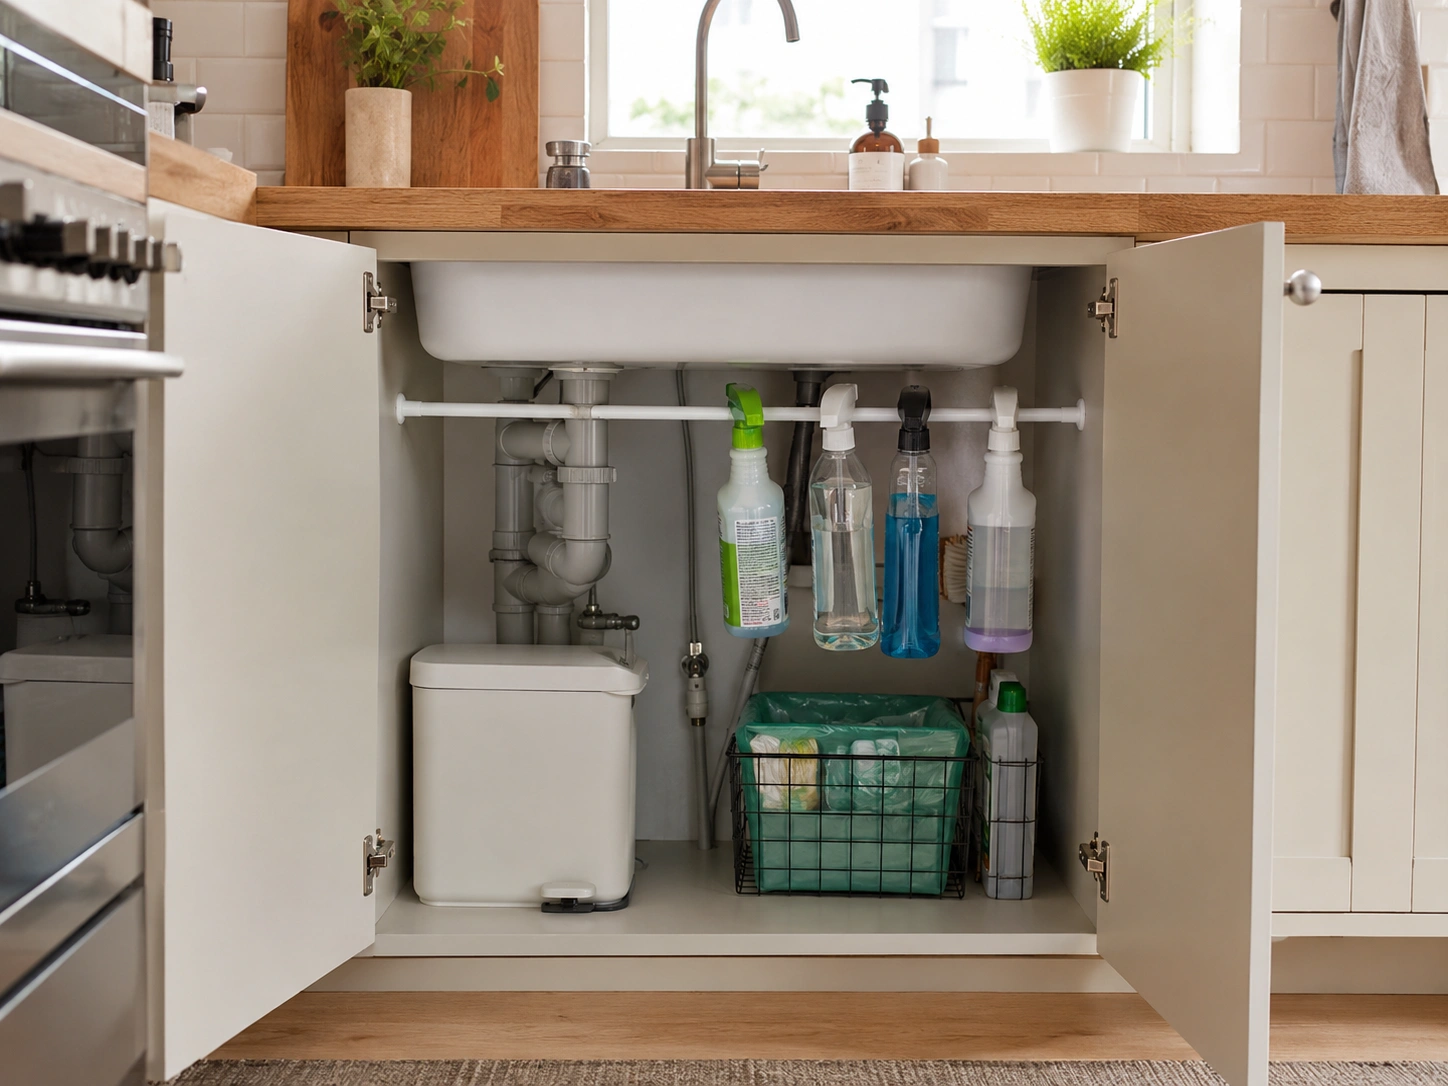
A tension rod installed inside the under-sink cabinet, just below the doors, lets you hang spray bottles by their handles instead of standing them on the cabinet floor. It clears the cabinet floor for trash bins or recycling bags.
19. Bridge the Corner With Open Shelving for Display, Not Storage
Open shelving installed across the inside corner connects the two runs of an L-shaped kitchen visually, which matters more here than in a galley because the eye naturally jumps the gap at the corner. I’ve seen conflicting advice on open shelving — some designers swear by it, others call it visible clutter. My read: it works at a corner specifically because it’s doing a structural job, not just a decorative one.
Ideas That Work in Any Tiny Kitchen Layout
These last three don’t care what shape your kitchen is. You don’t need a full reno, you don’t need your landlord’s permission, and you don’t need another rolling cart you can’t find a place to park.
20. Choose a Rolling Cart Under 16 Inches Wide — and Give It a Parking Spot
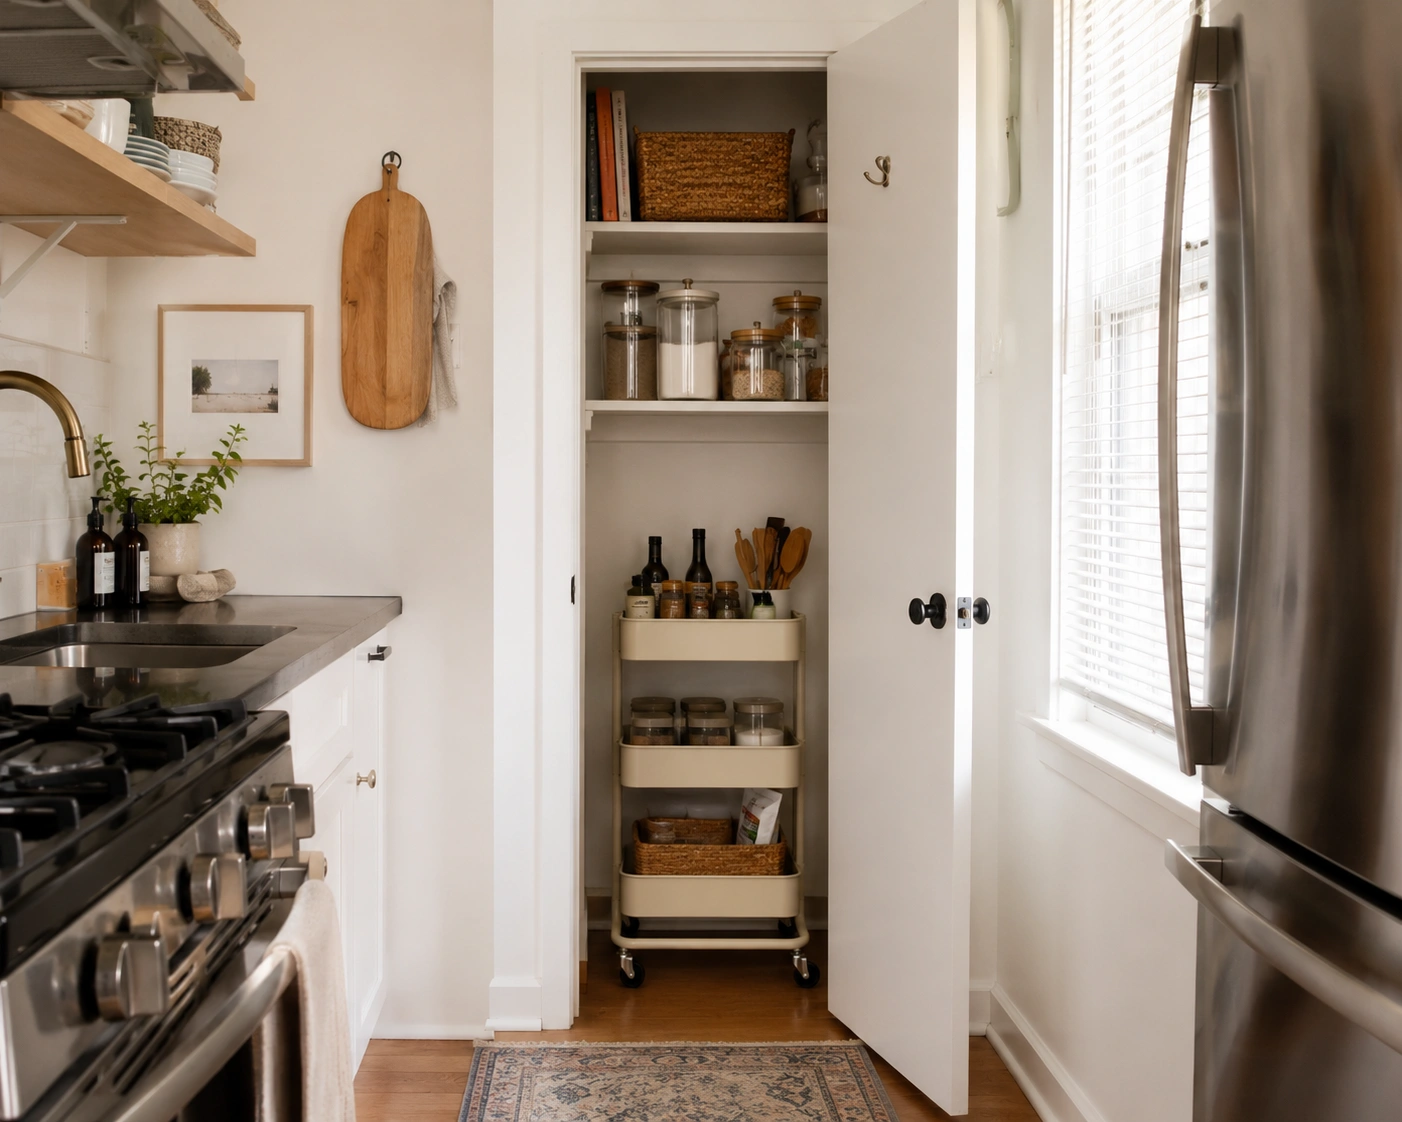
The RÅSKOG cart from IKEA is one of the most-saved small-kitchen products on Pinterest, and also one of the most-blamed for blocking walkways. The fix isn’t skipping the cart — it’s measuring your walkway first and designating a spot, like inside a closet, where it lives when you’re not cooking. If there’s no parking spot, there’s no cart.
21. Add Under-Shelf Pull-Out Baskets to Double Any Existing Shelf
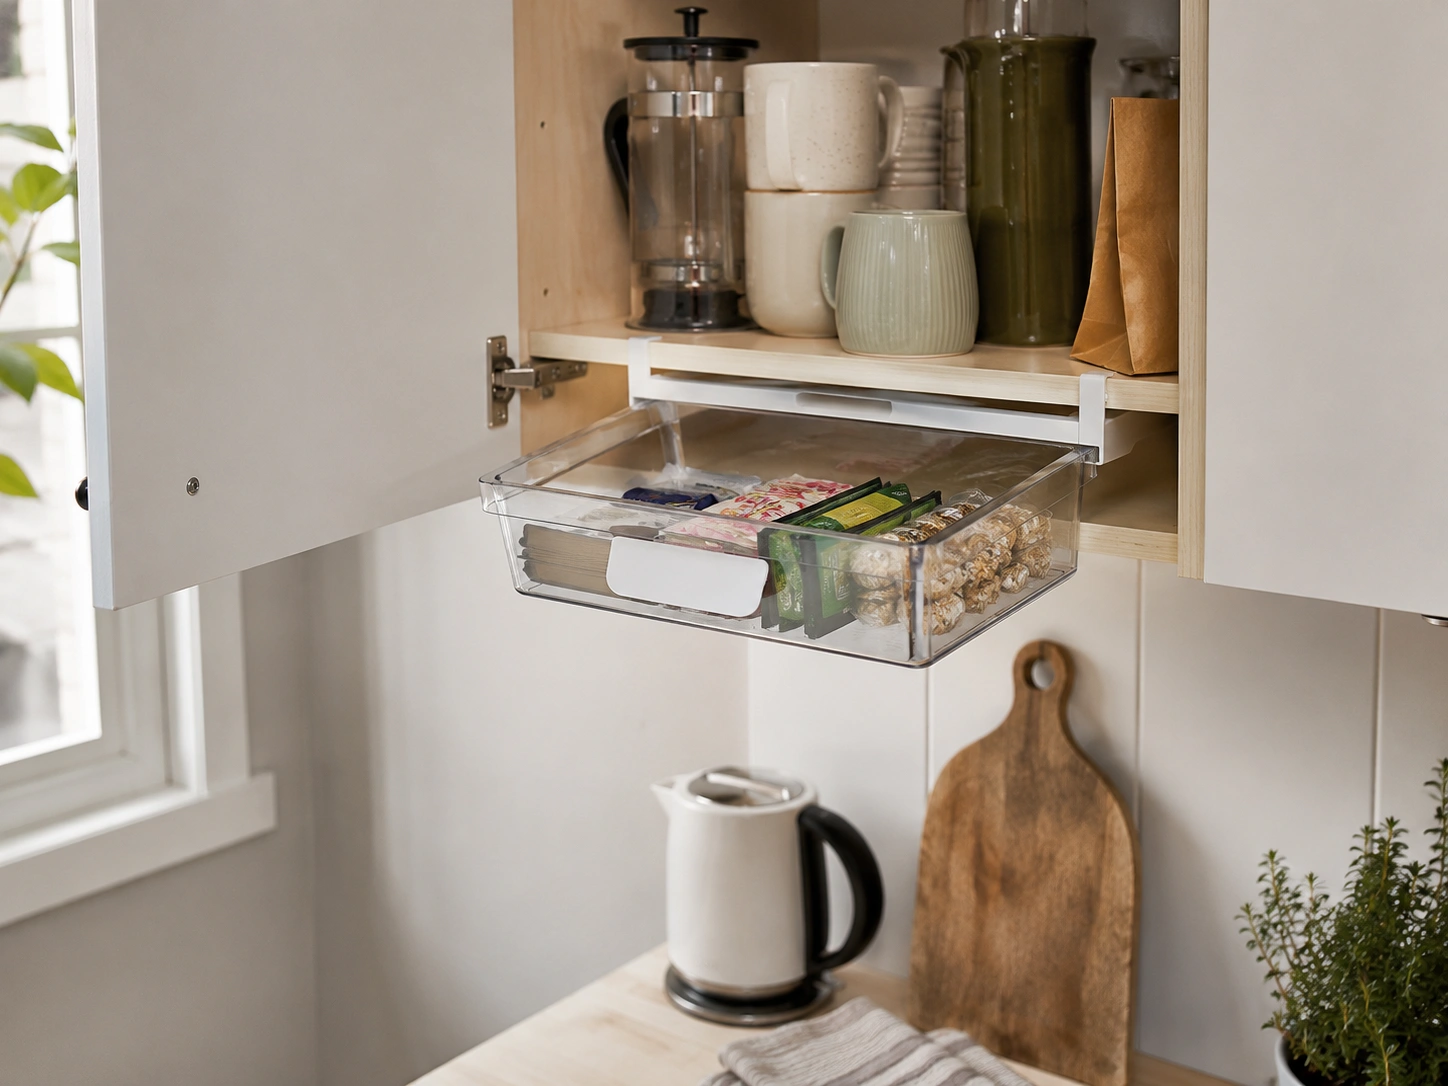
OXO’s under-shelf baskets clip onto the underside of an existing shelf and slide out independently, instantly adding a second storage layer without removing or replacing anything already installed. What most guides skip is that this works in rented kitchens precisely because it requires zero modification to the shelf itself.
22. Mount a Magnetic Spice Rack on the Side of the Fridge
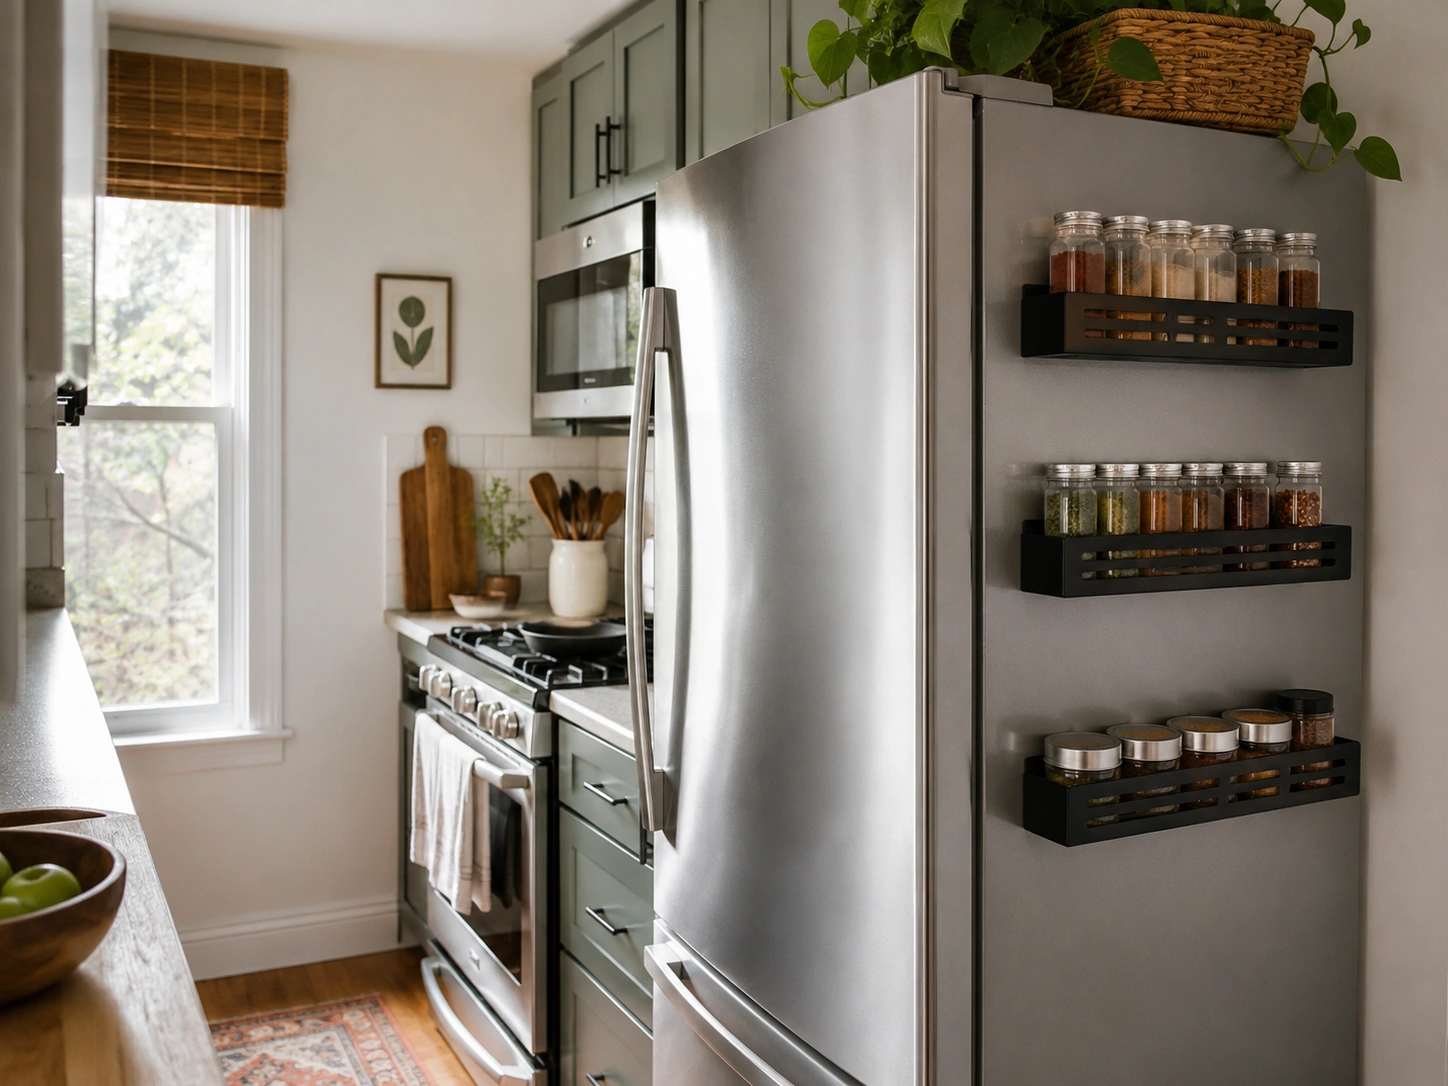
The exposed side panel of a refrigerator is one of the most overlooked vertical surfaces in any tiny kitchen. A magnetic spice rack mounted there holds tins within reach of the stove without using a single inch of cabinet or counter space. This only works on fridges with a metal side panel — check yours before buying.
Quick Comparison
| Option | Best For | Key Benefit | Limitation |
|---|---|---|---|
| Rolling cart (RÅSKOG) | Movable extra counter/storage | Goes wherever you need it that day | Becomes a walkway obstacle without a dedicated parking spot |
| Wall rail + S-hooks (SUNNERSTA) | One-wall and galley kitchens | Keeps tools visible and off the counter | Limited to lightweight items |
| Under-shelf baskets (OXO) | Any existing shelf | Doubles storage with zero shelf modification | Adds depth, which can crowd a narrow cabinet |
| Stackable pull-out bins (elfa) | Deep lower cabinets | Turns one dead layer into two or three usable ones | Requires cabinet depth of at least 18 inches |
| Slim-depth fridge/range (Summit) | Sub-8-foot footprints | Reclaims several inches of floor space along the whole run | Higher cost than standard-depth units |
Tiny Kitchen Design: Quick Answers
What’s the best layout for a tiny rental kitchen?
It depends on your wall configuration — galley layouts maximize counter space, one-wall layouts suit studios, and L-shaped layouts work best when you have a corner to use.
How do I make a small kitchen look bigger in photos?
Use under-cabinet lighting, a light-reflective backsplash, and minimal counter clutter — these three do more for photos than paint color alone.
Should I remove my upper cabinets in a tiny kitchen?
Not if you’re renting. It’s a permanent change, and you lose storage you can’t put back before you move out.
Why does my small kitchen still feel cramped after decluttering?
Floor-level storage like carts and racks eats walking space. Vertical storage — rails, shelves, hooks — clears the floor and opens up the room.
When should I invest in a slim-depth fridge or range?
When your kitchen is under 80 square feet and a standard 30- to 36-inch fridge depth blocks the walkway or cabinet doors.
Conclusion
Twenty-two ideas is a lot to take in standing in a kitchen that already feels too small for one more thing. Start with one. Pick whichever idea from your layout’s section solves the exact problem you complained about this week — the blocked walkway, the missing counter space, the corner you can’t reach.
This list covers layout-specific storage and styling fixes for rented kitchens under 100 square feet. It doesn’t cover full renovations, plumbing changes, or wall removal — if you’re past that stage, you need a contractor, not a Pinterest board.
Small kitchens aren’t a design failure. They’re a different design problem, and now you know which one you’re actually solving.


No Comment! Be the first one.