




15 Under Stair Storage Hacks That Turn Wasted Space Into Your Home’s Best Feature
There’s a space in most homes that collects dust bunnies, forgotten umbrellas, and vague guilt. You walk past it every single day and think, I really need to do something with that. That...

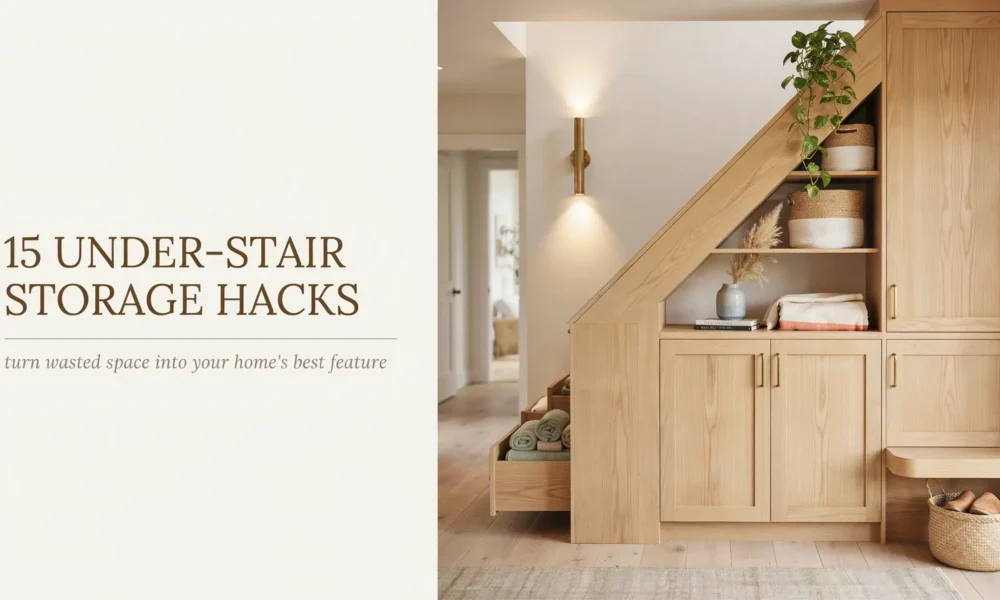
There’s a space in most homes that collects dust bunnies, forgotten umbrellas, and vague guilt. You walk past it every single day and think, I really need to do something with that. That awkward triangle under the stairs has real potential, and most people never tap it.
We’re not just talking about shoving a few baskets in there and calling it done. The right under stair storage hacks can genuinely change how your home feels. A dark, ignored corner can become a reading nook, a pantry, a mudroom, or the most organized closet in your house. It can look Pinterest-worthy and cost under $200, or it can be a built-in that adds real value to your home.
These 15 ideas cover every budget and skill level, from renters who can’t touch a wall to homeowners ready for a full weekend build. Something here will work for your space.
Before You Start: The 3 Things You Need to Know First
Before you buy a single shelf or open a single IKEA flat pack, do these three things.
Measure the full slope. Take measurements at every two feet of depth, from the tallest point at the back to the lowest point at the front. The slope is the thing that throws most under-stair projects off. Know your height at 12″, 24″, 36″, and 48″ depth so you can match items or builds to the actual clearance you have.
Plan your lighting from day one. This space will always be darker than the rest of your home. Motion-sensor LED strip lights ($15–$25 on Amazon) run on batteries and install with adhesive, no wiring needed. Buy these before anything else. They change how the space looks and functions entirely.
Decide: open or closed? Some people want concealed storage behind a door or curtain. Others want an open, styled display. Both work, but they require completely different approaches. Decide before you shop.
Under Stair Storage Hacks for Renters and No-Drill Situations
1. The Curtain-Covered Open Wardrobe
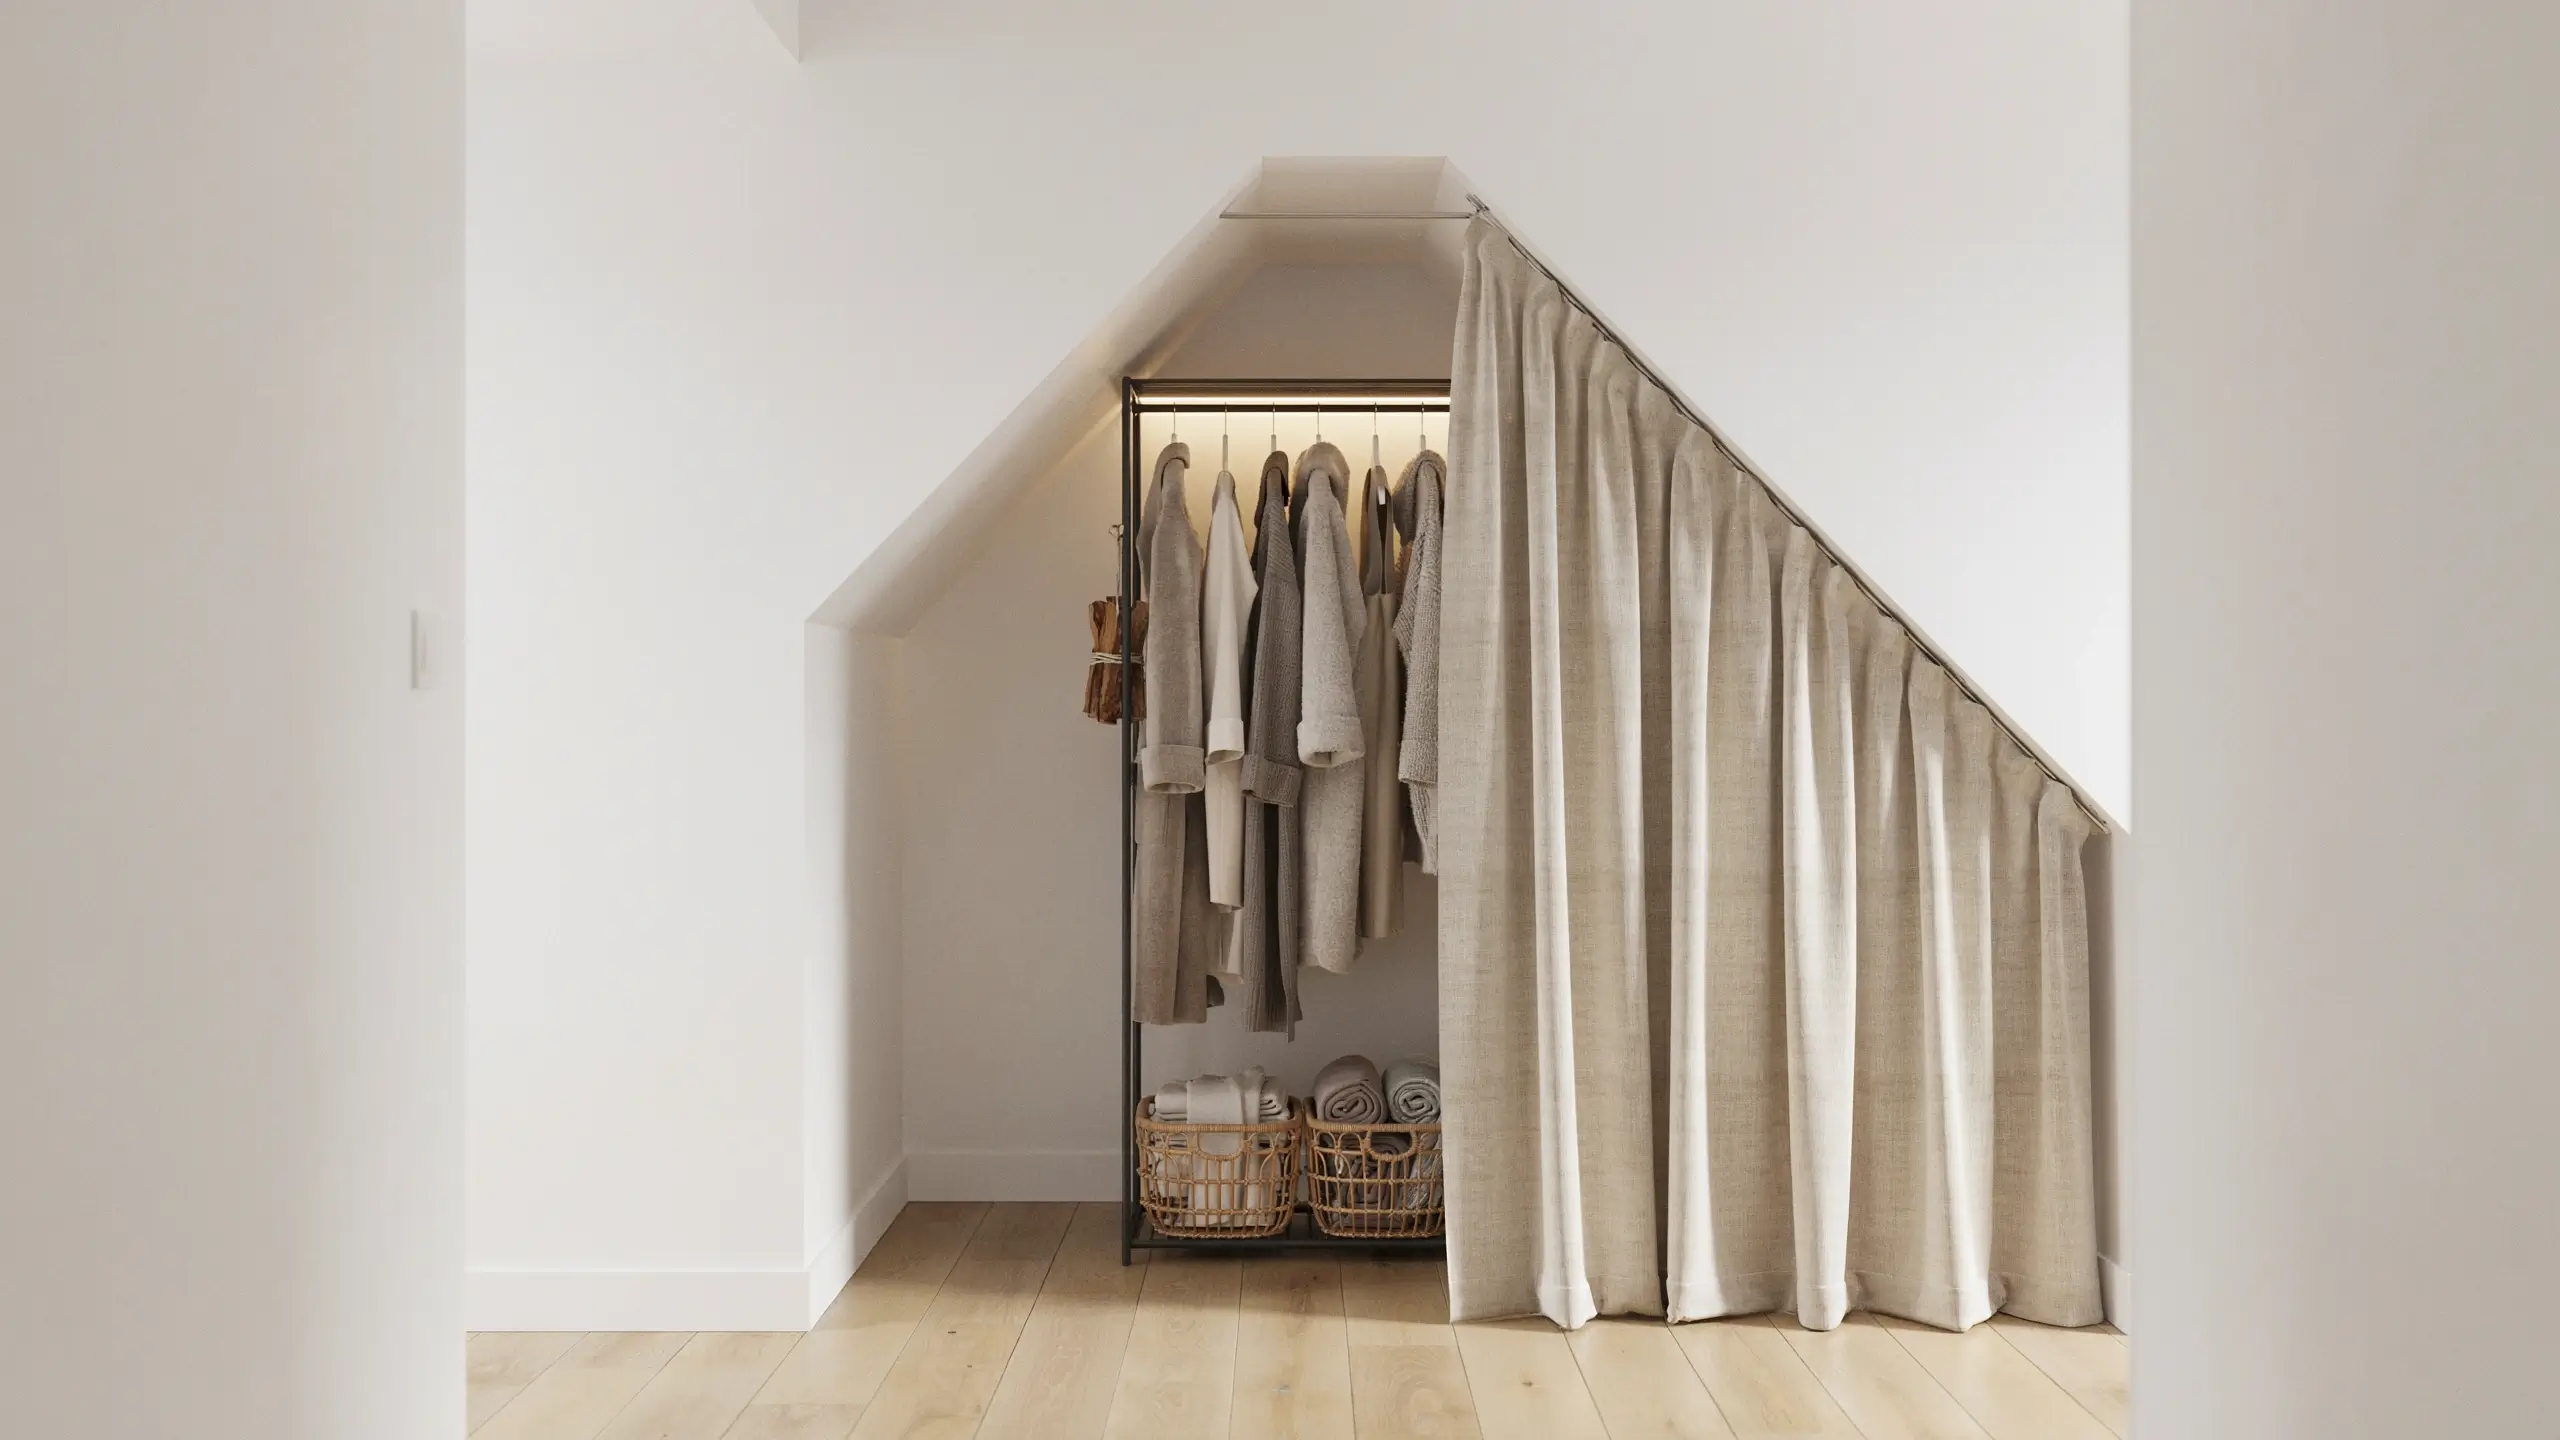
This is one of the most underrated under stair storage hacks, and it works whether your space has 6 feet of ceiling height or just 4. You don’t need a single nail.
Install a spring tension rod (or use a ceiling-mounted curtain track with removable adhesive clips) and hang a thick linen or canvas curtain across the opening. Behind it, use a freestanding clothing rack with a second tier, or bring in a set of IKEA ELVARLI shelving components. The curtain conceals everything while making the space look intentional.
This setup is excellent for off-season clothing, extra bed linens, or a capsule wardrobe overflow. Use velvet hangers to keep things from slipping, and add a cedar sachet or two to keep the space smelling clean. The whole setup can cost under $80 and pack up in an hour when you move.
What fits here: Off-season coats, extra blankets and pillows, hanging clothes, linens in baskets on the floor.
2. Freestanding Cube Shelving That Hugs the Slope
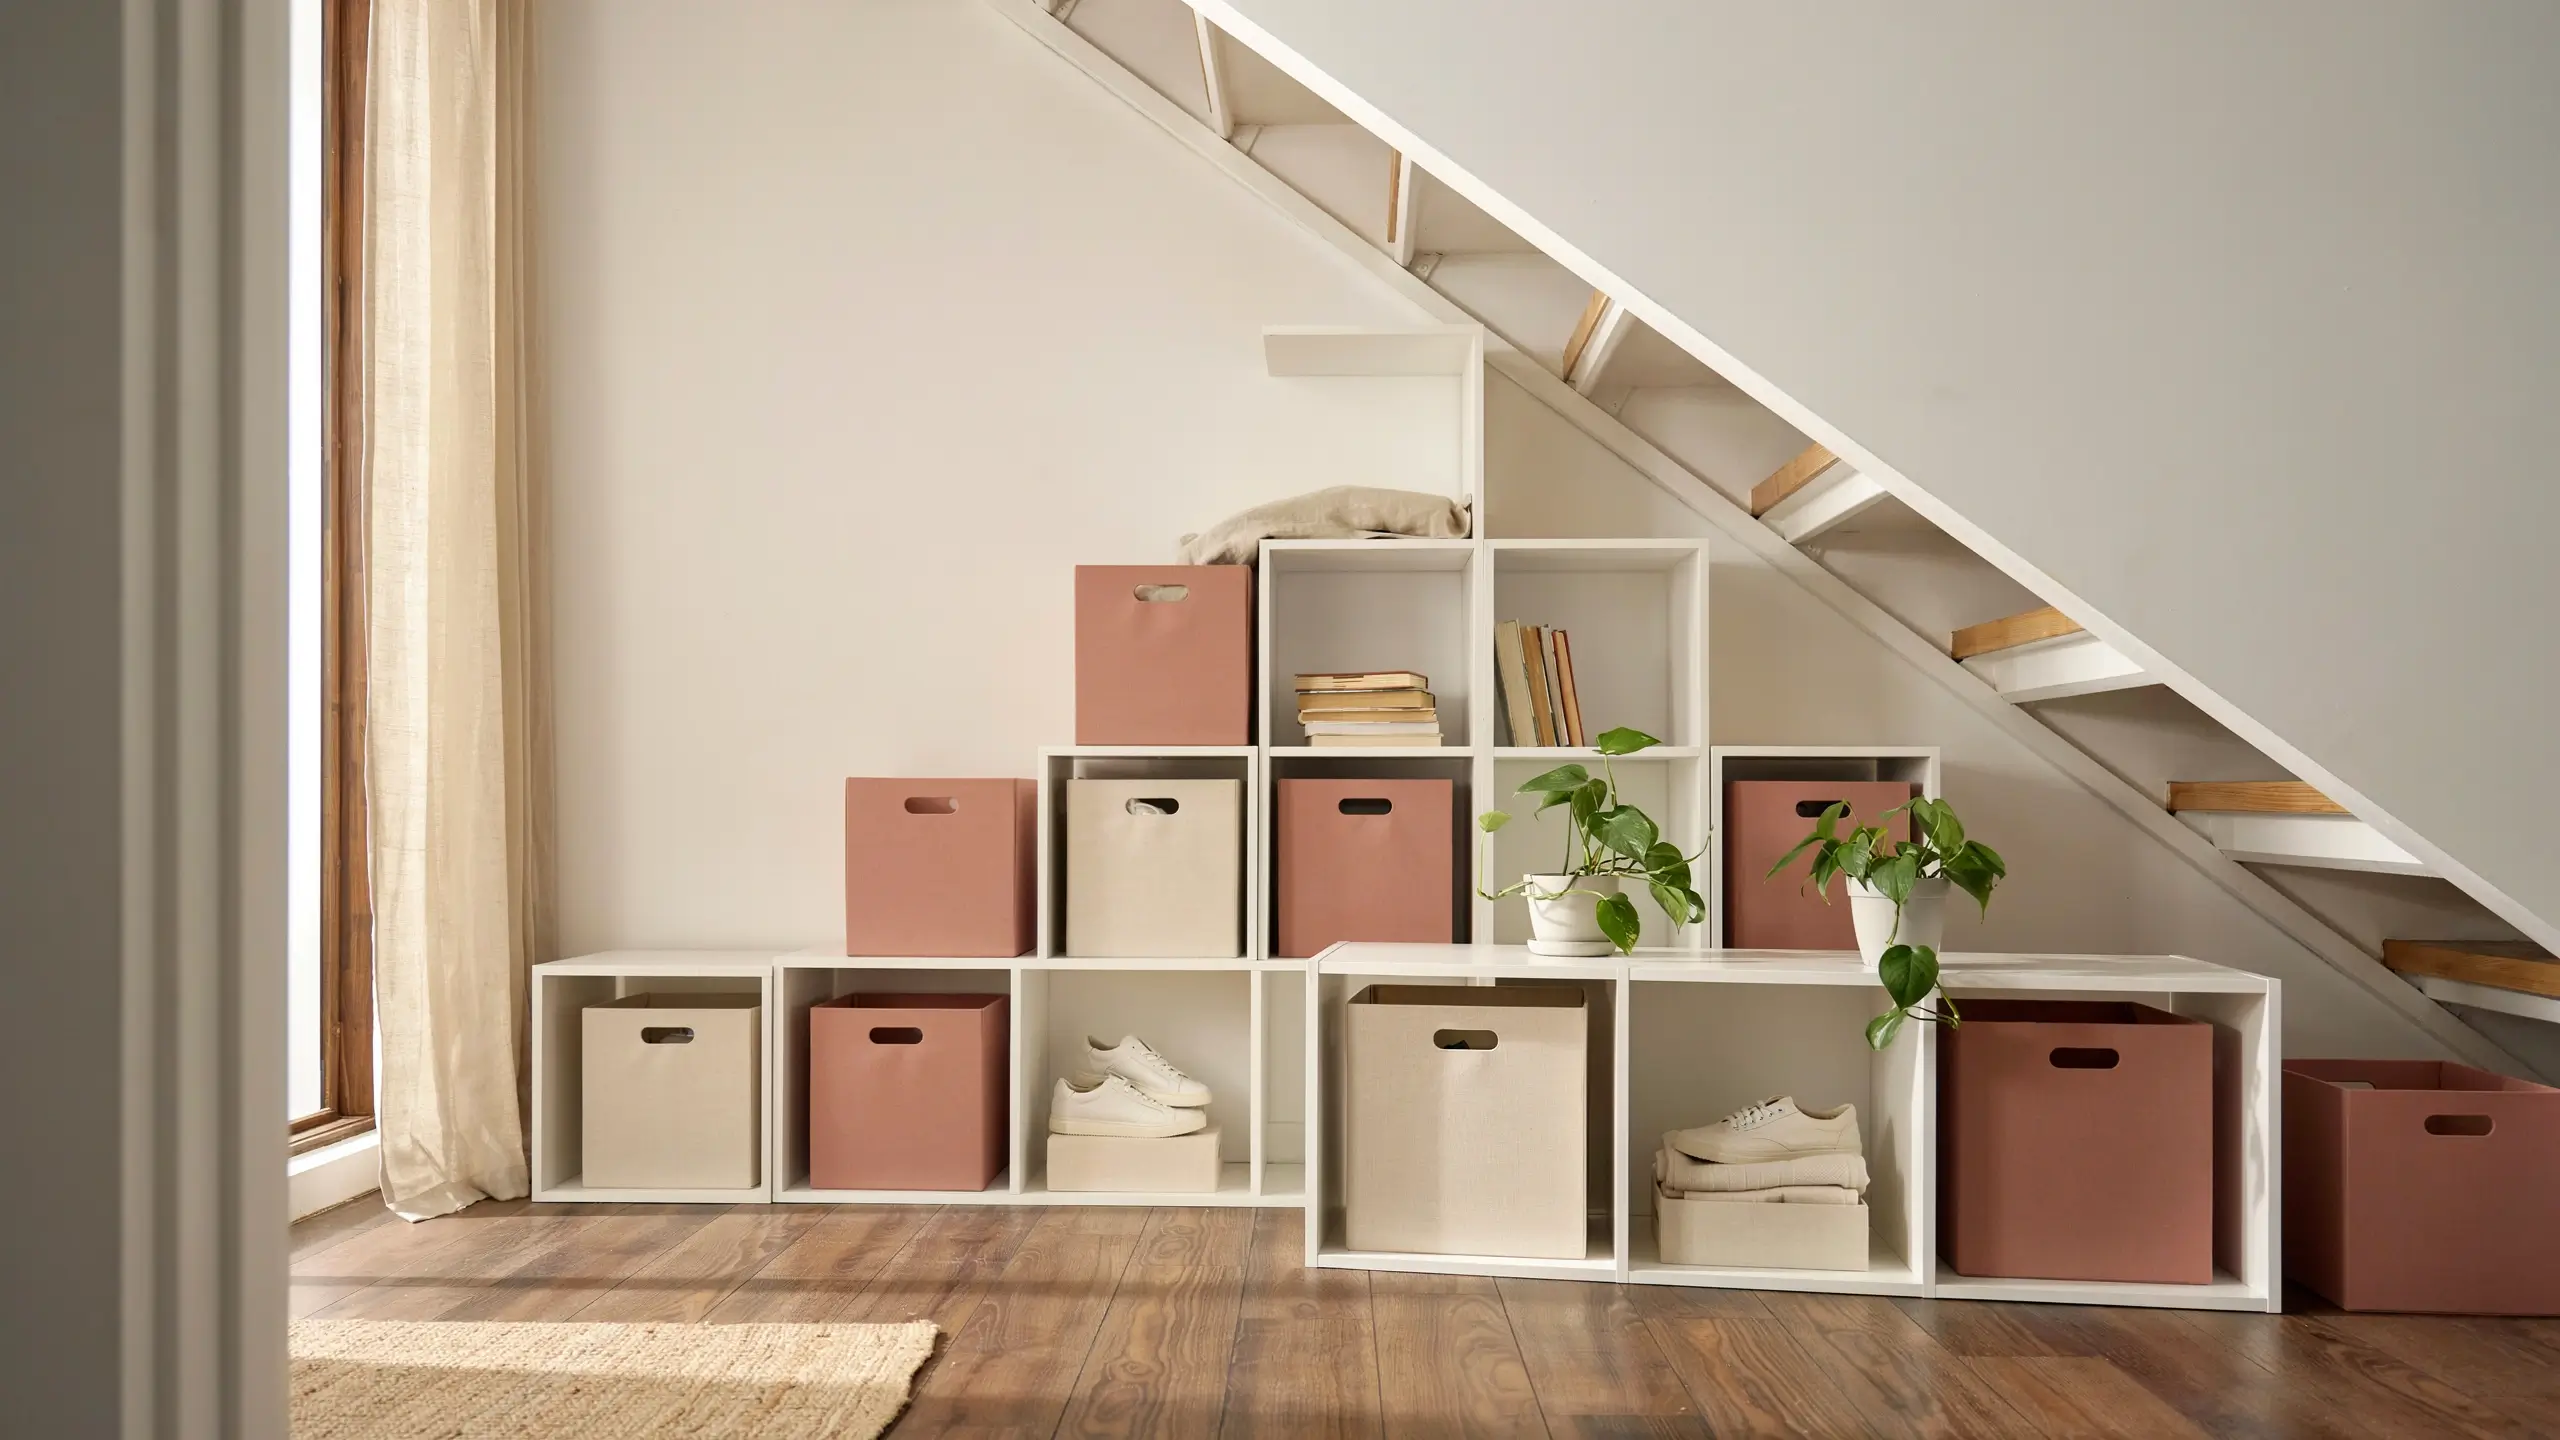
Cube organizers like IKEA’s KALLAX or similar alternatives from Target’s Room Essentials line are naturally modular. A 2×4 unit placed at the tall end and a 2×2 or 1×4 unit at the shorter end creates a staircase of shelving that mirrors the actual slope above it.
No wall anchoring needed for a renter setup (though anchoring is always safer and recommended if you have kids). Use fabric storage boxes in the cubbies to keep things tidy, and add a cushion across the top of the tallest unit for an instant bench moment.
This costs around $100–$180 for the KALLAX units, and the result looks completely intentional. The key is choosing a consistent basket or box color throughout so it reads as designed, not improvised.
What fits here: Books, baskets of kids’ toys, vinyl records, extra shoes, craft supplies, pantry overflow.
3. Pegboard Accent Wall With Hooks and Bins
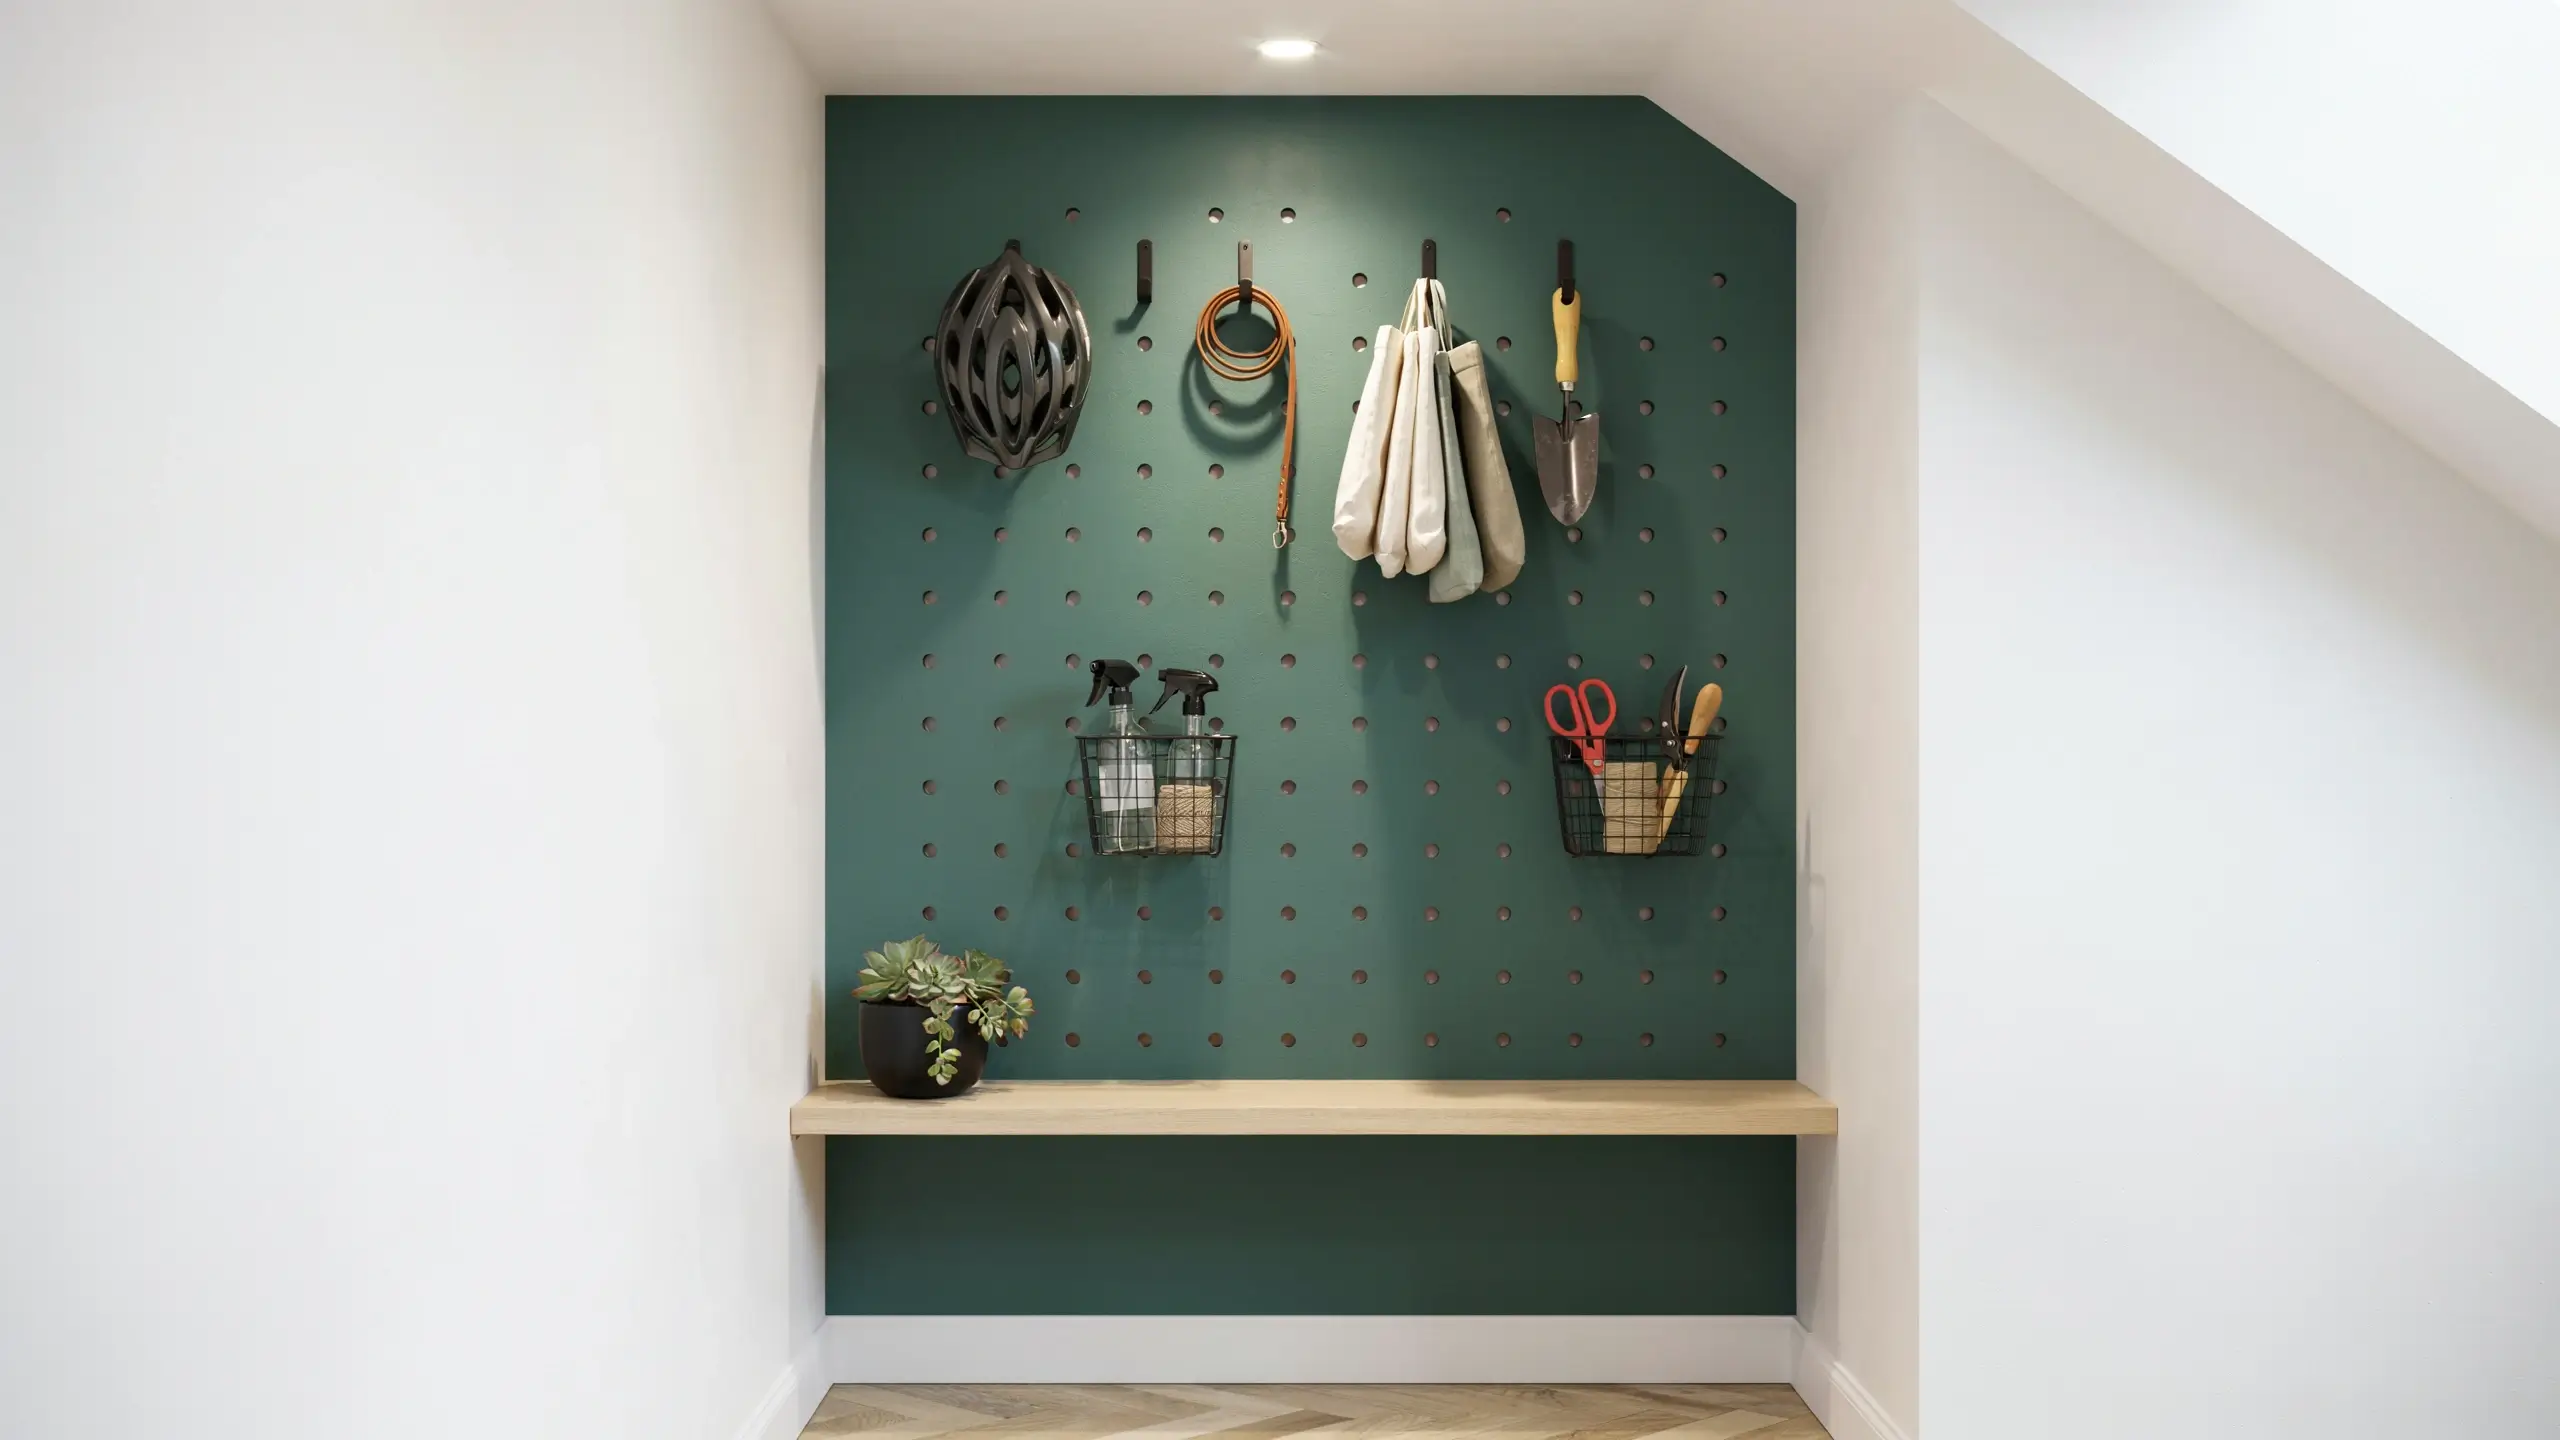
If your under-stair space is narrow, maybe just 12–16 inches deep at most, the wall itself is your storage. A full sheet of pegboard (4×8 ft, about $20 at most hardware stores) painted in a bold color and mounted flush to the wall turns this shallow zone into a highly visual and functional storage wall.
Add pegboard hooks, small metal baskets, and a few shelves and you’ve got a spot for cleaning supplies, craft tools, keys, dog leashes, bike helmets, or a gardening kit. For renters, use adhesive-backed panel mounting strips to hang the pegboard without studs, or lean it and secure it to the wall with removable poster tape along the edges.
This is one of those under stair storage hacks that photographs beautifully: a painted pegboard in terracotta, forest green, or navy with copper or black hooks looks like something out of a magazine.
Cost: $30–$80 depending on pegboard size and hook selection.
Weekend DIY Under Stair Storage Hacks
4. Float Some Shelves with a Statement Back Panel
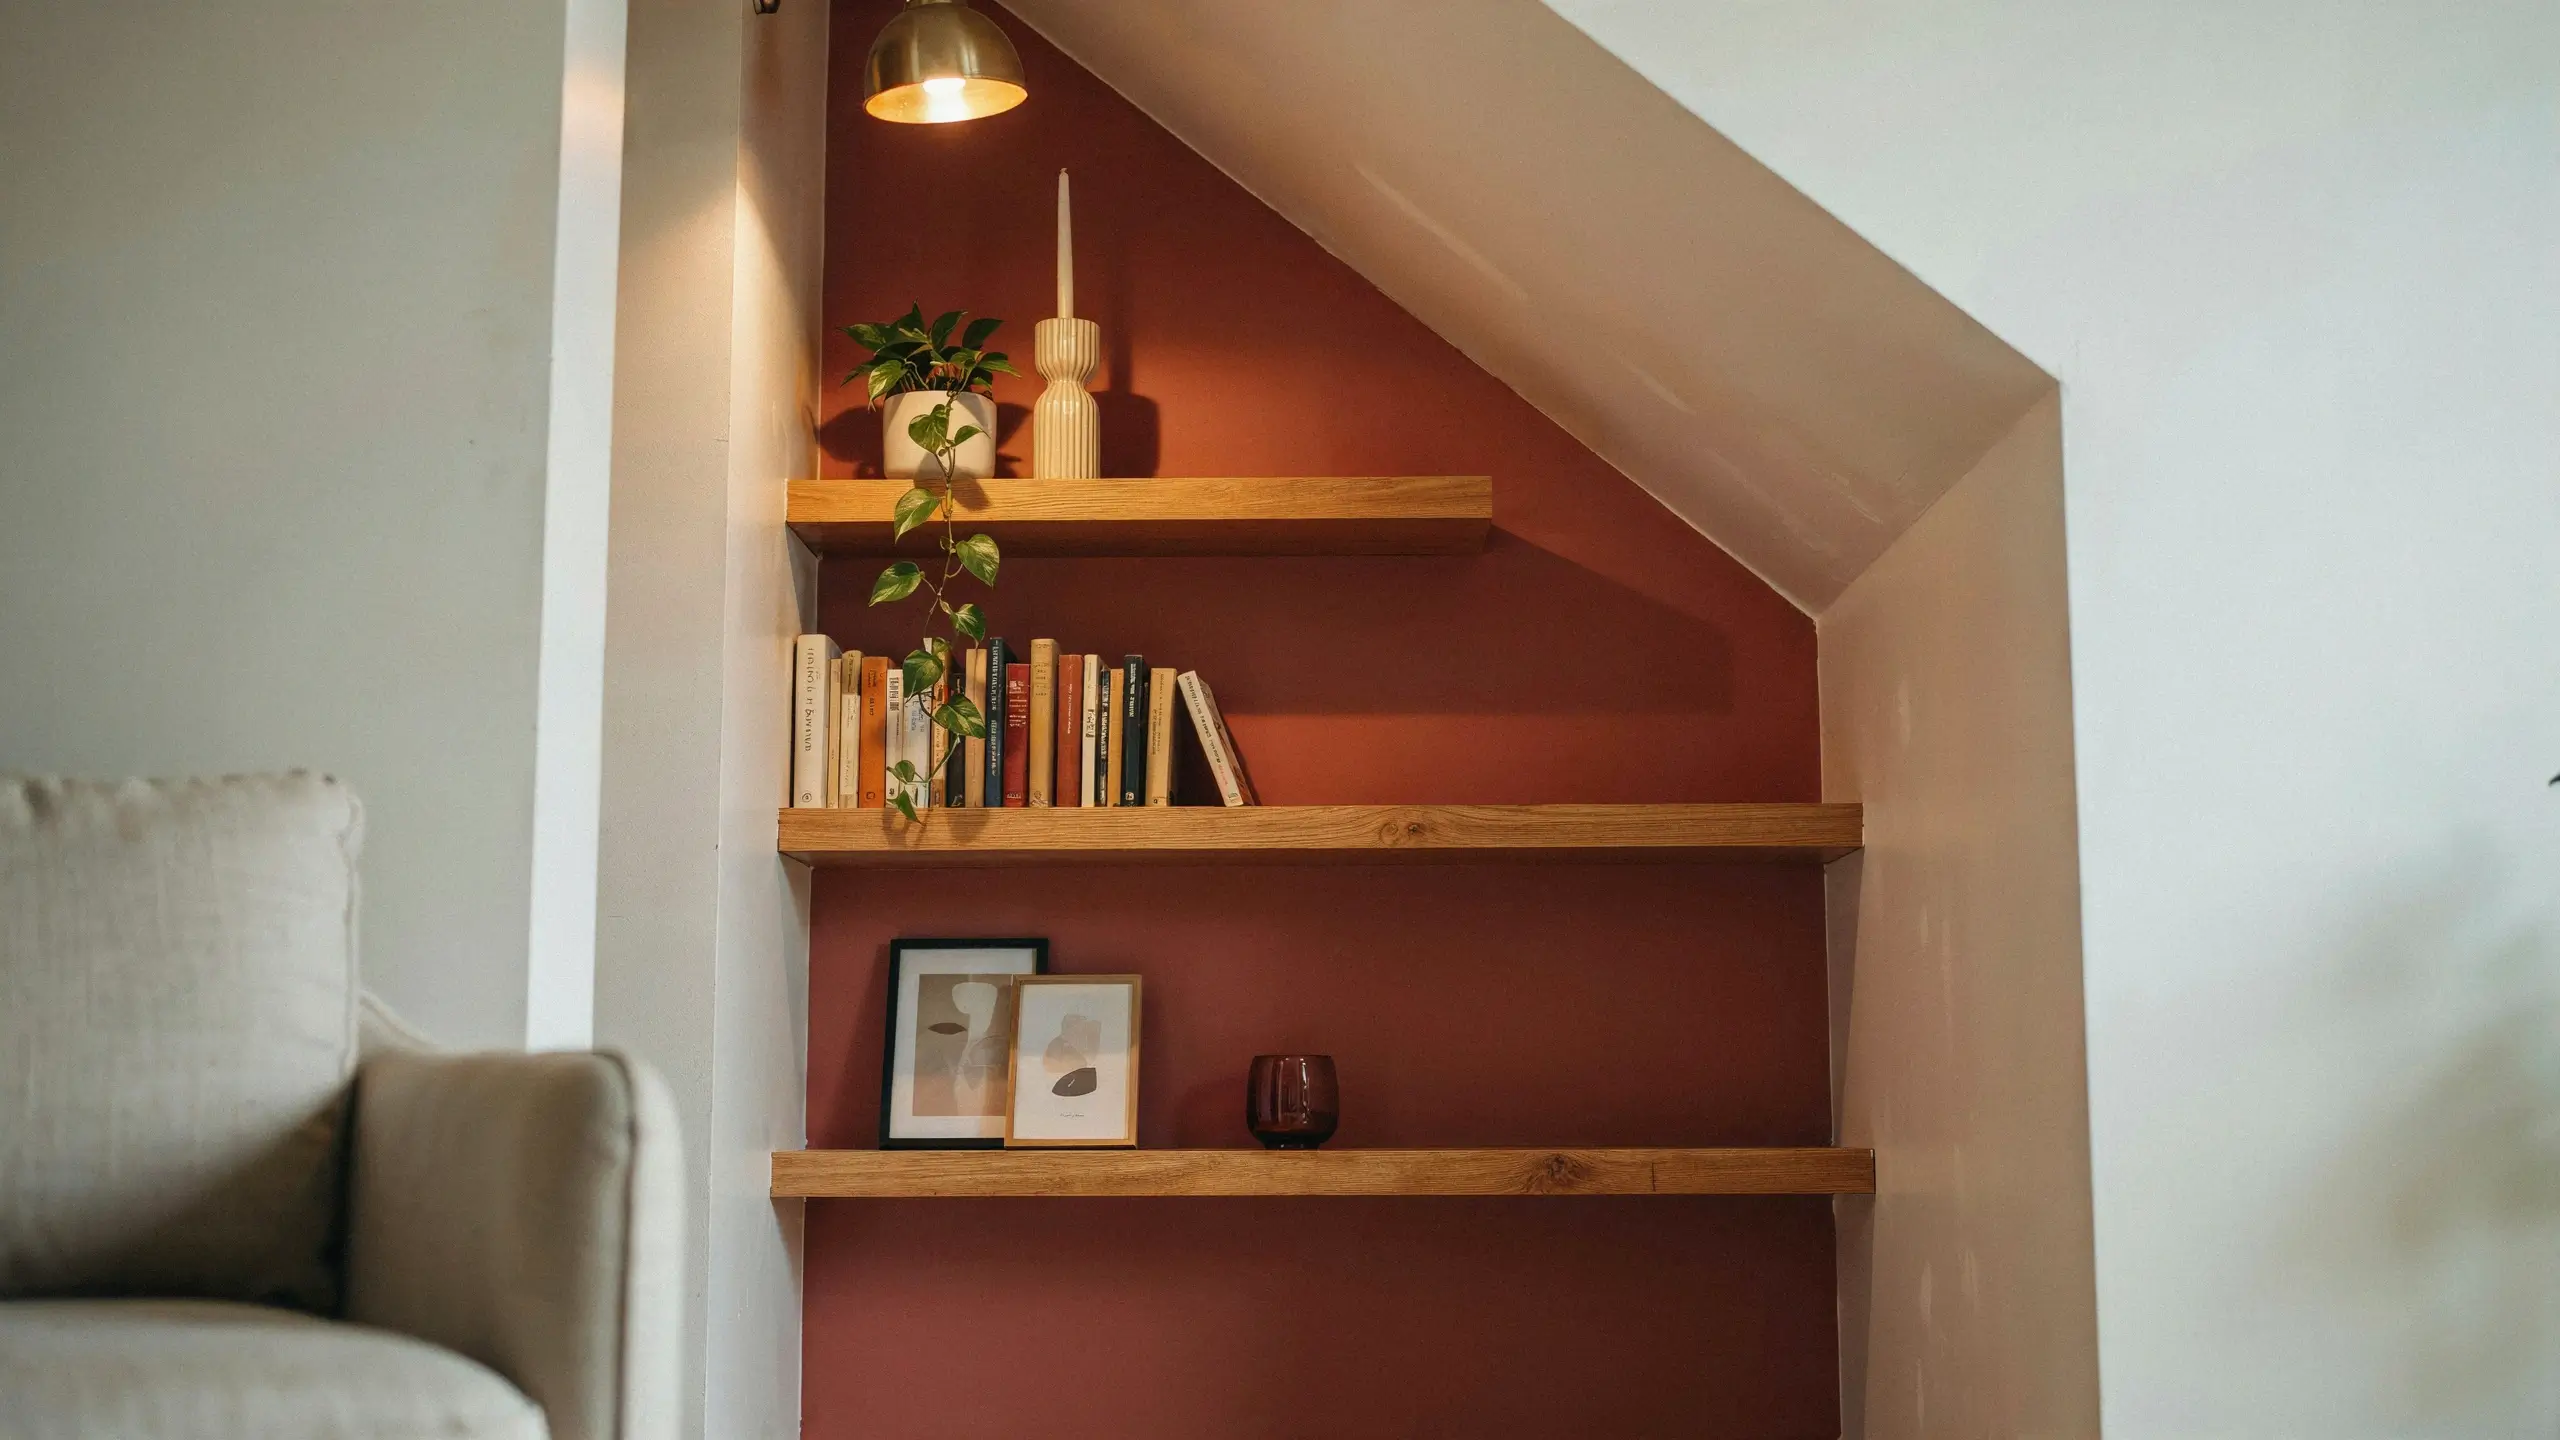
This might be the easiest upgrade with the most visual impact. Start by painting or wallpapering the back wall of the under-stair space in something strong: a deep navy, a warm terracotta, a geometric peel-and-stick pattern. Then install two or three floating shelves on that wall.
The contrast between the wall and whatever is on the shelves is what makes it look styled rather than functional. Books spine-out in sorted colors, small plants, framed photos, or a collection of anything works here. Use IKEA LACK shelves for budget builds, or thick wooden floating shelves for something that looks more custom.
This works best when the under-stairs area is open to a hallway or living space, and it takes one afternoon plus drying time.
Cost: $40–$120 depending on shelf type and whether you use peel-and-stick wallpaper or paint.
5. Pull-Out Pantry Shelves (DIY Version)
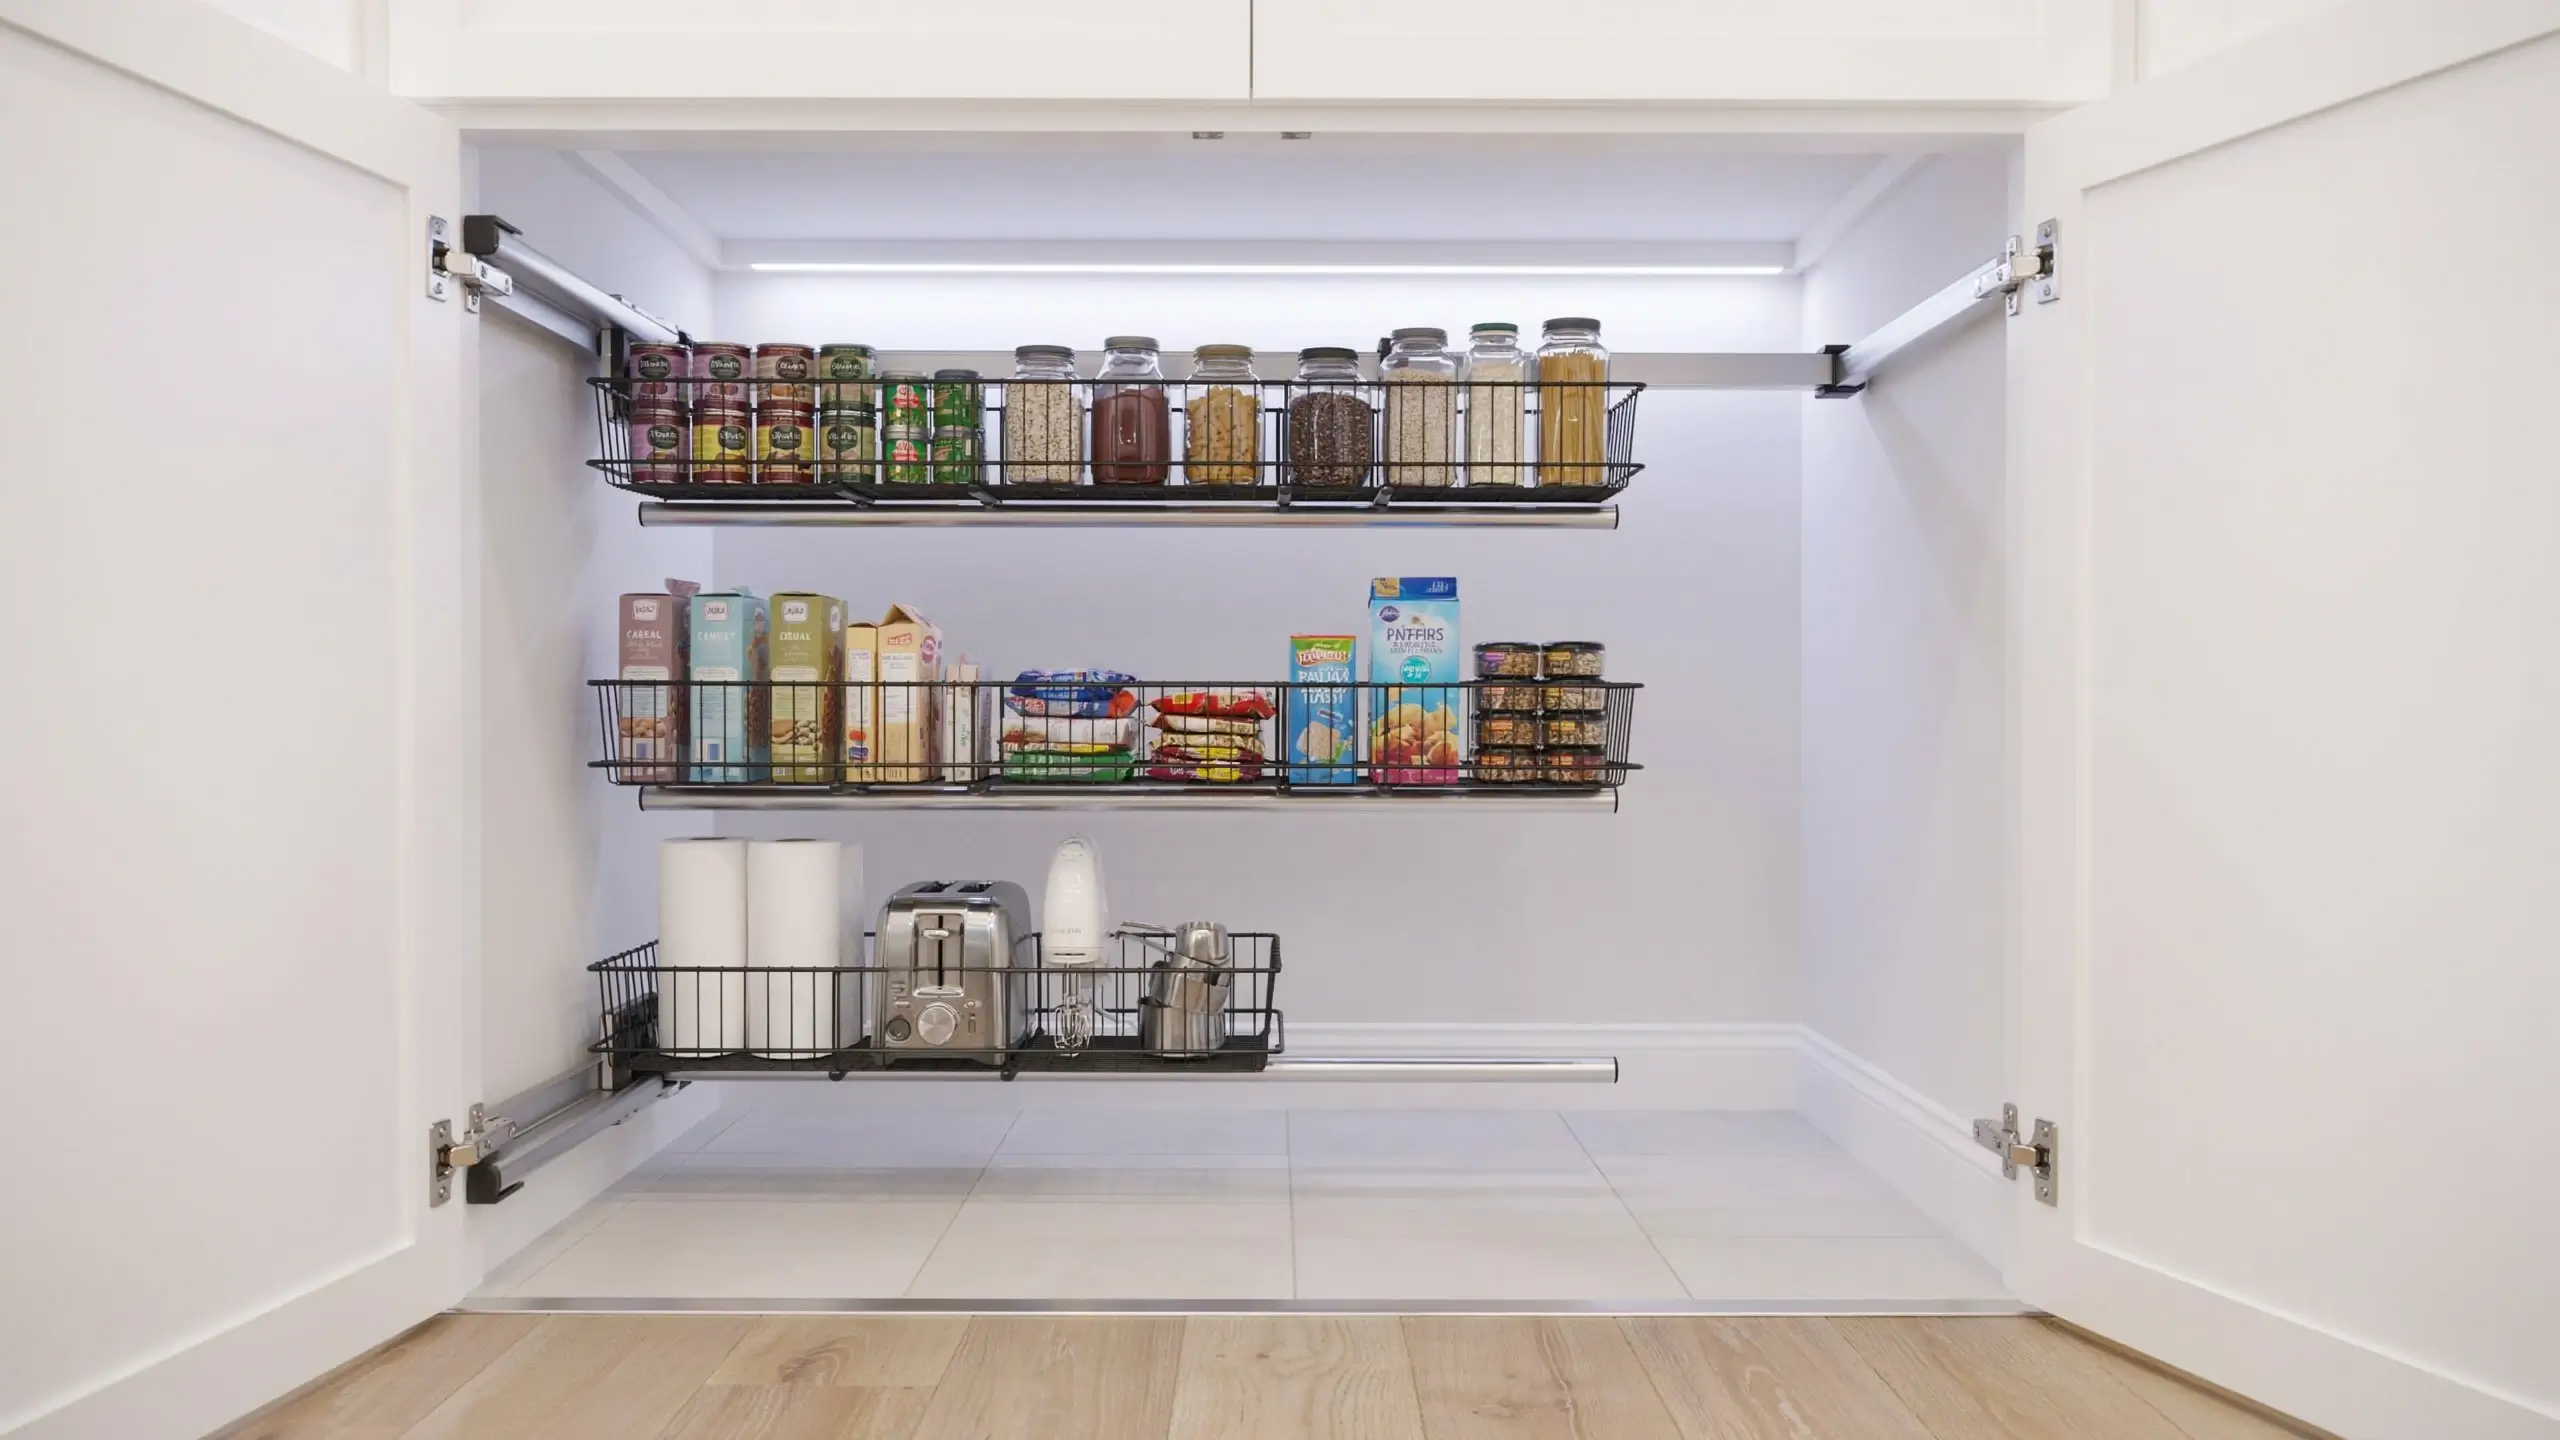
This is one of the most useful under stair storage hacks for anyone who lacks kitchen storage. The key is using wire pull-out baskets mounted on wall-bracket rails, which means everything stored deep in the space slides out to meet you.
IKEA’s BOAXEL or ALGOT systems work well here. Mount two vertical wall rails on either side of the opening, attach pull-out wire shelves at the intervals that suit your items, and you’ve got a pantry that costs roughly $150–$200 in materials. A professional version of this same setup runs $1,200 or more. Add a motion-sensor light inside so you always see what you have.
Store dry goods, canned items, cereal, snacks, paper goods, and small appliances. Avoid perishables unless the space stays consistently cool. Label each basket by category.
One thing most tutorials miss: install a small vent cover in the drywall or cabinet panel at the back if your space is fully enclosed. Trapped air gets musty fast, especially with food stored inside.
Cost: $150–$250 DIY.
6. Angled Shoe Cubby Tower for the Low End
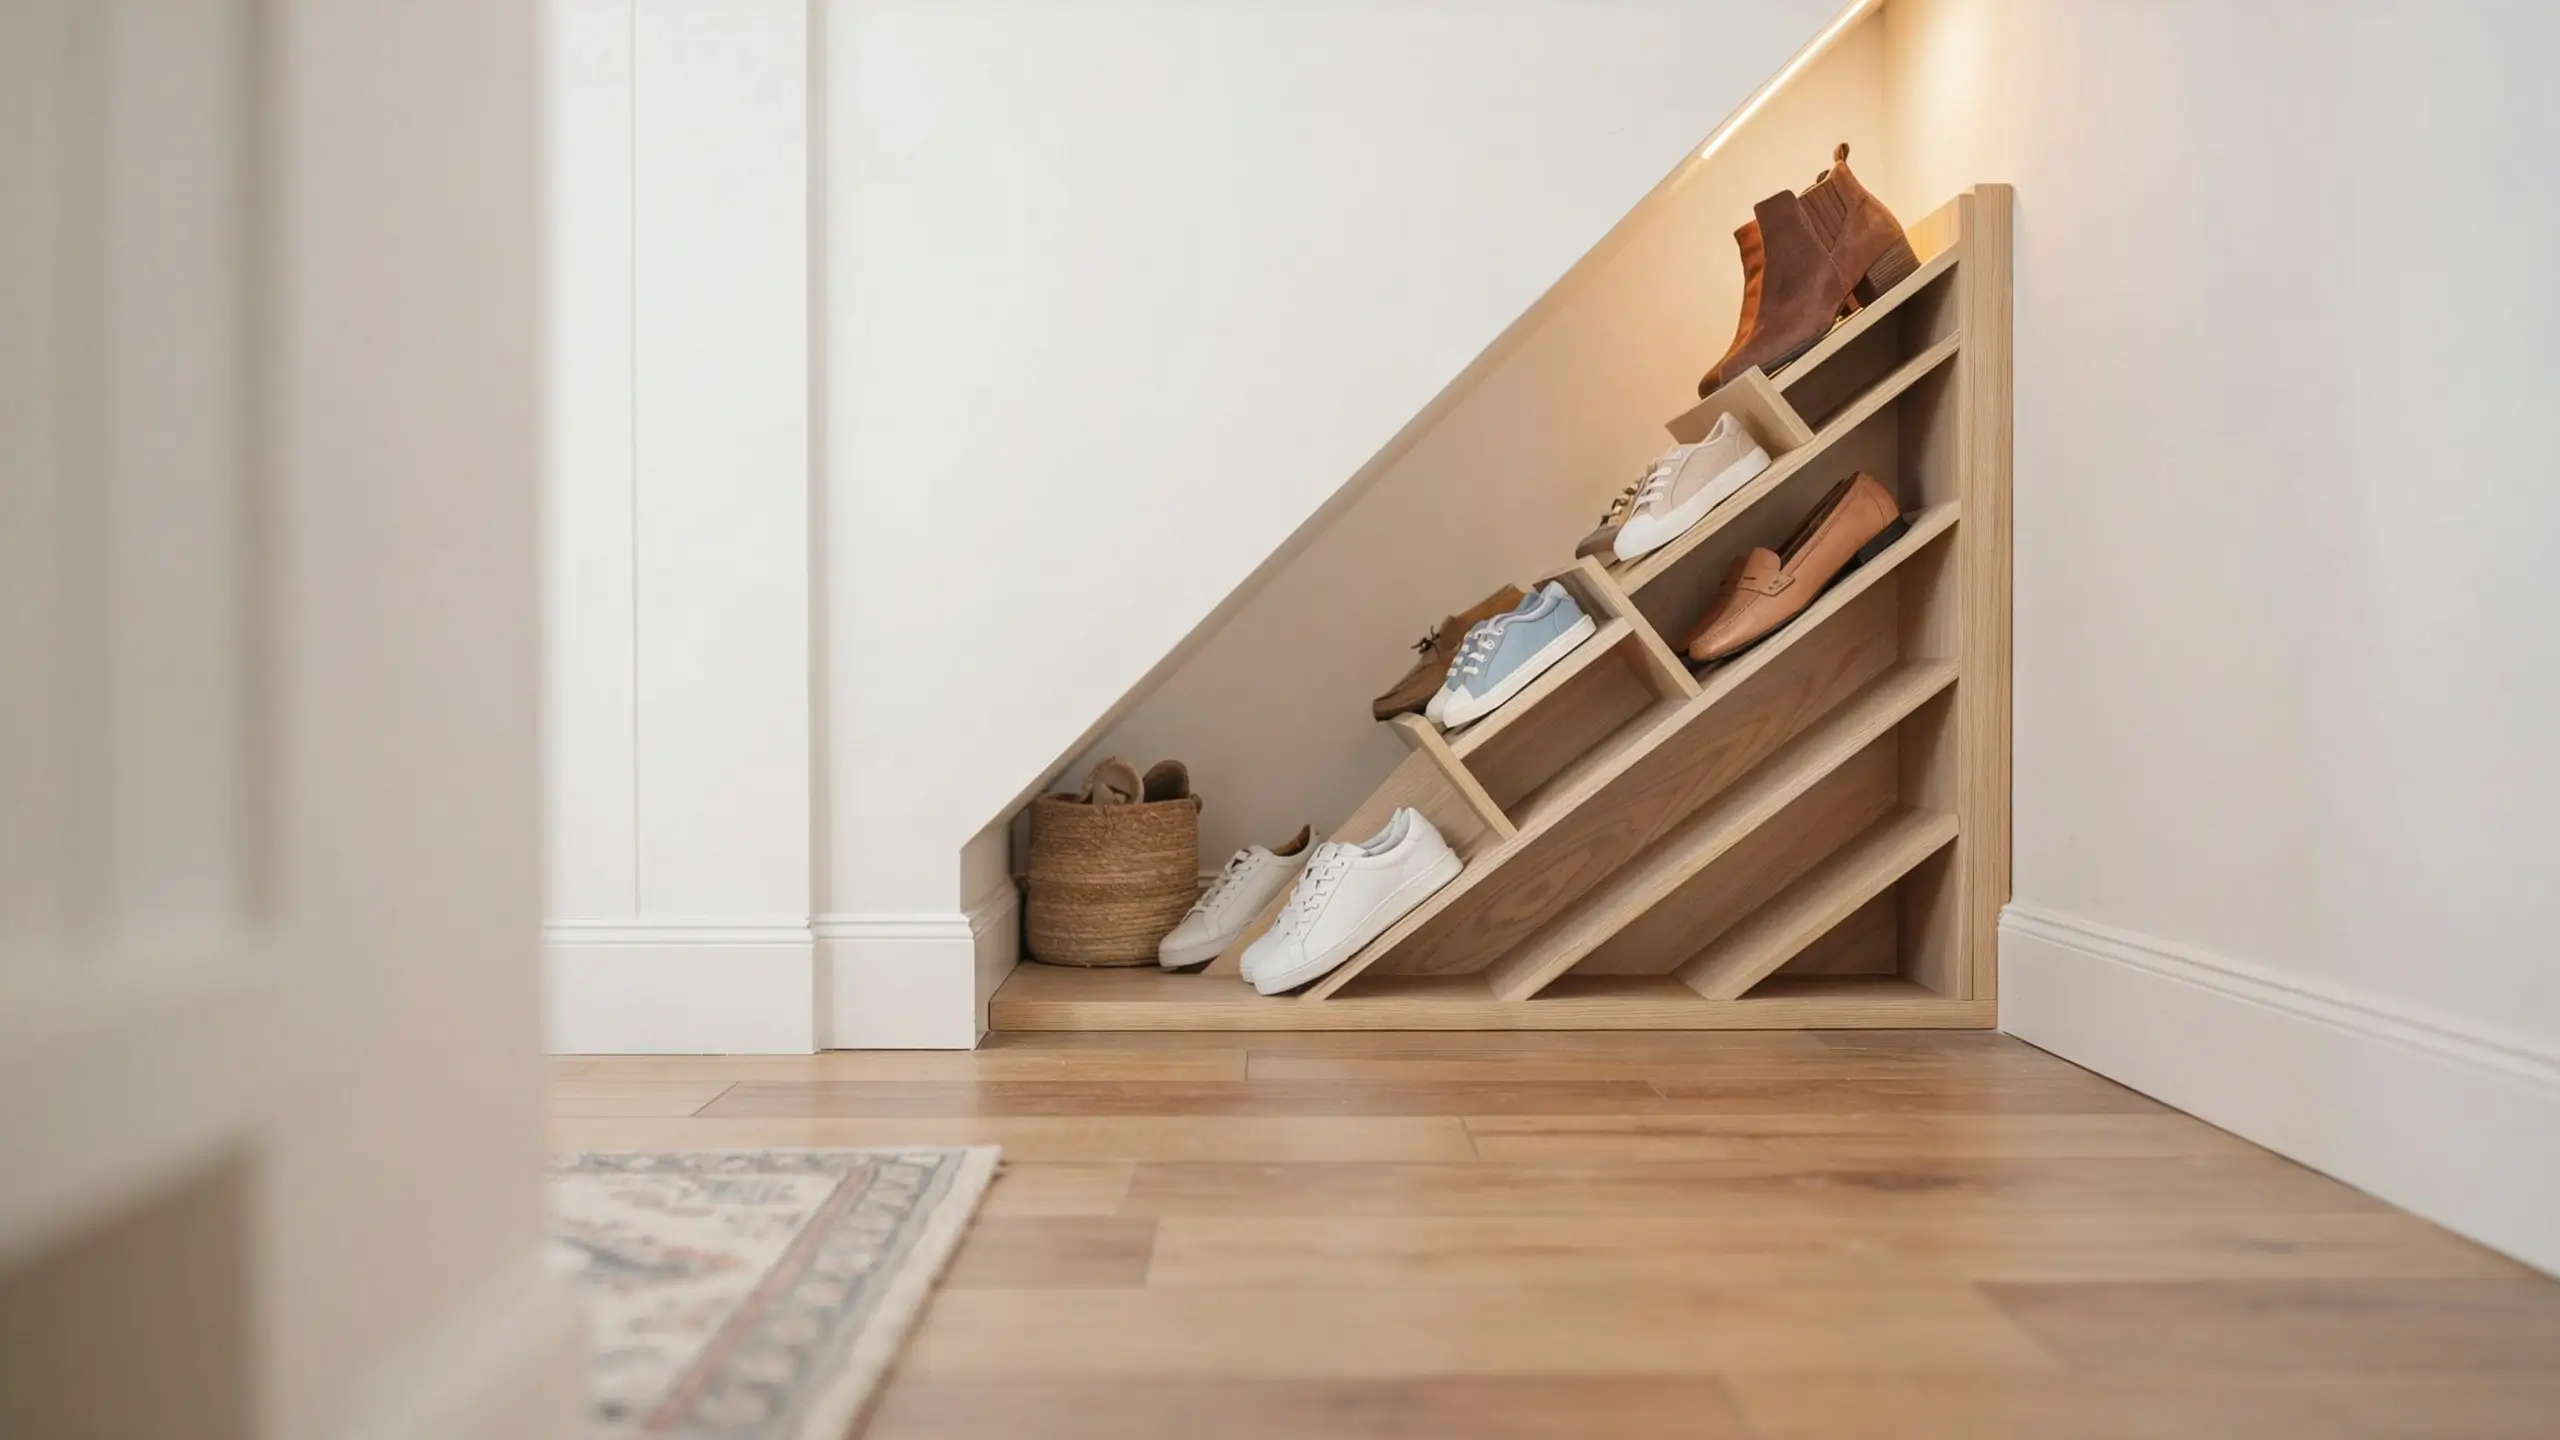
The shallow front of the under-stair space, often just 12–18 inches tall, gets ignored most of the time. This is prime shoe storage real estate.
Build or buy a slanted shoe cubby that matches the angle of the slope. Many closet organizer brands make angled-shelf shoe racks specifically for this purpose (try ClosetMaid or Simple Houseware adjustable shoe racks stacked at a slant). Each pair of shoes sits at a slight angle, accessible from the front, and the slope overhead becomes an asset rather than an obstacle.
For a family of four, this can hold 20–30 pairs of shoes in a space most people ignore. Paint the interior walls white to keep it feeling bright.
Cost: $40–$90 for freestanding adjustable racks.
7. Kids’ Reading Nook with a Curtain Door
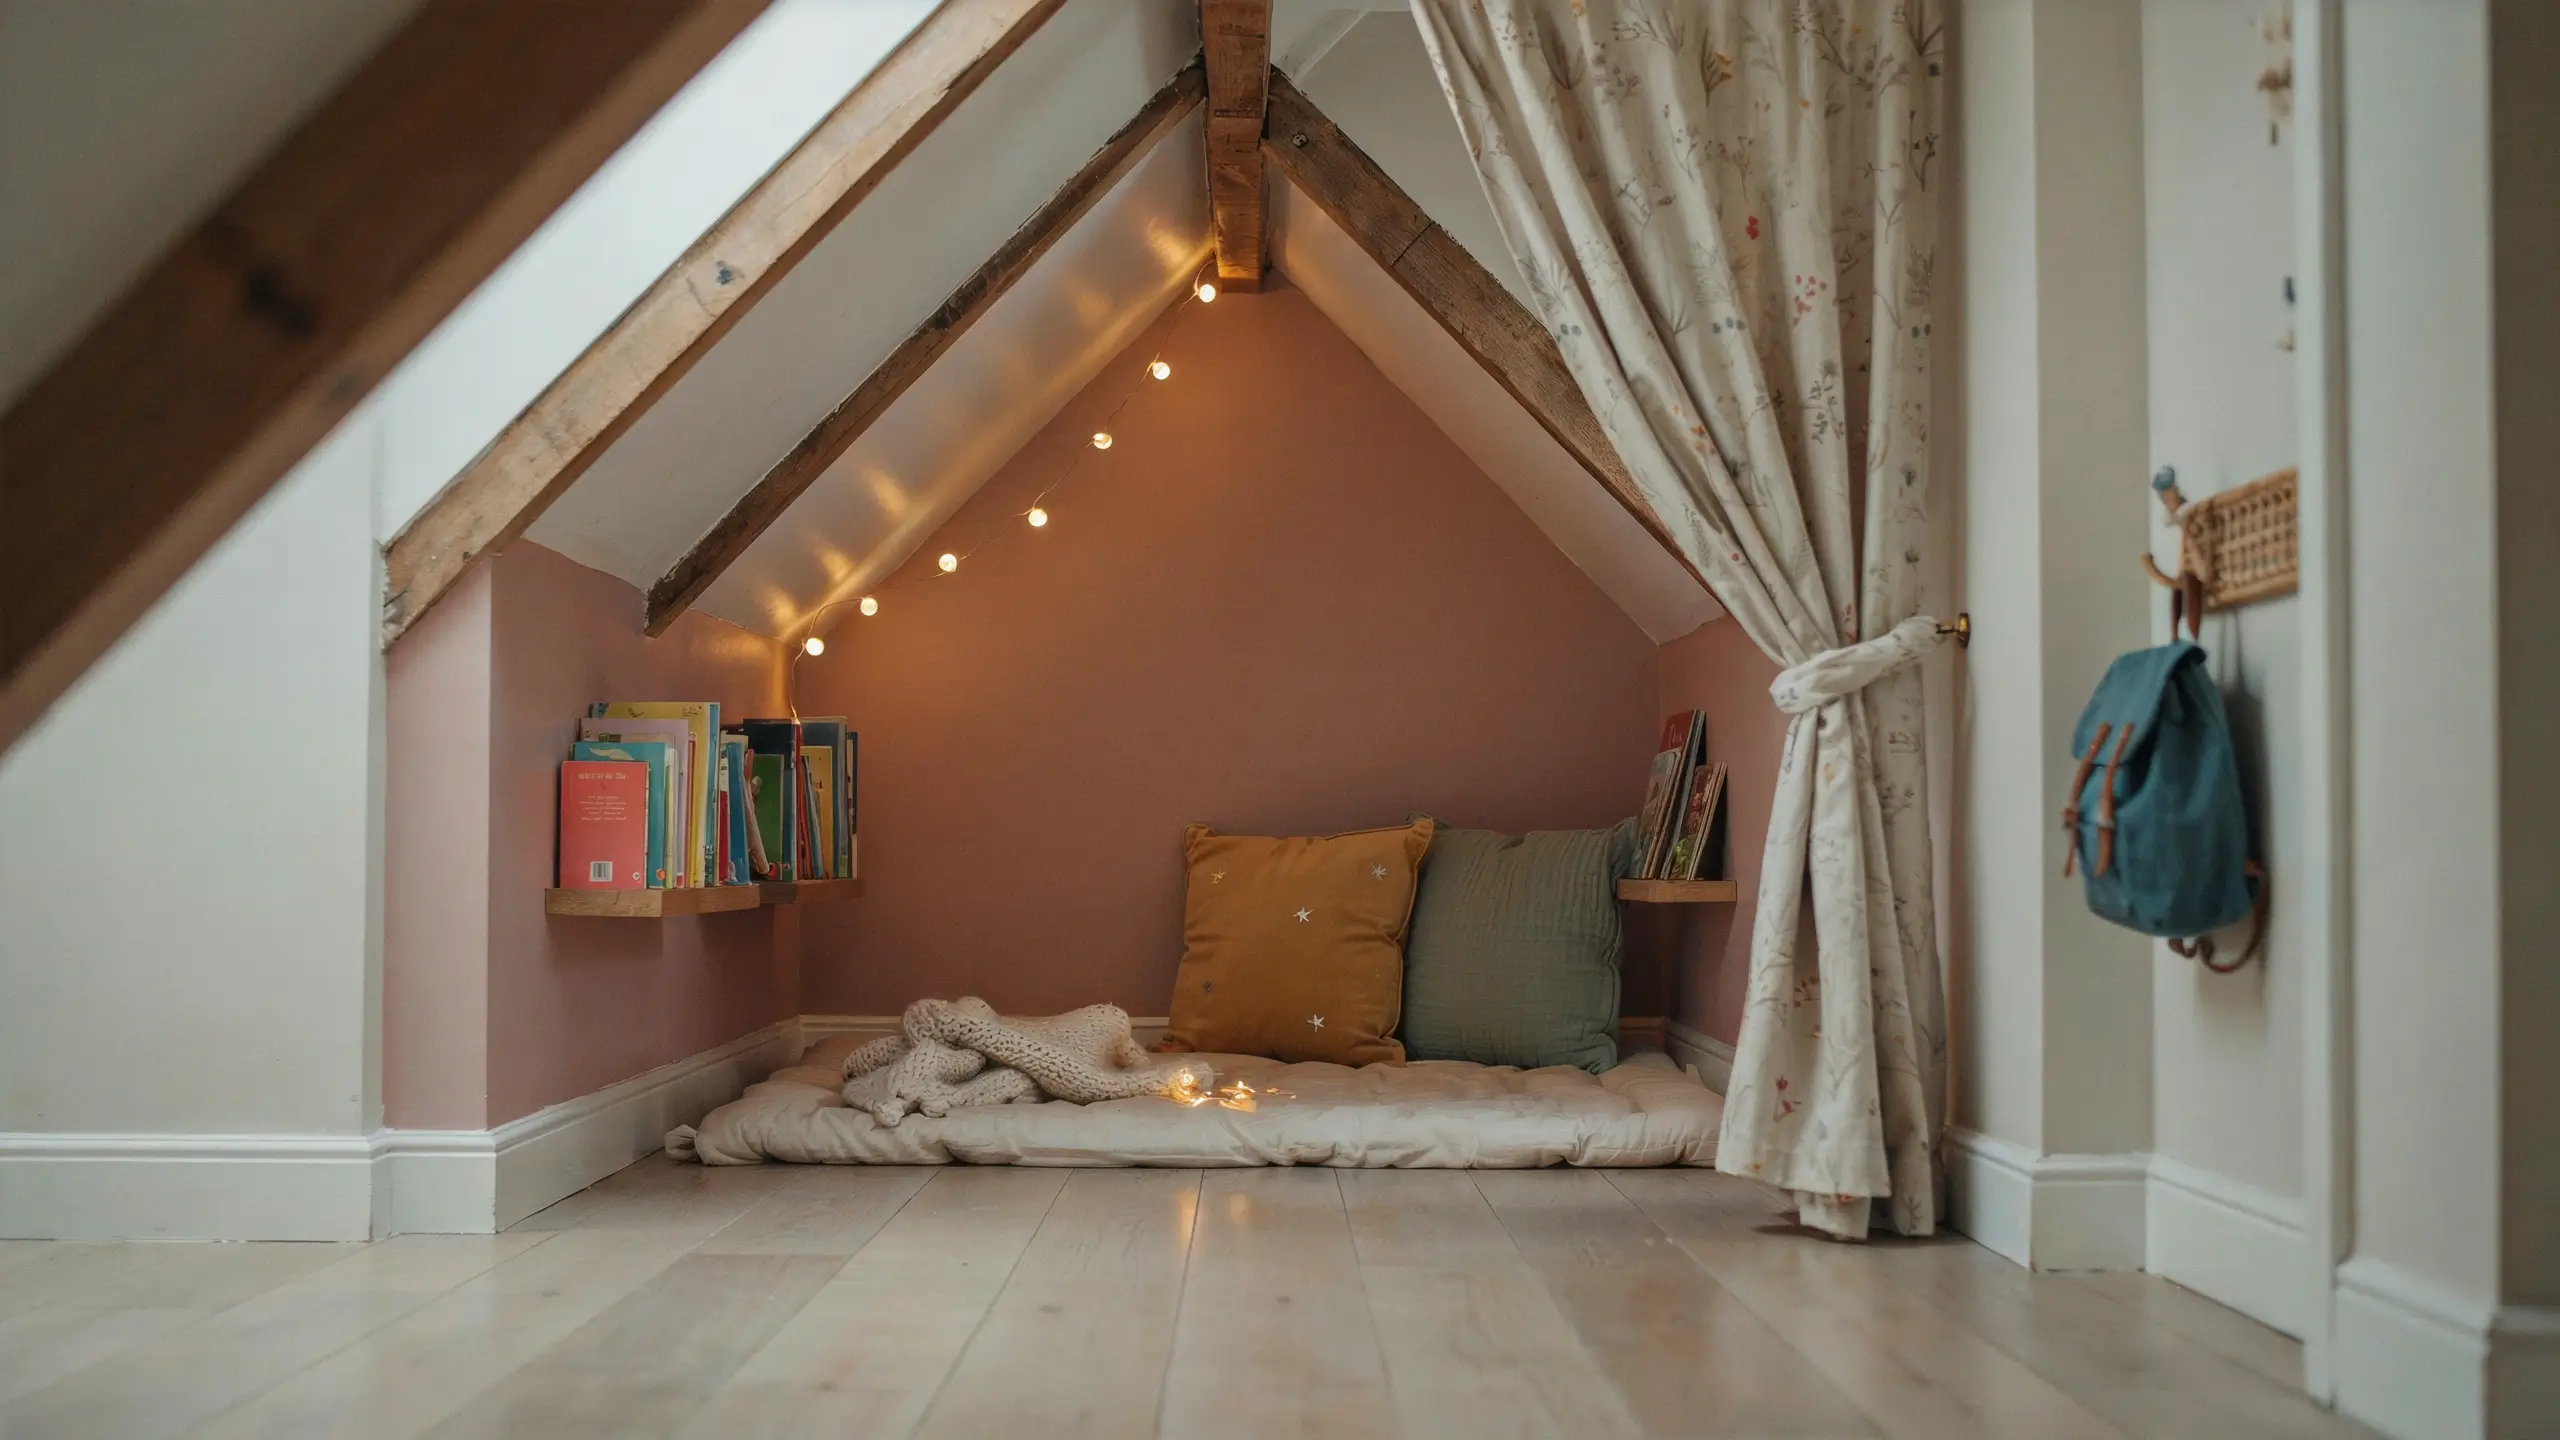
Parents will understand why this one belongs on the list. Kids need cozy corners, and under-stair spaces were practically designed for small humans. The slope overhead feels snug and secret, which is exactly what a six-year-old wants.
Paint the walls inside a soft warm color, add a foam floor mat or a few stacked cushions, mount two short floating shelves for books, and hang string lights along the slope. A curtain rod at the opening with a striped or patterned curtain gives the nook its own “door” and makes it feel like a proper hideout.
Add a small battery-powered lantern inside and a hook by the entrance for small bags or art supplies. Under $150 total, and it becomes the most-used spot in the house.
For safety: keep the light sources cool-to-touch (battery LED only), make sure the curtain is lightweight and easy to push aside, and leave enough ventilation. Check the space once a week for things that have wandered in.
Bigger Under Stair Storage Transformations
8. IKEA BILLY Bookcase Built-In (Trimmed to Fit the Slope)
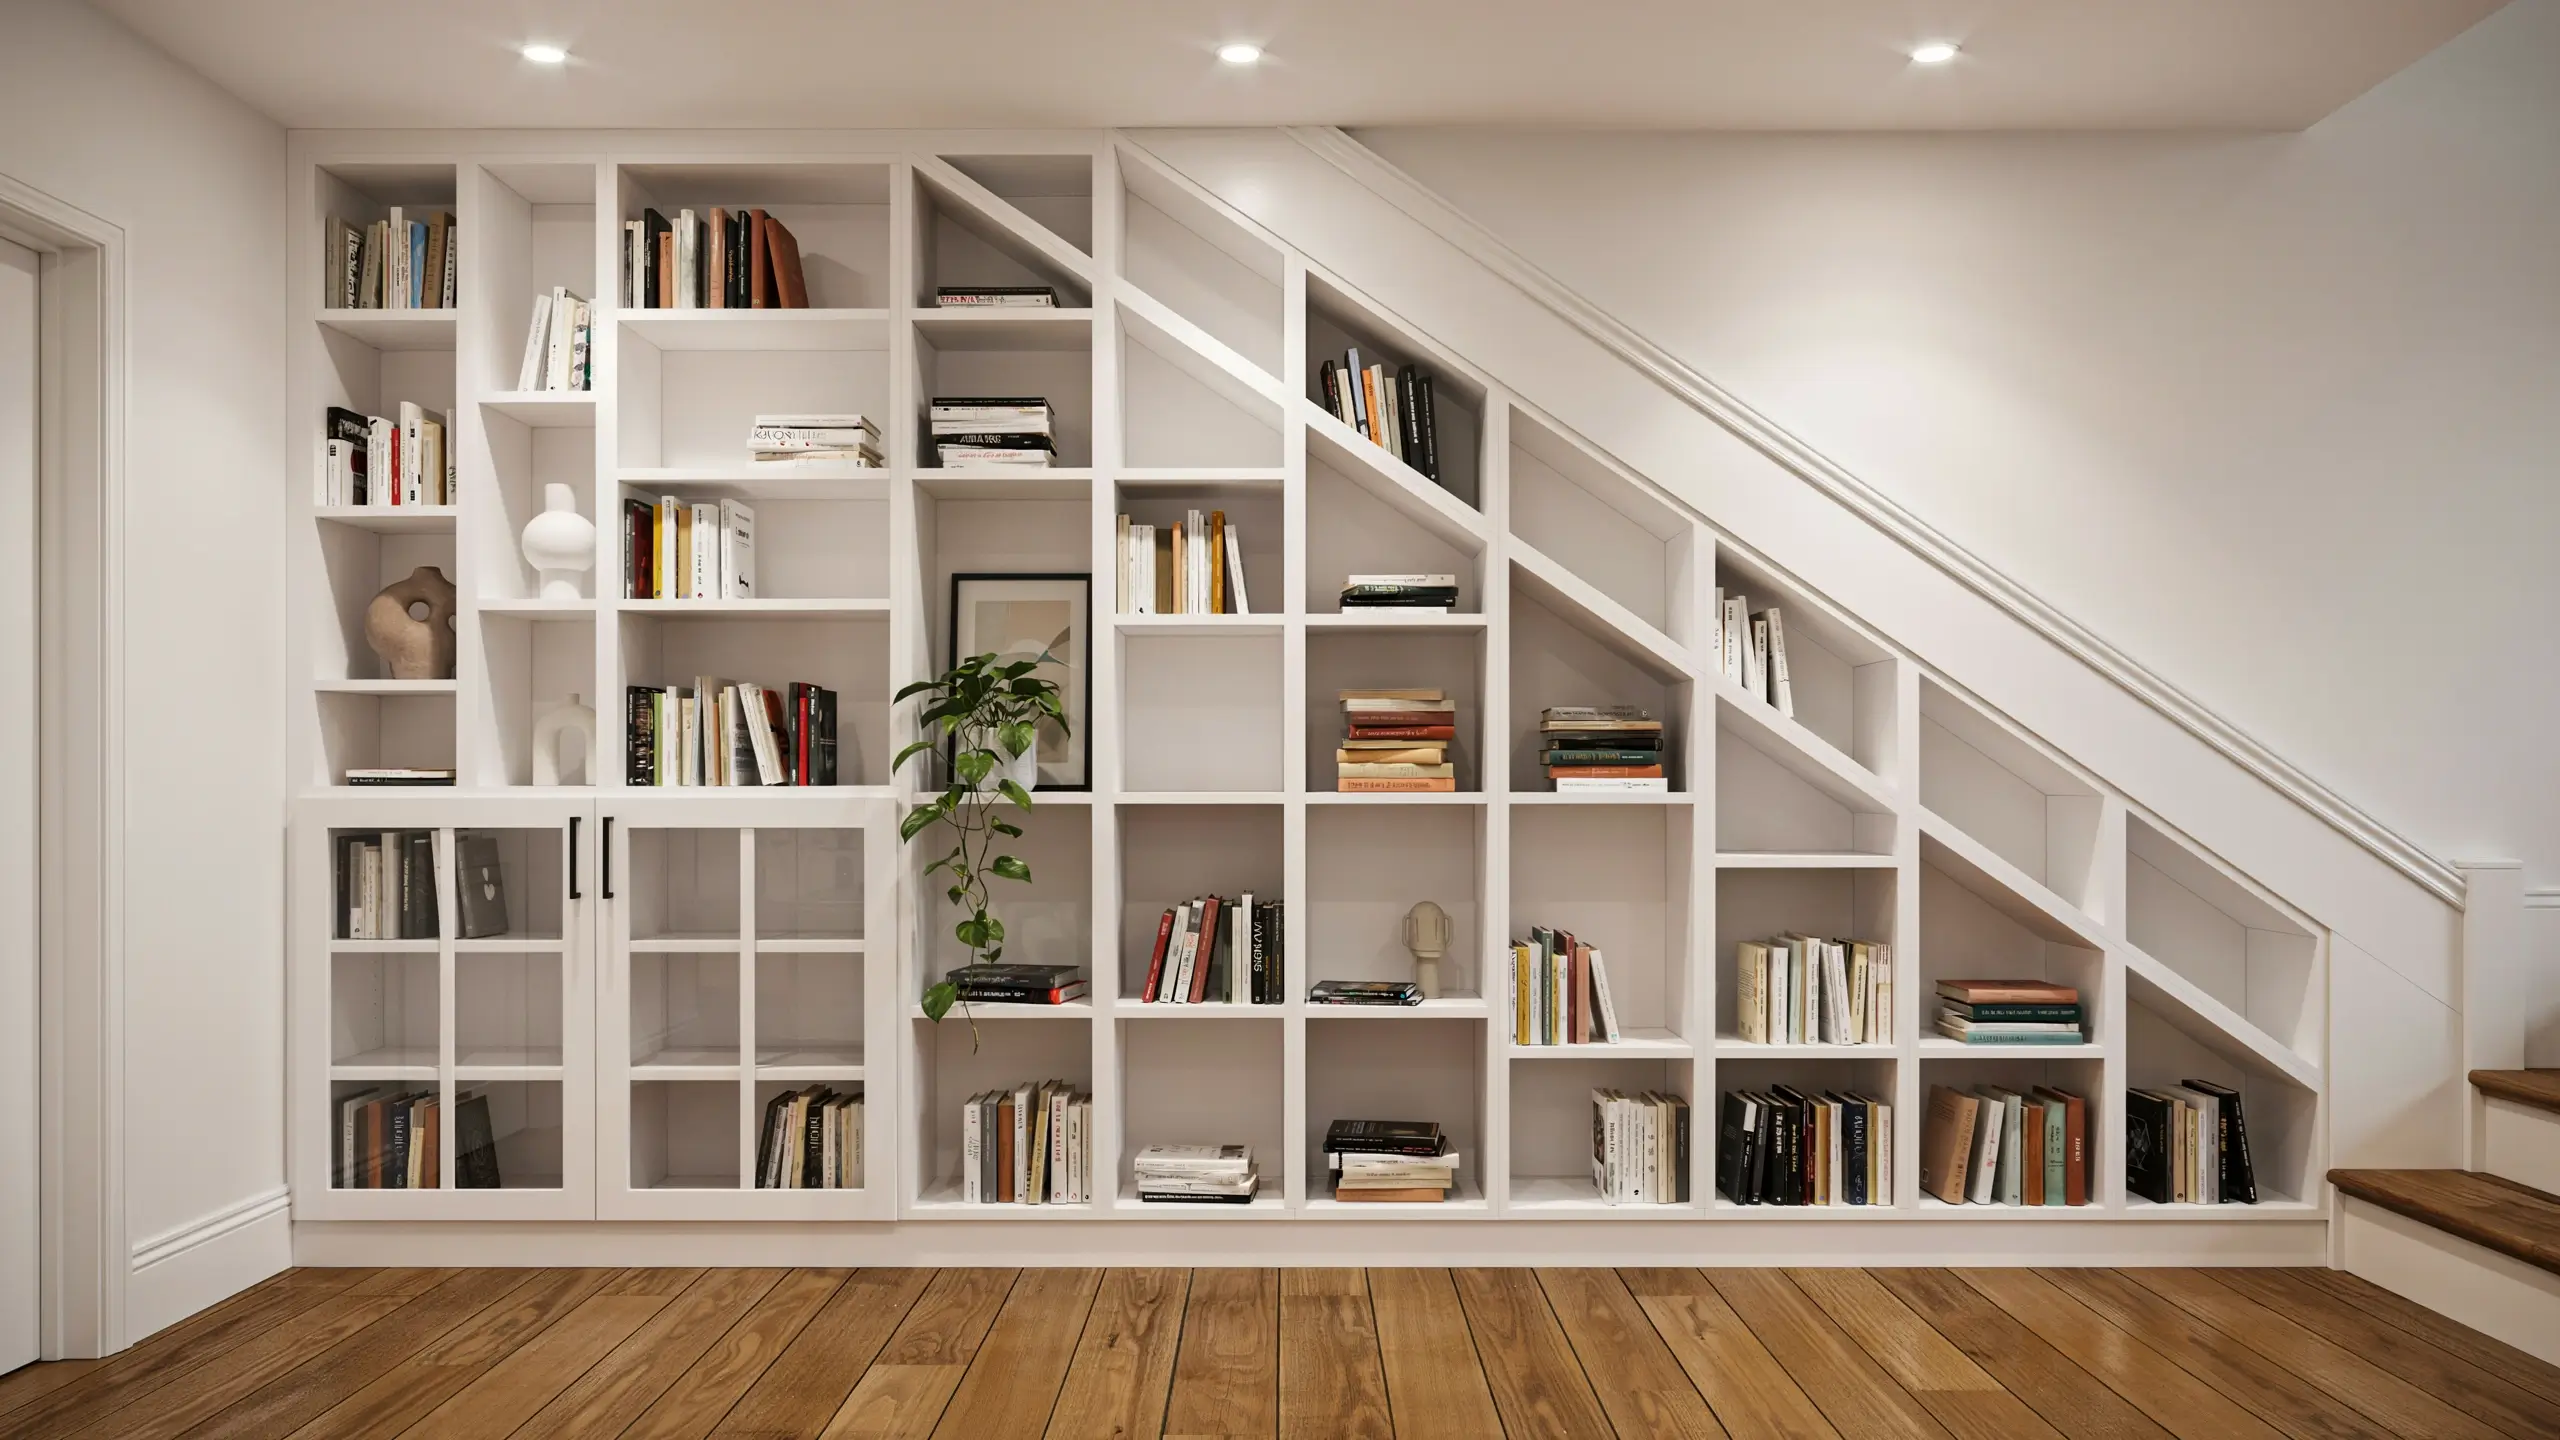
This is a slightly more advanced but deeply satisfying project that has taken over Pinterest boards for good reason. BILLY bookcases from IKEA can be trimmed at an angle using a circular saw or a handsaw to match the pitch of your staircase, then installed side by side to create what looks like a custom built-in library at a fraction of the cost.
Use a combination of full-height and shorter BILLY units, cut the top shelf panels at the matching angle, and fill the gap with a wood panel or crown molding painted to match. Add OXBERG glass or solid doors on the lower units for concealed storage and leave the upper shelves open for display.
This project typically runs $300–$600 in IKEA materials and a weekend of work. The finished result genuinely looks like bespoke cabinetry.
What really makes it look built-in: Paint the back panels the same color as the wall and add the same hardware throughout. Consistency is what fools the eye.
9. Under-Stairs Mudroom with Bench, Hooks, and Cubbies
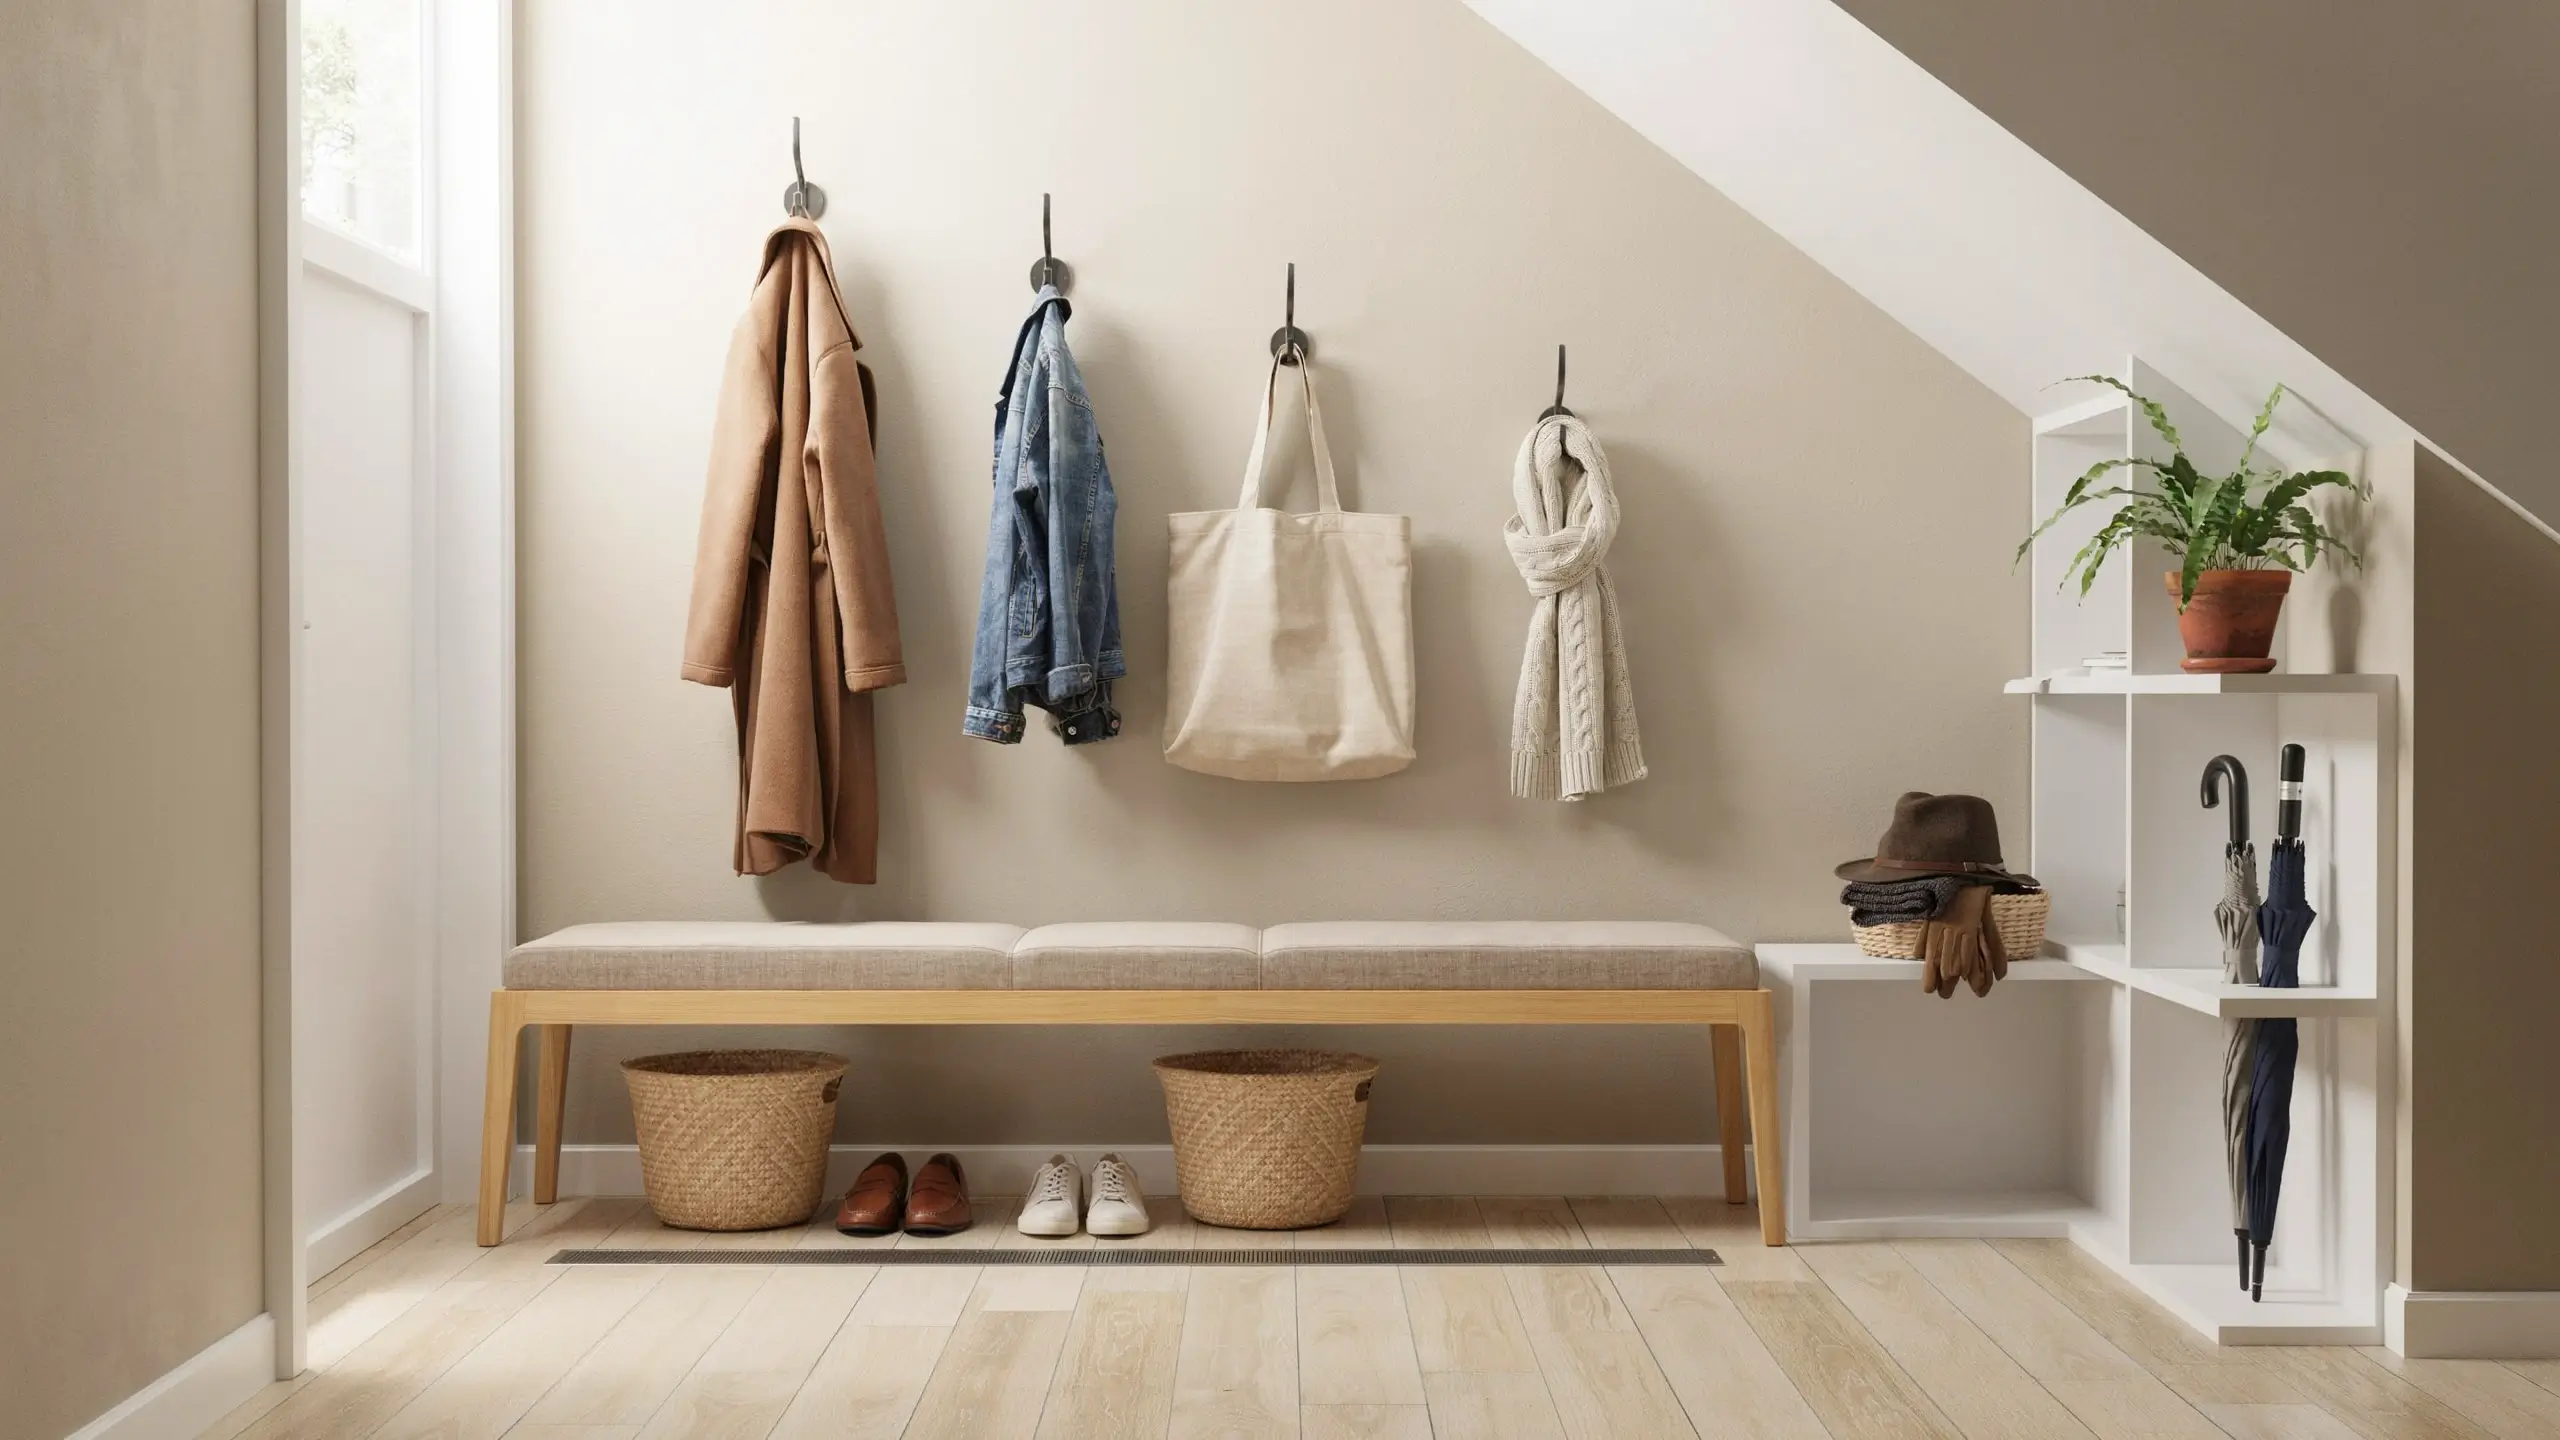
This is one of the most practical under stair storage hacks for families. If your staircase is near the front door or back entry, this transformation is a game-changer.
The setup: a low bench (or two KALLAX cubes with a cushion on top) for sitting and putting shoes on, a row of hooks above for coats and bags at varying heights for adults and kids, a shallow tray or drawer below the bench for shoes, and open cubbies or labeled baskets on the sides for hats, scarves, umbrellas, and mail.
Use IKEA TJUSIG coat racks, a standard wooden floating bench, and a few wicker baskets from Target or Michaels. The back wall painted in a warm neutral ties it together. This setup can hold an entire family’s outerwear and shoe situation in under 24 inches of wall space.
Renter version: Use a freestanding coat rack, a separate bench with storage, and baskets on a low shelf. No drilling, still very functional.
Cost: $150–$400 depending on whether you DIY the bench or buy it.
10. The Home Office Nook That Actually Disappears
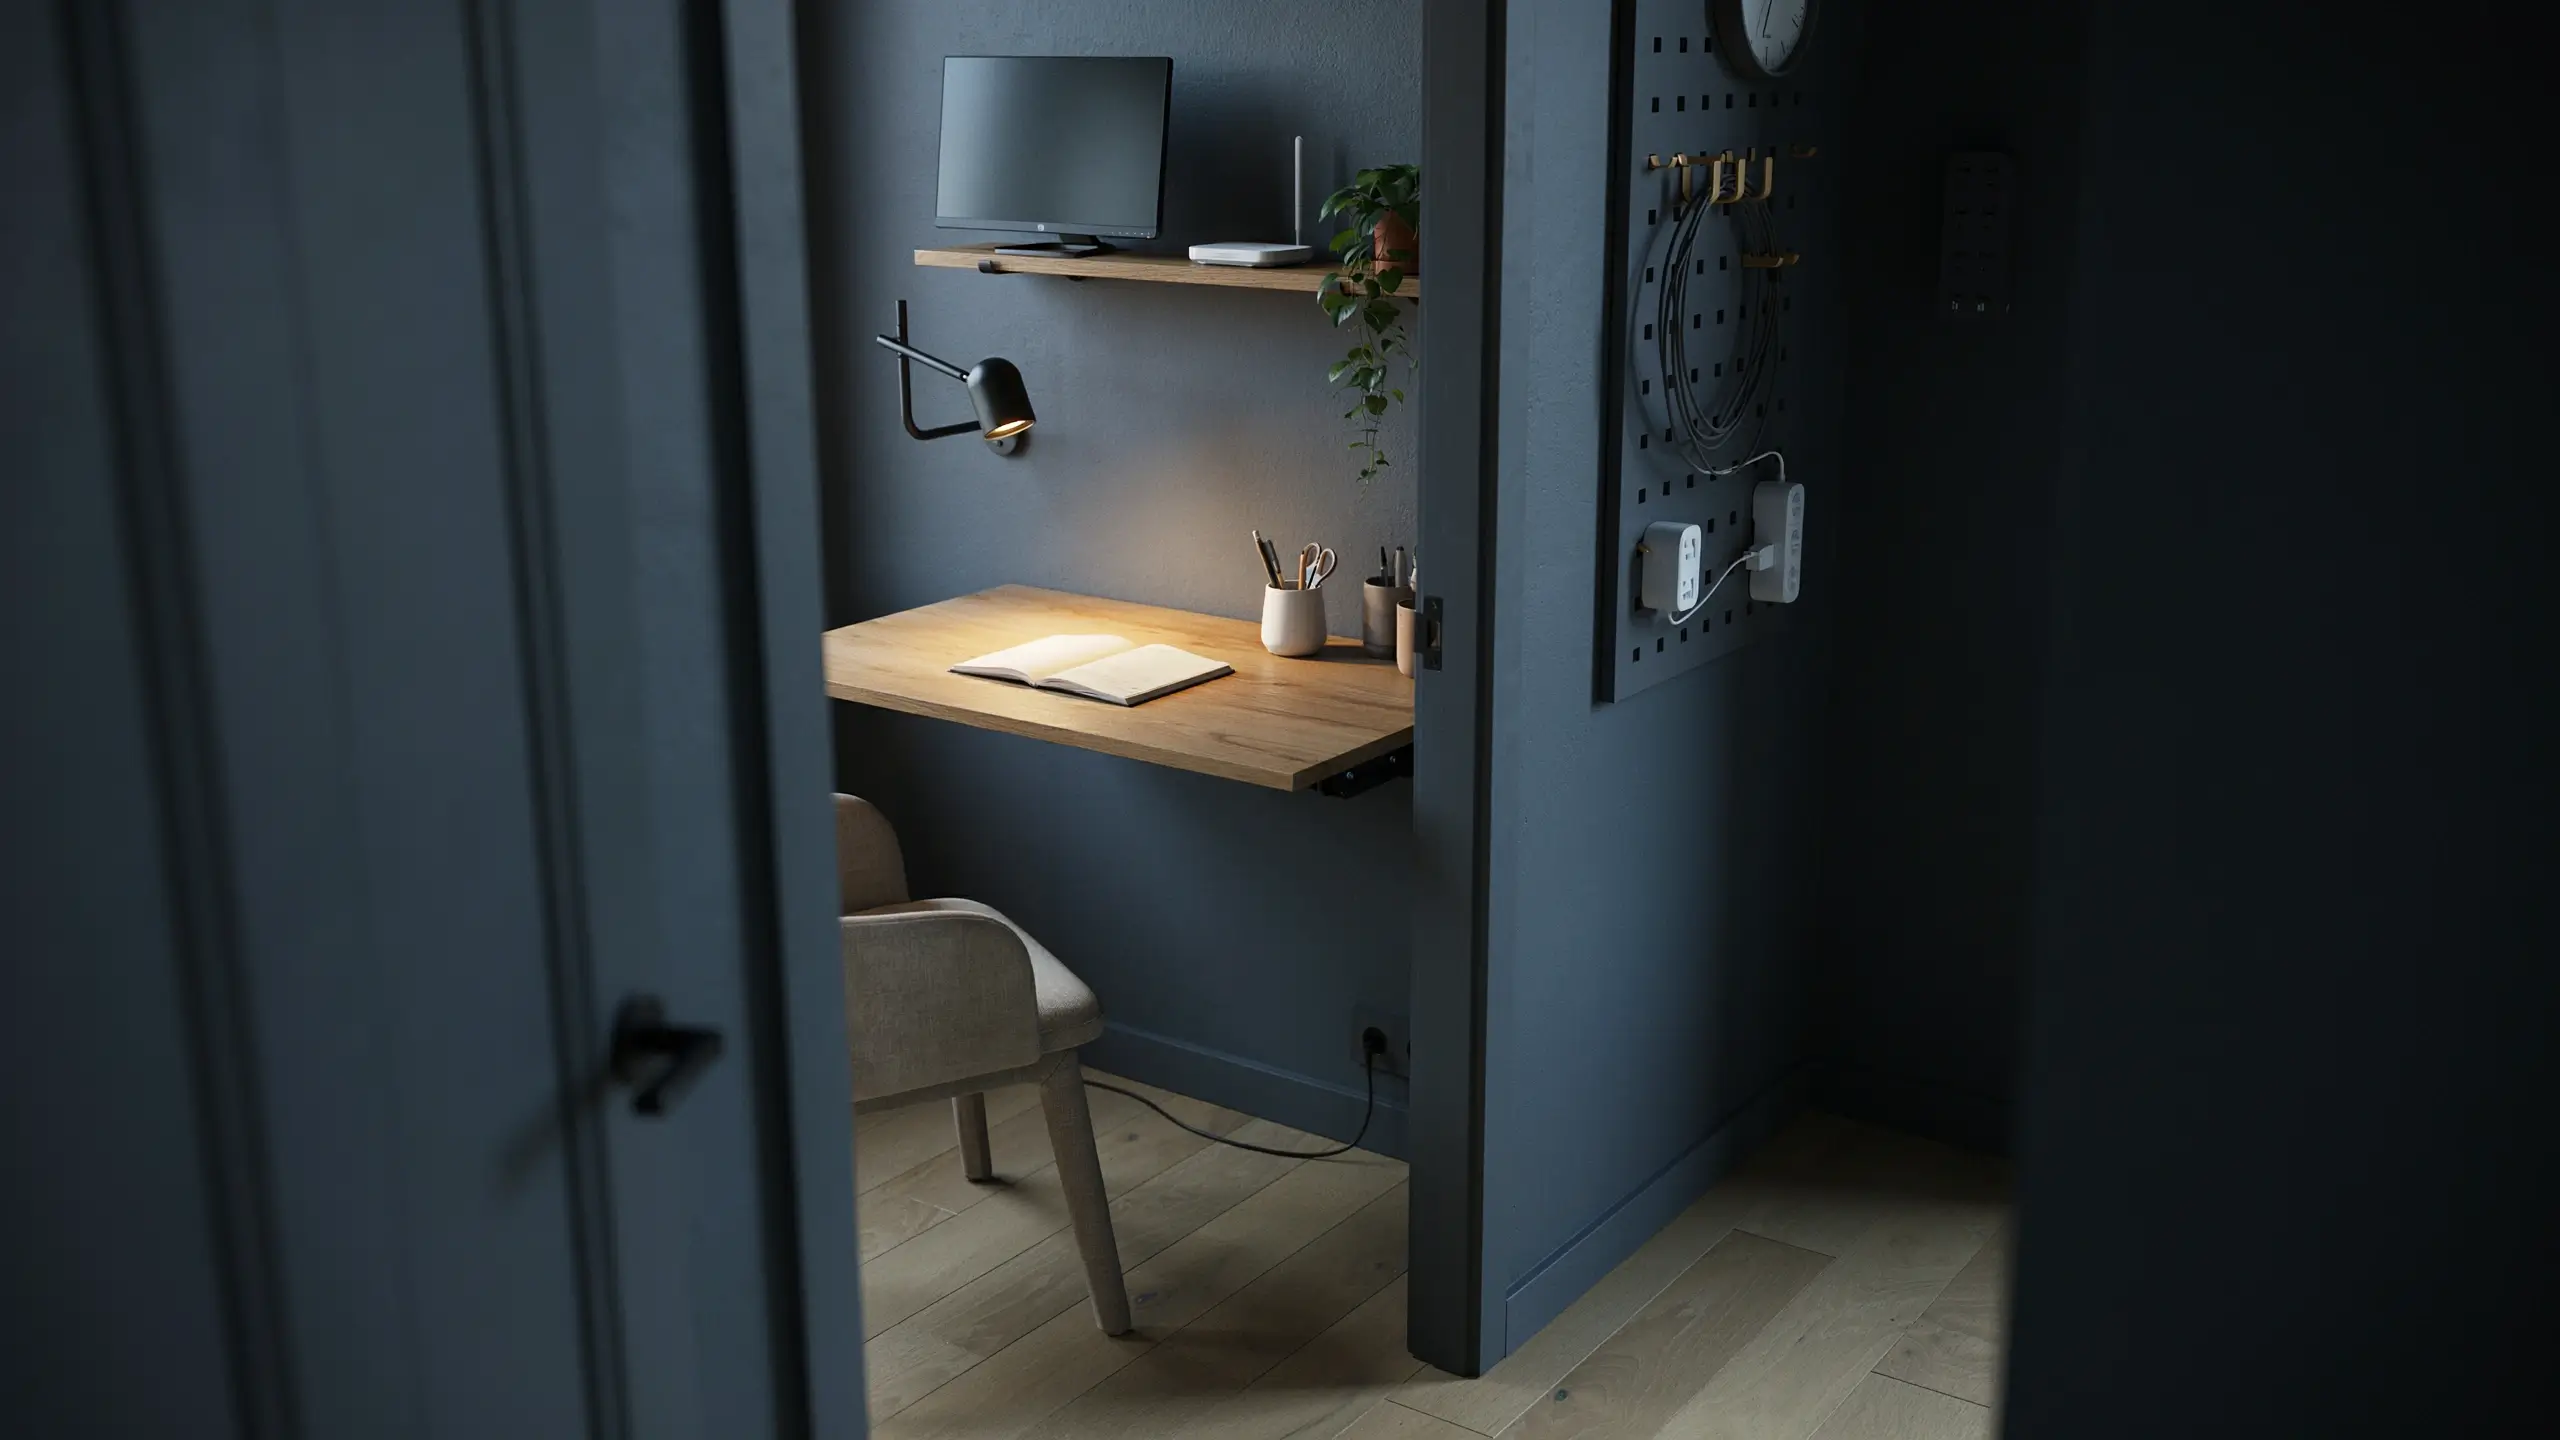
A wall-mounted fold-down desk inside the under-stair space, with the door closed, looks like nothing at all. Open it up and you have a working surface, a shelf above for a monitor or notebooks, a pegboard side panel for chargers and supplies, and your own quiet corner.
IKEA’s NORBERG fold-down wall table is around $60 and mounts directly to the wall. Pair it with a wall-mounted shelf above (EKBY bracket shelf, around $25) and a pegboard panel on the side wall for cables and stationery. Add a USB power strip on a side shelf for charging.
If the space has a door, this setup is completely invisible when closed. The chair sits outside the opening when in use and slides or folds away when not. This works even in spaces only 30 inches deep.
What most tutorials skip: Cable management. Run one power strip inside along the back wall with cord clips, and route the cable under the door threshold into a nearby outlet. One cord exits, not five.
11. Slide-Out Drawers Built Into the Risers
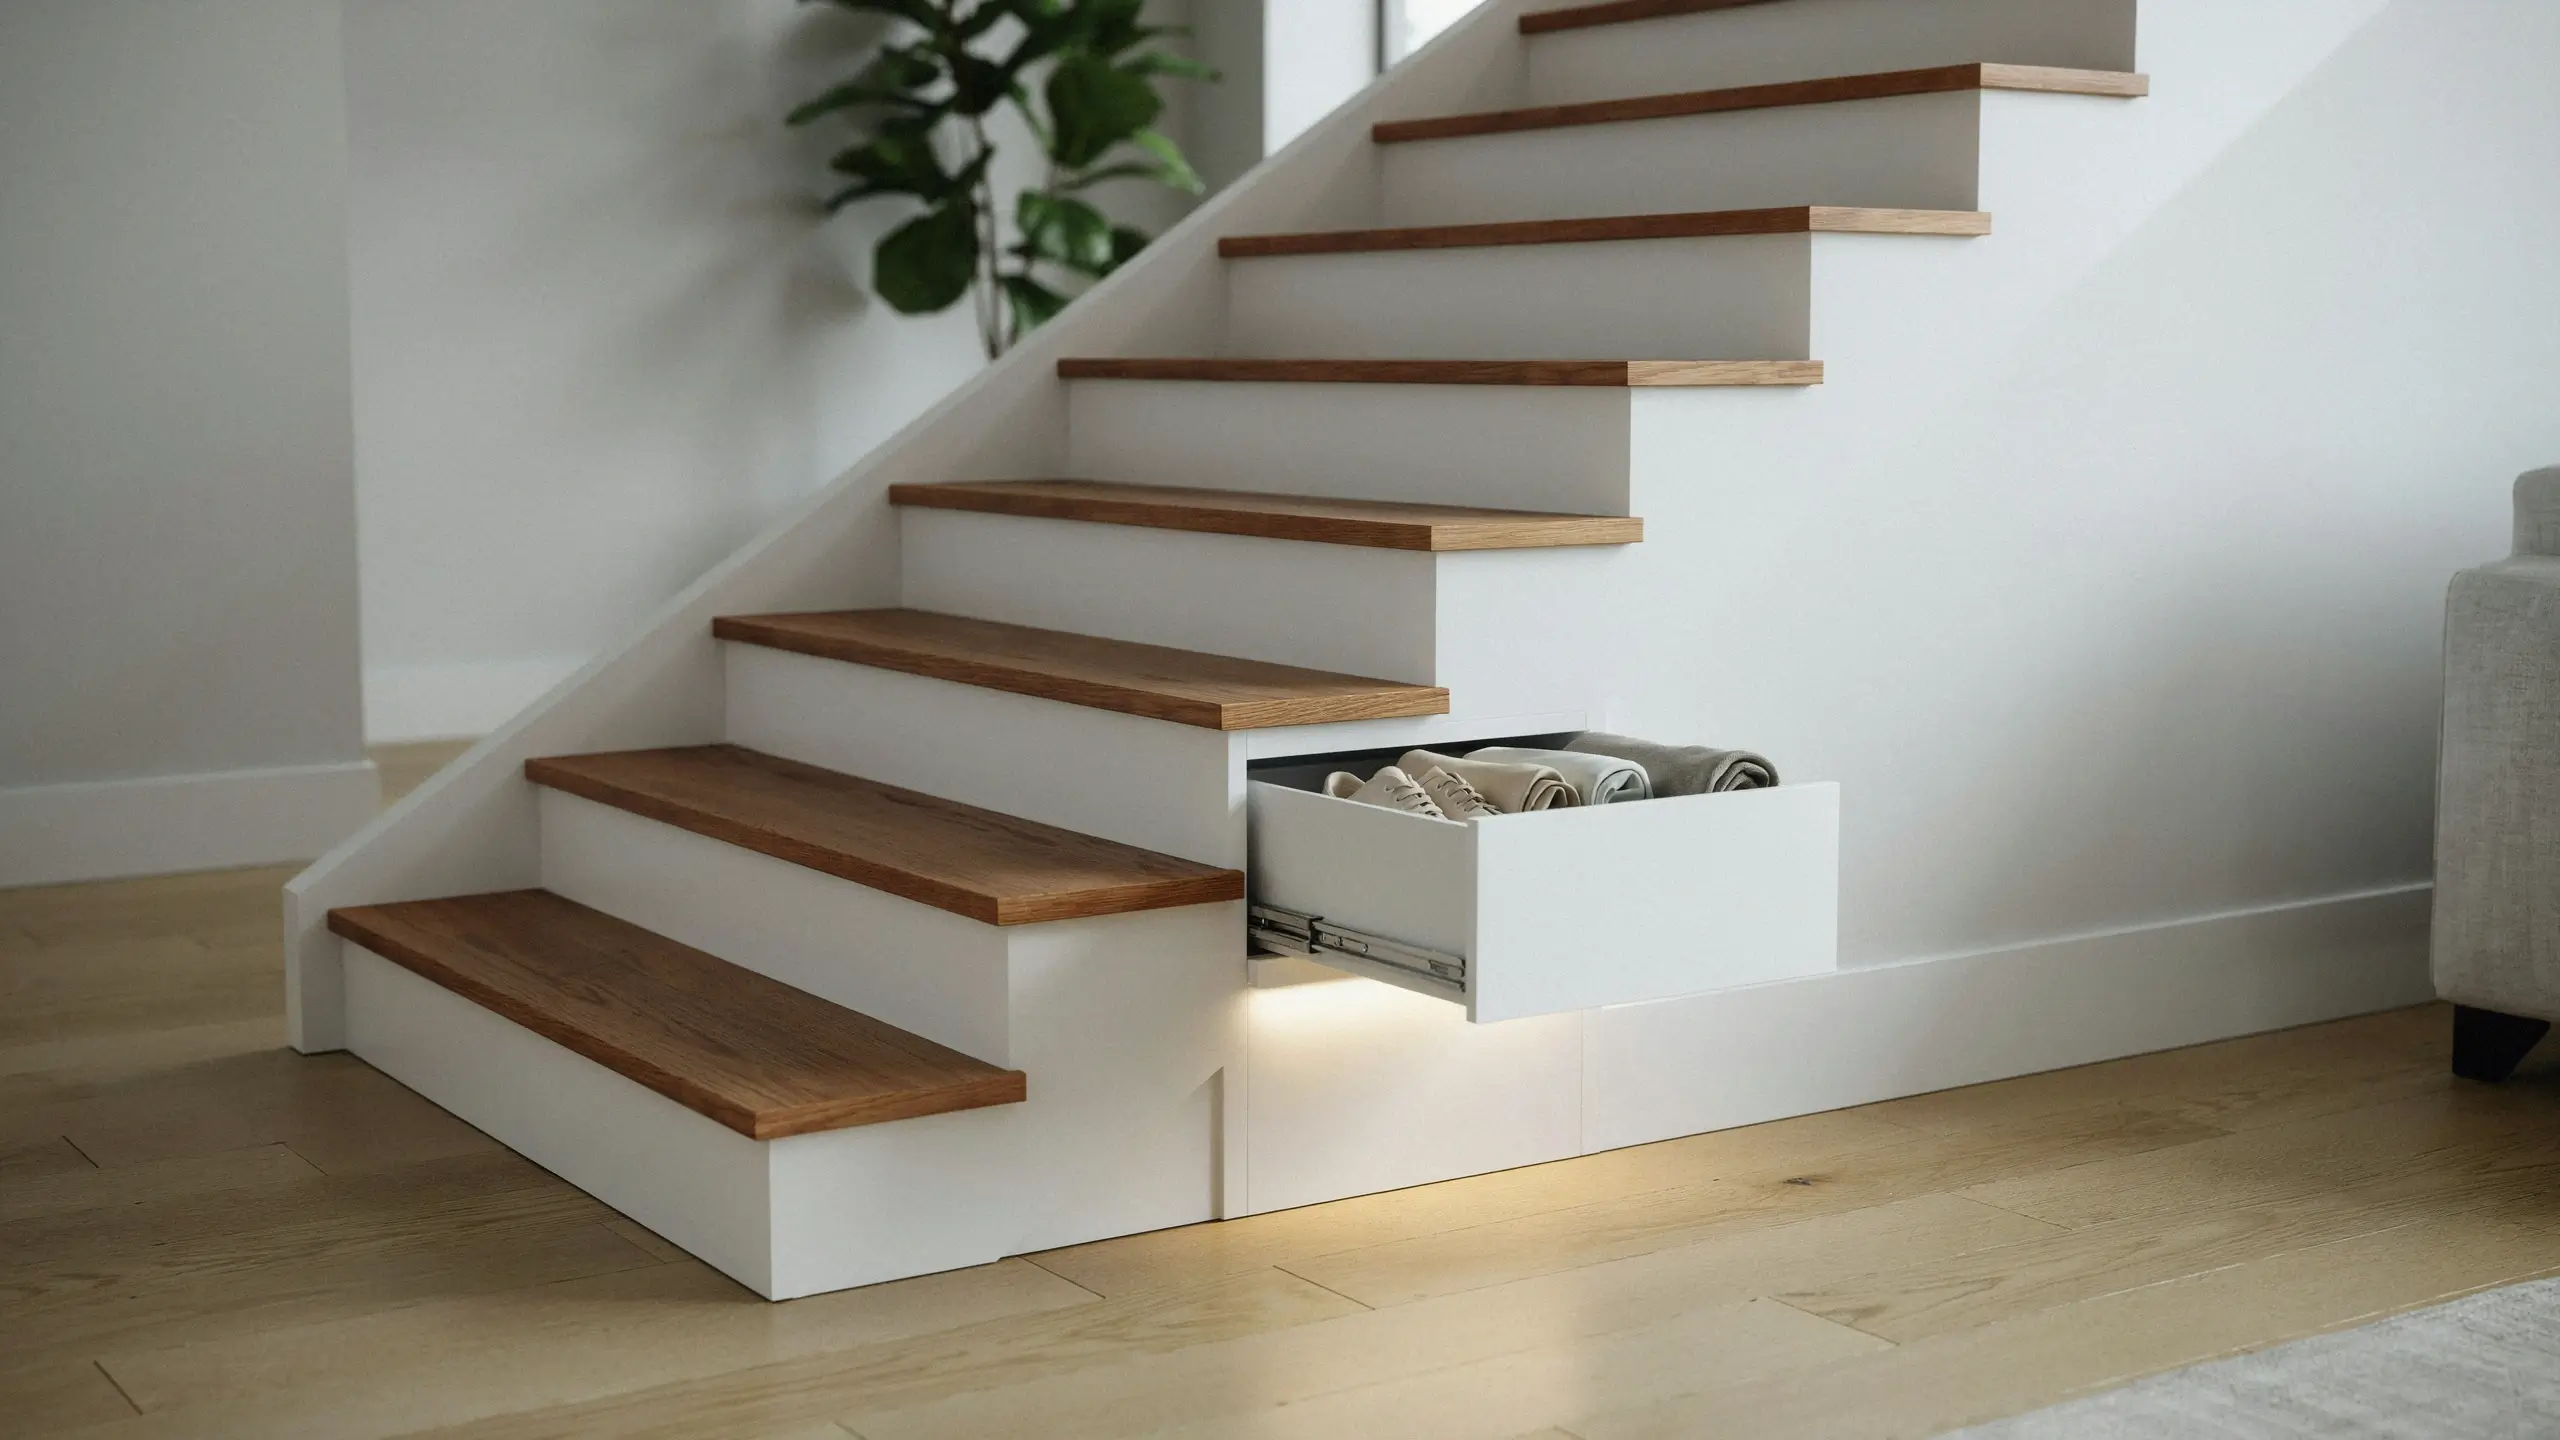
This is the kind of under stair storage hack that makes people stop mid-scroll. Each individual stair riser becomes the face of a shallow pull-out drawer. The drawers are typically 3–4 inches deep, which is enough for shoes, remote controls, charging cables, art supplies, or pantry items.
This is a carpentry project, not a furniture-assembly one. But it’s more achievable than it looks with basic woodworking skills. You’re essentially building box drawers that sit on drawer slides behind each riser, then reattaching the original riser wood as the drawer face.
Touch-release hardware (look for Accuride soft-close touch-release drawer slides) means there are no visible handles, giving the staircase a completely clean and seamless look. Each drawer on a standard 36-inch wide staircase holds surprisingly more than you’d expect.
Cost: $200–$600 in materials for a full flight of stairs, depending on the number of steps and hardware quality.
Specialty Zones That Competitors Keep Missing
12. The Coffee or Tea Station (Seriously, Try This)
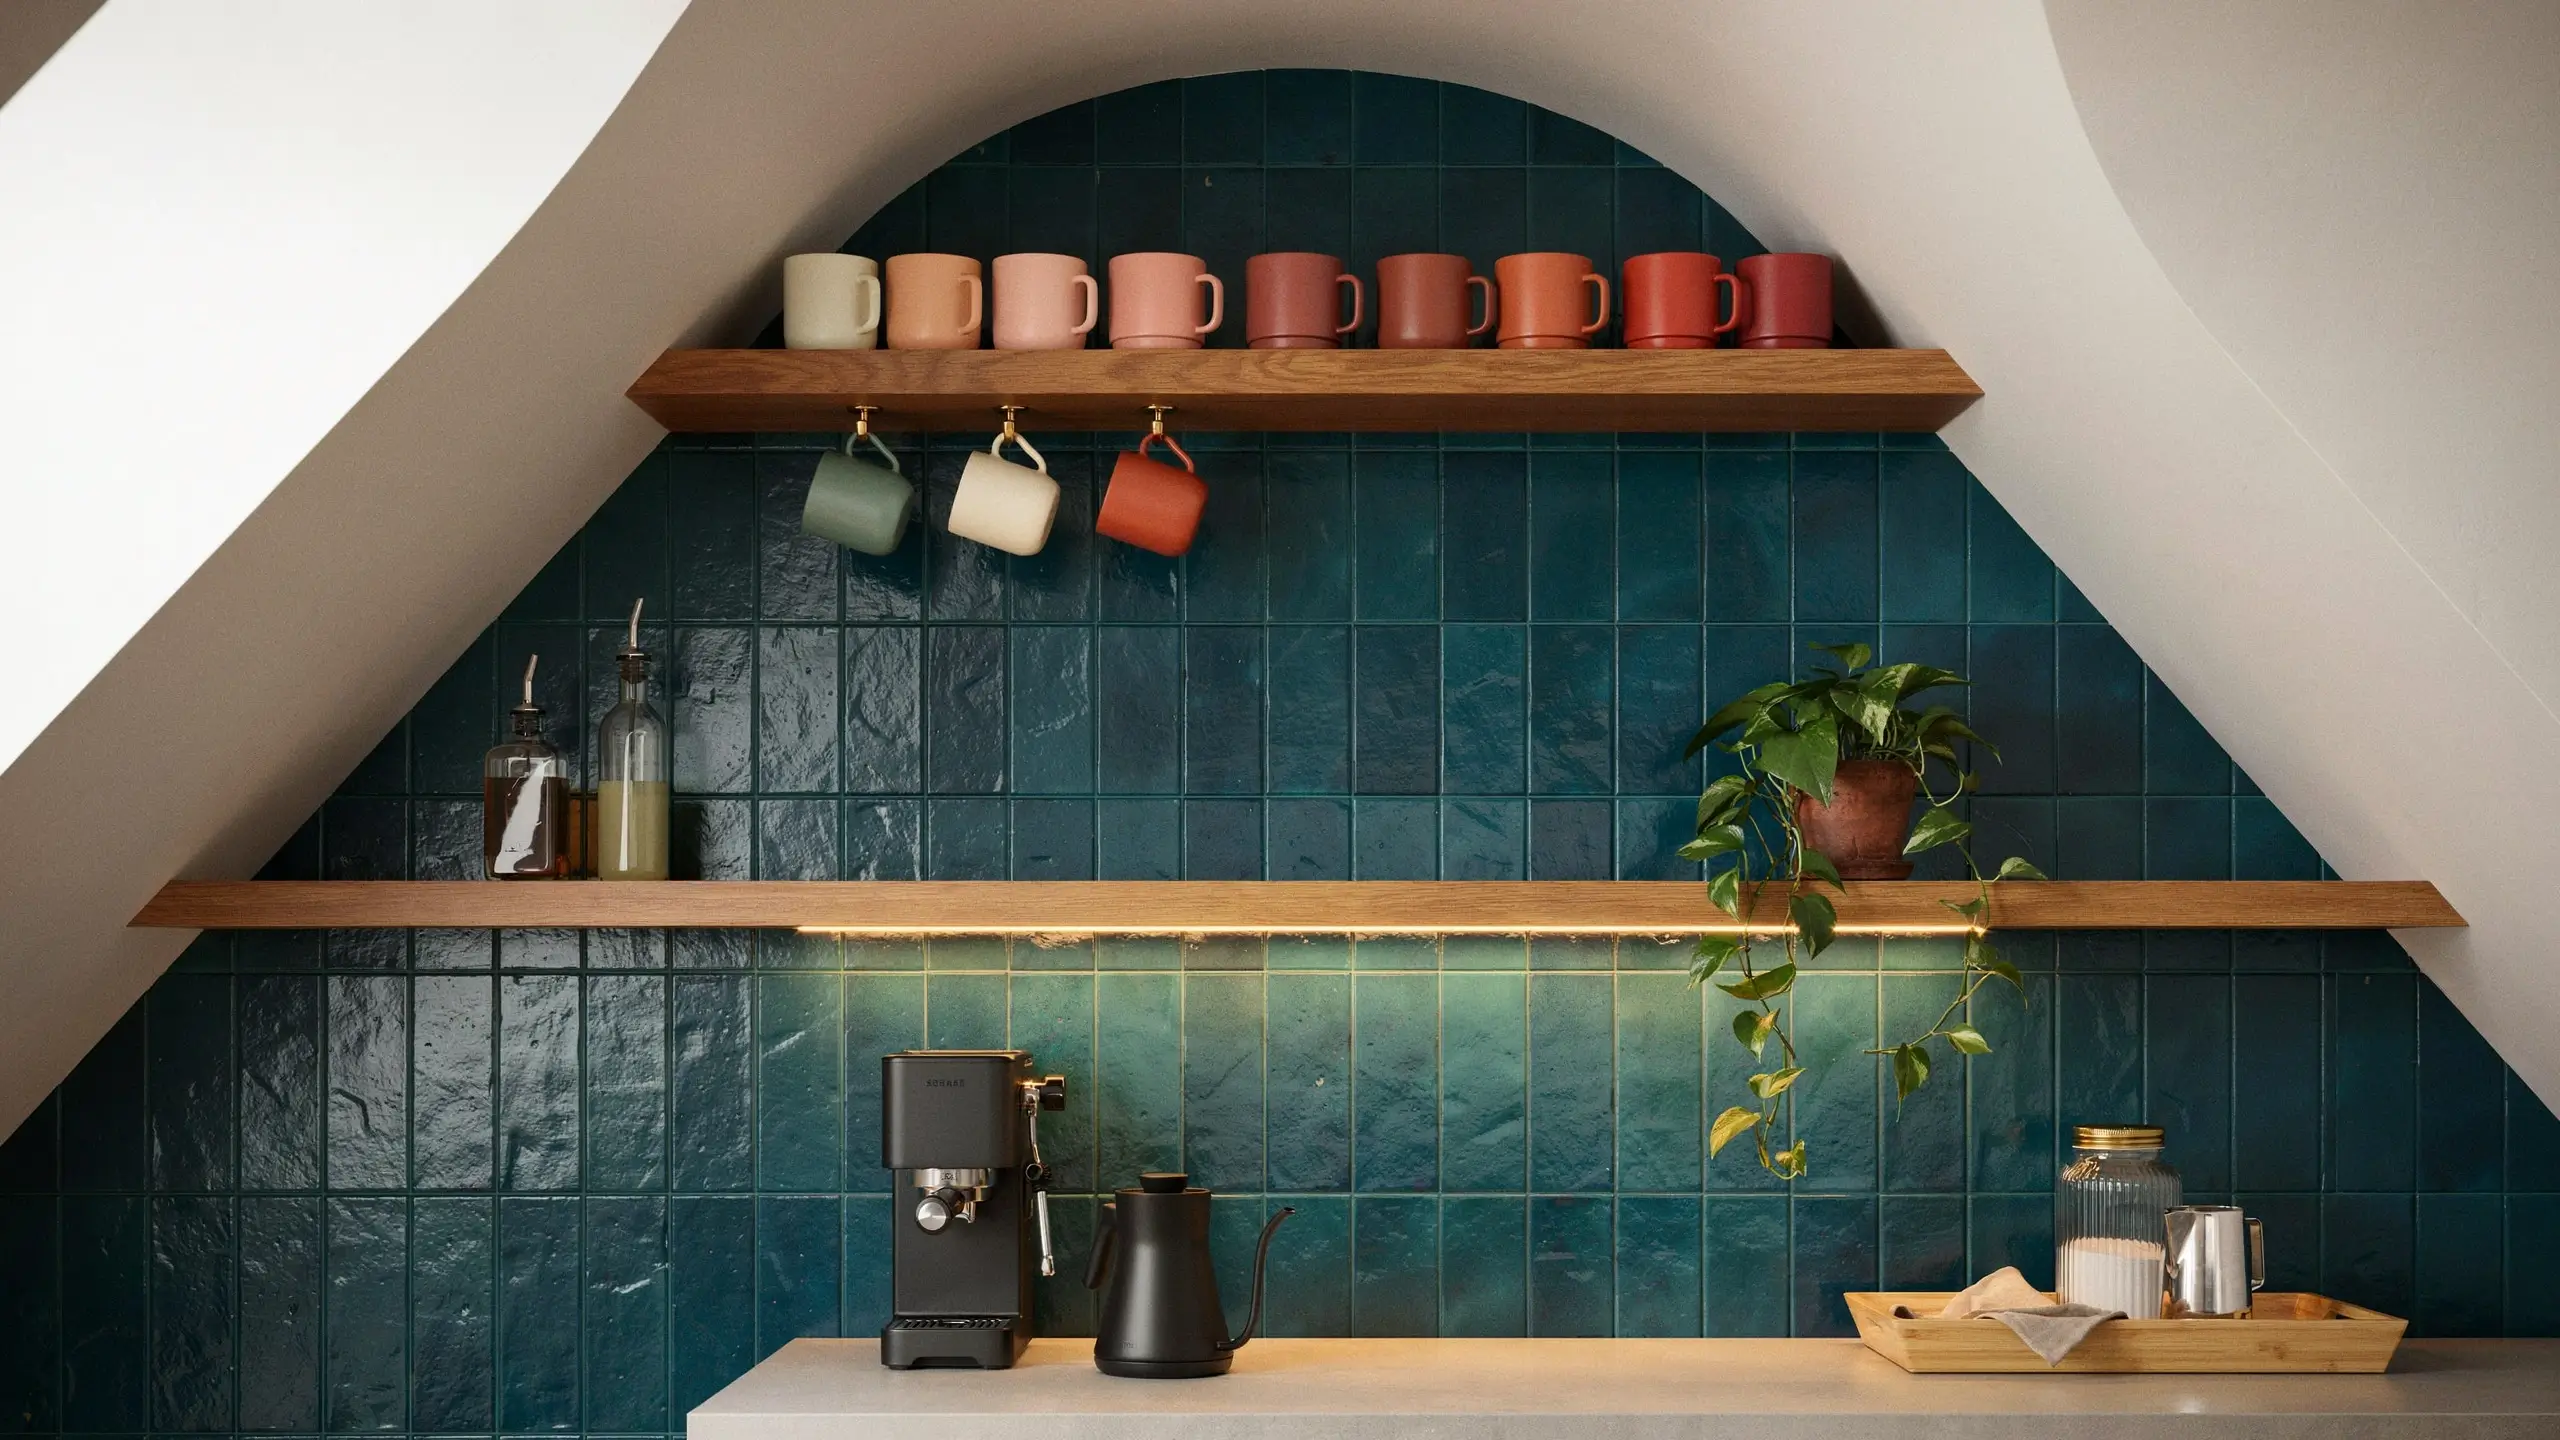
Most under stair storage hacks focus on what to hide. This one is about what to show off. Converting the under-stair space into a dedicated coffee or tea bar feels wildly satisfying.
Mount two floating shelves on the back wall: one at counter height for the coffee machine and a kettle, one above for mugs arranged by color or type. Add a small strip of hooks below the upper shelf for travel mugs. Use a floating shelf at mid-height for syrups, a sugar container, and a small plant.
For renters: a rolling RÅSKOG kitchen trolley from IKEA ($40) works as the base unit and can be wheeled out during morning use, tucked back in when done.
Line the back wall in a fun tile-effect peel-and-stick wallpaper or a deep-toned paint color. Light it with a warm-toned LED strip along the upper shelf edge. This is legitimately one of the most photograph-worthy versions of an under-stair setup.
Cost: $50–$200 depending on whether you have the appliances already.
13. Seasonal Storage System That Actually Works Year-Round
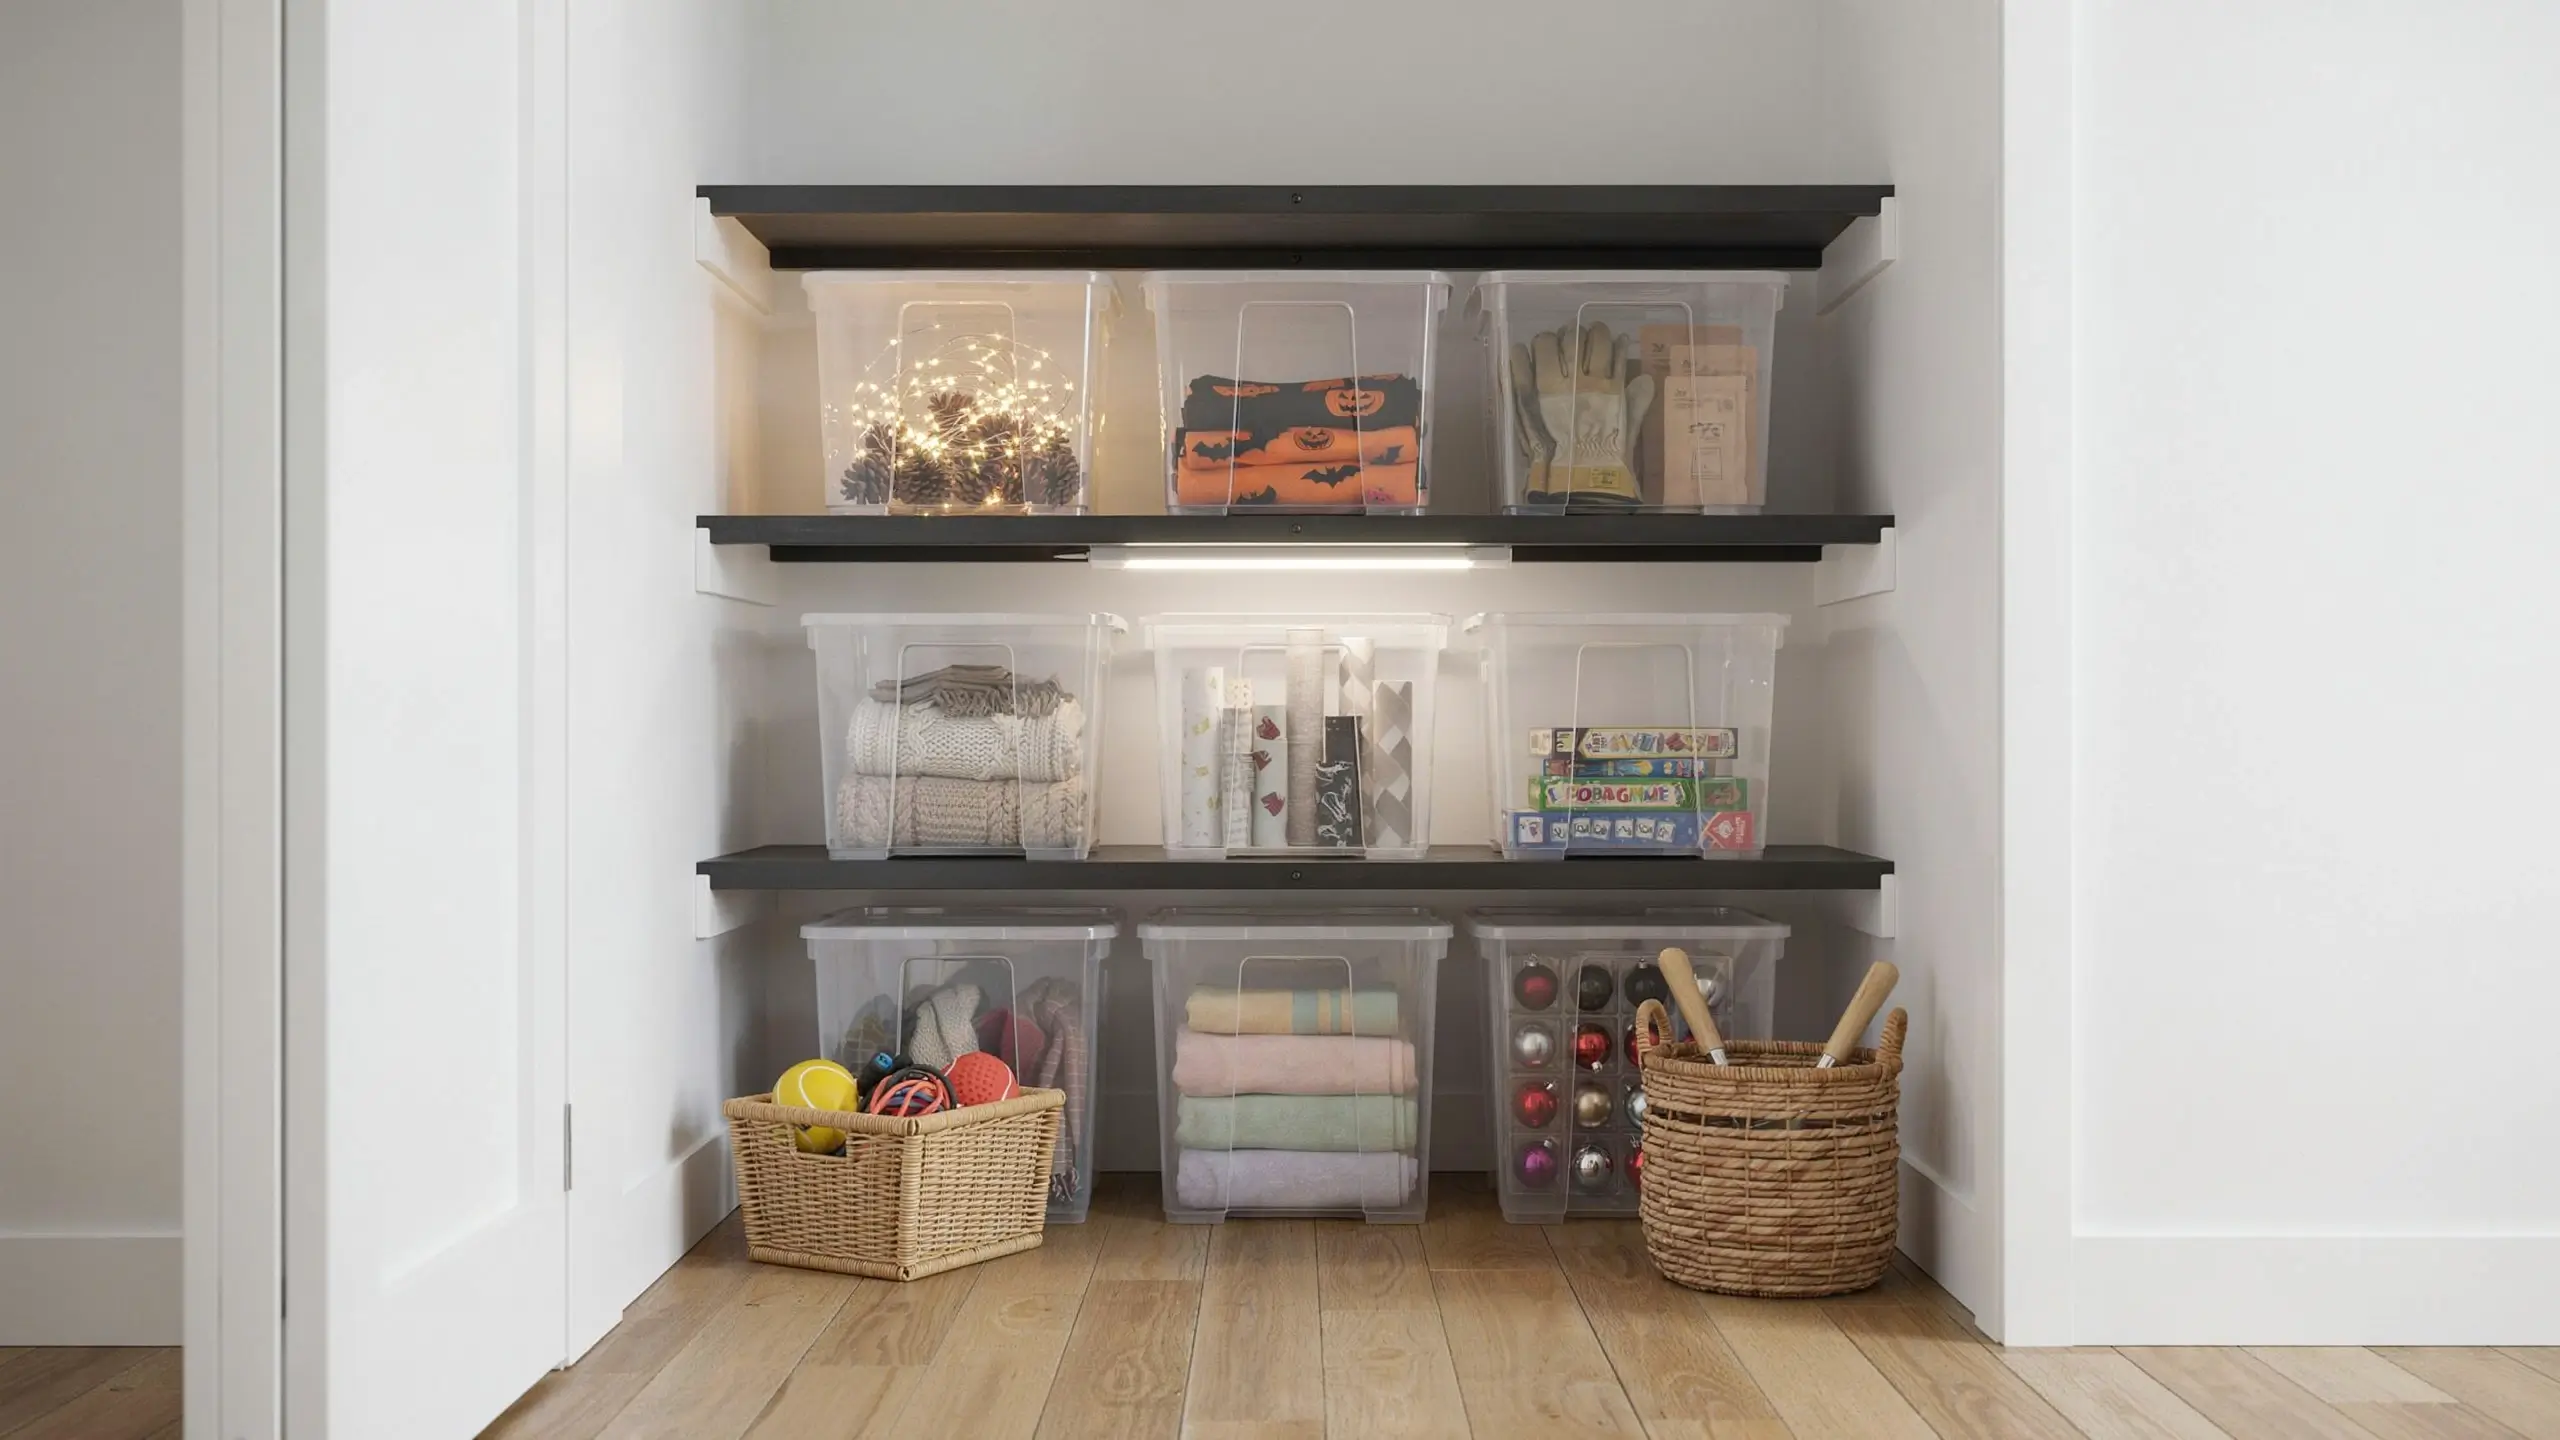
Most homes have seasonal items scattered in weird places because there’s no dedicated zone for them. Your under-stair space solves this.
Use clear stackable bins (the kind with latching lids, like Sterilite or IRIS) labeled clearly with a label maker or handwritten tags. Organize by season: winter decor, spring gardening supplies, summer outdoor gear, fall and Halloween decor. Stack them by rotation: whatever’s coming up next is at the front, what just passed goes to the back.
At the tallest-clearance end, install two or three heavy-duty shelves rated for at least 75 lbs each (these are not the places to cheap out on brackets). That’s where the bins live. At the shorter end, keep a labeled basket for “donate” and one for “mend or repair.” Review and rotate quarterly.
This system works best with a basic inventory taped inside the door: a handwritten list of what’s in each bin. You’ll thank yourself in November when you’re hunting for the advent calendar.
14. Pet Nook With a Mini Barn Door
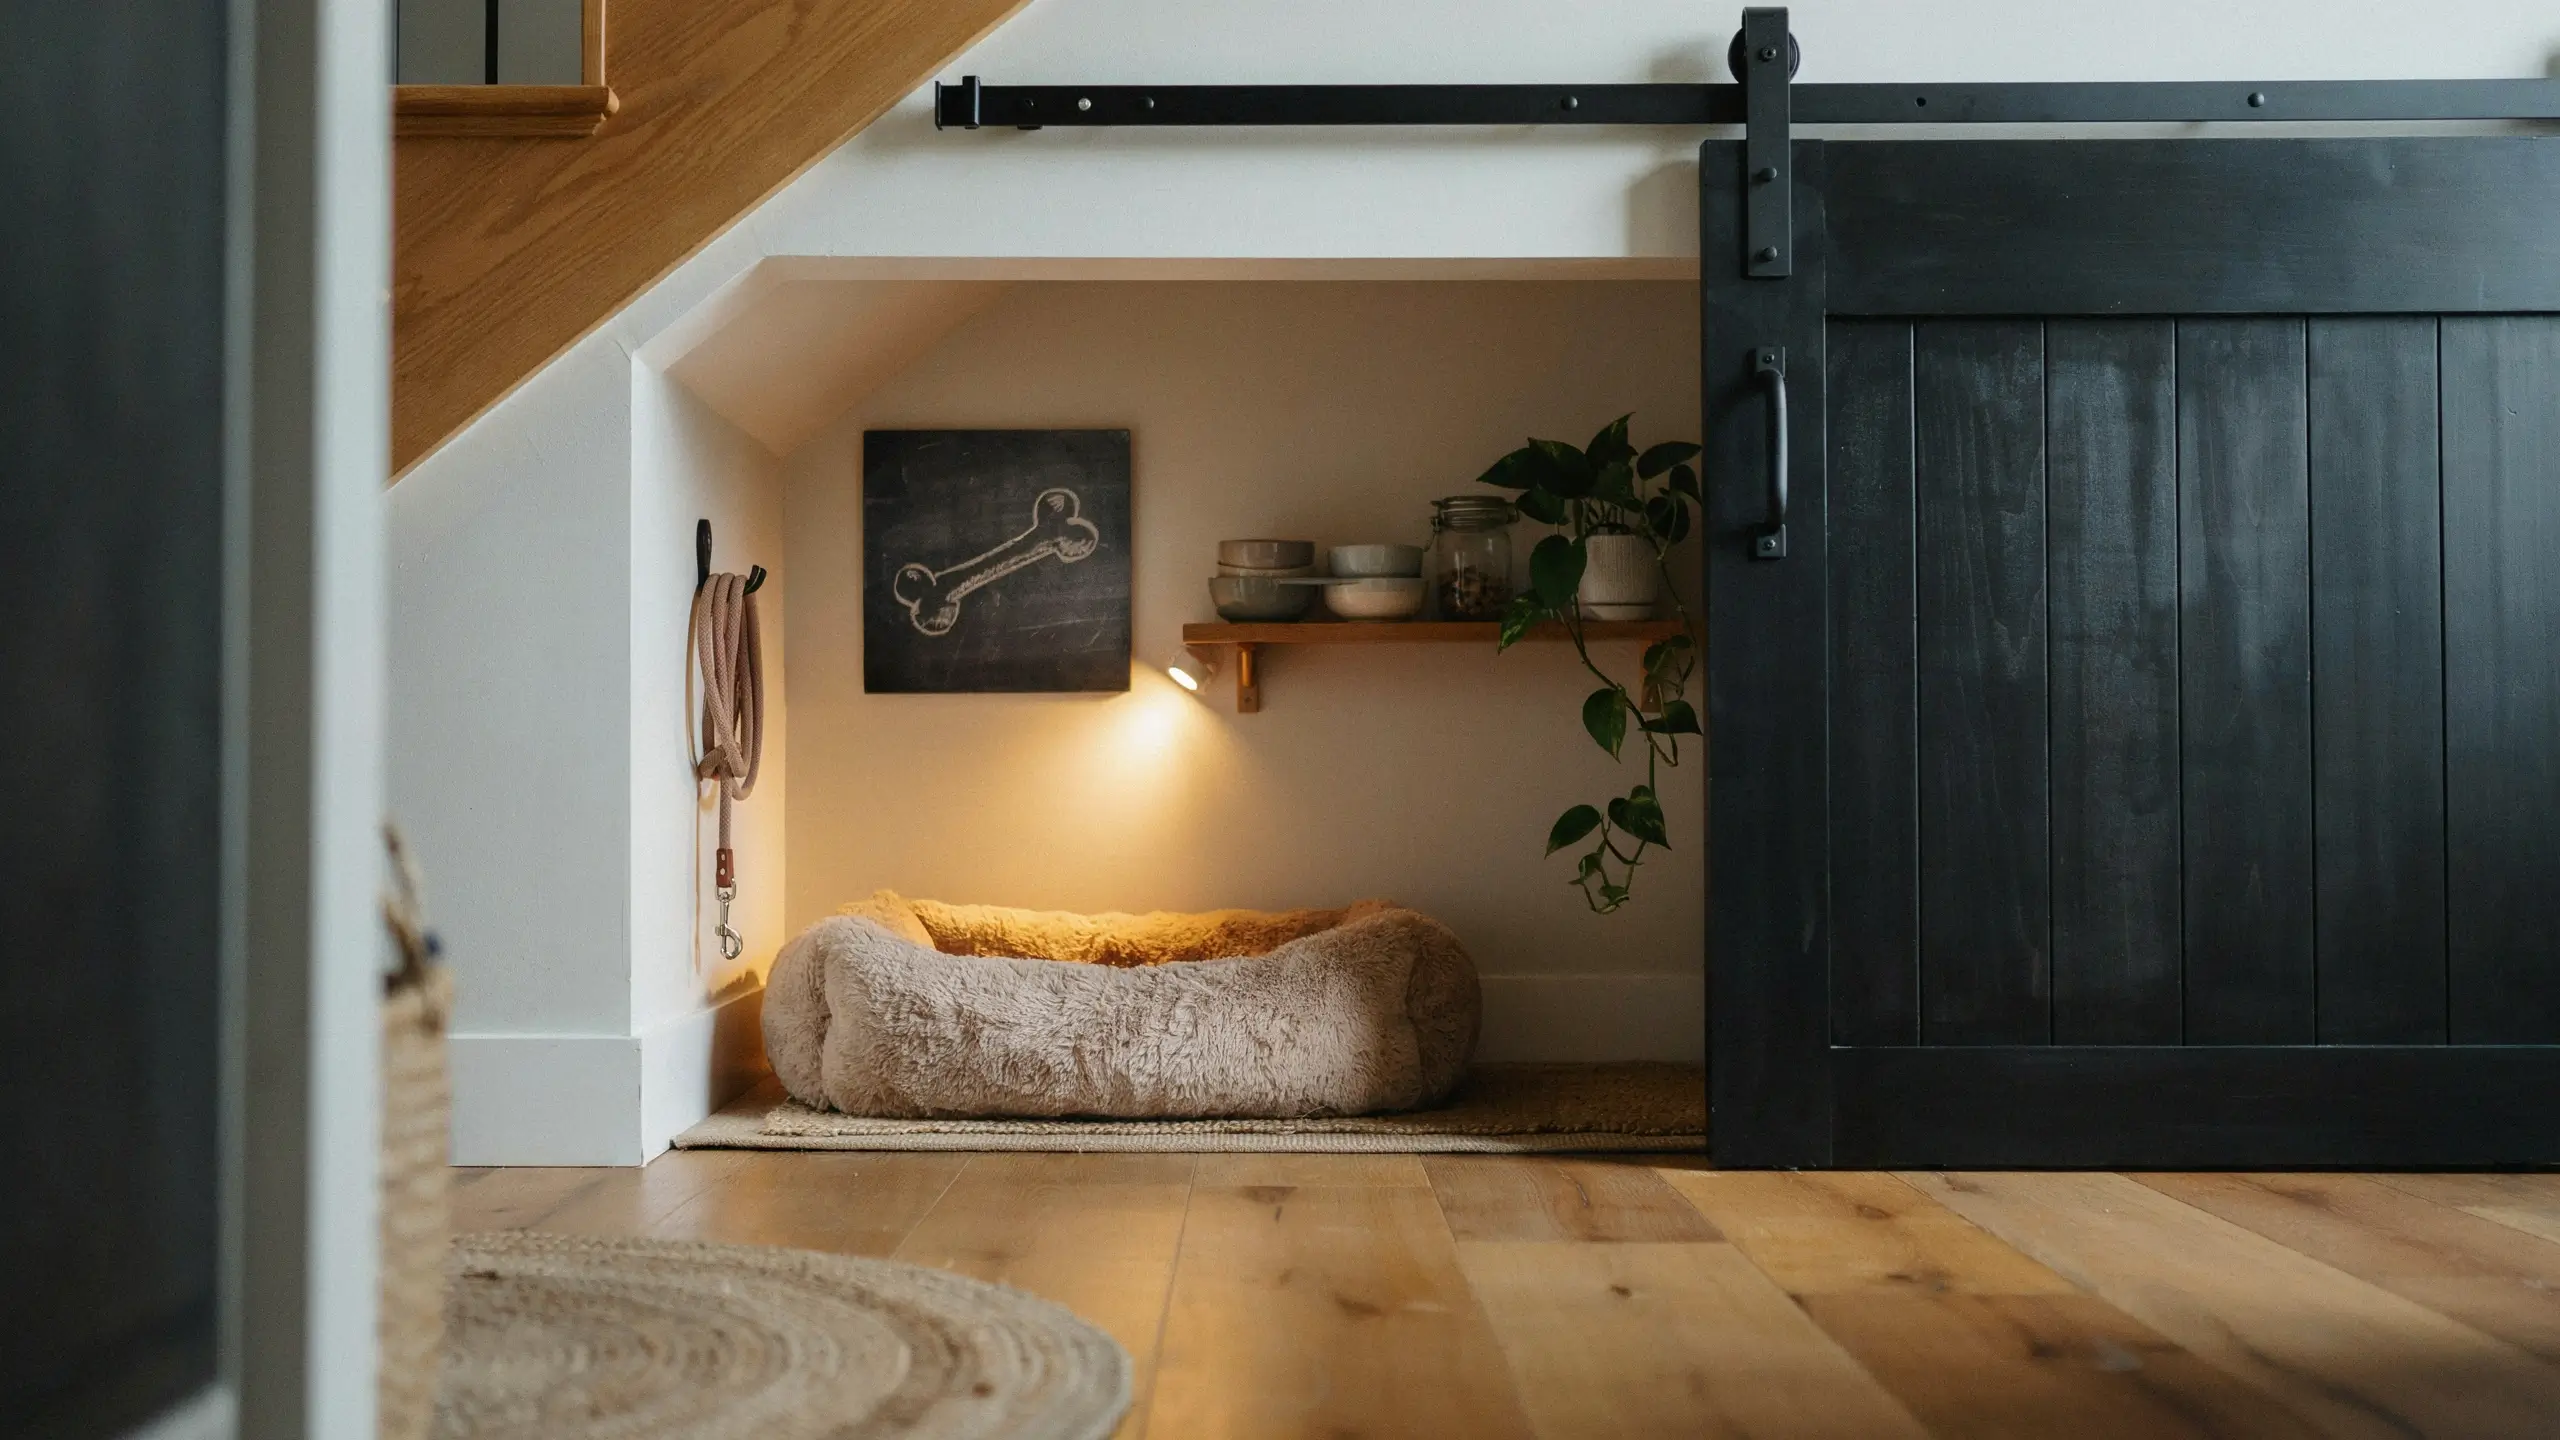
If you have a dog or cat, this one is worth the afternoon it takes. The low-clearance end of the under-stair space, often just 24–36 inches tall, is the perfect size for a pet corner.
Paint it a fun, washable color. Add a soft washable mat or a dog bed sized to fit. Mount a small hook on the side wall for the leash. On the opposite wall, add a shallow shelf for a bowl caddy, treats, and a small plant (kept well out of reach). Put a chalkboard contact paper square on the wall and write your pet’s name above the entrance.
The door: a DIY barn door made from a single sheet of plywood, cut to size, painted black or stained, and hung on a simple surface-mount sliding barn door track runs about $60–$80 in materials. It closes flat against the wall and looks completely intentional.
This is one of those under stair storage hacks that photographs exceptionally well for Pinterest and doubles as a genuine quality-of-life improvement for your pet.
15. The Plant Station for Low-Light Lovers
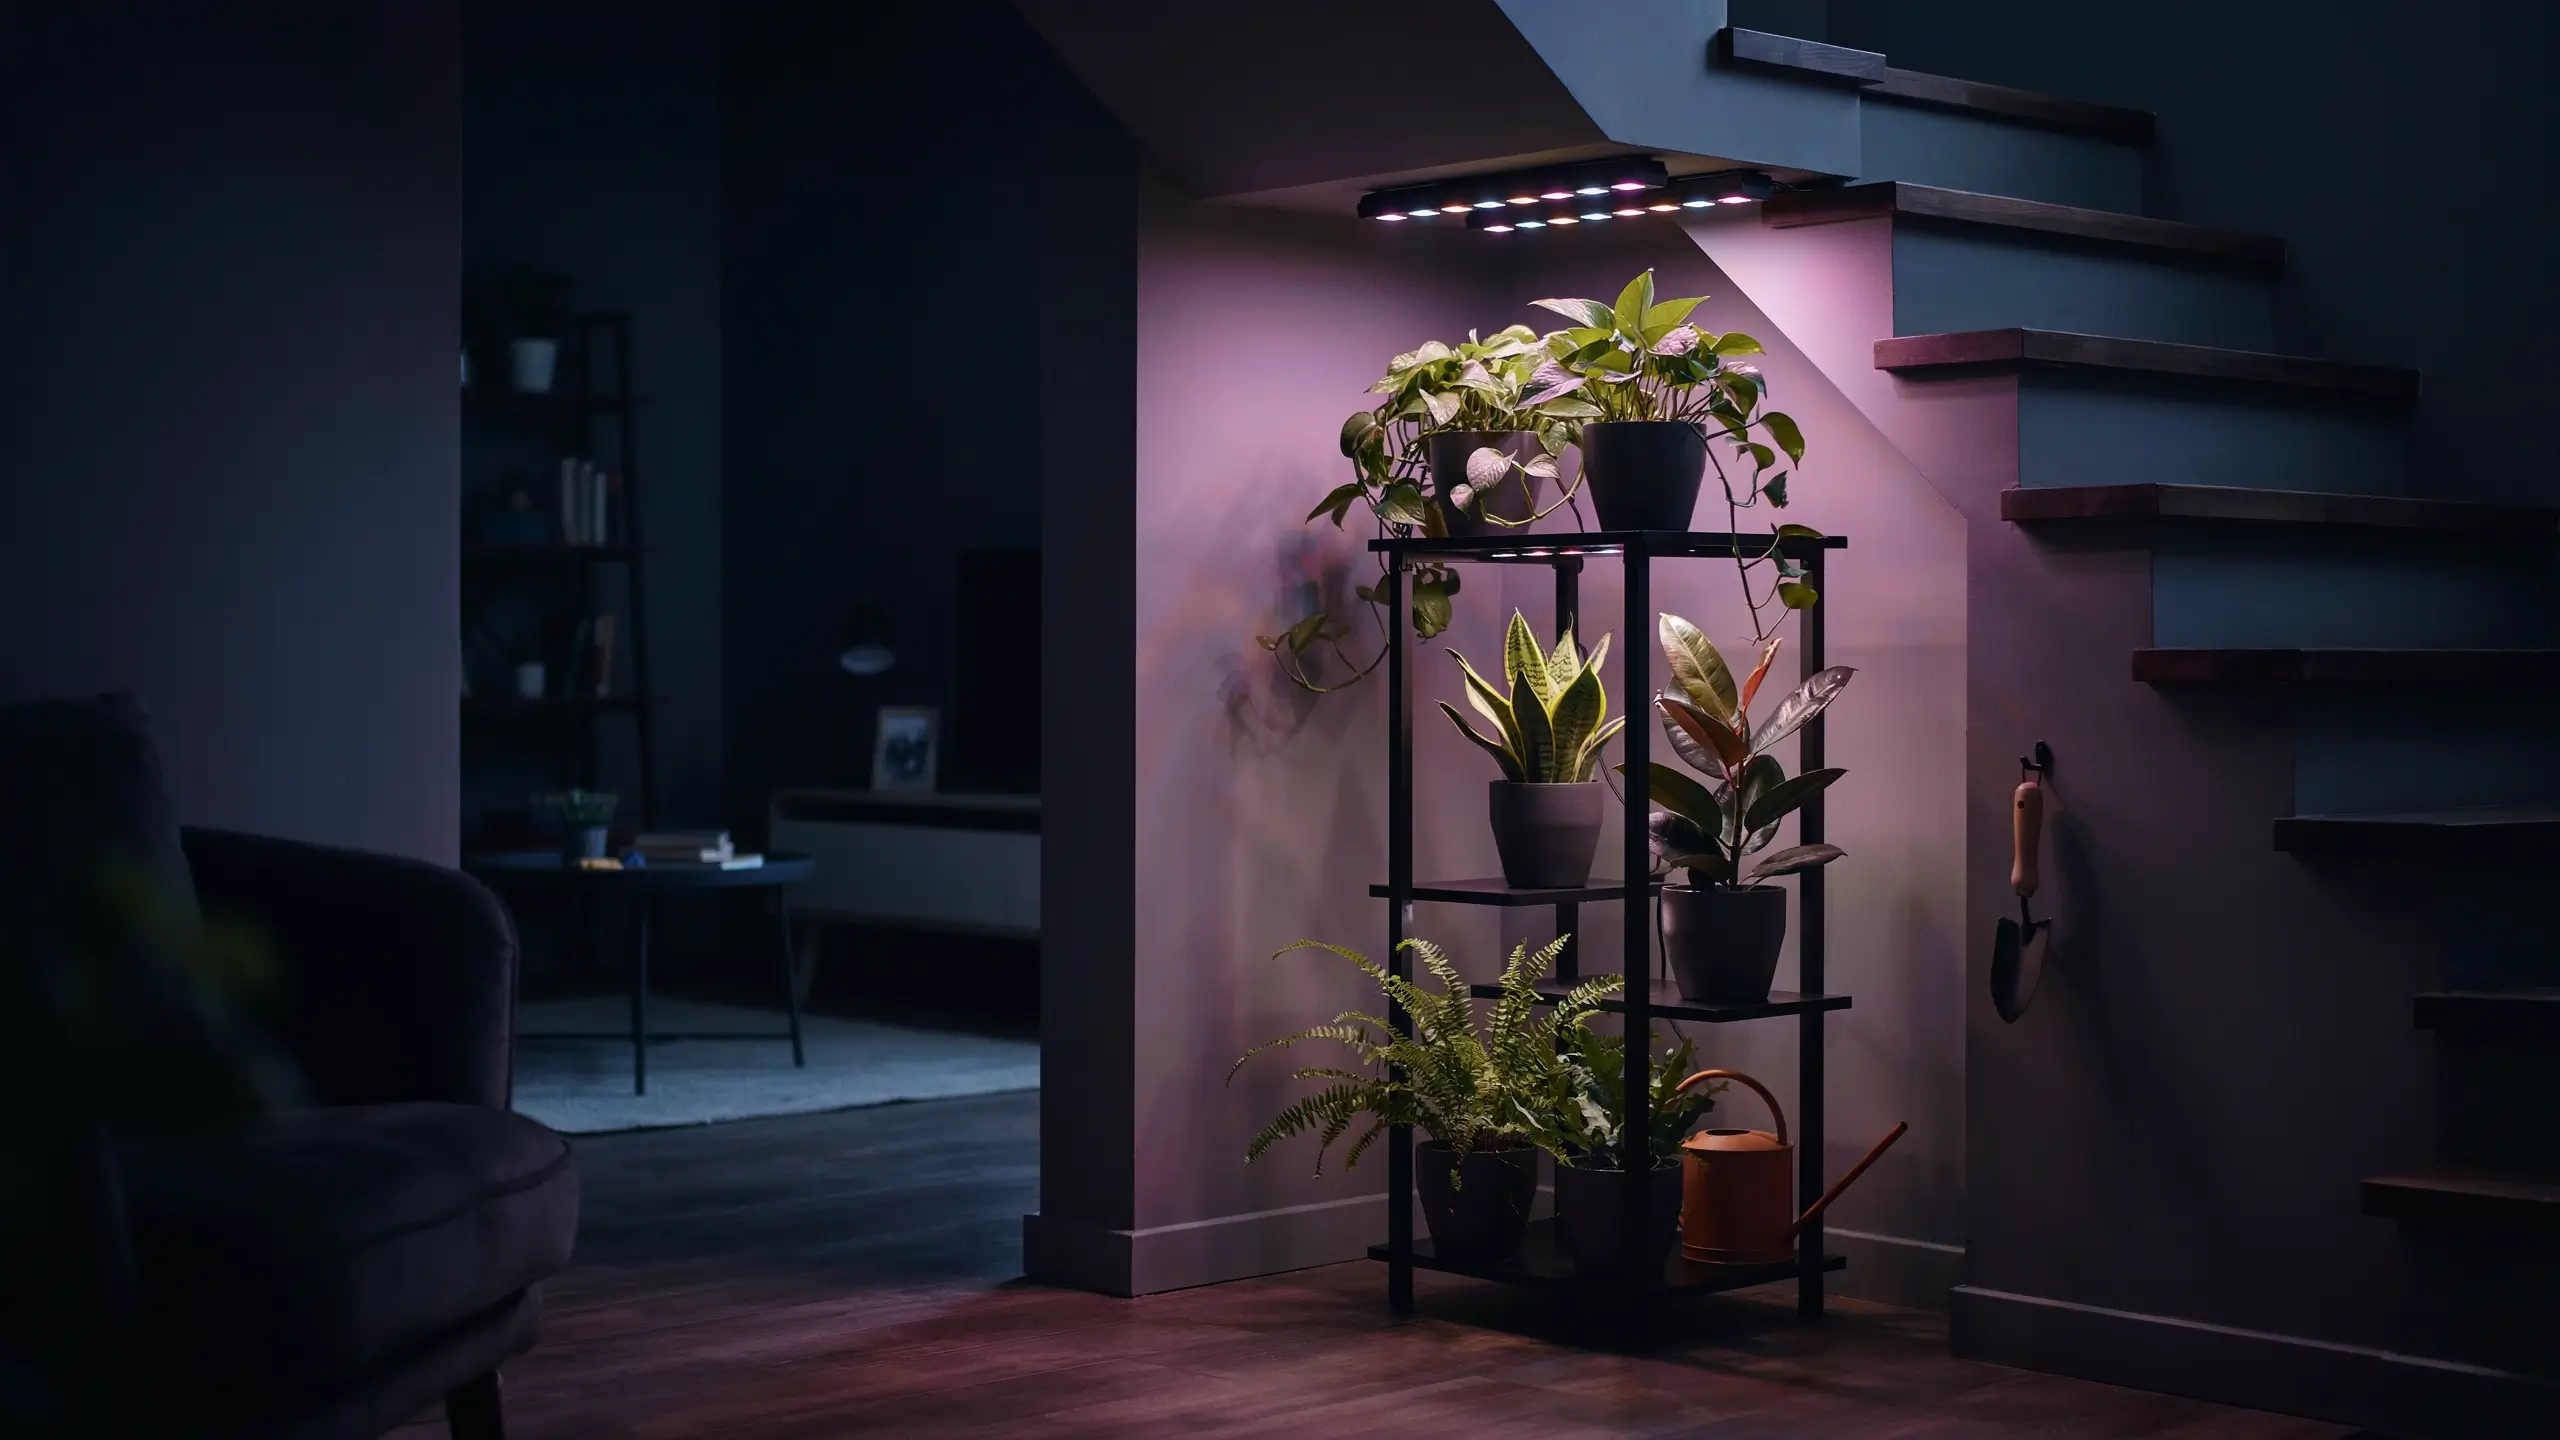
The under-stair space near a window is rare, but if you have it, it’s perfect for trailing plants arranged on tiered shelves with the light source at the back. Most people, though, don’t have a window. That’s where grow light strips come in.
Install one or two LED grow light strips (under $30 each on Amazon) along the upper shelves, set them on a plug-in timer for 12 hours per day, and you can grow pothos, snake plants, ZZ plants, ferns, and even small herbs in a space that never sees natural daylight.
A simple tiered plant stand in a dark space, lit by warm-toned grow lights with trailing plants spilling over the edges, looks beautiful at night. This works in an open under-stair space especially, where the plants are visible from the room.
What pairs well: a small watering can on the lowest shelf, a slim trowel hook on the side wall, and all pots in one consistent style (terracotta, or all white, all black) so it reads as curated rather than random.
The Mistakes That Ruin Under Stair Projects
- Skipping the full slope measurement. This is the most common reason projects fail. Measure height at every foot of depth and write it all down before buying a single thing.
- Starting without lighting. A beautiful shelf system in a pitch-black corner is useless. The light plan comes before everything else.
- Ignoring ventilation in enclosed spaces. If you’re closing off the space with a door and storing shoes, food, or laundry items inside, add at least one small vent cover or an inch gap at the door bottom. Without airflow, the space gets musty within weeks.
- Treating the deep end like dead space. The deepest part of the under-stair cavity feels hardest to reach, but it’s actually the highest-clearance zone. It’s where shelving, hanging rods, and taller storage belongs. Use pull-out systems so you can access it without crawling.
- Forgetting the door. If your under-stair space has an existing door and it’s a flat slab of hollow-core wood with a cheap knob, the whole space looks bad before anyone opens it. Paint it a bold color, swap the hardware for something matte black or brushed brass, or replace it with a curtain. The door sets the expectation for everything inside.
One Last Thing Before You Grab the Measuring Tape
The space under your stairs has probably been sitting there for years, doing nothing, quietly judging you every time you walk past. These under stair storage hacks exist on a real spectrum, from a $20 peel-and-stick wallpaper and some battery lights to a full IKEA built-in library that took a weekend and some determination. None of them require you to live in a perfectly sized home or have a professional budget.
Start with the measurement, then the light. Pick one idea that solves an actual problem you have right now, whether it’s too many shoes, no pantry, nowhere for the kids to be, or just the low-grade frustration of wasted space. That’s the one to do first.
The rest can wait. But it won’t want to.
Which of these ideas fits your space? Drop a comment below and tell me what your under-stair situation looks like. Is it an open triangle, a closed door, a weird closet that came with the house? I’d love to see what you do with it.



No Comment! Be the first one.