




7 DIY Garden Decor Ideas That Make Your Yard Look Like You Spent a Fortune
There is something quietly magical about a garden that feels like it belongs to someone. Not a catalog. Not a nursery showroom. But a real place, full of personality, texture, and little touches that...

There is something quietly magical about a garden that feels like it belongs to someone. Not a catalog. Not a nursery showroom. But a real place, full of personality, texture, and little touches that clearly came from a person’s own hands.
The truth is, the most beautiful outdoor spaces you see on Pinterest are rarely the most expensive ones. They are the most intentional ones. And most of them started with a free afternoon, some basic supplies, and one solid idea.
If you have been putting off your garden because you think you need a big budget or serious craft skills to pull it off, this post is your permission slip to start this weekend. These 7 DIY garden decor ideas are beginner-friendly, budget-conscious, and genuinely gorgeous. Every single one looks incredible in a photo and holds up beautifully in real life too.
1. Concrete Leaf Stepping Stones
Why This Idea Works
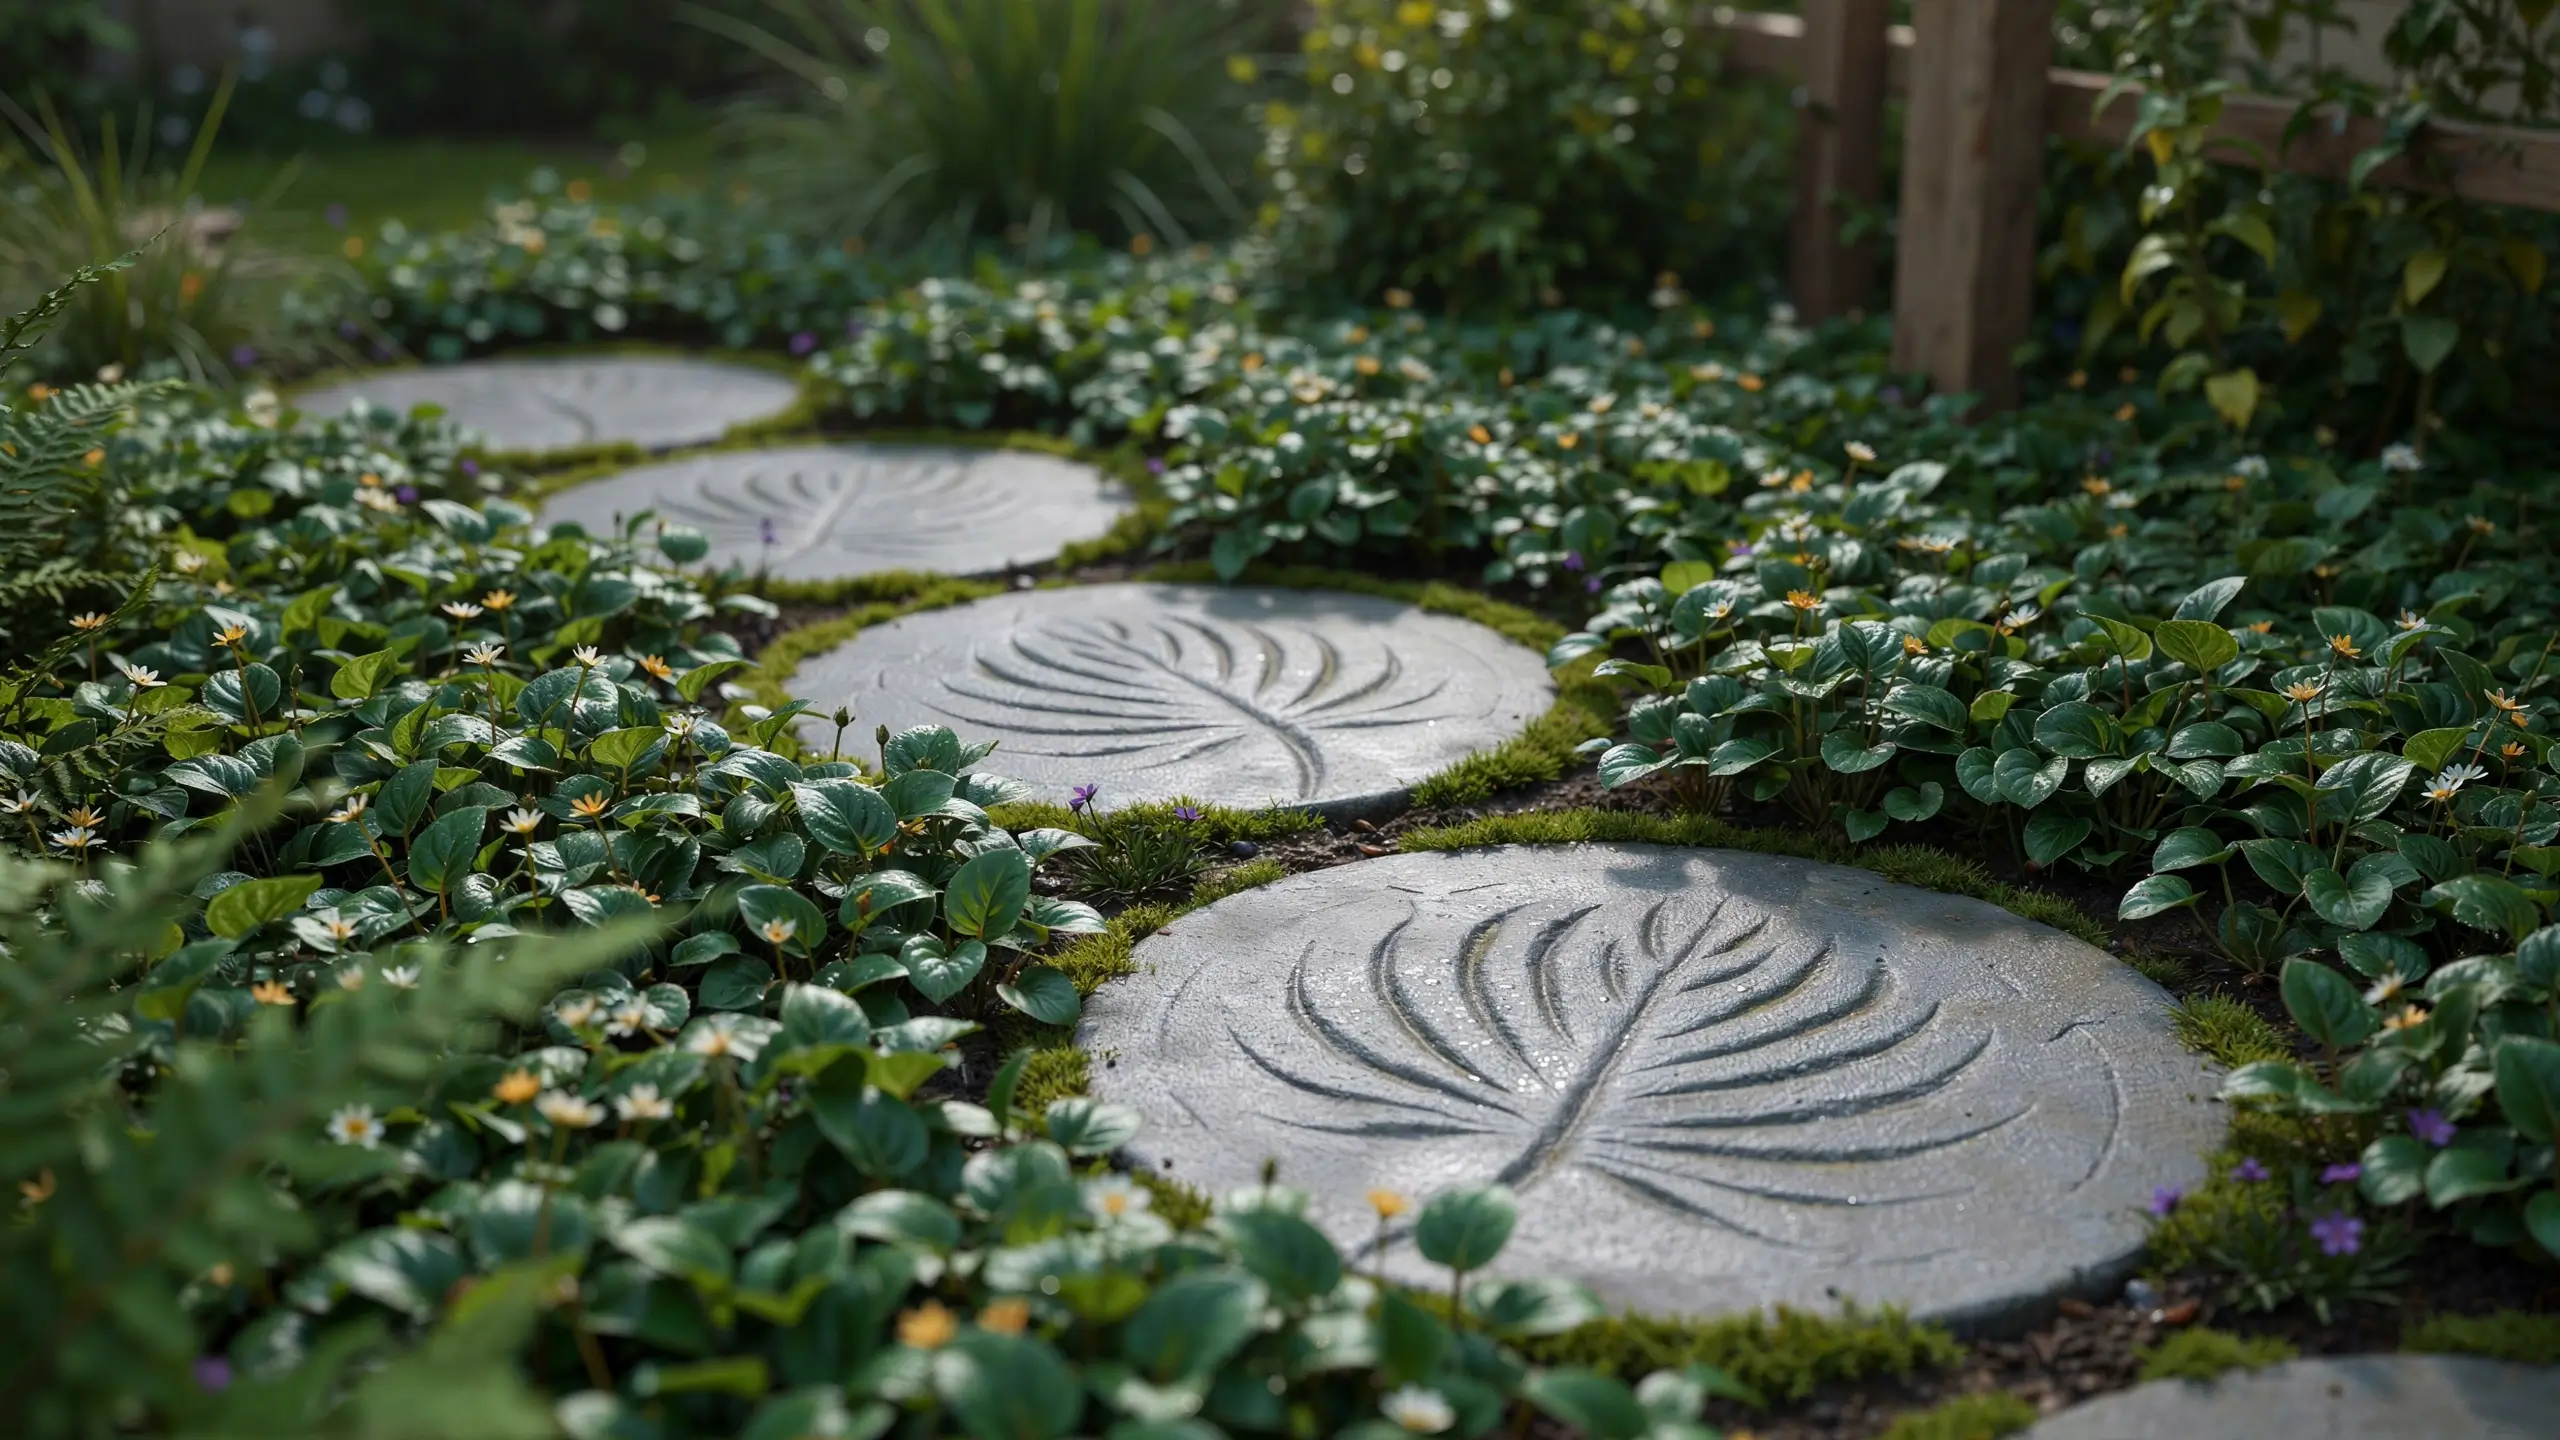
Concrete leaf stepping stones are one of those projects that looks complicated but is actually almost foolproof. The texture comes from the leaf itself. You are mostly just mixing, pouring, and waiting.
What You Need
- Large leaves (hostas, rhubarb, and elephant ears work best because of their distinct vein patterns)
- Quick-setting concrete mix (Quikrete or similar, around $8-10 for a 50 lb bag)
- A shallow plastic tray or old pan as a base
- Rubber gloves
- Plastic sheeting or a garbage bag to work on
- Outdoor concrete sealer (optional but recommended)
- Sand or pea gravel
How to Make Them
Start by mounding a gentle hill of damp sand under your plastic sheeting, roughly the size and shape of the leaf. This gives your stepping stone a natural, slightly curved look instead of being completely flat. Lay the leaf vein-side up on top of the mound.
Mix your concrete to a peanut butter consistency, not too watery. Spread it gently over the top of the leaf to about an inch and a half thick. Smooth the edges with gloved hands to round them off.
Let it cure for 24 hours, keeping it lightly damp under plastic. Then carefully peel the leaf off the back to reveal the imprinted veins. The detail is genuinely breathtaking for how simple the process is.
Once fully cured (about a week), seal it with outdoor concrete sealer to prevent cracking over winter.
Cost: Around $10-15 for multiple stones.
Time: About 30 minutes of active work, plus 24 hours curing.
Mistake to avoid: Using leaves that are too thin or dry. Fresh, just-picked leaves with thick veins give you the best detail. If the concrete is too wet, the leaf floats. Too dry and it won’t spread evenly. Peanut butter texture is your target.
2. Upcycled Wine Bottle Garden Edging
Why This Idea Works
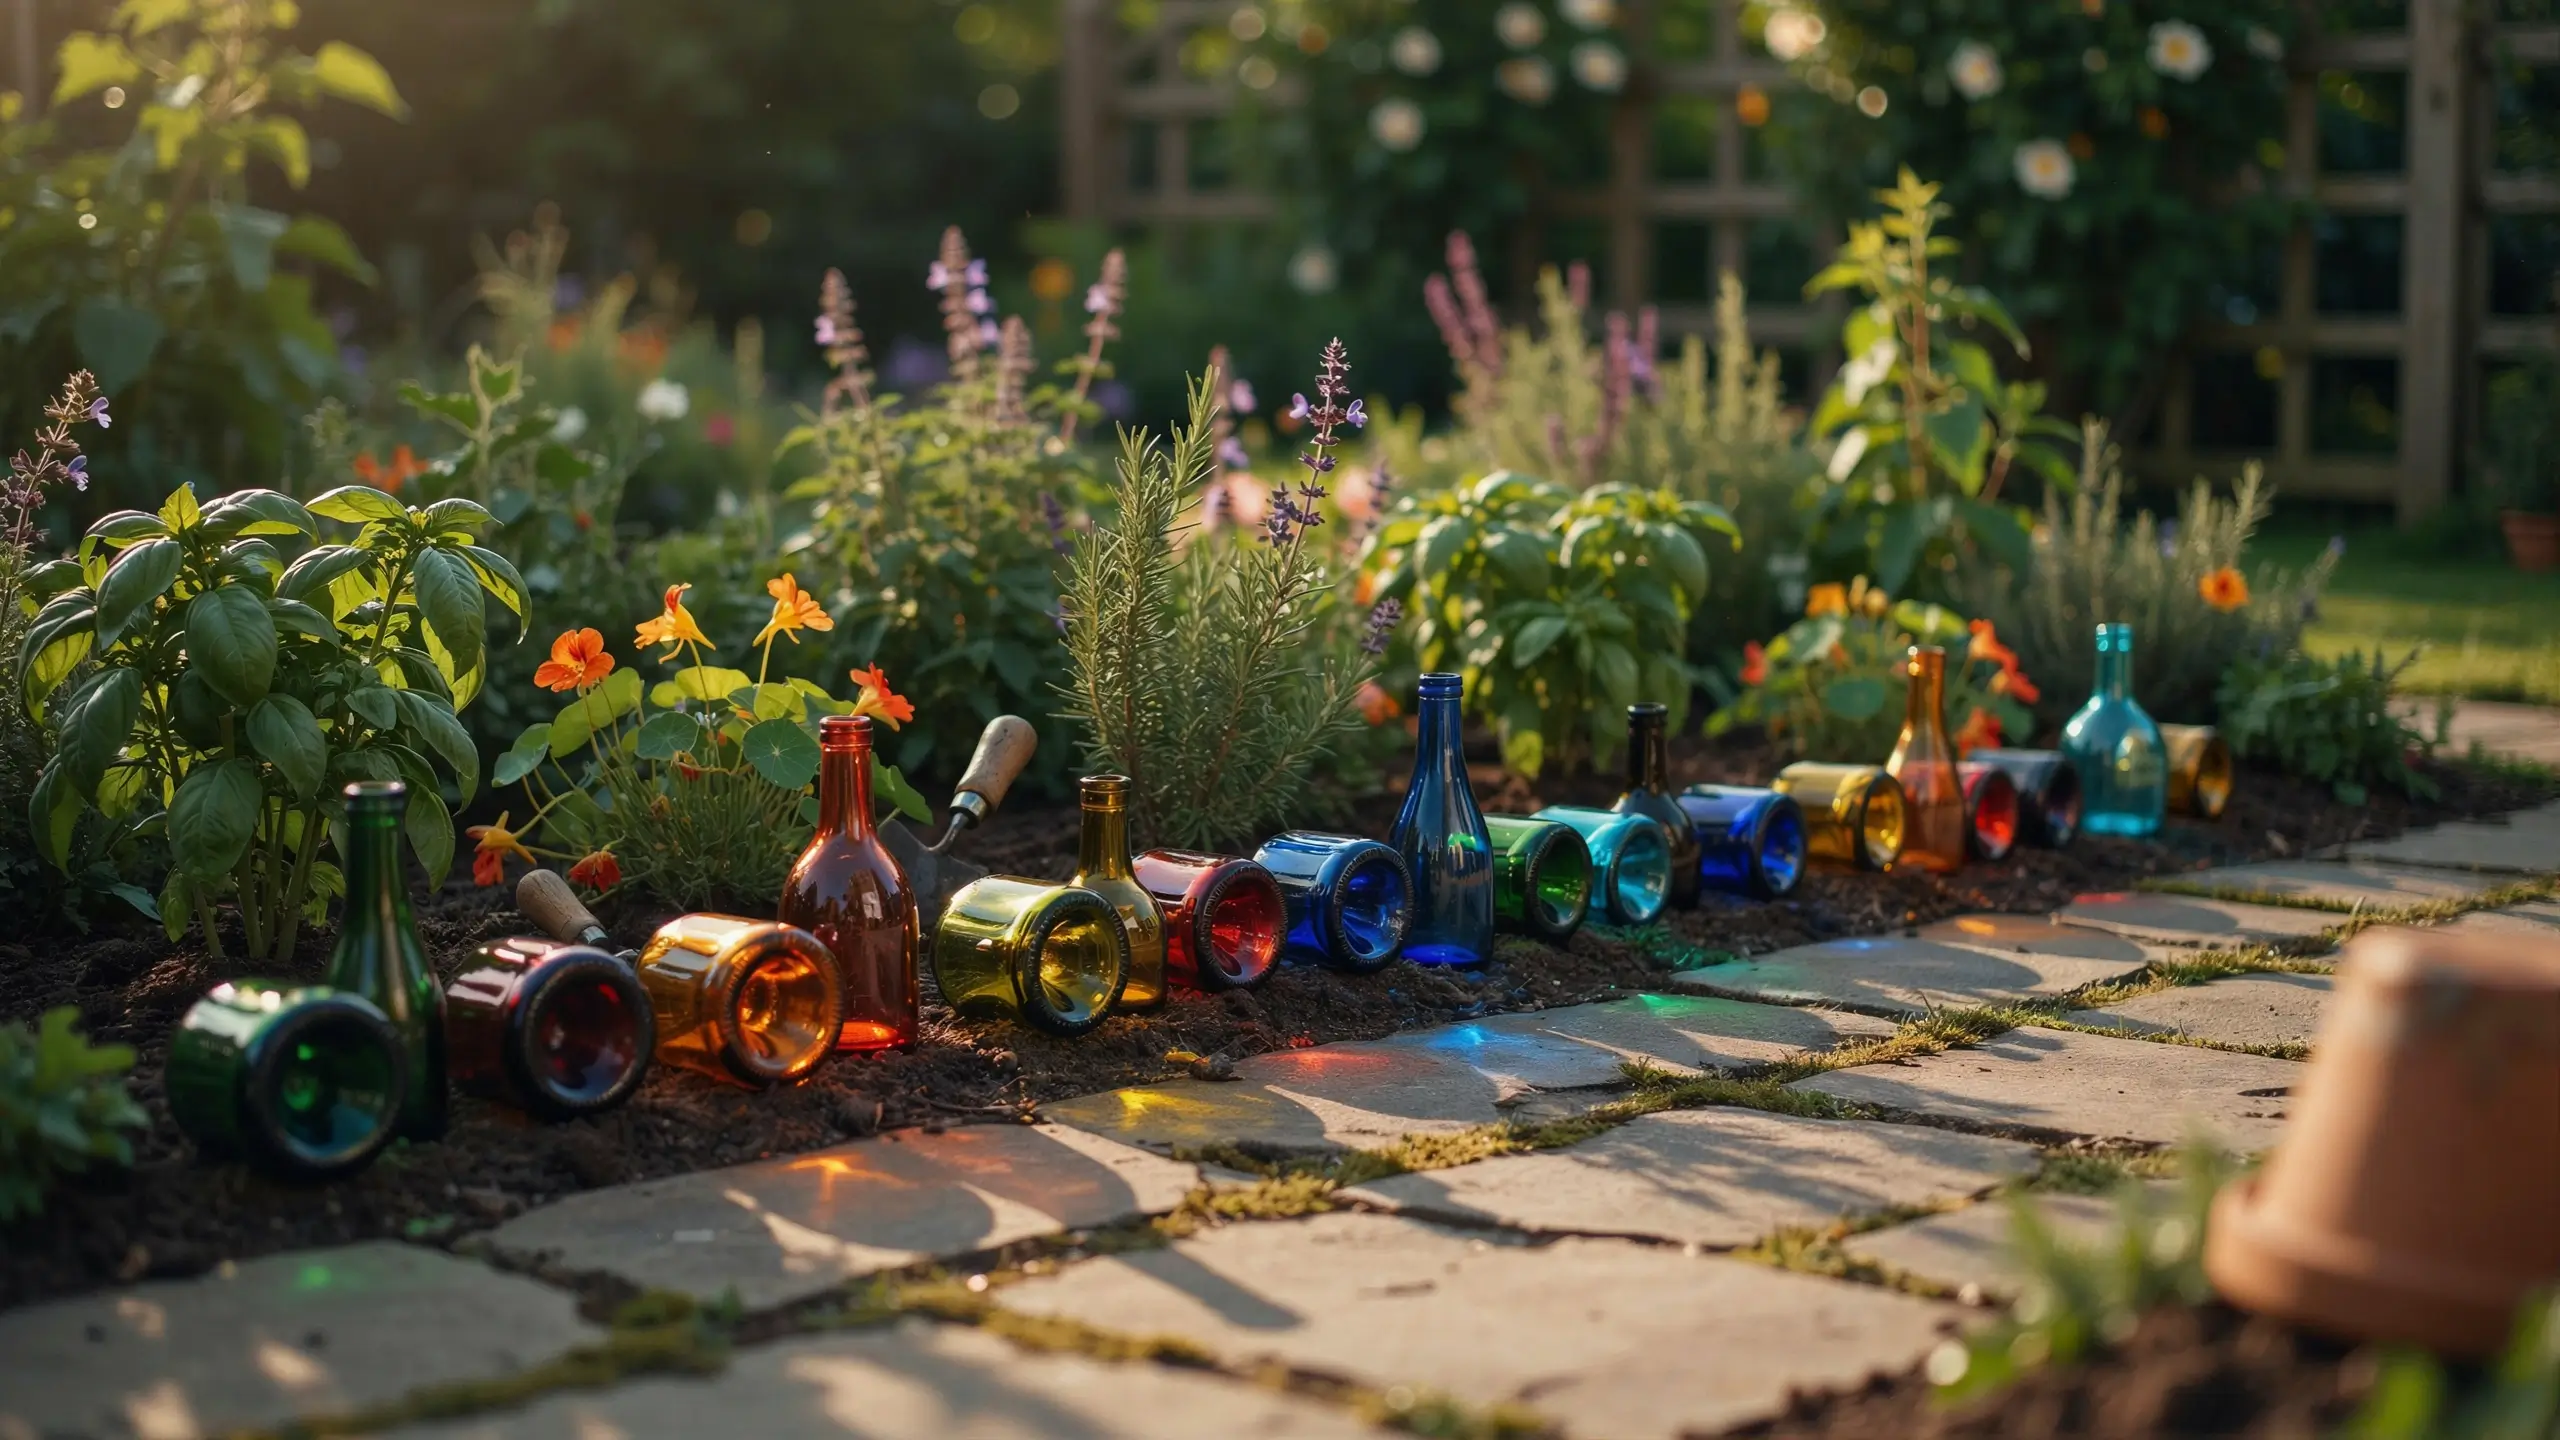
This one genuinely costs you nothing if you save bottles over a few weeks. Upside-down wine bottles buried neck-first into the soil create a colorful, jewel-toned garden border that looks intentional and artistic. It is wildly popular on Pinterest and one of the most dramatic-looking projects on this list for the absolute least effort.
What You Need
- Clean, empty wine or beer bottles (collect about 12-15 for a short border section)
- A hand spade or trowel
- Optional: spray paint if you want a uniform color rather than mixed glass tones
How to Make It
Choose a straight edge along your garden bed or pathway. Dig a trench about 5-6 inches deep and as long as your border. Place the bottles upside down into the trench, necks pointing into the soil, so that the bottoms of the bottles face up. Space them close together so they touch or slightly overlap. Pack the soil firmly around each neck.
That is it. The light catches the glass differently throughout the day. Dark green, amber, clear, and blue bottles together have an almost stained-glass effect in the afternoon sun.
Cost: Free, or close to it.
Time: 45 minutes to an hour for a 6-foot border.
Variation: Paint all your bottles the same color (terra cotta, cobalt, or matte black) for a more modern, cohesive look instead of the eclectic mixed-glass style. Both are beautiful in different ways.
Mistake to avoid: Not burying the necks deep enough. If you only go 3-4 inches down, frost heave will push them out over winter. Get to at least 5-6 inches and you will not have that problem.
3. Vertical Pallet Herb Garden
Why This Idea Works
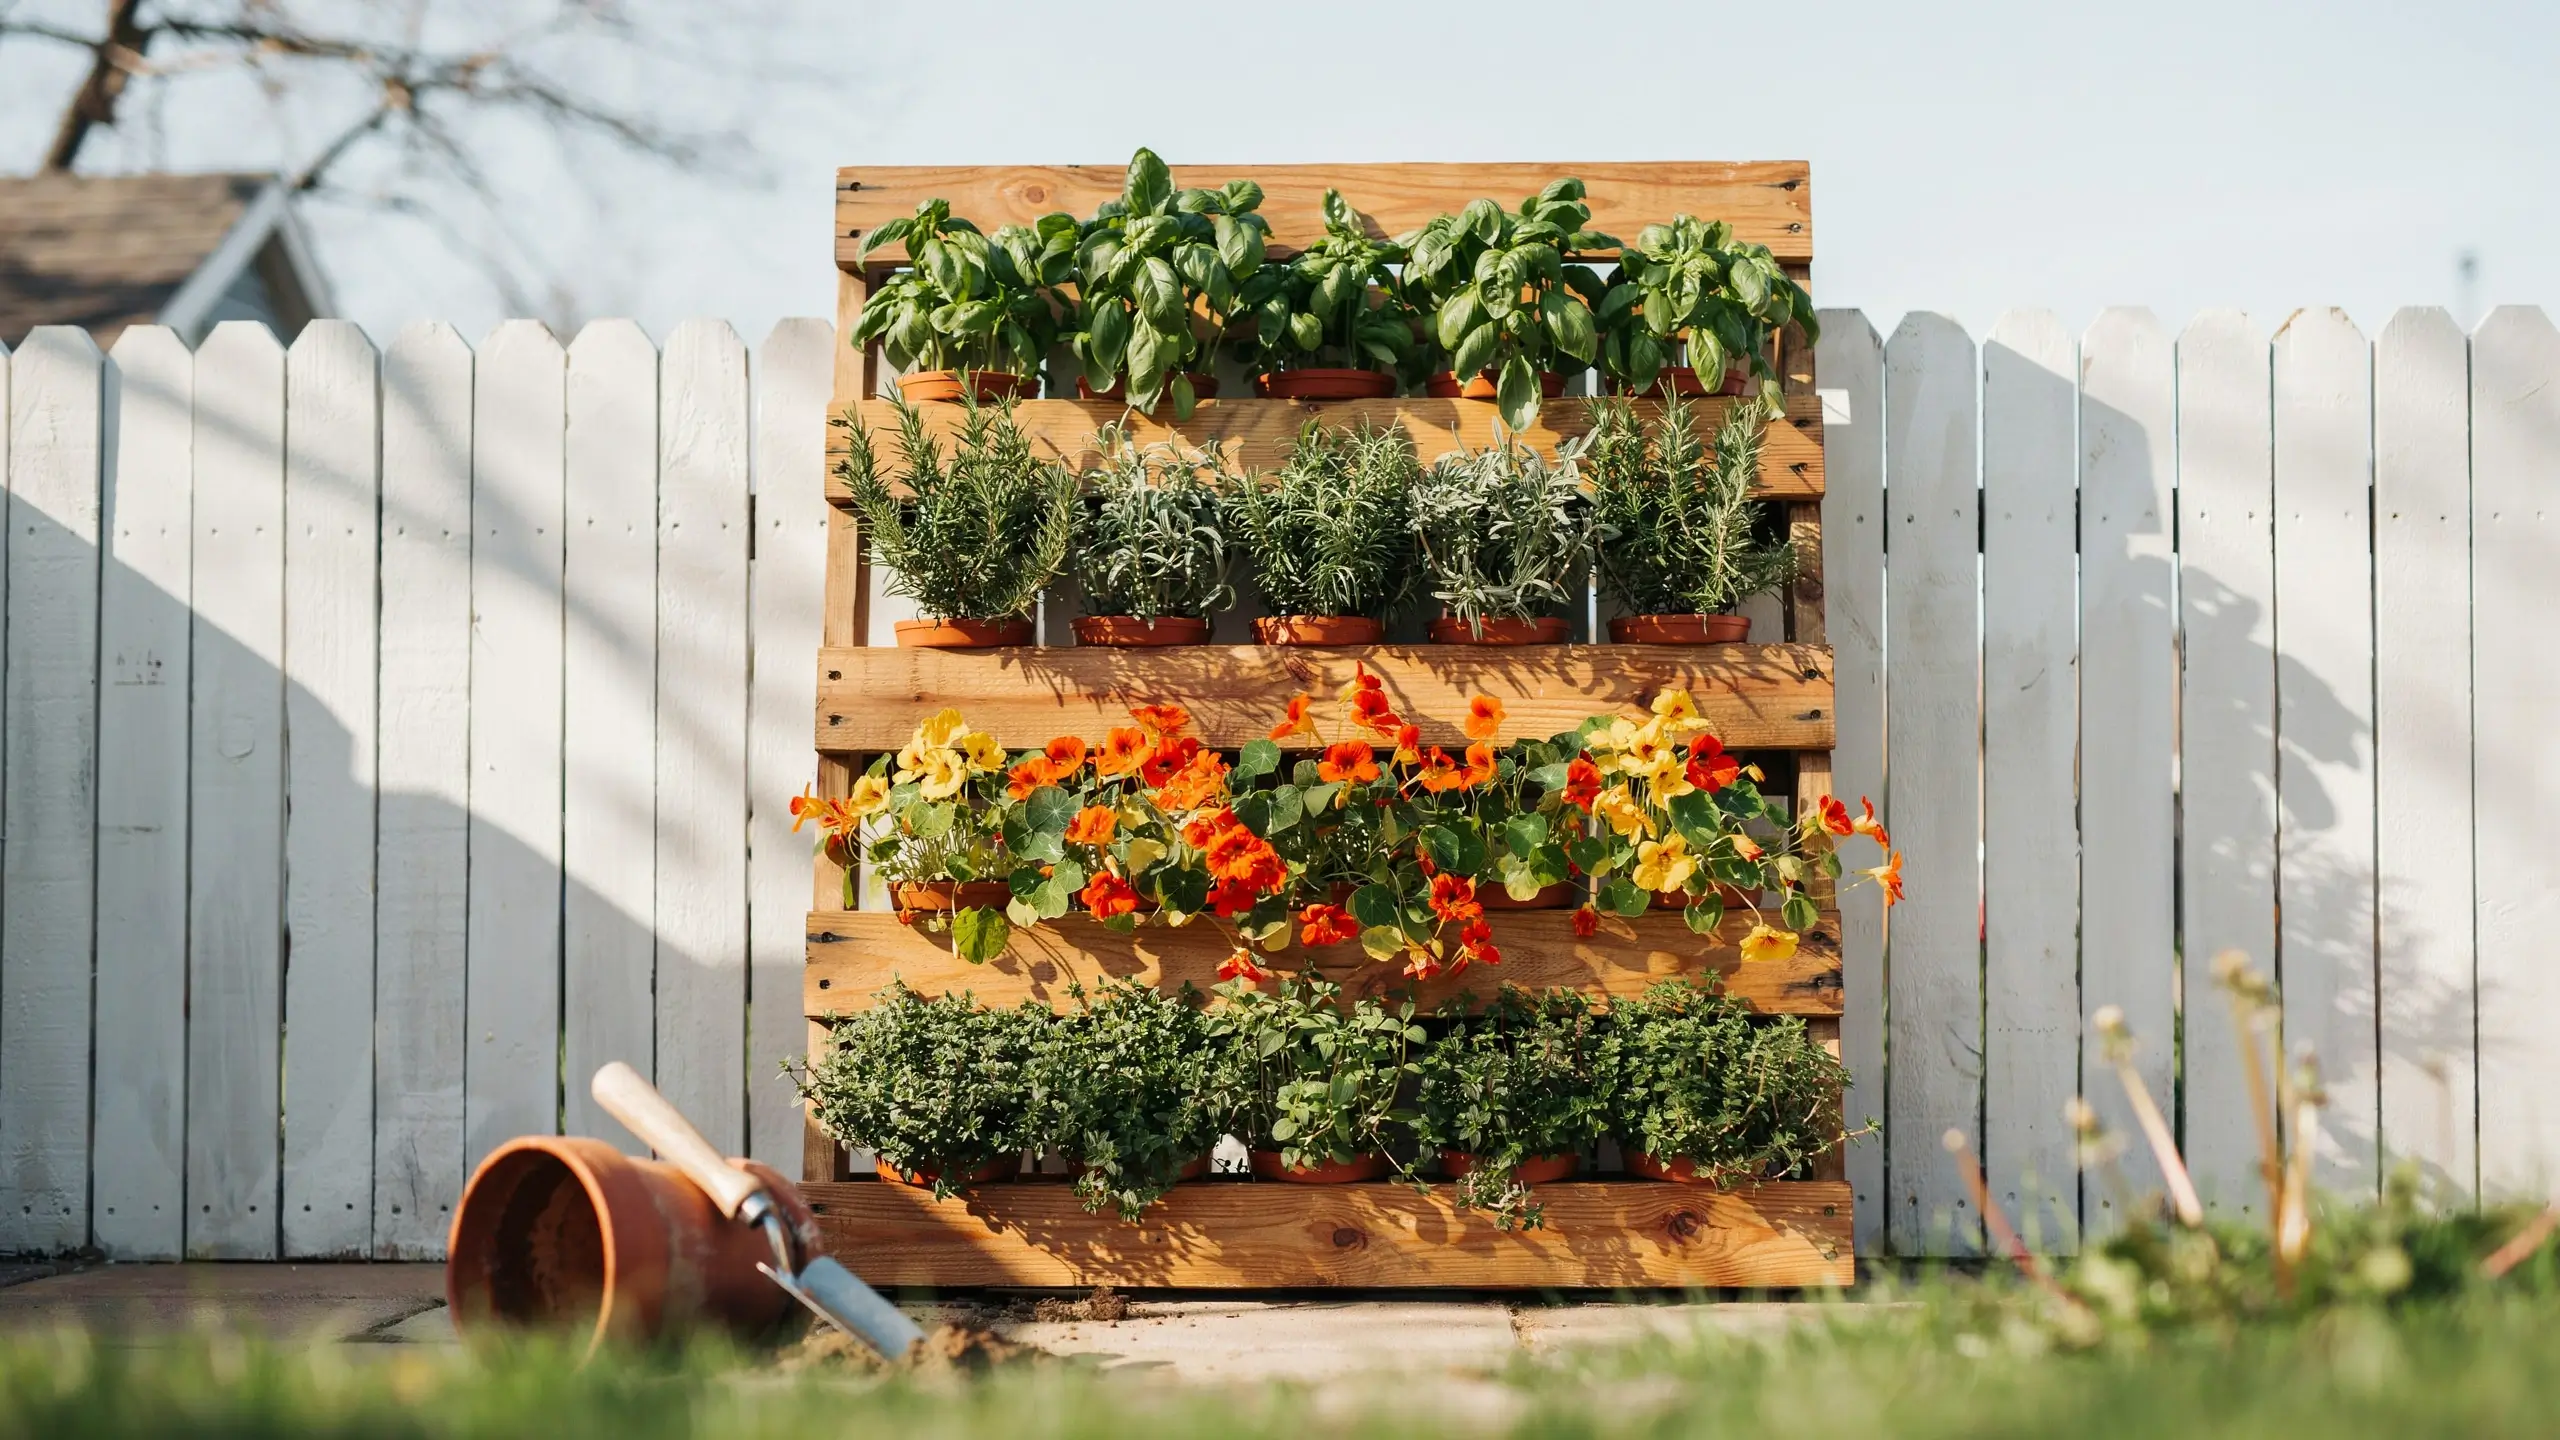
Vertical gardening is perfect for small spaces, patios, balconies, or anyone who wants a lush, layered garden without taking up square footage. A single wooden pallet leaned against a sunny fence or wall can hold 12-15 herb or flower plants and looks absolutely stunning in photos.
What You Need
- 1 heat-treated wooden pallet (look for the HT stamp, which means it’s safe for food gardening)
- Landscape fabric or burlap
- Staple gun and staples
- Potting soil
- Plants or seeds (herbs like basil, thyme, rosemary, and mint work well, as do succulents, strawberries, and small annuals)
- Sandpaper (optional, for smoothing rough edges)
- Exterior stain or paint (optional)
- Eye hooks and strong twine or L-brackets for mounting
How to Make It
Sand the pallet lightly to remove splinters, especially on the front face. If you want to stain or paint it first, do that before adding plants since it is much easier.
Cut landscape fabric to size and staple it along the back of the pallet, the bottom, and the two side openings to create a pocket of soil that will not fall out. Leave the front open so plants can grow through the slats.
Lay the pallet flat on the ground and fill it with potting mix, pressing it into each pocket. Plant your herbs or flowers through the slats, roots pushed back into the soil. Water thoroughly and let it sit flat for 1-2 weeks so roots can establish before you stand it upright.
Mount it against a sunny wall using L-brackets screwed into a fence post, or lean it securely with a heavy pot at its base.
Cost: $10-30 depending on whether the pallet is free and which plants you choose.
Time: 1-2 hours of setup, then 1-2 weeks flat before mounting.
Mistake to avoid: Using a pallet marked MB (methyl bromide treated) for food plants. Always look for the HT stamp. Also, make sure your wall or fence location gets at least 6 hours of sun daily, especially if you are growing herbs rather than shade plants.
4. Punched Tin Can Lanterns
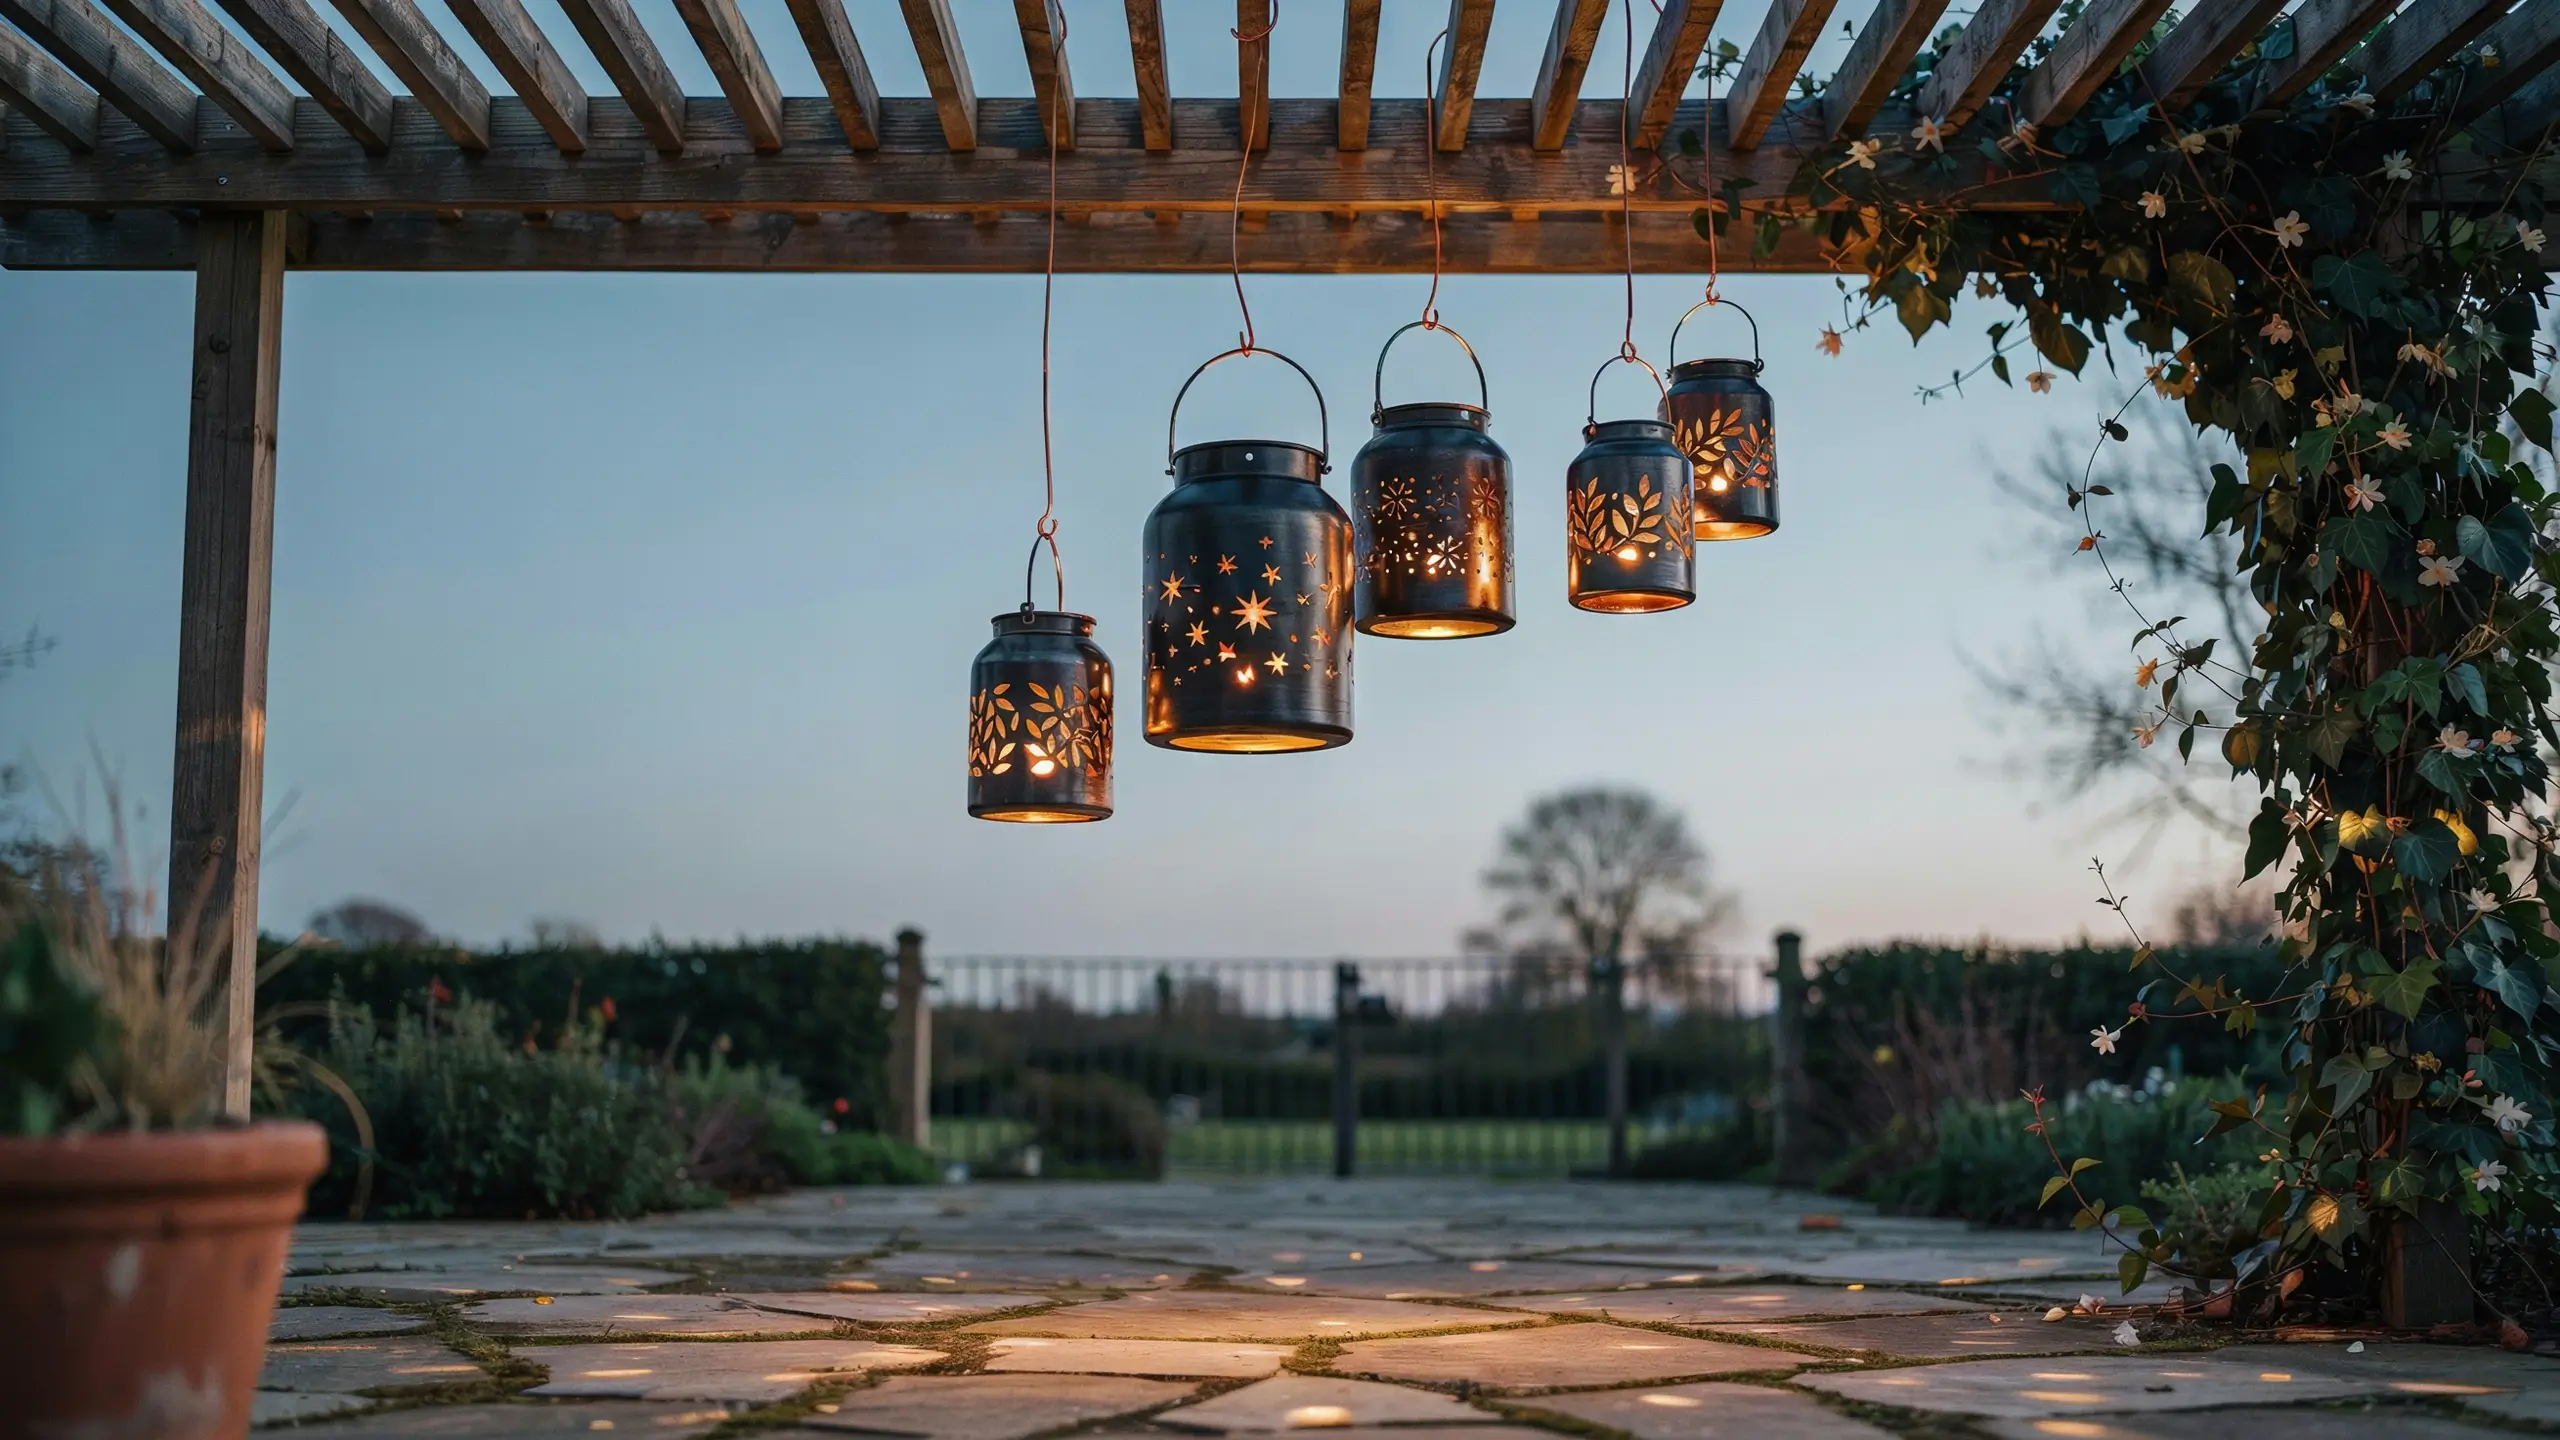
Why This Idea Works
These lanterns look like something from a high-end garden boutique and cost almost nothing to make. When a candle or solar tea light glows inside a punched tin can at dusk, the pattern of light across your patio or path is genuinely enchanting. It is the kind of DIY that makes people ask where you bought them.
What You Need
- Clean tin cans of varying sizes (vegetable, coffee, or large soup cans all work)
- Permanent marker
- Nail and hammer (or a metal punch)
- Towel or folded cloth to work on
- Spray paint in your chosen color (matte black, gold, or terra cotta are all stunning)
- Tea light candles or solar tea lights
- Thin wire or twine for hanging (optional)
How to Make It
Fill your cans with water and freeze them solid the night before. This is the trick that makes the whole project work: the frozen water keeps the can from denting and collapsing as you punch your design.
Draw your pattern on the outside of the frozen can with a permanent marker. Simple geometric patterns, stars, leaves, or even initials all work beautifully. Then, working quickly before the ice melts, punch holes along your design using the nail and hammer. Space them about half an inch apart for a delicate pattern or closer together for a denser light effect.
Let the ice melt and dry the cans completely. Spray paint them in your chosen color. Once dry, add a tea light inside and hang or set them around your garden.
Cost: Essentially free if you use candles you already own. Under $5 if you add a can of spray paint.
Time: About 20-30 minutes of active work plus freezing time overnight.
Mistake to avoid: Using cans with sharp ridges at the rim. Smooth-rimmed cans are safer to handle. Wear gloves while punching. Also, if you skip the freezing step, the can will dent badly. The ice is non-negotiable.
Variation: Skip painting them entirely for a rustic, weathered tin look that feels more farmhouse and country. Both styles are beautiful in different gardens.
5. Mosaic Garden Birdbath from Thrift Store Pieces
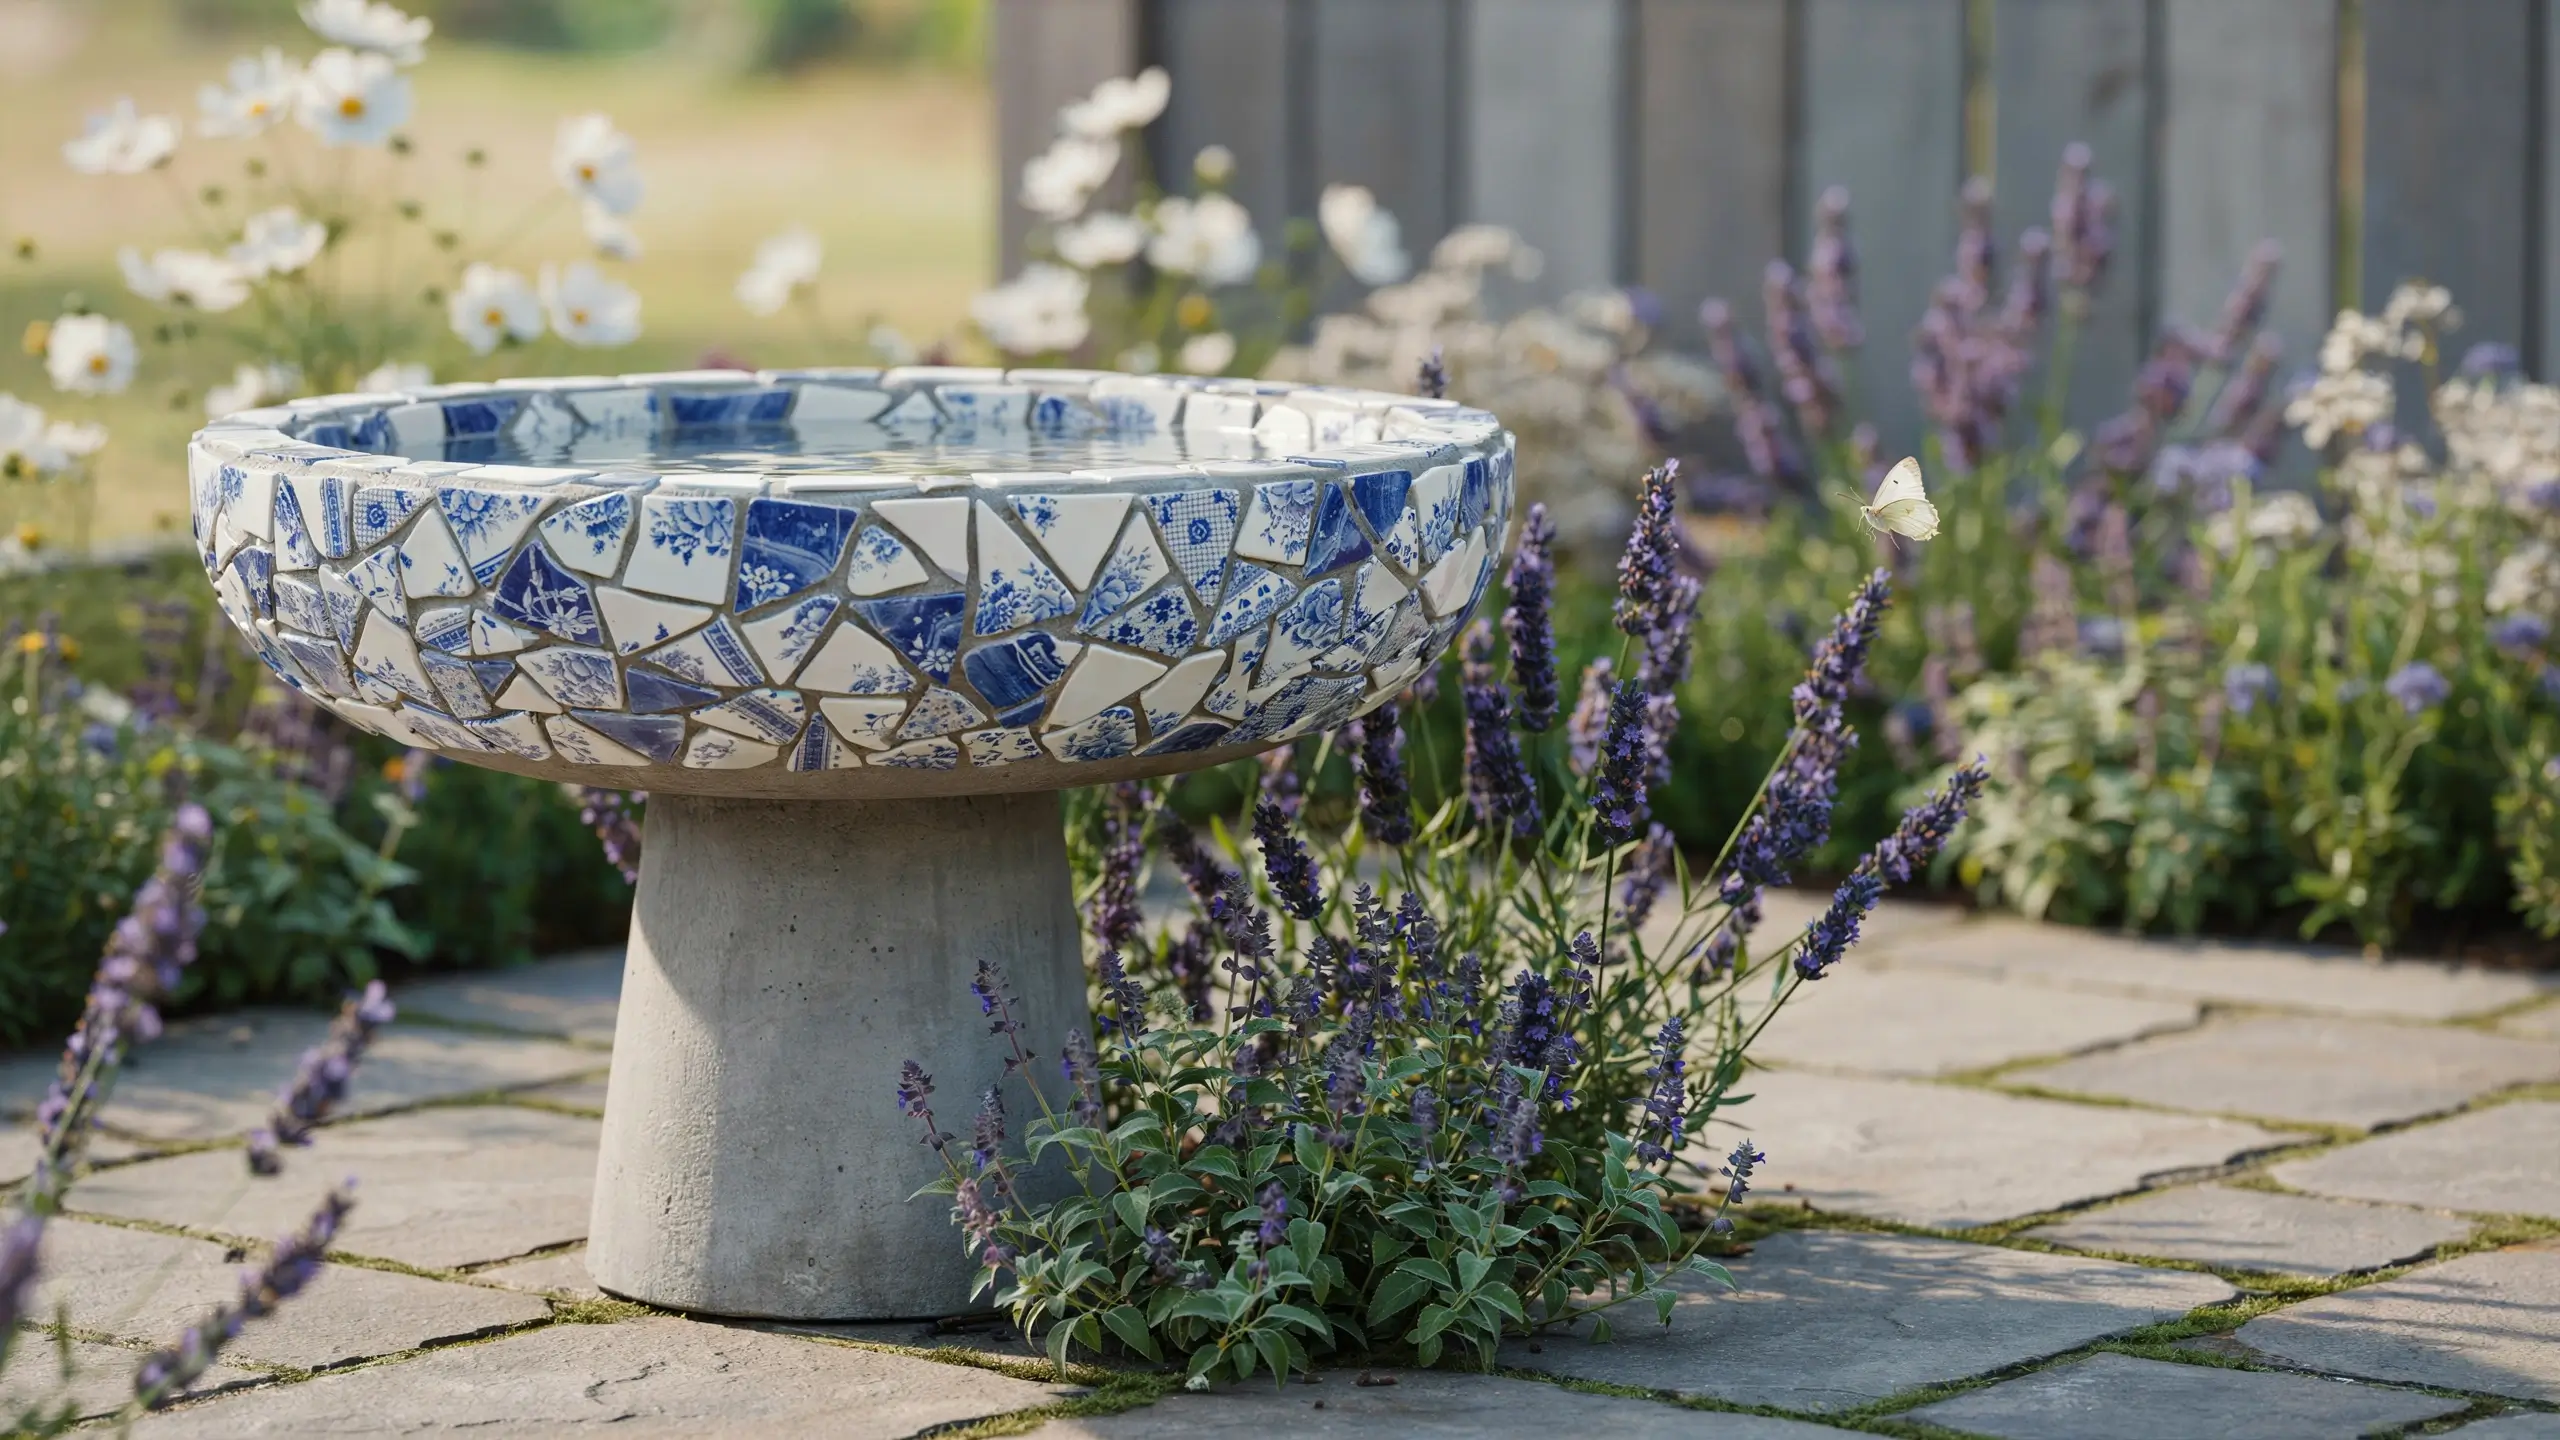
Why This Idea Works
A mosaic birdbath is one of the most visually striking things you can add to a garden. It catches light, draws birds, and photographs like art. And the materials? Almost entirely sourced from thrift stores, garage sales, or your own broken dishes. No kiln. No special skills. Just patience and a plan.
What You Need
- A plain concrete or plastic birdbath (thrift stores often have them for under $5)
- Broken tiles, old china plates, colored glass, or mosaic tiles
- Tile adhesive or outdoor-rated mosaic adhesive
- Unsanded tile grout (gray, white, or black)
- Safety glasses and cloth to wrap tiles in for breaking
- Rubber gloves
- A plastic spreader or old credit card
- A damp sponge
How to Make It
Wrap your plates or tiles in an old cloth and break them with a hammer into irregular pieces. Safety glasses are important here. Sort the pieces loosely by color before you begin.
Plan your design first by laying pieces out on a flat surface before gluing anything. You do not need a perfect pattern. Flowing spirals, a sunburst from the center of the basin, or a simple flower motif all work beautifully. Even random color mixing looks intentional when done with mosaic.
Apply adhesive to the back of each piece and press it firmly into place. Work in small sections and let each section dry before moving on. Once everything is glued and fully dried (usually 24 hours), mix your grout to a thick paste consistency and spread it over the entire surface, pressing it into the gaps with gloved hands or a spreader.
Let it sit for 15-20 minutes, then wipe away the excess grout with a damp sponge in circular motions until the tile surfaces are clean and the grout lines are smooth. Let it cure completely, a minimum of 72 hours, before filling with water.
Cost: $10-25 depending on materials sourced.
Time: 2-3 hours across two days (for drying time between steps).
Mistake to avoid: Using indoor grout instead of outdoor-rated or unsanded grout. Indoor grout will crack in freeze-thaw cycles. Also, do not skip the sponge-wiping step before the grout fully hardens. Once grout dries on the tile surface, it takes real effort to get off.
6. Painted Rock Garden Markers
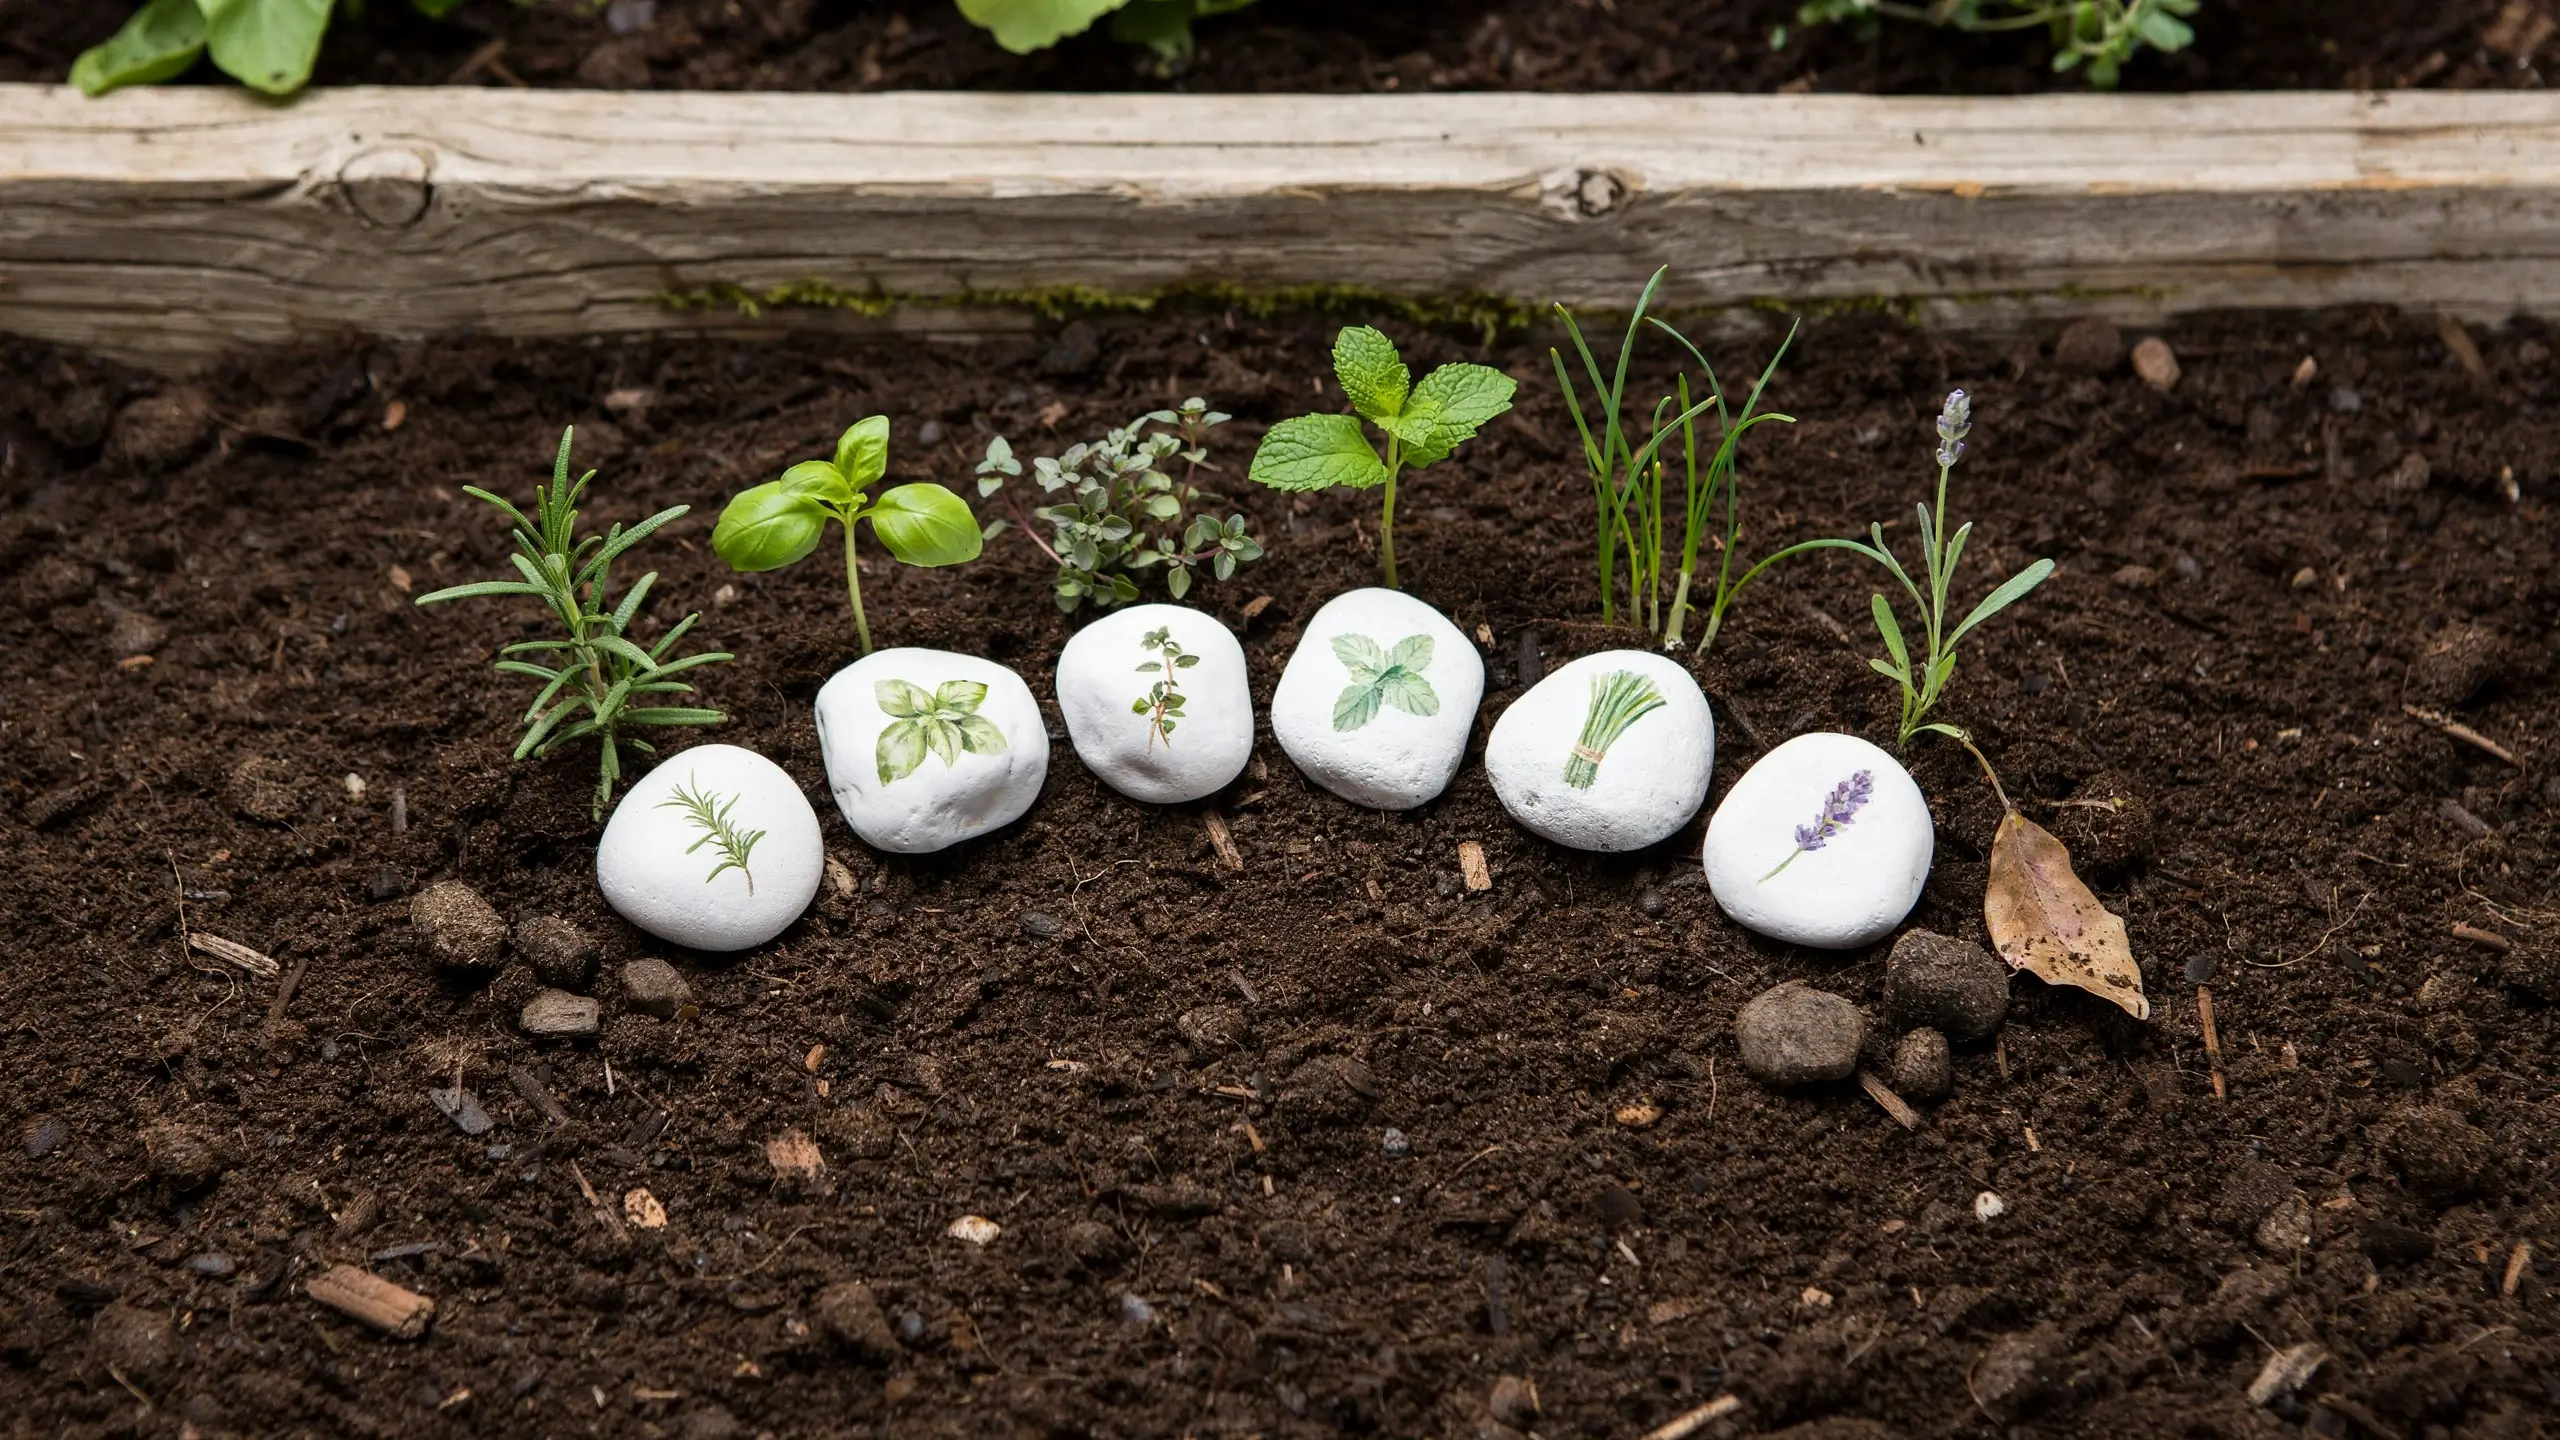
Why This Idea Works
This is probably the most beginner-friendly project on the entire list, and it might be the most charming. Hand-painted river rocks used as garden markers for your herbs or vegetable patch are a genuinely lovely detail that pulls a kitchen garden together. They also make a wonderful rainy-day activity with kids.
What You Need
- Smooth, flat river rocks (find them at a dollar store, craft store, or even the edge of a stream or driveway)
- Outdoor acrylic paint in your chosen colors
- A fine paintbrush or paint pens (Posca paint pens are especially good for this)
- Outdoor Mod Podge or clear acrylic spray sealer
- Optional: a white base coat to help colors pop
How to Make Them
Wash and dry your rocks completely. Apply a thin white base coat if you want bright, vivid colors or a clean hand-lettered look.
Paint your herb or plant names onto the rock in a style that fits your garden’s personality. Simple black script on a white stone is classic and clean. Watercolor-style botanical illustrations around the name look incredible but take a steadier hand. Bright geometric patterns with the name in the center are cheerful and modern.
Seal every finished rock with two coats of outdoor sealer. Without this step, the paint will begin to flake within one season.
Cost: Under $10 for supplies that will make 15-20 markers.
Time: 30-45 minutes for a set of six.
Mistake to avoid: Skipping the sealer and assuming outdoor paint is weatherproof on its own. It is not, at least not long-term. Two coats of clear sealer extends the life dramatically. Also, very rough or porous rocks make lettering look messy. Smooth, dense rocks give you much cleaner results.
Fresh idea competitors miss: Instead of just writing herb names, paint a small watercolor illustration of the herb itself alongside the name. Even a simple green leaf outline or a sprig of thyme makes the marker feel like a piece of art rather than a label. These also make incredibly thoughtful handmade gifts for gardener friends.
7. Mason Jar Solar Light Garden Stakes
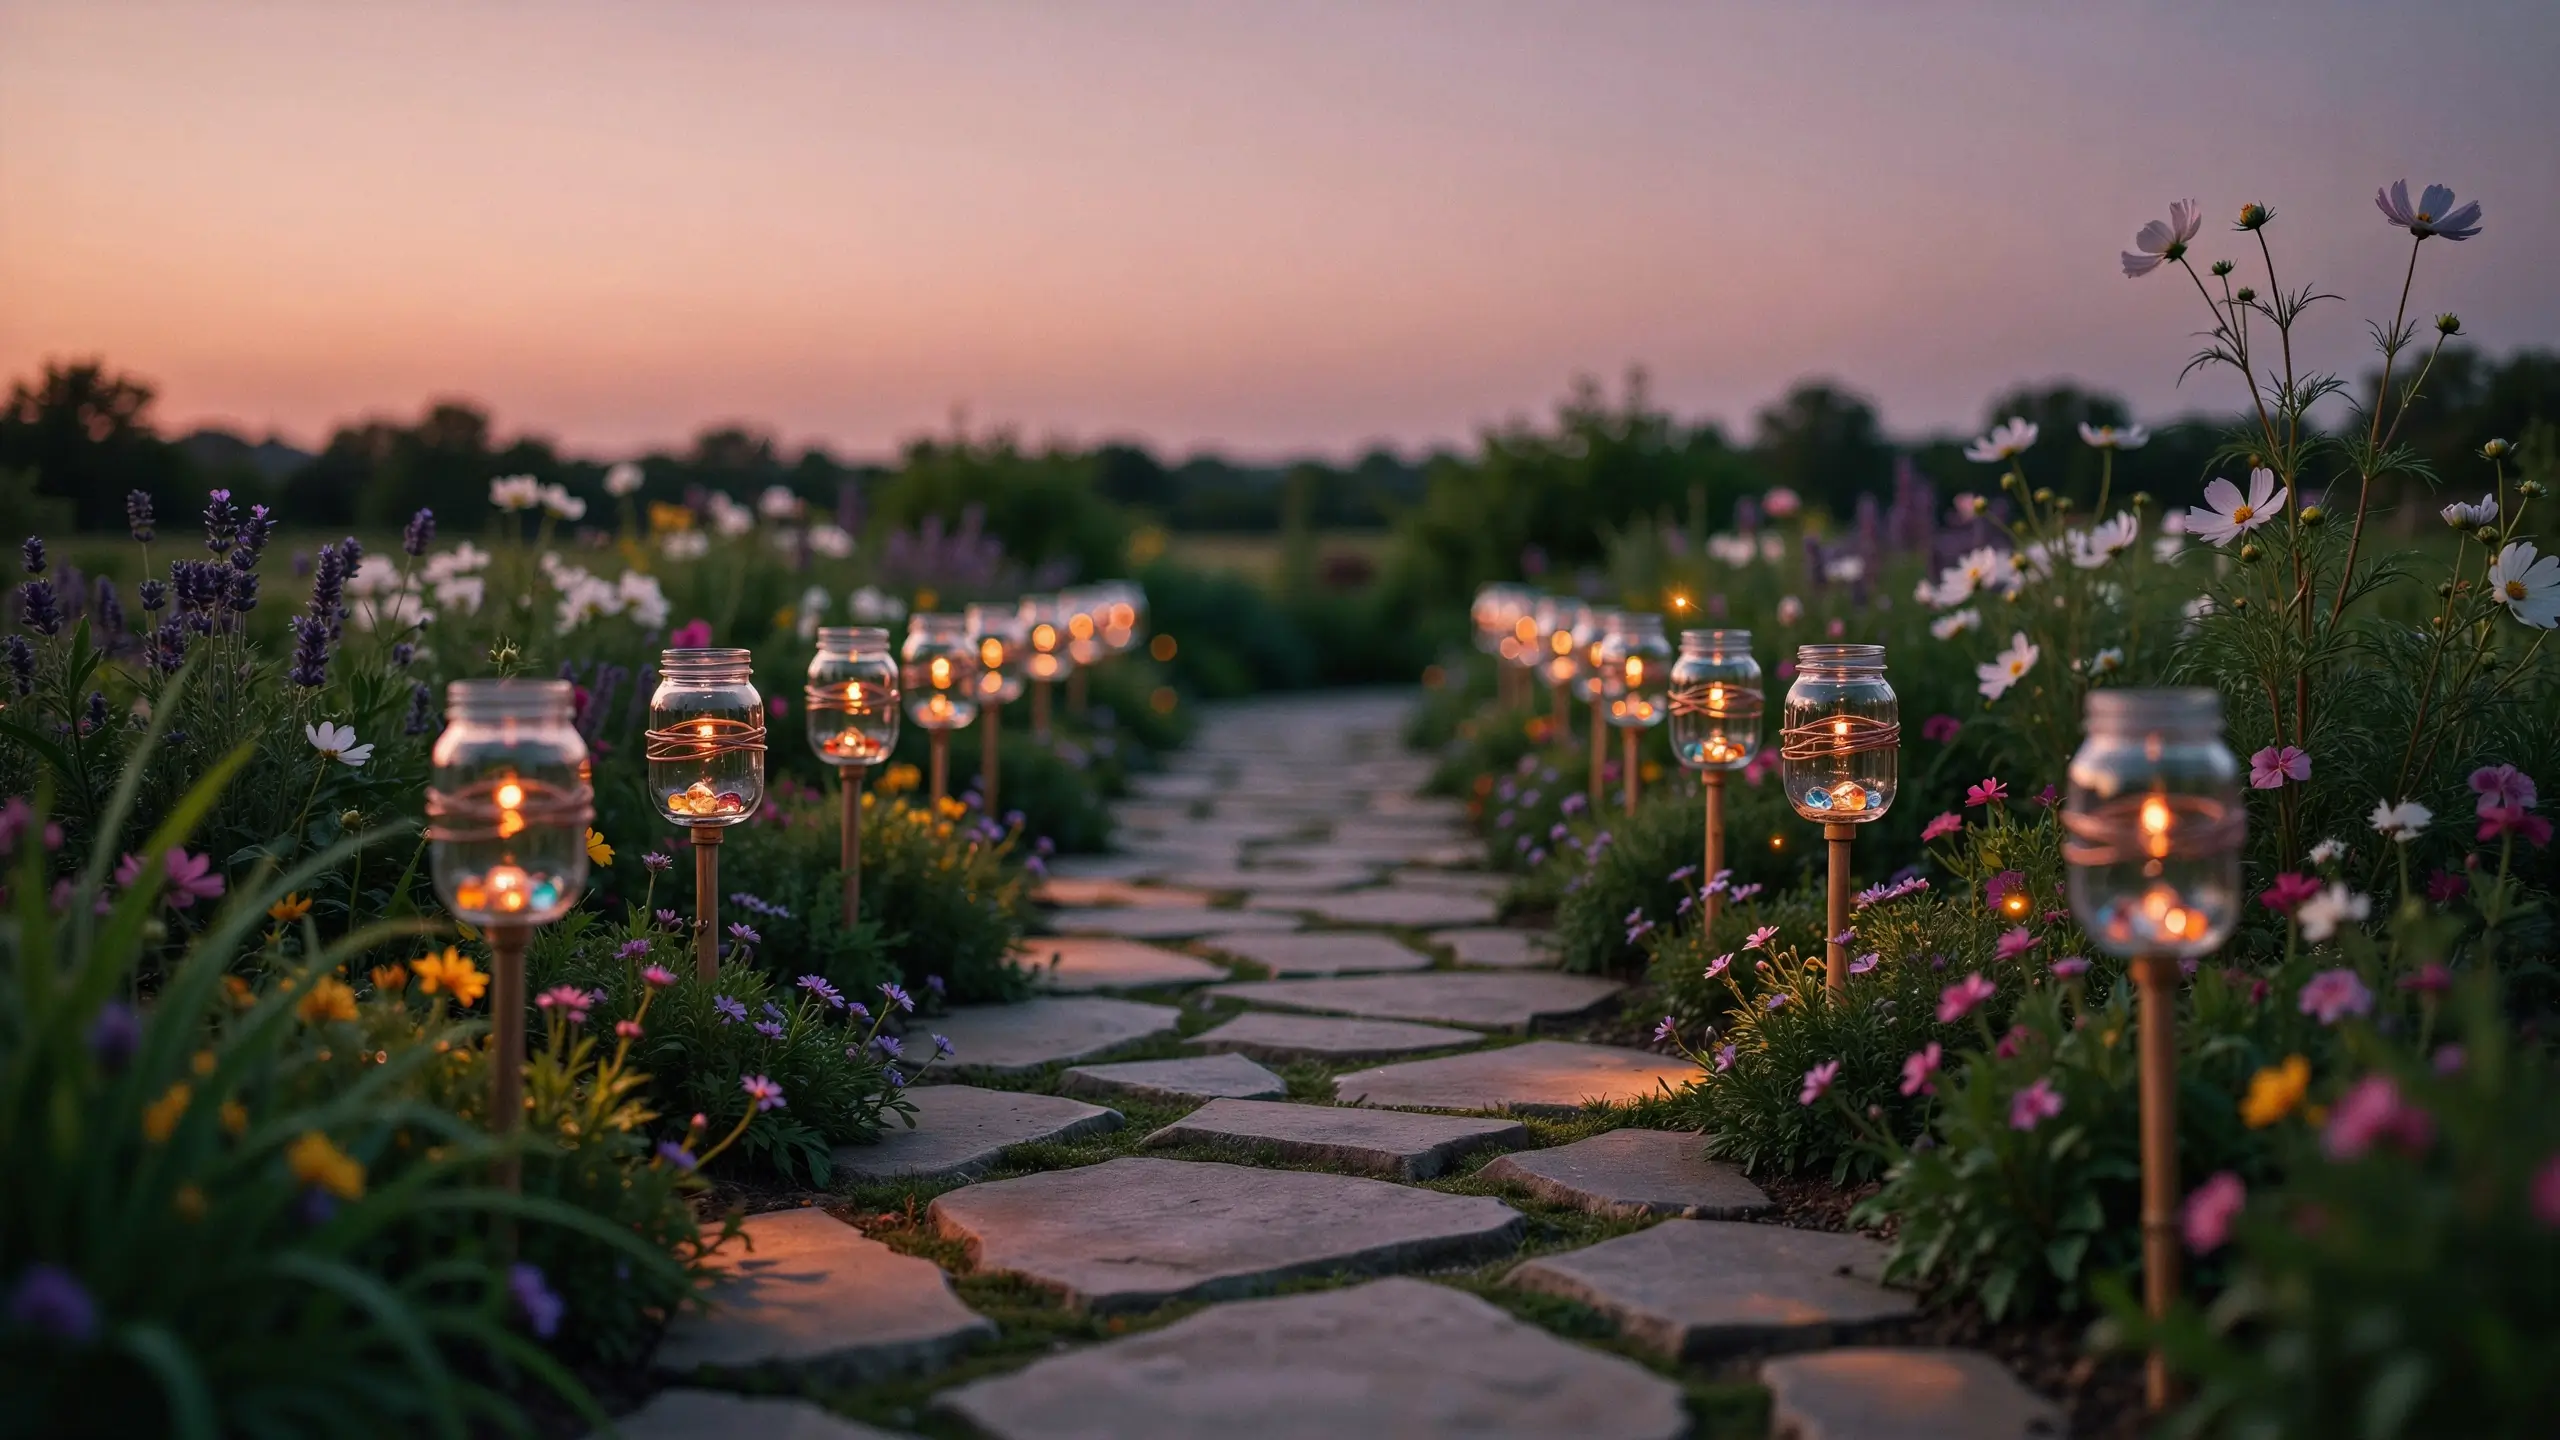
Why This Idea Works
Garden lighting changes everything after dark. A row of glowing mason jars along a garden path or tucked among your raised beds turns an ordinary yard into something that feels like a summer celebration. These solar light stakes are simple to make, cost about $10 for a set, and require almost no tools at all.
What You Need
- Small or medium mason jars (any size works, pint jars are especially lovely)
- Solar-powered garden lights with removable tops (the kind sold in packs of 8-10 at dollar stores or hardware stores for around $1-2 each)
- Epoxy or waterproof outdoor adhesive
- Thin copper or galvanized wire for wrapping the jar
- Thin metal rebar stakes or thick bamboo stakes (18-24 inches long)
- Optional: glass gems, small shells, or decorative pebbles to place inside the jar
How to Make Them
Remove the spike from your solar light and keep just the light head. Use waterproof epoxy to secure the solar light head into the lid of the mason jar, or simply rest it inside the open jar mouth if the sizing fits snugly.
Wrap copper wire around the neck of the jar 3-4 times and twist it to create a sturdy loop at the back. You can use this loop to hang the jar from a stake, hook, or branch, or simply set them directly on the ground along a path.
If you want them on stakes, thread the wire securely around a rebar stake and bend it to hold the jar at the desired angle. Bamboo stakes work well for lighter glass jars and blend beautifully into the garden.
Add glass gems or shells inside the jar for an extra sparkle effect as the light shines through them.
Cost: About $8-15 for a set of six, depending on where you source your supplies.
Time: About 20-30 minutes for a full set.
Mistake to avoid: Using regular craft wire instead of galvanized or copper wire. Regular wire will rust quickly outdoors. Also, make sure your solar light tops are getting actual direct sunlight during the day or the charge will not last through the evening. South-facing or open positions work best.
Variation: Paint the outside of the jar with glass paint in amber, sage, or cobalt blue for a colored lantern effect instead of the clear glass look. Both are absolutely save-worthy and look stunning photographed at golden hour.
How to Choose the Right Project for Your Space
Not every idea works for every garden. Here is a quick guide to matching the project to where you are right now.
| Garden Type | Recommended Projects |
| Small space or balcony | Start with the pallet herb garden and the mason jar stakes. Both work in tight spaces and do not require ground access. |
| Beginner with no tools | Go with the painted rocks and wine bottle edging first. Zero power tools needed. |
| Kid-friendly afternoon project | Painted garden rocks and punched tin lanterns (with adult supervision for the hammering) are both wonderful activities to do together. |
| Looking for a wow-factor focal point | The mosaic birdbath and the concrete leaf stepping stones are your best bets. They take a little more time but they are genuinely stunning. |
| Rental or temporary space | All seven of these are fully movable. No digging deep foundations, no permanent installs. Every single project works whether you own the yard or not. |
A Few Mistakes Worth Skipping
Most DIY garden decor fails come from one of four things:
- Using the wrong sealant for outdoor conditions
- Not letting materials cure fully before using them
- Skipping the prep work on the surface you are decorating
- Going for the cheapest materials without checking if they are weather-rated
None of these are hard mistakes to avoid. They just require one extra step and a little patience.
The other common mistake is trying to do everything at once. Pick one or two projects that excite you most and do those well. A single beautiful concrete leaf stepping stone in a garden bed is more impressive than five half-finished projects sitting in a pile near the garage.
Your Garden Is Worth the Effort
DIY garden decor does not have to be complicated or expensive to be genuinely beautiful. It just has to be yours. These 7 DIY garden decor ideas are all things a real person can make on a Saturday, with supplies that are either free or very affordable, and they look every bit as good as things you would find in a boutique garden shop.
Start with the one that made you pause when you read it. That hesitation is usually excitement in disguise.
If you try one of these projects, come back and share how it went in the comments below. Tell me which idea you chose, what you changed to make it your own, and what surprised you along the way. That is always my favorite part.





No Comment! Be the first one.