



10 Space Saving Camper Storage Hacks That Will Change How You Camp
The first night we spent in our travel trailer, I spent a full twenty minutes looking for the can opener. It was buried under a sleeping bag, wedged behind a cast-iron skillet, next to a bag of...

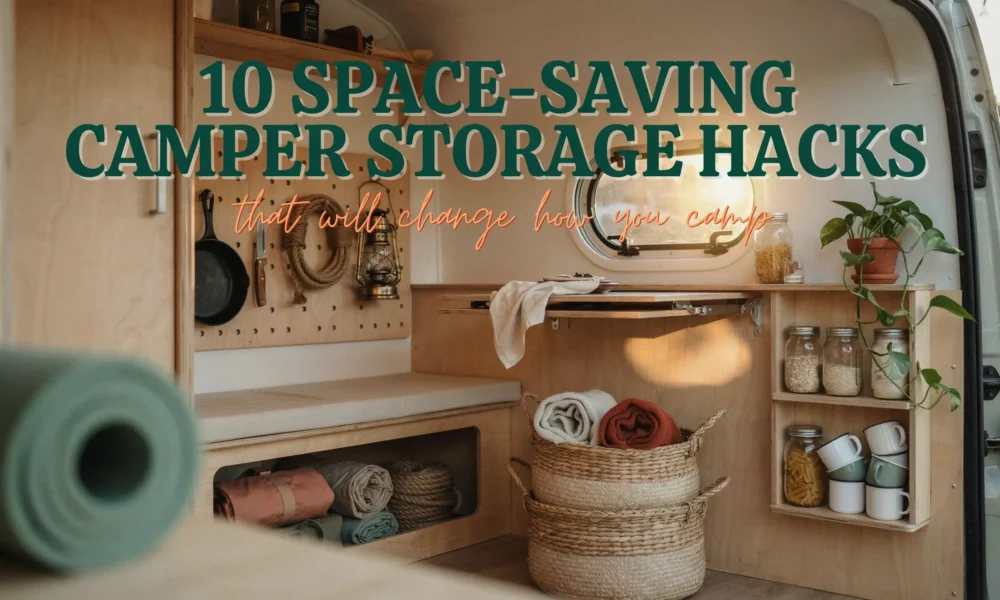
The first night we spent in our travel trailer, I spent a full twenty minutes looking for the can opener. It was buried under a sleeping bag, wedged behind a cast-iron skillet, next to a bag of coffee I couldn’t reach without knocking three things over. We had packed everything we thought we needed. The problem was we had nowhere to actually put it.
If you’ve ever felt like your camper is full the moment you close the door, you’re not alone. The average travel trailer gives you roughly the storage equivalent of a studio apartment bathroom, and yet somehow we expect it to hold food, clothes, gear, kids’ stuff, and everything else we drag along for the trip.
The good news: you don’t need a bigger camper. You need smarter storage. These 10 space saving camper storage hacks are practical, mostly budget-friendly, and designed for real people with real gear, not for Instagram campers who “bring only what fits in a tote bag.”
What Makes Camper Storage Different From Home Storage
Before diving into the hacks, one thing is worth saying clearly: camper storage is not the same as home organization. Everything in your rig moves while you drive. Things shift, slide, tip over, and sometimes break. Any storage solution you add needs to survive highway curves and pot-holed back roads. Weight distribution matters too. Load heavy items low and toward the center of the camper, and always secure loose items before you pull out of camp. That one rule alone will save you from a lot of surprise messes.
1. Use Tension Rods to Create Storage Where There Is None
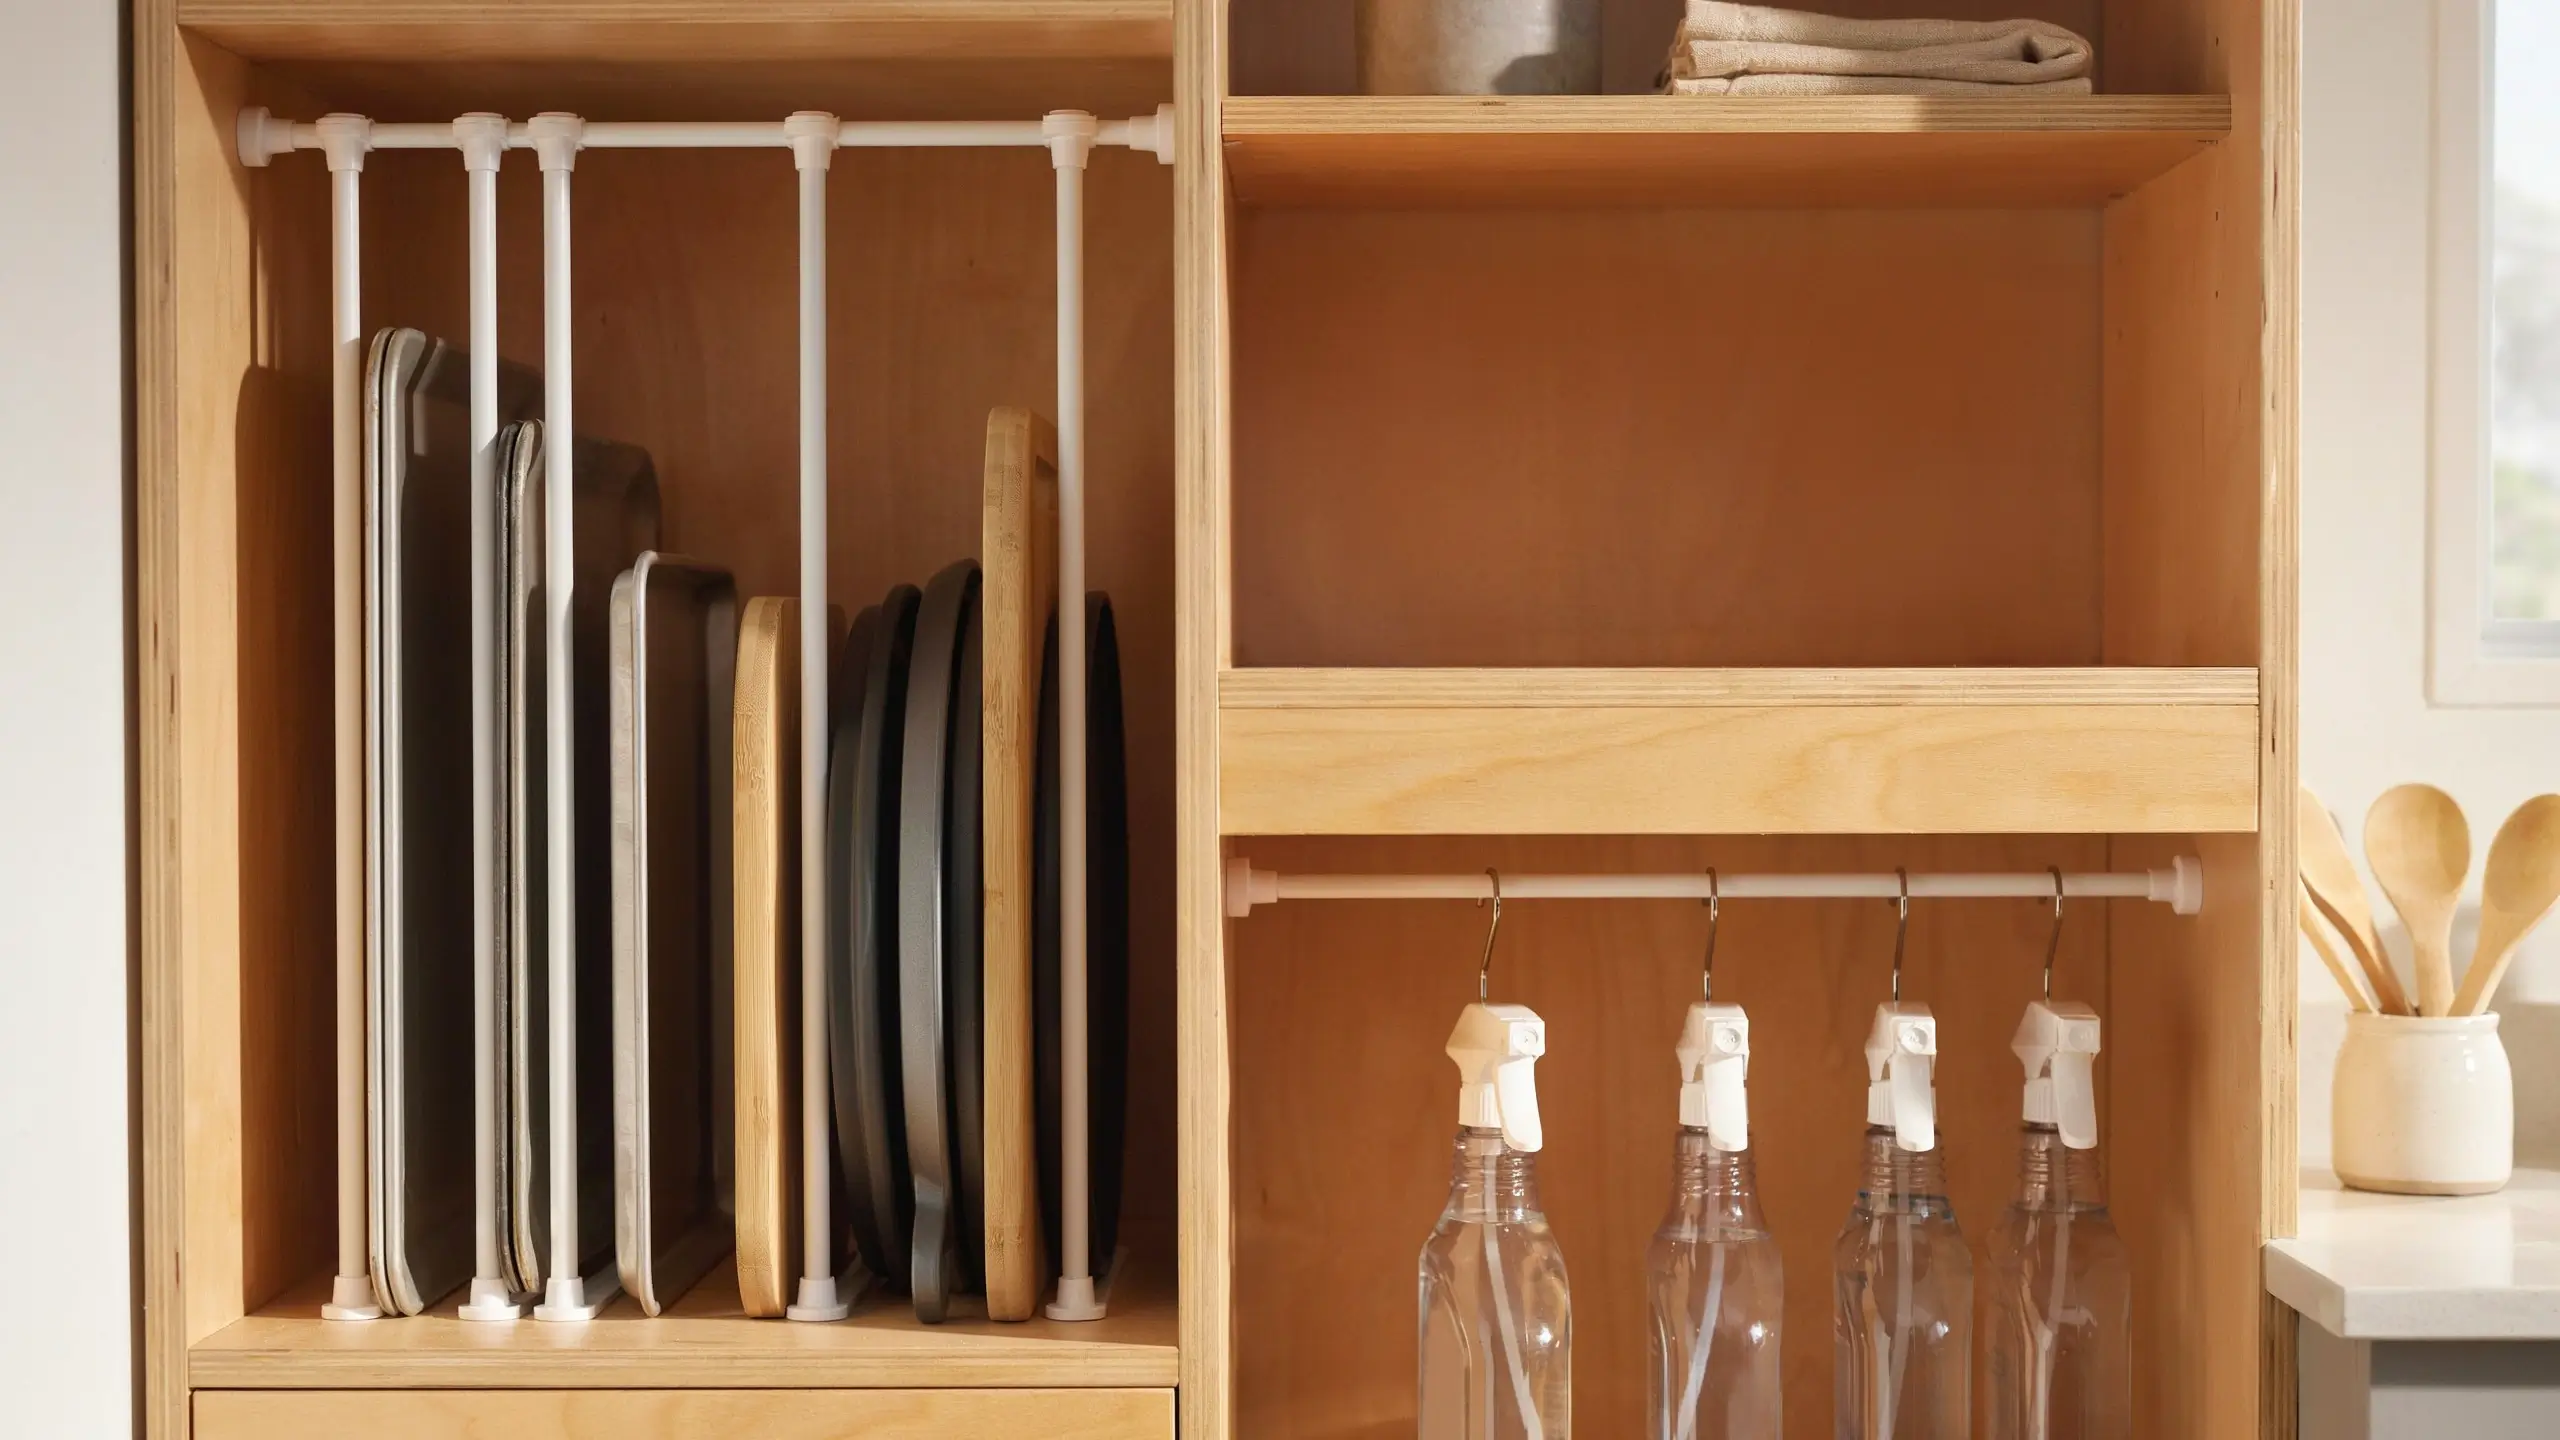
Tension rods might be the single most versatile camper storage tool you can buy, and a four-pack from a dollar store costs almost nothing.
Inside deep kitchen cabinets, set two or three tension rods vertically between shelves to create slots for baking sheets, cutting boards, pot lids, and sheet pans. Instead of stacking everything and pulling out the whole pile to find what’s at the bottom, each item slides out individually. Under the sink, mount a single horizontal tension rod a few inches below the cabinet shelf and hang spray bottles by their trigger handles. This keeps the cabinet floor completely clear for other things.
You can also run tension rods across the inside of a drawer to keep bottles from rolling, or across a shelf to serve as a simple lip that stops items from sliding forward when the camper moves. They adjust to fit any space and install without a single screw.
2. Hang a Clear Shoe Organizer on Any Door or Wall
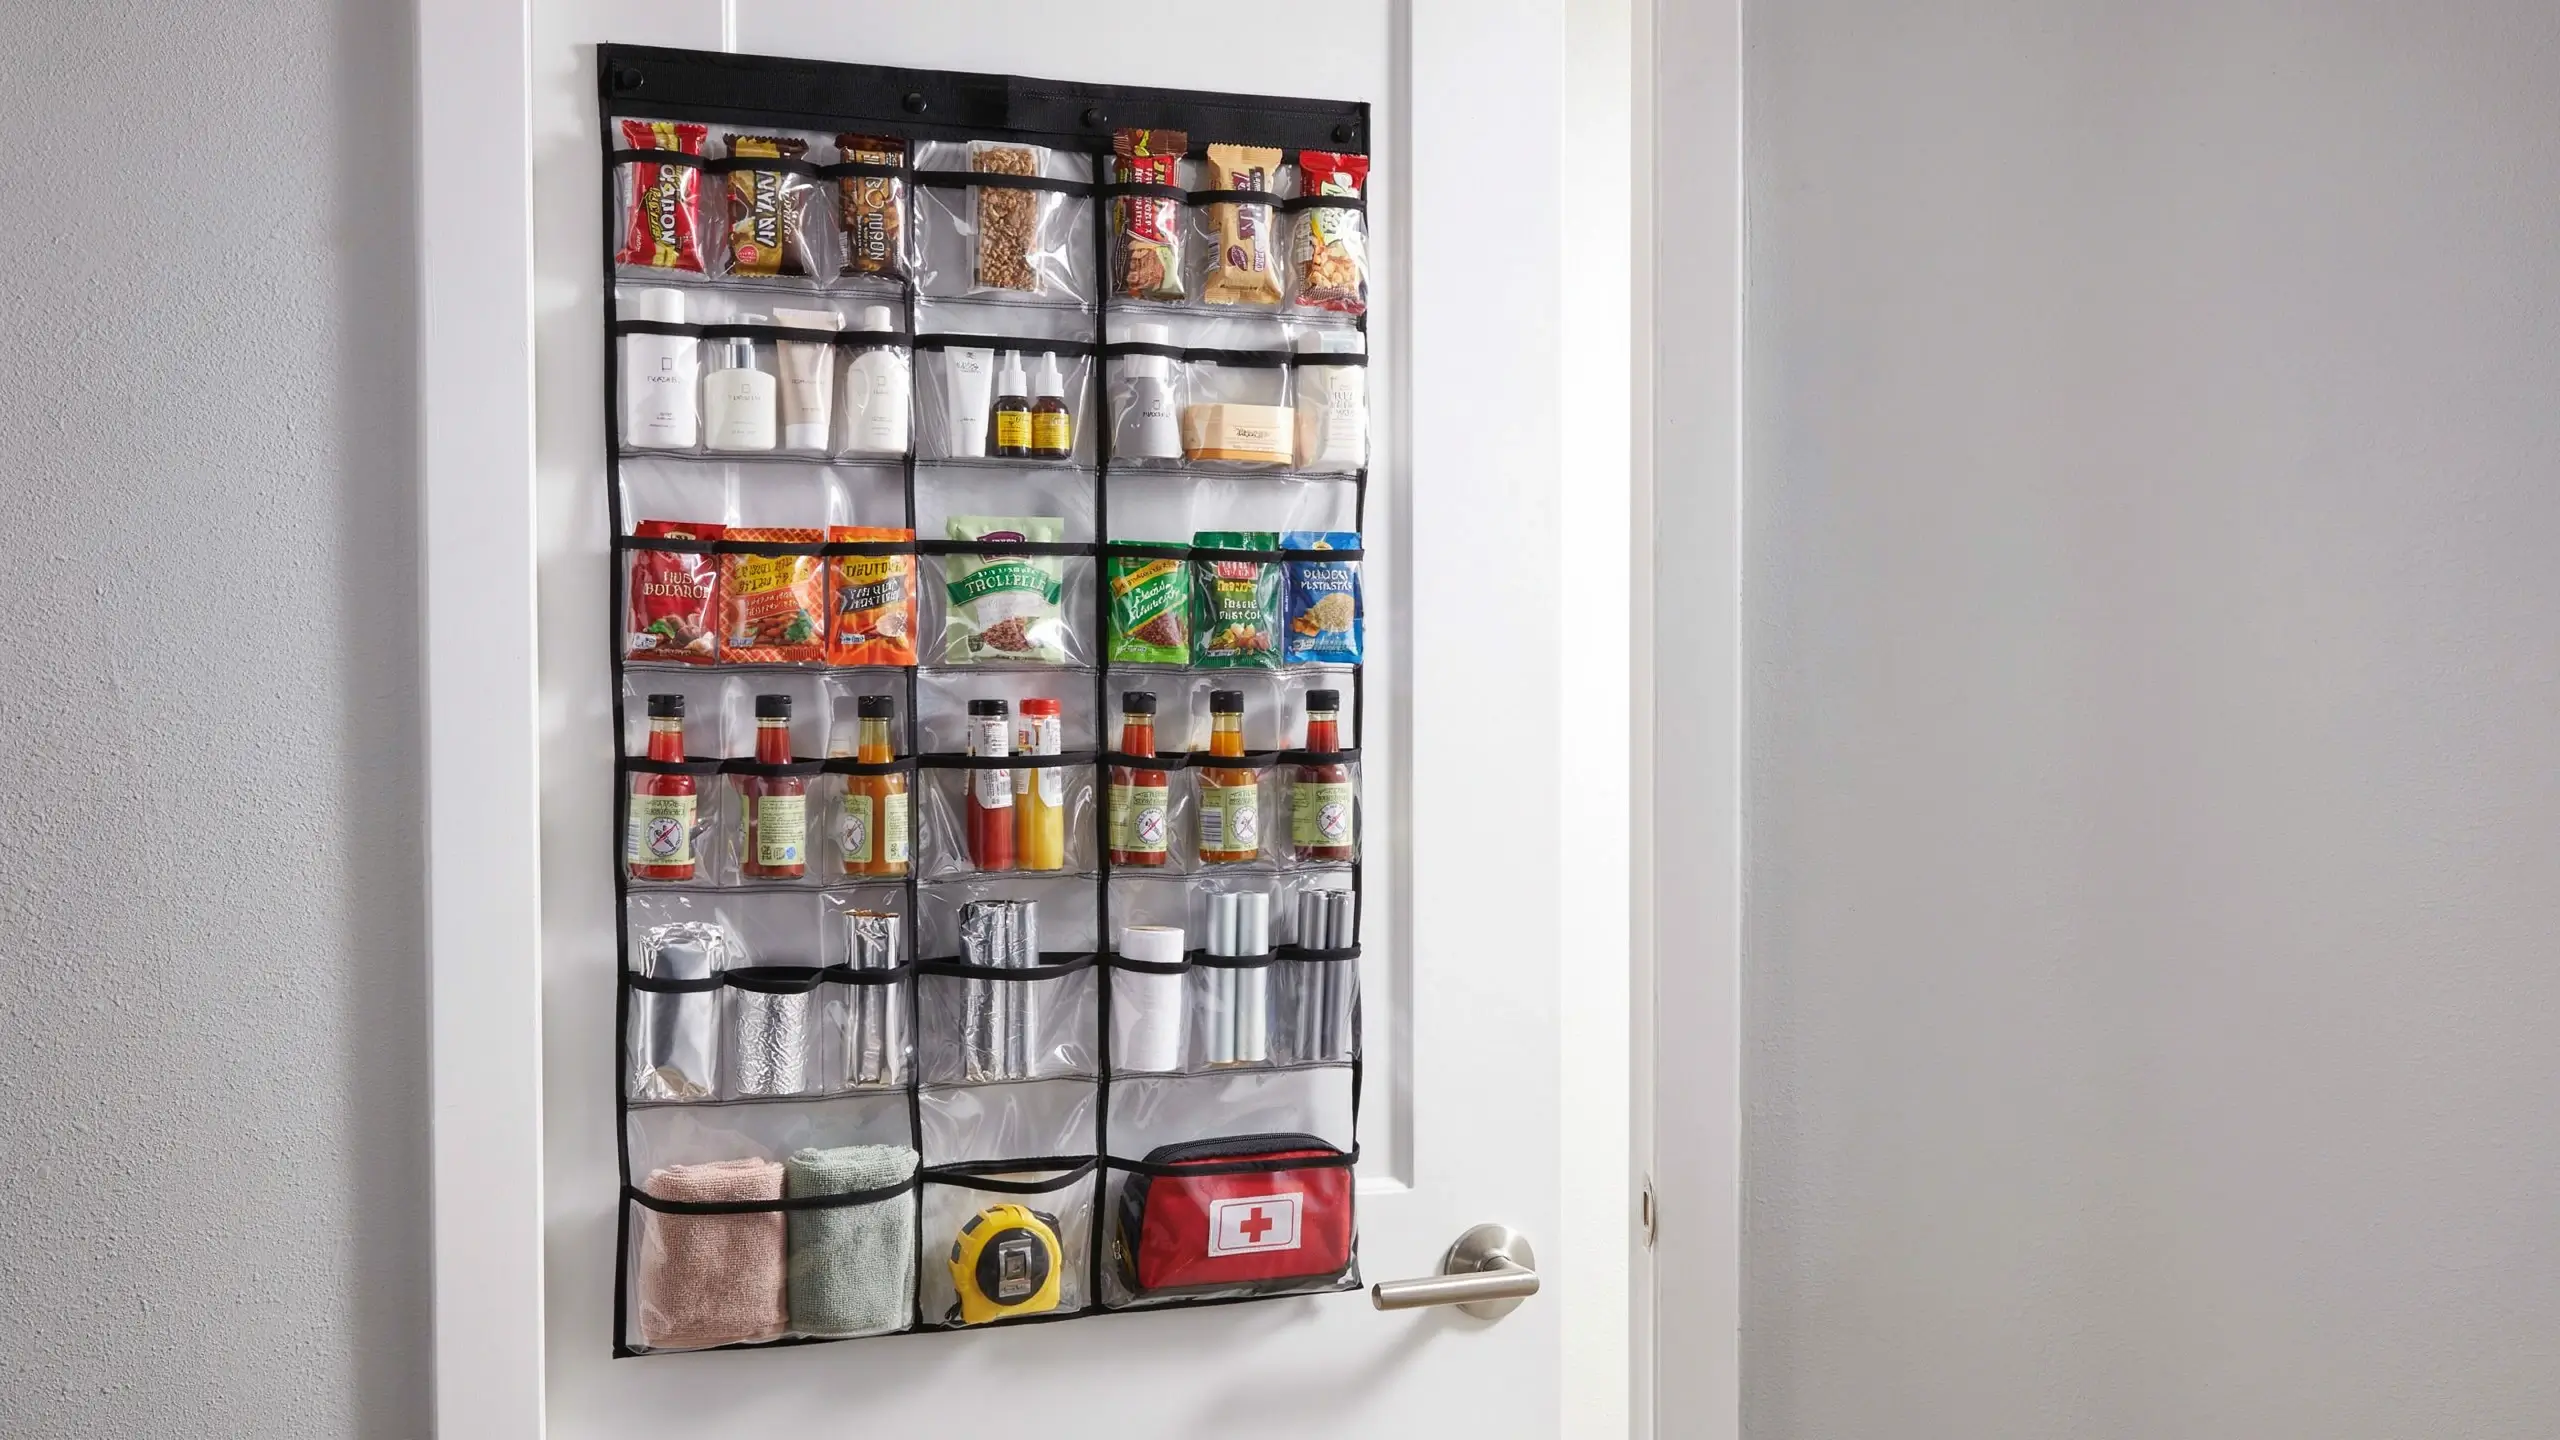
A clear over-the-door shoe organizer is one of the fastest, cheapest, and most visual storage upgrades you can make in a camper. A standard 24-pocket organizer fits on the inside of a pantry door, a bathroom door, or even flat against a wall using Command strips.
In the kitchen area, use it to store spice packets, hot sauce bottles, cooking oils, foil, zip lock bags, condiment packets, and snack bars. Each pocket is visible at a glance, so you never dig through a cabinet again. In the bathroom, it holds shampoo, toothpaste, razors, and travel-sized toiletries without crowding your tiny counter. If you camp with kids, hang one near the door for sunscreen, bug spray, hand sanitizer, and their individual snack packs. They can grab what they need without asking you where anything is.
Look for organizers with reinforced grommets if you plan to hang them with hooks, or choose ones with a flat back panel that lies flush against the wall. Either way, you’re adding organized storage to a surface you were already ignoring.
3. Mount a Magnetic Spice Strip Inside a Cabinet Door
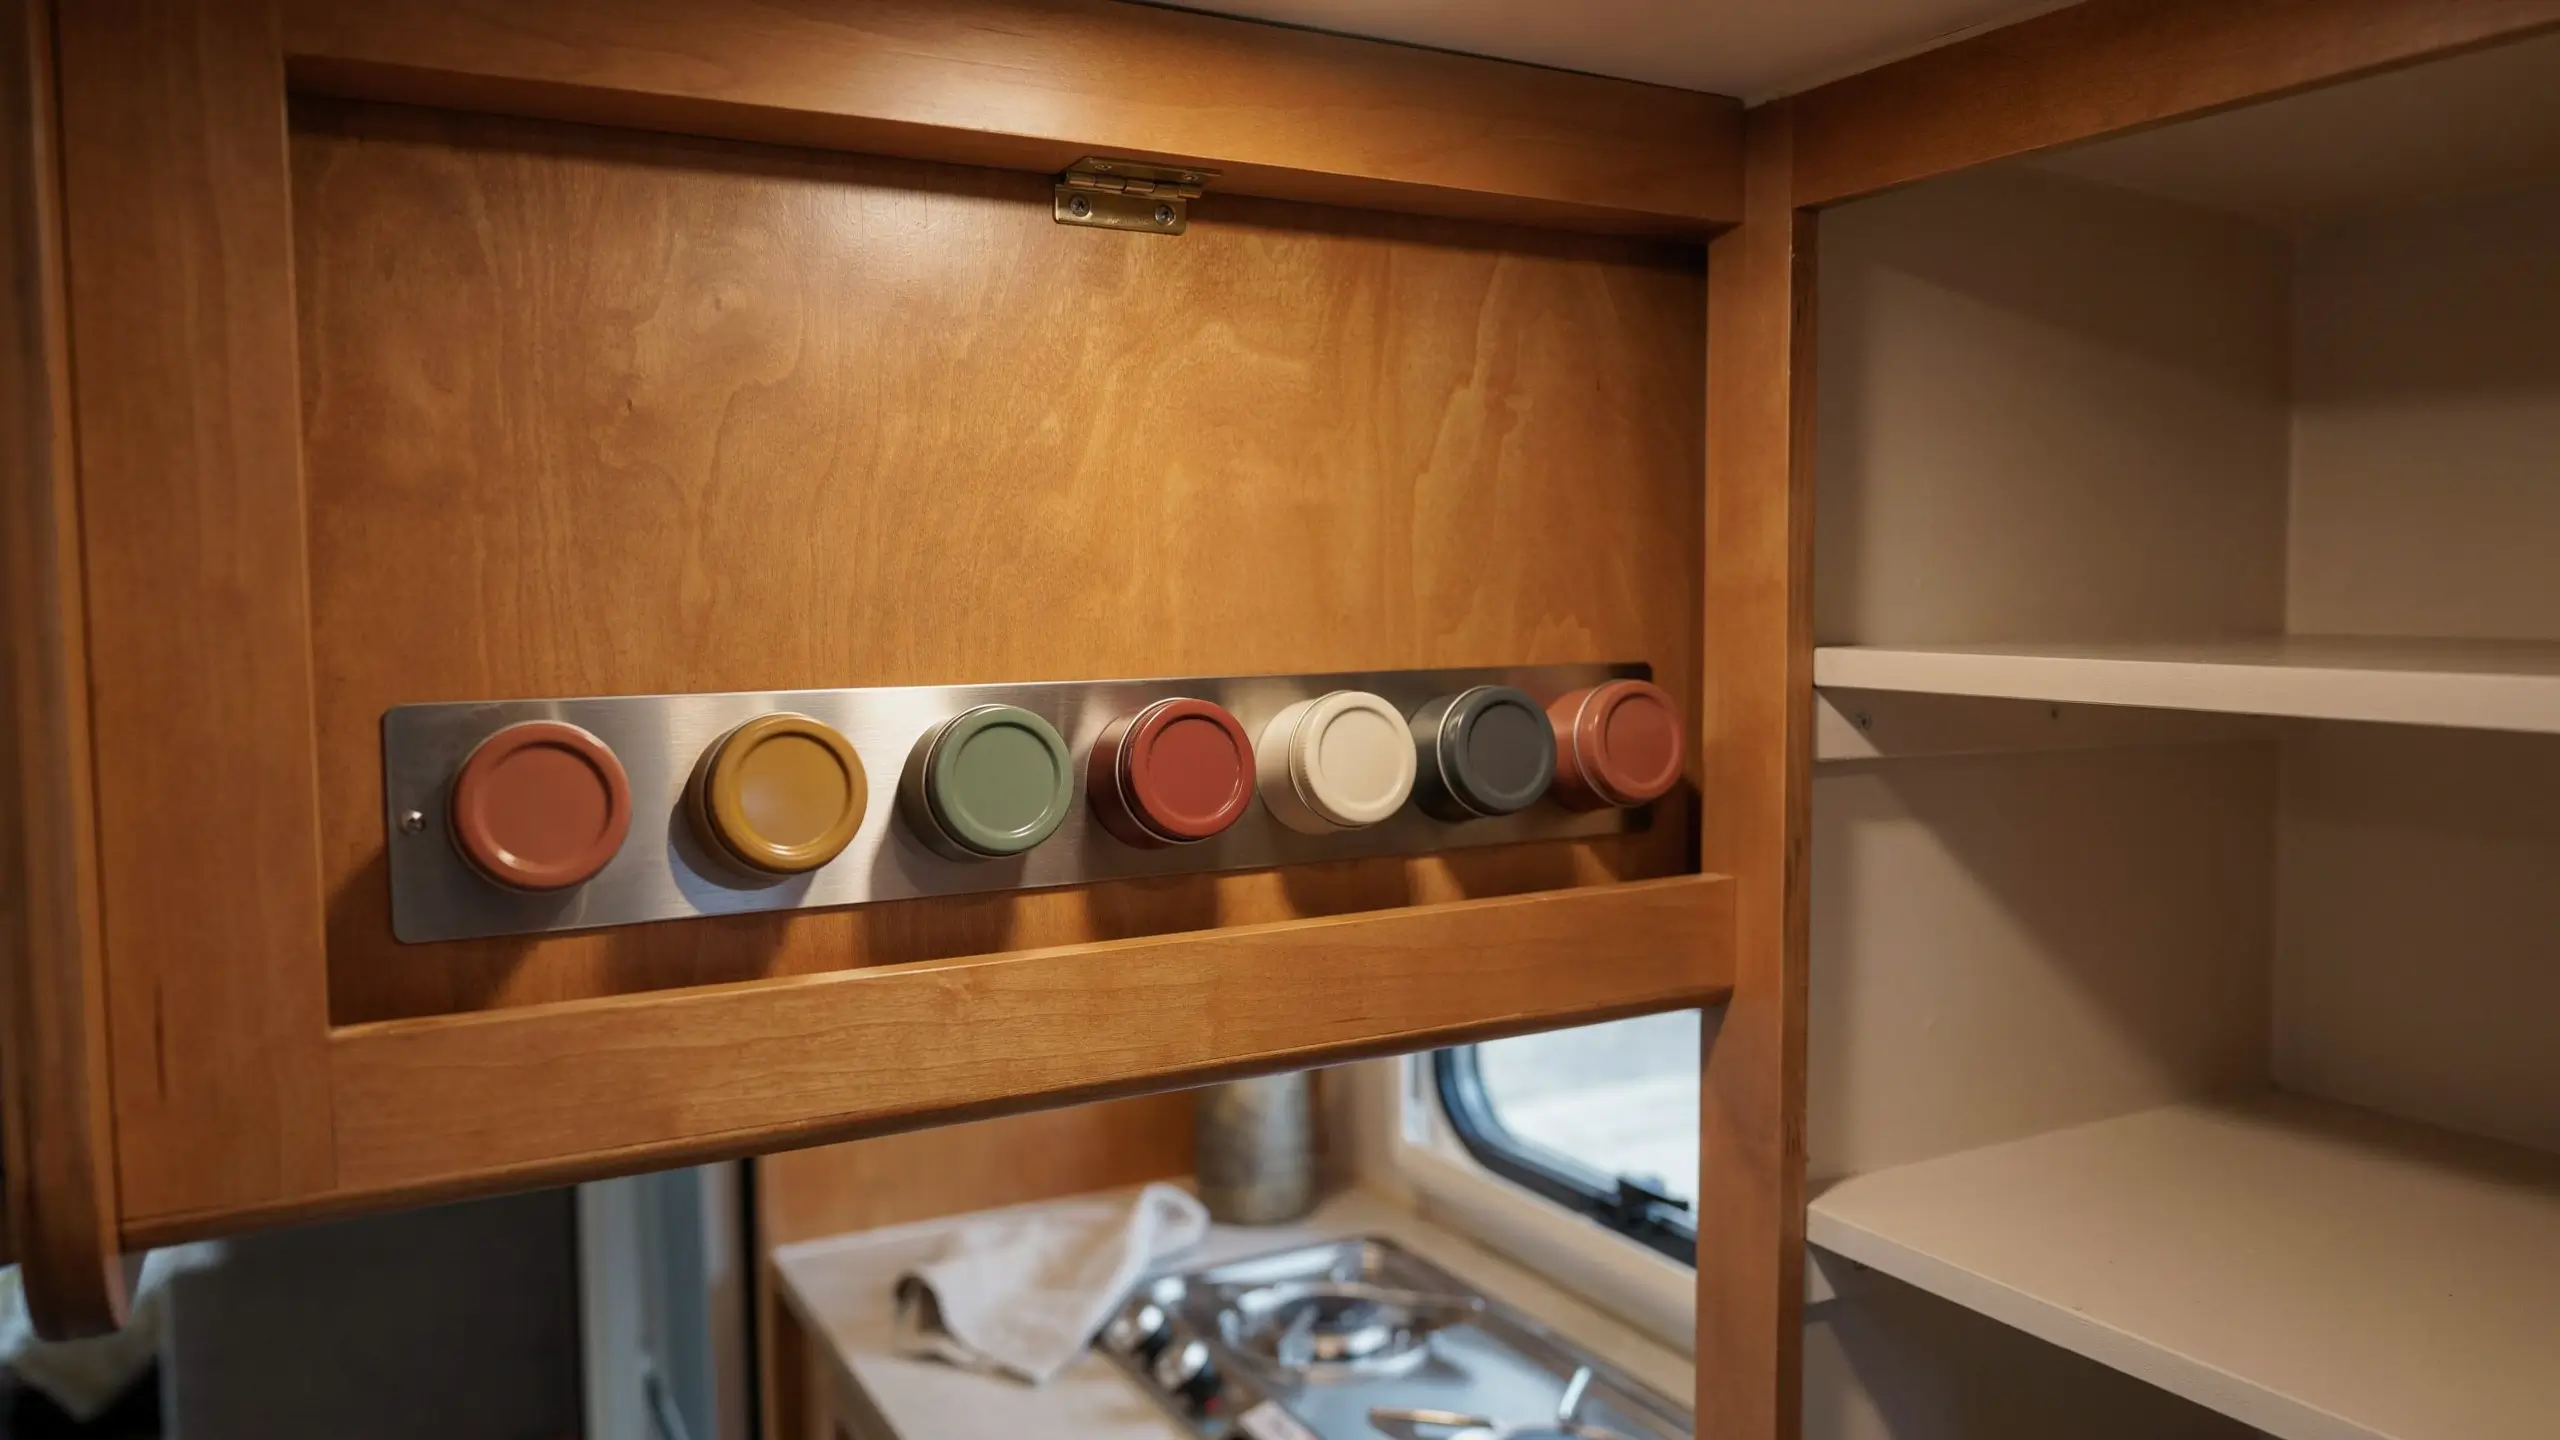
Most camper kitchens dedicate an entire shelf to spice jars that rattle around, fall over, and never seem to have the one you need facing forward. A magnetic spice strip fixes all of that and reclaims the shelf entirely.
Mount a magnetic knife strip or a set of magnetic spice tins directly to the inside of a cabinet door using screws or very strong adhesive. Fill the tins with your most-used spices, label the lids, and close the door. When you cook, the door swings open and every spice is right there, organized and visible.
One important safety note: always transfer the spice tins to a drawer or secure container before you drive. Magnetic strips hold well when you’re parked, but a hard brake or rough road can send the tins flying, and nobody wants to explain to the urgent care nurse that they were hit by cumin. Remove them from the strip before every departure and put them back when you’re set up at camp.
4. Add Command Hooks Everywhere (and Know Which Ones to Use)
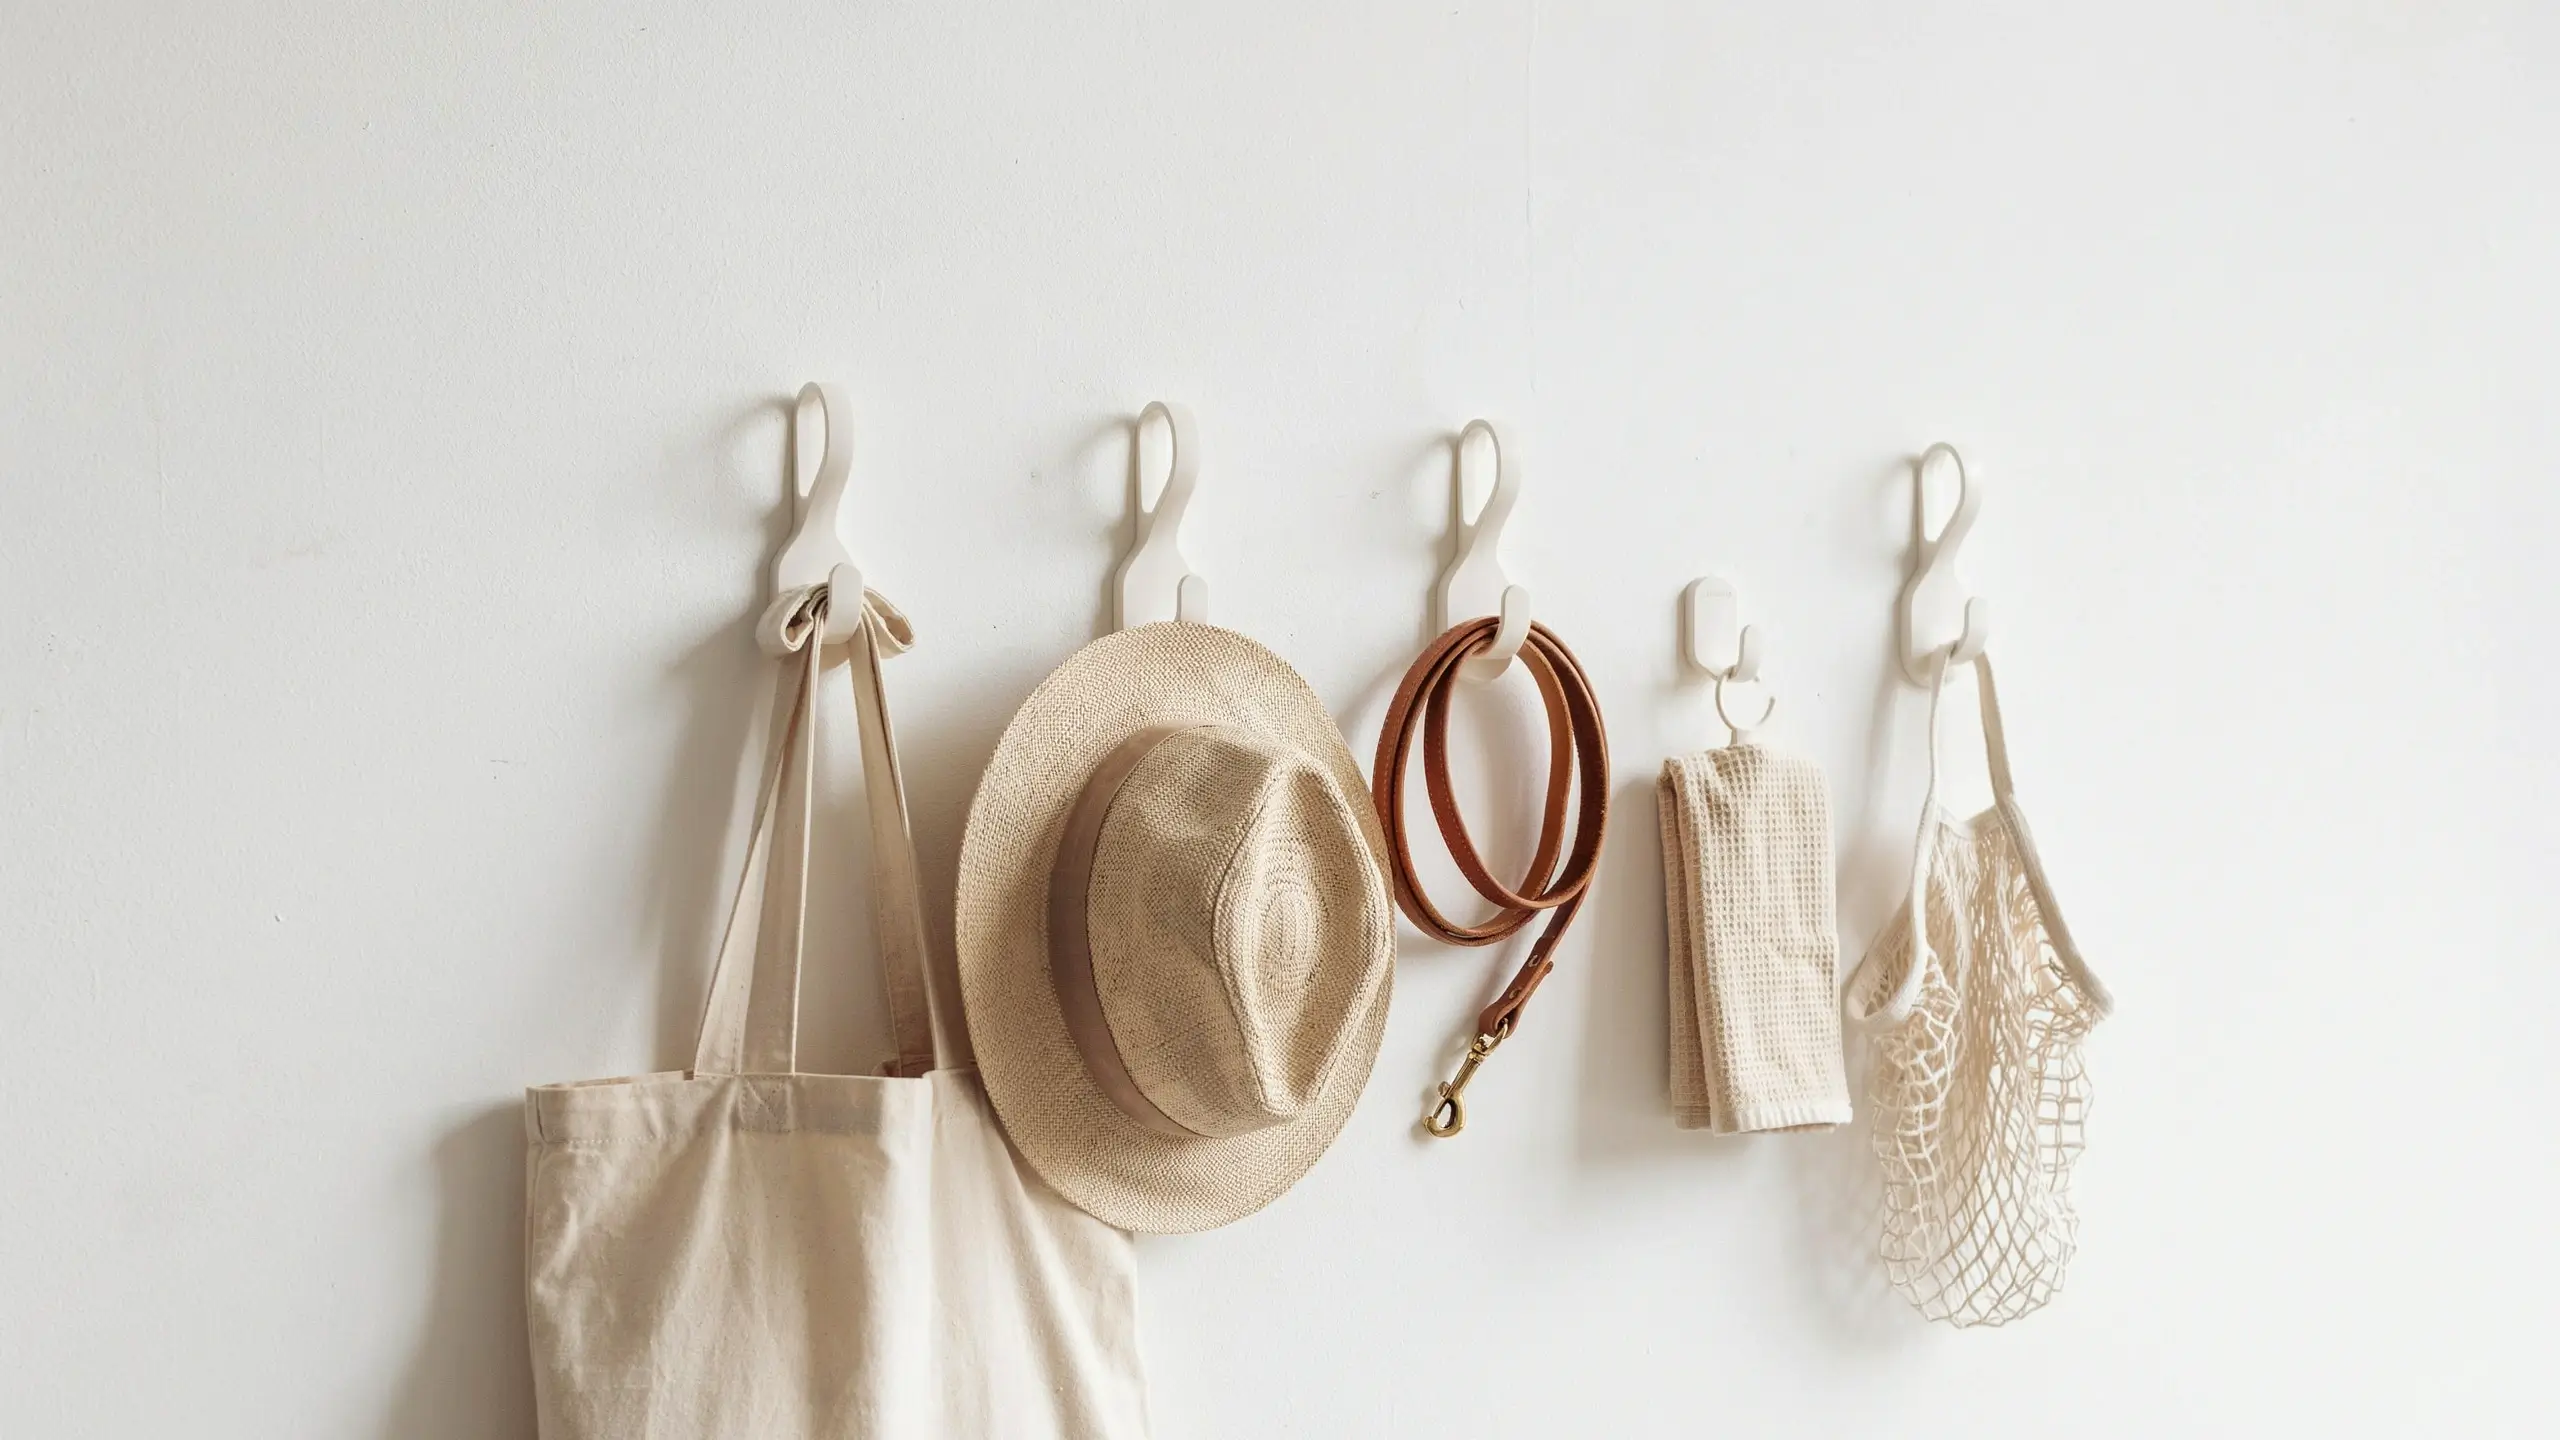
Command hooks get recommended in almost every RV article, and the advice usually stops at “stick some hooks up.” Here’s what the other articles leave out: not all Command hooks are equal, and placement matters.
- For heavy items like bags, hats, or a hanging mesh produce basket, use the jumbo or large Command hooks rated for 5 to 7.5 pounds.
- For lighter things like dish towels, keys, or a small lantern, medium hooks are fine.
- On the wall near the door, a row of three hooks is perfect for hats, jackets, and dog leashes so they never pile on the dinette.
- Inside a kitchen cabinet door, two hooks hold pot lids.
- Near the bathroom, one hook holds your towel.
- On the side of a cabinet near the stove, a hook holds your oven mitt so it’s always exactly where you need it.
Before applying, clean the surface with rubbing alcohol and let it dry completely. Press firmly for thirty seconds. Then wait an hour before loading anything onto the hook. This step is skipped constantly and it’s why people assume Command hooks don’t work in campers. They work great when you follow the prep step.
5. Organize Under-Bed Storage With Rolling Bins on Casters
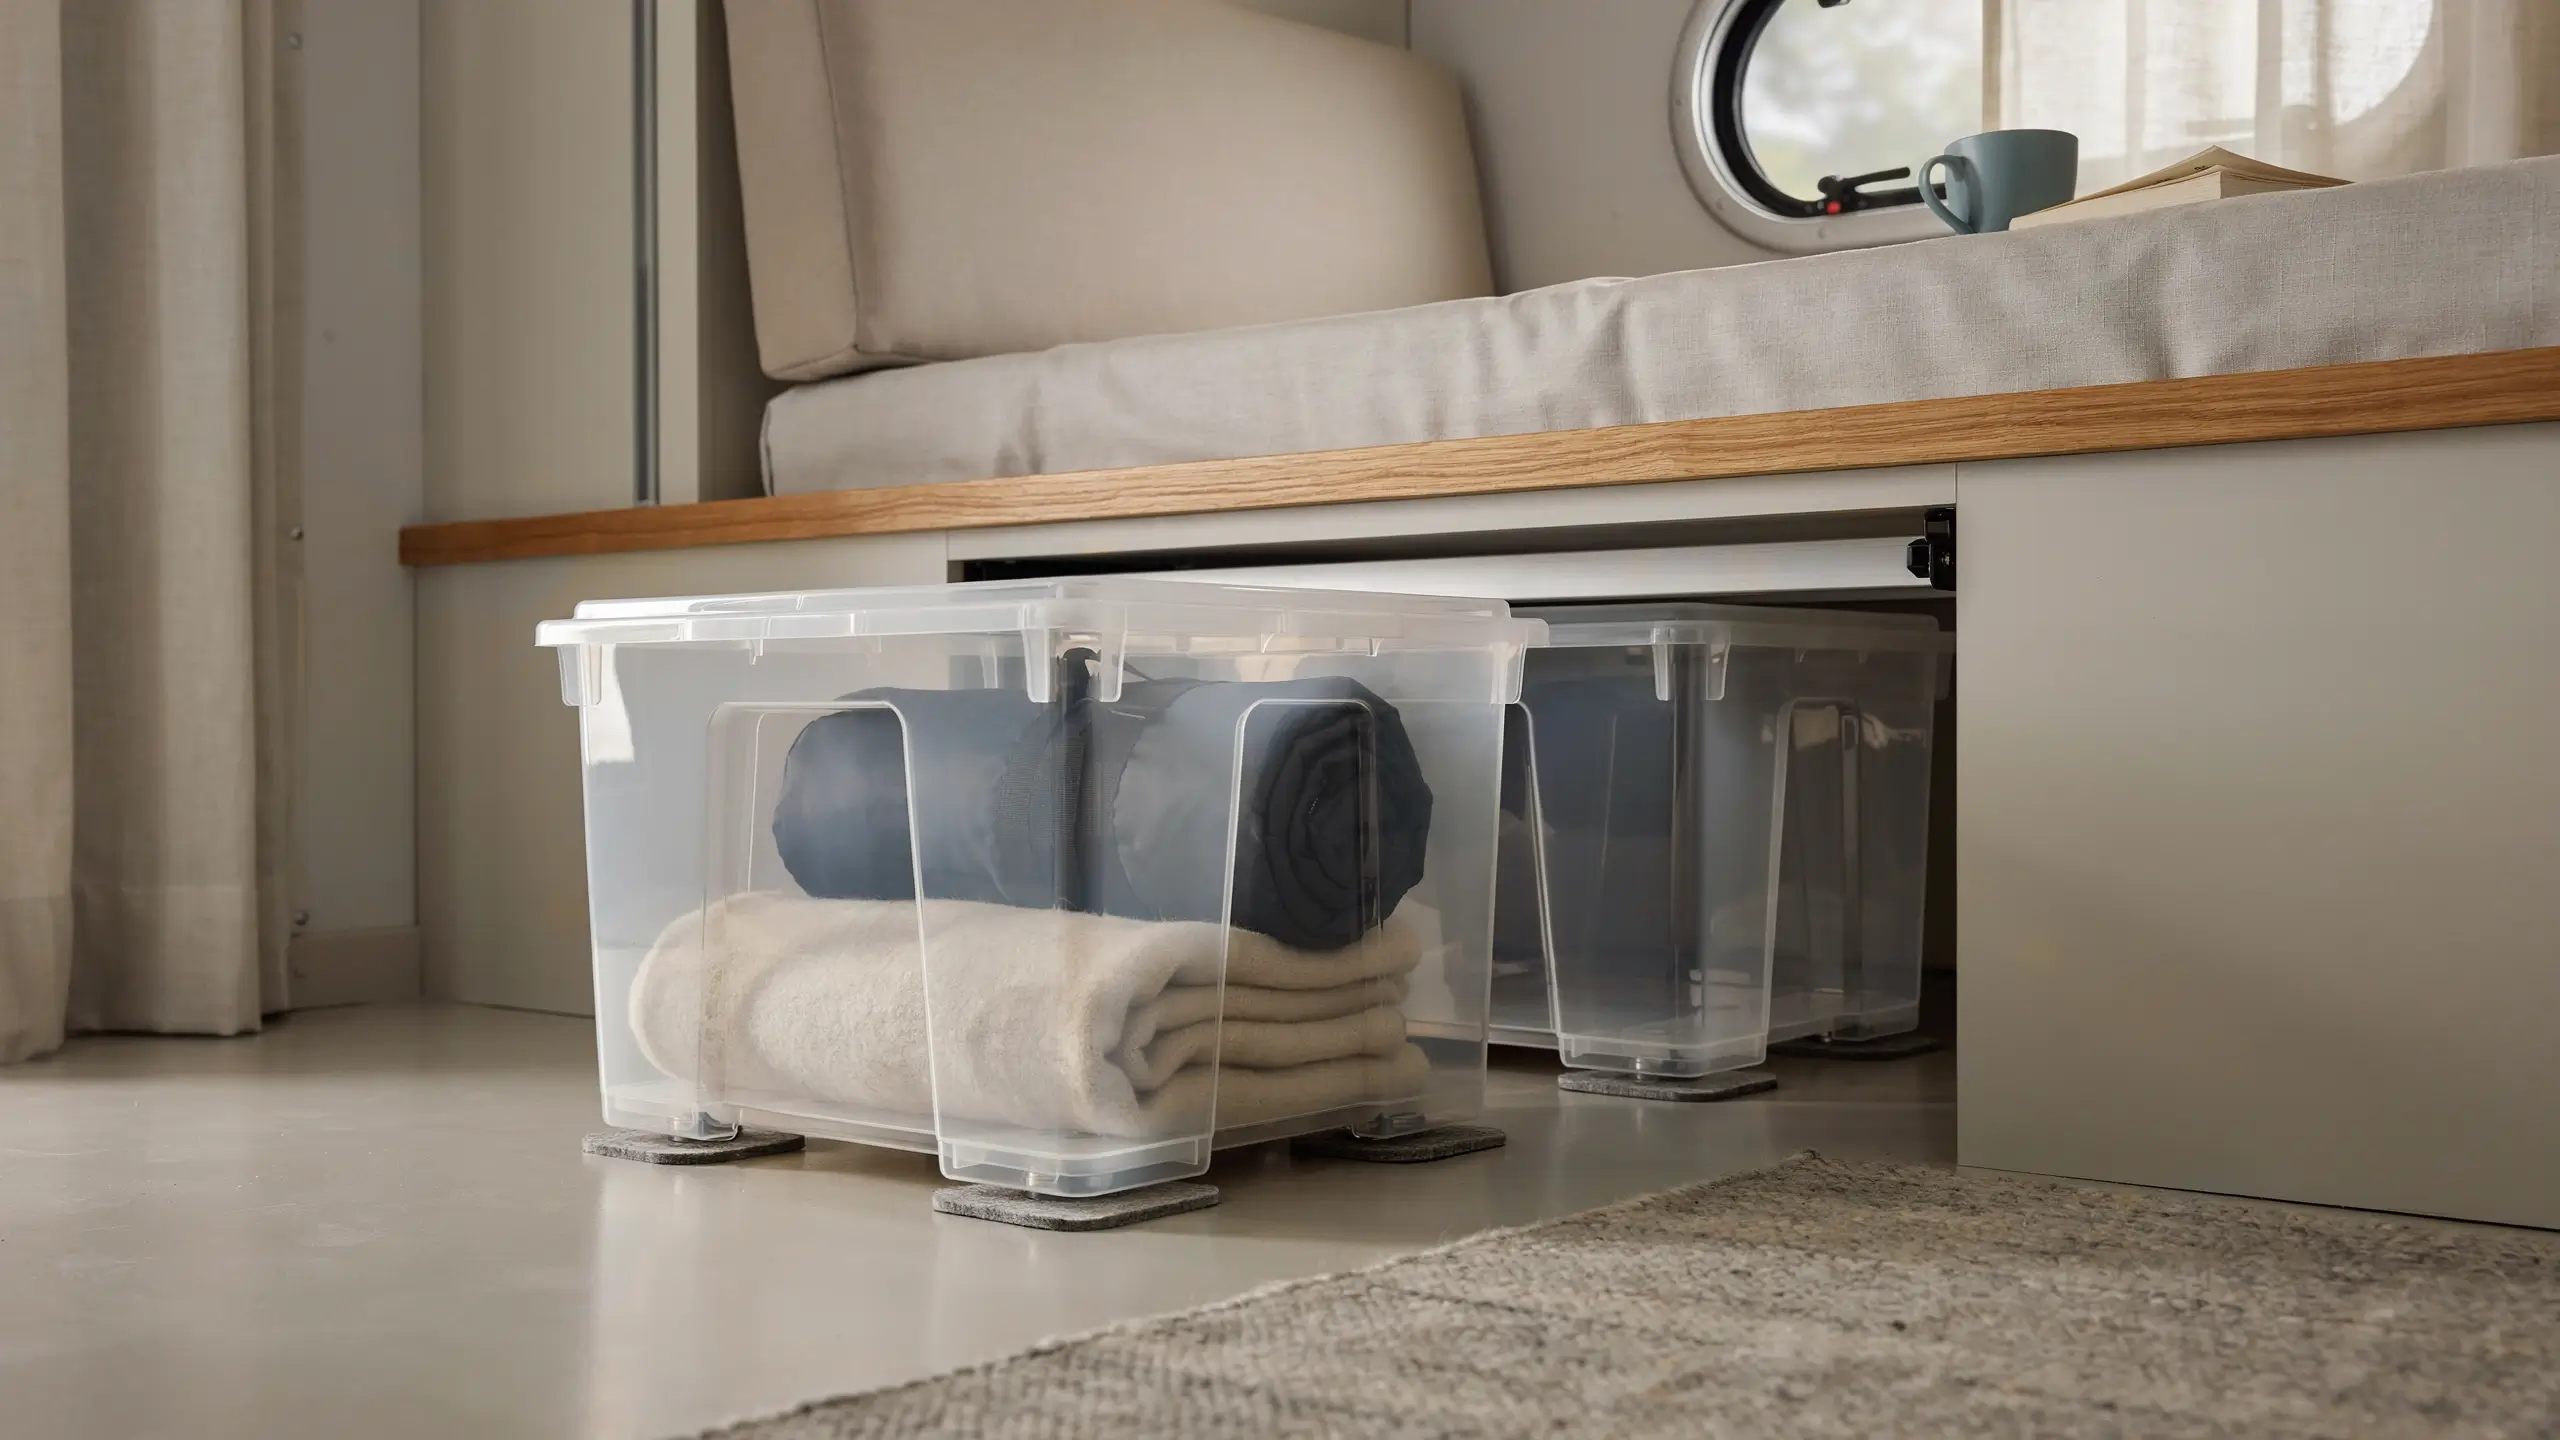
Under-bed storage in campers is one of the most underused spaces in any rig. Most people lift the mattress, toss a sleeping bag in, and call it done. With a little setup, that same space can hold a surprisingly organized collection of bins that slide in and out easily.
- First, measure the height of the opening, the depth, and the width before you buy anything. Under-bed camper storage varies a lot between models.
- Then look for low-profile plastic bins with lids that fit your measurements.
- Add adhesive felt casters or small rolling wheels to the bottom of each bin so they glide out smoothly instead of dragging.
- Label every bin: camping gear, extra bedding, off-season clothes, tools, etc.
For campers with a pedestal bed that has a hinged platform, use bins without casters and simply stack them with handles facing out for easy pulling. Keep the heaviest items in the bins closest to the center of the camper for better weight distribution while driving.
6. Switch to Collapsible and Nesting Cookware
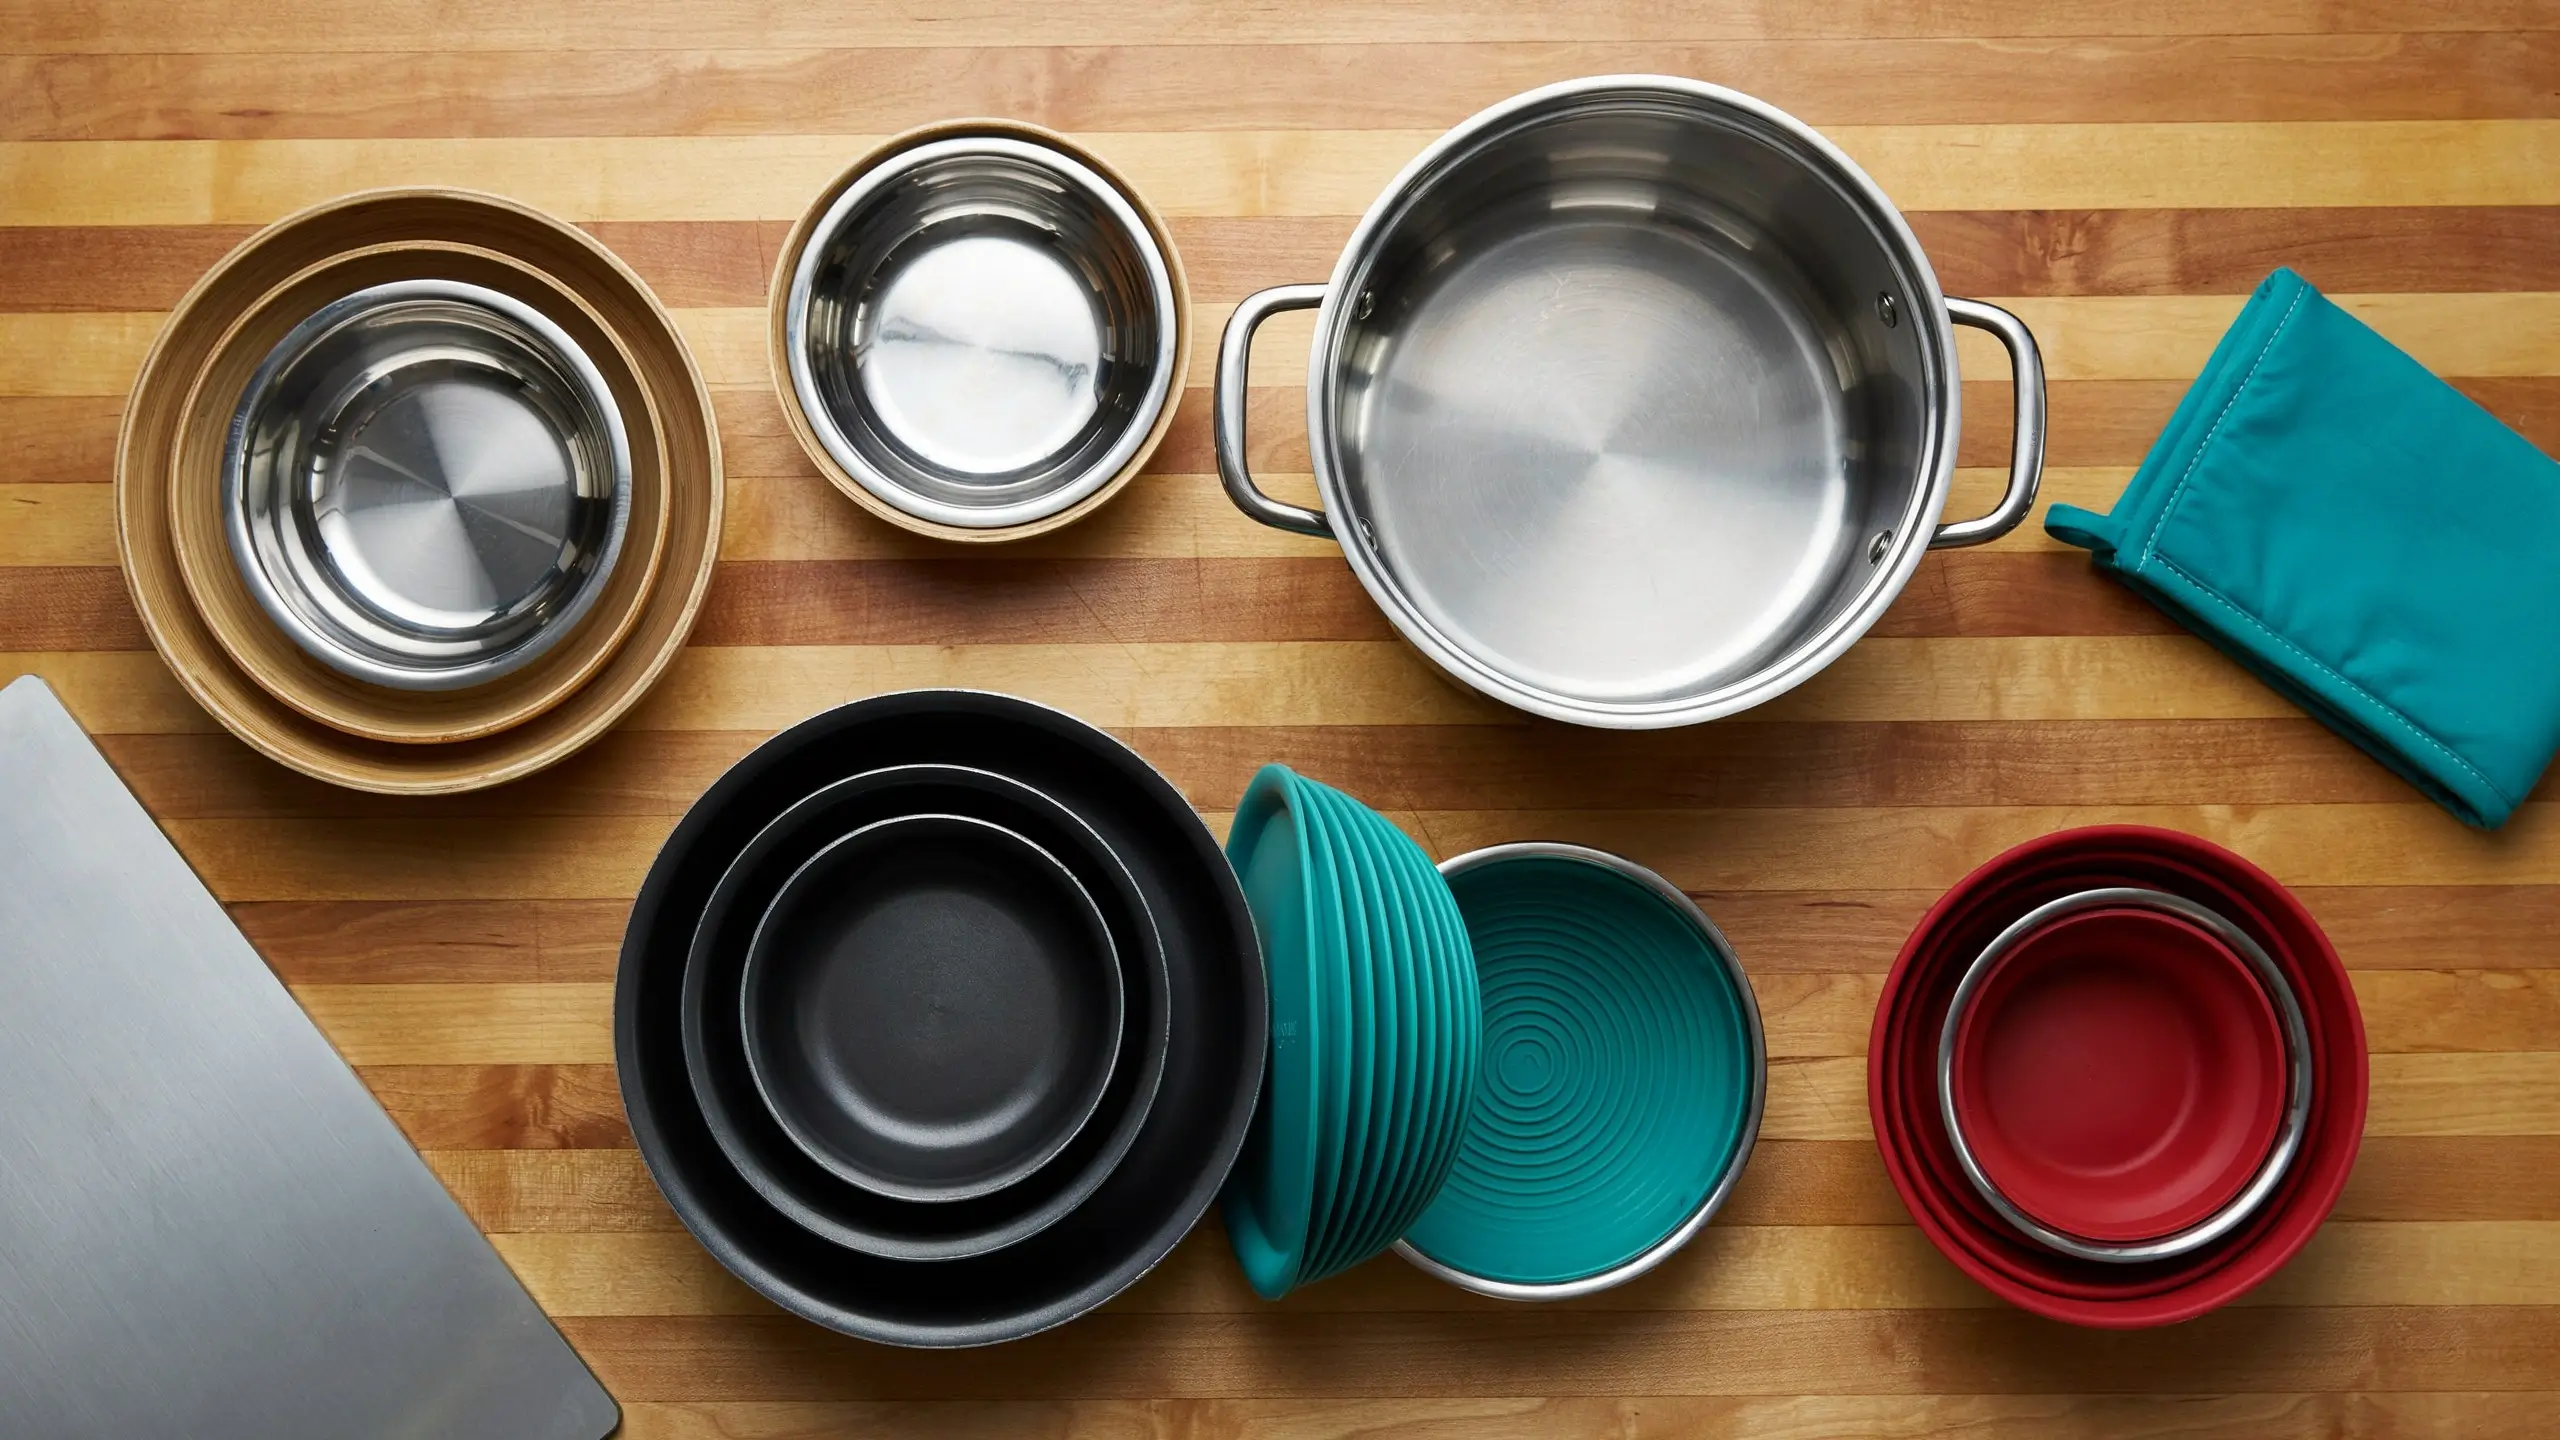
This one takes a little investment upfront but pays back in cabinet space immediately. Collapsible silicone cookware, nesting pot and pan sets, and stackable dish sets are designed specifically for small-space cooking, and they work genuinely well.
A silicone collapsible colander folds flat to about one inch thick. A nesting three-pot set takes the space of a single pot. Collapsible measuring cups, nesting mixing bowls, and stackable plates that include cups and bowls all nested together can cut your kitchen storage needs roughly in half.
When shopping, look for hard-anodized or stainless nesting pots rather than the super-lightweight versions, which tend to feel flimsy and cook unevenly. For silicone items, choose food-grade silicone from brands with good reviews. One tip for checking quality: press the silicone and release it. If it bounces back immediately with no white marks, the quality is solid. If it stays creased or whitens, skip it.
7. Add a Ceiling Cargo Net Above the Dinette or Bed
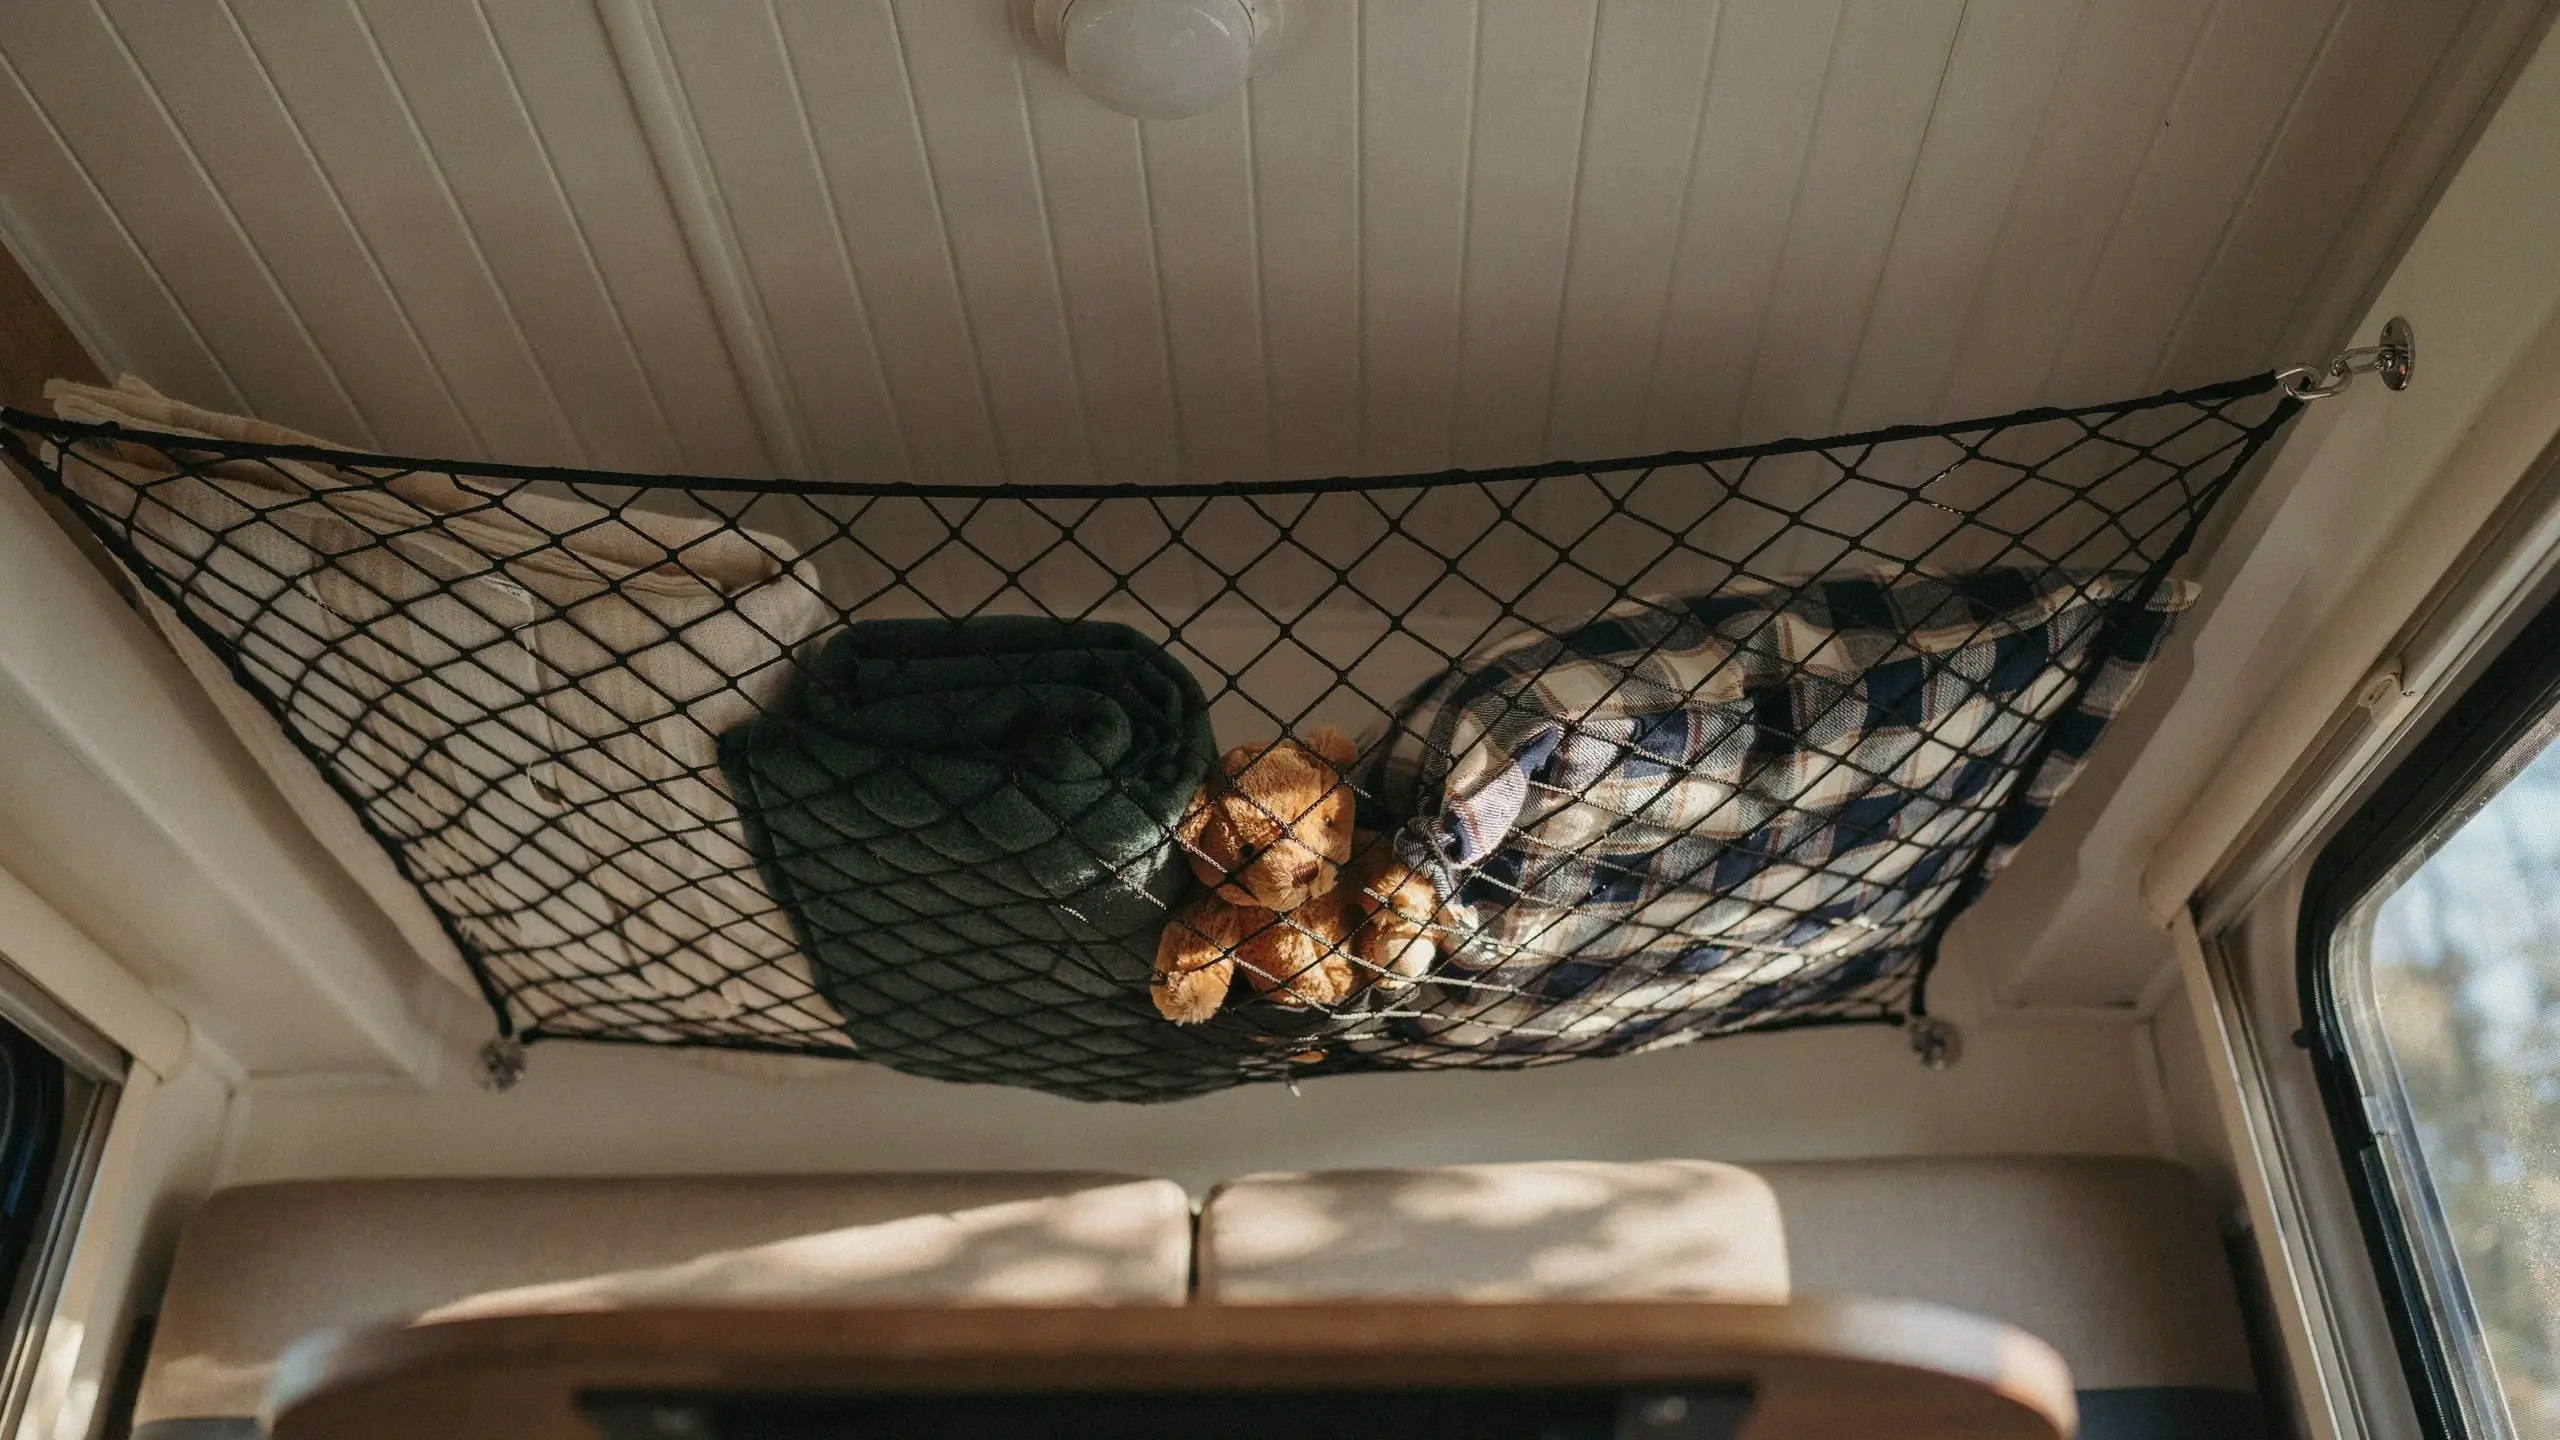
Ceiling space is almost entirely ignored in most campers, and a simple cargo net turns it into usable storage overnight.
Attach a mesh cargo net, the kind made for truck beds or cargo areas, to eye bolts or ceiling hooks above the dinette seating area or above the bed. Use it to store pillows, sleeping bags, rolled blankets, stuffed animals, and anything soft and bulky that doesn’t need to be accessed mid-drive. It keeps those items off the seating area and bed so you actually have somewhere to sit when you arrive at camp, rather than moving a pile of pillows before you can relax.
Choose a net with tighter mesh so smaller items don’t fall through. Bungee cord attachment points are easier to work with than clip systems if you want the net to be quickly removable. Attach it securely before driving and don’t load it with anything heavy. Ceiling nets are for soft, light, bulky items only.
8. Use the Space Behind the Cab Seats
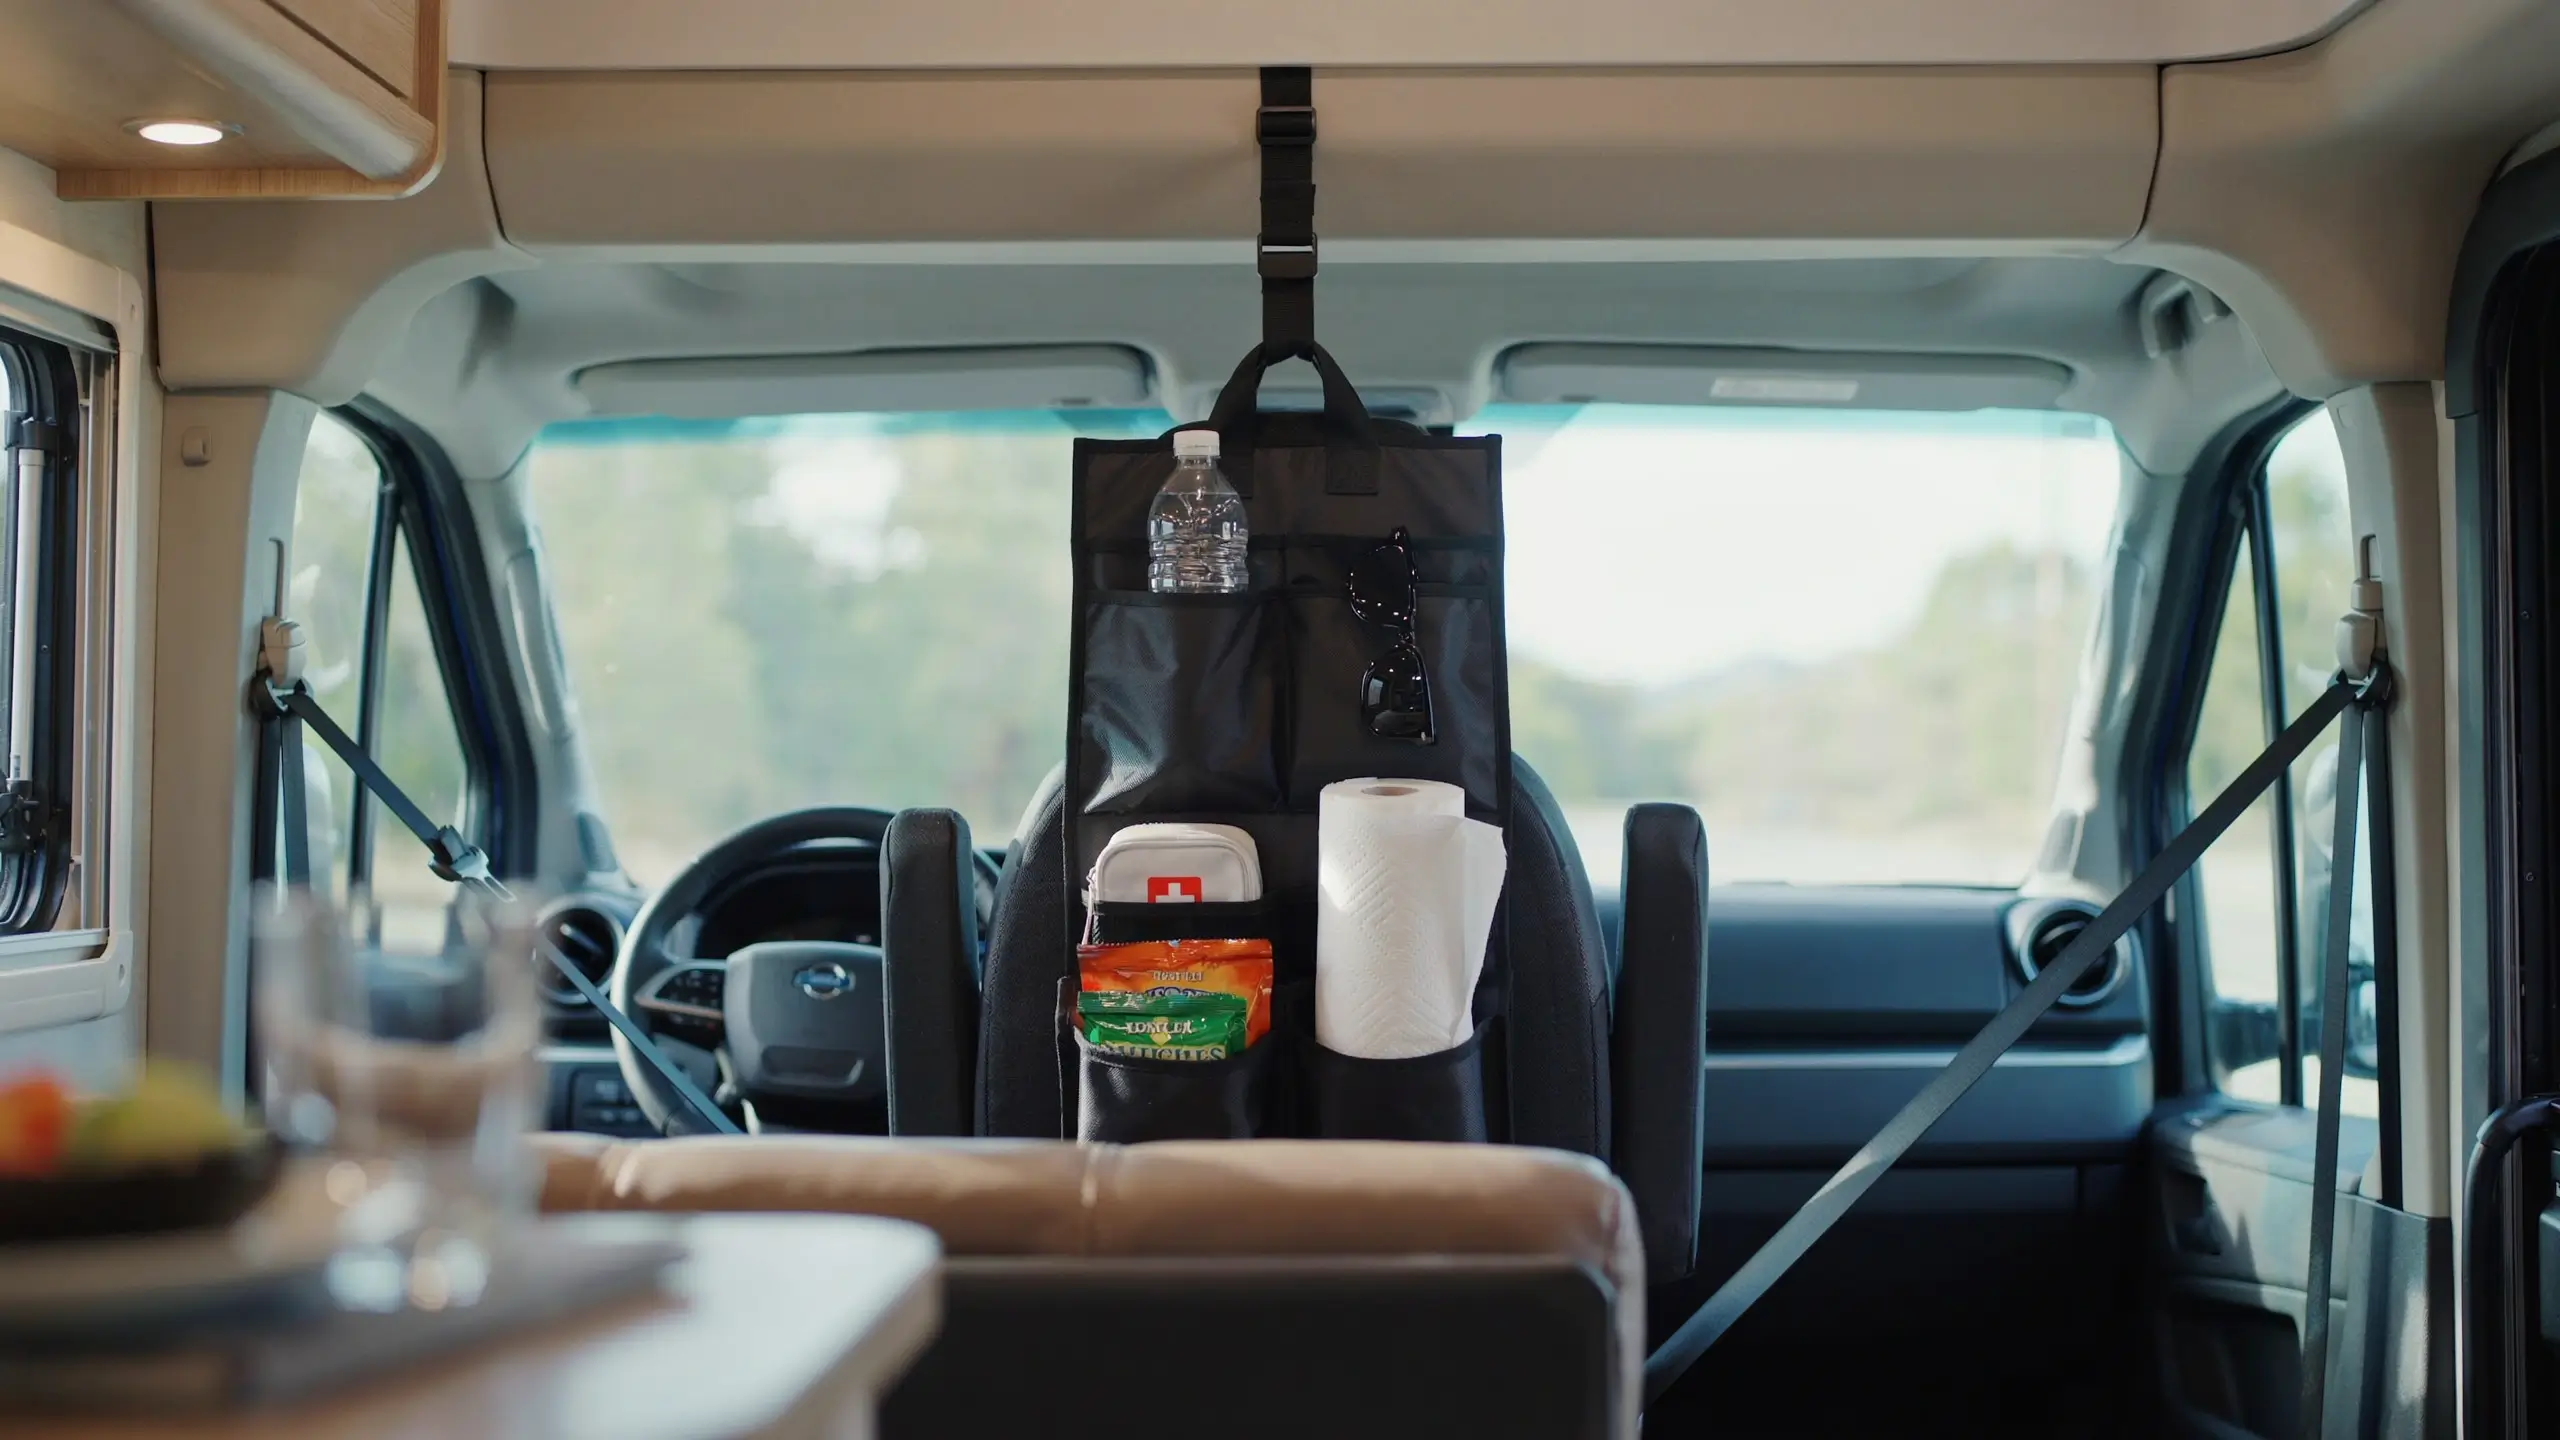
In most truck campers, travel trailers being towed, and motorhomes, the cab area or driving section has a dead zone directly behind the seats that gets used for nothing. This is a missed opportunity.
A hanging car backseat organizer, the kind made for road trips with kids, installs over the headrest of the driver and passenger seats and provides a grid of pockets and pouches. Use it for road trip snacks, water bottles, sunglasses, paper towels, wet wipes, a first aid kit, phone chargers, and any other items you want accessible while driving without digging through bags. Some organizers even include a tablet holder, which is genuinely useful for navigation or keeping kids occupied.
For full-timing campers, the back-of-seat area is also a good place to hang a compact file organizer for campground reservations, park passes, insurance documents, and registration paperwork.
9. Install a Wall-Mounted Utensil Rail in Your Camper Kitchen
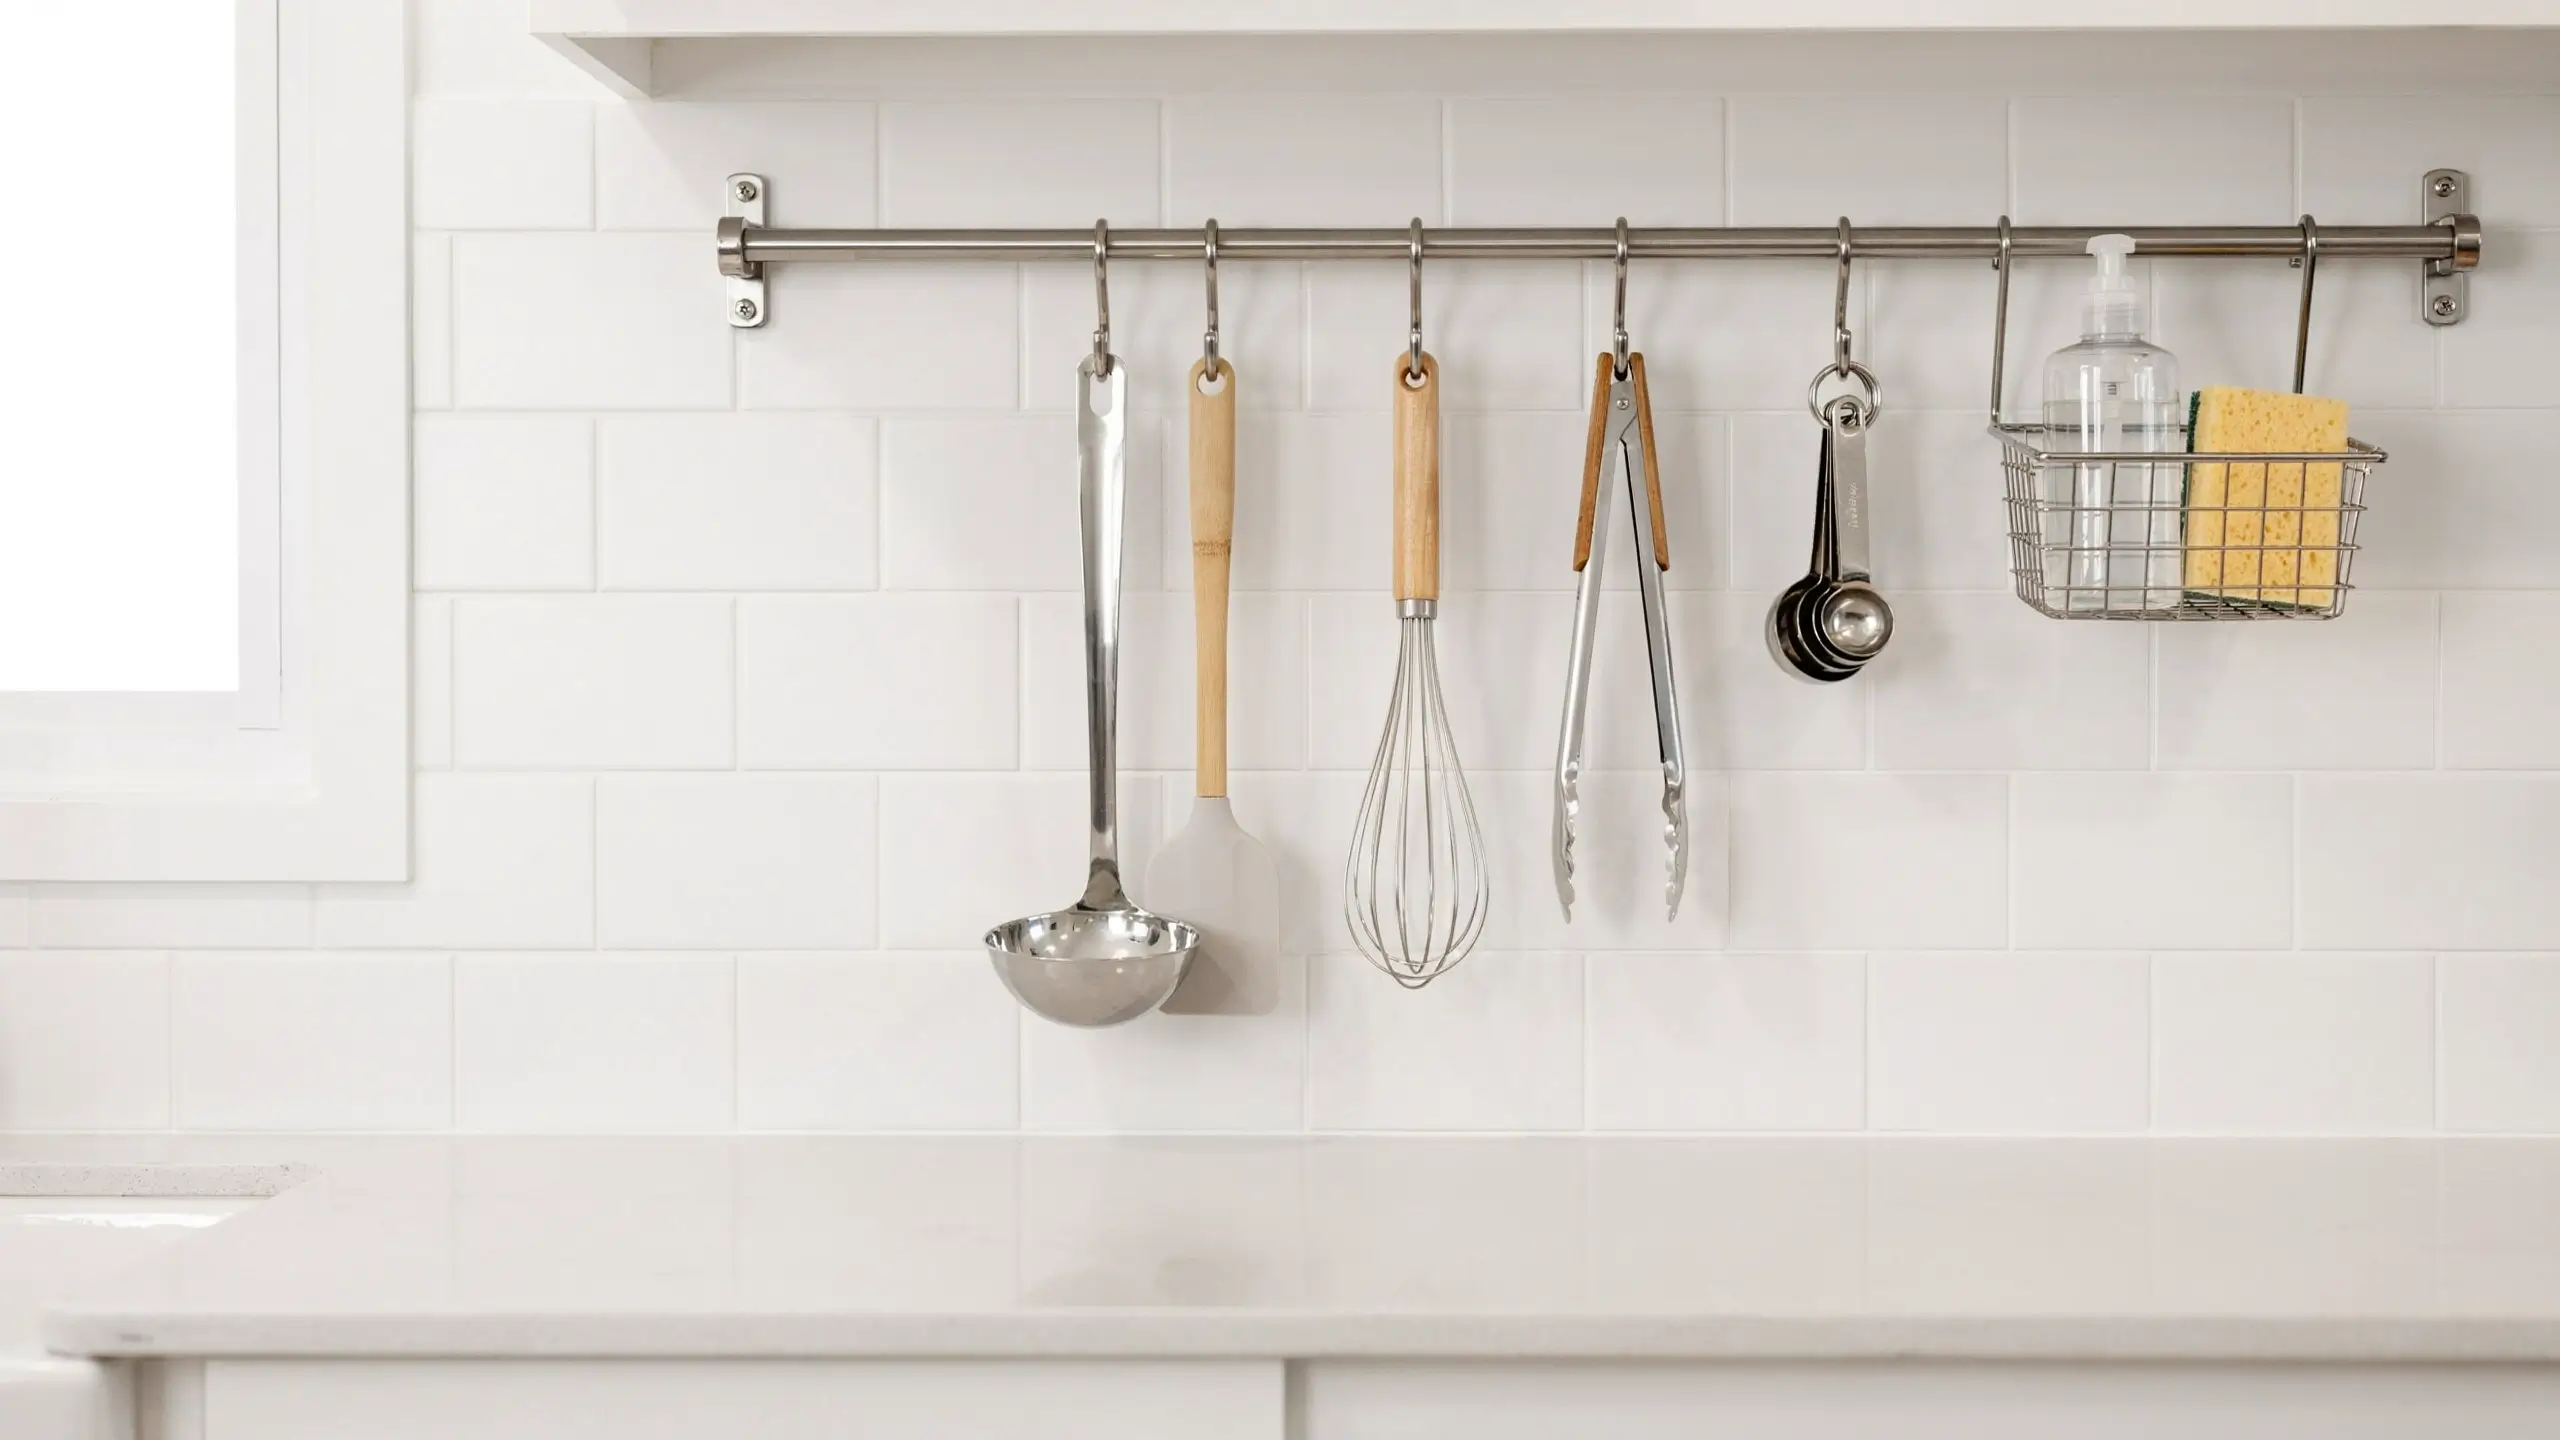
Every inch of counter space in a camper is precious. A wall-mounted rail system, the same style used in restaurant kitchens, takes all the things living on your counter and moves them to the wall.
A simple stainless steel rail with S-hooks holds ladles, spatulas, whisks, tongs, and measuring spoons. Add rail baskets and you can hang a small bin for dish soap, a sponge holder, or a container of cooking oils. You can find these rails at restaurant supply stores, IKEA (the KUNGSFORS and GRUNDTAL lines both work well), or online for under $20.
If you don’t want to drill into your camper walls, look for Command-strip-compatible rail systems, or use a tension rod mounted horizontally between two cabinet sides in the kitchen area and add S-hooks to it. It takes about fifteen minutes and immediately frees up the counter.
10. Make Every Piece of Furniture Do Double Duty
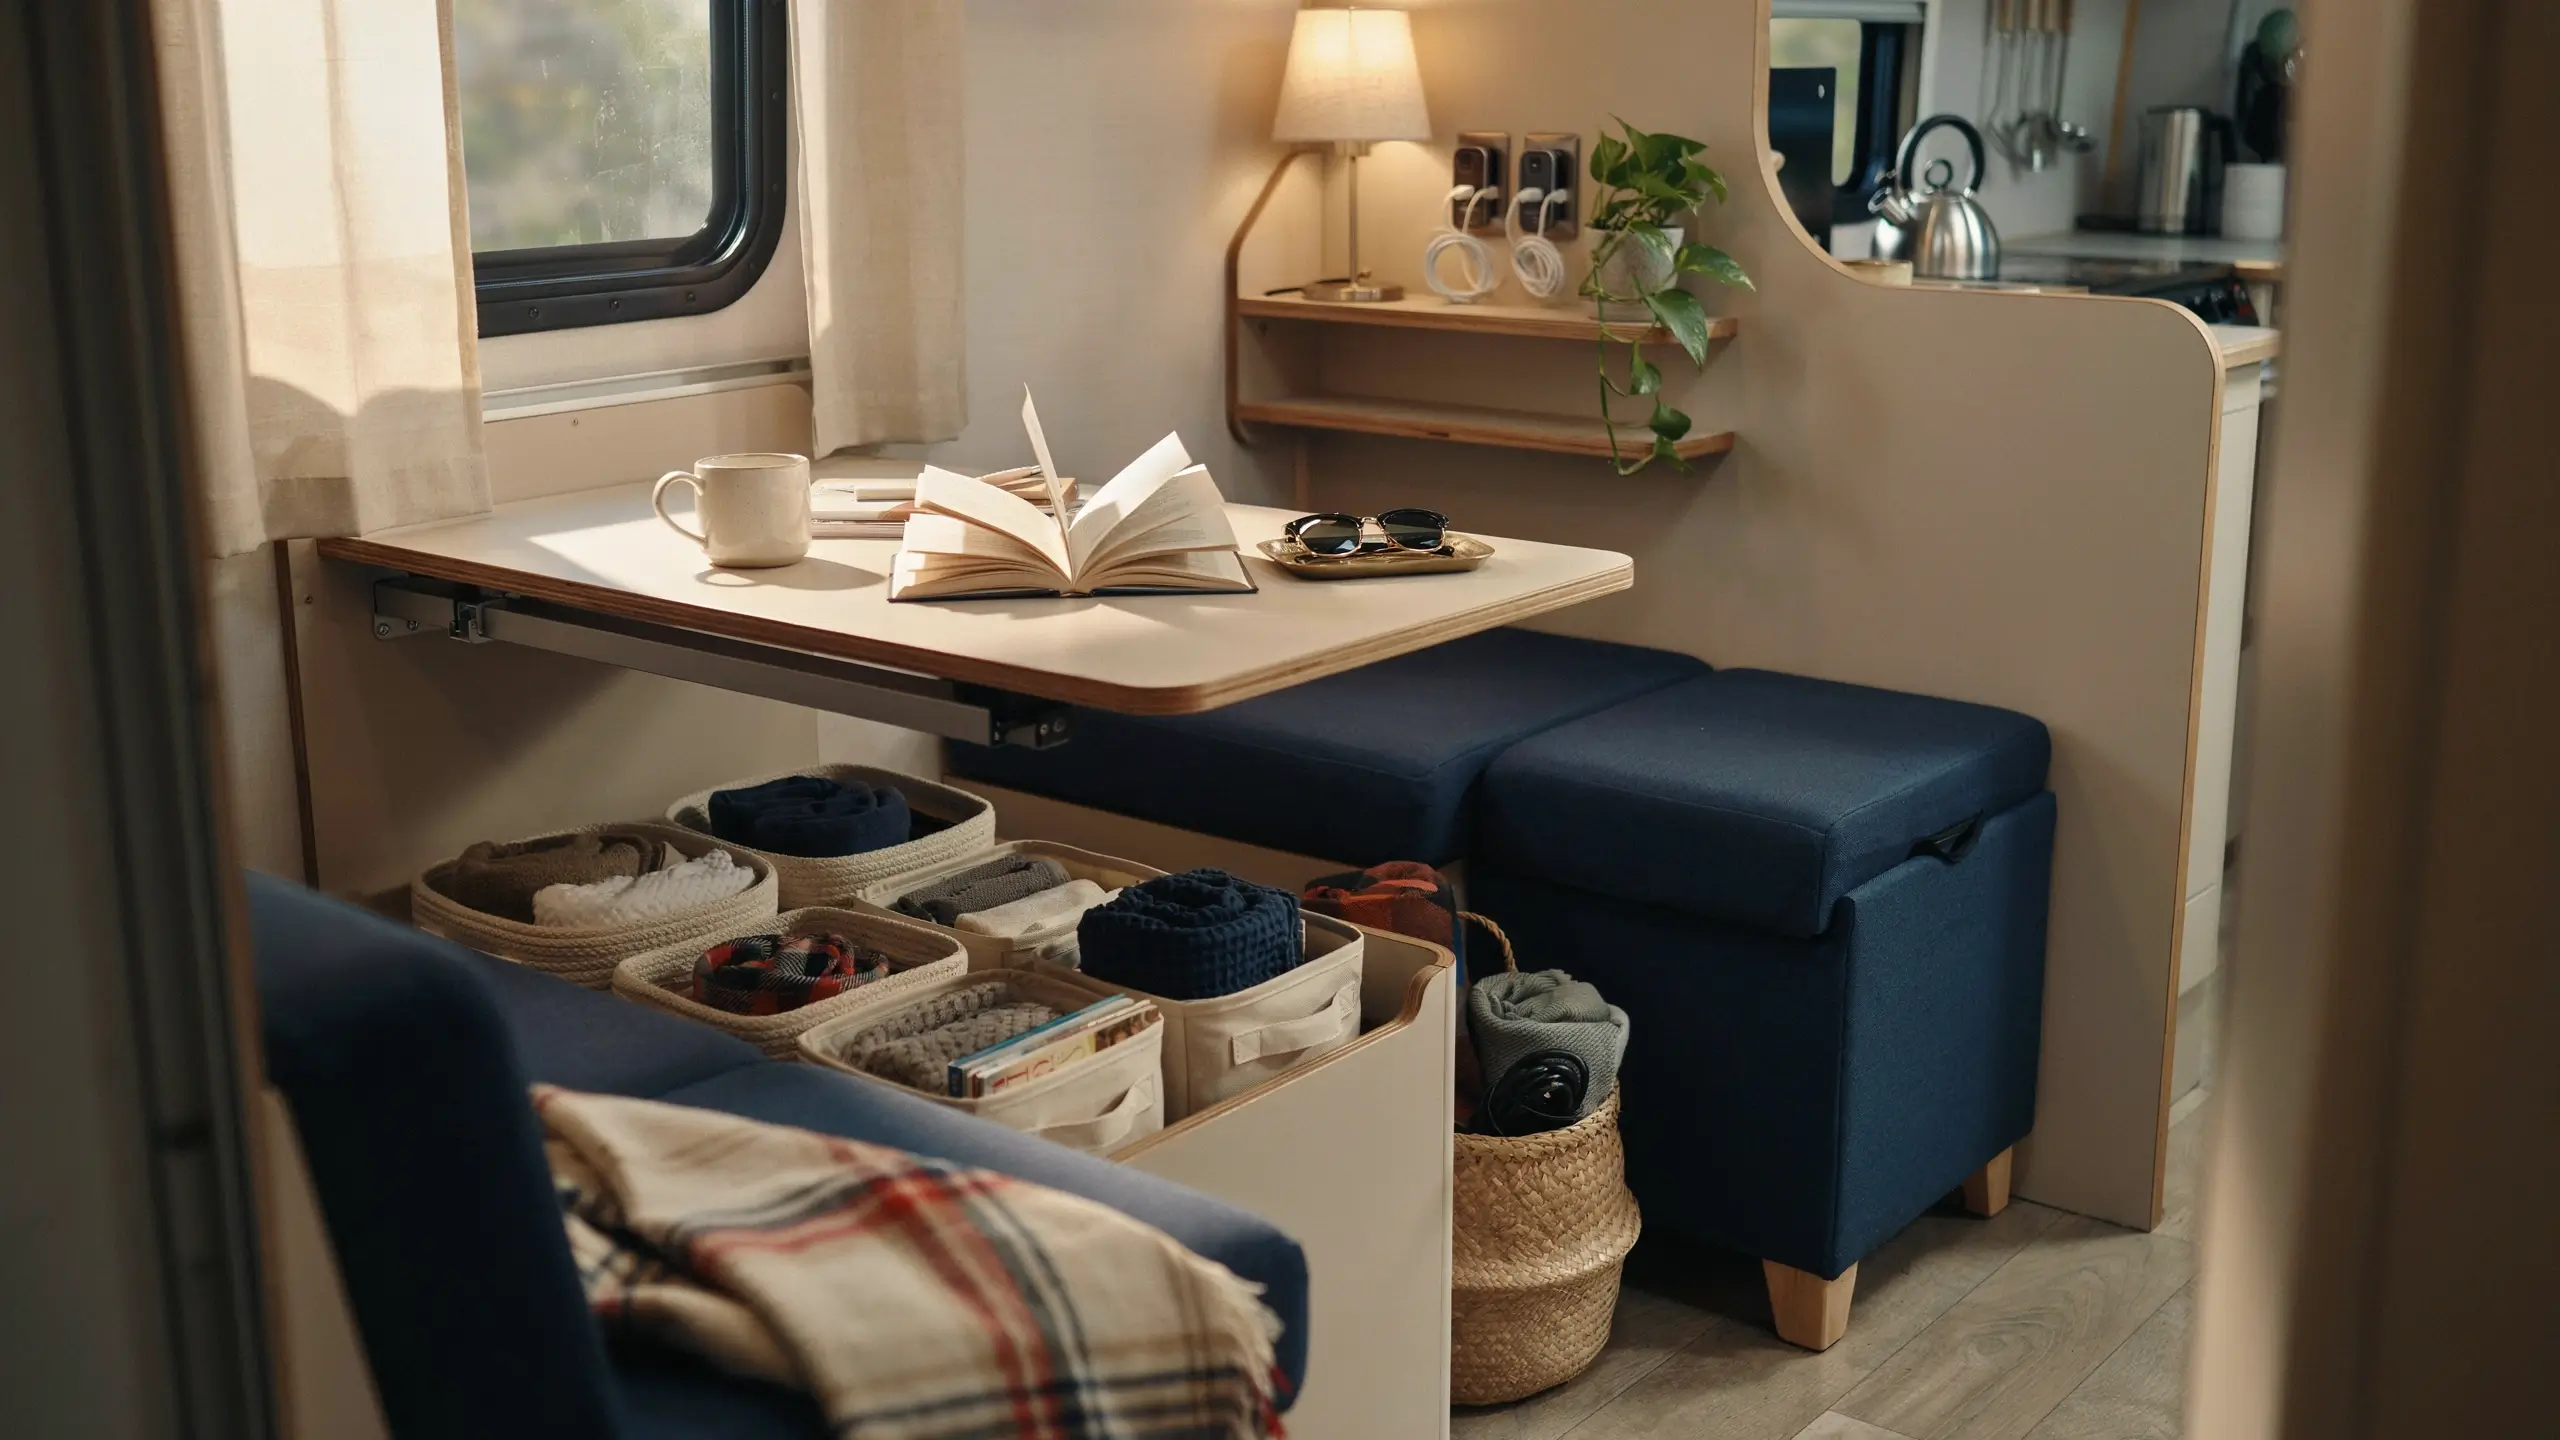
In a camper, furniture that only does one job is furniture that’s wasting space. The goal is to look at every surface, bench, and cabinet and ask: what else could this hold?
- The dinette bench seats in most travel trailers have lift-up access to storage below, but that storage is often just one big open hole. Add a few small lidded bins to organize what goes inside.
- An unused corner of the dinette becomes a small charging station if you run a short extension cord and add a cable organizer.
- Seating ottomans that double as storage boxes are perfect for sitting at the campfire and storing outdoor gear inside.
- A headboard with a shelf built in (or attached) holds books, glasses, a small lamp, and phone chargers for the sleeping area without taking any floor space.
- Even the inside of your camper door can get a small over-the-door organizer for sandals, camp shoes, and flip flops so they’re never underfoot.
Mistakes to Avoid Before You Buy Anything
- Buying before measuring. Storage products that don’t fit the exact dimensions of your camper are useless. Measure every space twice before ordering anything online.
- Choosing heavy storage solutions. Heavy plastic bins, metal drawer organizers, and thick shelving units add weight to your camper quickly. Always consider weight before adding storage. Go light wherever you can.
- Ignoring travel safety. Any item that isn’t secured will move while you drive. Bungee cords across cabinet shelves, child-proof latches on cabinet doors, and rubber shelf liners under items keep things in place on the road.
- Overloading upper cabinets. Keep heavy items low. This helps with weight distribution and prevents cabinet doors from swinging open mid-drive under the load.
- Trying to organize everything at once. Start with the kitchen and bathroom first since those spaces cause the most frustration. Get those right, then move to the rest of the camper.
The Right Storage Setup Makes Camping So Much Better
When your camper is organized, something shifts. Camp arrival stops feeling stressful and starts feeling like coming home to a place where everything has a spot. You spend less time searching and more time outside. You end up fighting less with your travel partner about where the spoons went. Small wins, but they matter.
These 10 space saving camper storage hacks work together or individually depending on where your biggest frustrations are. Start with one or two that fit your specific camper layout, then keep adding as you get a feel for what works in your rig. The goal isn’t a perfect, Pinterest-only camper. It’s a camper you can actually live in comfortably while you’re out doing the things you came to do.
Which of these hacks do you think would make the biggest difference in your camper? Drop a comment below. I’d love to hear what setup challenges you’re working with and what storage solutions have already changed the game for you.





No Comment! Be the first one.