




18 DIY Pallet Garden Ideas That Are Easy, Beautiful, and Almost Free
There’s something deeply satisfying about turning trash into a thriving garden. A few years ago I dragged home two battered pallets from behind a garden center and leaned them against my fence,...

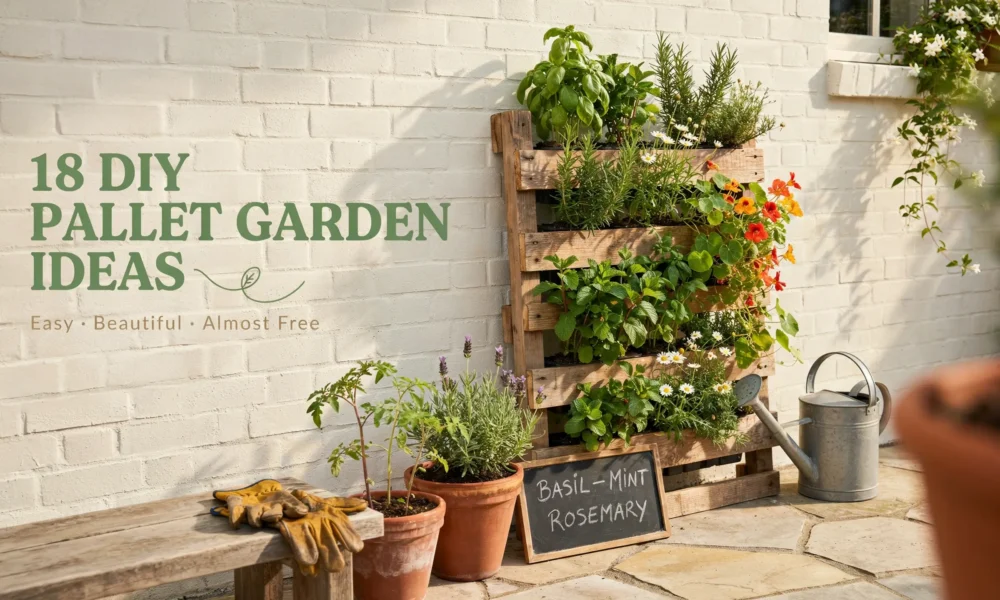
There’s something deeply satisfying about turning trash into a thriving garden. A few years ago I dragged home two battered pallets from behind a garden center and leaned them against my fence, not entirely sure what I was doing. By the end of that afternoon I had a vertical herb wall planted with basil, thyme, and oregano, and it cost me less than $15 in soil and plants. I was hooked.
Since then I’ve tried nearly every DIY pallet garden project you can imagine, including a few that completely fell apart (literally). So this list is the real stuff. The ideas that actually work, look incredible in photos, and hold up through an entire growing season. Whether you have a sprawling backyard or a tiny rental balcony, there’s something here for you.
Before You Start: The Pallet Safety Rule Nobody Talks About
This is the part most articles skip over, and it matters more than anything else on this page.
Not all wooden pallets are safe to use in the garden, especially when you’re growing food. Before you bring a pallet home, flip it over and look for a small stamp or brand burned into the wood. You’re looking for the letters HT, which stands for heat-treated. That means the wood was heated to kill pathogens without any chemicals. HT pallets are completely safe.
What you want to avoid is any pallet stamped MB, which stands for methyl bromide, a toxic pesticide fumigant. It can leach into soil and be absorbed by edible plants. If the pallet has no stamp at all, skip it — you have no way of knowing what it carried or how it was treated.
| Pallet Stamp | Meaning | Safe for Gardening? |
|---|---|---|
| HT | Heat-treated (heated to kill pathogens without chemicals) | Yes — completely safe |
| MB | Methyl bromide (toxic pesticide fumigant) | No — can leach into soil and be absorbed by edible plants |
| No stamp | Unknown treatment history | Skip it — no way to know what it carried or how it was treated |
One more tip: avoid blue pallets (usually branded CHEP) and any pallet with visible chemical stains or a strong odor. Stick to unstained, stamped HT wood and you’re good to go.
Where to Find Free Pallets
The best sources are closer than you think:
- Garden centers — This is the #1 source. They receive huge deliveries of soil, mulch, and stone on pallets, especially in spring (March through May is prime pallet season). Most centers are thrilled to have someone haul them away.
- Hardware stores like Home Depot and Lowe’s receive weekly shipments. Ask at the loading dock, not the front desk.
- Grocery stores — Go early morning or late afternoon when deliveries come in.
- Facebook Marketplace and Craigslist — Search “free pallets” in your area. People post them constantly.
- Pet stores like Petco get heavy weekly deliveries and the pallets are usually in great condition since pet supplies are clean and dry.
- Small local businesses — They’re often more willing to give pallets away than big chains because they don’t have a pallet return system in place.
Always ask before you take. A polite “Do you have any pallets you’d like me to haul away?” almost always works, and you’ll build a relationship with a reliable source for future projects.
18 DIY Pallet Garden Ideas Worth Building
1. The Classic Vertical Herb Wall
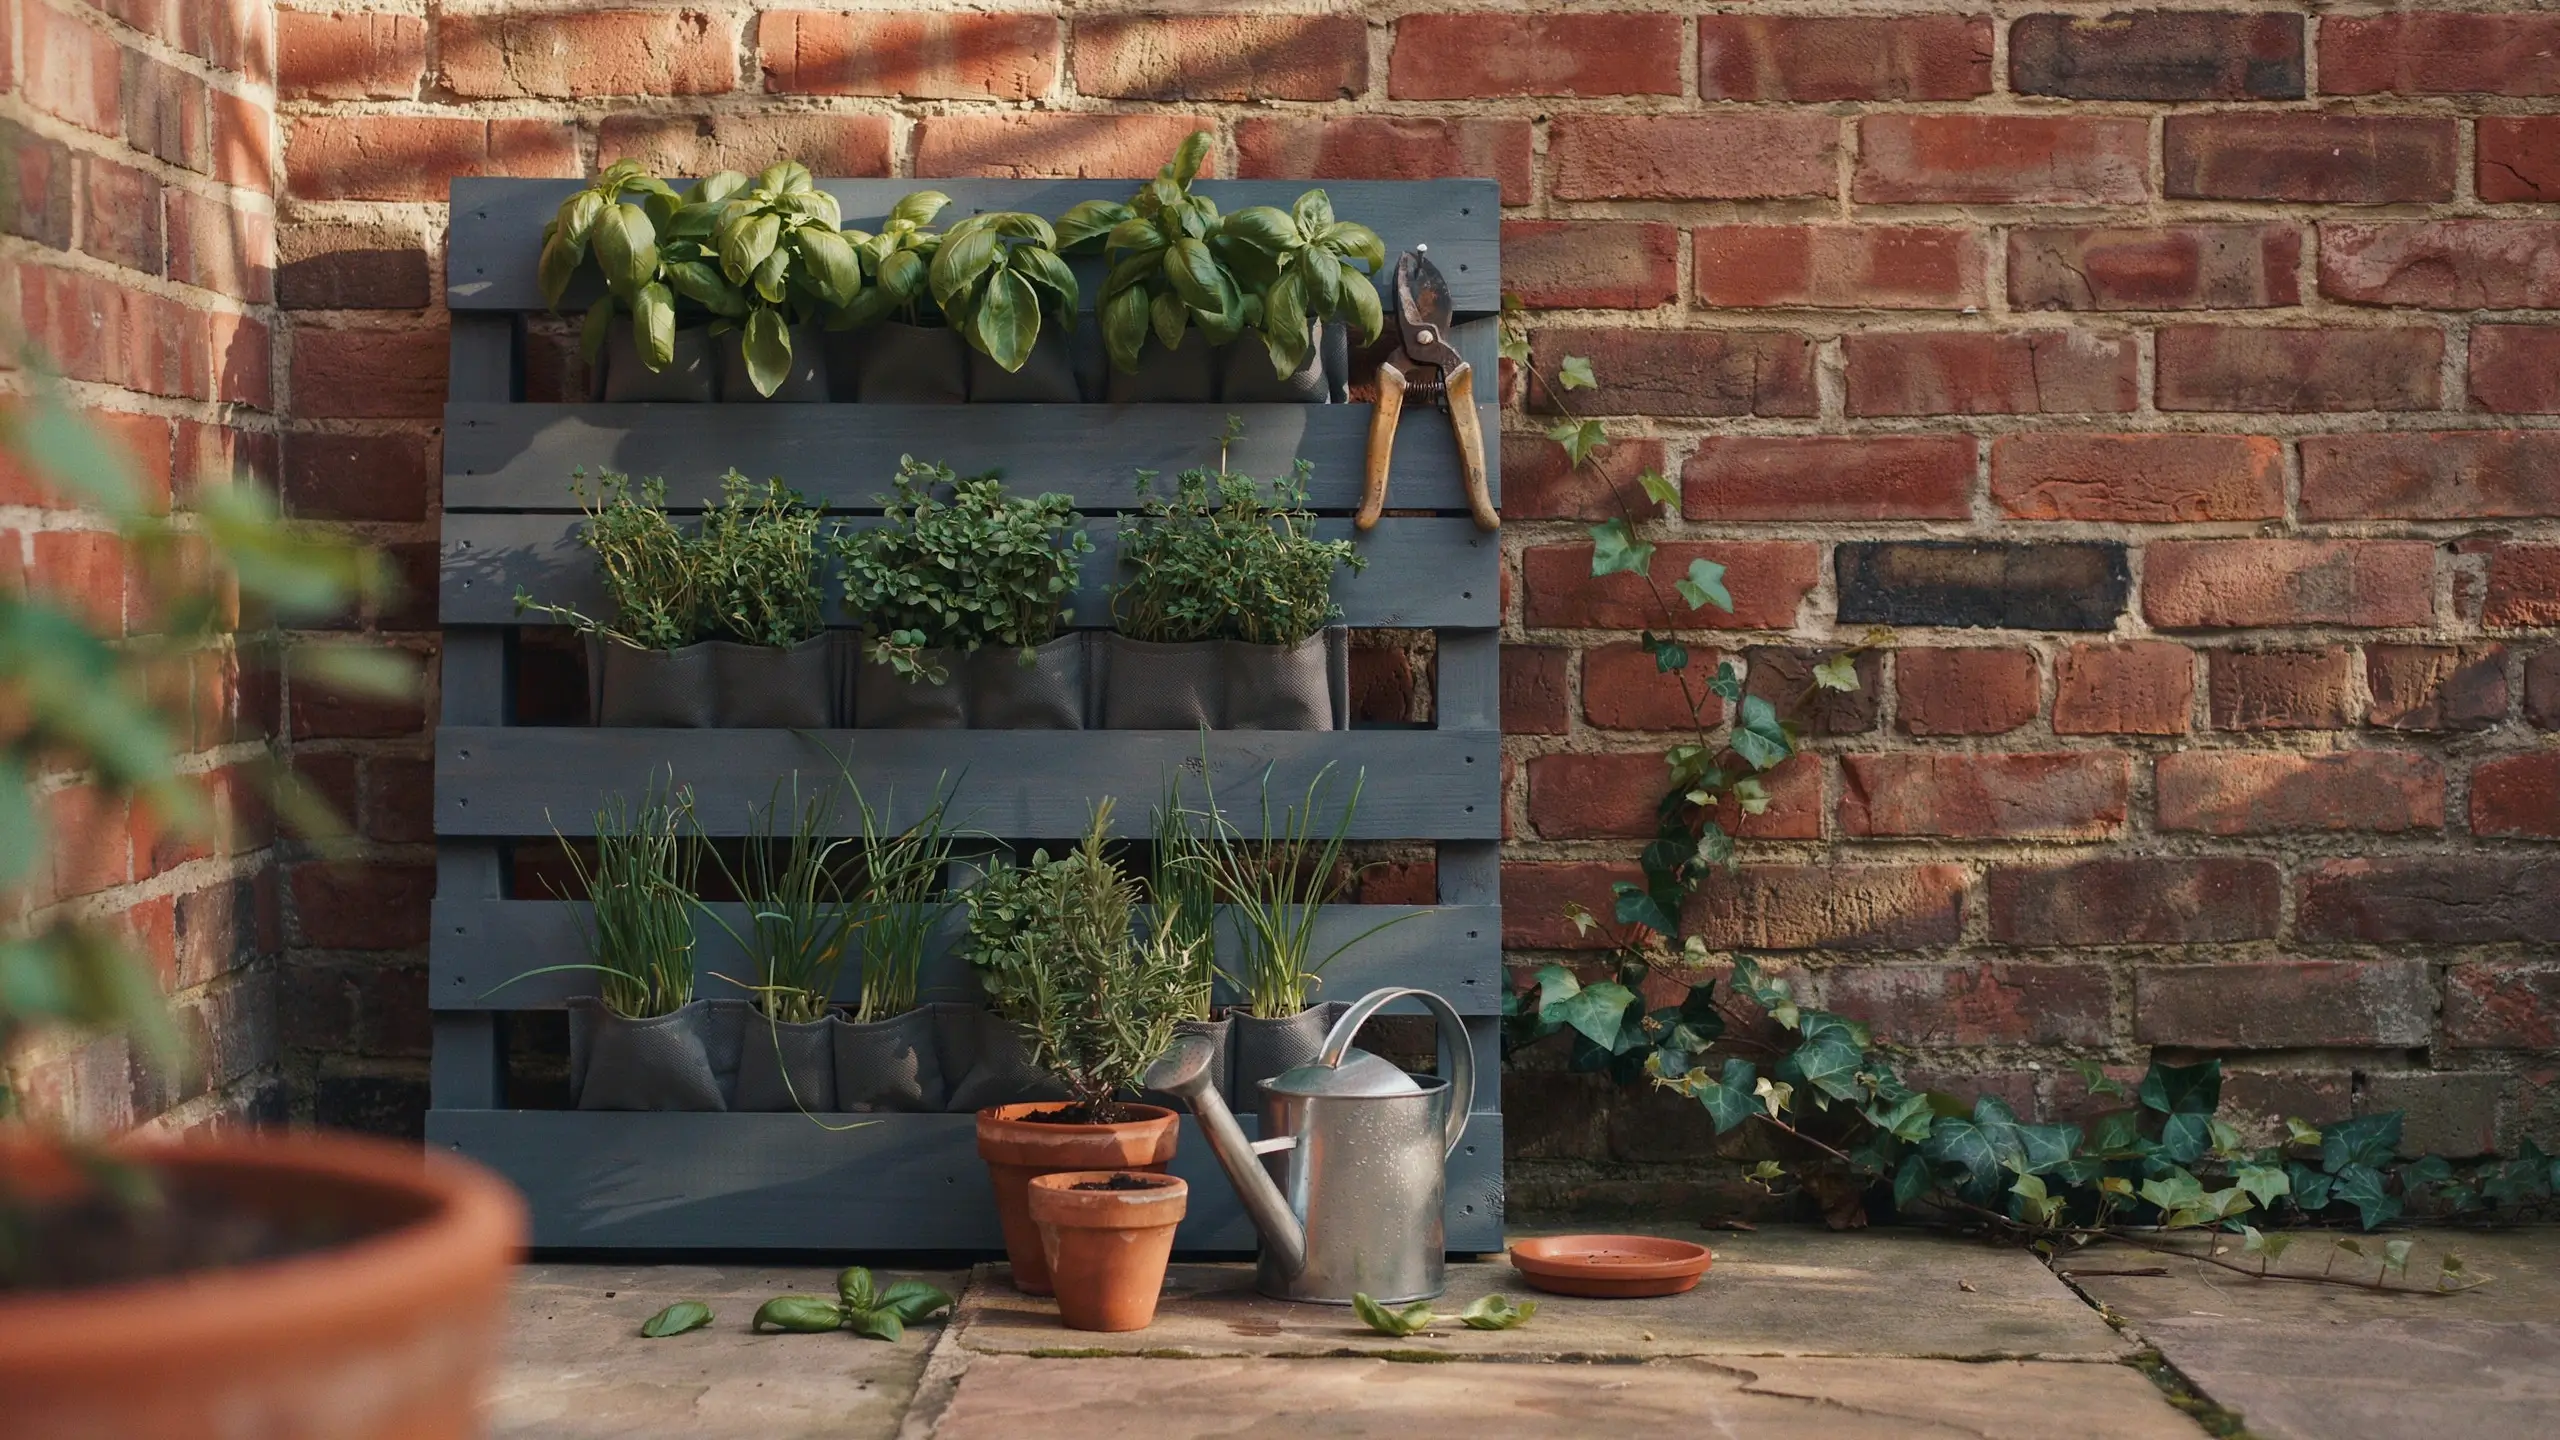
This is the project that started my pallet obsession, and for good reason. Stand a single HT pallet upright and lean it against a wall, fence, or exterior house surface. Staple landscape fabric across the back of each horizontal row to create planting pockets. Fill each row with potting mix and tuck in herbs: basil, flat-leaf parsley, thyme, chives, mint, and oregano all do well.
One important mint warning: that plant is aggressive. Give it its own row or plant it in a small pot inside the pallet pocket, otherwise it will crowd everything else out within a few weeks.
A standard pallet measures about 48 by 40 inches, which gives you three to four good planting rows. Painted a deep charcoal or sage green, this thing photographs beautifully and is genuinely useful. Clip herbs straight from the wall while you’re cooking.
- Best near: a kitchen door or sunny exterior wall
- Cost: approximately $8–15 for soil and starts
- Skill level: beginner
2. The Flat Raised Garden Bed
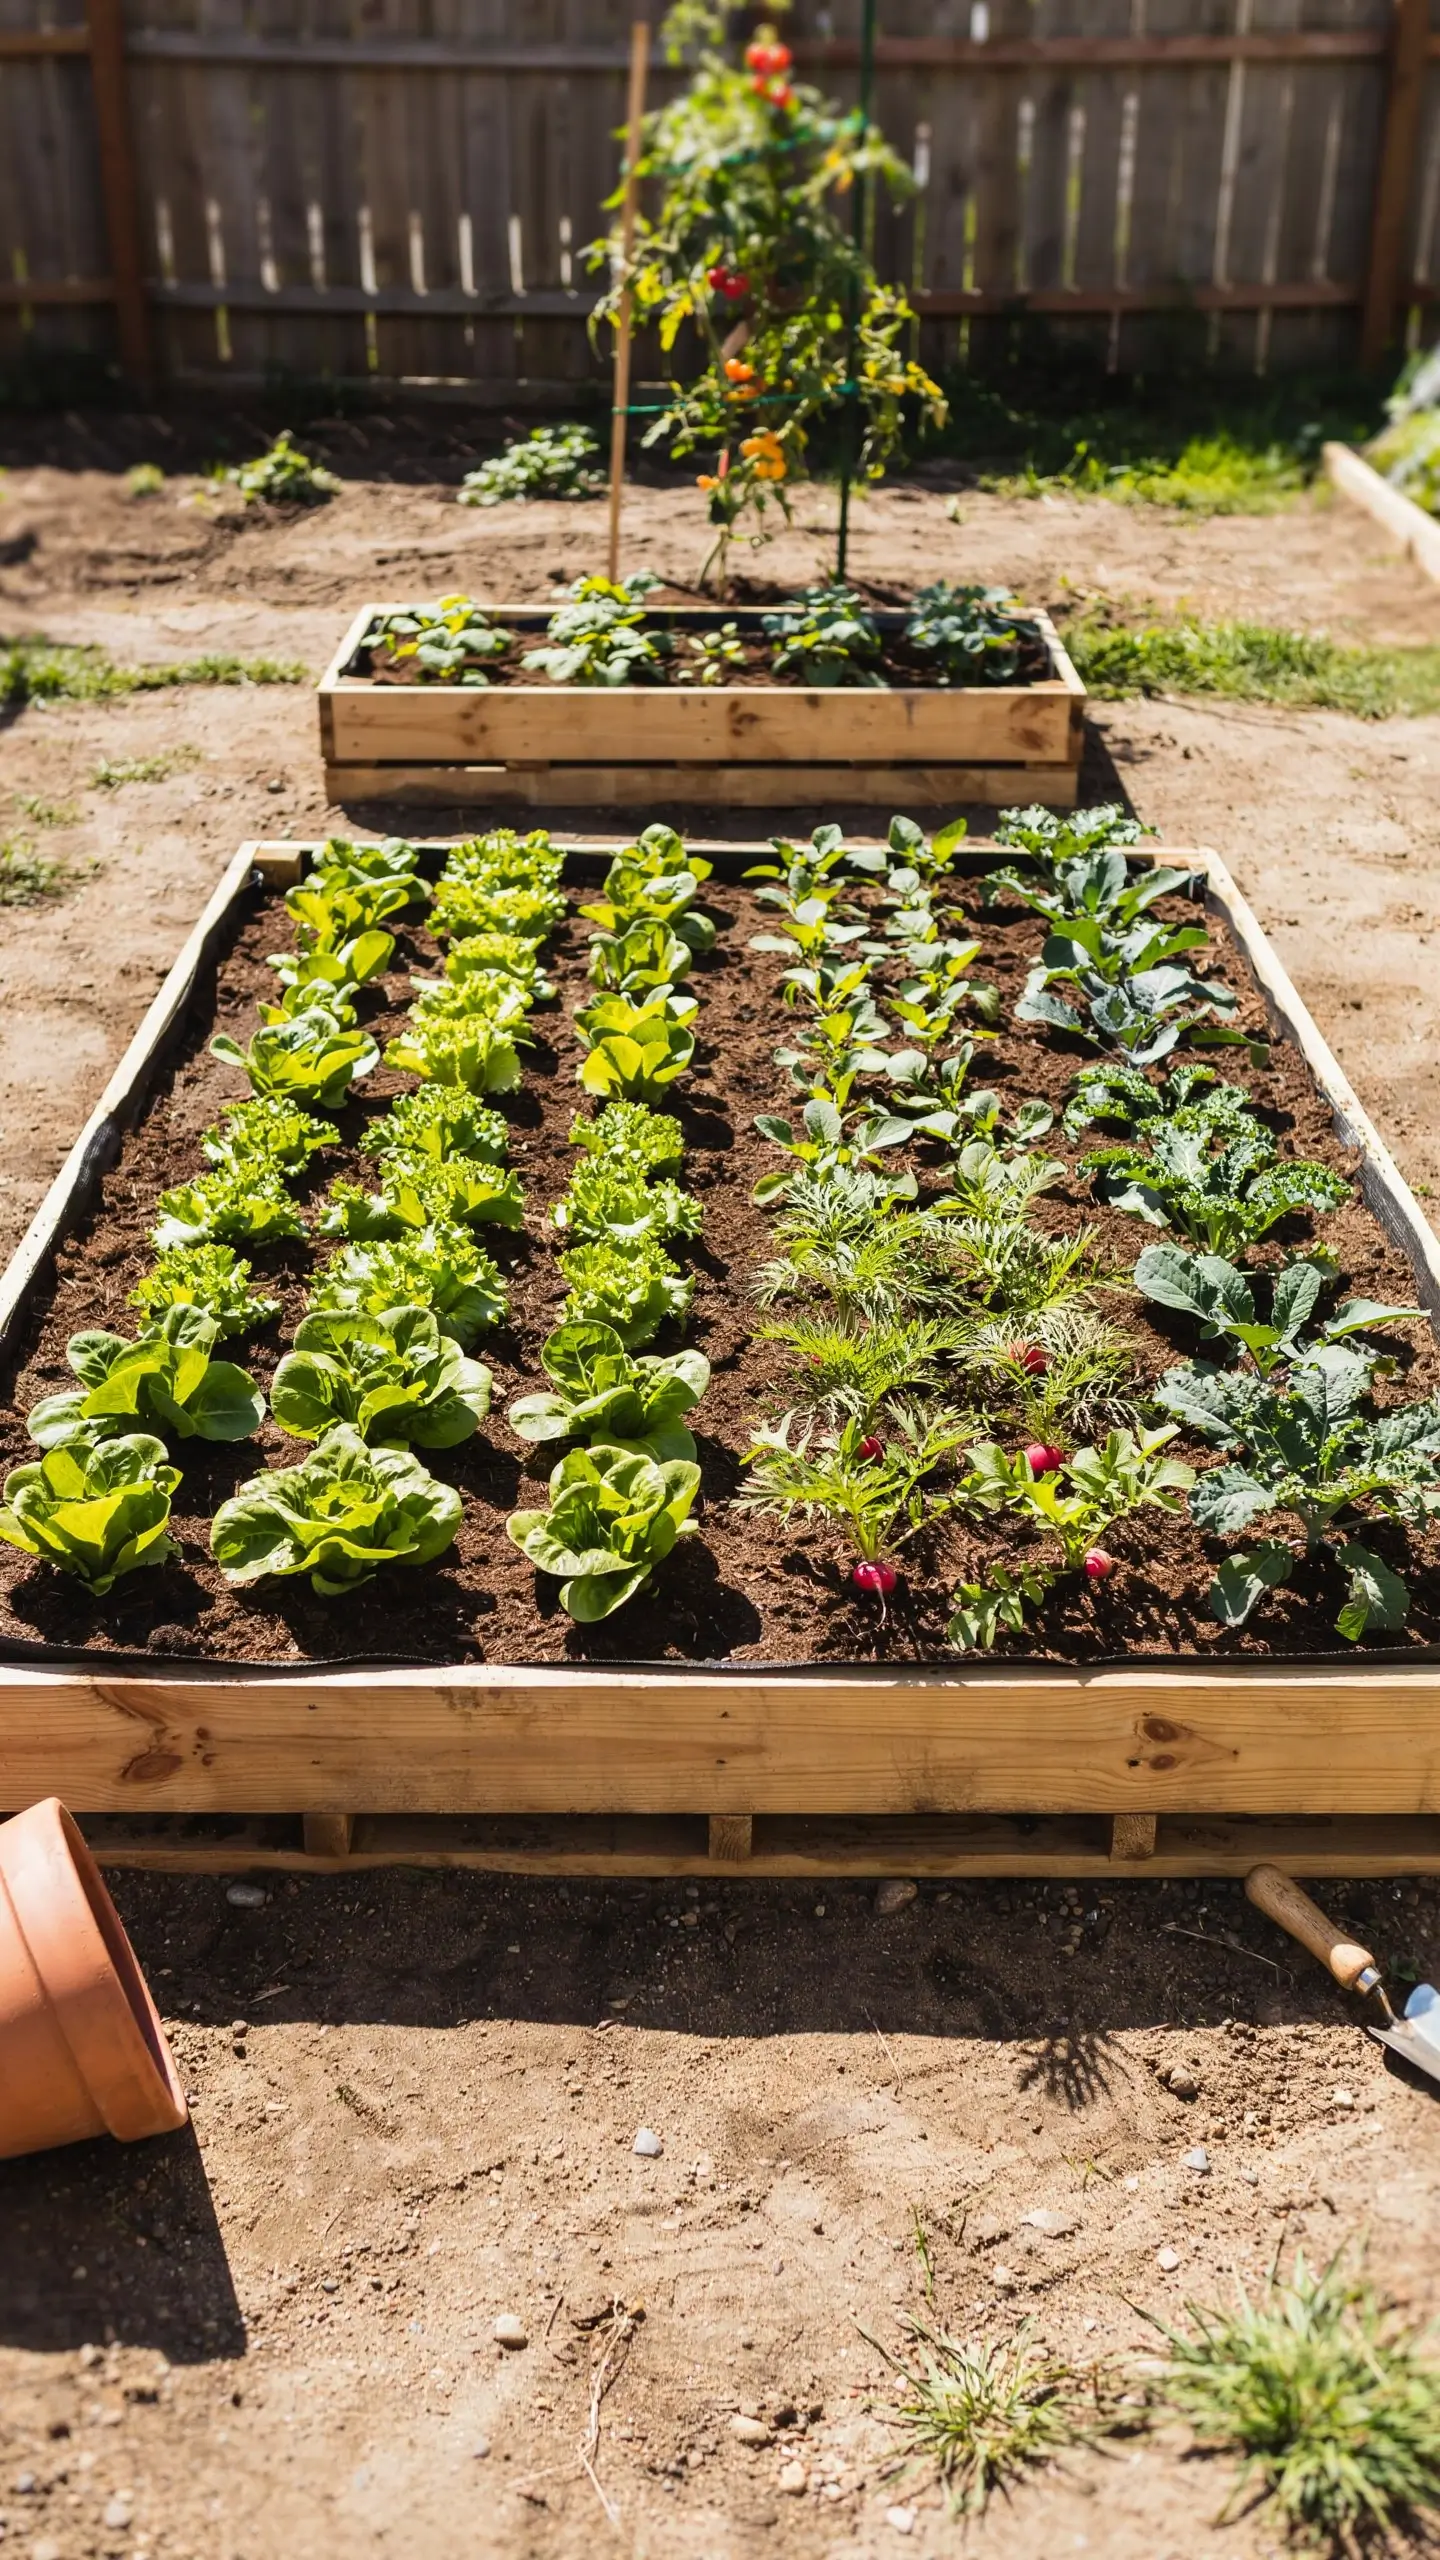
If you’ve been wanting a raised bed but can’t justify the lumber cost, lay two pallets side by side on level ground. Stack a third pallet on top of them to get extra height, which helps with drainage and saves your back. Line the inside with landscape fabric, then fill with a mix of good-quality garden soil and compost.
This works beautifully for shallow-rooted vegetables and greens: lettuce, spinach, kale, radishes, arugula, and bush beans all thrive here. The natural slat divisions of the pallet help you practice square-foot gardening without any extra framing.
The extra height also means fewer slugs reaching your plants and warmer soil earlier in spring.
- Best for: backyards, patios, side yards
- Cost: $20–35 for soil and compost
- Skill level: beginner, no power tools needed
3. A Succulent Wall Display
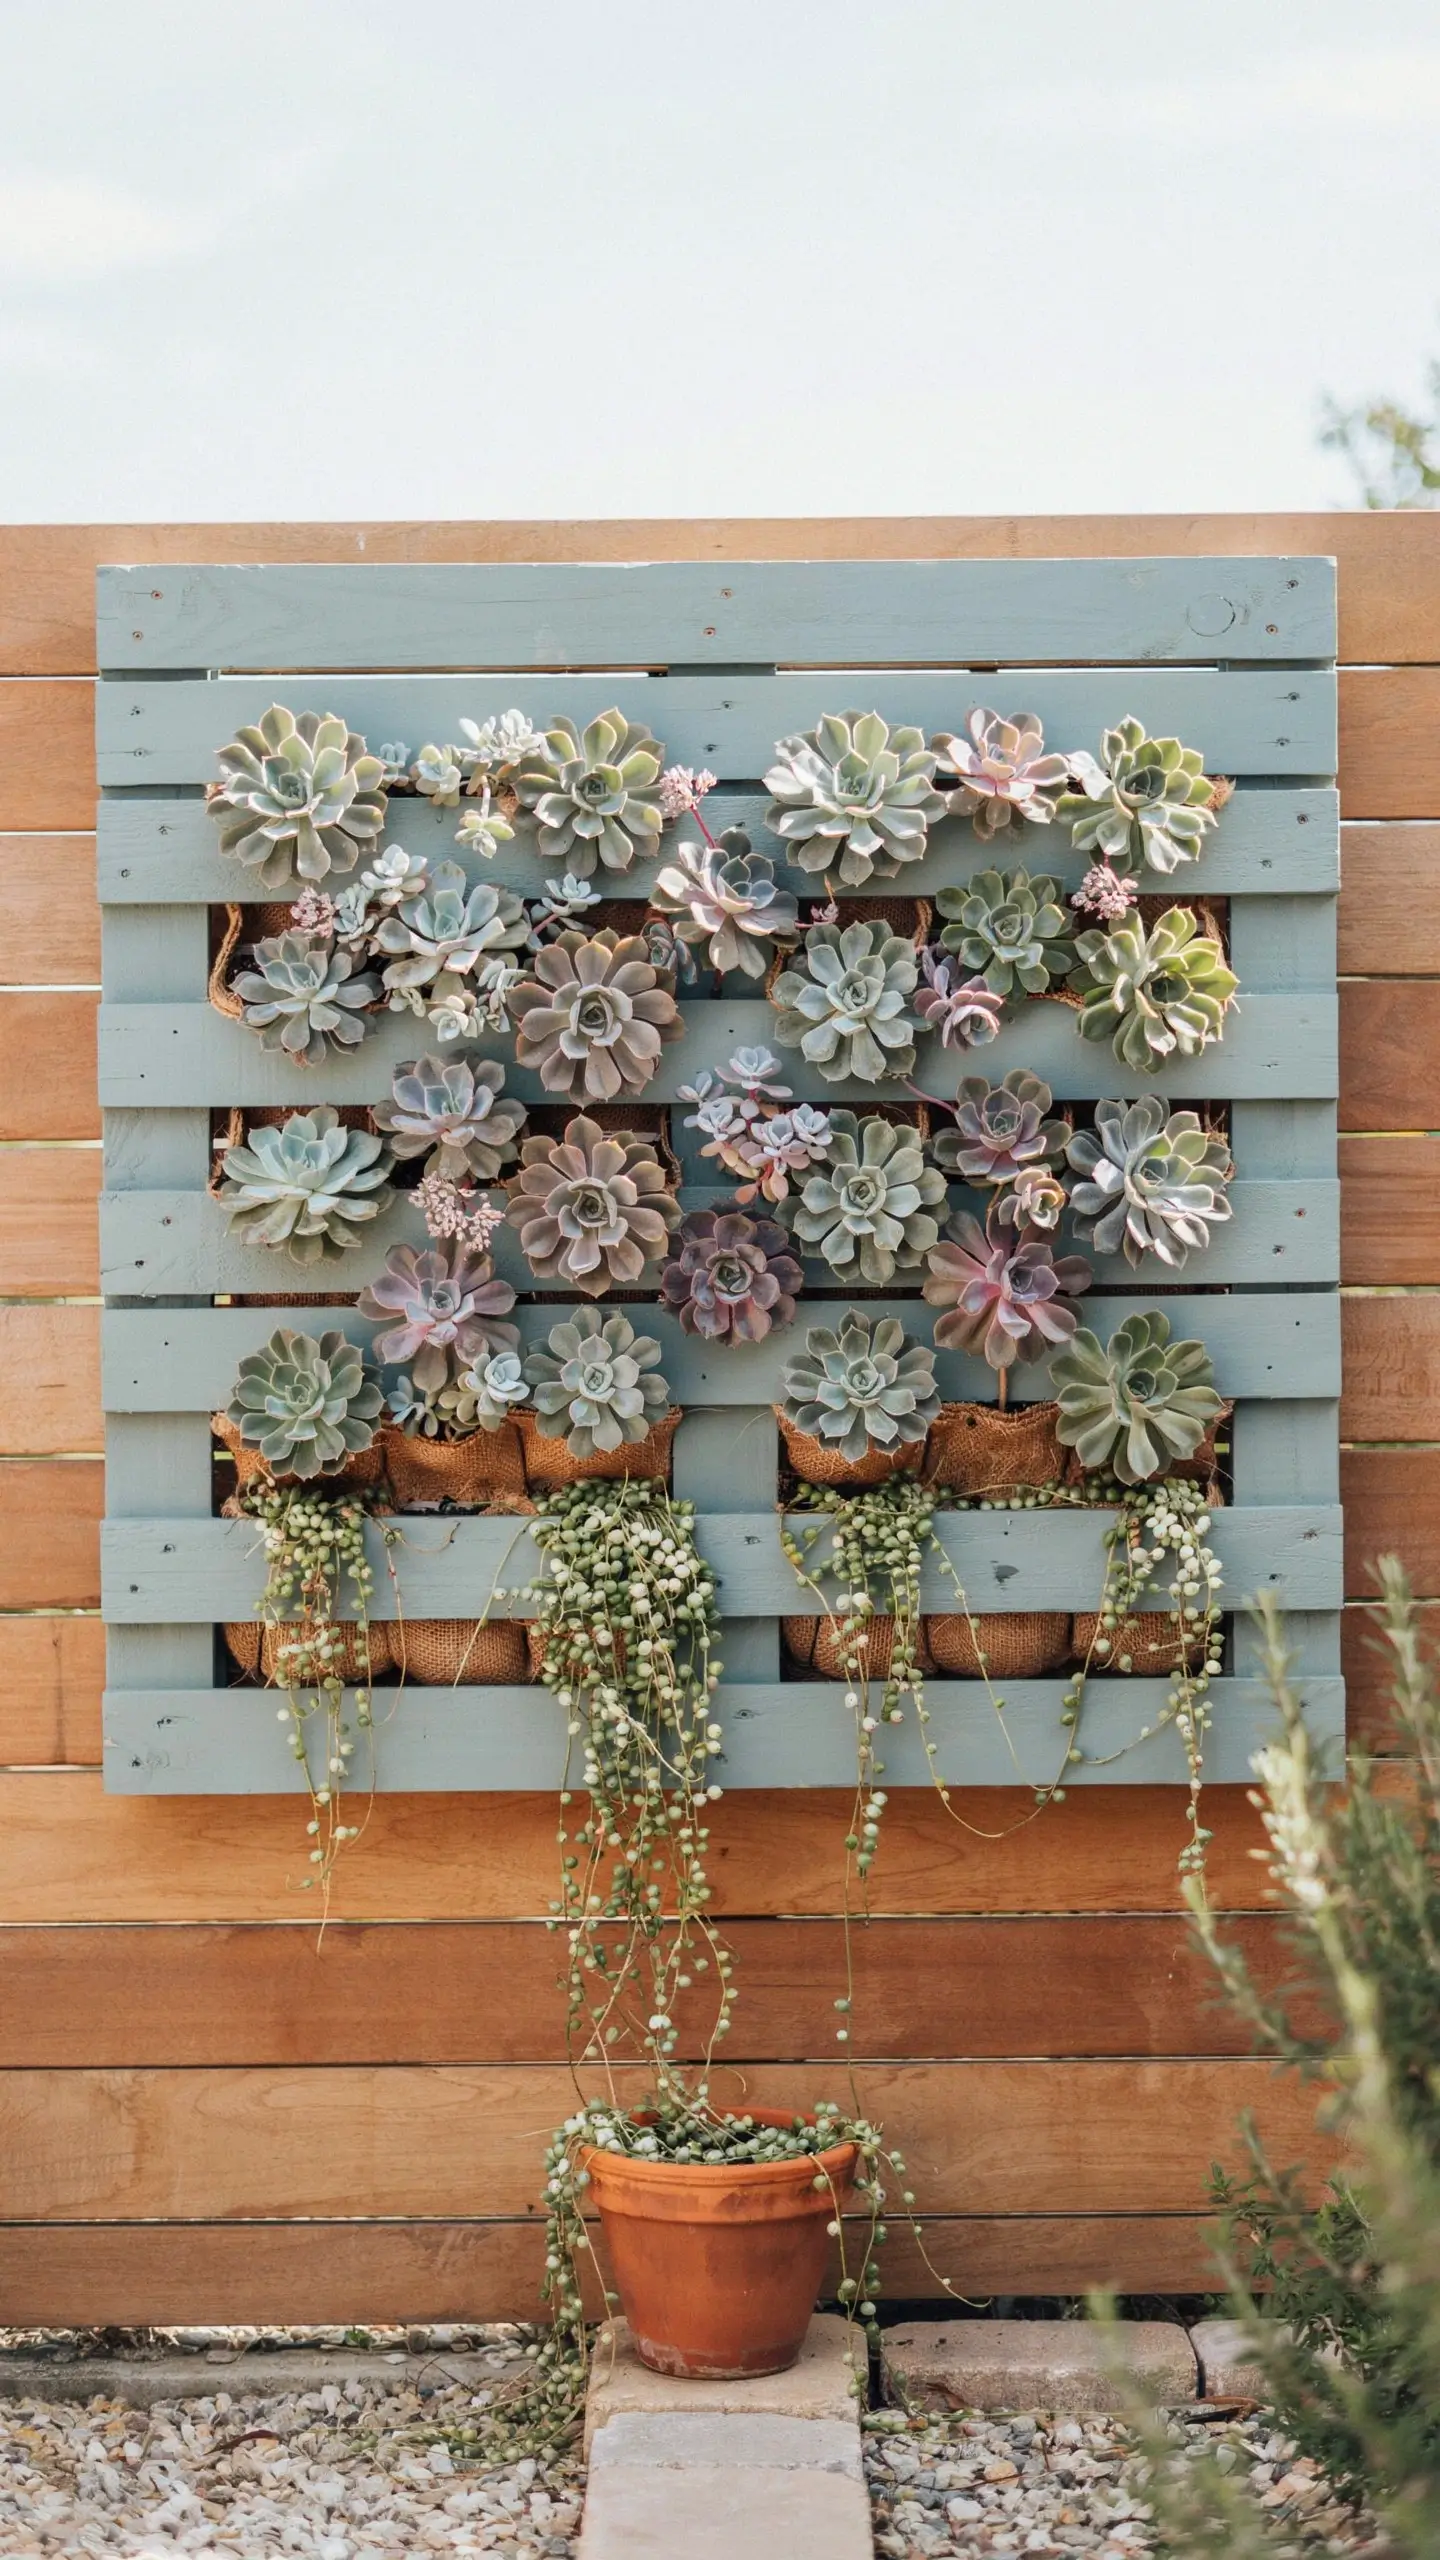
This is the most Pinterest-worthy project on this list. Take a pallet, sand it smooth, and paint it white, soft gray, or a dusty sage. Line each row with coconut coir liner or landscape fabric, then fill with well-draining cactus and succulent mix. Plant a mix of echeveria, sedum, hens-and-chicks, and trailing string of pearls.
Lay the pallet flat for two to three weeks after planting so the succulents can root in before you stand it upright. Once vertical, this needs minimal watering (once every week or two, depending on your climate) and looks stunning against a fence, porch wall, or wooden backdrop.
This is a project that genuinely looks like something from a boutique nursery, but you can build it for under $40 total.
- Best for: patios, porches, sunny fences, apartment balconies
- Cost: $25–45 (succulents are the main expense)
- Skill level: beginner
4. A Strawberry Tower
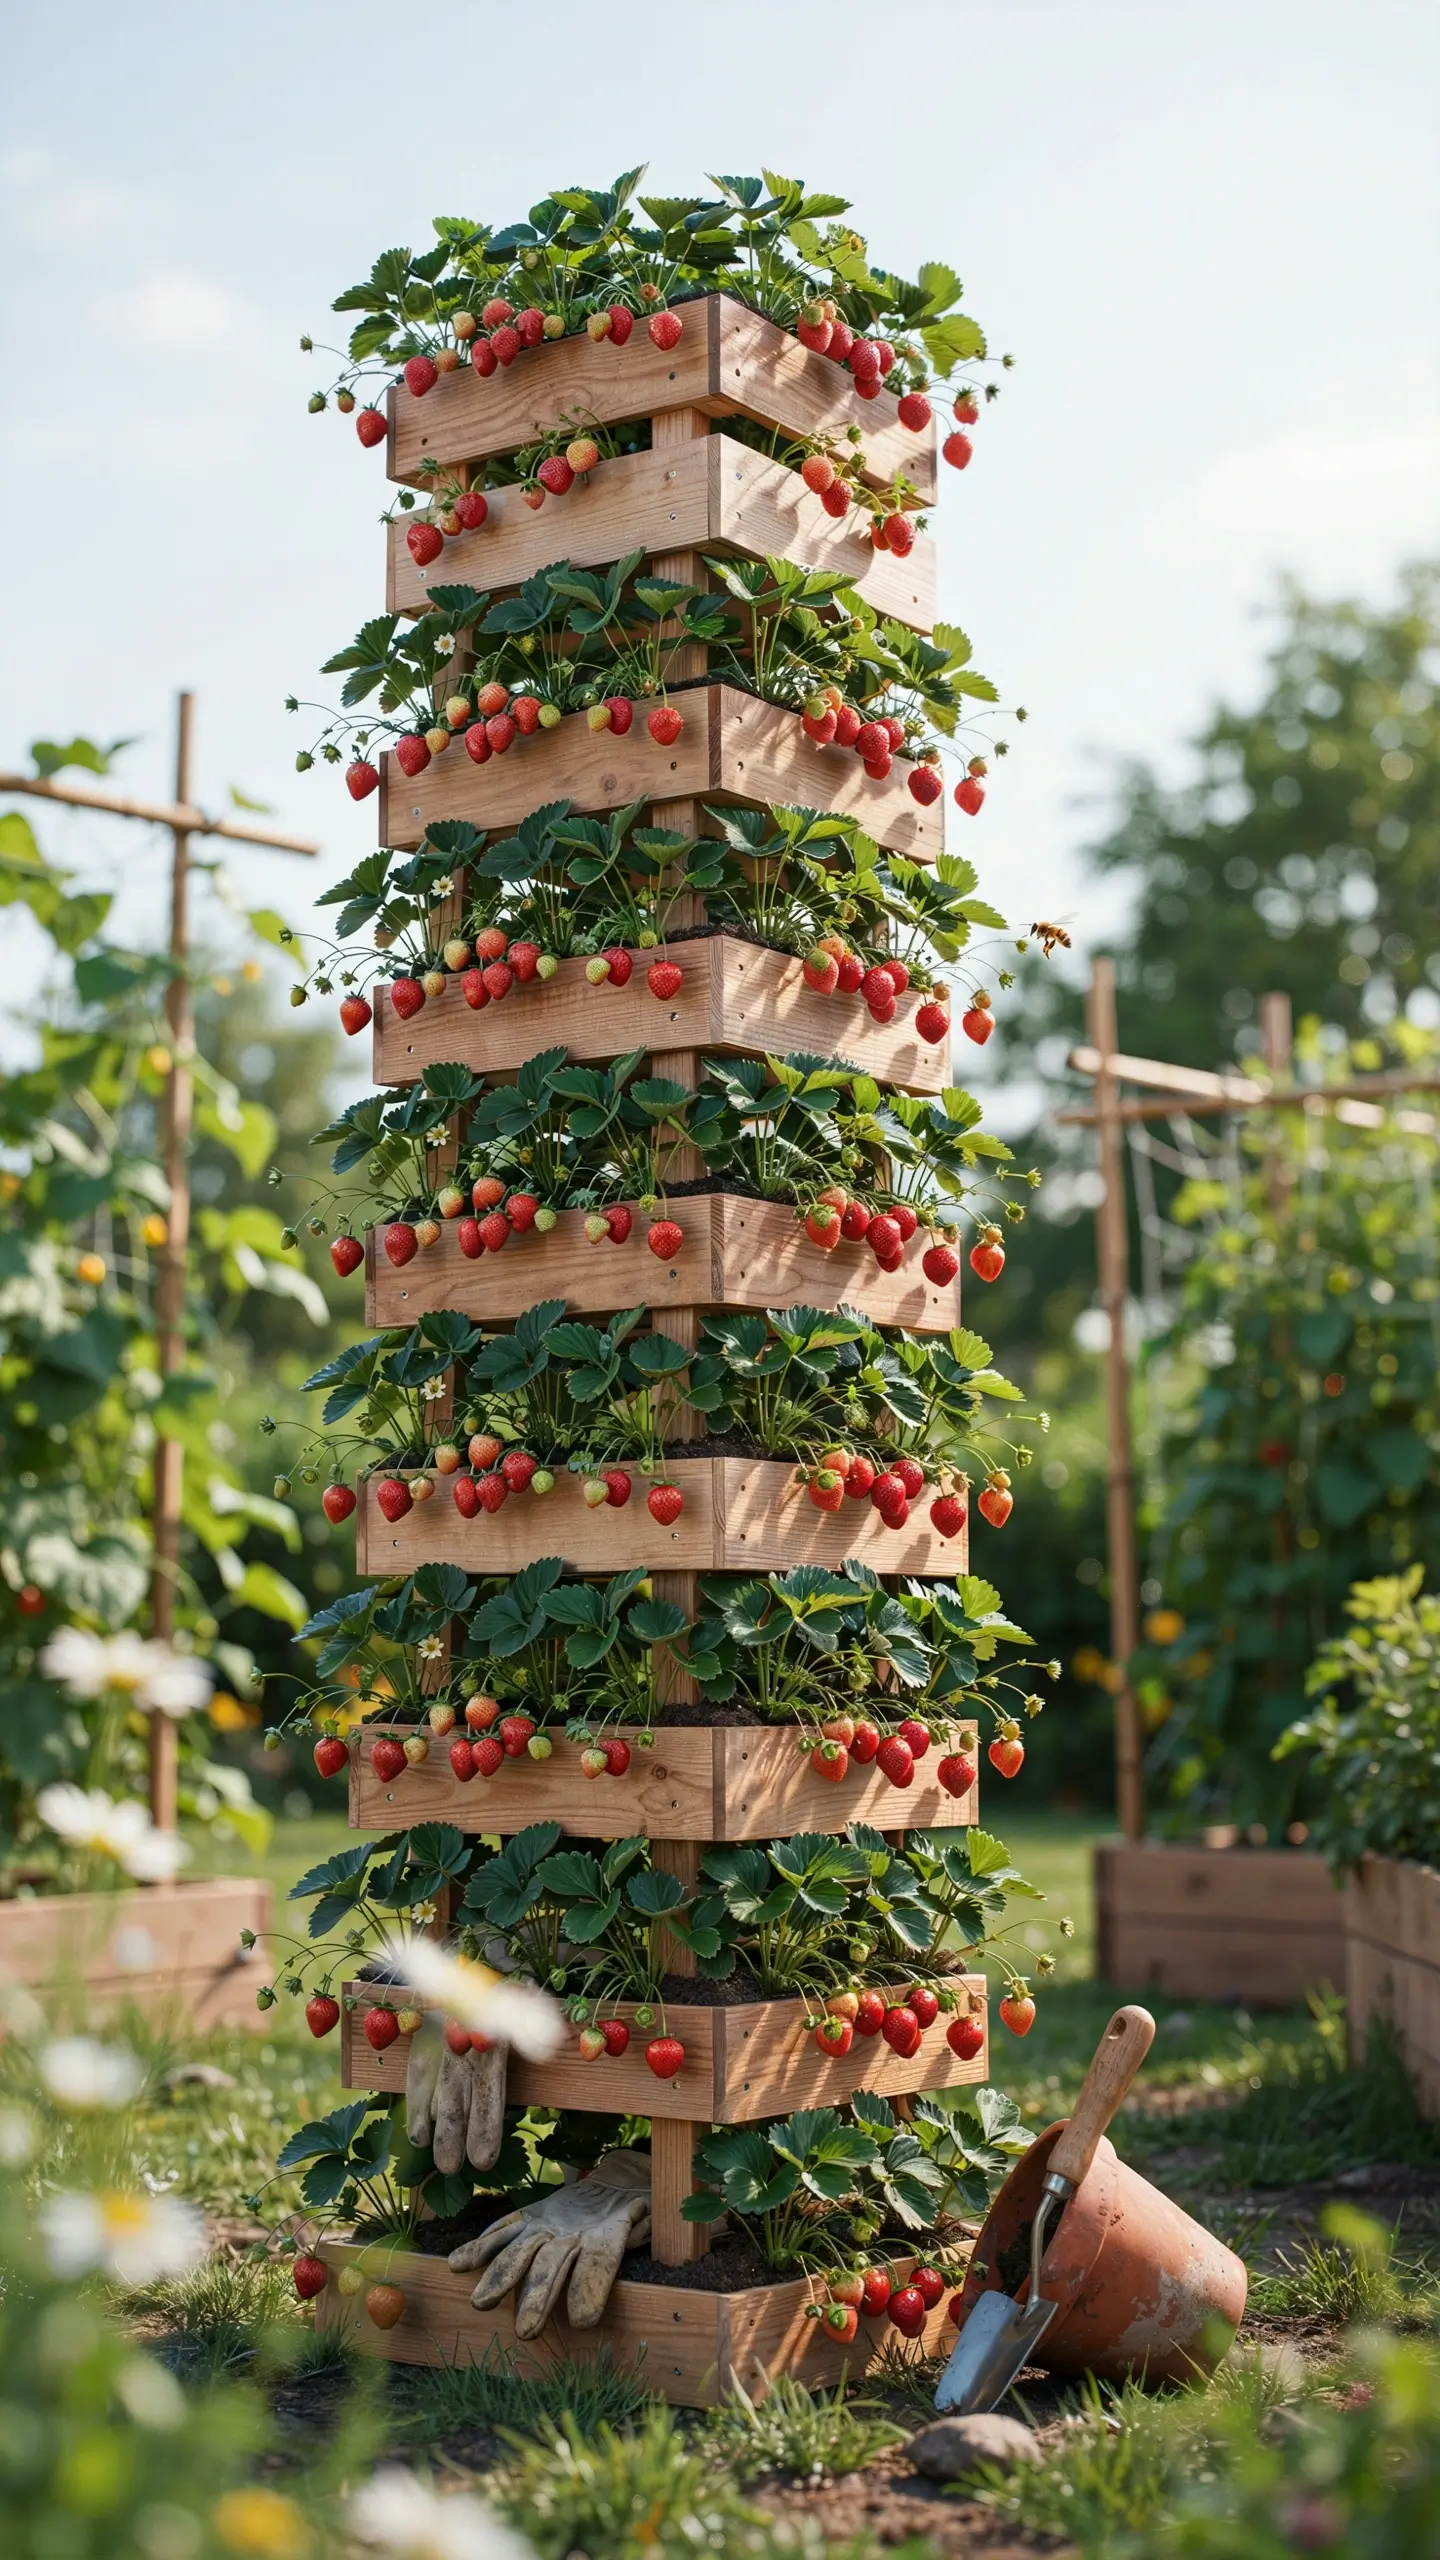
Stack pallet slats vertically to create a tiered tower with multiple planting pockets running up the sides, similar to a strawberry jar but taller and far cheaper. Line each section with landscape fabric so soil stays in but water can drain through.
Plant strawberry starts in each pocket so the berries dangle over the edges as they ripen, keeping them off the ground and away from slugs. You get excellent airflow between plants, which helps prevent the mold that ruins berries grown too close together on the ground.
You can DIY this from disassembled pallet boards, or find tutorials that use whole pallets stacked and filled between the slats. Either way, this tower produces a surprising amount of fruit in a tiny footprint.
- Best for: small gardens, balconies, anywhere space is limited
- Cost: $15–25 plus strawberry plants
- Skill level: beginner to intermediate
5. A Fairy-Light Garden Wall
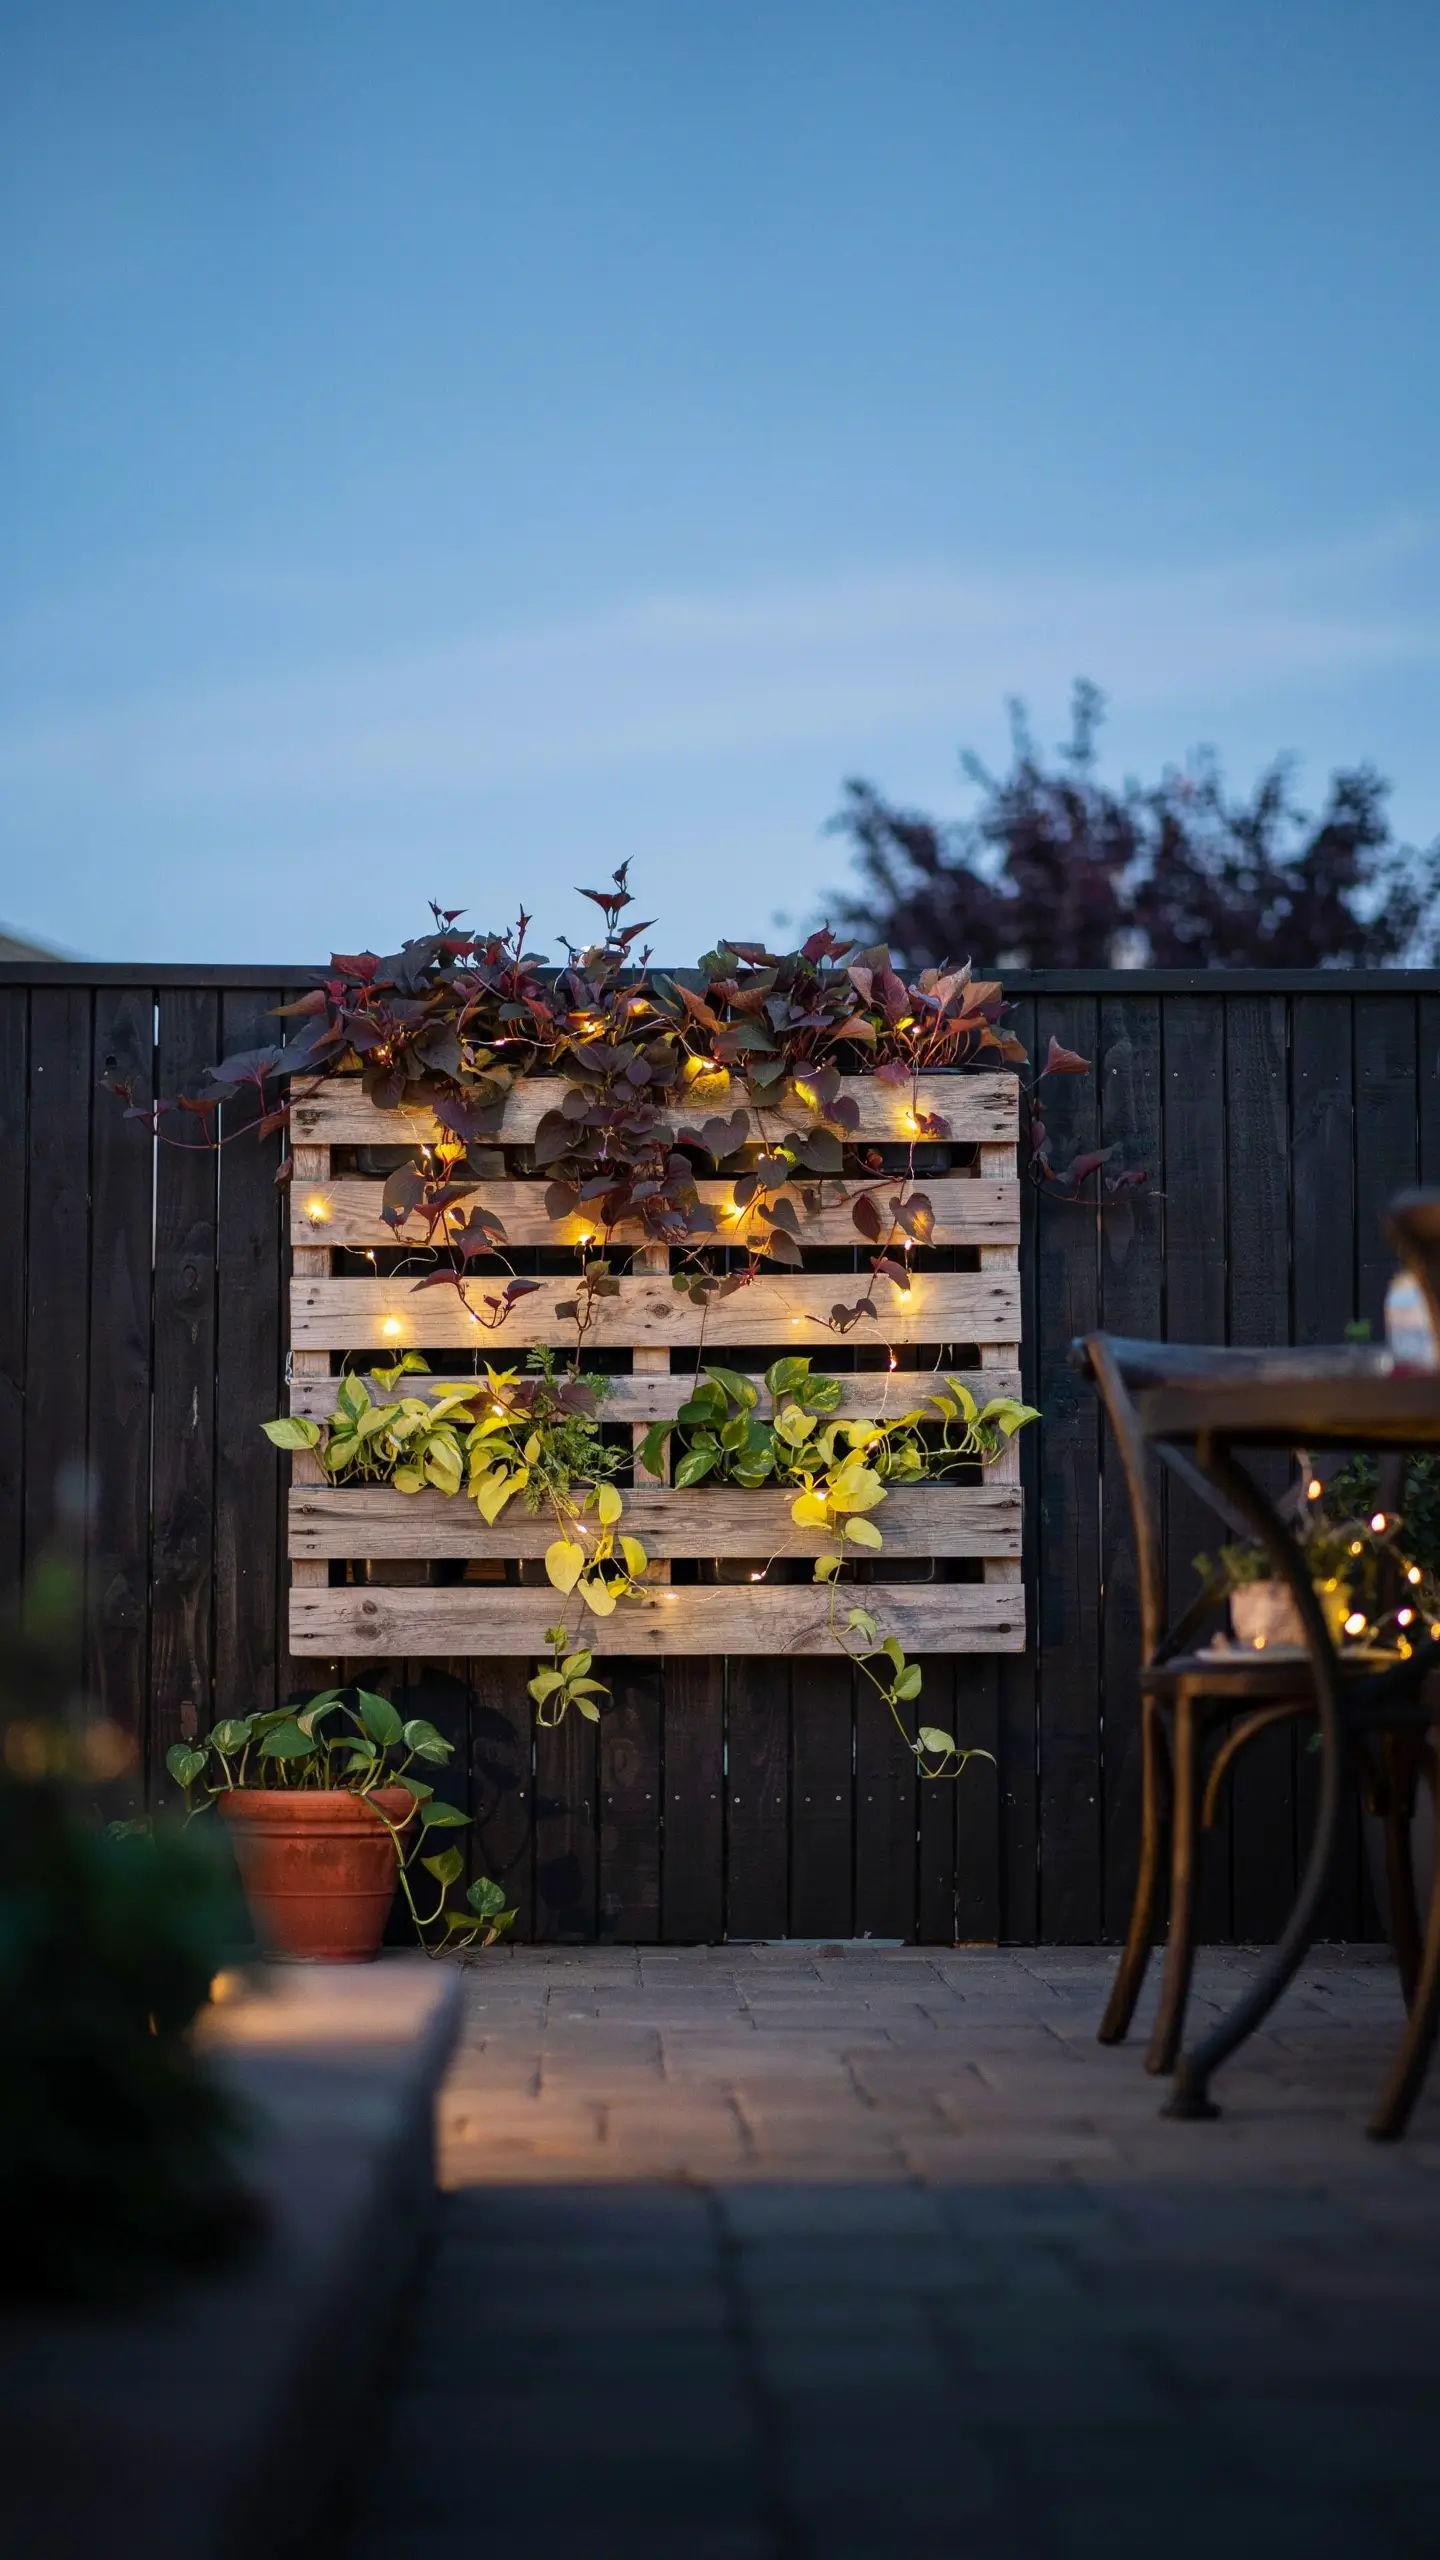
This one is purely for atmosphere, and it’s magical. Mount a pallet horizontally or vertically on a fence or exterior wall. Plant trailing greenery in the rows: sweet potato vine, trailing verbena, creeping Jenny, or cascading nasturtiums. Then weave solar-powered fairy lights through the slats and let them drape down with the plants.
After dark, the whole thing glows softly. It looks like a garden art installation and costs almost nothing beyond the lights (usually $8–15 for a solar string at any hardware store or online).
This is the idea that gets saved most on Pinterest because it photographs so beautifully at dusk. Pair it with a couple of patio chairs and a candle and your outdoor space feels entirely transformed.
- Best for: patios, decks, evening entertaining spaces
- Cost: $10–20
- Skill level: beginner
6. A Privacy Screen with Climbers
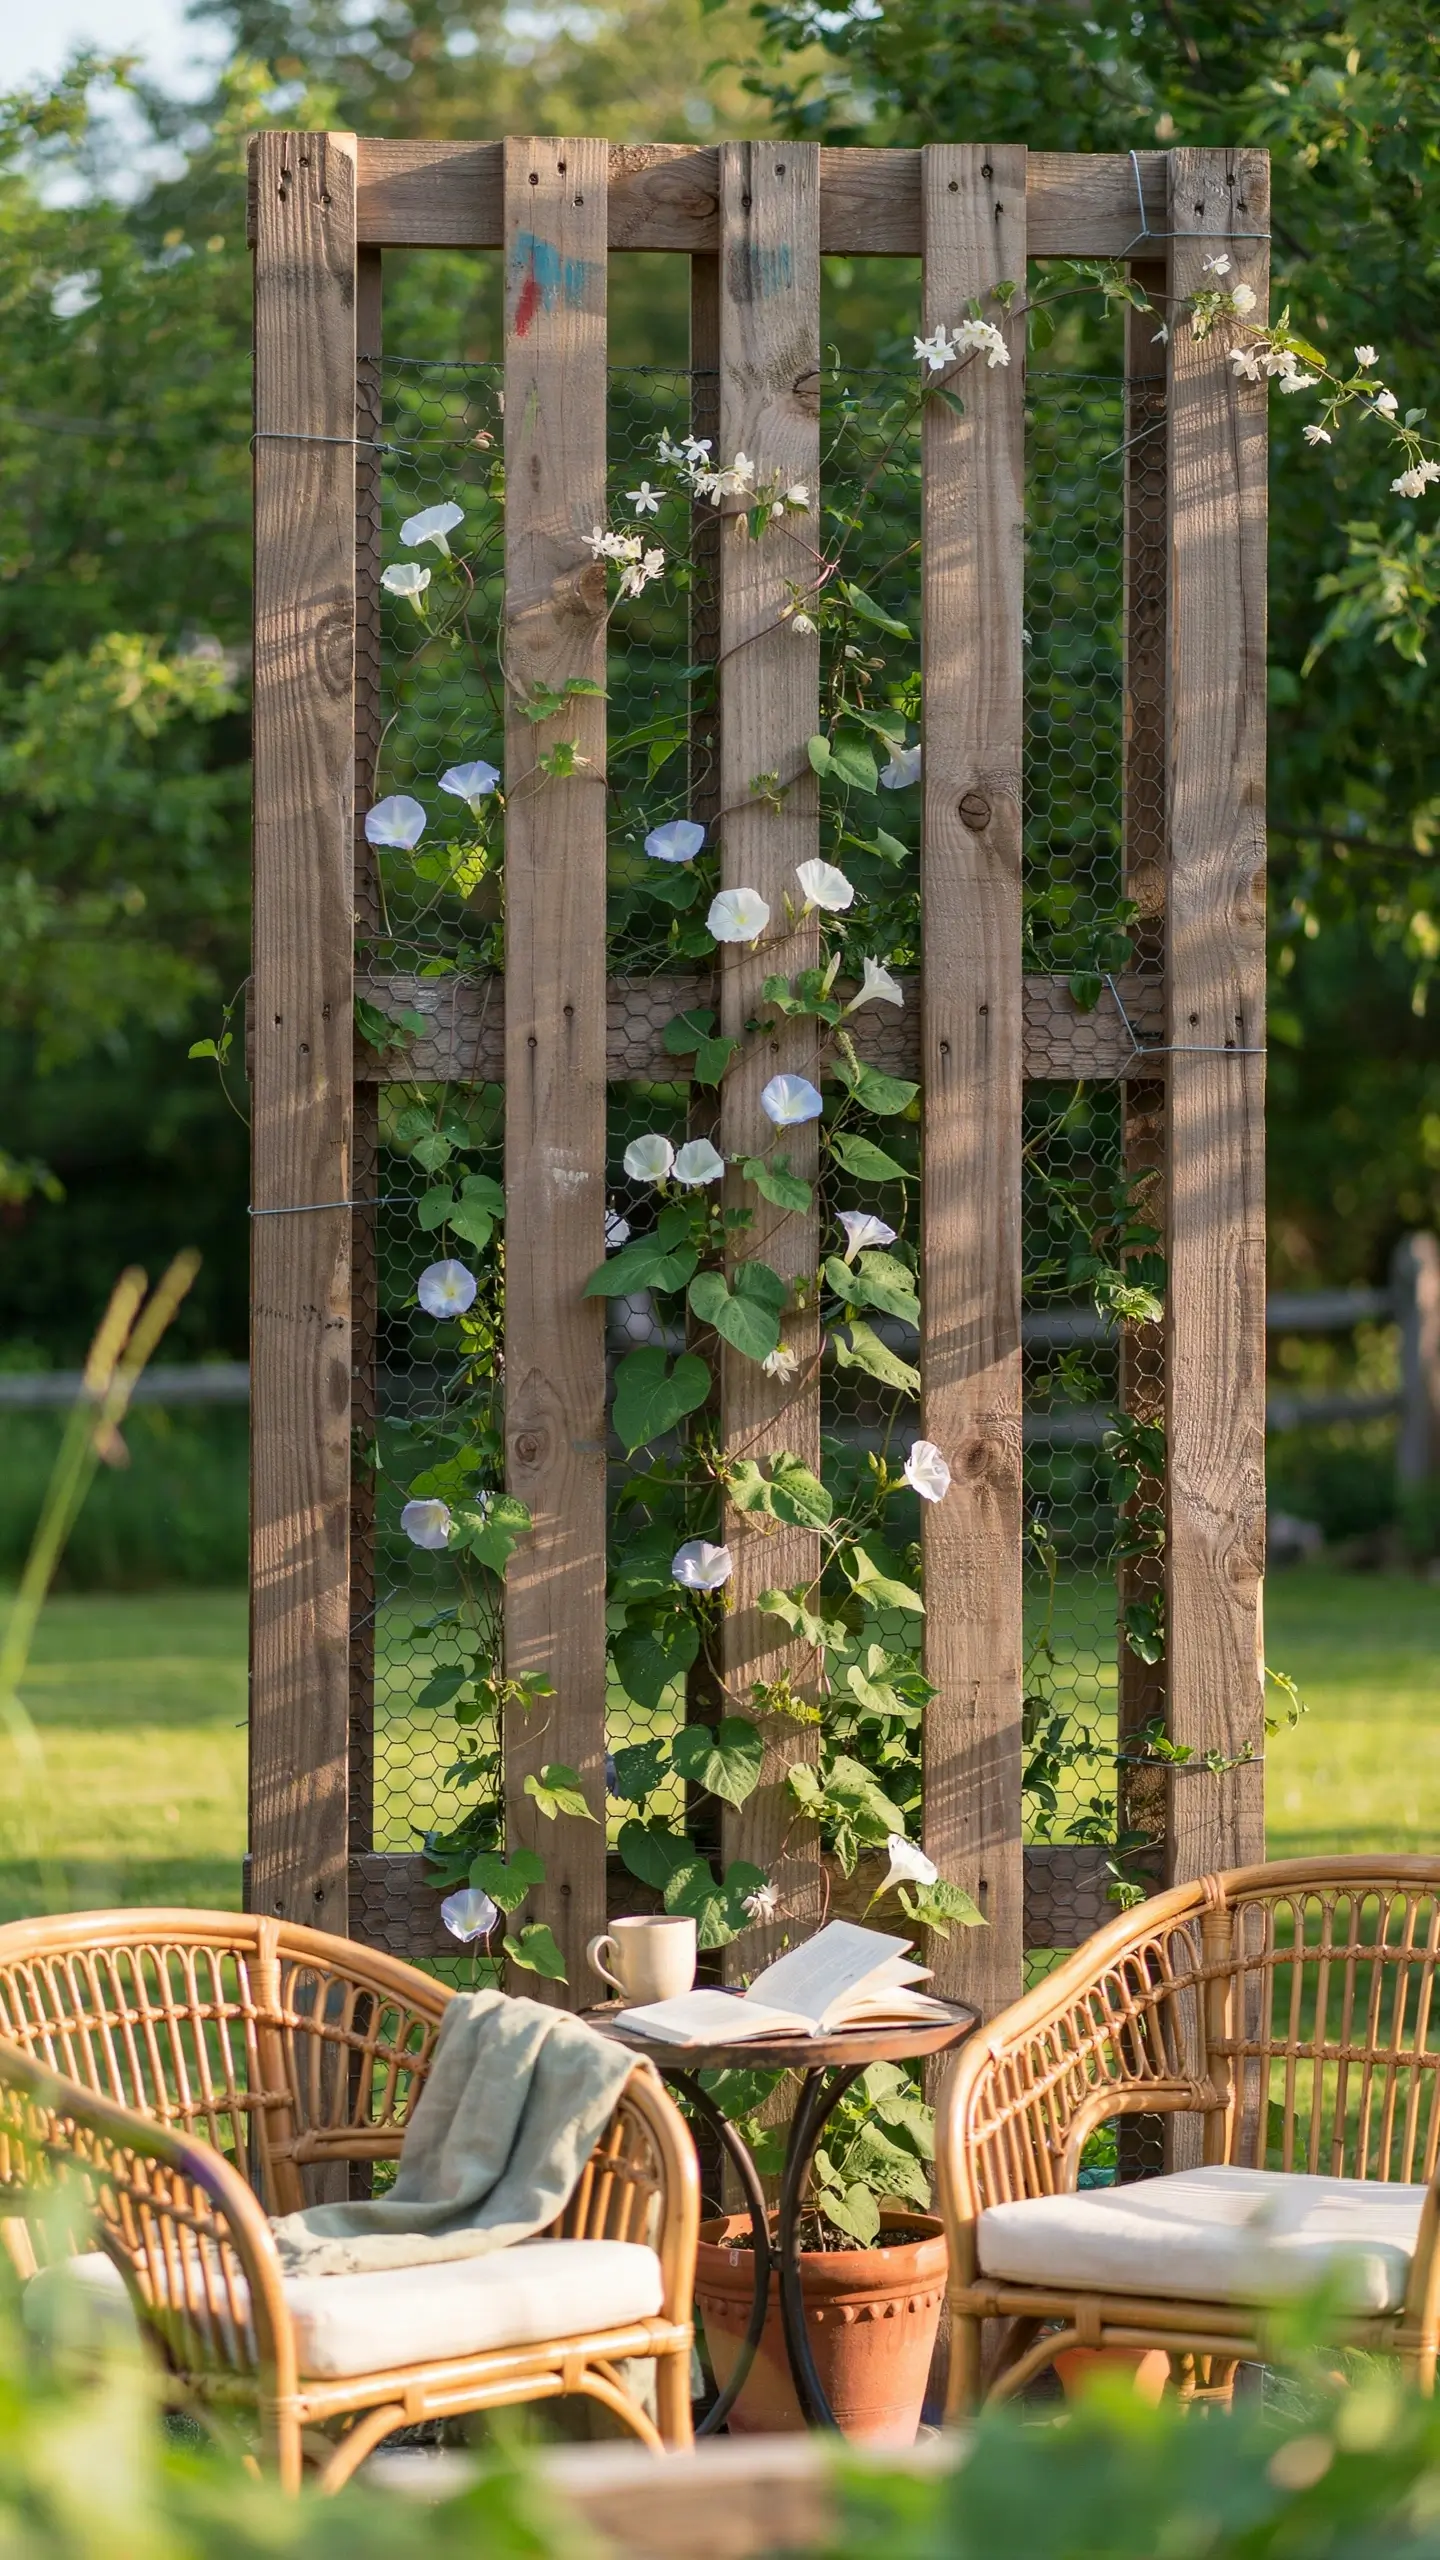
Need to block a neighbor’s sightline or create a defined outdoor room? Stand two or three pallets side by side and secure them with cable ties or deck screws. Prop them with stakes driven into the ground, or build simple L-shaped feet from scrap wood.
Add wire mesh across the face of the pallets and plant climbing vines at the base: morning glory, climbing nasturtiums, jasmine, hyacinth bean vine, or edible cucumber and bean plants. Within a few weeks the entire screen fills in with leaves and flowers, creating a soft, green privacy wall without the cost or permanence of a fence.
This is an especially good solution for renters who can’t install permanent fencing. When you move, you pull the stakes, remove the pallets, and take your screen with you.
- Best for: patios, apartment courtyards, side yards
- Cost: $10–20 plus seed packets
- Skill level: beginner
7. A Raised Bed Planter With Built-In Legs
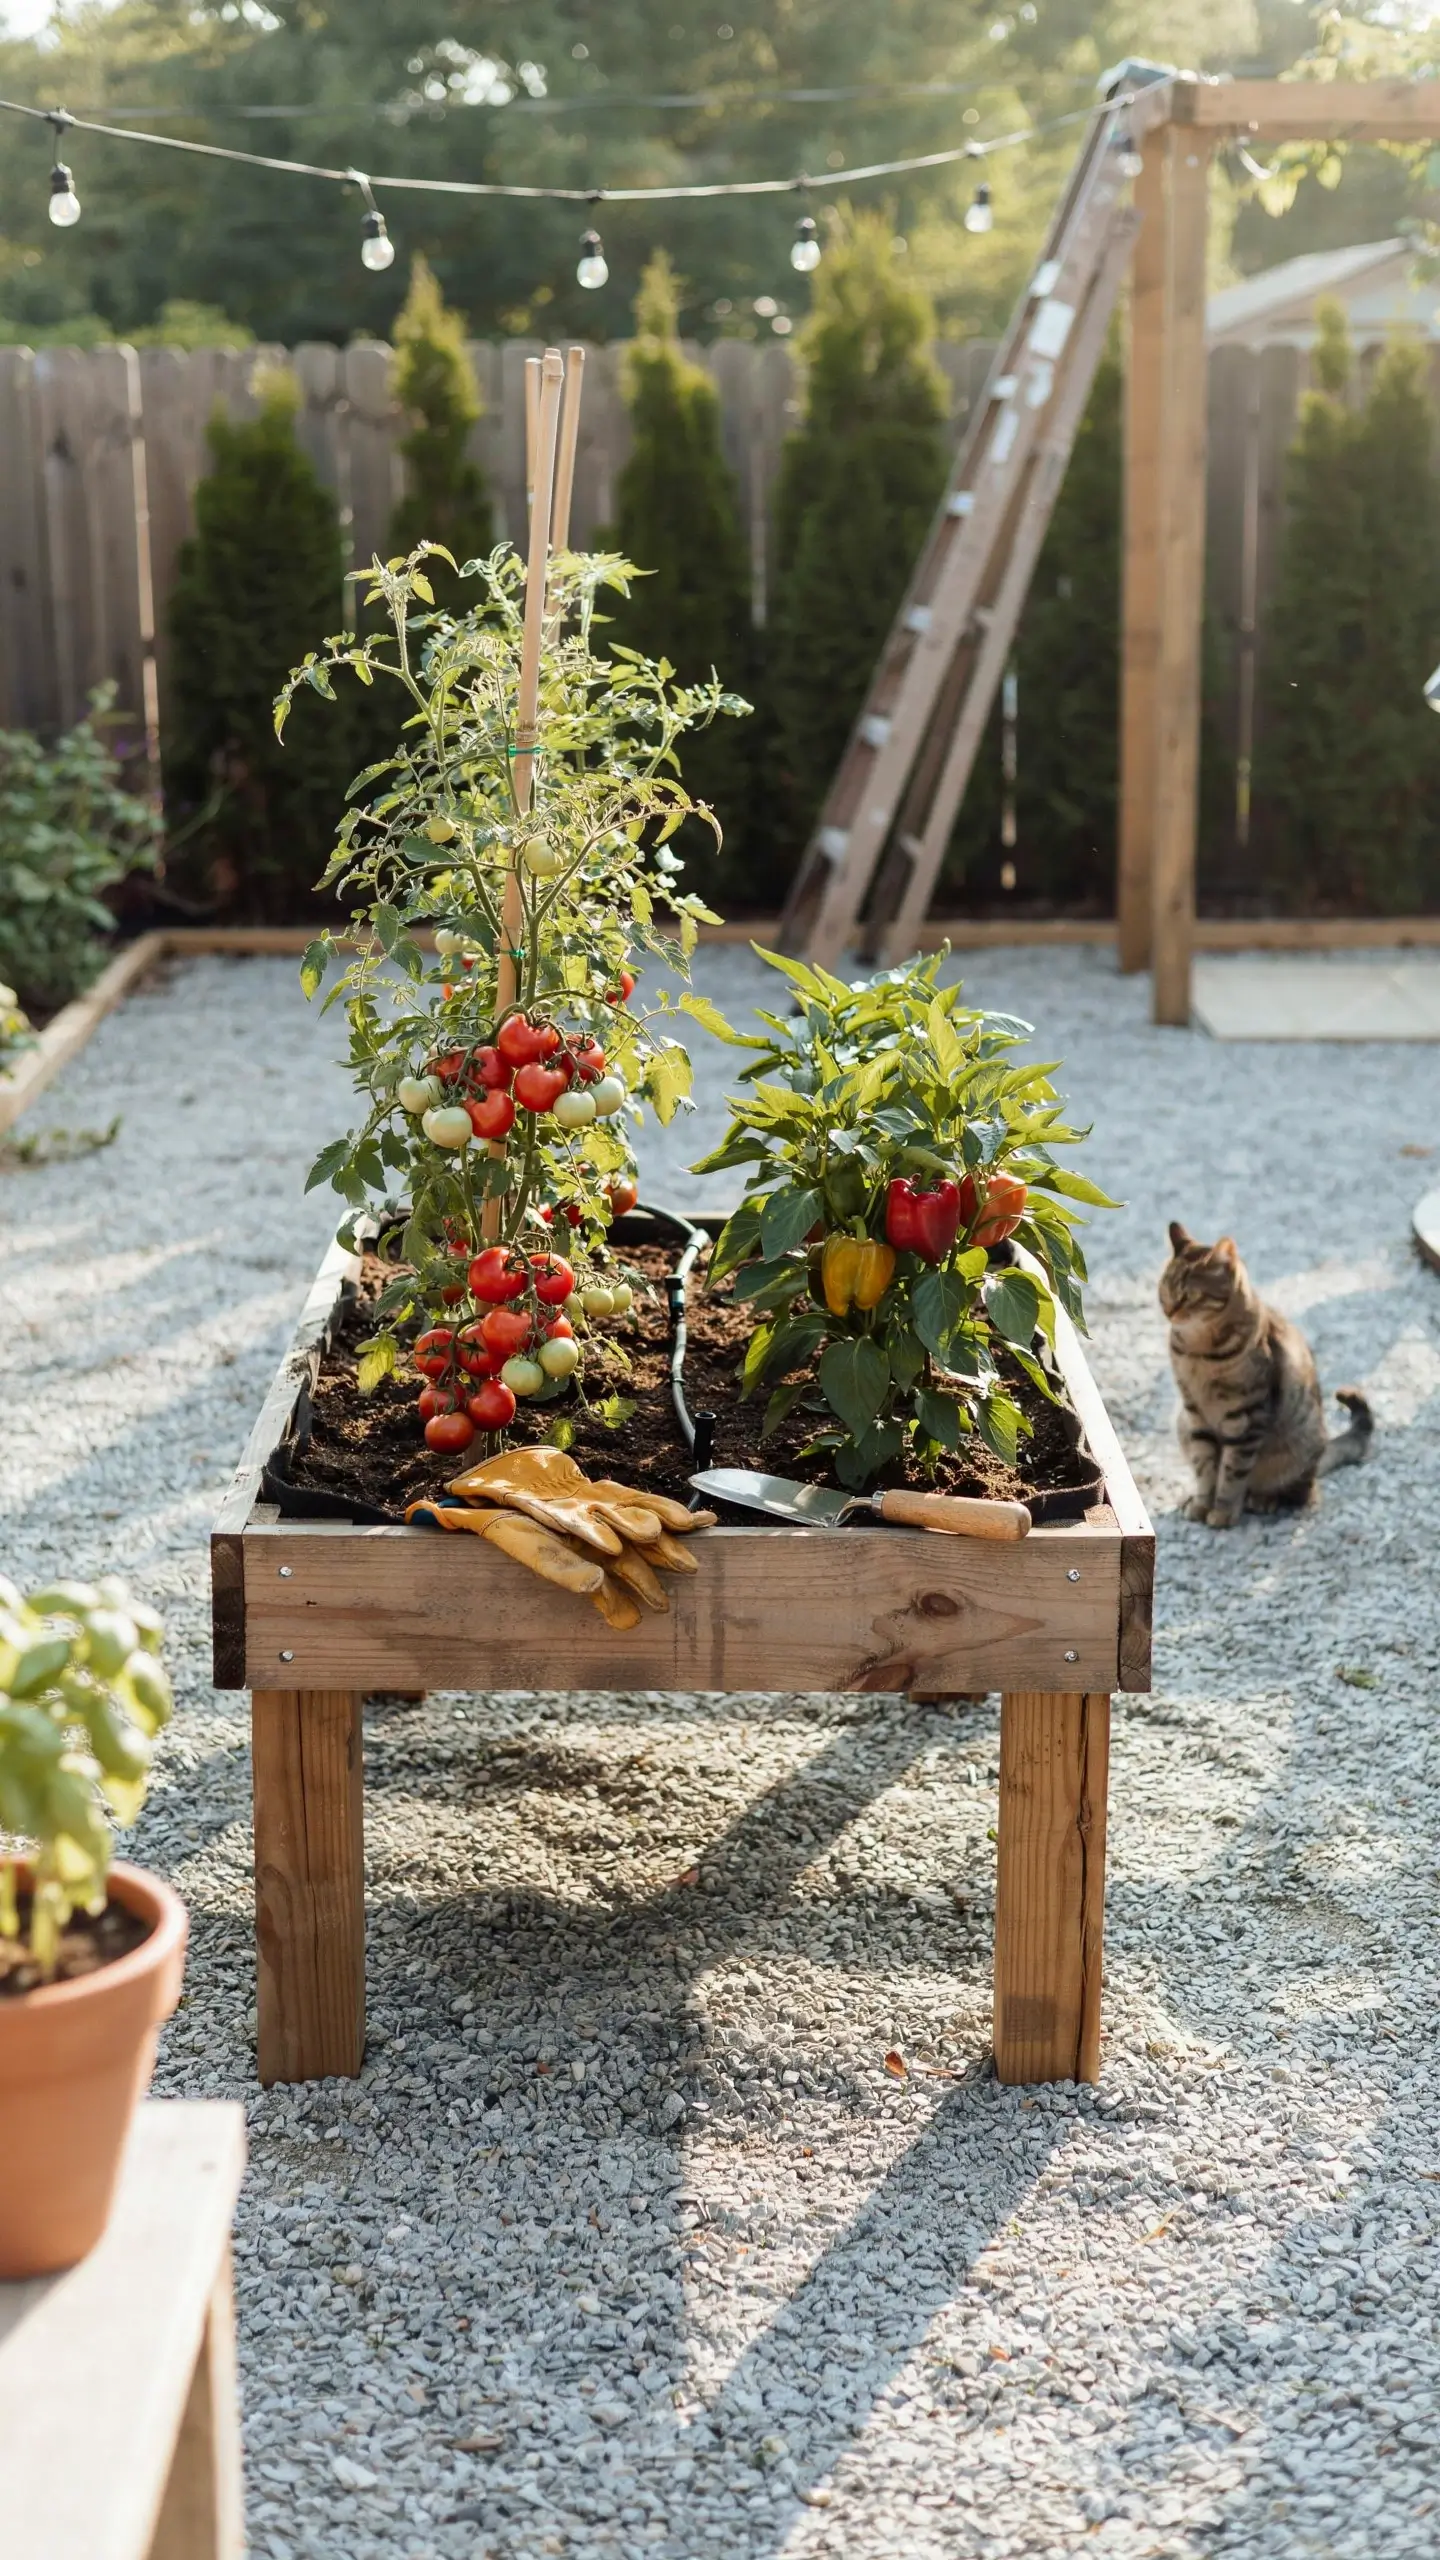
This takes the flat raised bed one step further. Add four 4×4 legs to the corners of a pallet to lift the whole thing off the ground 24 to 30 inches. Seal the inside with landscape fabric, add a layer of window screen over the bottom to prevent soil loss, then fill with potting mix.
At this height, you’re gardening completely standing up. No kneeling, no bending, no aching back. This is genuinely life-changing if you have mobility issues or just want to make daily garden checks feel effortless.
Plant tomatoes, peppers, herbs, or lettuce. Add a drip irrigation line if you want to be really hands-off about watering.
- Best for: people who want accessible, ergonomic gardening
- Cost: $30–55 (lumber for legs, soil, hardware)
- Skill level: intermediate (basic drilling required)
8. A Tiered Pallet Planter
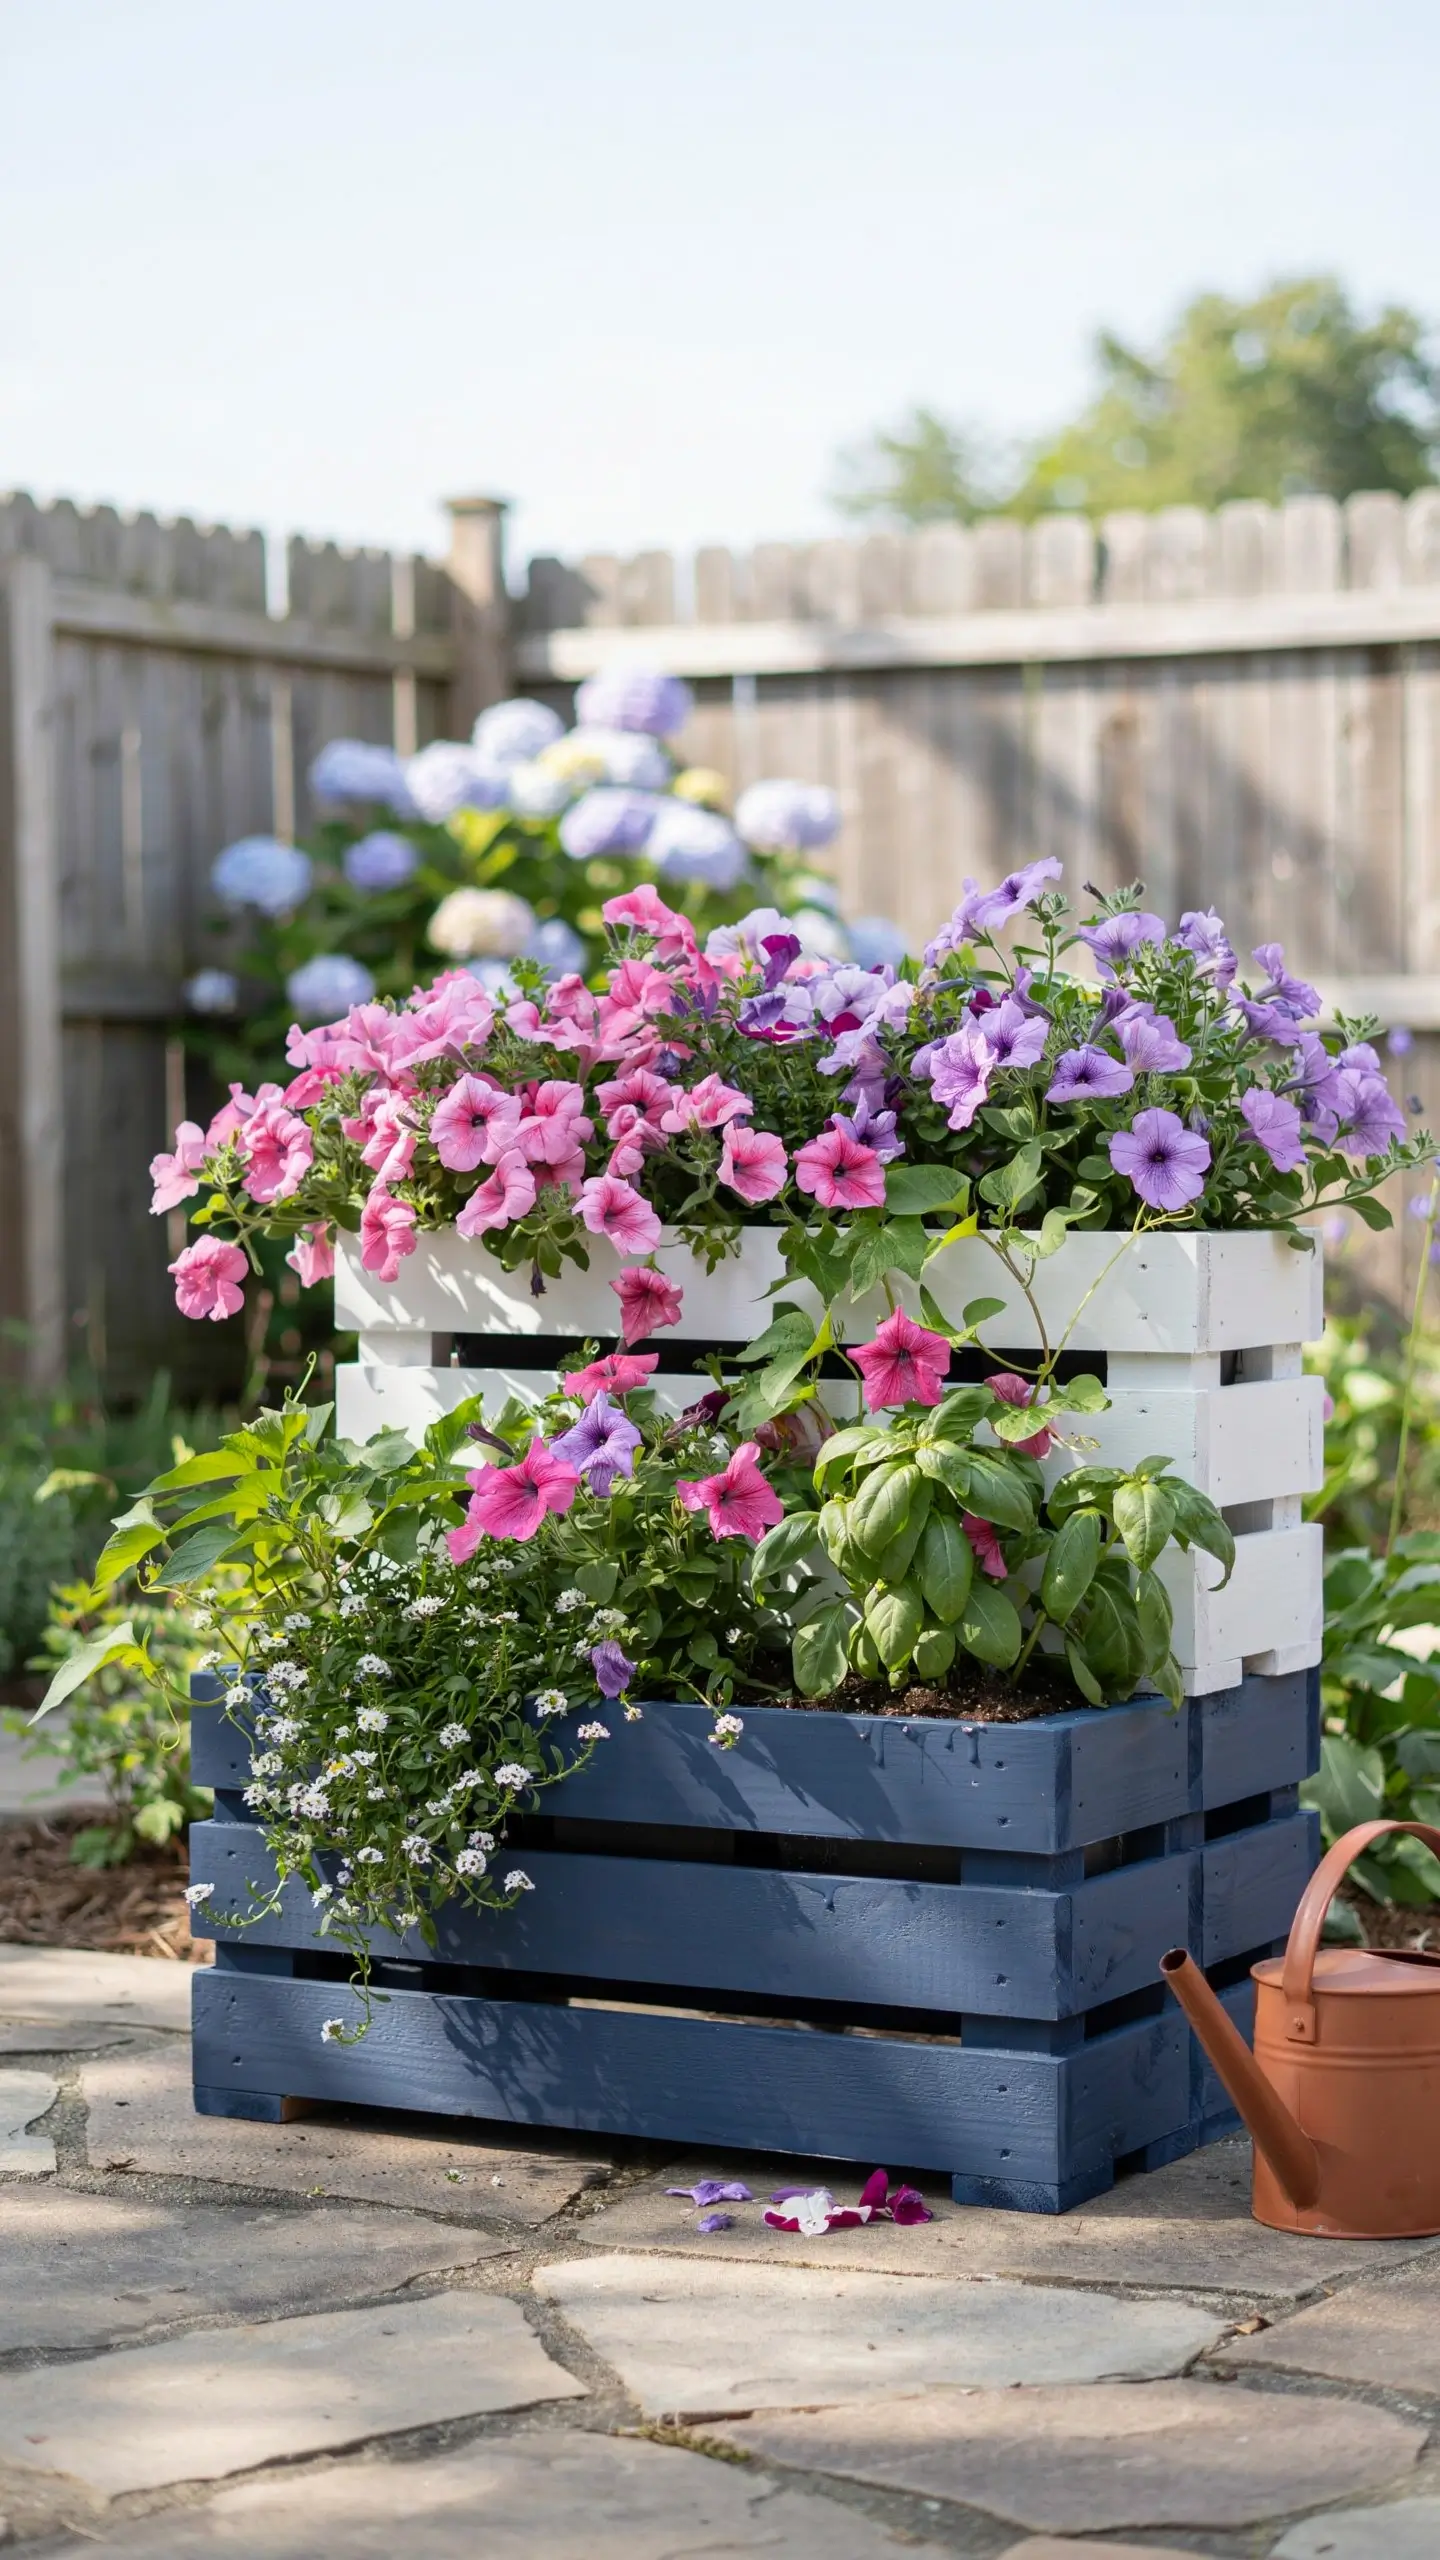
Stack two pallets at a slight offset so the second pallet sits on top and behind the first, creating a tiered effect. Fill both pallets with potting soil, then plant taller plants at the back and trailing or shorter plants at the front.
This is beautiful with annuals: petunias on the top tier, alyssum and lobelia trailing down the front. Or try a mix of kale and ornamental cabbage at the back with pansies and violas at the front for a cool-season display. Paint each tier a different color (navy, white, and terracotta look especially good together) to make the structure feel intentional and designed rather than makeshift.
- Best for: entryways, patio focal points, front porch displays
- Cost: $20–30 for soil and plants
- Skill level: beginner
9. A Three-Bin Compost Station
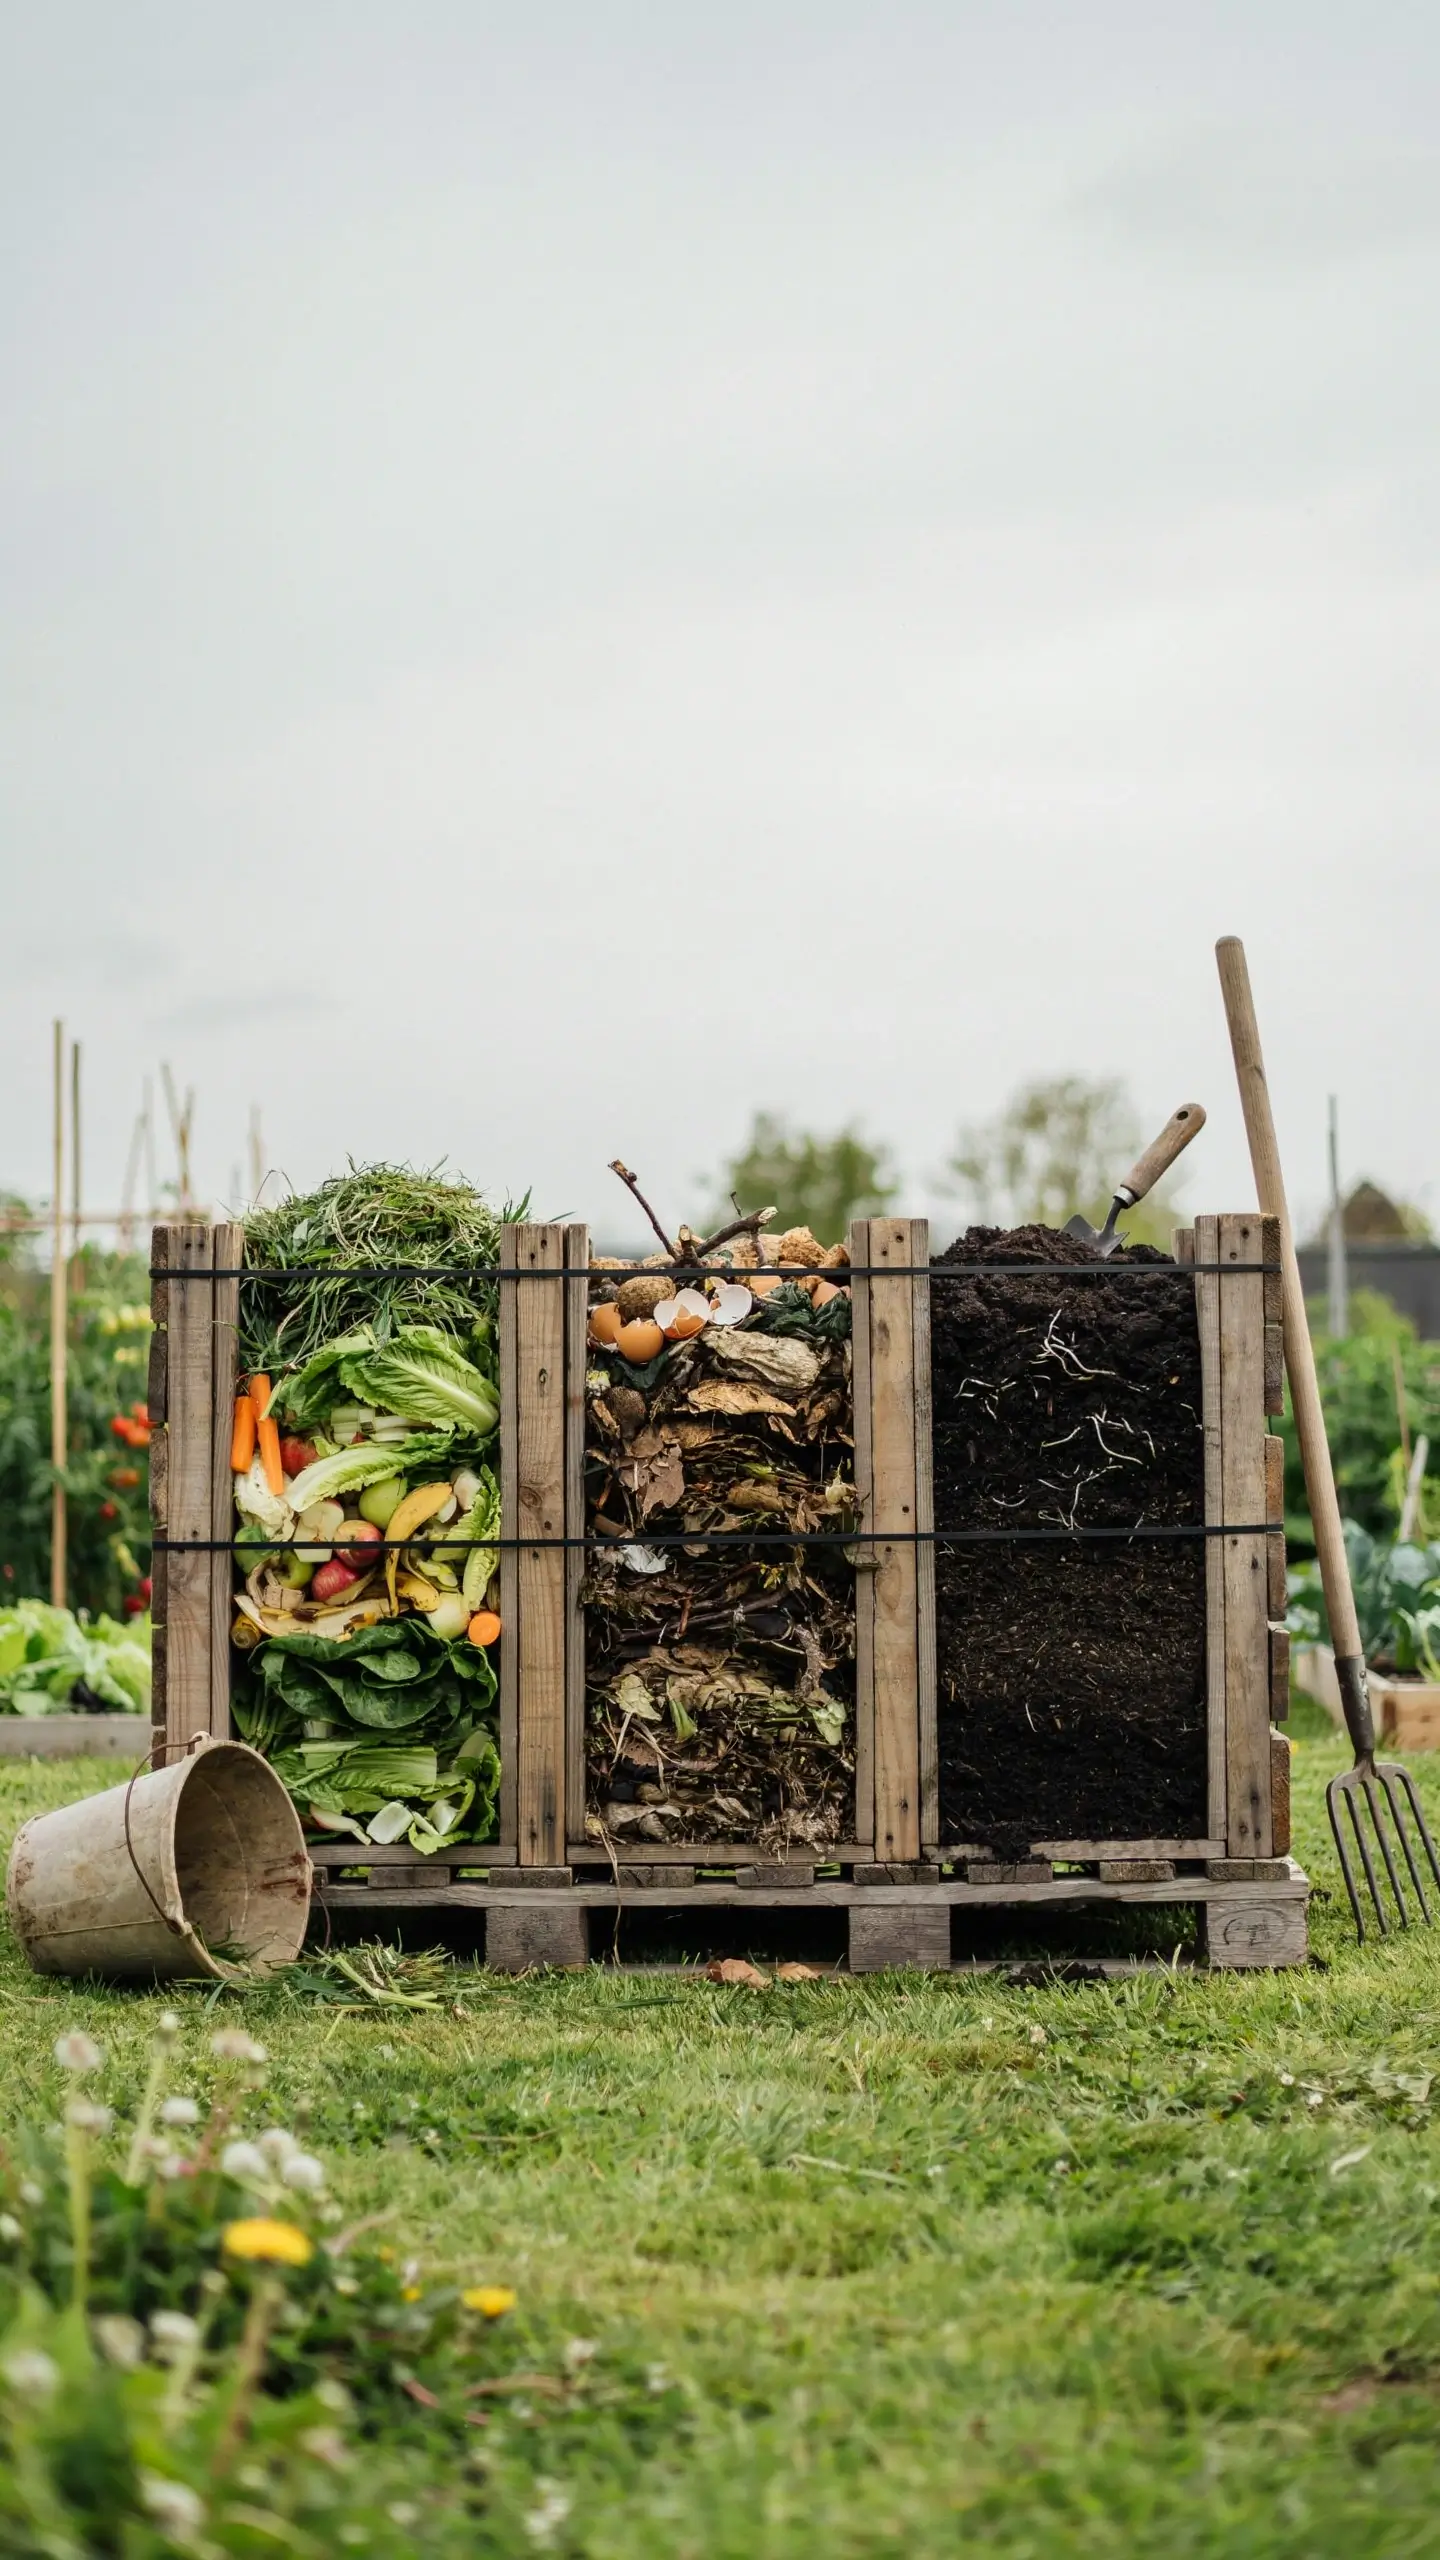
Four pallets, a bag of heavy-duty zip ties, and about an hour of your time. Stand the pallets on edge to form three connected square bins side by side. Tie the corners together with zip ties (no tools needed). Leave the front of each section open, or add a hinged pallet door for easy access.
Use the first bin for fresh green material (fruit scraps, grass clippings, fresh weeds). Turn it into the second bin after a few weeks. Move finished compost to the third bin for use in the garden.
This is genuinely one of the most useful pallet projects you can build. A comparable three-bin composter from a garden center costs $200 to $400. Your pallet version costs nothing but time.
- Best for: backyard gardens, anyone who wants free fertilizer
- Cost: approximately $0 if pallets are free
- Skill level: beginner
10. A Pallet Garden Bench with Planter Arms
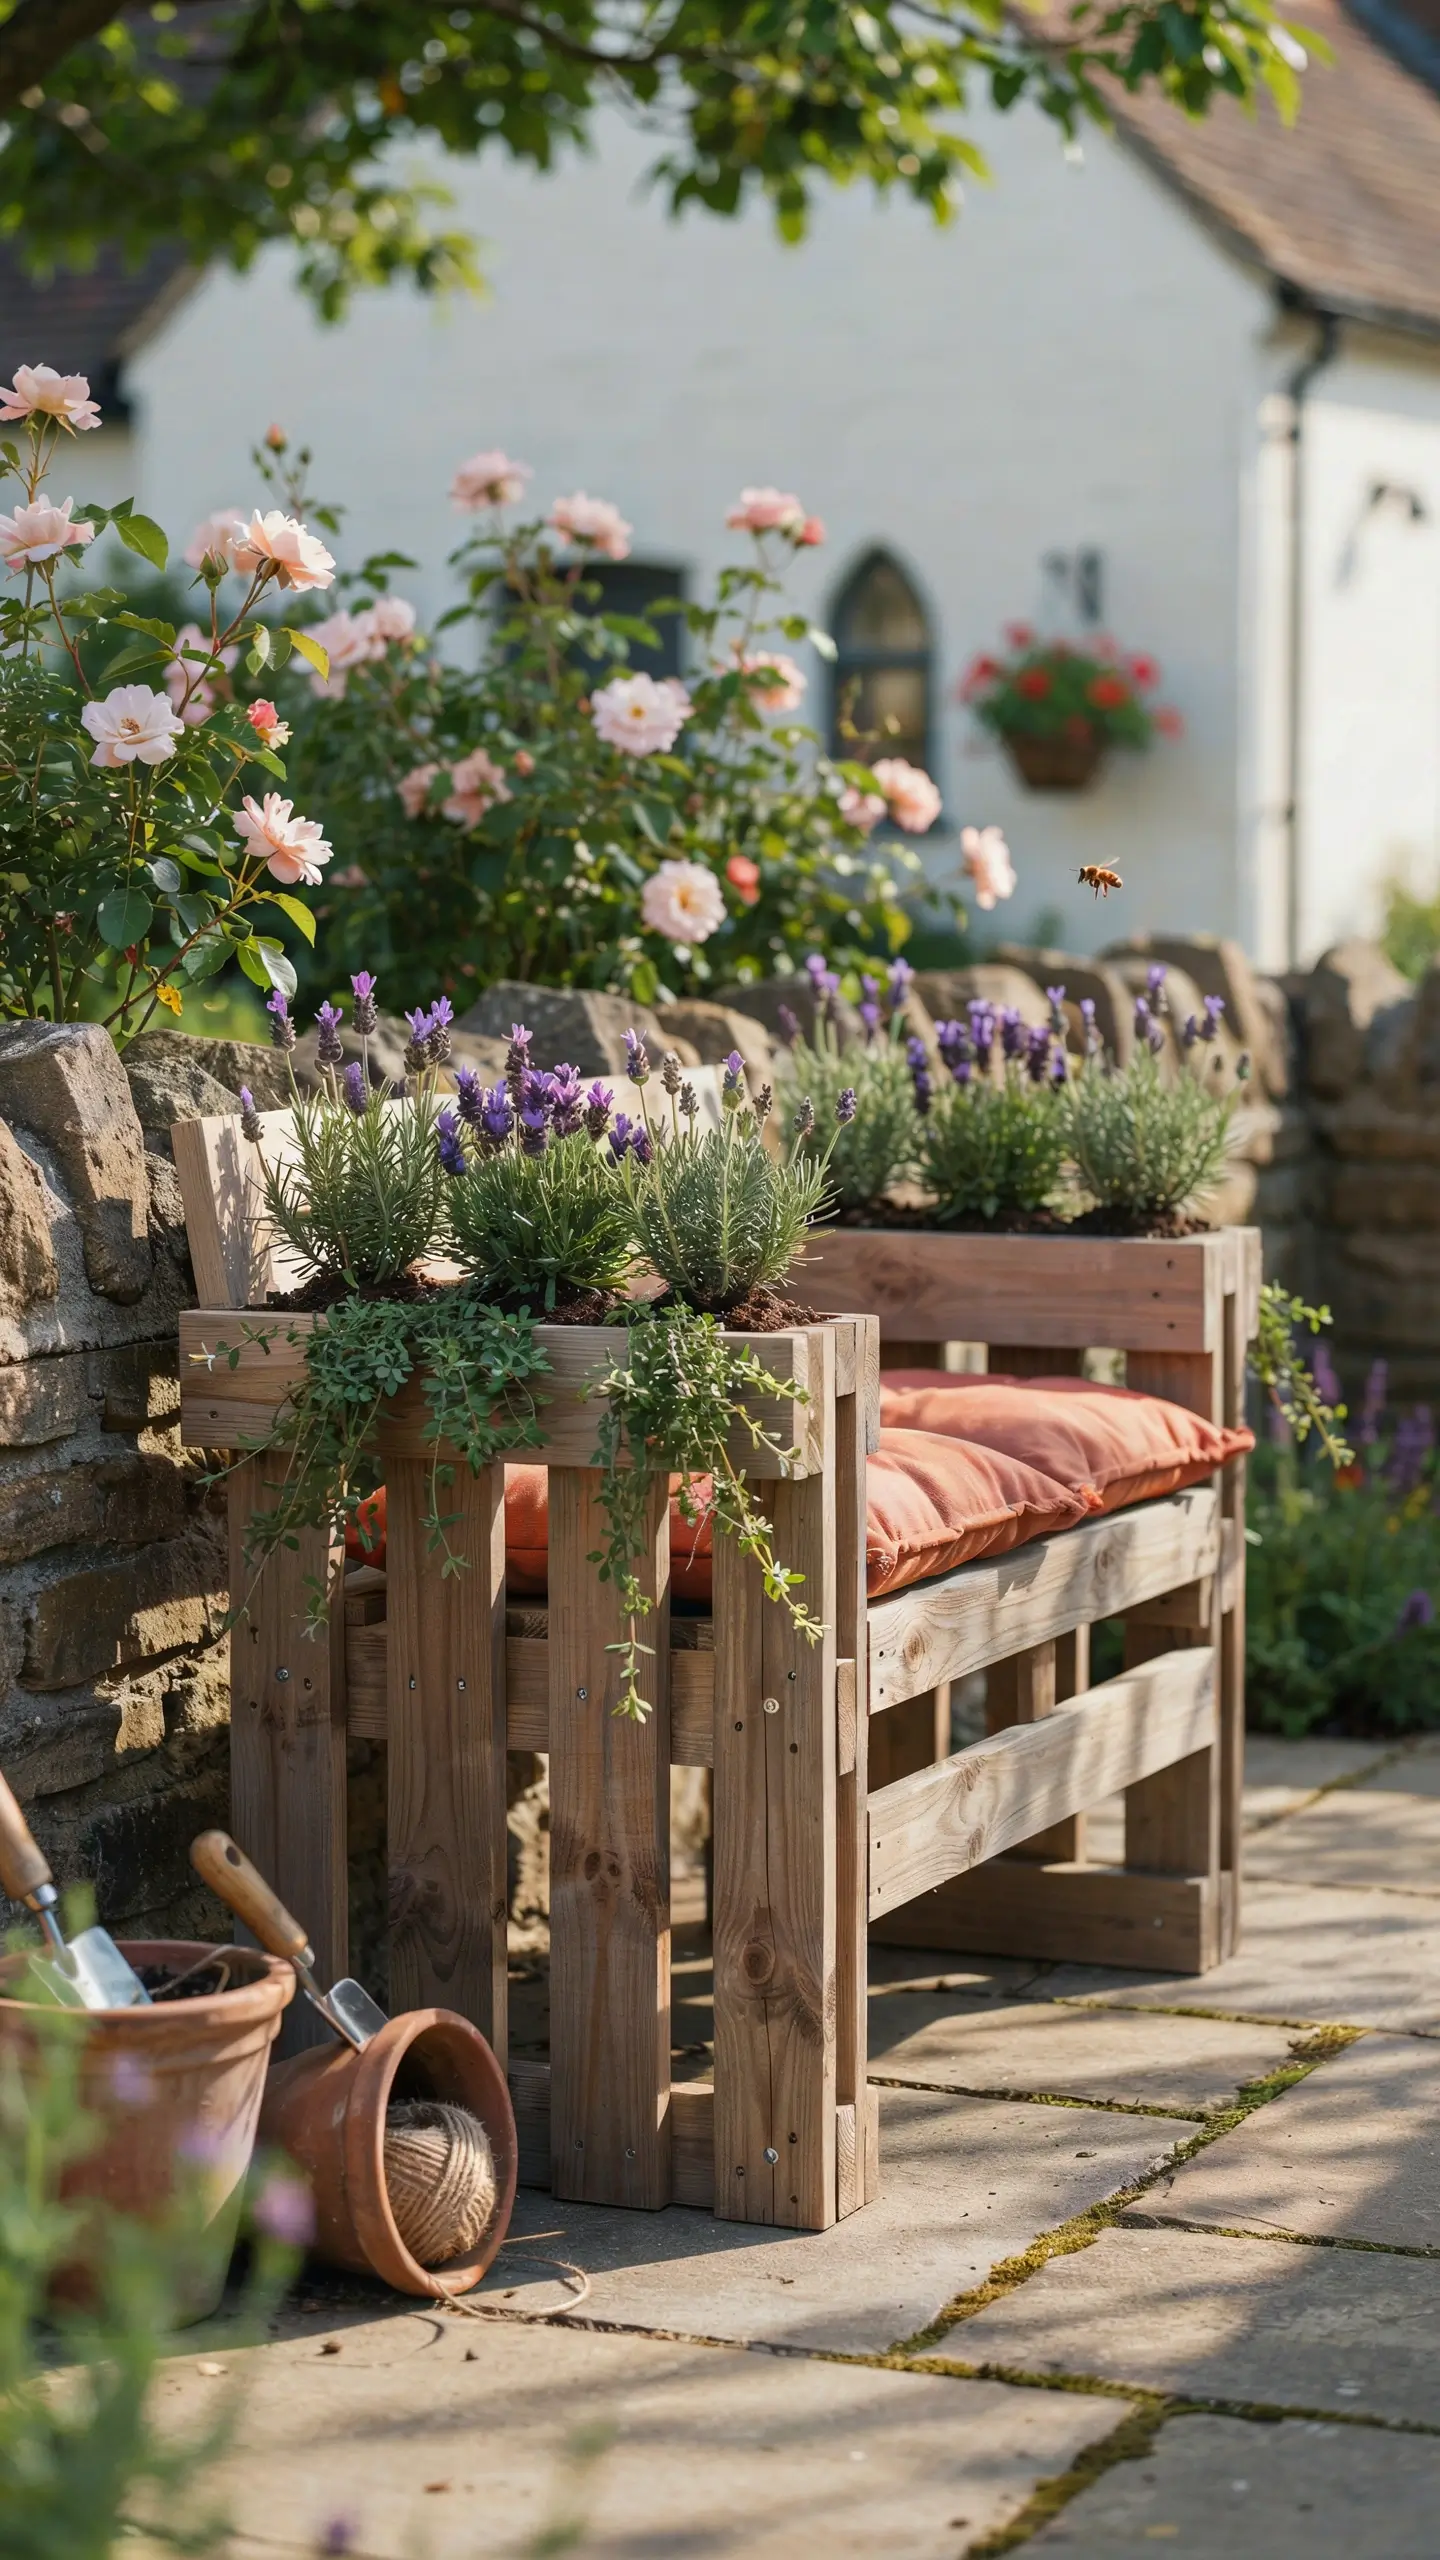
Divide a large pallet into two sections: a longer piece for the seat and a shorter piece for the backrest. Attach them at a slight recline using deck screws, and add simple wooden legs from lumber scraps. Then at each end of the seat, stand small pallet sections upright and fill them with plants.
Lavender, trailing rosemary, or compact ferns at the bench ends make the whole structure feel like it belongs in a cottage garden. Add an outdoor cushion in a fabric you love and this becomes the most-used spot in your yard.
The combination of seating and living plants in one piece of furniture is what makes it save-worthy on Pinterest. It looks expensive and complicated but it’s actually a weekend afternoon build.
- Best for: patios, garden corners, outdoor entertaining areas
- Cost: $30–50 (cushion is the biggest expense)
- Skill level: intermediate
11. A Freestanding Trellis Hinge
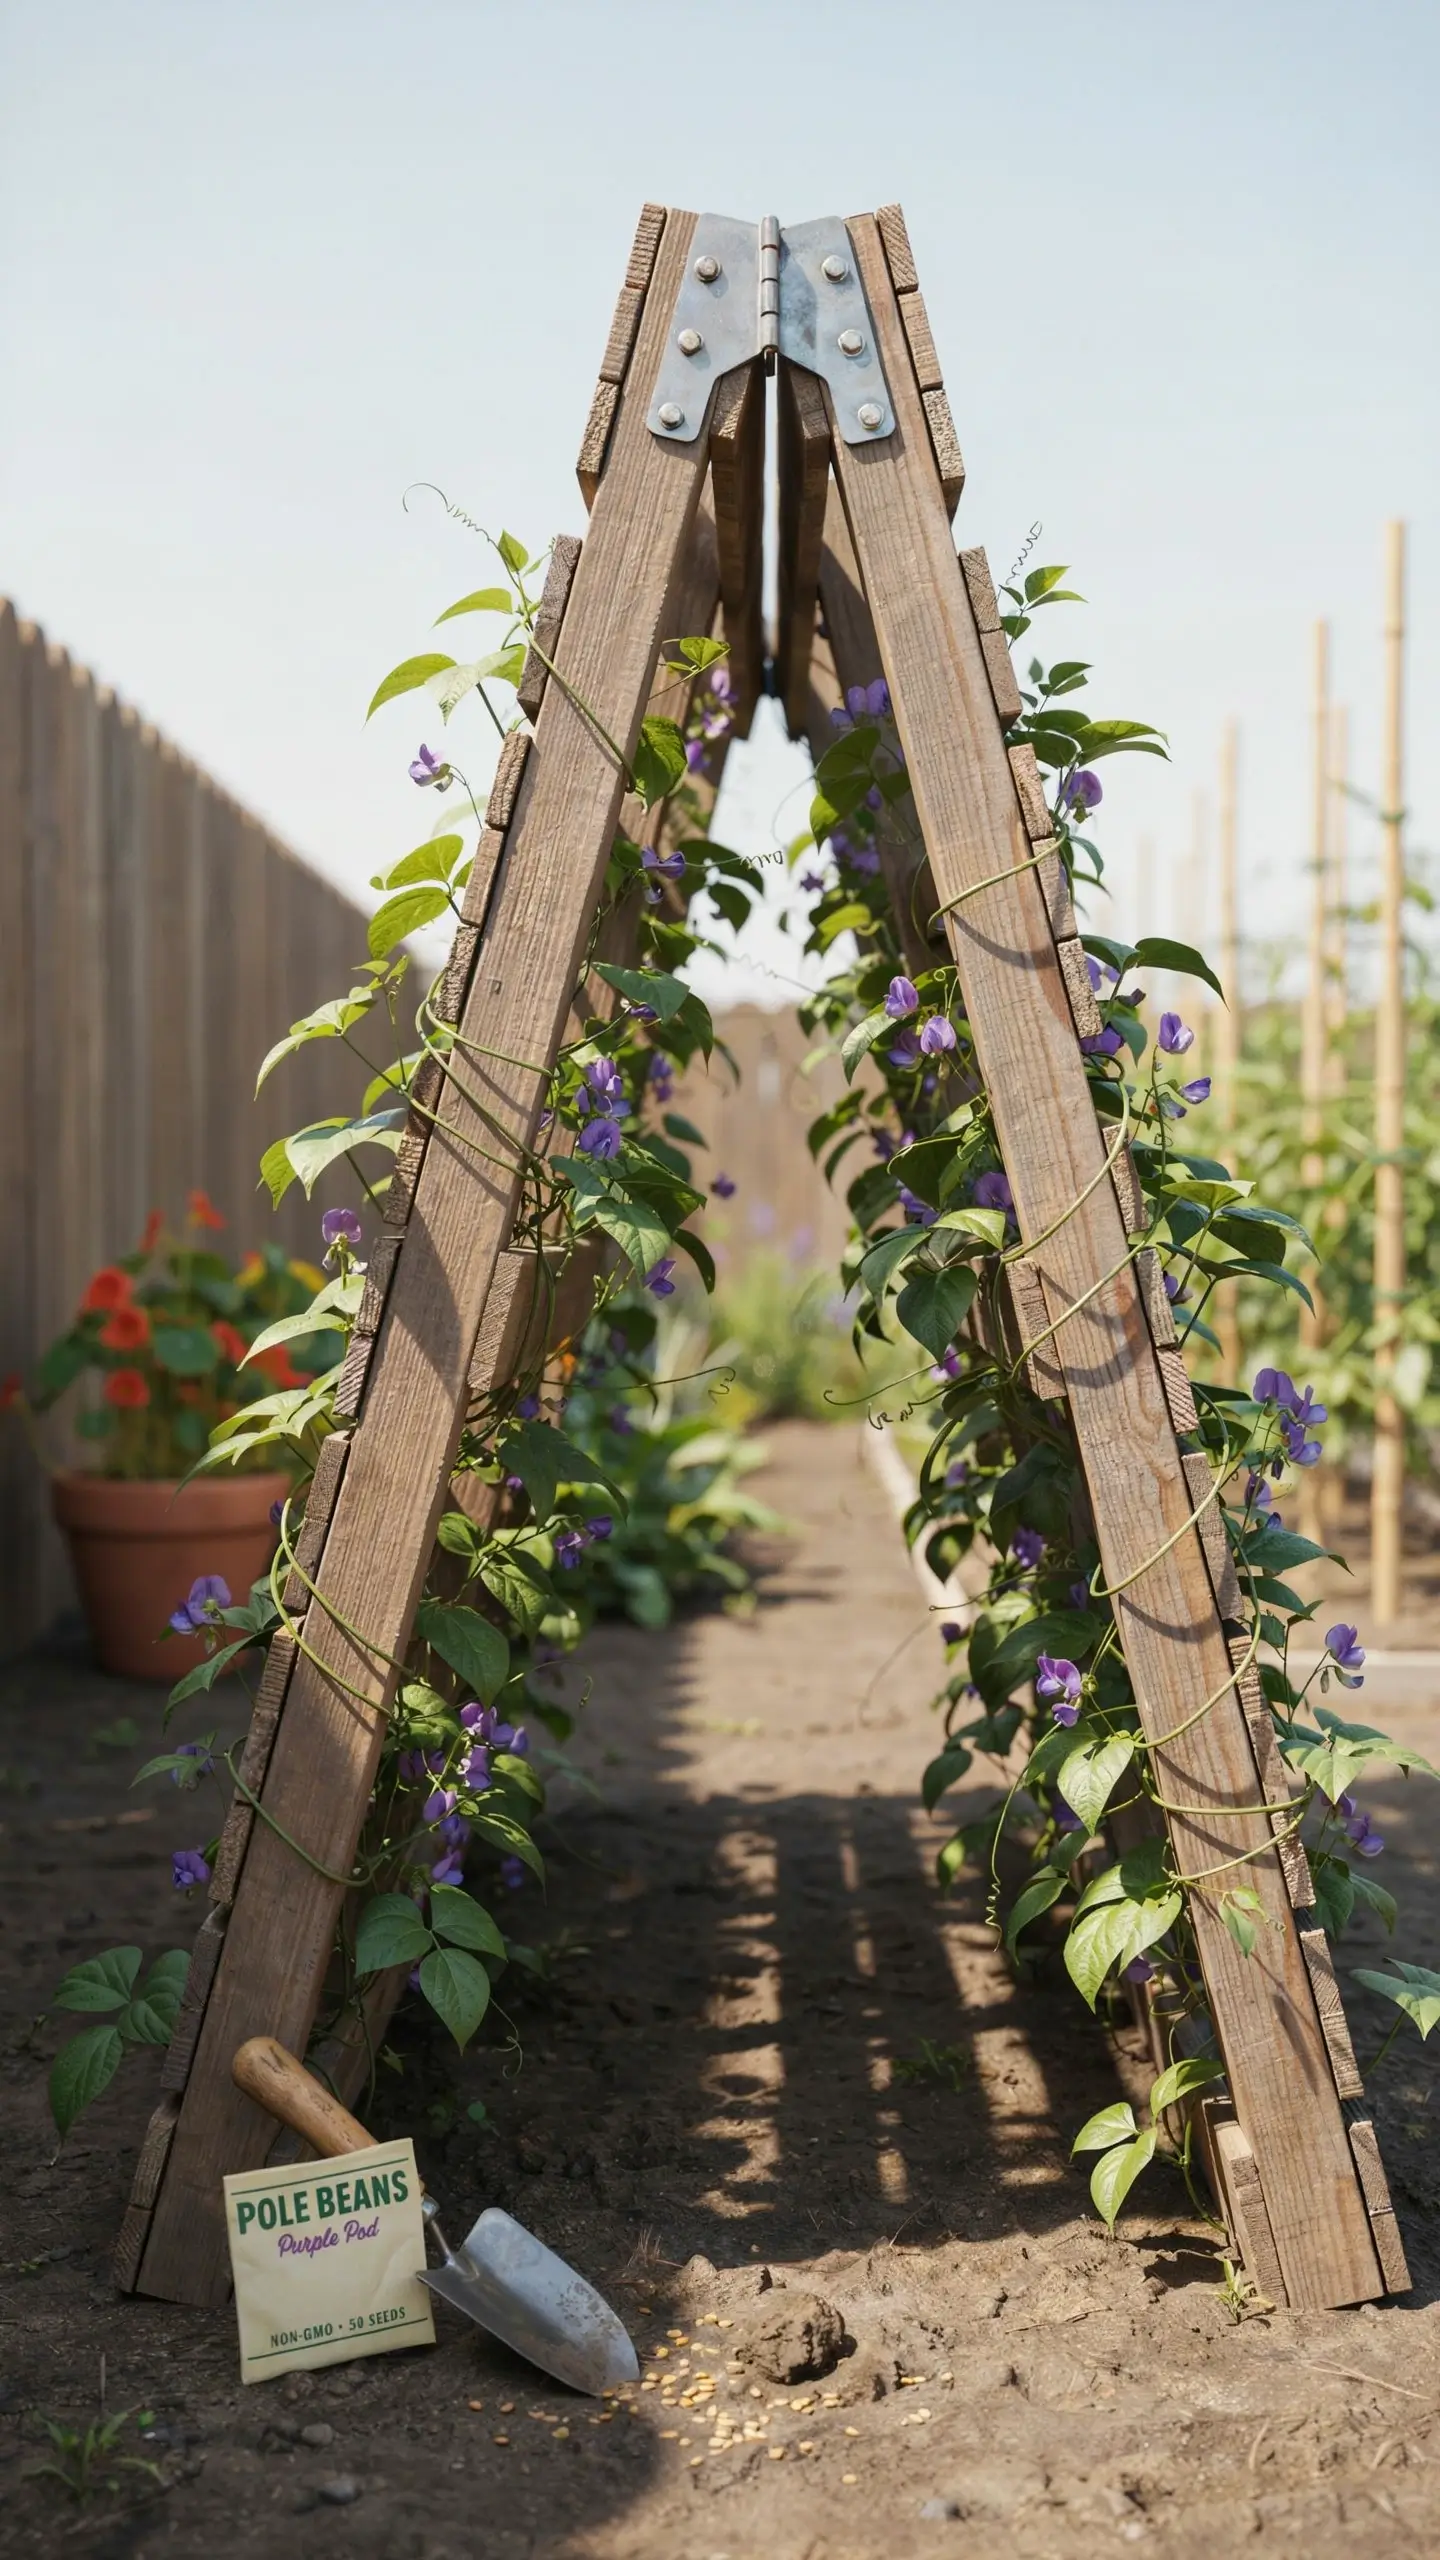
This is the simplest trellis you will ever build. Take two pallets and attach them at the top with a heavy-duty door hinge. Open them in a V-shape and set them on the ground without any staking needed. The A-frame shape is self-supporting.
Plant beans, peas, cucumbers, or small-fruited squash at the base. Within weeks the vines climb the wooden slats and cover the whole structure. You can harvest from both sides without walking around.
At the end of the season, fold it flat for storage. This project takes less than 30 minutes to build and costs less than the price of the hinge.
- Best for: vegetable gardens, anyone who grows climbing crops
- Cost: $5–8 (just the hinge)
- Skill level: beginner
12. A Garden Pathway
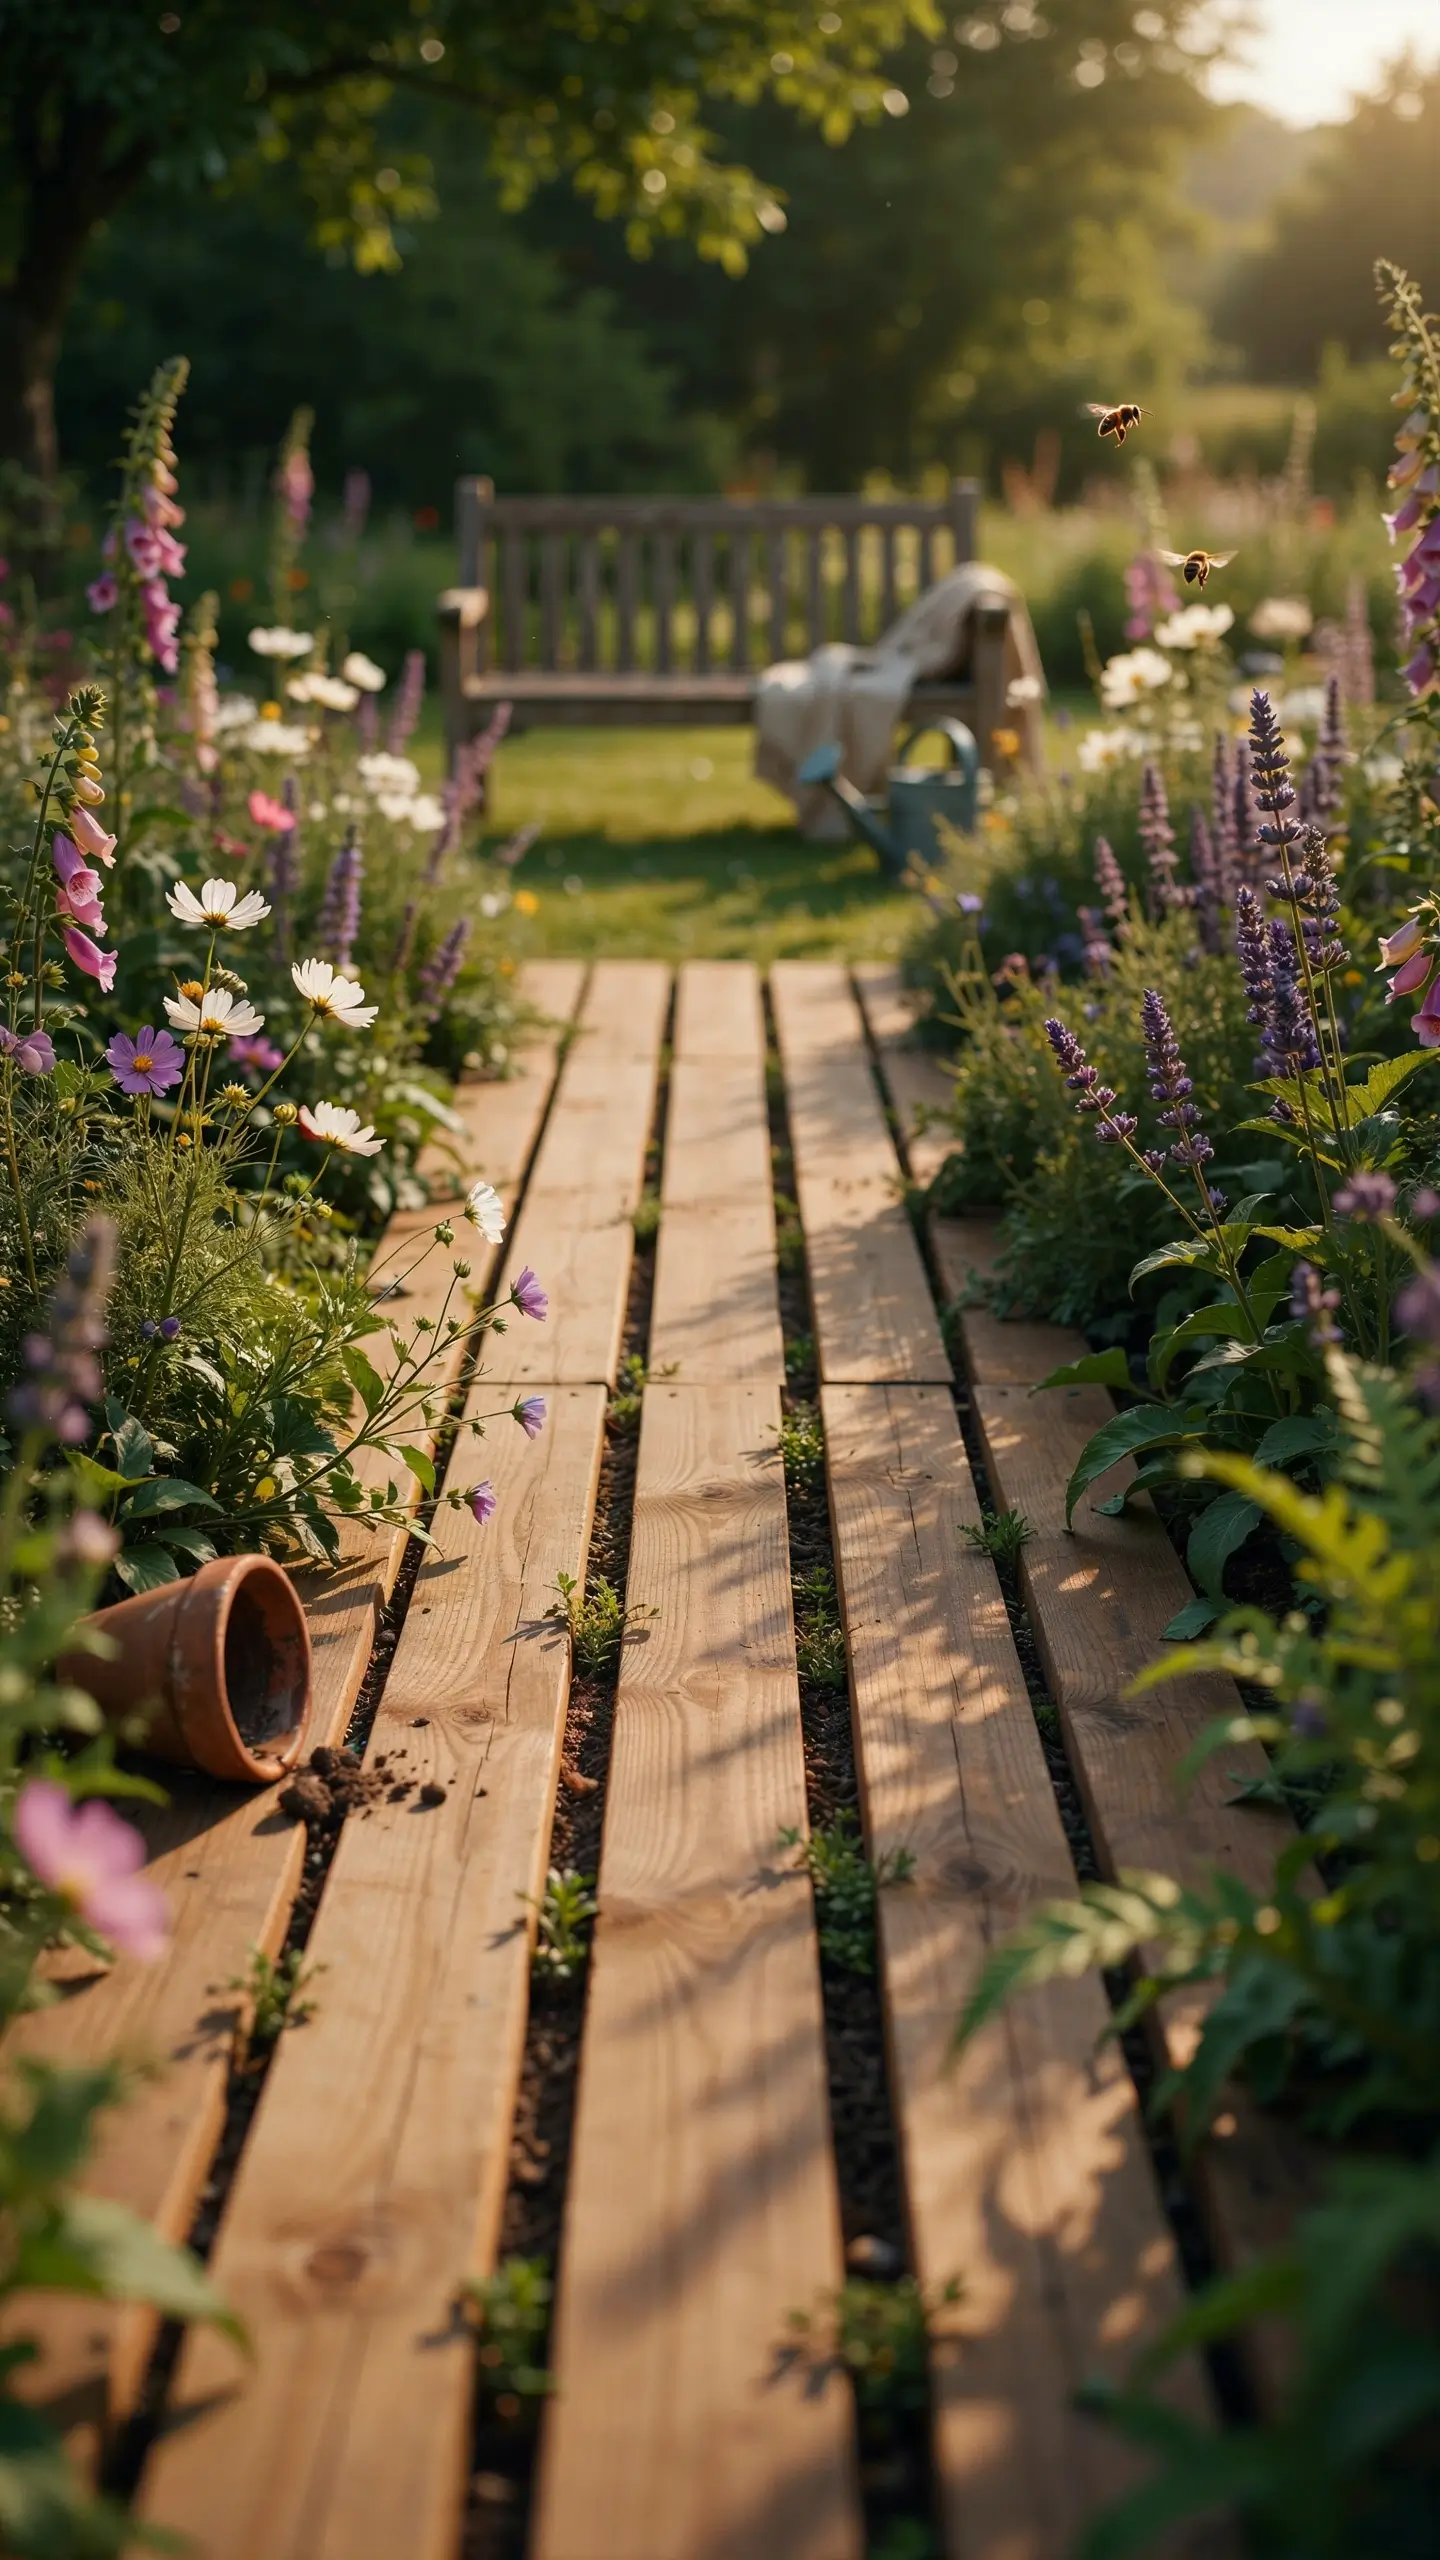
Lay whole pallets flat in a line to create a rustic garden walkway through a muddy yard or flower bed. Clear and level the ground first, set the pallets in place, and pack soil around the edges to stabilize them.
You can use pallets as-is for a rough, rustic look, or disassemble them and use the individual boards to create a more refined slatted path with small gaps between each board. The gap version drains better and looks more polished.
Stain or seal the wood before laying it down to extend the life significantly. Expect to replace boards every few years as the wood weathers, but that’s a minor cost compared to stone or gravel pathways.
- Best for: backyard gardens with muddy or uneven ground
- Cost: $10–20 for stain and hardware
- Skill level: beginner
13. A Potting Bench
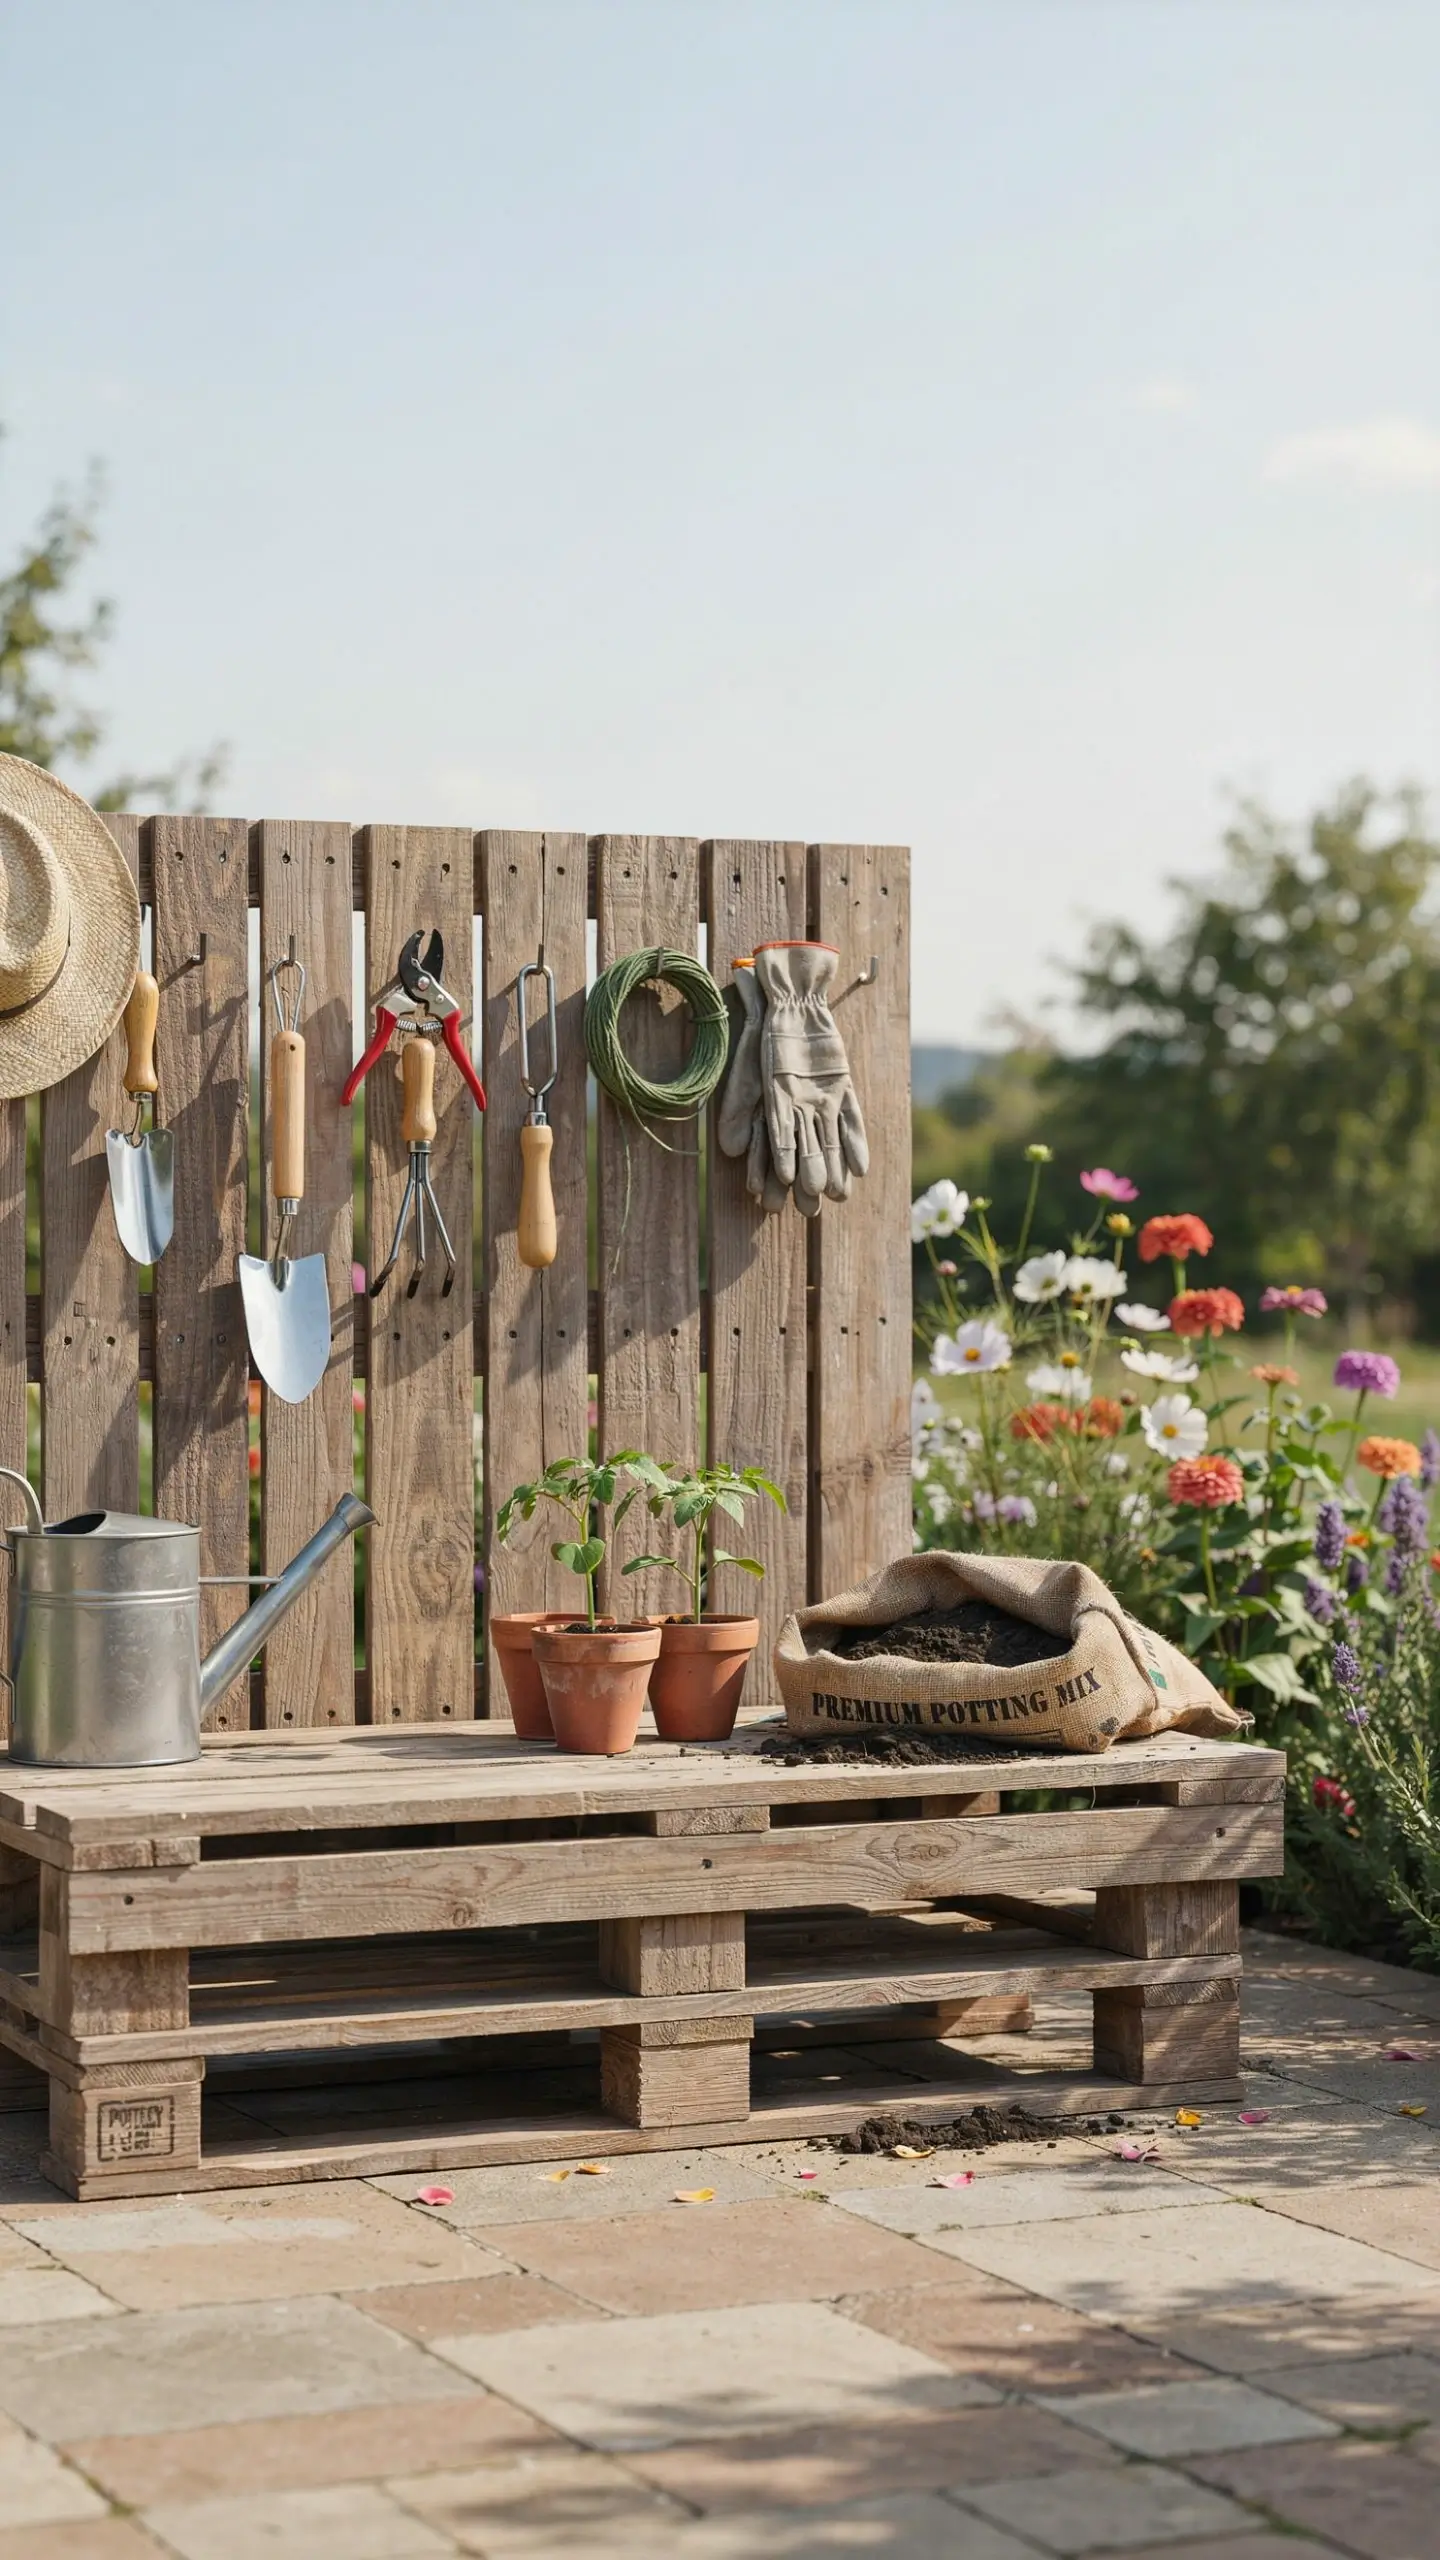
Stack two pallets horizontally to create a base, then add a third on top as the work surface. Attach a fourth pallet vertically at the back to act as a pegboard-style tool organizer. Hang hooks or bend wire through the slats to hold trowels, gloves, pruners, and small pots.
A good potting bench keeps all your gardening supplies in one place and gives you a dedicated surface for repotting, seeding, and mixing soil. This version costs basically nothing and you can build it in an afternoon.
Sand everything smooth before use so you’re not pulling splinters out of your hands every time you reach for a tool.
- Best for: organized gardeners, anyone who seeds a lot of plants
- Cost: $0–15 for hooks and hardware
- Skill level: beginner to intermediate
14. A Kid’s Garden Patch
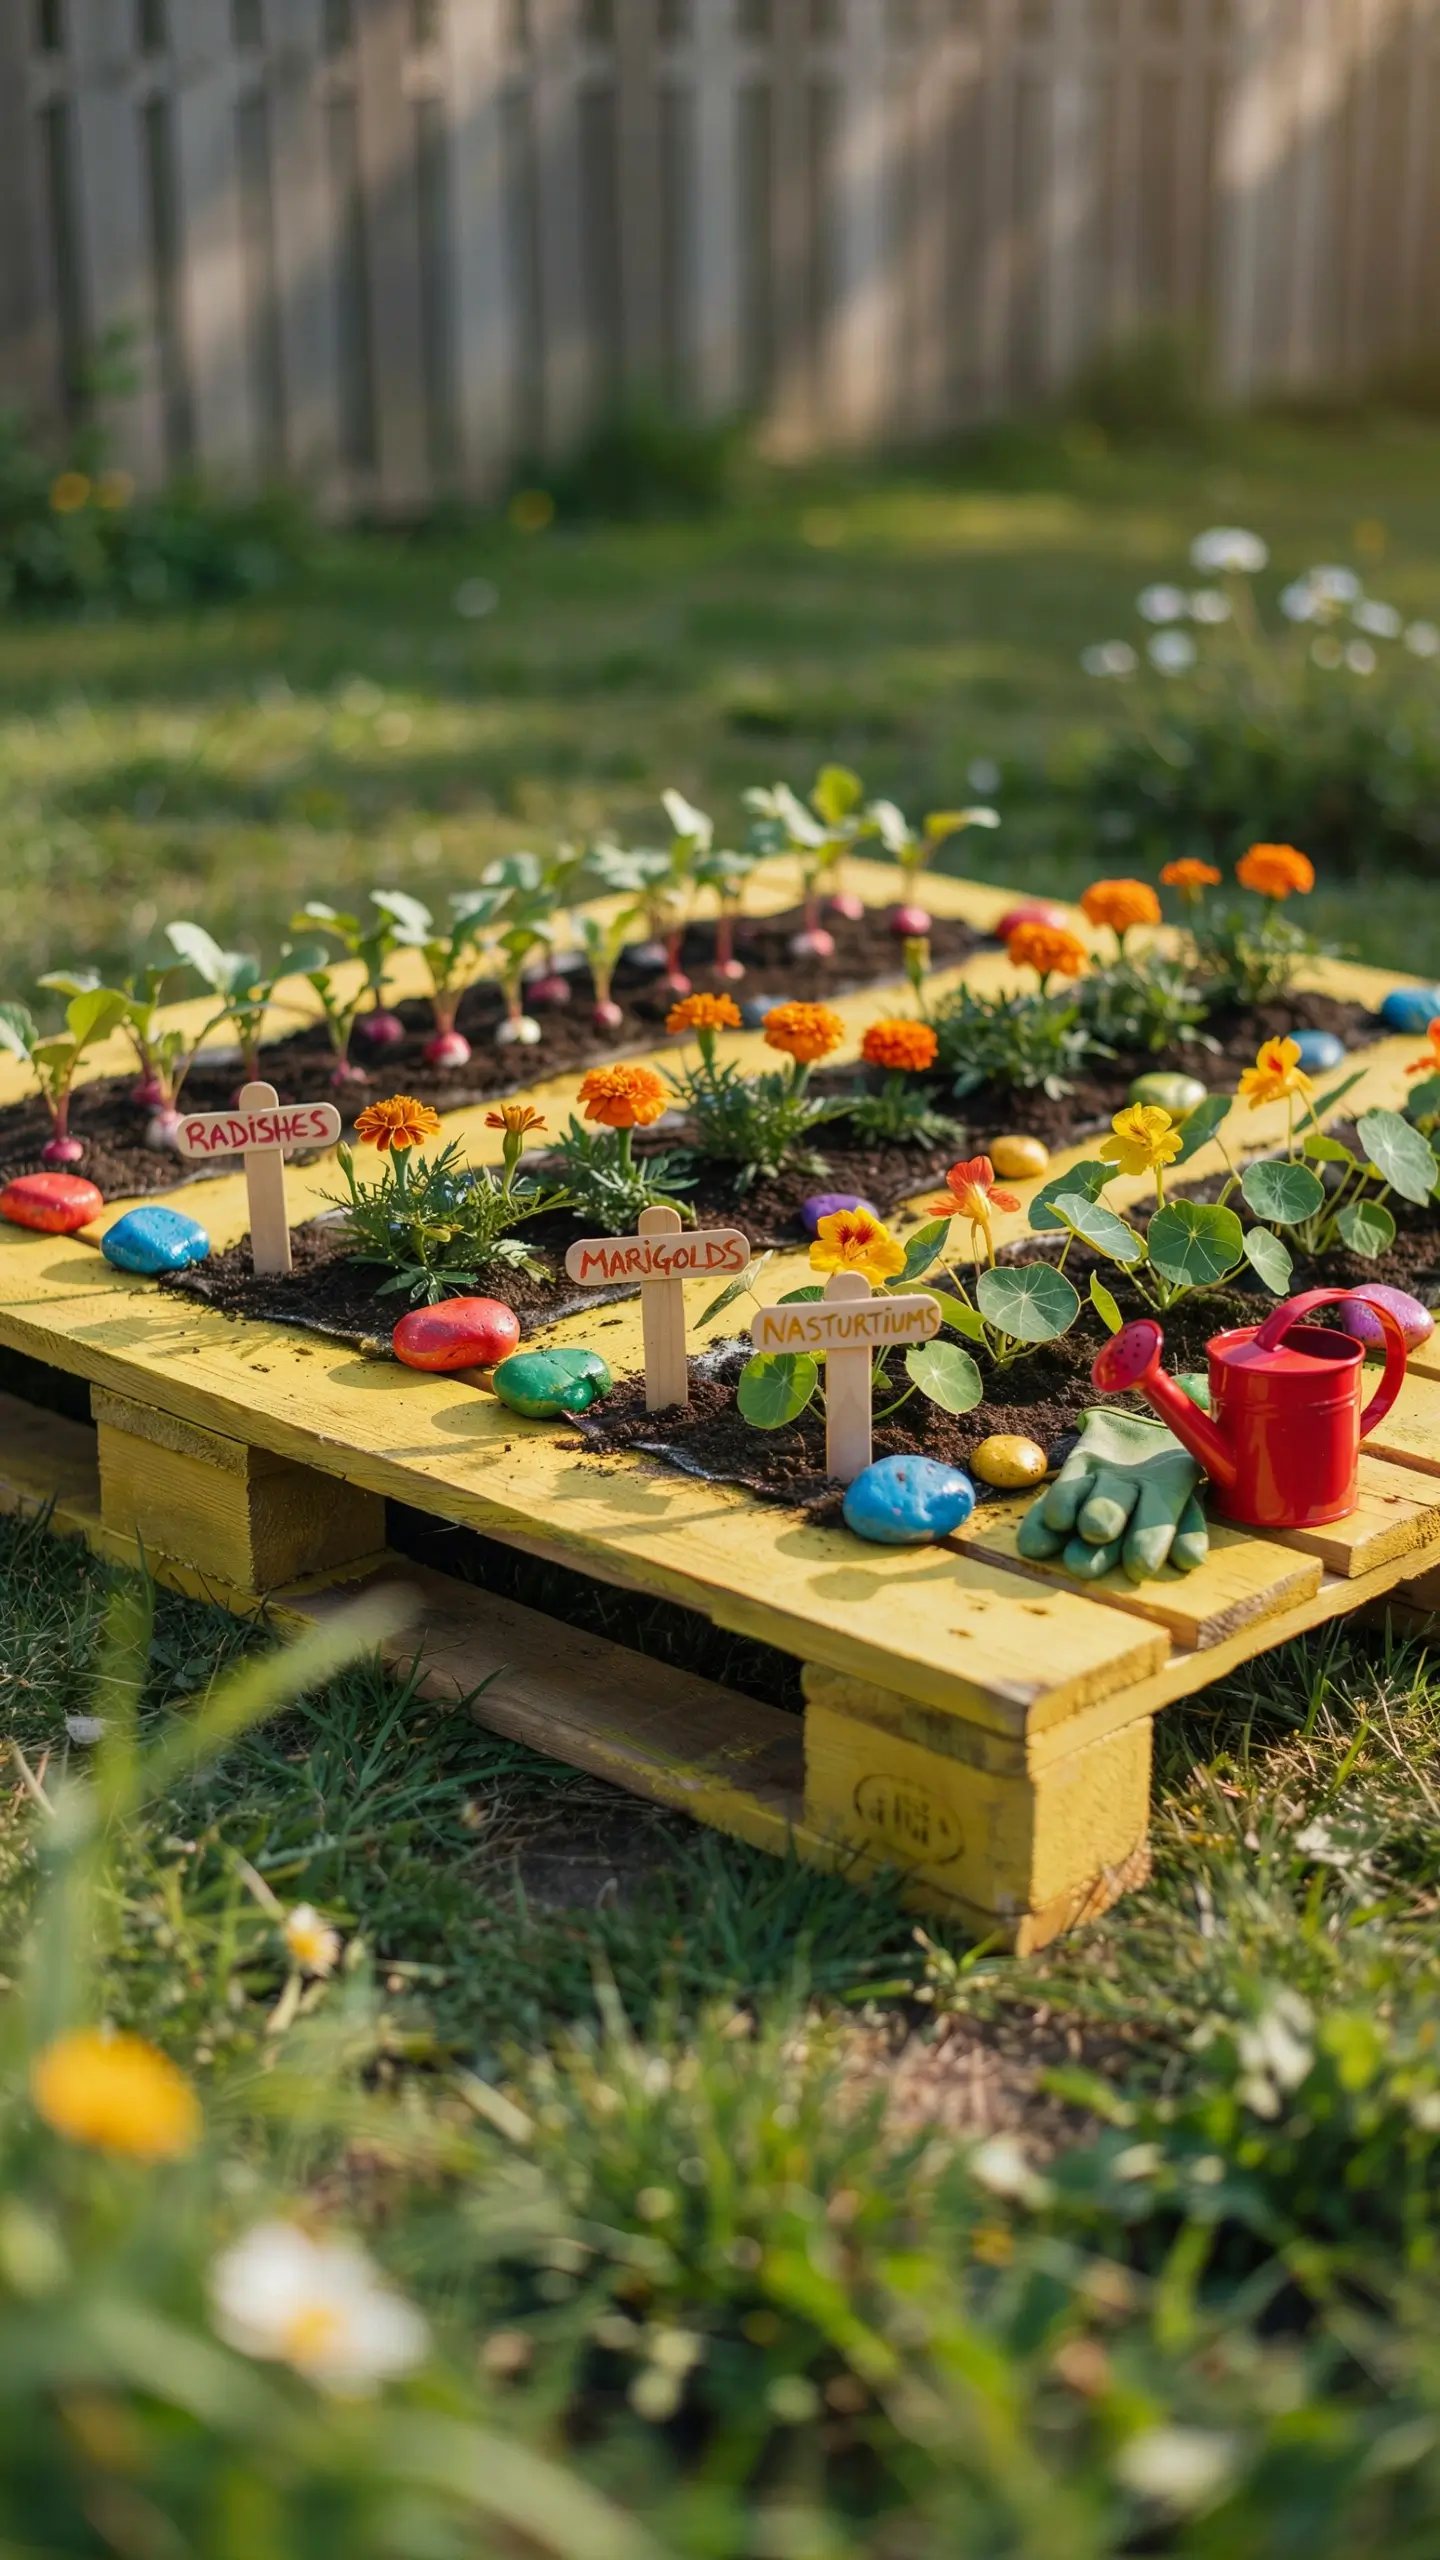
Cut a pallet down to about half its original size (a jigsaw works well here) and lay it flat. Line with landscape fabric, fill with potting mix, and plant a dedicated kid’s garden section with easy-to-grow crops: marigolds, nasturtiums (edible flowers!), radishes, and cherry tomatoes.
Give the pallet a coat of bright paint and let your child help pick the plants and label the rows with painted rocks or popsicle sticks. Radishes mature in as little as 25 days, which is fast enough to hold a young child’s interest. Nasturtiums bloom quickly and the flowers taste peppery in salads, which kids find fascinating.
This teaches the whole garden cycle in a kid-sized, manageable patch that feels entirely theirs.
- Best for: families, homeschoolers, backyard gardens
- Cost: $10–20 plus seed packets
- Skill level: beginner (great to do with kids)
15. A Balcony Herb Garden for Renters
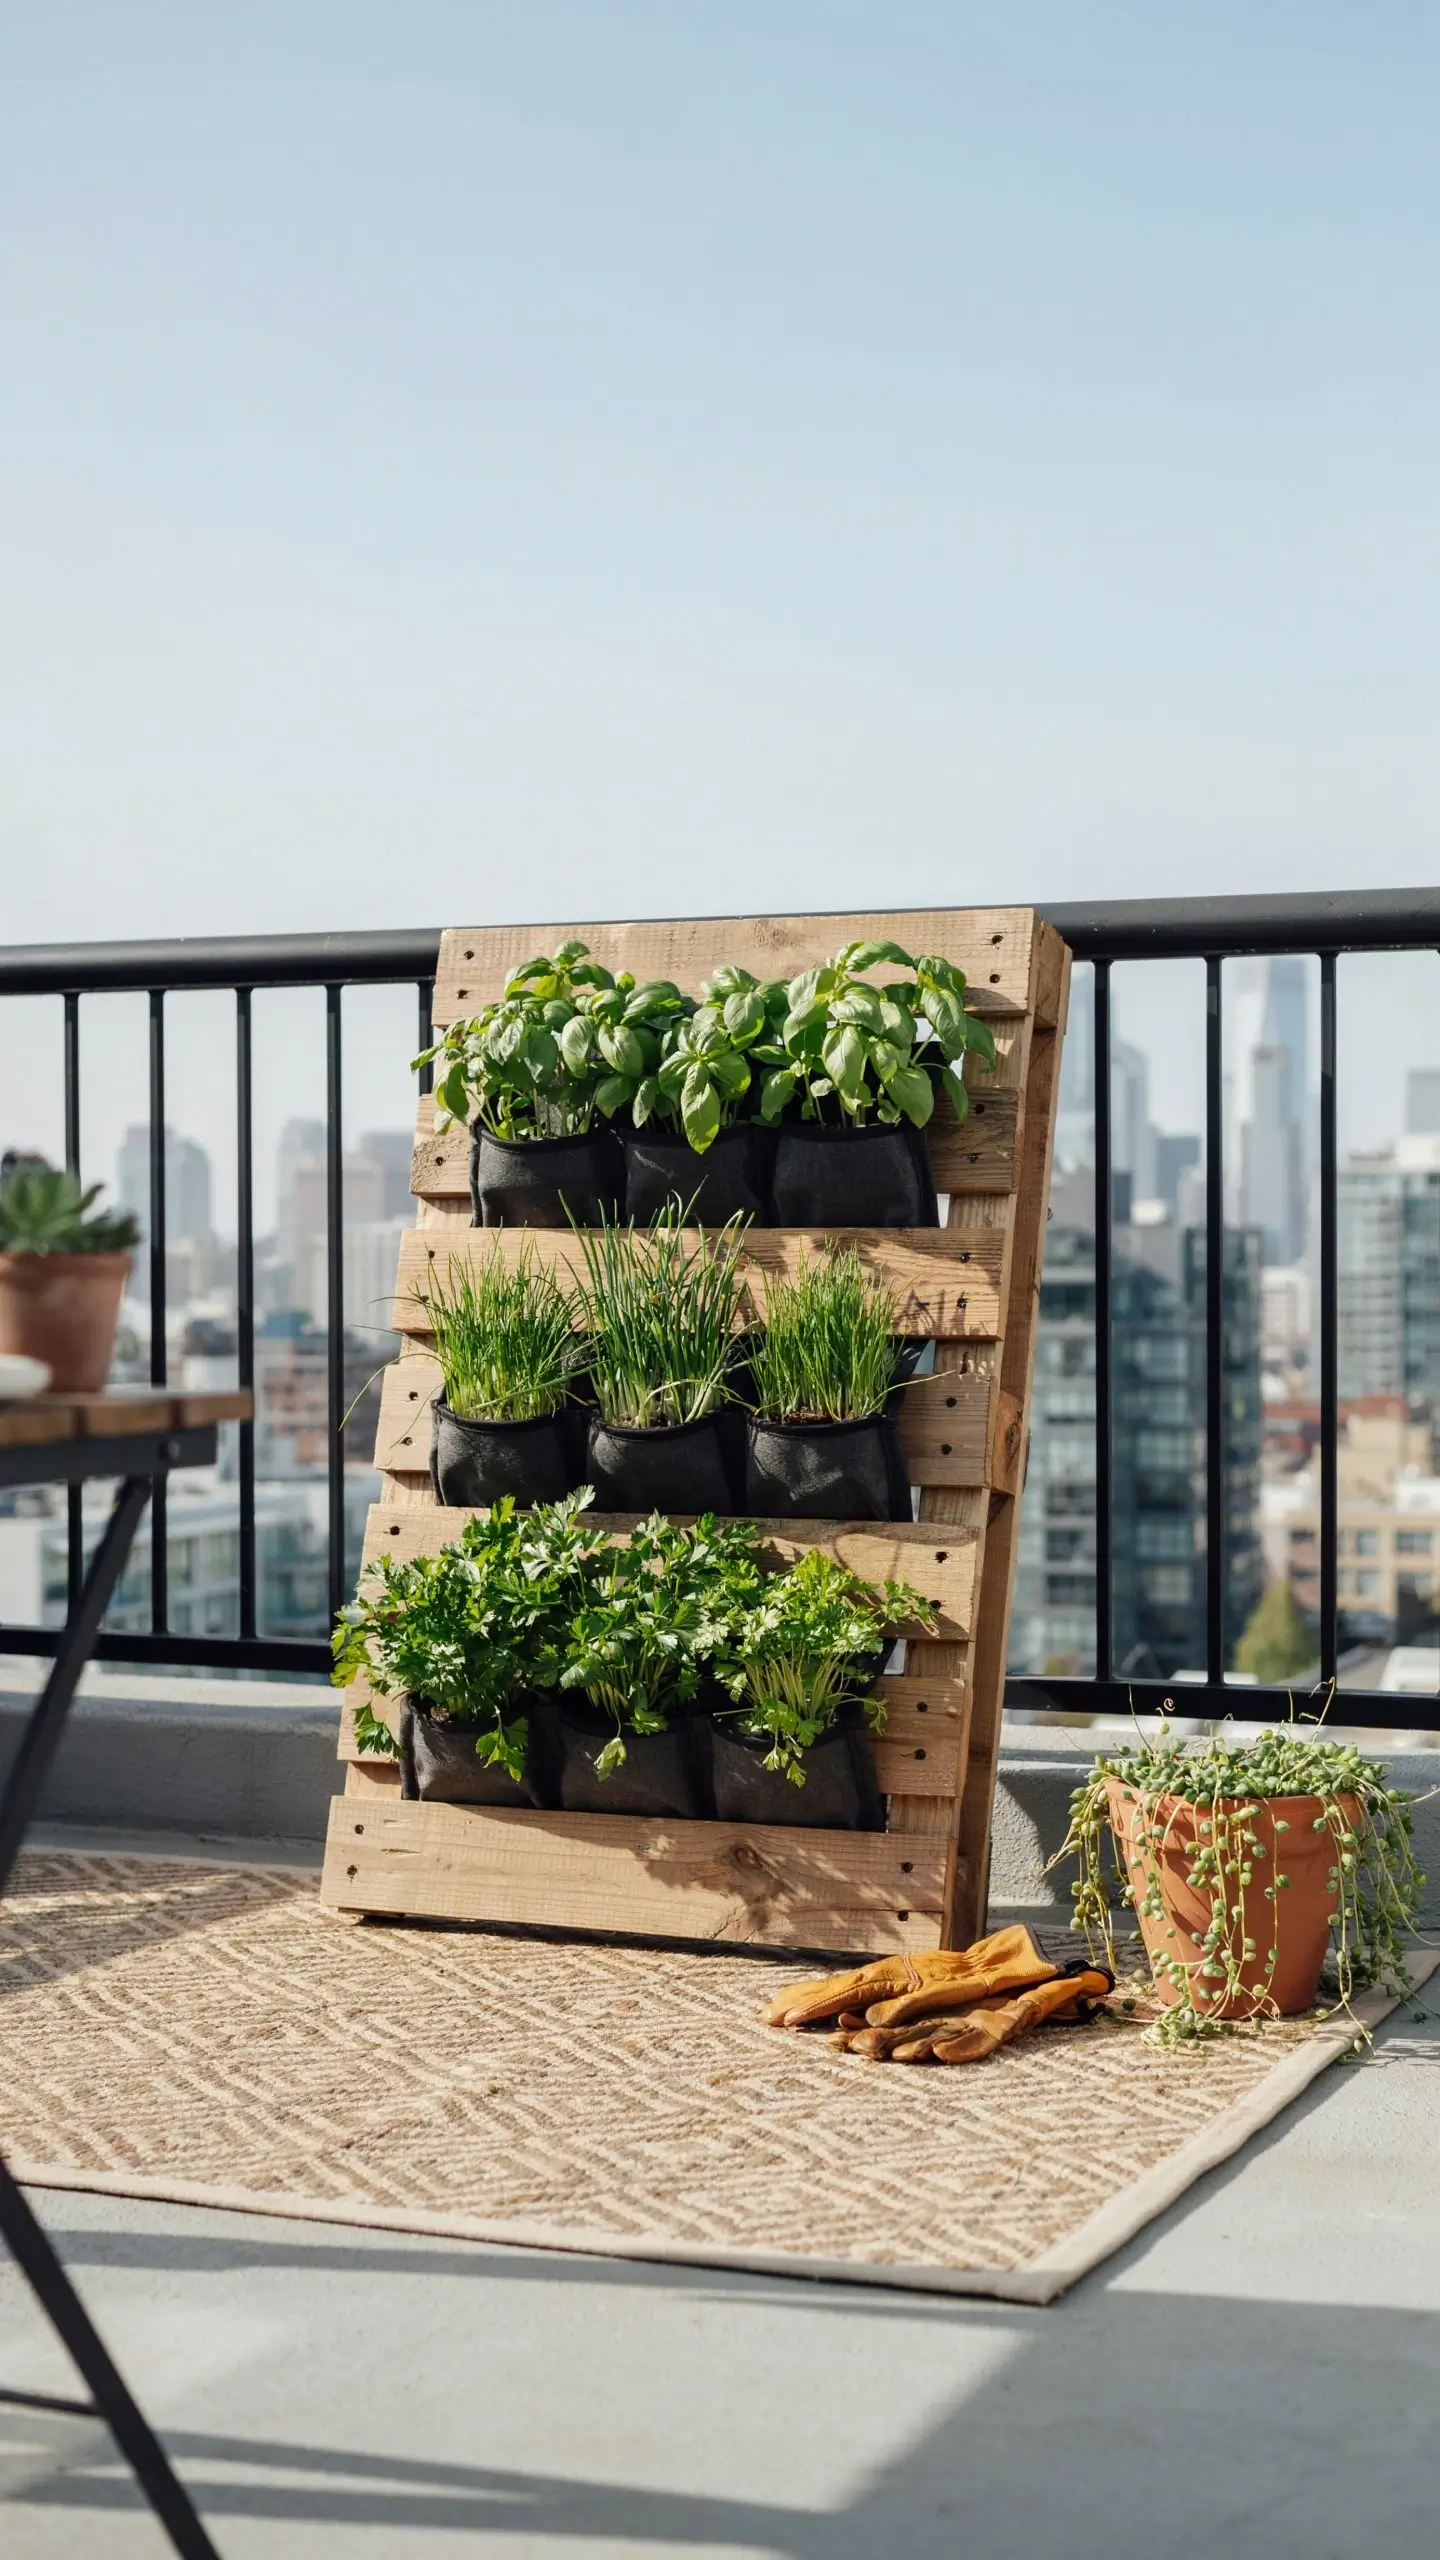
This is the project that makes pallet gardening accessible for renters and apartment dwellers. Stand a single HT pallet upright on your balcony, leaning it at a slight angle against the wall or railing without attaching it to anything. It needs no drilling, no mounting hardware, and no landlord permission.
Fill the rows with landscape fabric pockets and potting soil, then plant compact herbs: basil, thyme, flat parsley, chives, and mint (in its own contained pocket). The pallet leans against the surface but doesn’t damage it.
When you move out, you pick up the whole thing and take it with you. Your herb garden moves with you between rentals, which is something a traditional garden bed can never do.
- Best for: renters, apartment balconies, small patios
- Cost: $12–18 for soil and herb starts
- Skill level: beginner — no tools required
16. A Colorful Flower Fence
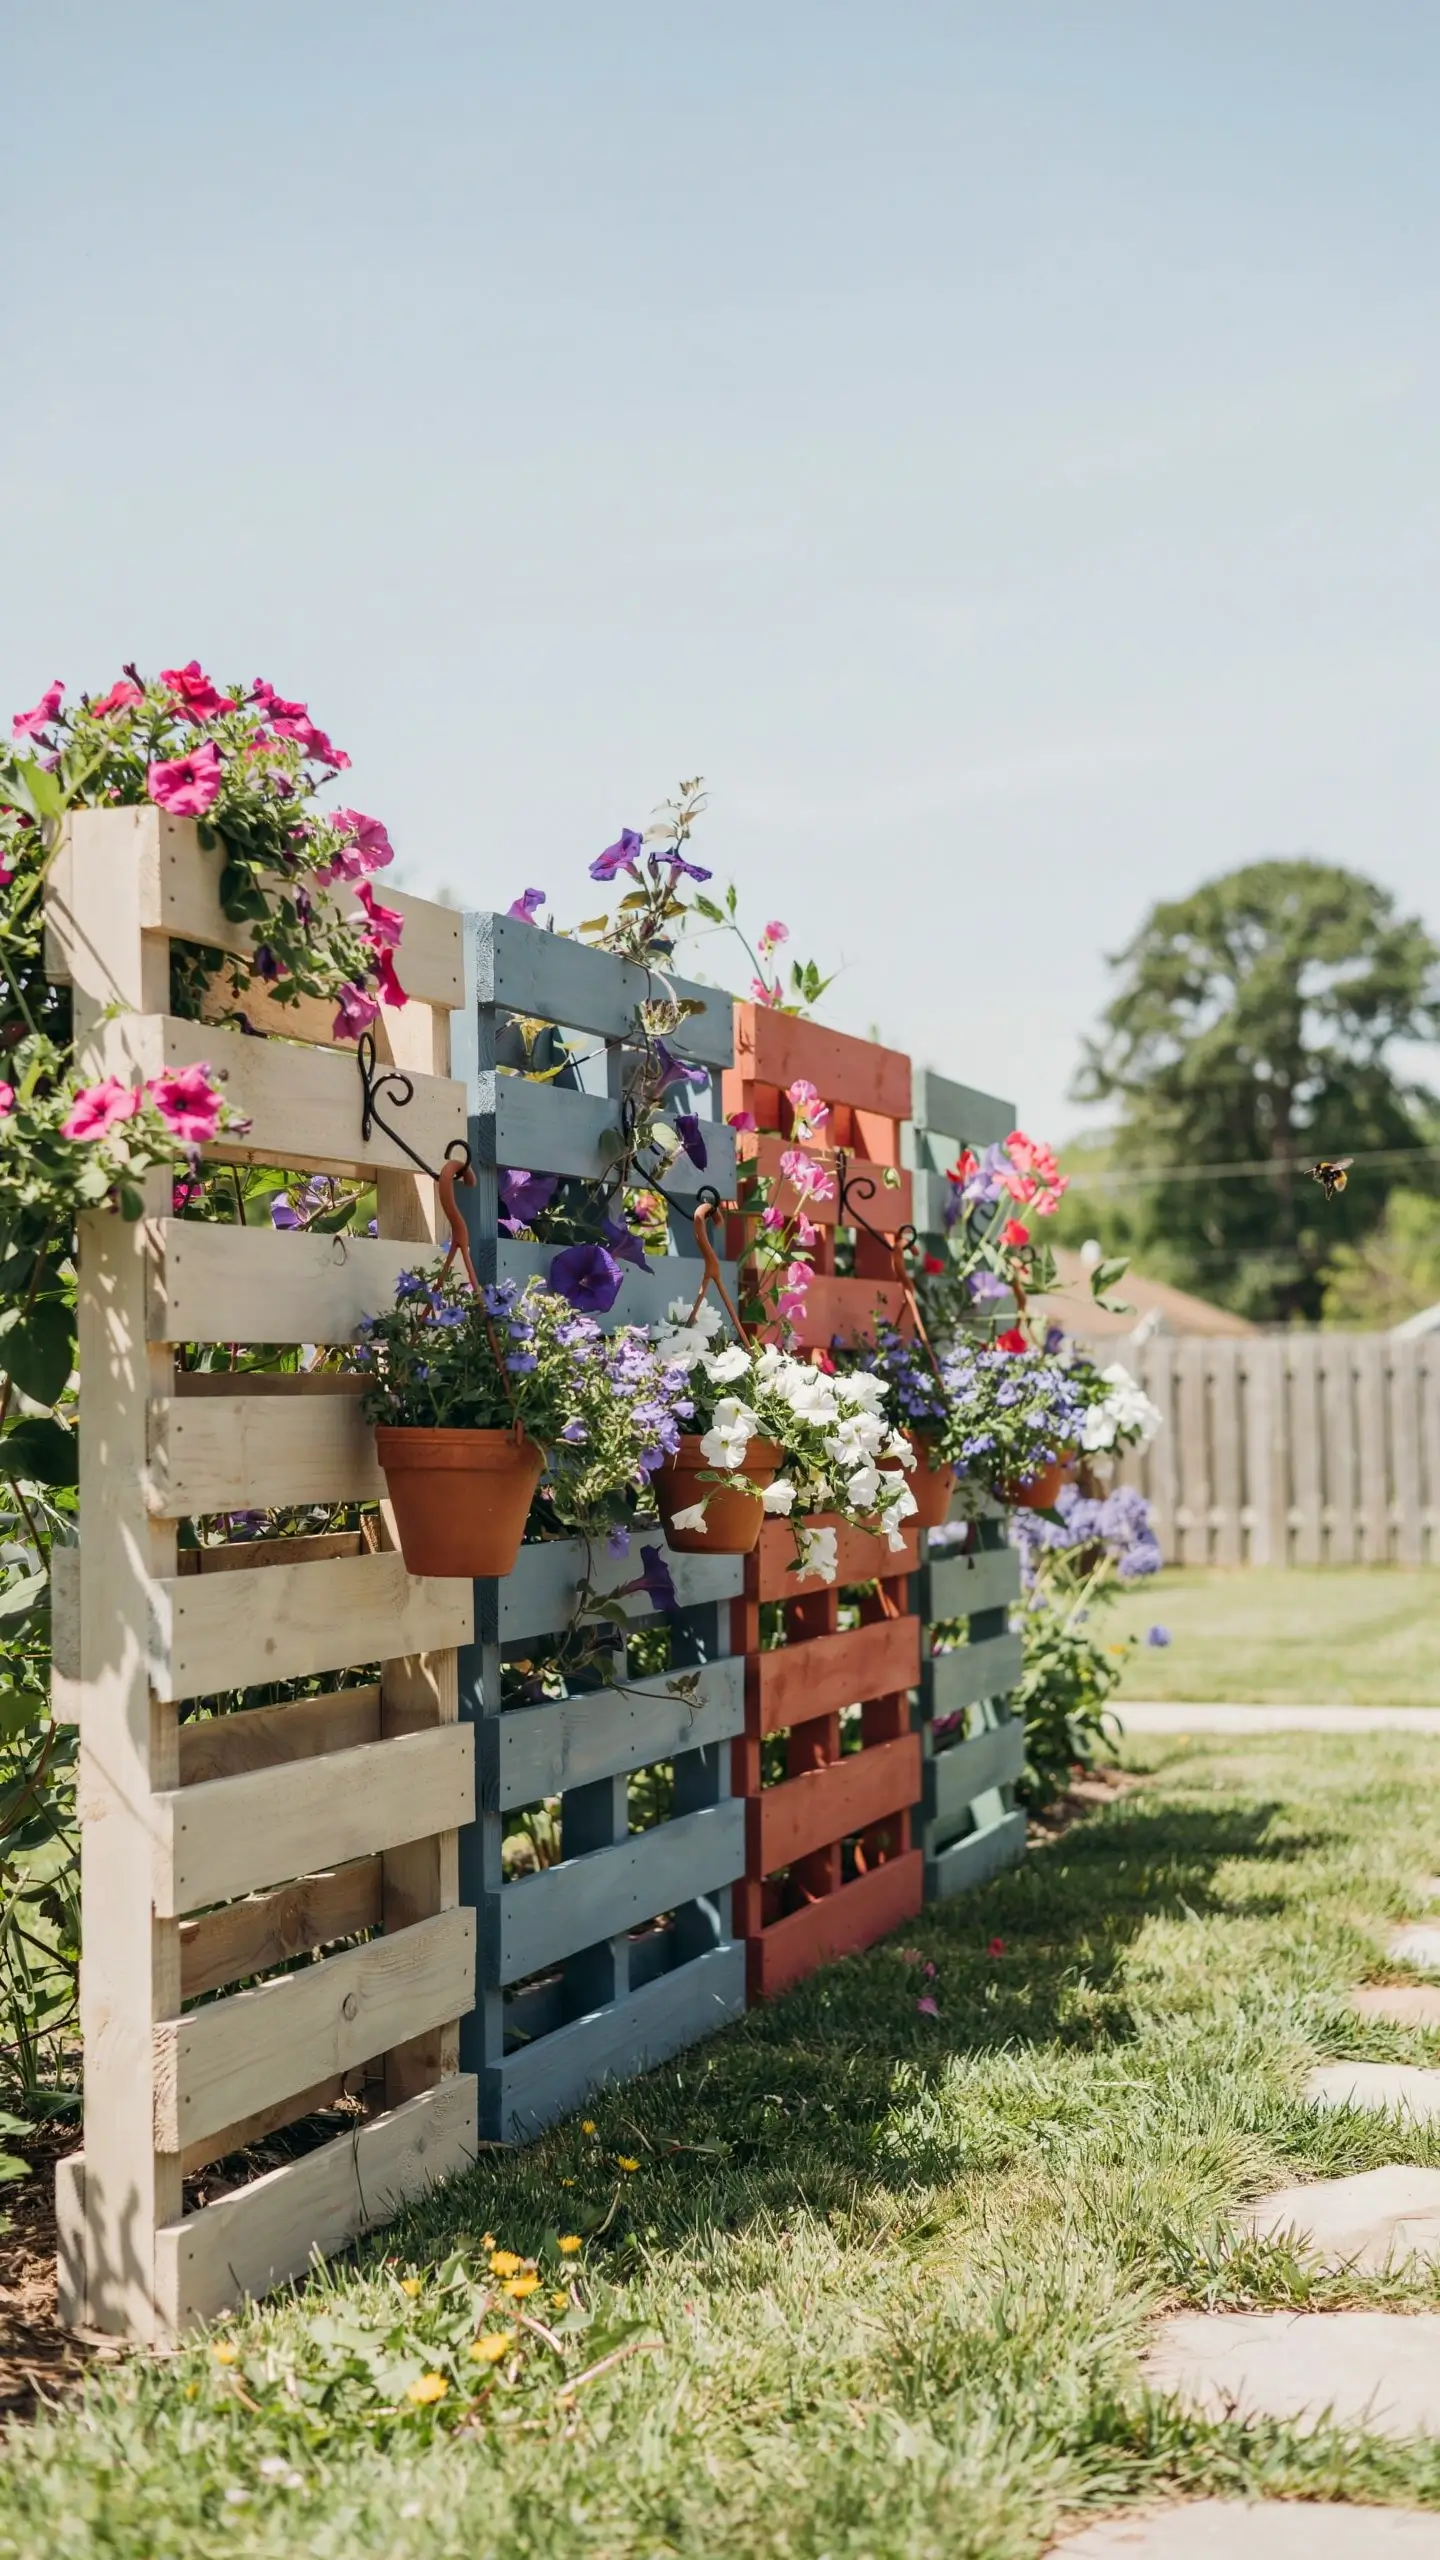
Stand several pallets side by side along a property line or yard perimeter, secured together with zip ties or deck screws. Paint each pallet a different color from a cohesive palette (think French country: cream, dusty blue, terracotta, and sage) or keep them all the same color for a cleaner look.
Plant trailing and climbing flowers at the base: petunias, morning glories, sweet peas, and black-eyed Susans all work beautifully. Add small hooks between the slats to hang lightweight pots of additional flowers at different heights.
The result is a living, colorful boundary that’s genuinely beautiful from both sides and far cheaper than a wood or vinyl fence.
- Best for: yard boundaries, garden room dividers, anyone who hates boring fences
- Cost: $20–40 for paint, hooks, and plants
- Skill level: beginner
17. A Solar-Powered Pallet Garden Wall
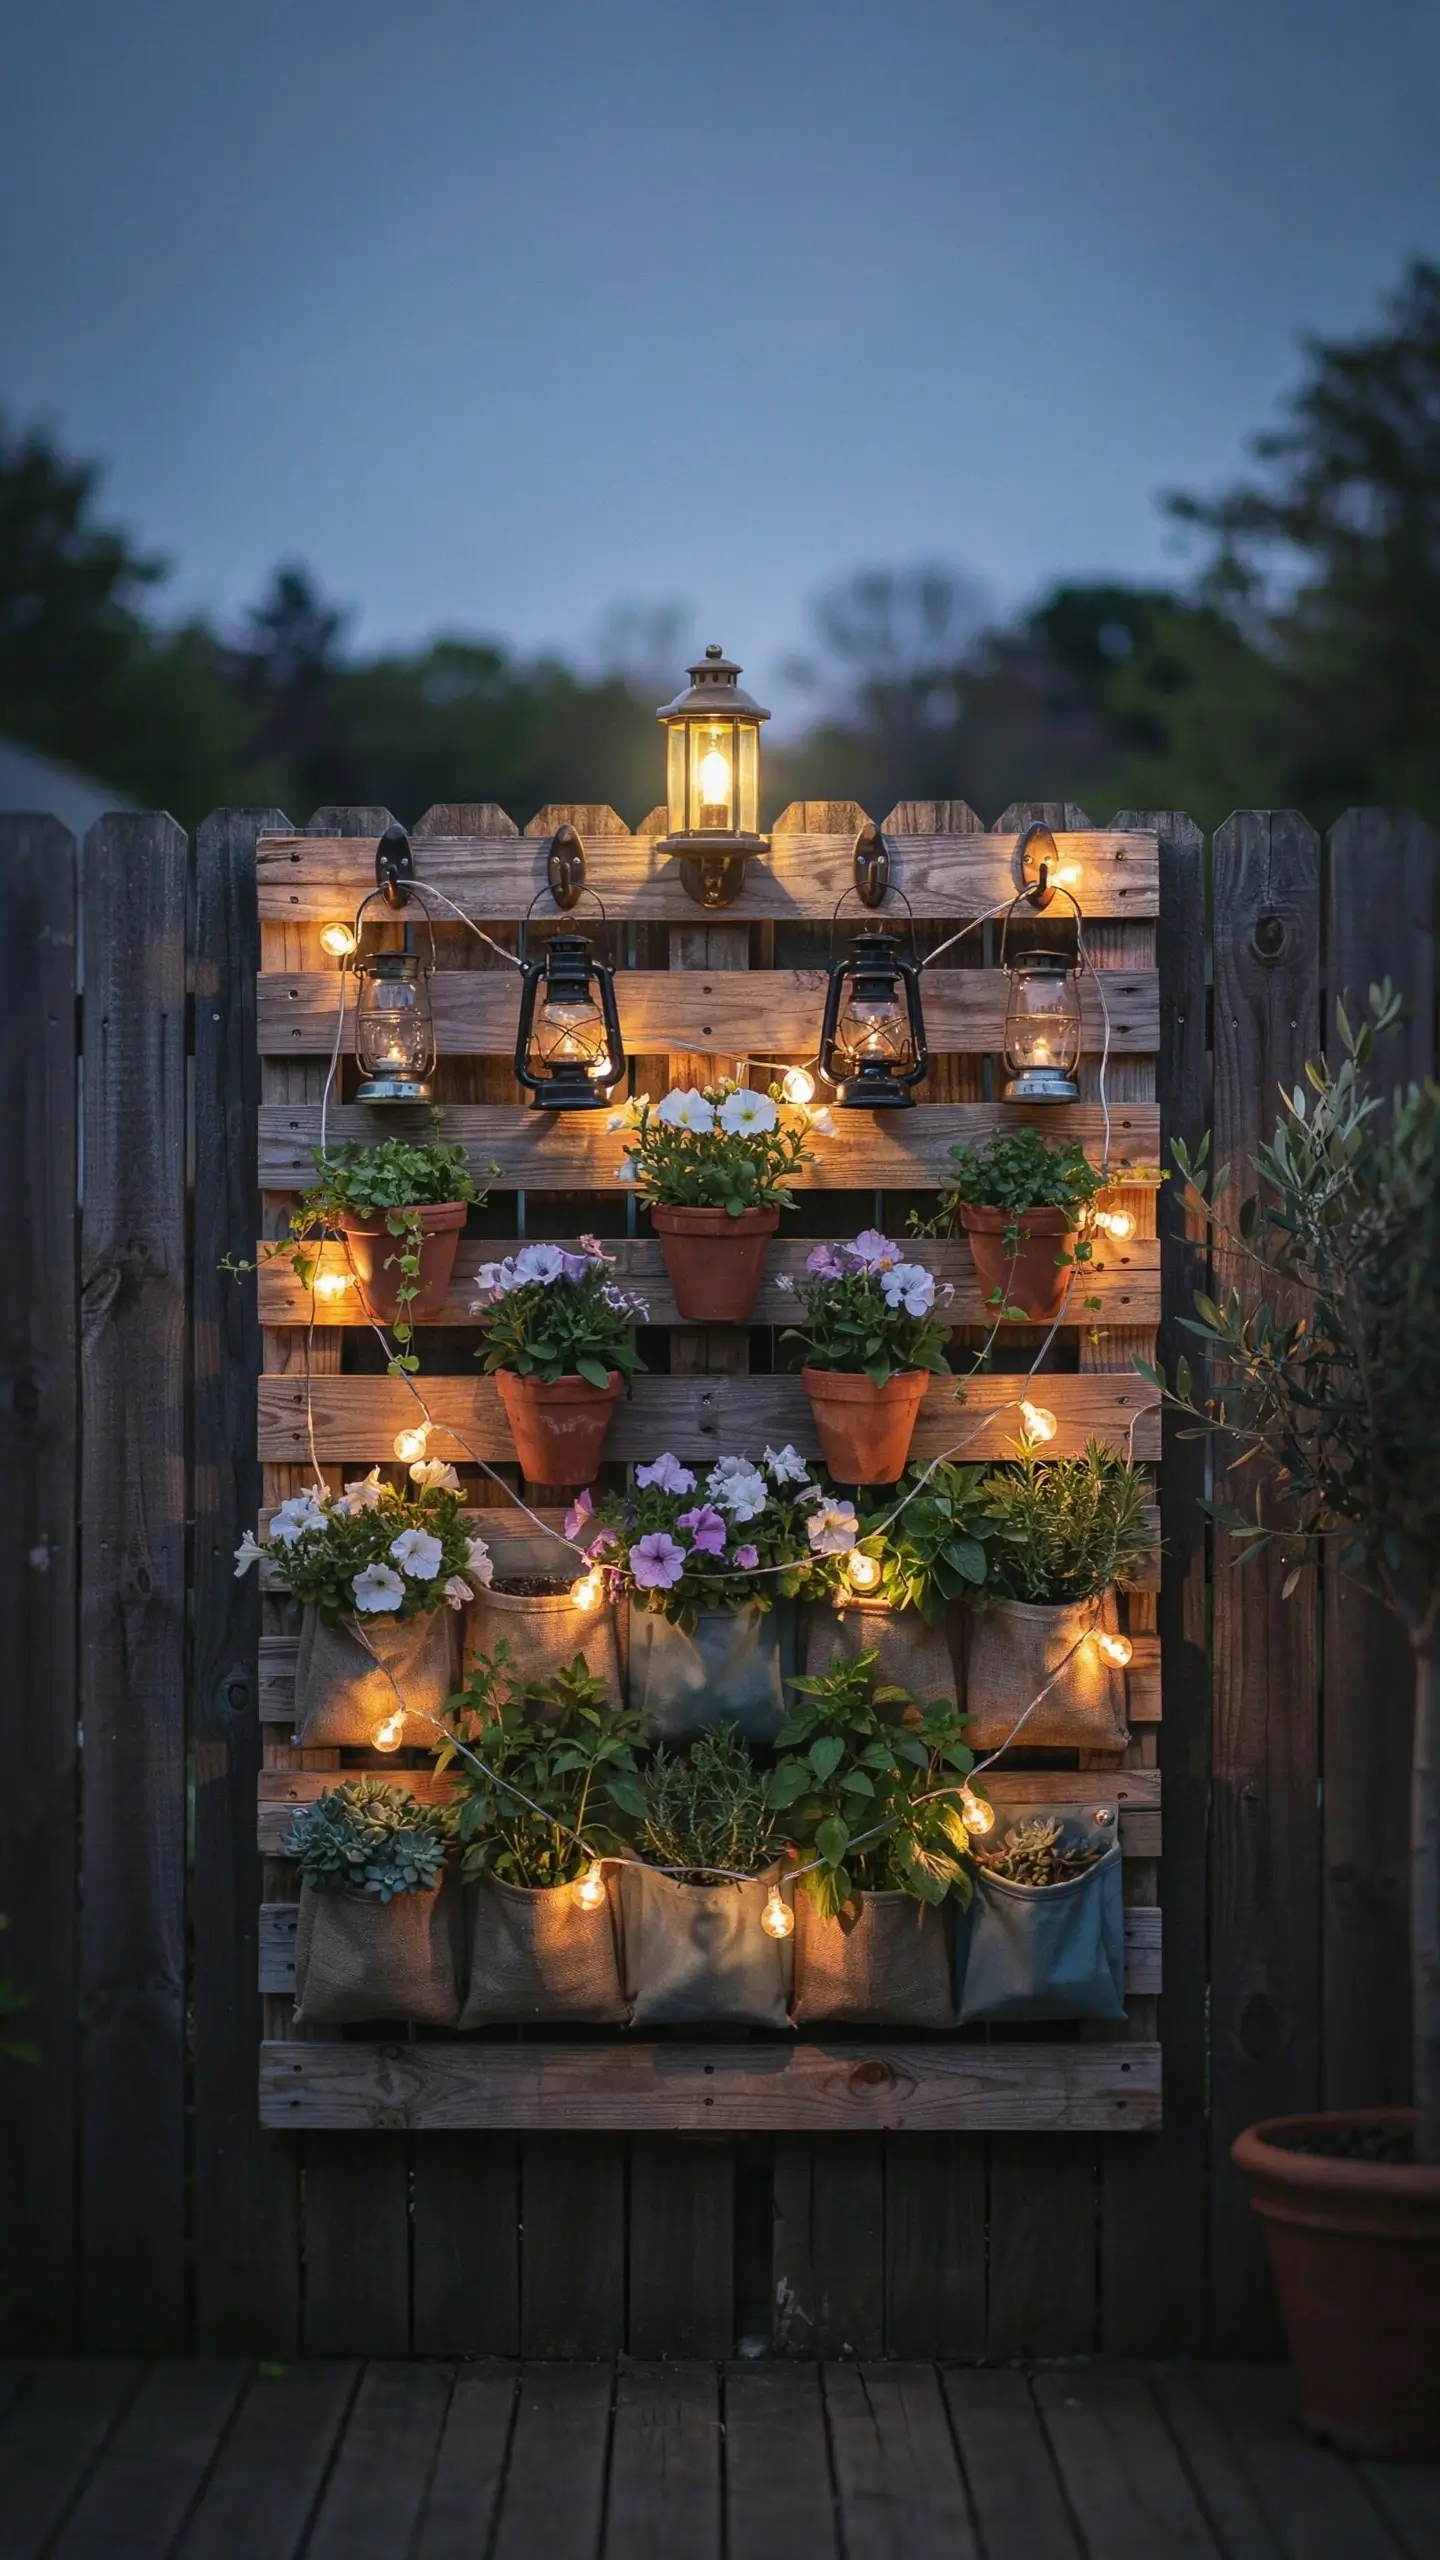
This is a more ambitious version of the fairy-light wall (Idea #5), built with intention as an outdoor focal point. Mount a pallet vertically on a fence and create multiple planting levels using small terracotta pots wired through the slats, fabric pocket planters in each row, and small hooks for hanging glass lanterns.
Run solar string lights through and around the entire structure. Add a solar-powered lantern at the top. Plant trailing and tumbling plants like creeping Jenny, string of pearls, or wave petunias so the greenery drapes between the light strings.
At night this becomes a glowing garden installation that looks like it belongs in a high-end boutique hotel courtyard. In reality it took an afternoon to build and costs under $50.
- Best for: patios, back decks, outdoor entertaining areas
- Cost: $35–55
- Skill level: intermediate
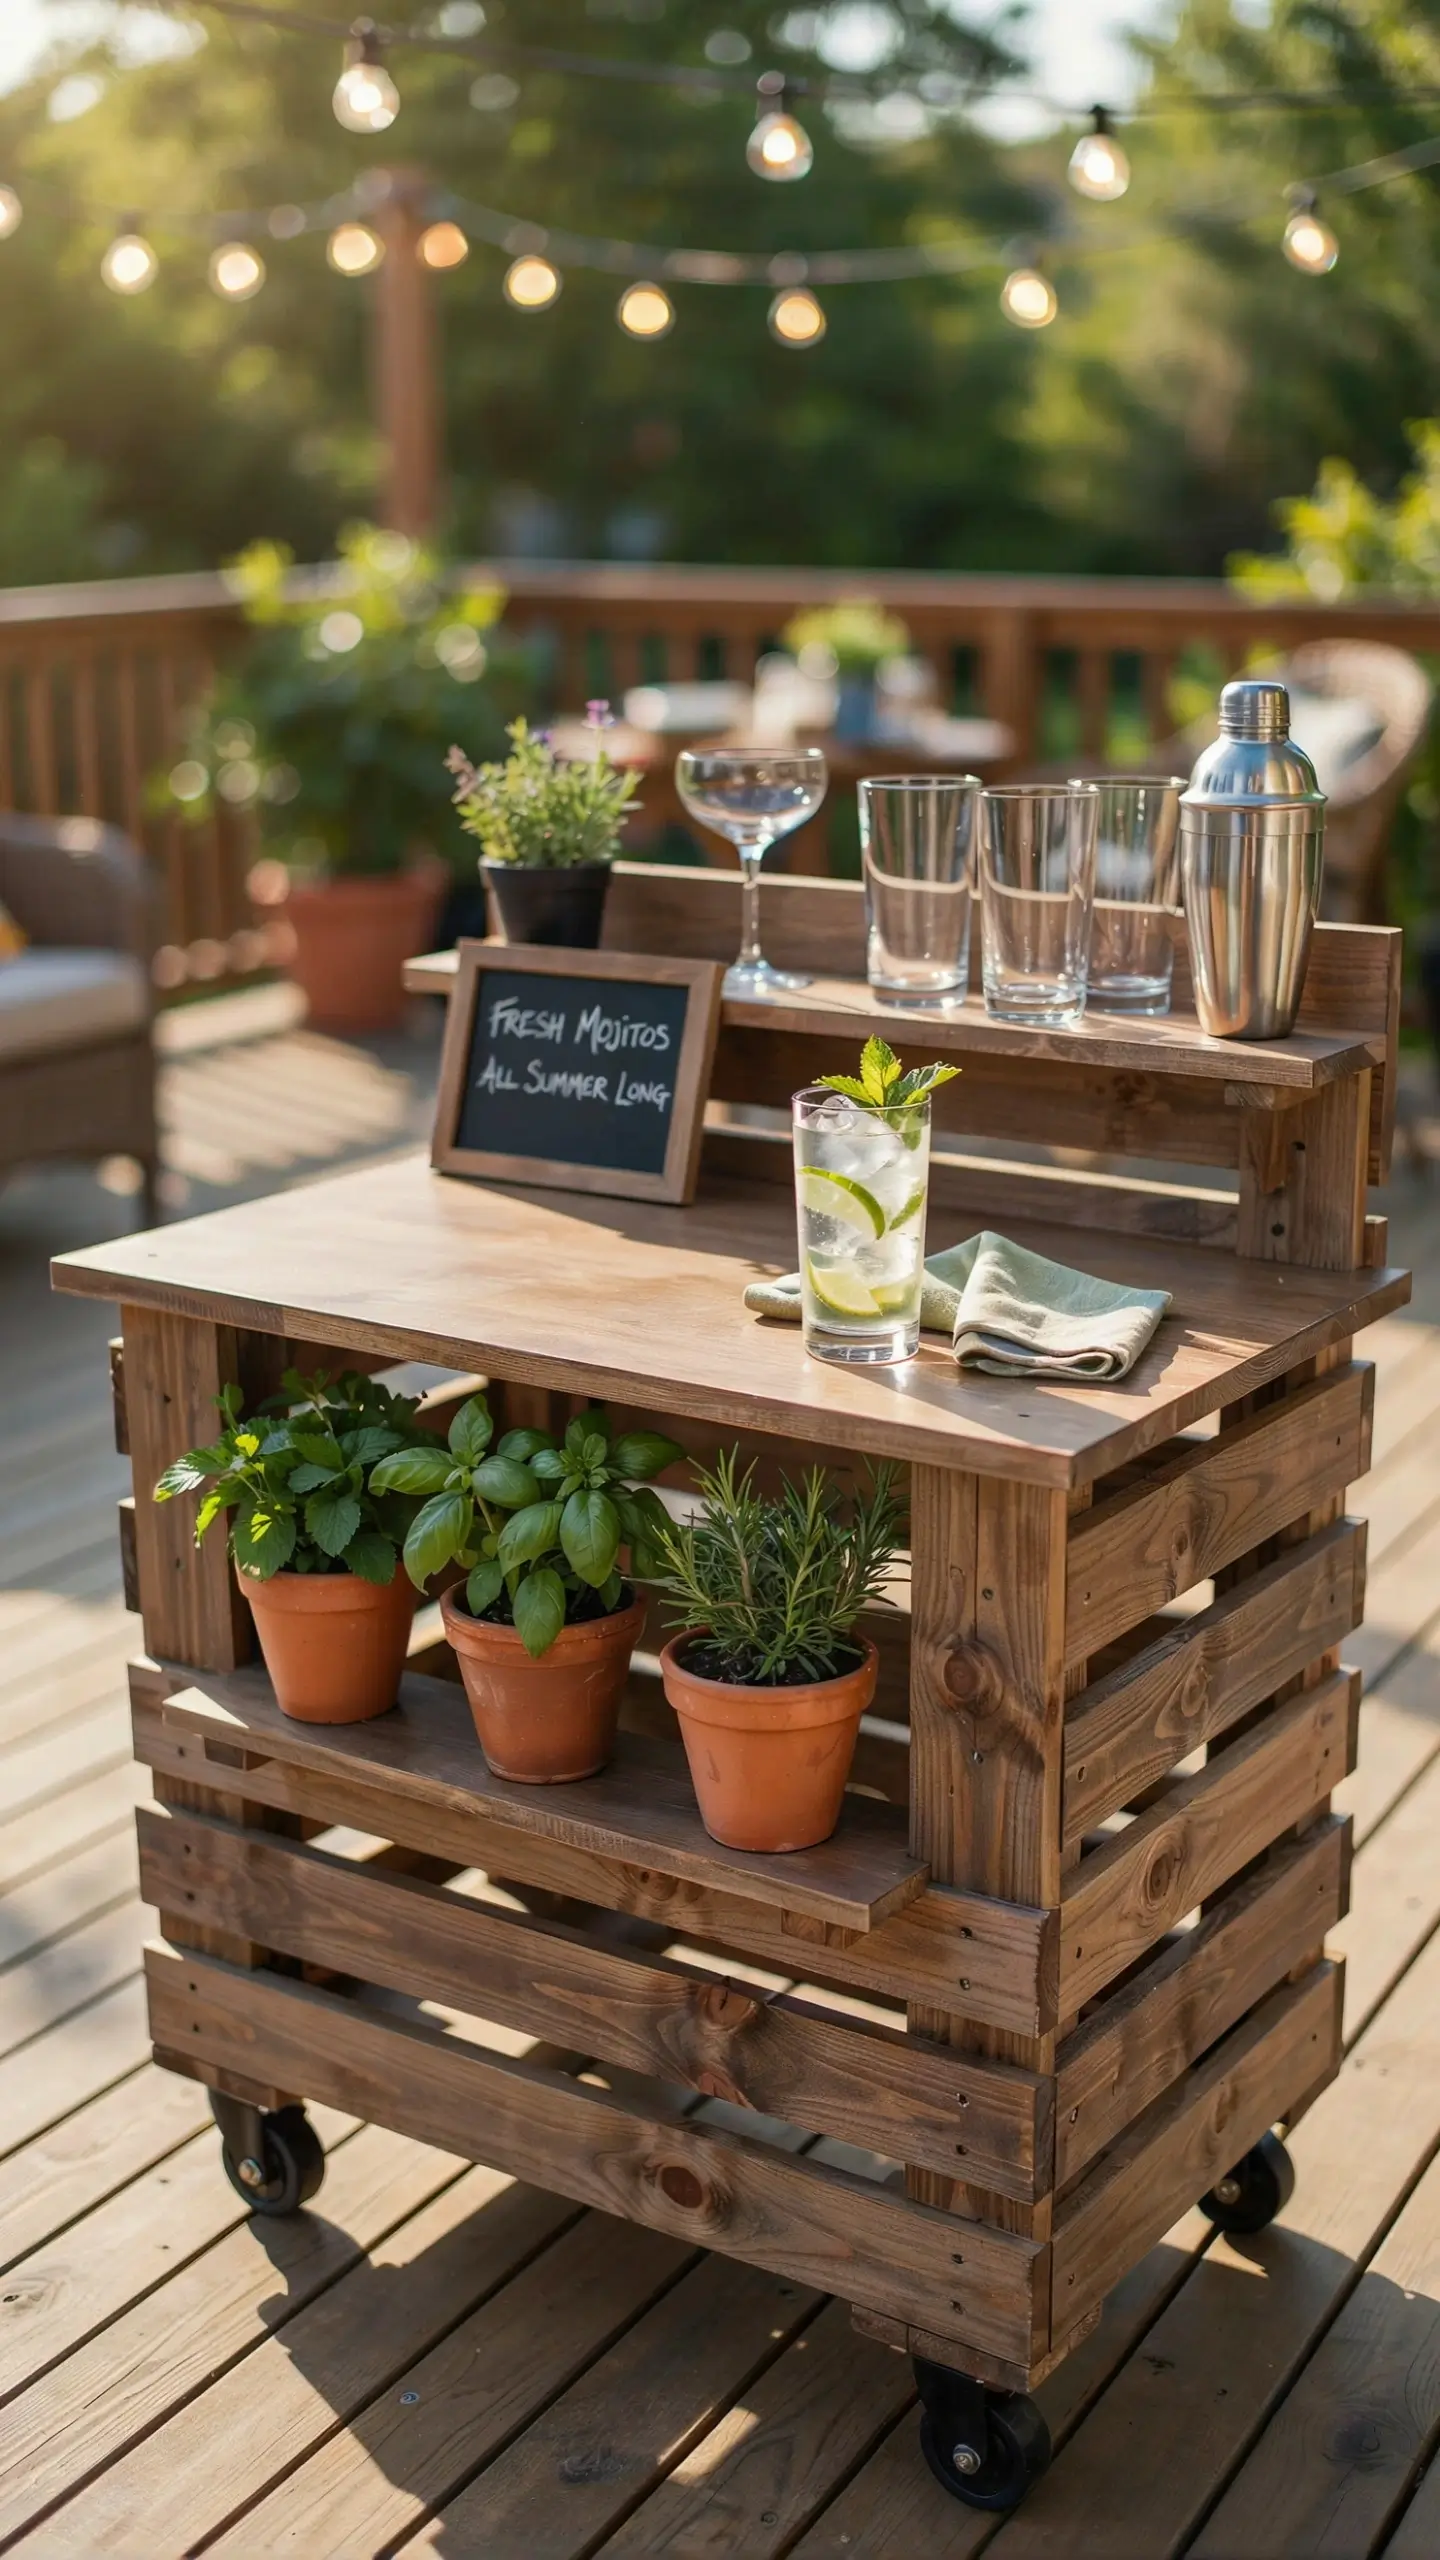
18. A Pallet Planter Bar for Entertaining
Stack two or three pallets to create a rectangular base, then nail or screw them together for stability. Add a flat plywood top cut to size for the bar surface. Mount a fourth pallet vertically at the back to act as shelving for glasses, bottles, and small potted plants.
Tuck compact herb pots between the shelved items: fresh mint for mojitos, basil for garnishes, rosemary for cocktails. Add wheels to the base with locking casters and you have a completely mobile outdoor bar that also functions as an herb station.
This is the project that surprises people the most. They walk into a backyard, see this thing, and genuinely cannot believe it’s made from pallets.
- Best for: outdoor entertaining, summer parties, deck spaces
- Cost: $35–60 (wheels and plywood are the main costs)
- Skill level: intermediate
Pallet Garden Mistakes to Avoid
A few things I learned the hard way so you don’t have to.
- Not sealing the wood. Raw pallet wood in contact with wet soil can rot surprisingly fast, sometimes within a single season. Apply an exterior wood stain or a natural linseed oil treatment before building anything that will sit directly on the ground or hold soil. It adds two hours to your project and doubles the lifespan.
- Using regular potting mix in vertical gardens. Standard potting soil is too heavy for vertical pallet planters and tends to pull away from the roots as it dries. Use a lightweight mix blended with coco coir or perlite to improve drainage and moisture retention.
- Planting edibles in non-HT pallets. This is covered in the opening section, but worth repeating: don’t plant anything you plan to eat in a pallet without verifying the HT stamp. For purely decorative flower displays, any safe, unstamped pallet is fine. For herbs and vegetables, HT only.
- Overloading a balcony. If you’re building pallet gardens on a balcony, know your weight limits. Most residential balconies are rated for 50 to 100 pounds per square foot. Wet soil is heavy. Use lightweight potting mixes and keep pots closer to the main building wall where structural support is strongest.
- Skipping drainage. Every pallet planter needs a way for water to escape, even vertical ones. Landscape fabric allows drainage while holding soil. If you’re inserting pots, make sure each pot has drainage holes.
Best Plants for Pallet Gardens
Not every plant is a good fit for the shallow soil depth of a pallet.
Herbs That Thrive
Basil, thyme, oregano, flat parsley, chives, mint (contained), lemon balm, sage, and cilantro. All have shallow roots and don’t mind slightly irregular watering.
Flowers That Work Well
Petunias, lobelia, alyssum, violas, pansies, nasturtiums, marigolds, and creeping Jenny. Look for “compact” or “trailing” varieties specifically.
Vegetables for Flat Raised Bed Pallets
Lettuce, spinach, kale, arugula, radishes, bush beans, and strawberries. Shallow-rooted crops work best.
What to Avoid
Deep-rooted vegetables like carrots, parsnips, or large tomatoes in vertical pallets. They need more root depth than a pallet pocket provides. Save those for deeper beds.
How to Keep a Pallet Garden Alive
This part matters as much as the build.
Vertical pallet gardens dry out faster than ground-level planters because moisture evaporates from multiple exposed sides. In summer heat, water at least three times a week, checking by pushing a finger into the soil. If it’s dry an inch down, it’s time to water.
Feed herbs and flowers with a diluted liquid fertilizer every two weeks during the growing season. This matters more in pallet planters than in-ground gardens because regular watering flushes nutrients out of the limited soil volume faster.
Remove dead or spent plants promptly and replace them with fresh starts. The visual density is part of what makes pallet gardens look so good. Gaps with bare soil undercut the whole effect.
In colder climates, bring vertical pallet planters indoors or into a garage for winter if they contain tender perennials. Succulents planted in outdoor pallet walls may need to be overwintered inside depending on your zone.
The Bottom Line
DIY pallet garden ideas are popular for a reason: they’re cheap, flexible, and genuinely beautiful when done right. A single free pallet can become a living herb wall, a vertical flower display, or a self-contained raised bed depending on what you need and how much time you have. Most of these projects take one afternoon and cost under $30.
Start with one idea that solves an actual problem in your space, whether that’s growing herbs on a rental balcony, adding privacy to a patio, or giving the kids their own garden patch. Build it, live with it for a season, and then expand. Pallet gardening tends to become addictive once you see the first results.
If you’ve already tried a pallet garden project, I’d love to hear about it in the comments. What did you build, what grew well, and what would you do differently? Drop it below.


No Comment! Be the first one.