




15 Kids Craft Room Ideas That Actually Get Used (and Stay Organized)
You know the moment. You walk into the living room and find crayon shavings on the carpet, a puddle of dried glue on the coffee table, and your good scissors somewhere inside a pile of construction...

You know the moment. You walk into the living room and find crayon shavings on the carpet, a puddle of dried glue on the coffee table, and your good scissors somewhere inside a pile of construction paper scraps. Nobody planned this. It just happened, the way it always does when creative kids and shared spaces collide.
Here’s the thing though: a little bit of setup can change everything. A dedicated space for kids to make messes, create freely, and find their supplies without tearing apart the kitchen drawer? It’s one of those small investments that pays back in calm, in confidence, and honestly, in fewer ruined tablecloths.
You don’t need a whole room. You don’t need a big budget. You just need a plan that fits your actual home and your actual kids.
These kids craft room ideas range from full room setups to single-corner solutions. Whether you have a spare bedroom, a closet, a corner of a shared space, or just a rolling cart, there’s something here you can use today.
Before You Start: Ask Yourself These Two Questions
Before buying a single bin or shelf, think about how your kids actually craft. Do they like to paint and draw? Build with cardboard and tape? Do bead projects and jewelry making? Work with clay or slime?
The best kids craft rooms are built around what your child actually does, not what a generic “art room” is supposed to look like. A painter needs different storage than a kid who’s obsessed with origami.
Also ask: how much independence do you want your child to have? If they’re old enough to use the space unsupervised, supplies need to be organized so they can find things on their own. Scissors need a home. Paper needs a home. This makes the whole thing actually work.
1. The Pegboard Supply Wall
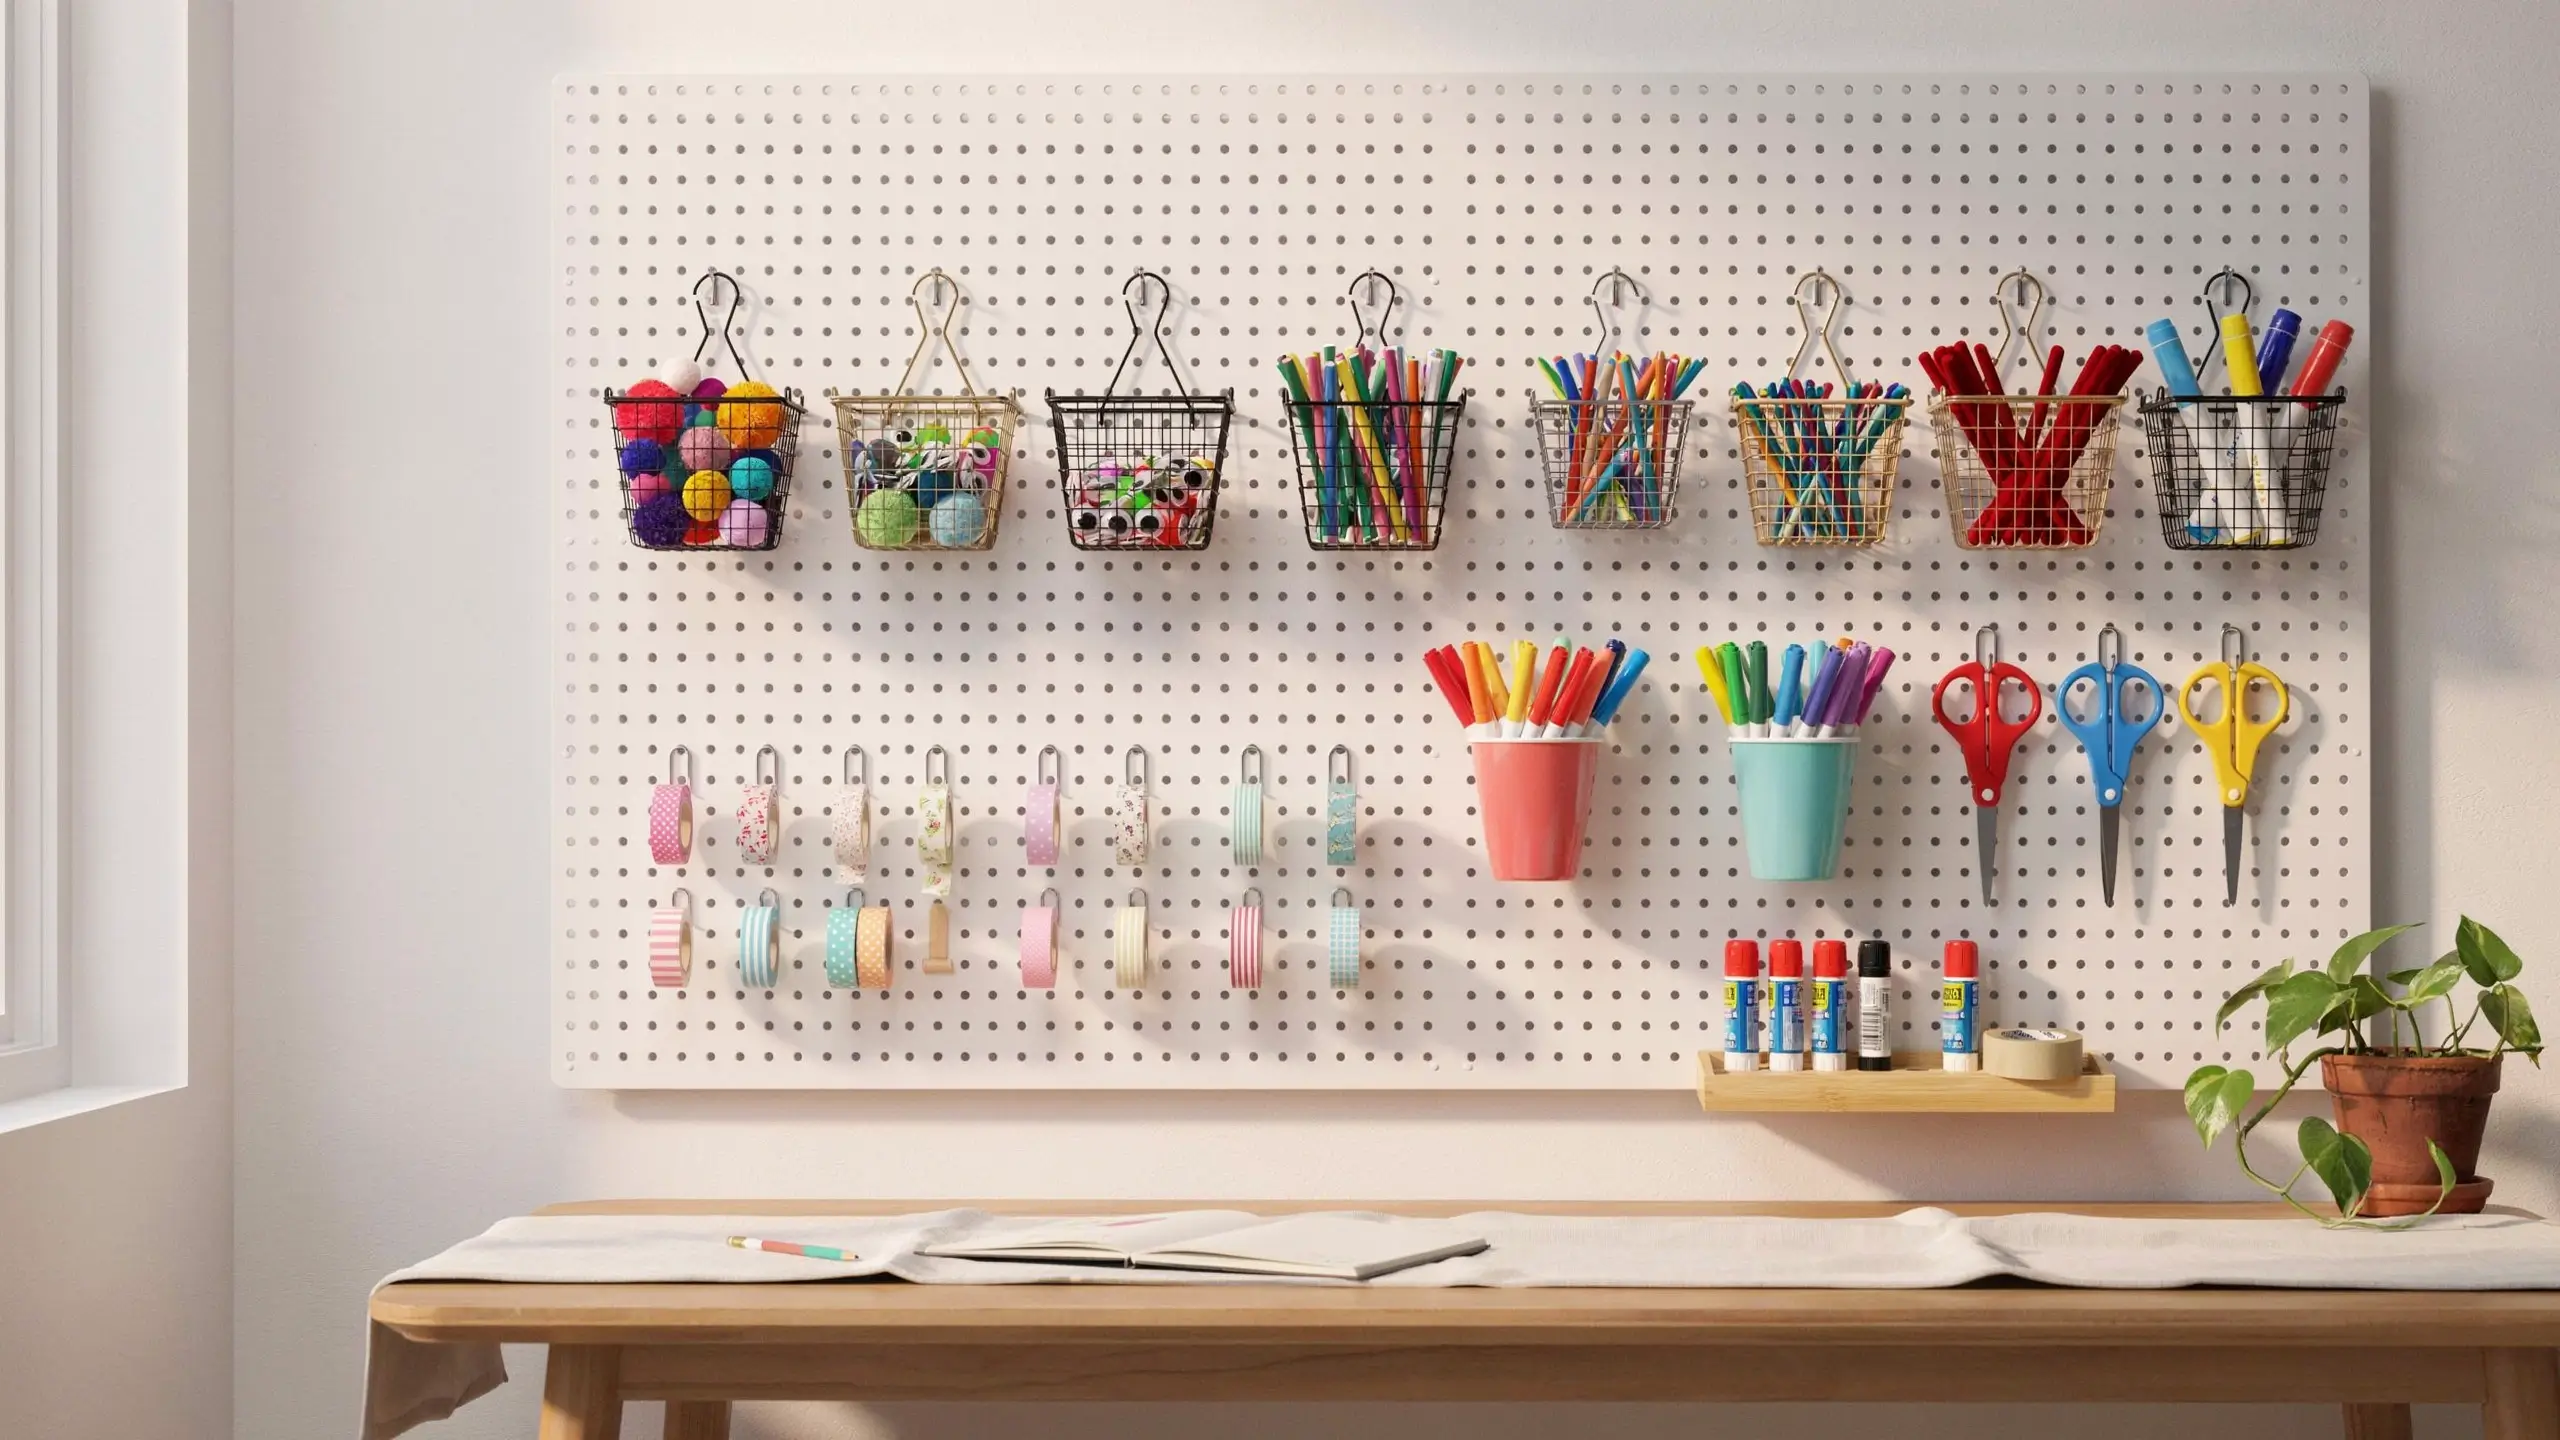
If there’s one idea that earns its Pinterest saves every single time, it’s a pegboard wall. And for good reason. Pegboards keep everything visible, off the counter, and within reach.
Mount a large sheet of white, painted, or natural wood pegboard on the primary wall behind the craft table. Use pegboard hooks, small baskets, pencil cups, and little shelves to sort markers by color, hang scissors by size, and display rolls of washi tape like little trophies. The whole wall becomes storage AND decoration at once.
For kids specifically, lower the pegboard so supplies sit at their eye level, not yours. If your child is between 4 and 8, that means starting the pegboard around 18 to 24 inches from the floor.
The IKEA SKADIS pegboard system is a popular and budget-friendly option. The accessories are sold separately and click on without any tools, which makes it easy to rearrange as your child’s projects change.
Renter tip: Pegboards can be mounted with a French cleat system that hooks over a wall ledge without damaging drywall, or you can prop a large pegboard panel between two shelving units so it stands on its own with no wall holes at all.
2. A Rolling Art Cart (The Mobile Studio)
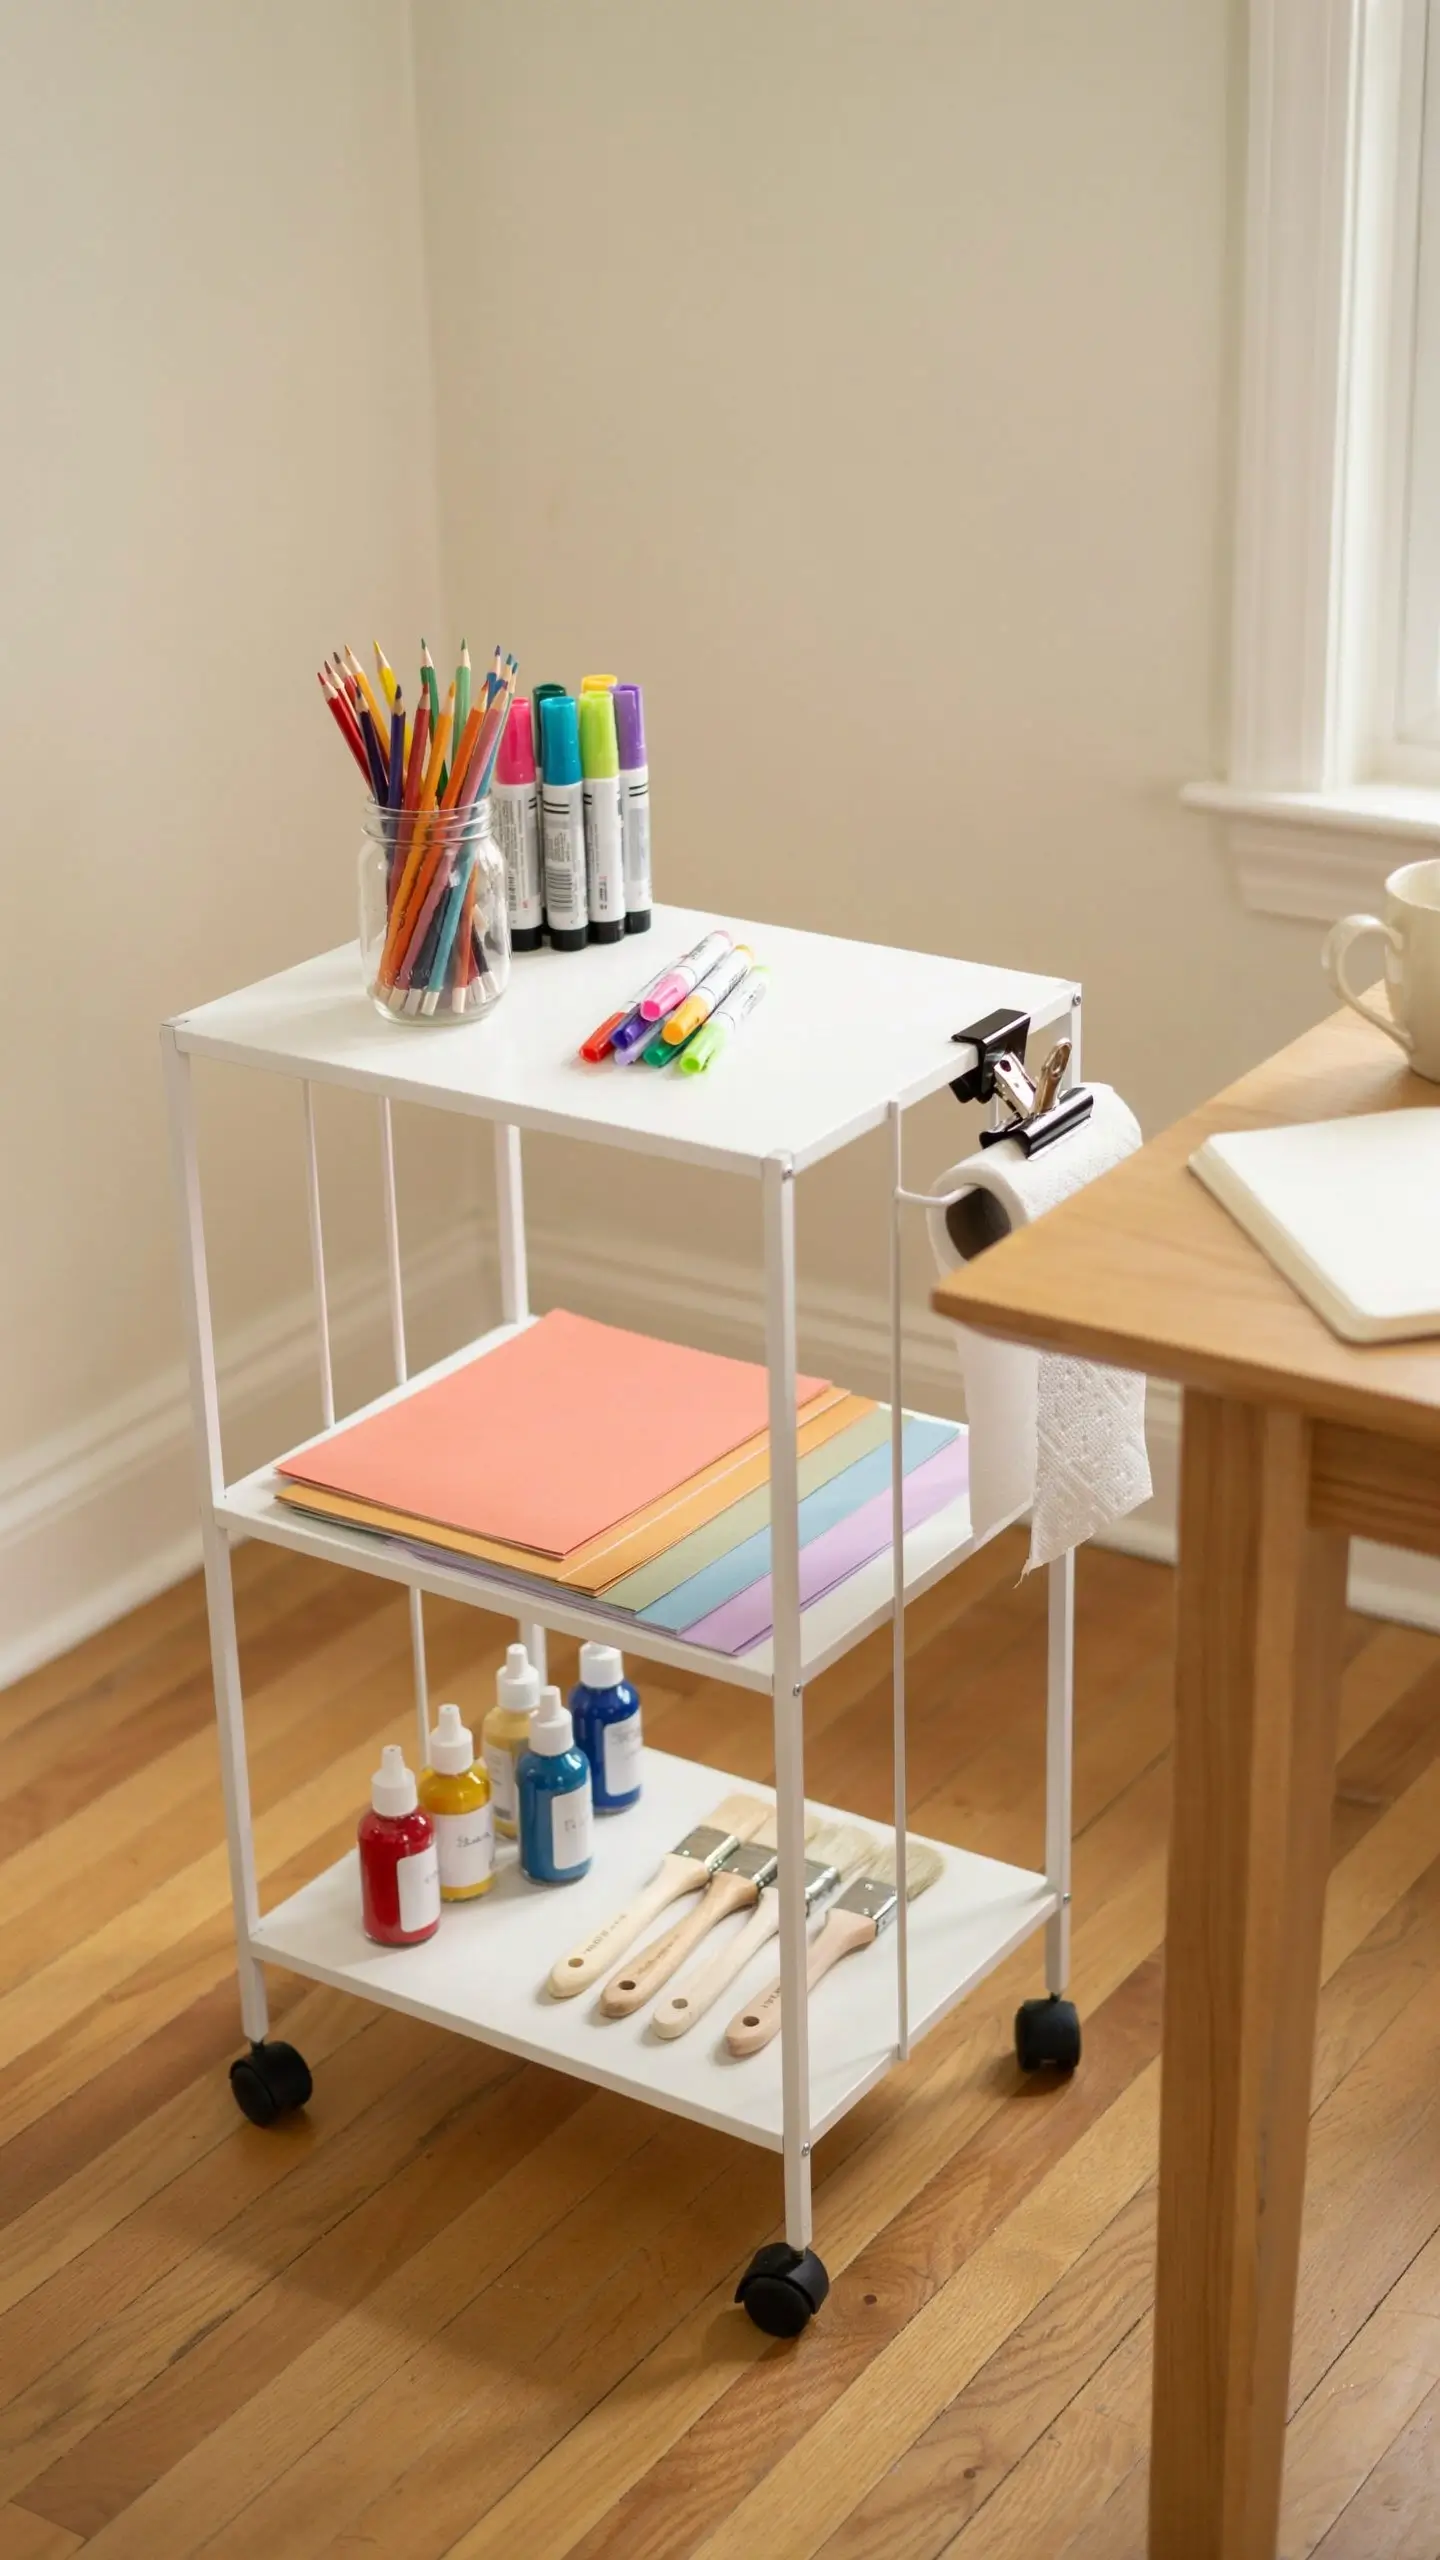
This is the idea for every family that doesn’t have a dedicated craft room yet. A three-tier rolling cart becomes a complete portable studio that lives in a closet, a corner, or the laundry room until it’s needed, and then rolls right out to the kitchen table when inspiration hits.
Set it up with intention. Top tier: current supplies used daily, like colored pencils, markers, and glue sticks. Middle tier: paper, cardstock, and project materials. Bottom tier: paints, foam brushes, and anything messier.
The IKEA RASKOG cart is the classic choice, roomy and lightweight. The Simple Trending 3-tier metal cart (available at Target and Amazon) is another popular option that holds more weight if you’re storing heavier supplies like clay or paint bottles.
Add a few small mason jars or pencil cups to the top tier so loose items don’t roll around. A tiny binder clip on the side keeps a roll of paper towels handy for quick cleanups.
Best part: When the craft session is over, everything goes back on the cart and rolls away. No cleanup chaos. No hunting for the tape next time.
3. A Dedicated Craft Table at Kid Height
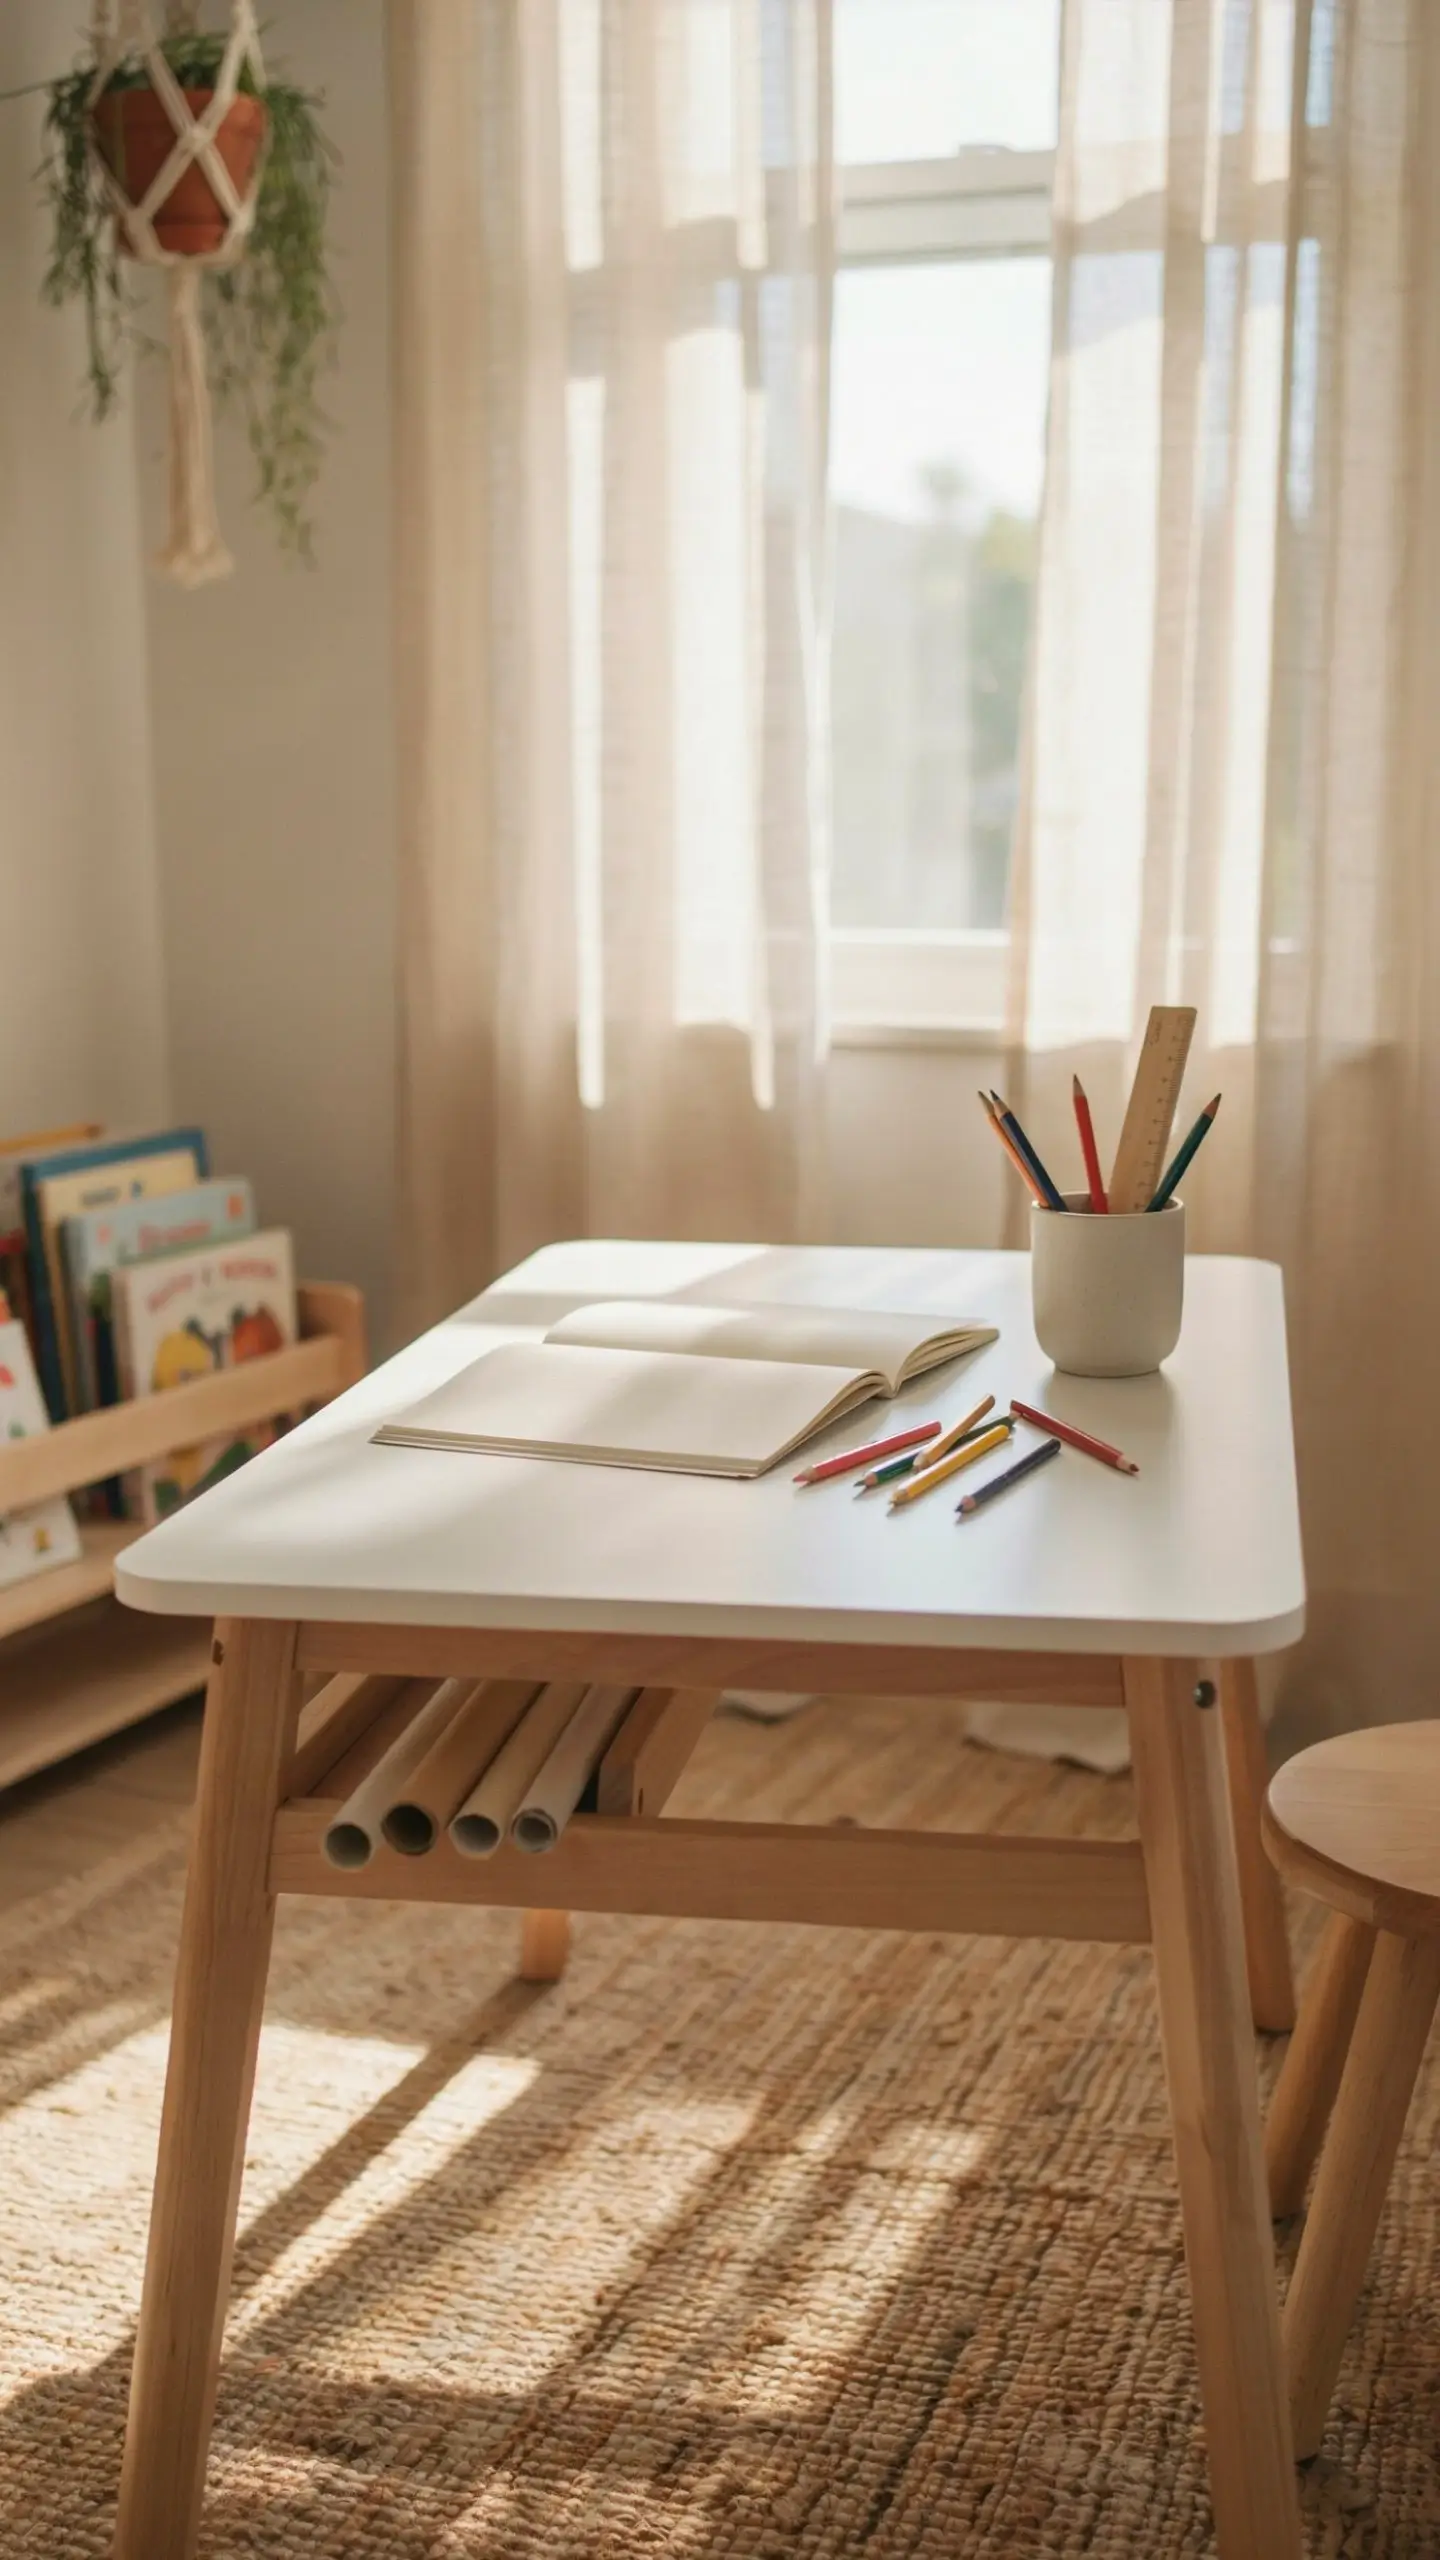
This sounds obvious, but it’s the step most parents skip. Craft tables need to actually fit the child using them. When kids are hunched over a too-tall table or trying to reach across a too-wide surface, they give up faster and make more mess.
For kids between 3 and 6, look for a table that sits about 18 to 20 inches from the floor. For school-age kids between 6 and 12, 22 to 26 inches works well. The IKEA FLISAT children’s table is highly recommended, with adjustable legs and a storage compartment built into the top surface that’s perfect for stashing paper and coloring books.
If budget is tight, an old dining table cut down to size by a local hardware store works great. Sand the legs, paint it a fun color, and it becomes a custom kid-sized worktable for under $30.
Consider waterproofing the surface. Self-adhesive vinyl in white or a light color is easy to wipe clean and can be replaced when it gets too worn. Clear contact paper over a painted surface works too.
4. The Artwork Display String Gallery
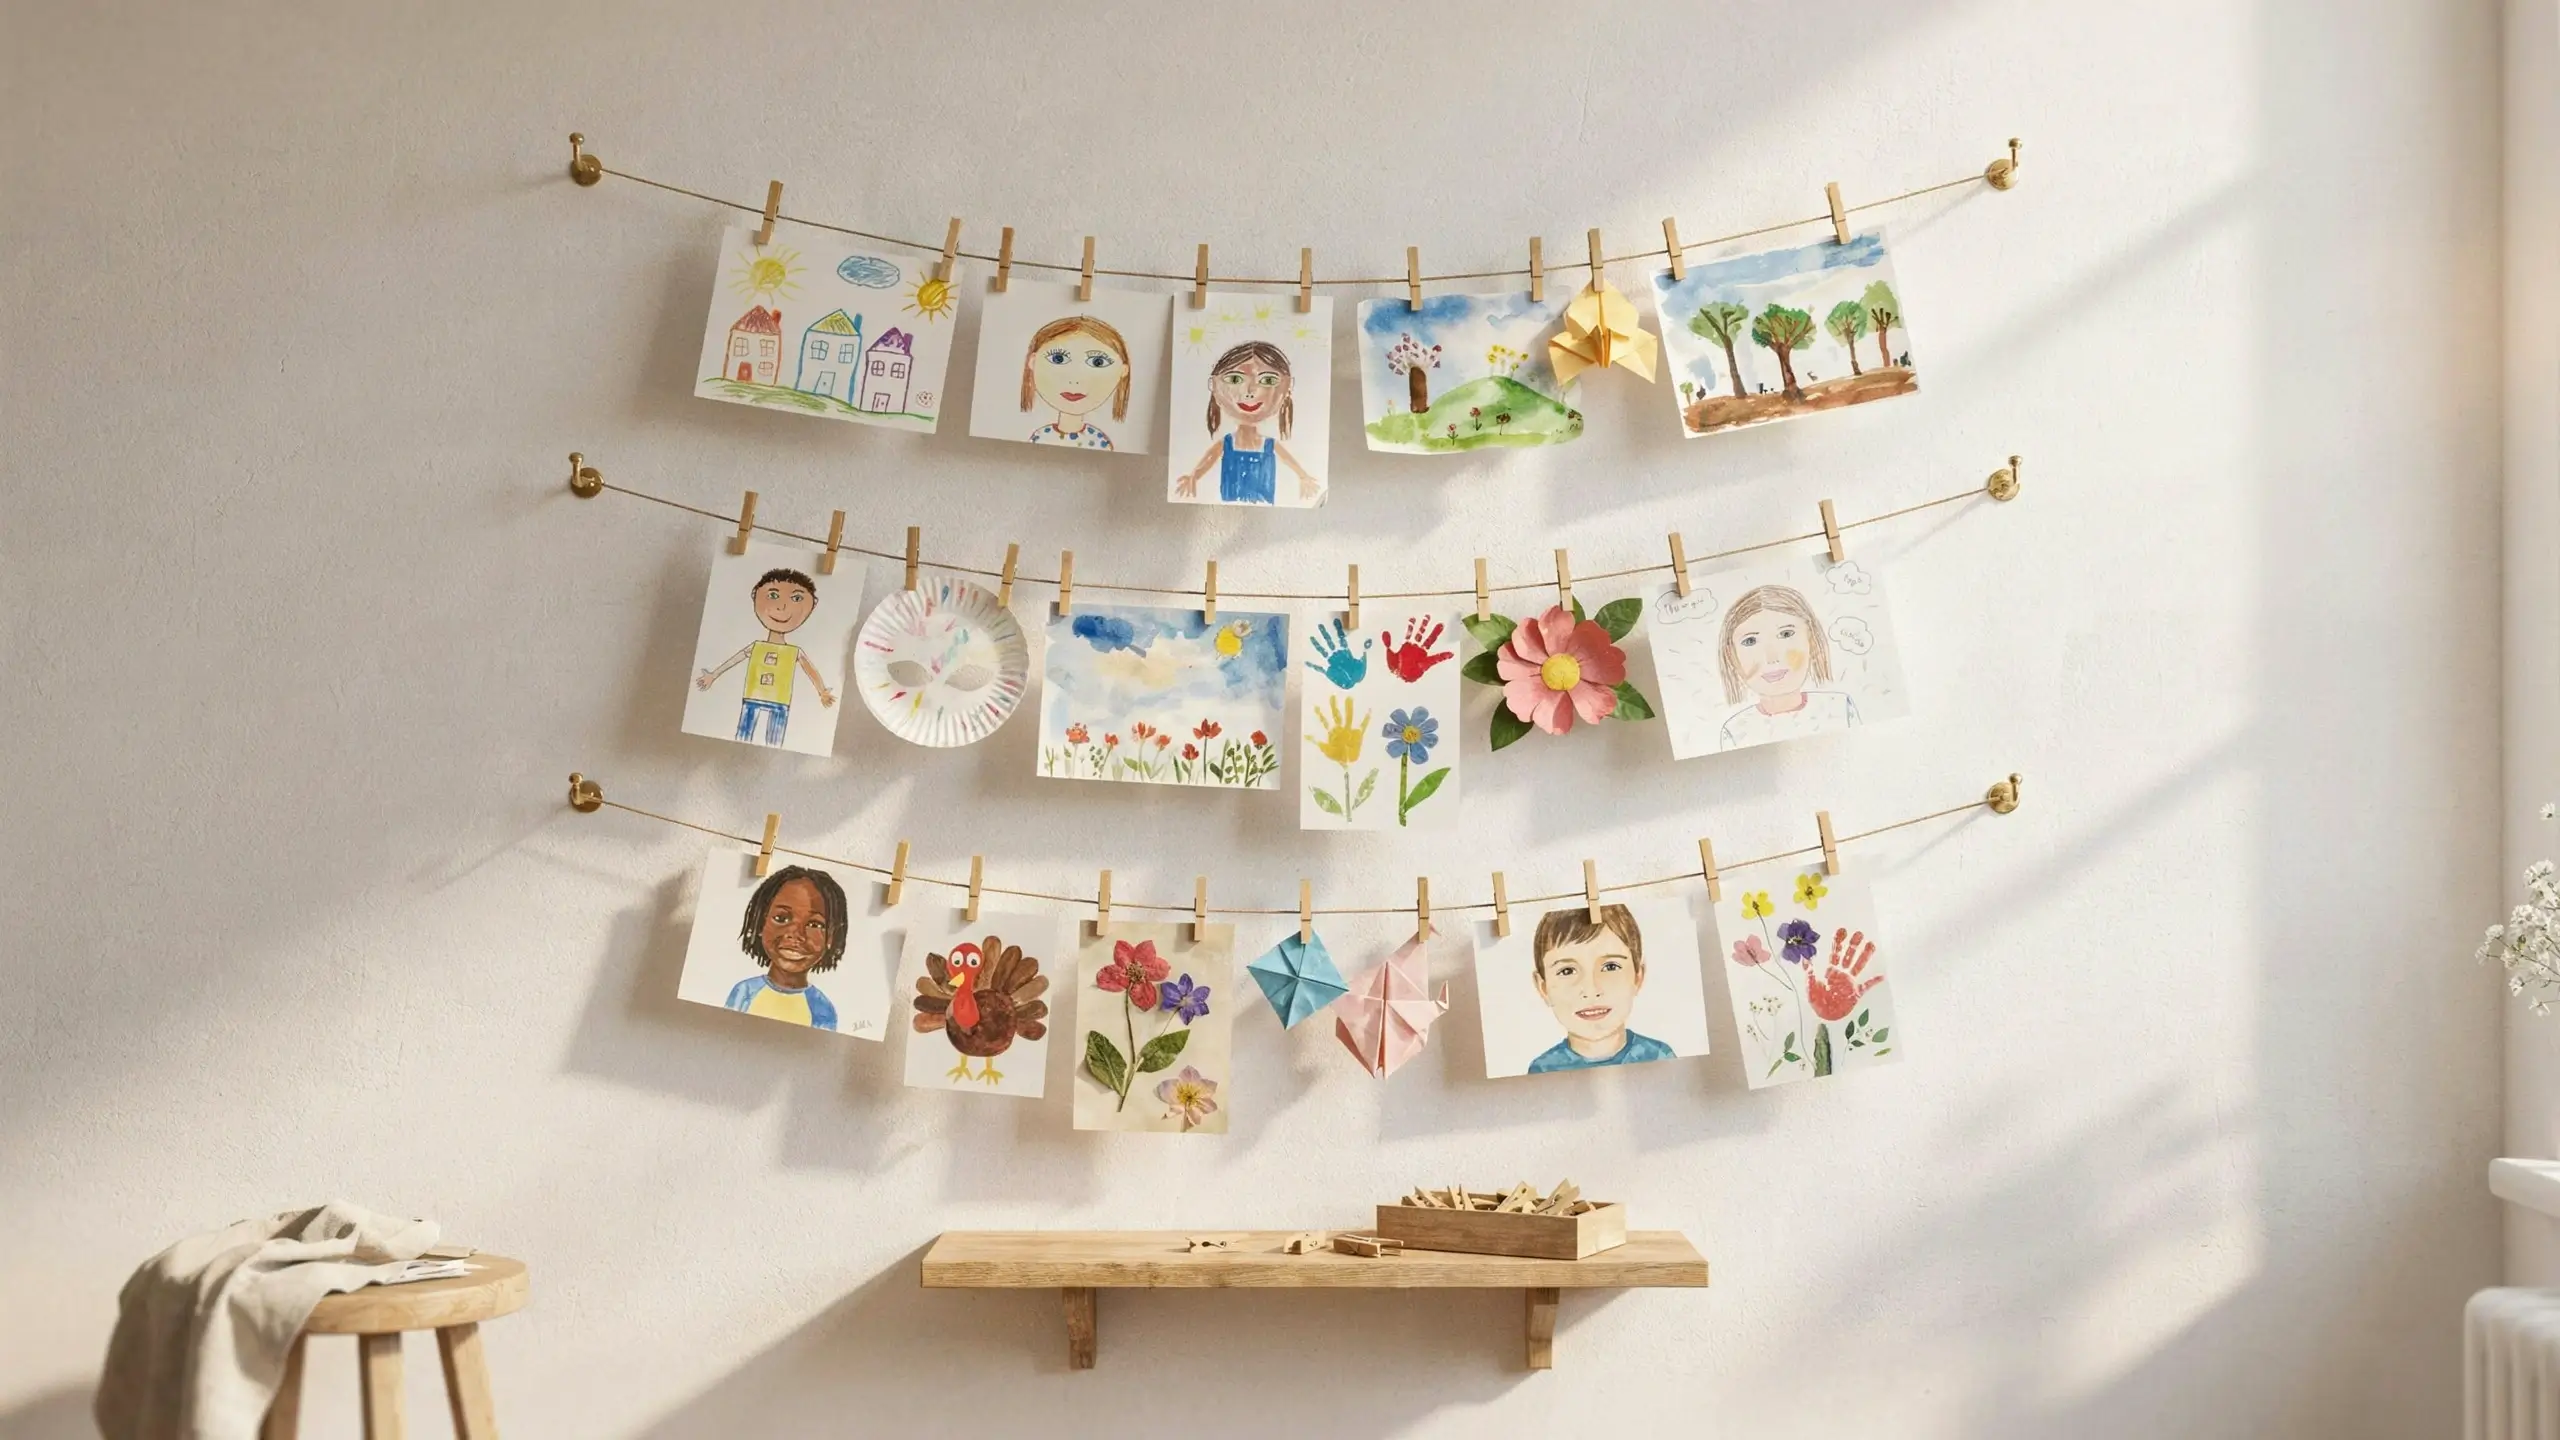
Every child who makes something wants to know someone noticed. A dedicated display wall inside the craft room does something simple but powerful: it tells your kid that what they create matters.
The most popular and Pinterest-friendly version uses thin wire or twine stretched horizontally across the wall, held by small hooks or cup hooks, with mini clothespins clipped along to hold drawings, paintings, and paper crafts. You can run two or three rows of wire to display several pieces at once.
This setup is completely damage-friendly because small cup hooks in drywall leave only a tiny hole, and the wire itself is cheap and easy to replace. The artwork changes whenever your child makes something new. Nothing gets thrown away before it’s been celebrated.
For a more polished version, use a copper pipe cut to length and hung with leather straps from two wall nails. Clips hang from the pipe. It looks like a real gallery and costs about $15 in hardware store materials.
Washi tape version (zero damage): For renters or parents who don’t want any holes, strips of washi tape on the wall create a grid of “frames” that artwork can simply be taped inside of. Use different washi tape colors for each child if you have more than one creator to celebrate.
5. The IKEA Kallax Craft Hub
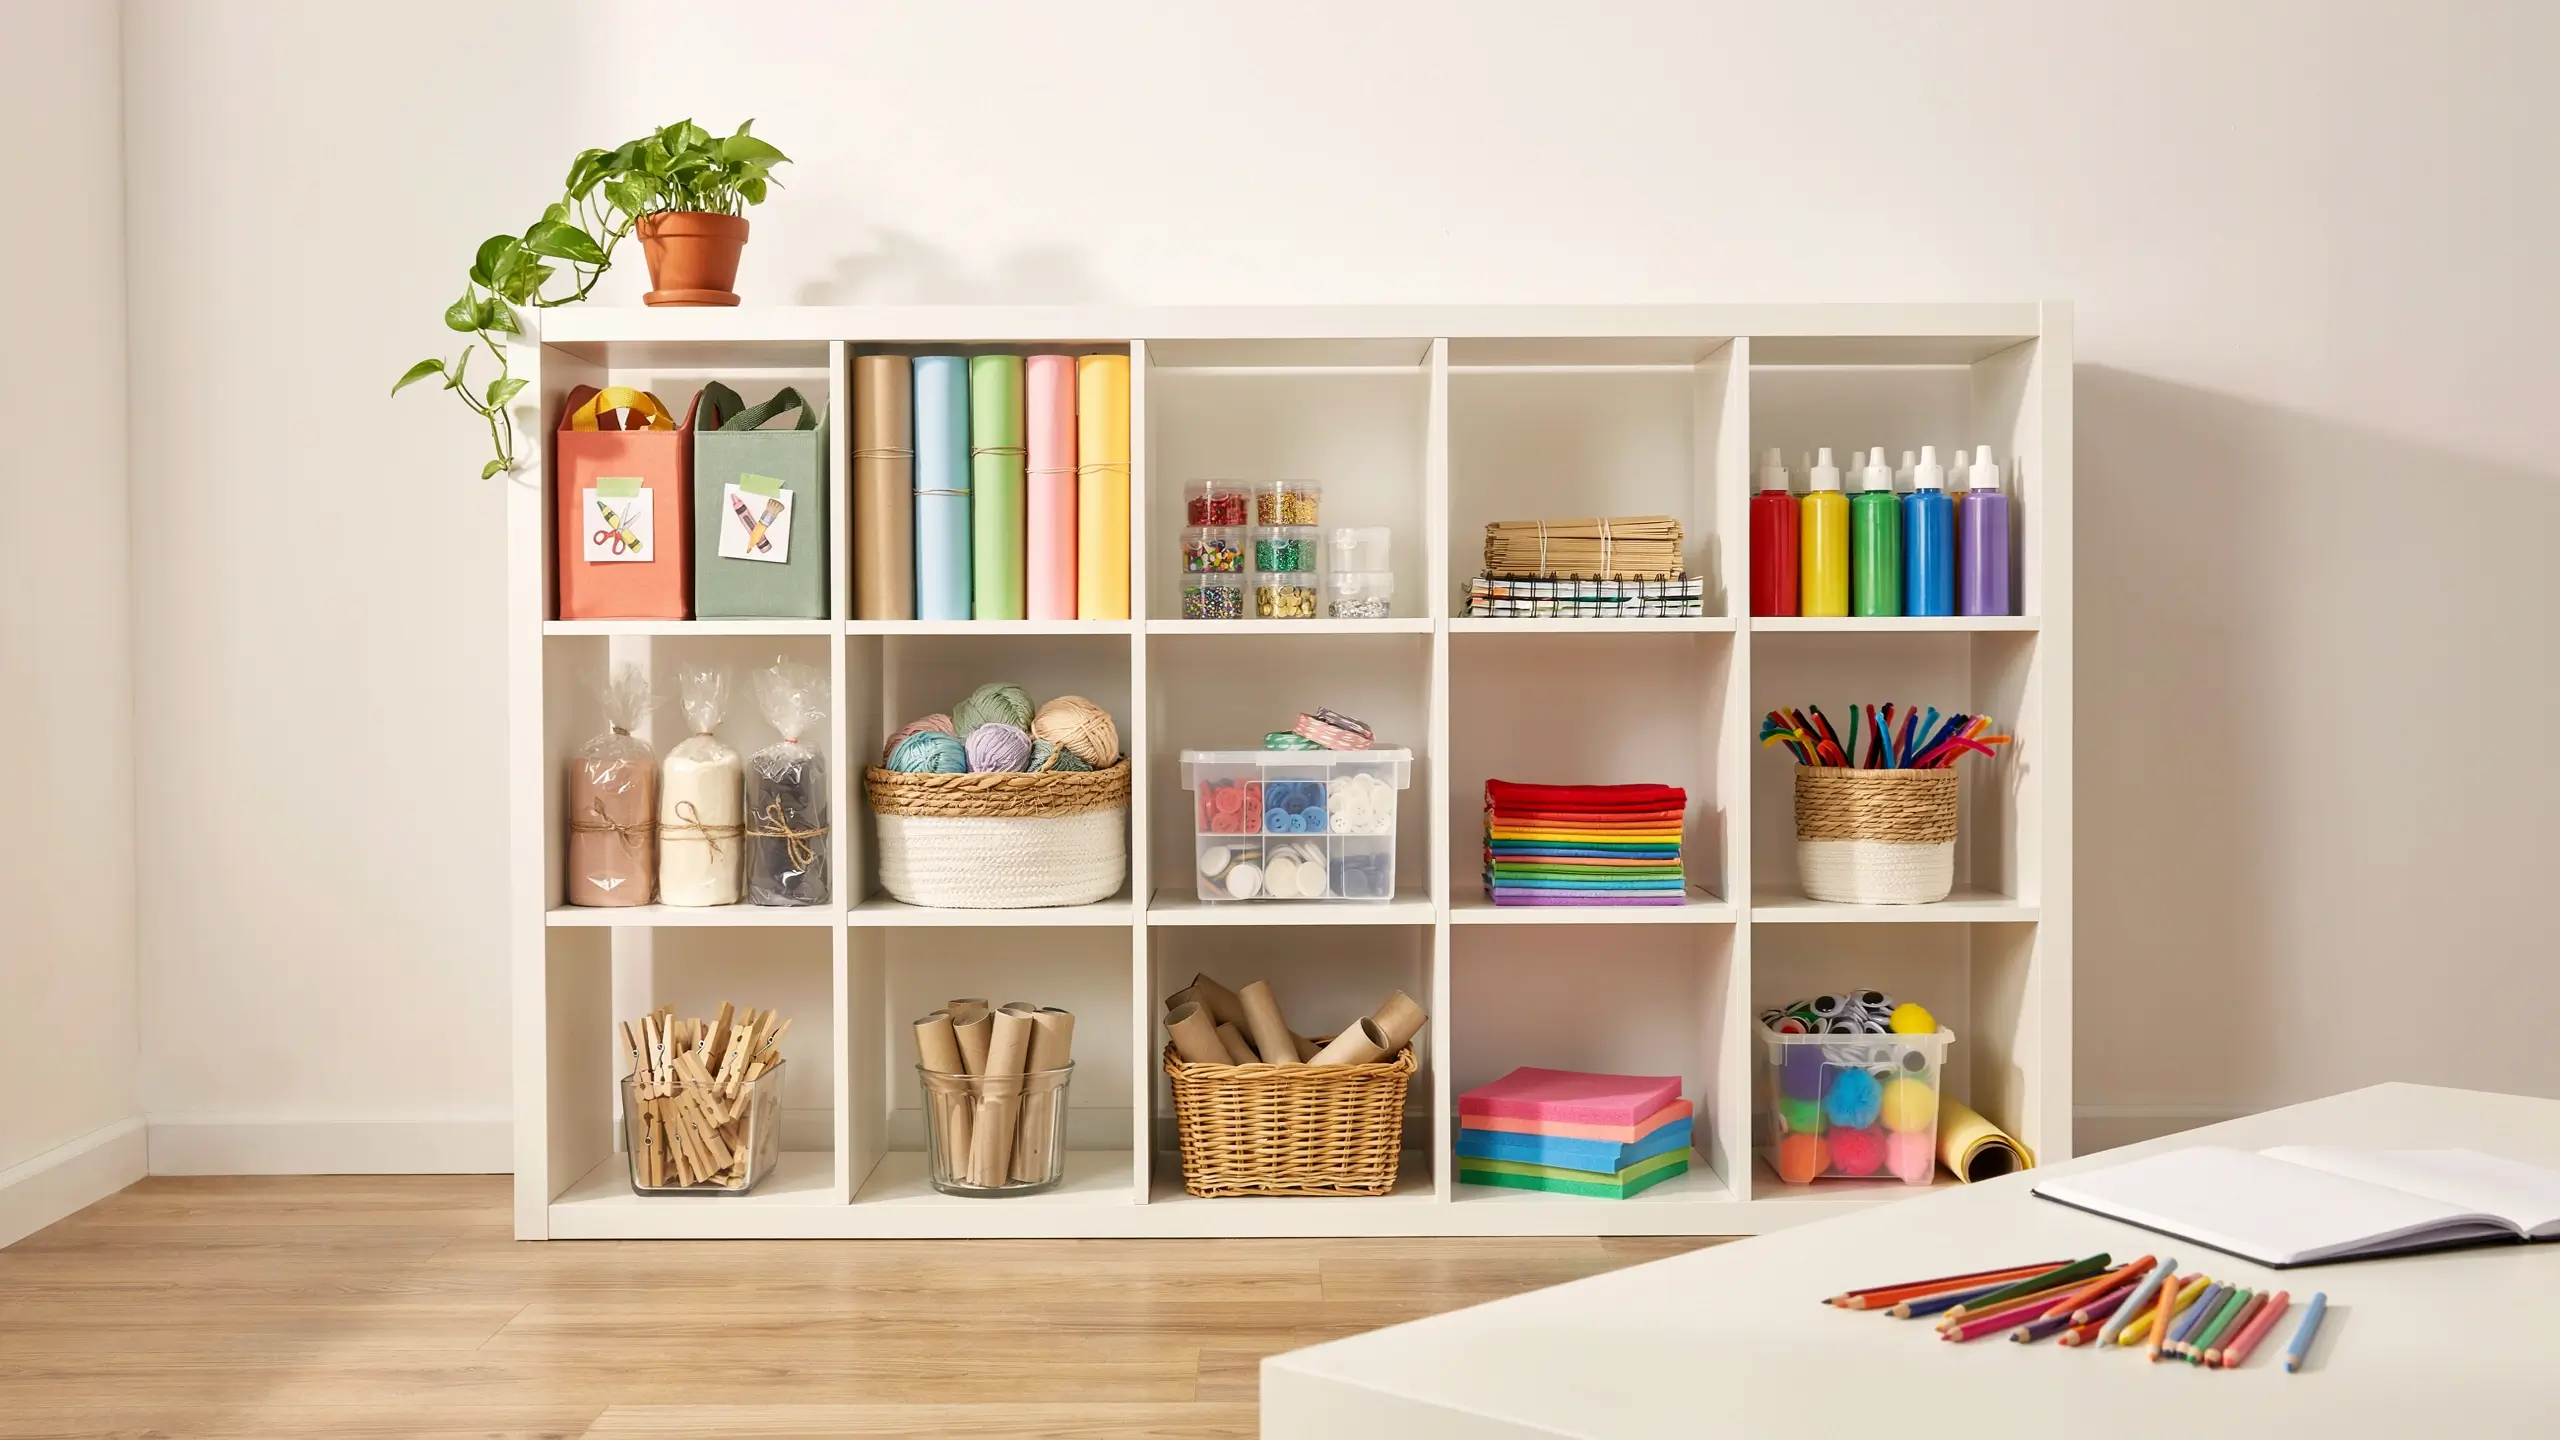
The KALLAX shelf from IKEA has earned its place as the backbone of so many craft rooms, and for good reason. It’s modular, sturdy, affordable, and works with fabric bins, baskets, and cube inserts that let you customize every slot.
For a kids craft room, use the 4×2 or 4×4 configuration and dedicate each cube to a category: one for painting supplies, one for paper types, one for glue and tape, one for beads and small items, one for clay and putty. Label each bin with a simple hand-drawn picture label for younger kids who aren’t reading yet. Pictures of scissors, a paintbrush, or a roll of tape are more useful than words to a four-year-old.
The TROFAST system is IKEA’s specifically kids-focused version, with colorful pull-out bins in different heights. It’s brilliant for a craft room because kids can see at a glance where things go, and returning supplies to the right bin becomes almost automatic.
| Feature | KALLAX | TROFAST |
| Best for | Older kids, customizable bins | Younger kids, colorful pull-out bins |
| Storage type | Cube inserts, fabric bins, baskets | Pull-out bins in various heights |
| Flexibility | Highly modular, mix and match | Specifically designed for kids |
| Visual appeal | Clean, modern | Bright, playful |
Pair either system with a long LINNMON tabletop laid across two Alex drawer units for a full crafting station that looks like it cost twice what it did.
6. A Chalkboard or Whiteboard Wall

Imagine a child walking into their craft room and being able to draw directly on the wall without getting in trouble. That’s the magic of a chalkboard or whiteboard wall, and it’s the design detail kids remember forever.
Chalkboard paint is sold at most hardware stores and goes on like regular wall paint over any primed surface. Two coats, a 24-hour cure, and the wall is a drawing surface. Keep a small wooden tray underneath to hold chalk and an eraser so the supplies are always right there.
If chalk dust is a concern (it does travel), a large sheet of whiteboard panel from a hardware store cut to size is a low-dust alternative. These sheets can be mounted with construction adhesive and simple panel clips, or even propped in a frame and leaned against the wall.
The chalkboard wall doesn’t have to take over the entire room. A single 4-foot by 4-foot square on one wall is enough to feel exciting. Frame it with simple molding strips painted in a contrasting color to make it look intentional.
7. The Closet Craft Room Conversion
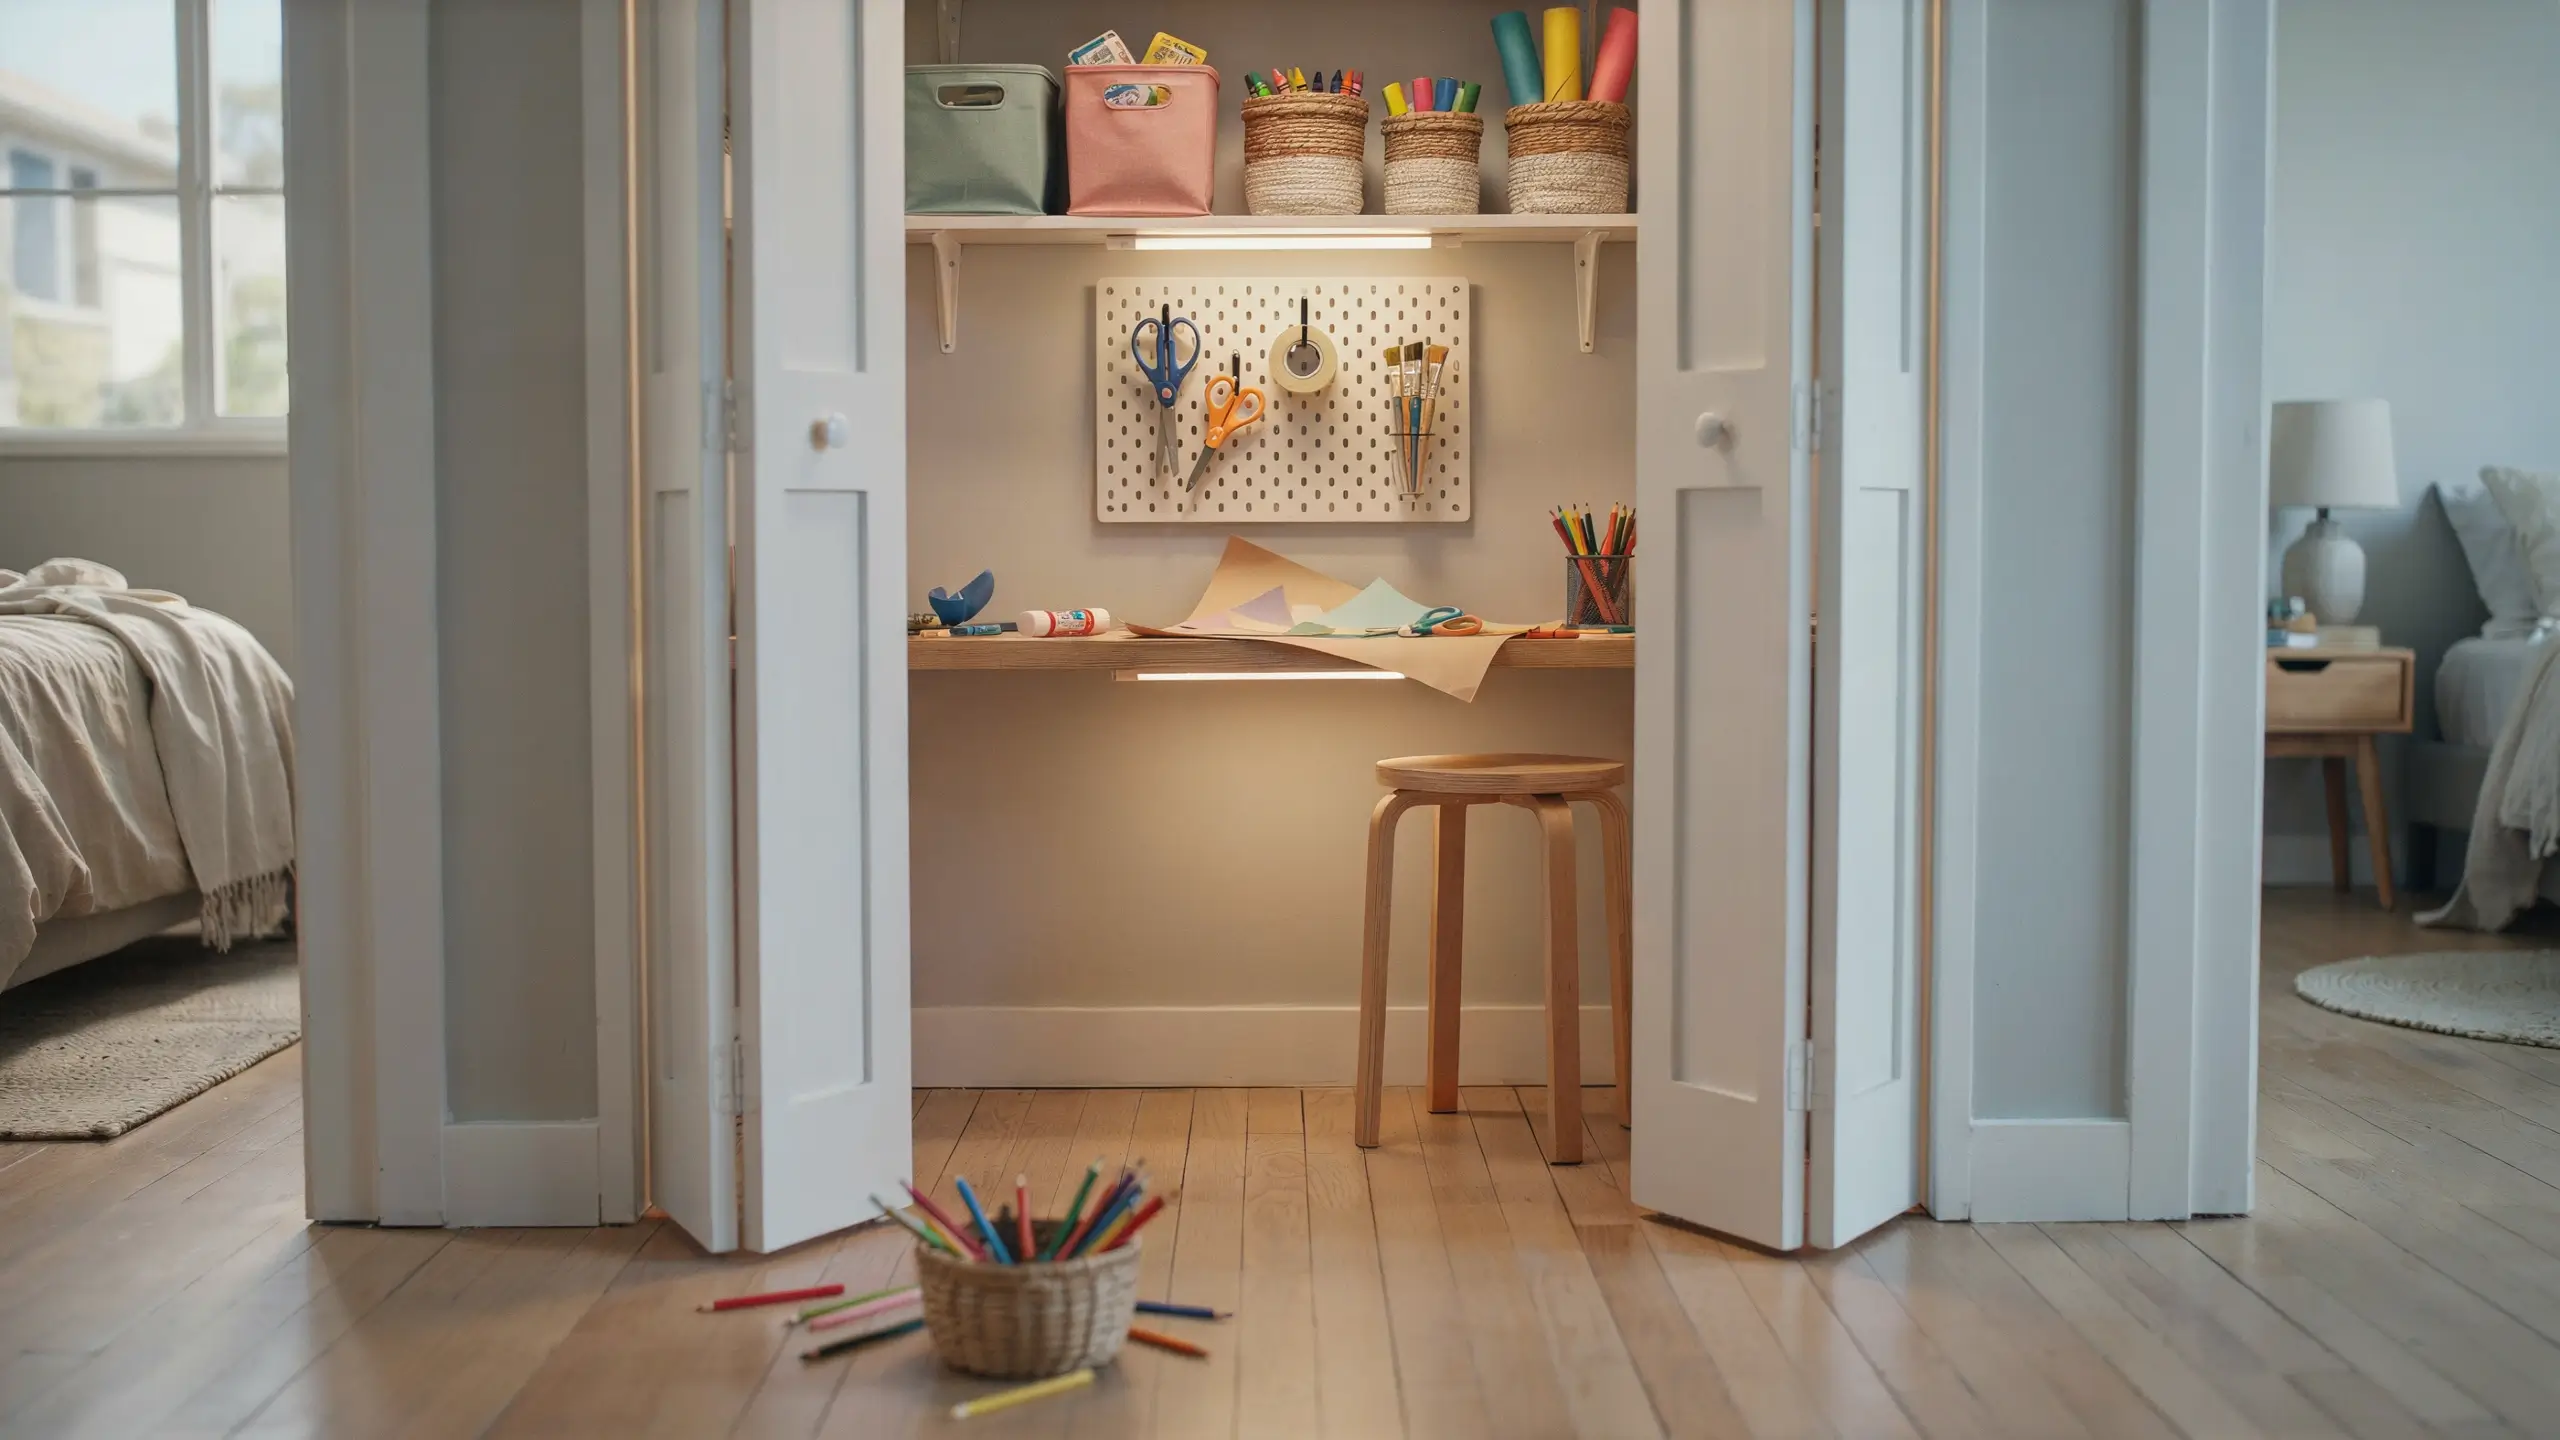
No spare room? A standard bedroom closet can become a fully functional craft station that stays completely hidden when the doors are closed. This is one of the most satisfying small-space transformations you can make.
Remove the existing rod and shelves. Install two or three adjustable shelves at working height. Add a small fold-down desk attached to the wall inside the closet, or place a simple shelf at table height with a stool that tucks under it. Mount a pegboard panel on the back wall of the closet to hold frequently used supplies.
Run an extension cord with a power strip for a small desk lamp or a Cricut-style machine. Add battery-powered LED strip lights along the shelf undersides for extra visibility.
When the doors close, the craft room disappears. Guests see a closet. Your child sees their studio.
Bifold doors work especially well here because they swing open fully, giving your child unobstructed access to the entire space. French doors on a closet give it an almost whimsical, playhouse feel.
8. A Wall-Mounted Paper Roll Station
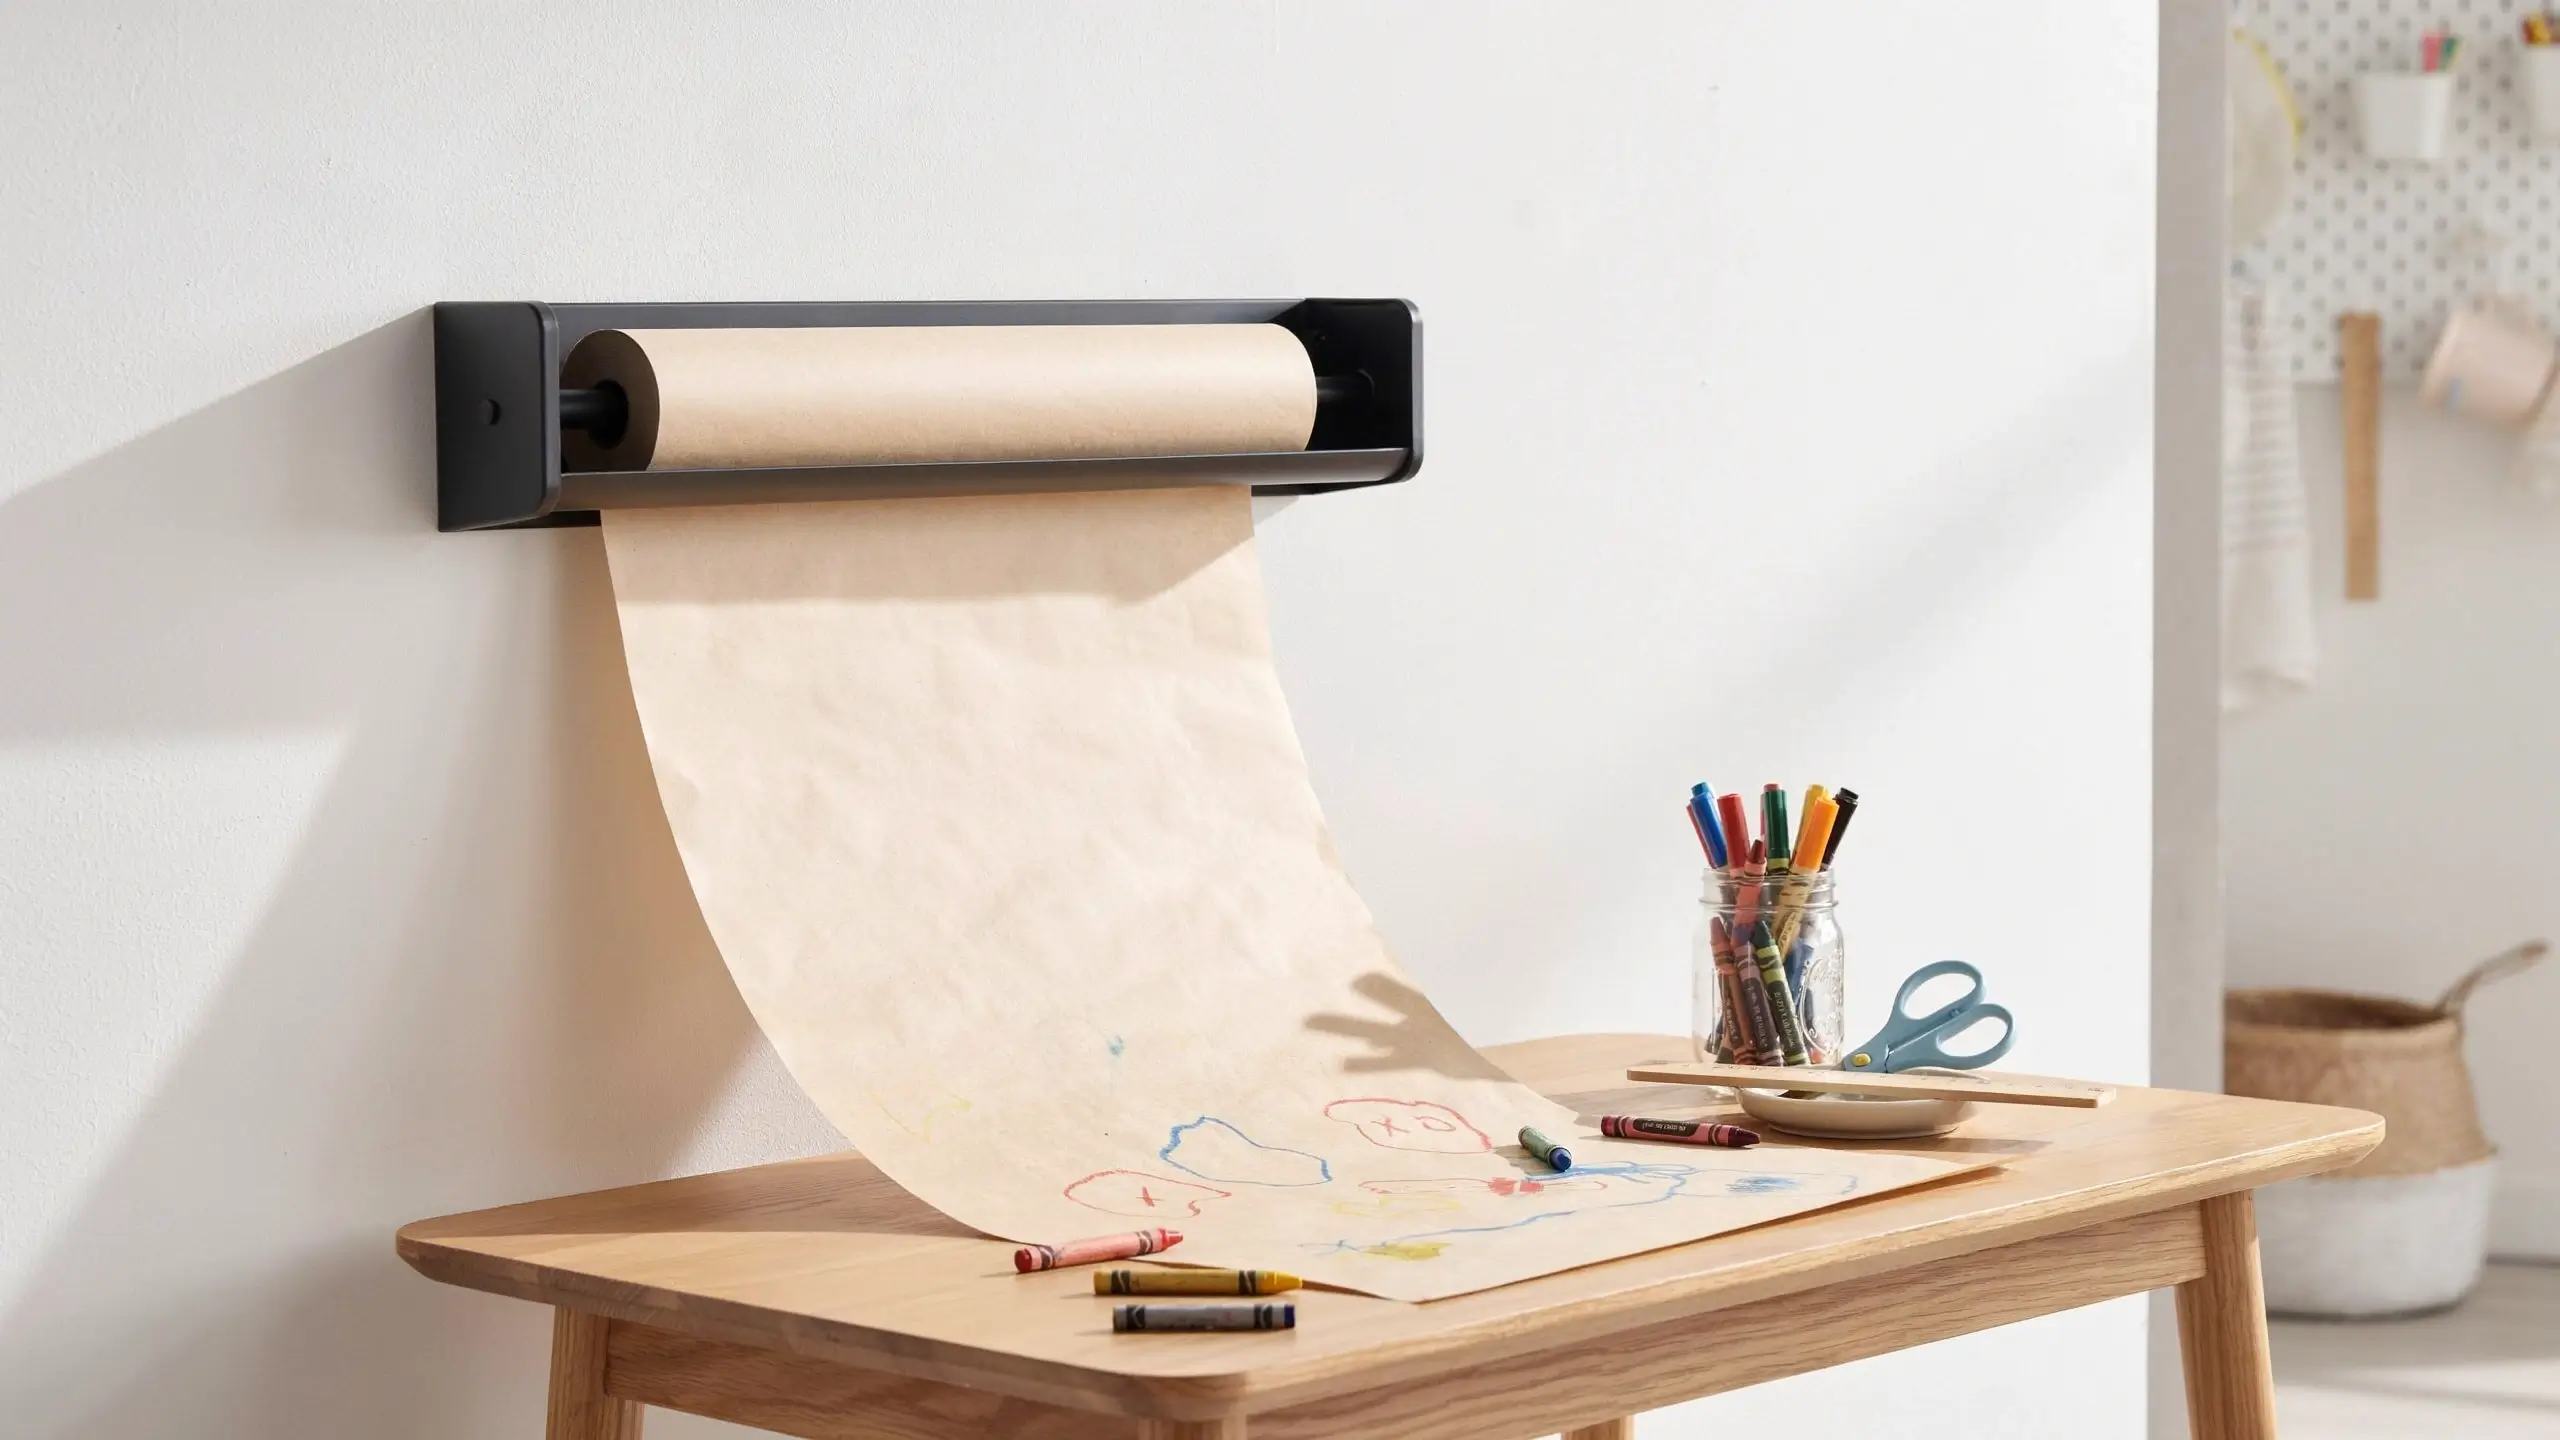
If your child loves to draw, trace, make maps, or create long scrolling story comics, a wall-mounted kraft paper roll dispenser might be the single most useful thing in their craft room.
These dispensers mount directly to the wall and hold a large roll of kraft paper, butcher paper, or newsprint. Your child pulls down as much paper as they need, tears it off at the built-in cutter, and goes. No hunting for paper, no digging through stacks.
IKEA sells the MÅLA kids’ paper roll in a set that includes a clamp-on paper holder meant for the edge of a table. For wall mounting, look for a commercial kraft paper roll holder at restaurant supply stores or on Amazon. Mount it at your child’s height and let them rip.
This is especially good for kids who love collaborative projects. Two kids can unroll a huge stretch of paper on the floor and create a mural together. No single sheet of paper could hold that kind of imagination.
9. The Rainbow Organization System
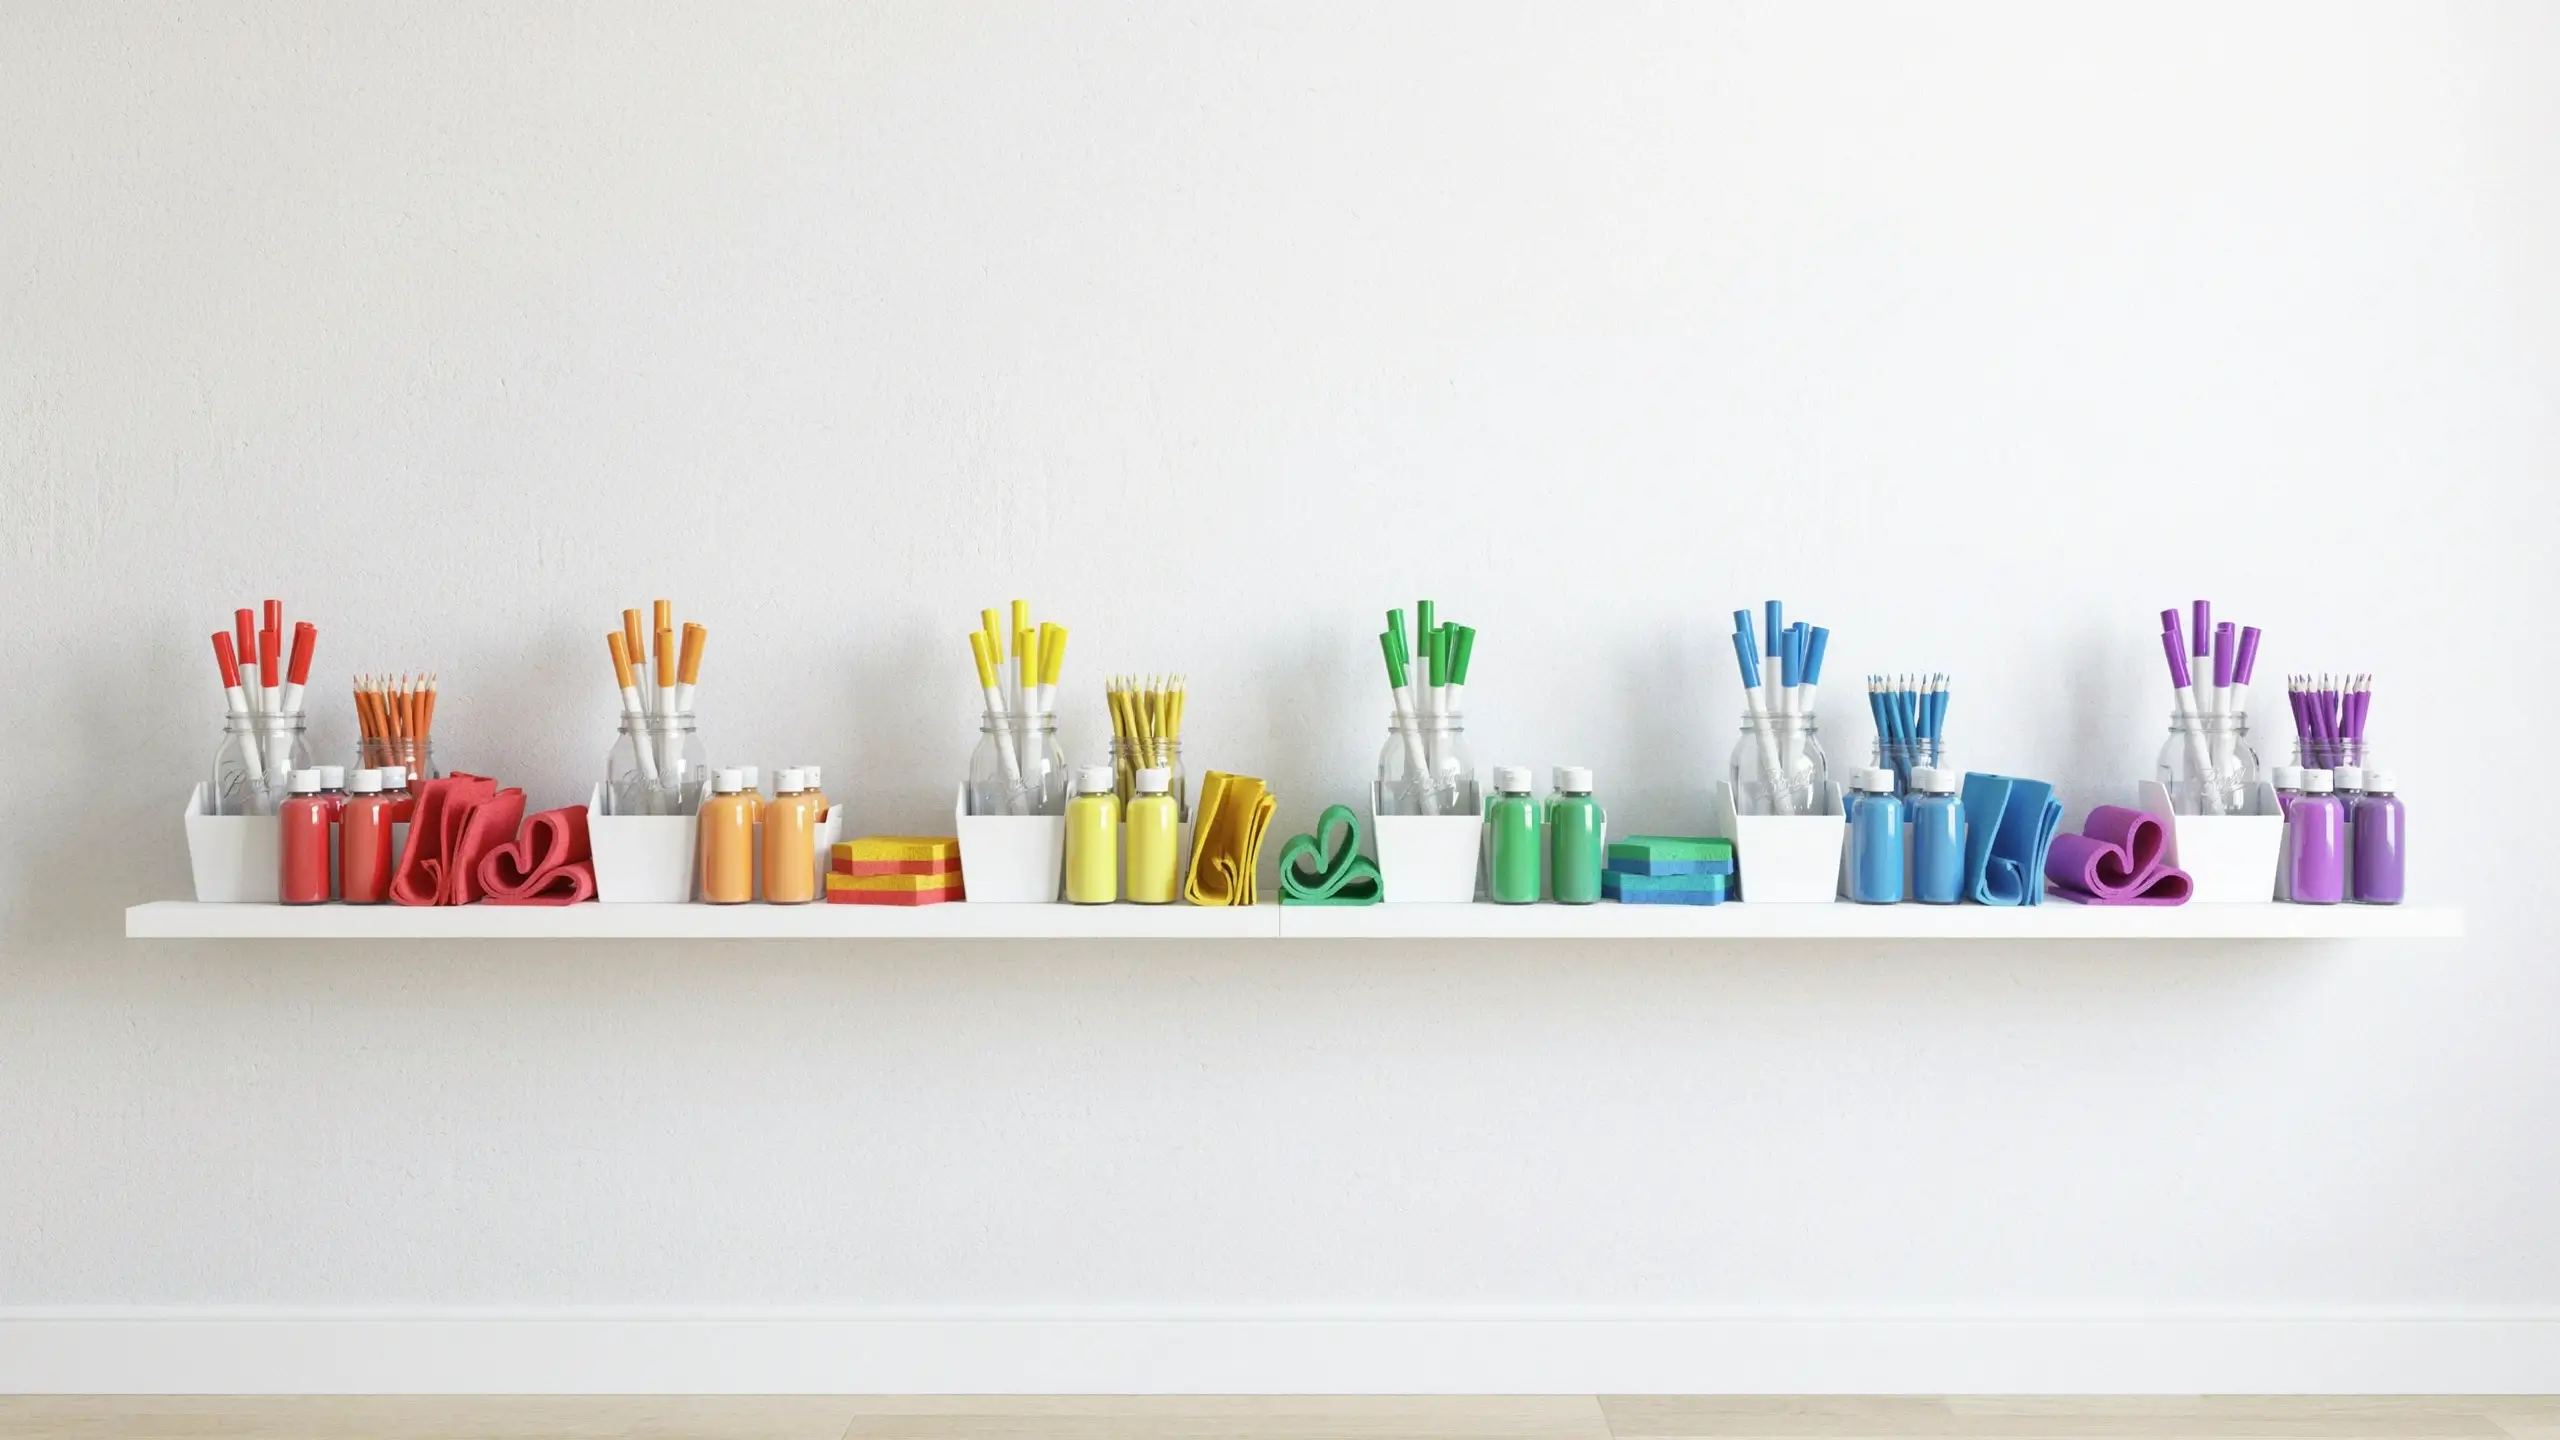
This is the storage idea that never stops going viral on Pinterest, and it genuinely works for kids in a way that other systems don’t.
Organize supplies by color instead of by category. Red markers, red paint, red construction paper, and red foam sheets all live together. Orange things live together. Yellow things live together. The rainbow runs across the shelf from left to right.
Children, especially visual learners and younger kids, find this intuitive in a way that “craft supplies” vs. “art supplies” vs. “project materials” labels never are. They know where the blue things are. They put the blue pen back with the blue things. Simple.
Use matching bins or jars across each shelf for a clean, cohesive look. Clear mason jars lined up by color across a shelf look almost like a science experiment and very much like something worth saving on Pinterest.
10. The Corner Craft Nook (No Dedicated Room Needed)
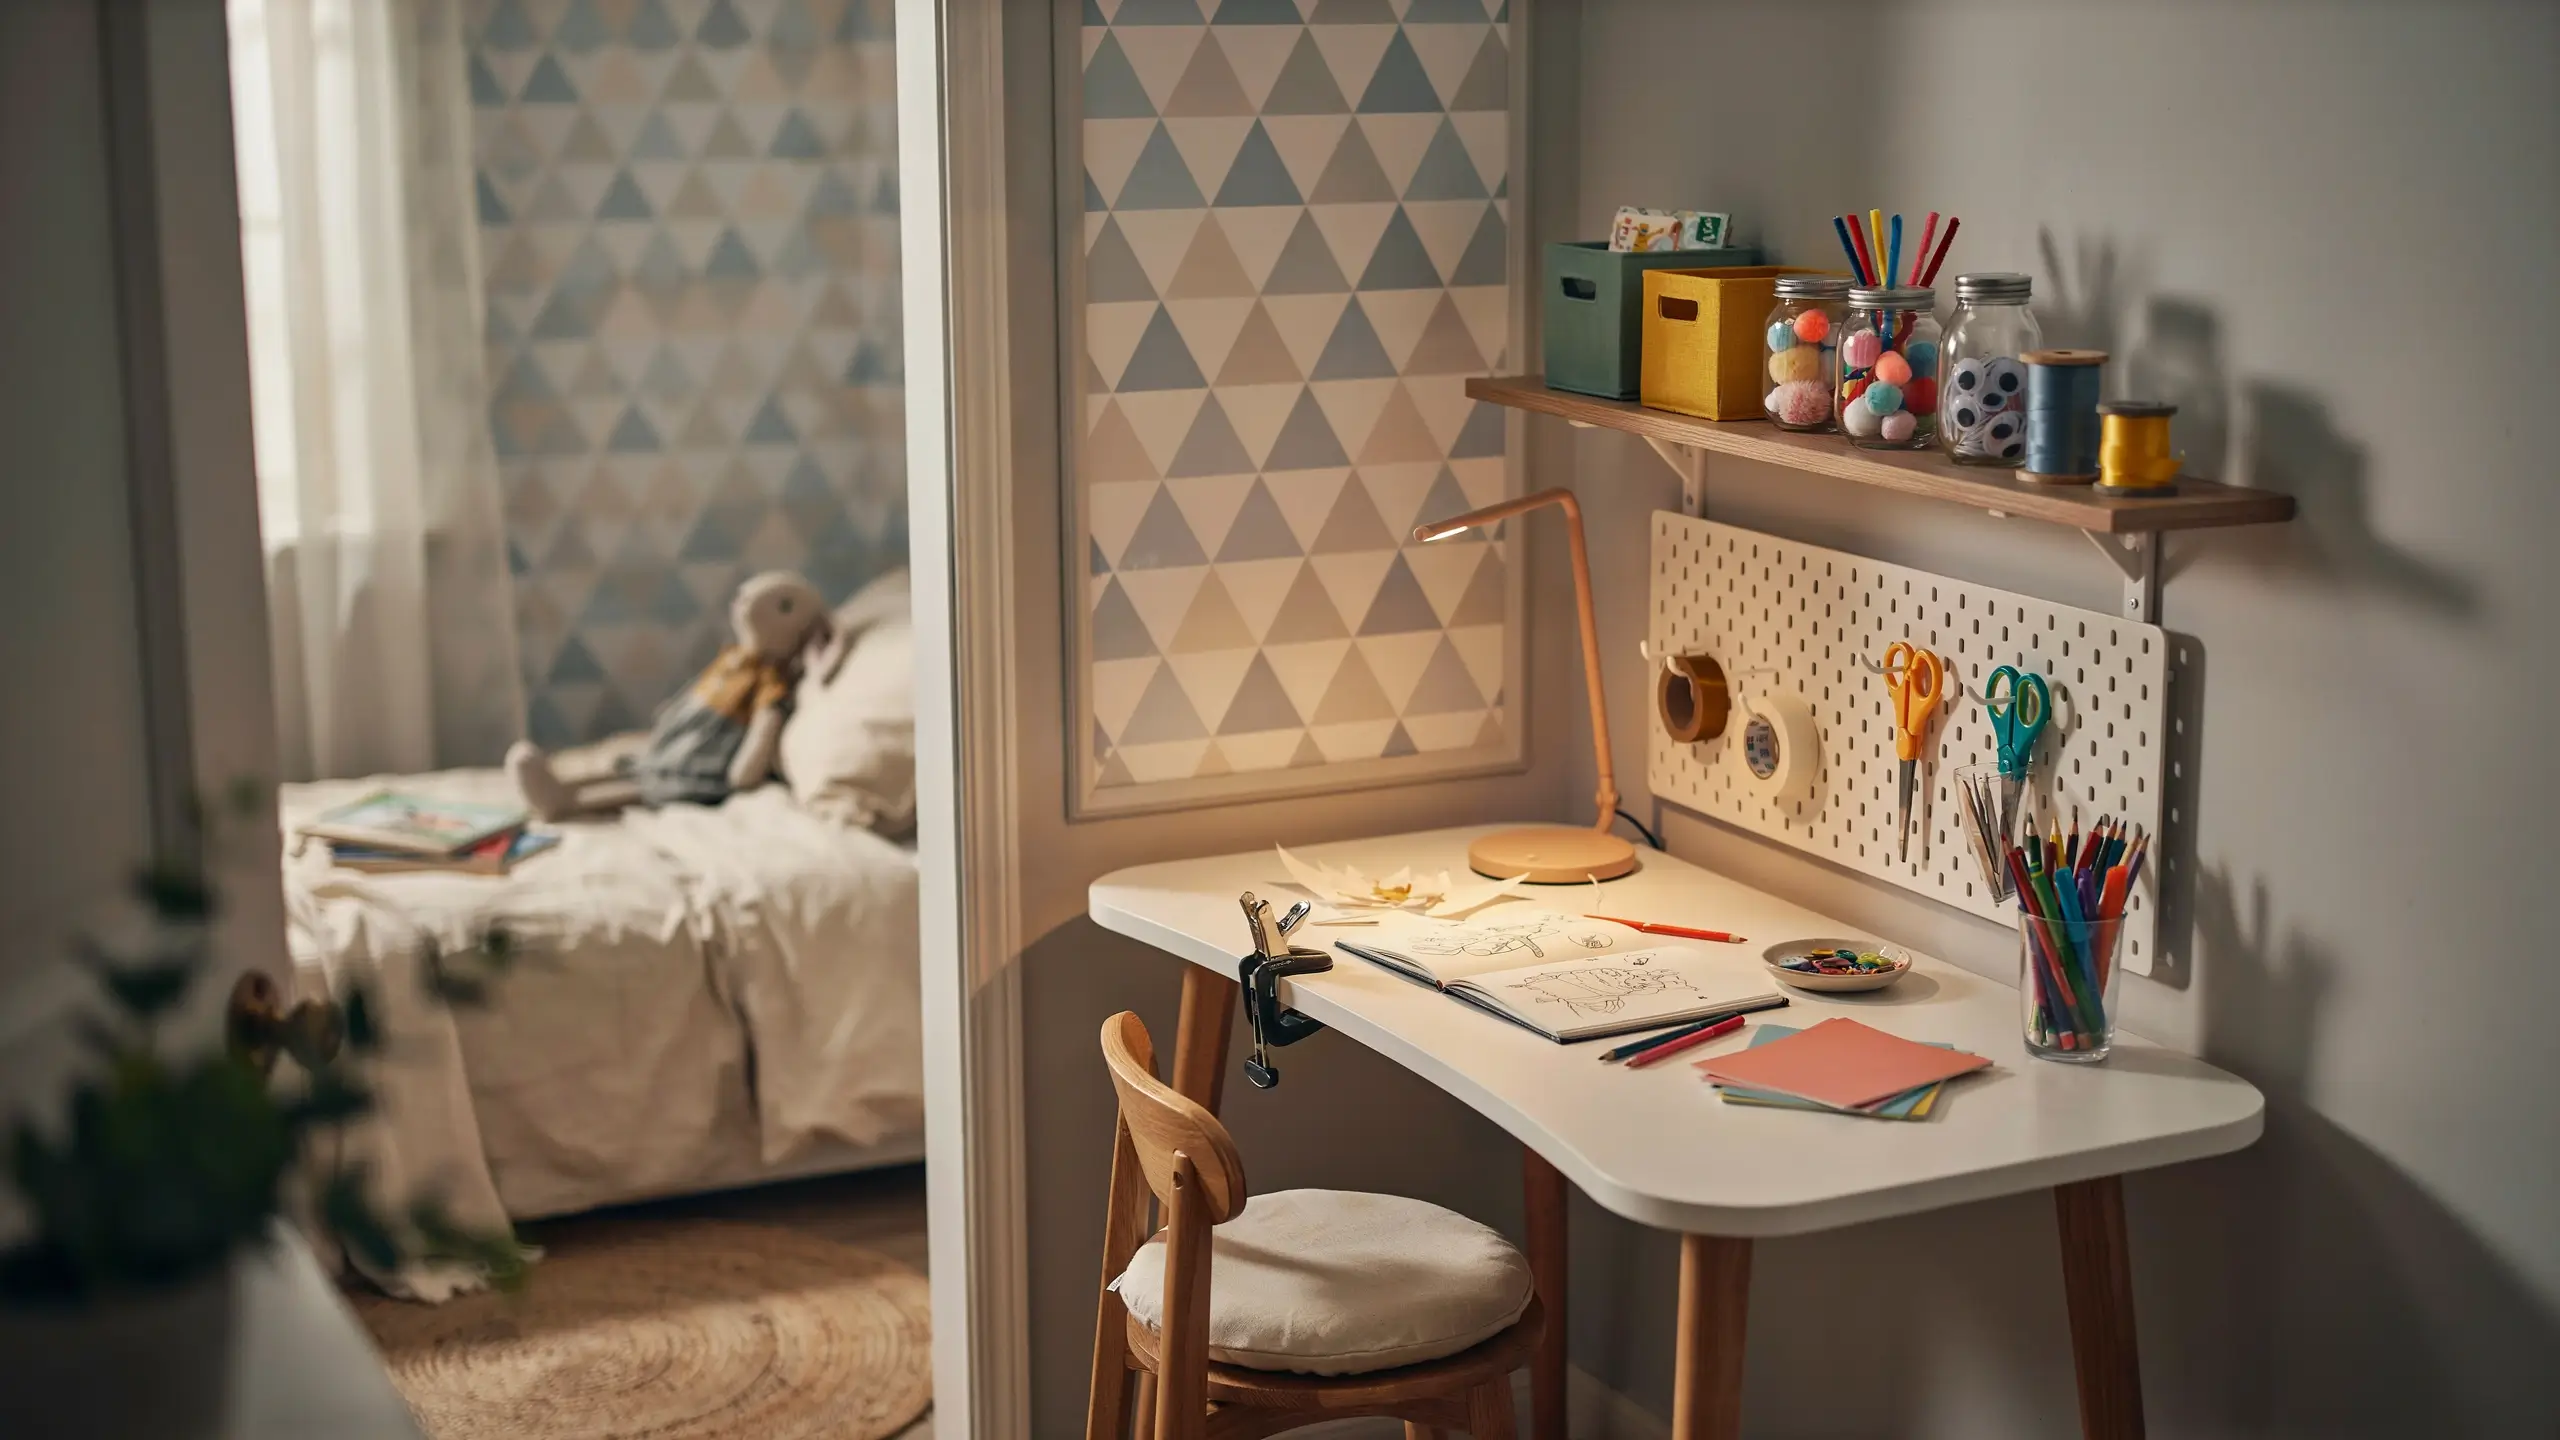
Most families don’t have a spare room to convert. The corner nook is the solution that makes a dedicated creative space possible in a shared bedroom, playroom, or even a living room corner.
A corner desk (L-shaped or triangle shaped) takes advantage of an underused part of the room and creates enough surface area for most projects. Add a floating shelf above it for bins and supplies. Hang a small pegboard panel on one of the adjacent walls. Put a clip light or small task lamp on the desk for proper lighting.
Define the nook visually by adding a removable peel-and-stick wallpaper panel on the back wall. It frames the space as “the craft corner” without any permanent changes. Even a fun solid color paint on just that back wall section does the job beautifully.
If the nook is in a shared bedroom, a simple fabric curtain on a tension rod can close off the craft area at night so the creative chaos doesn’t visually interrupt the sleeping space.
11. Zone the Room by Activity, Not Just by Supply
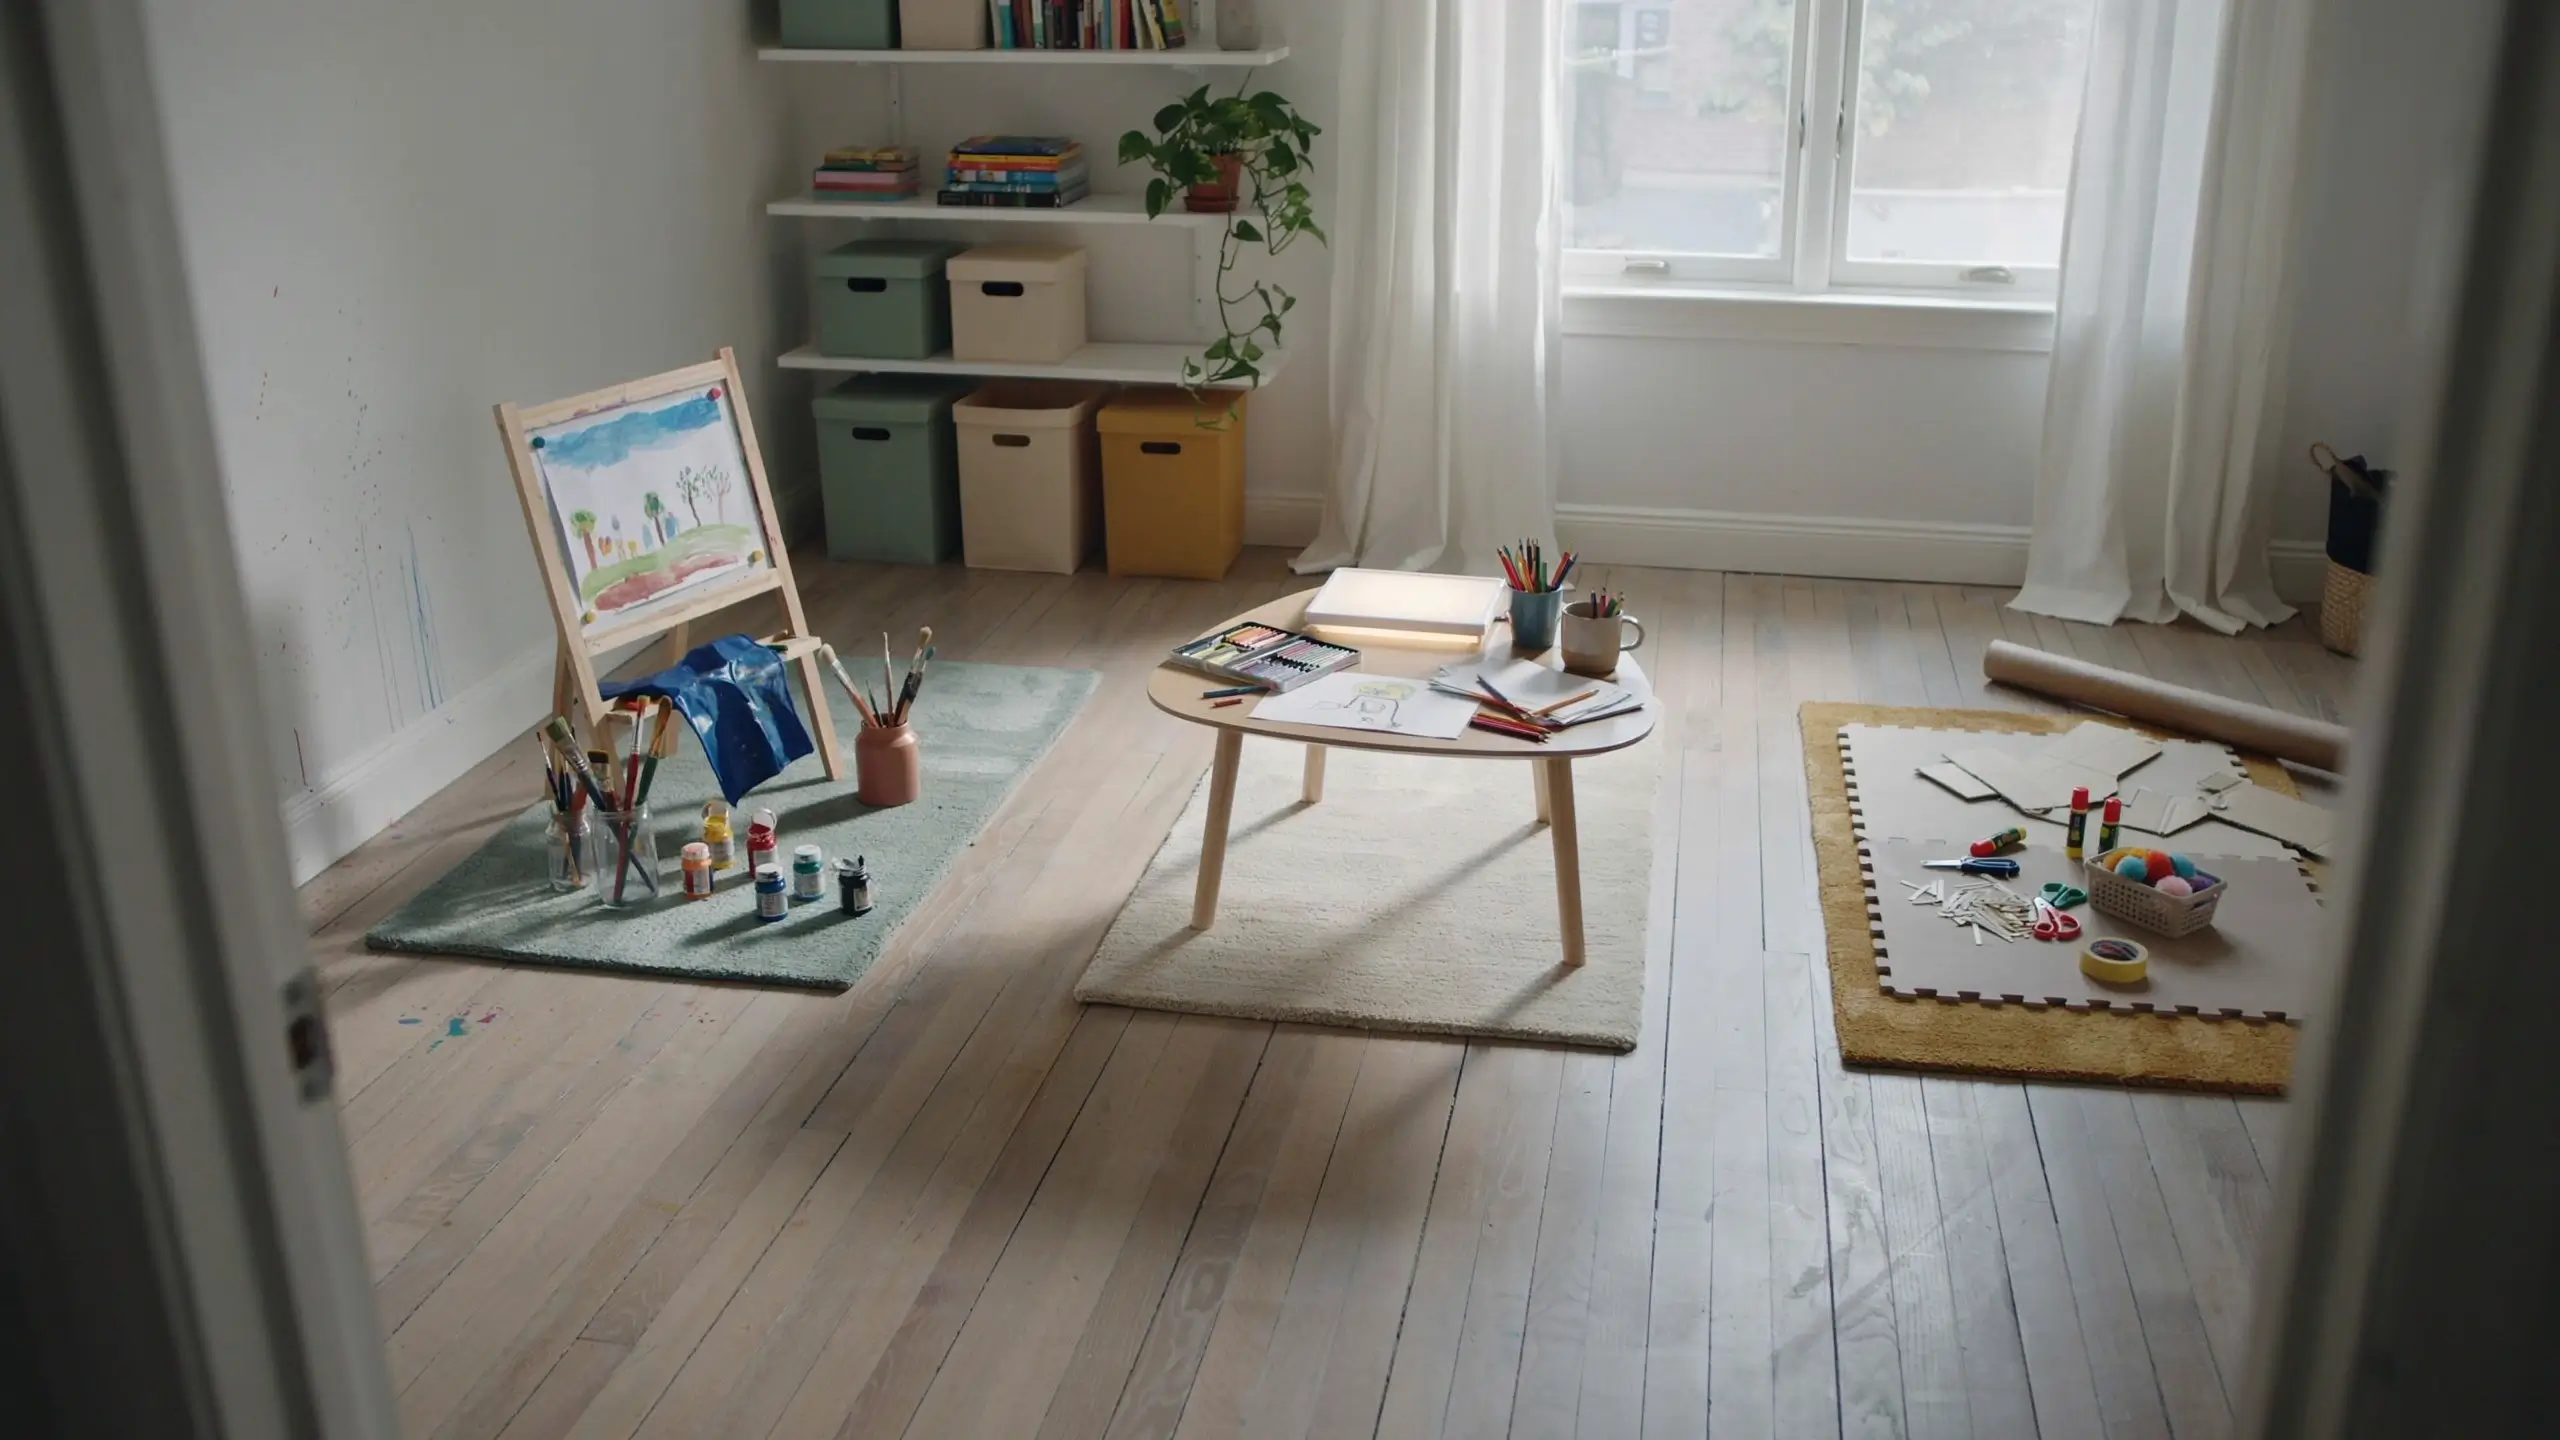
Here’s the idea most craft room articles miss entirely, and it’s the one that makes a real difference in how a room actually gets used.
Instead of organizing the room by supply type (crayons here, paint there, paper somewhere else), organize it by activity type.
Drawing zone: table, colored pencils, markers, blank paper, and a small lightbox if your child likes to trace.
Painting zone: easel or wipeable surface, smocks on a nearby hook, paints sorted by type (watercolor, tempera, acrylic), brushes in jars sorted by size, and a small water cup station nearby.
Building zone: low table or floor mat with tape, cardboard scraps, craft sticks, string, and scissors.
Small crafts zone: beads, friendship bracelet supplies, stickers, washi tape, and anything that involves tiny pieces. This zone benefits from a tray with raised edges to catch small items before they hit the floor.
When zones are clear, children move through the room with purpose. They know where to go for the kind of making they want to do. It also makes cleanup more specific: “put everything back in the painting zone.”
12. The Fold-Down Wall Desk (Renter-Friendly and Space-Saving)
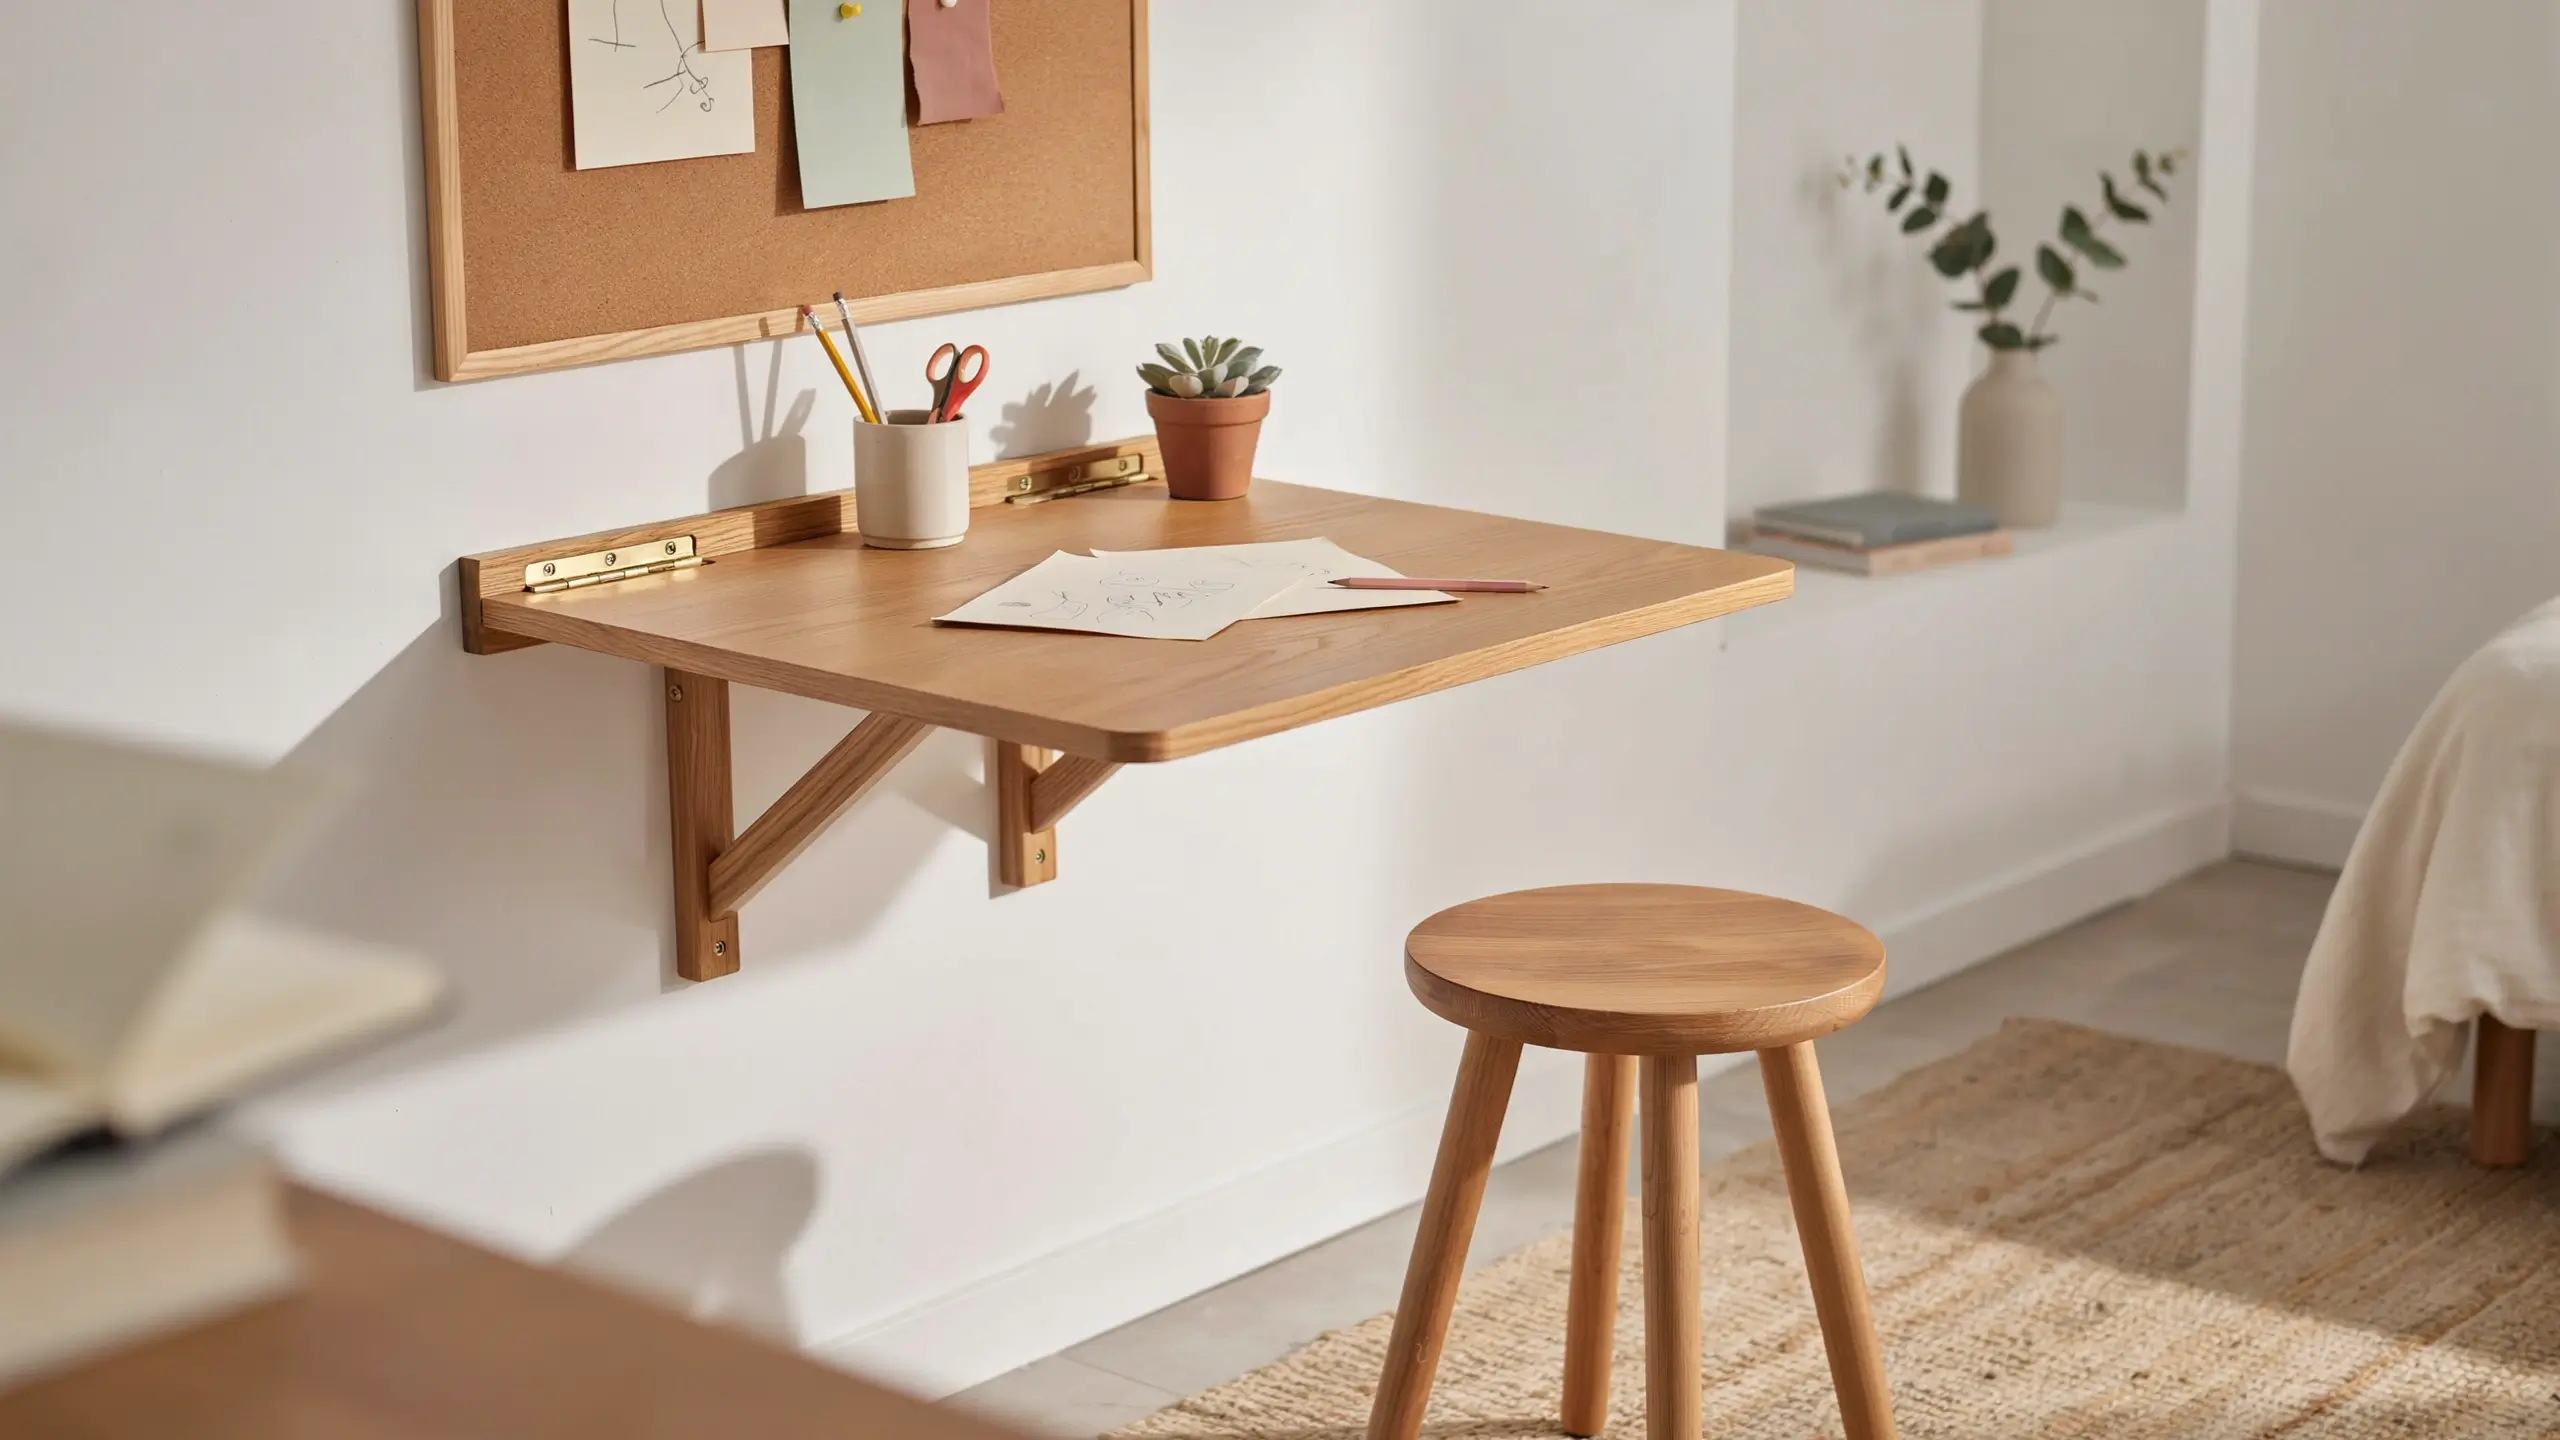
A wall-mounted fold-down desk is one of those solutions that feels almost unfair in how much function it packs into how little space. The desk folds flat against the wall when not in use and drops down to create a real work surface when needed.
Most fold-down desks attach with a few screws and a piano hinge, which means they do leave small holes in the wall. For renters, patch the holes with spackle before moving out. Alternatively, look for free-standing fold-down options that attach to a bookshelf unit instead of the wall.
Add a small corkboard or magnetic panel to the wall directly above the desk when folded up. It holds the space intentionally so the wall doesn’t look empty when the desk is closed, and it gives your child a pinboard when the desk is open.
This works especially well in a shared bedroom where a child needs a creative space that doesn’t crowd out the rest of the room.
13. Dedicated Smock Hooks and an Easy Cleanup Station
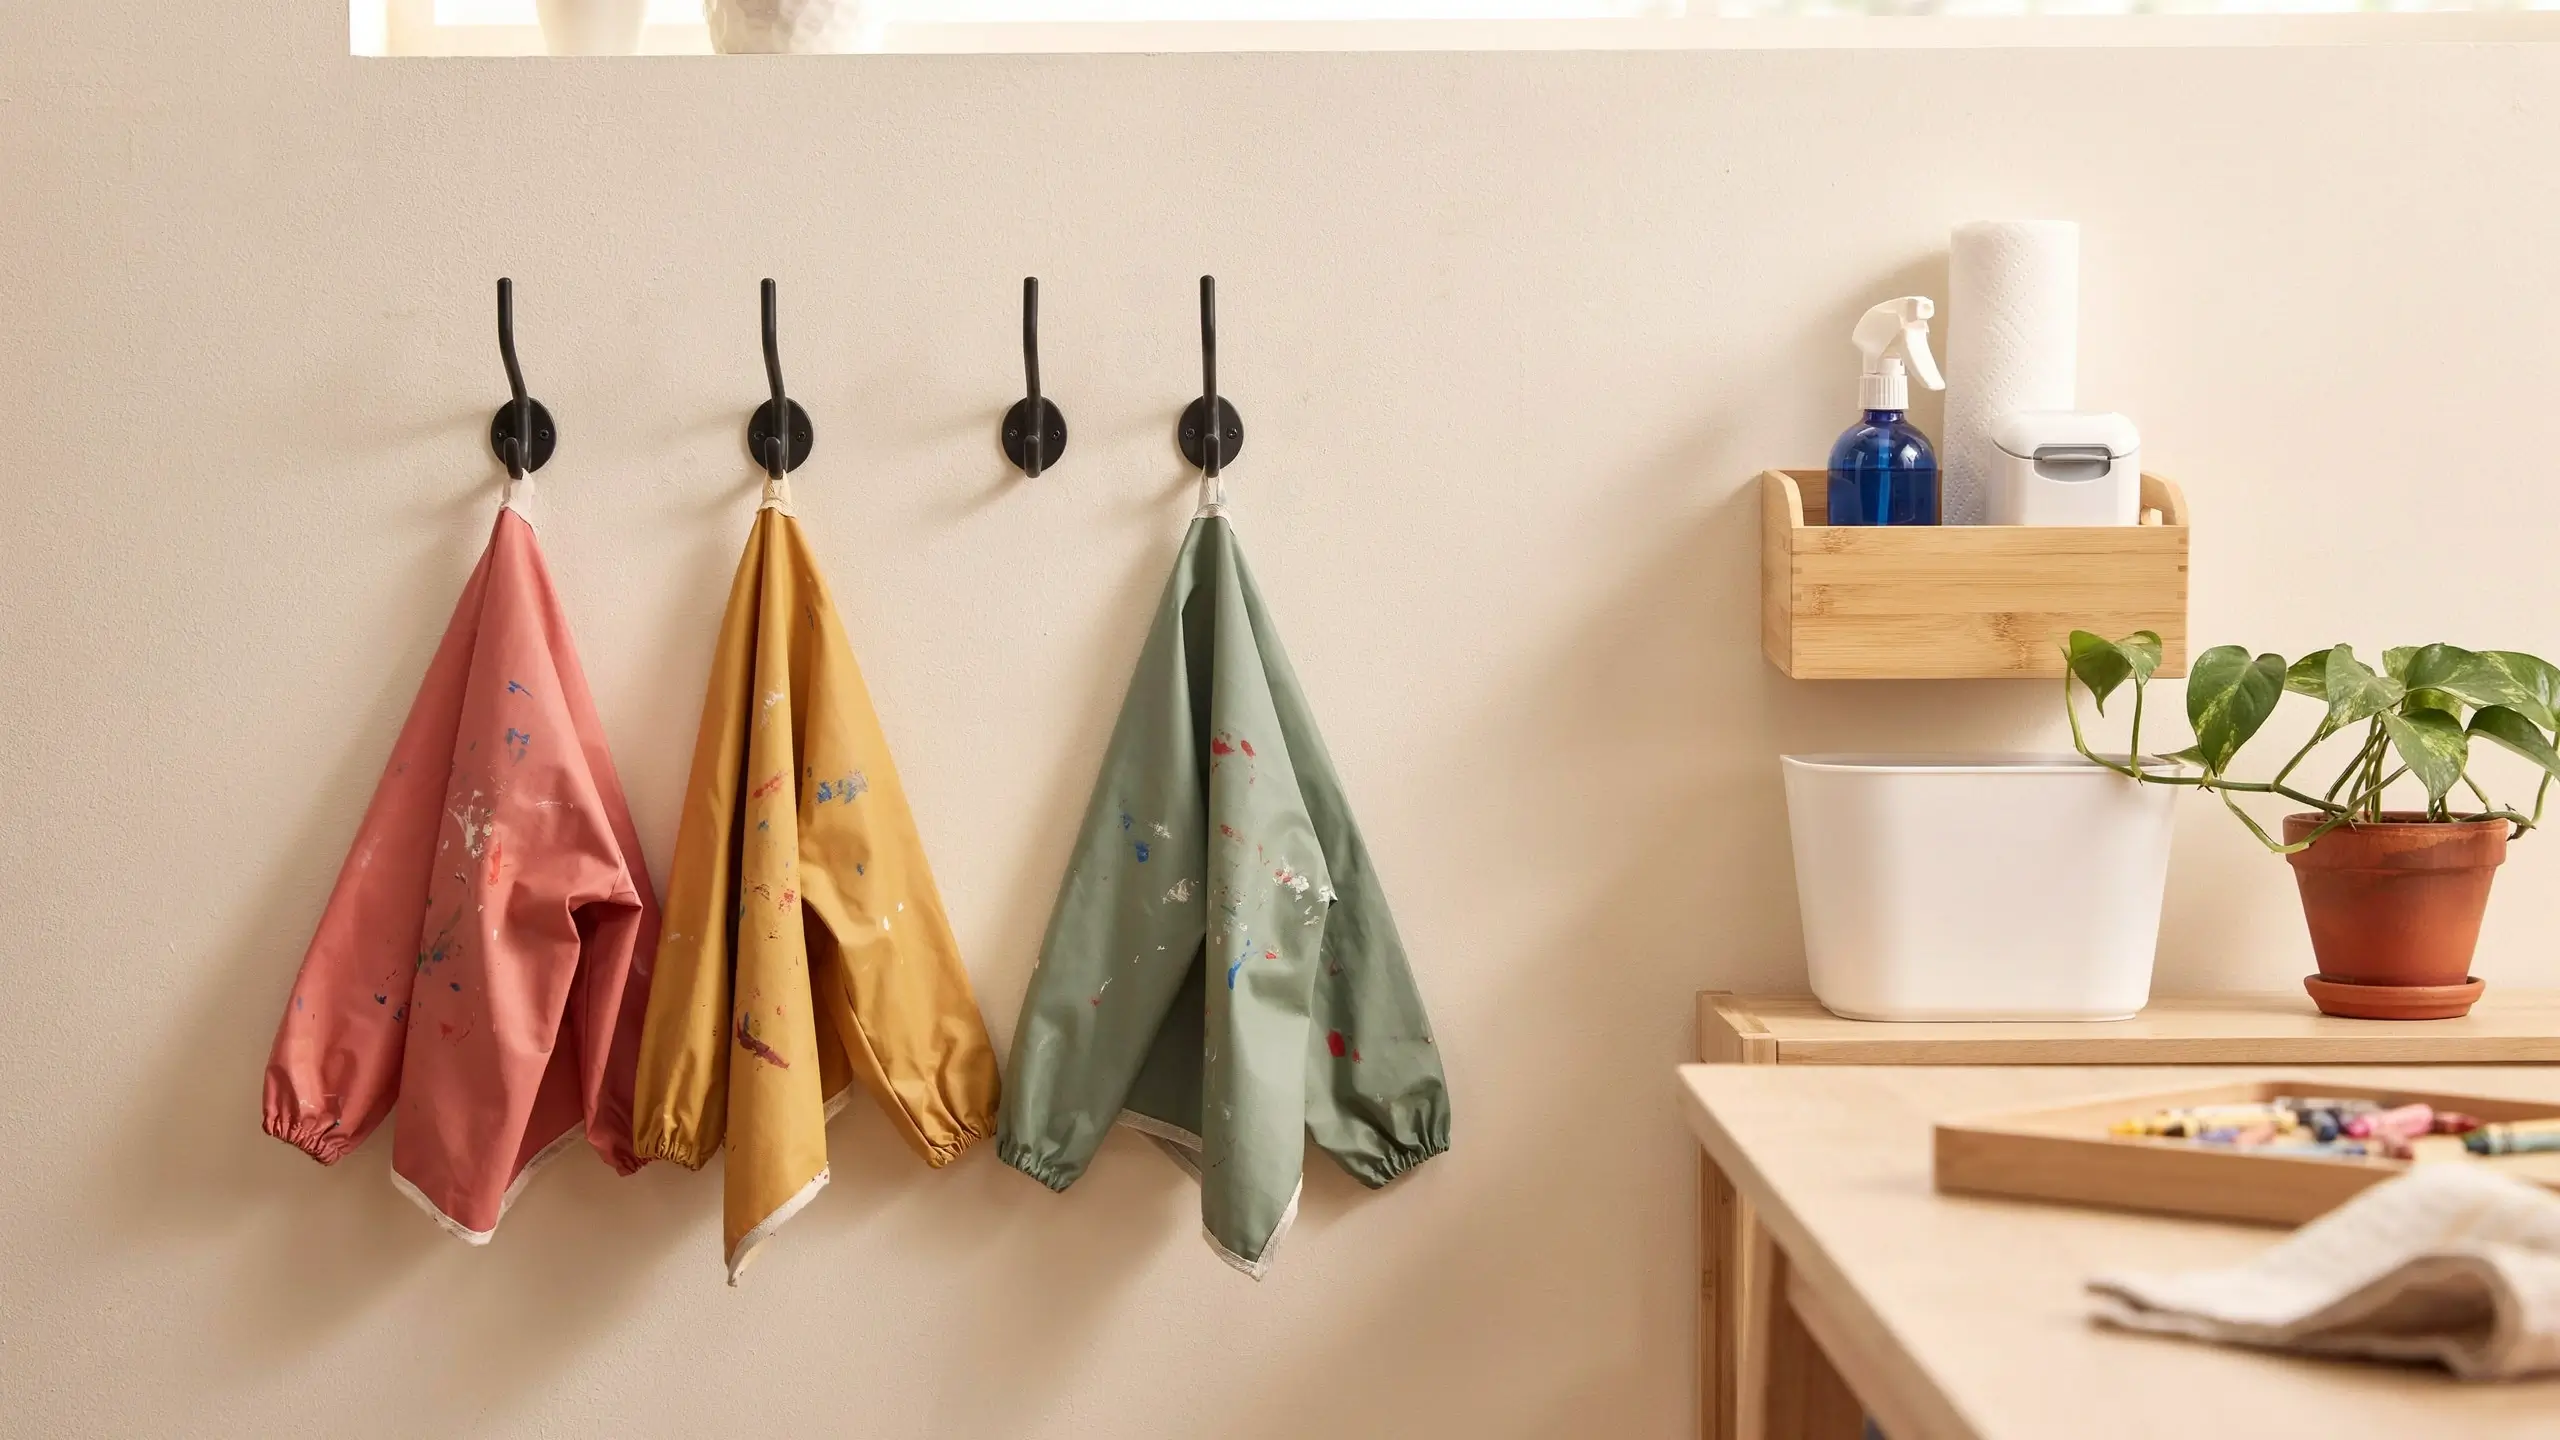
This is the idea nobody glamorizes in photoshoots, but it changes the daily reality of a craft room more than almost anything else.
Mount three or four sturdy hooks at your child’s shoulder height near the entrance of the craft area. Each hook holds an art smock or old oversized t-shirt (the cheapest “smock” there is). The rule is simple: smock on before crafting, smock off and back on the hook when done.
Within arm’s reach of the craft table, set up a small cleanup station: a roll of paper towels, a small spray bottle of water, a bin for trash scraps, and a wet wipe dispenser. These are the supplies that make the mess manageable in real time, before the paint dries on the table and before the glitter travels to the next room.
Adding a trash bin with a wide opening right at the table edge is one of the smallest changes with one of the biggest payoffs. Kids are far more likely to toss scraps if the bin is right there.
14. Make Storage Visible and Accessible
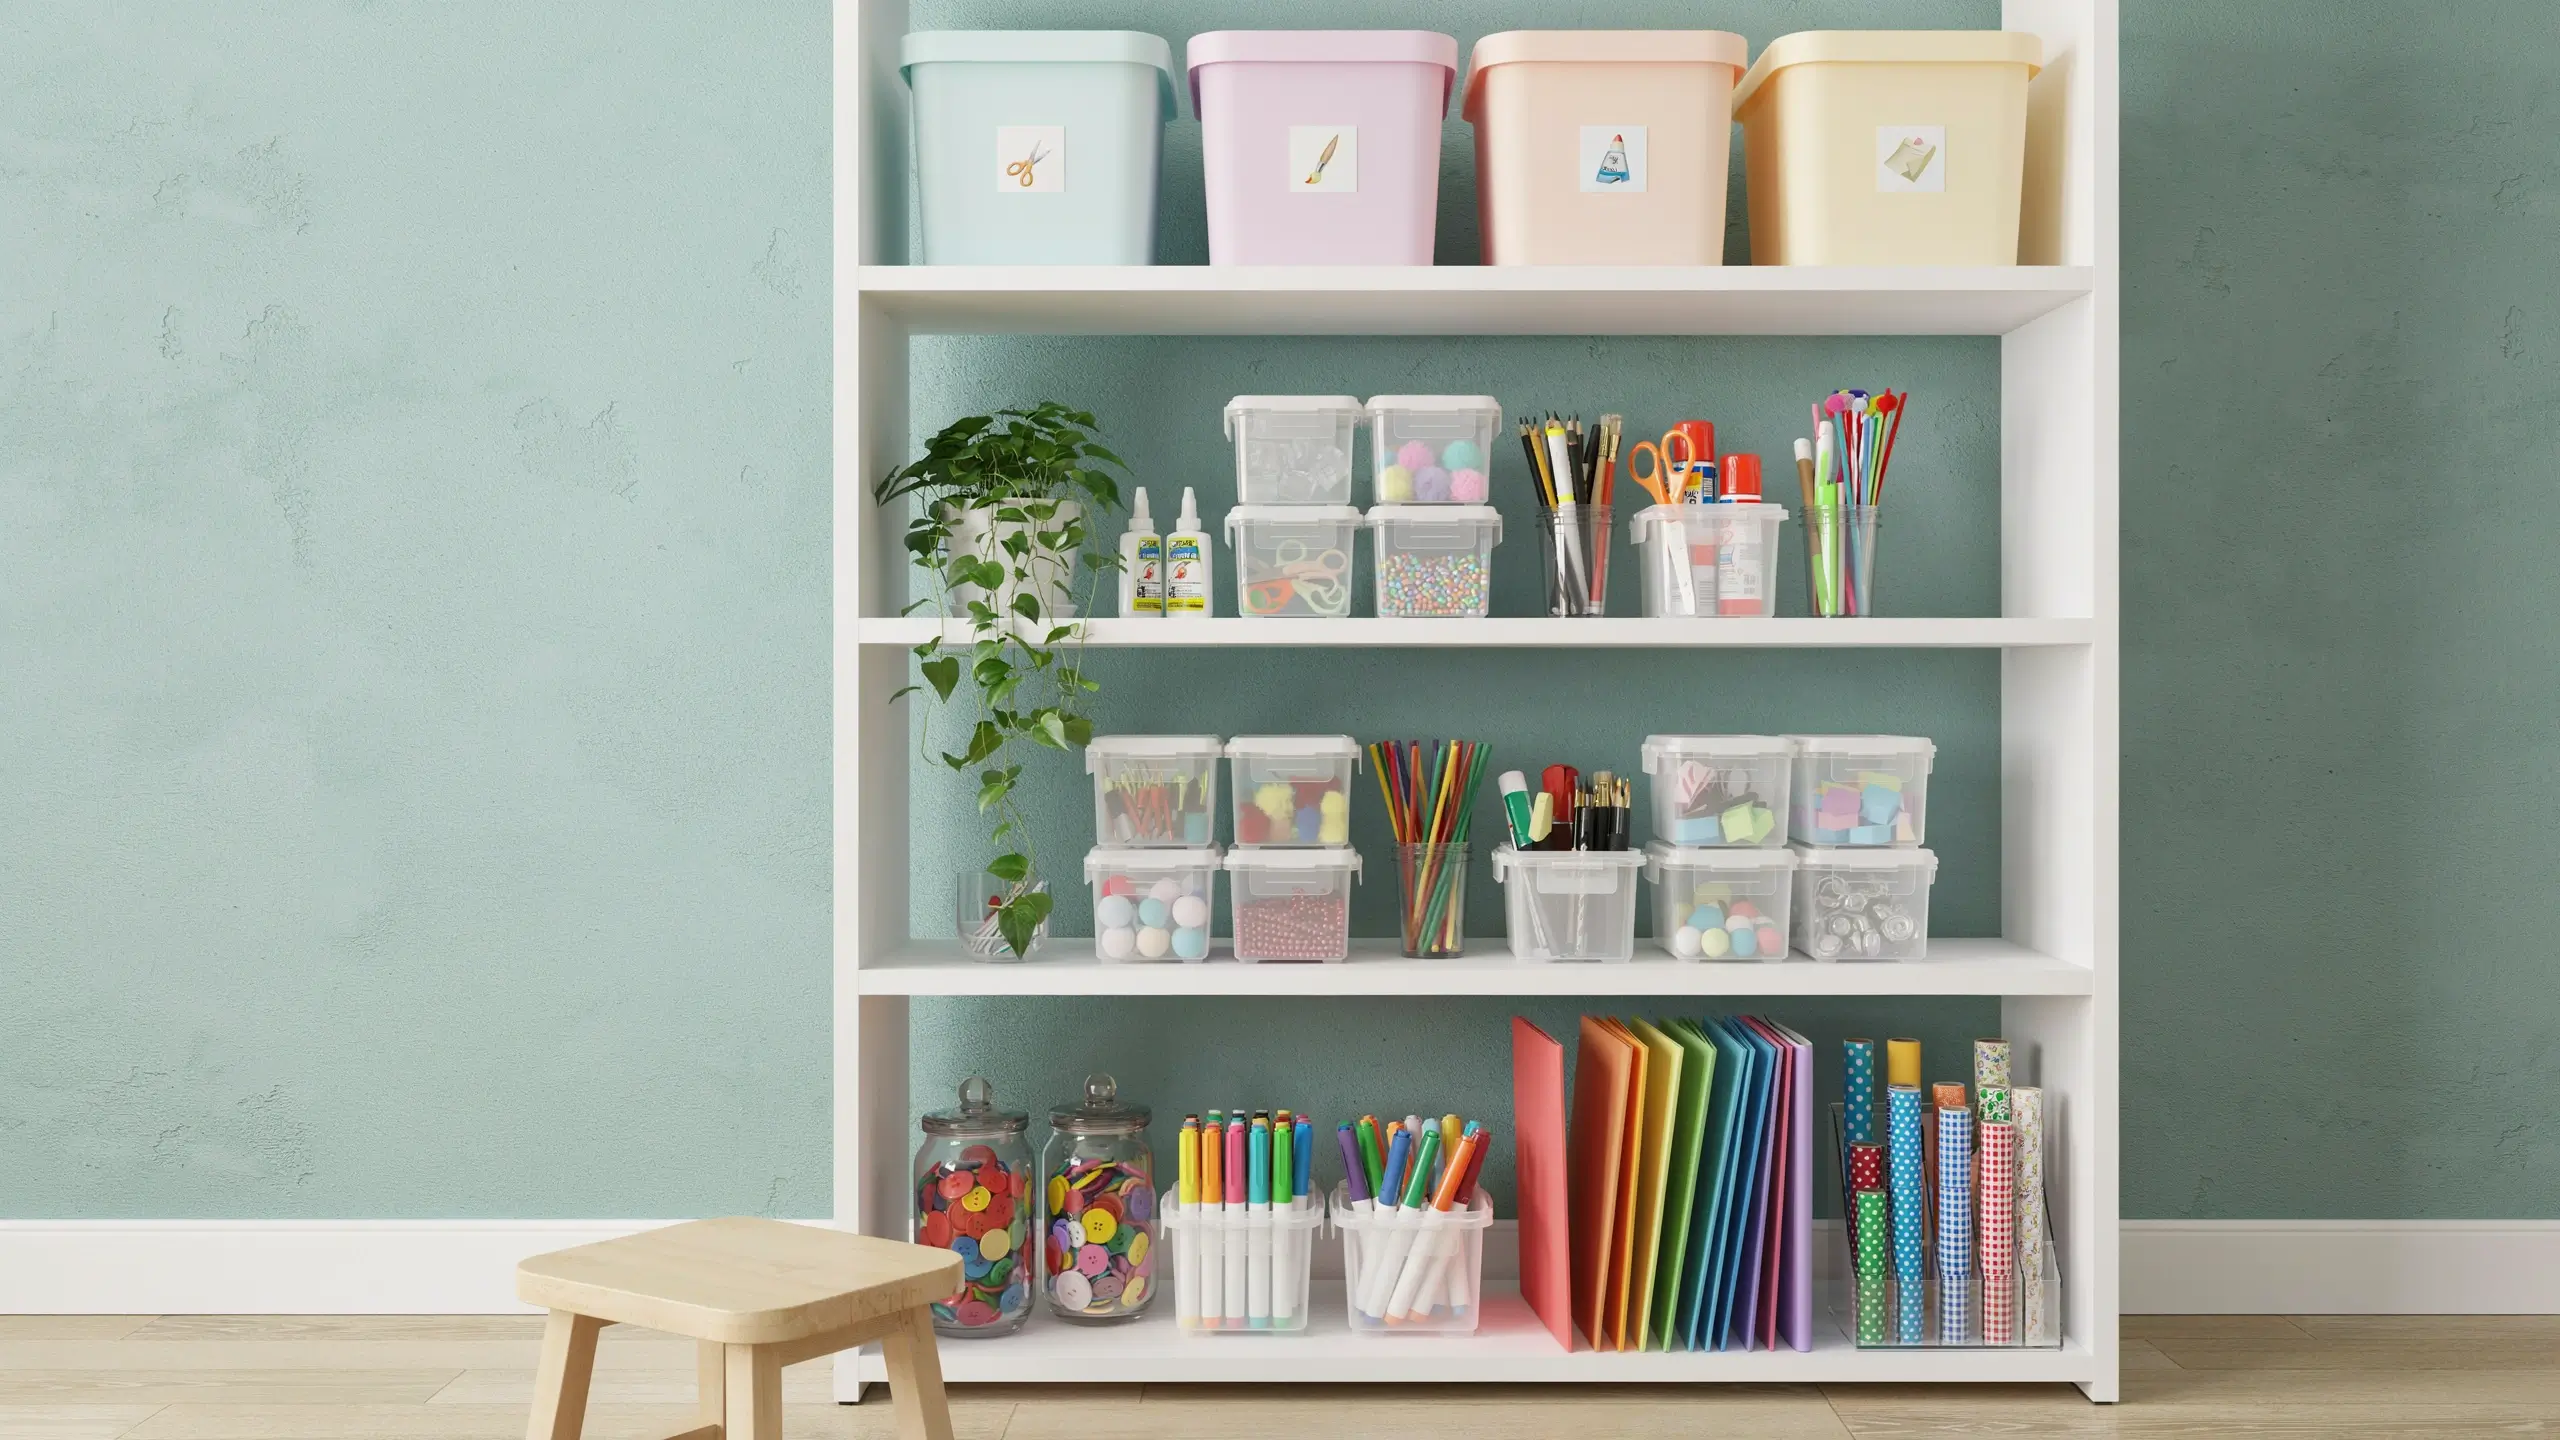
The fastest way to get kids not to use their craft room? Put supplies in closed bins they have to dig through, on shelves they can’t reach, in drawers with no labels.
Open storage works better for children. Clear bins, open shelving, and transparent containers let a child see at a glance what’s available. This is actually what inspires kids to create. Seeing a jar of colorful buttons on a shelf is an invitation. A button hidden in a closed drawer is forgotten.
Keep the most-used supplies at the lowest, most accessible level. Reserve upper shelves for supplies that need adult supervision, like glue guns, box cutters, or expensive specialty materials.
Label everything at the child’s level of literacy. Before they can read, use pictures and colors. Once they can read, use simple one-word labels. As they get older, involve them in making and updating the labels. That ownership makes them far more likely to maintain the system.
15. Display Finished Projects, Not Just Artwork
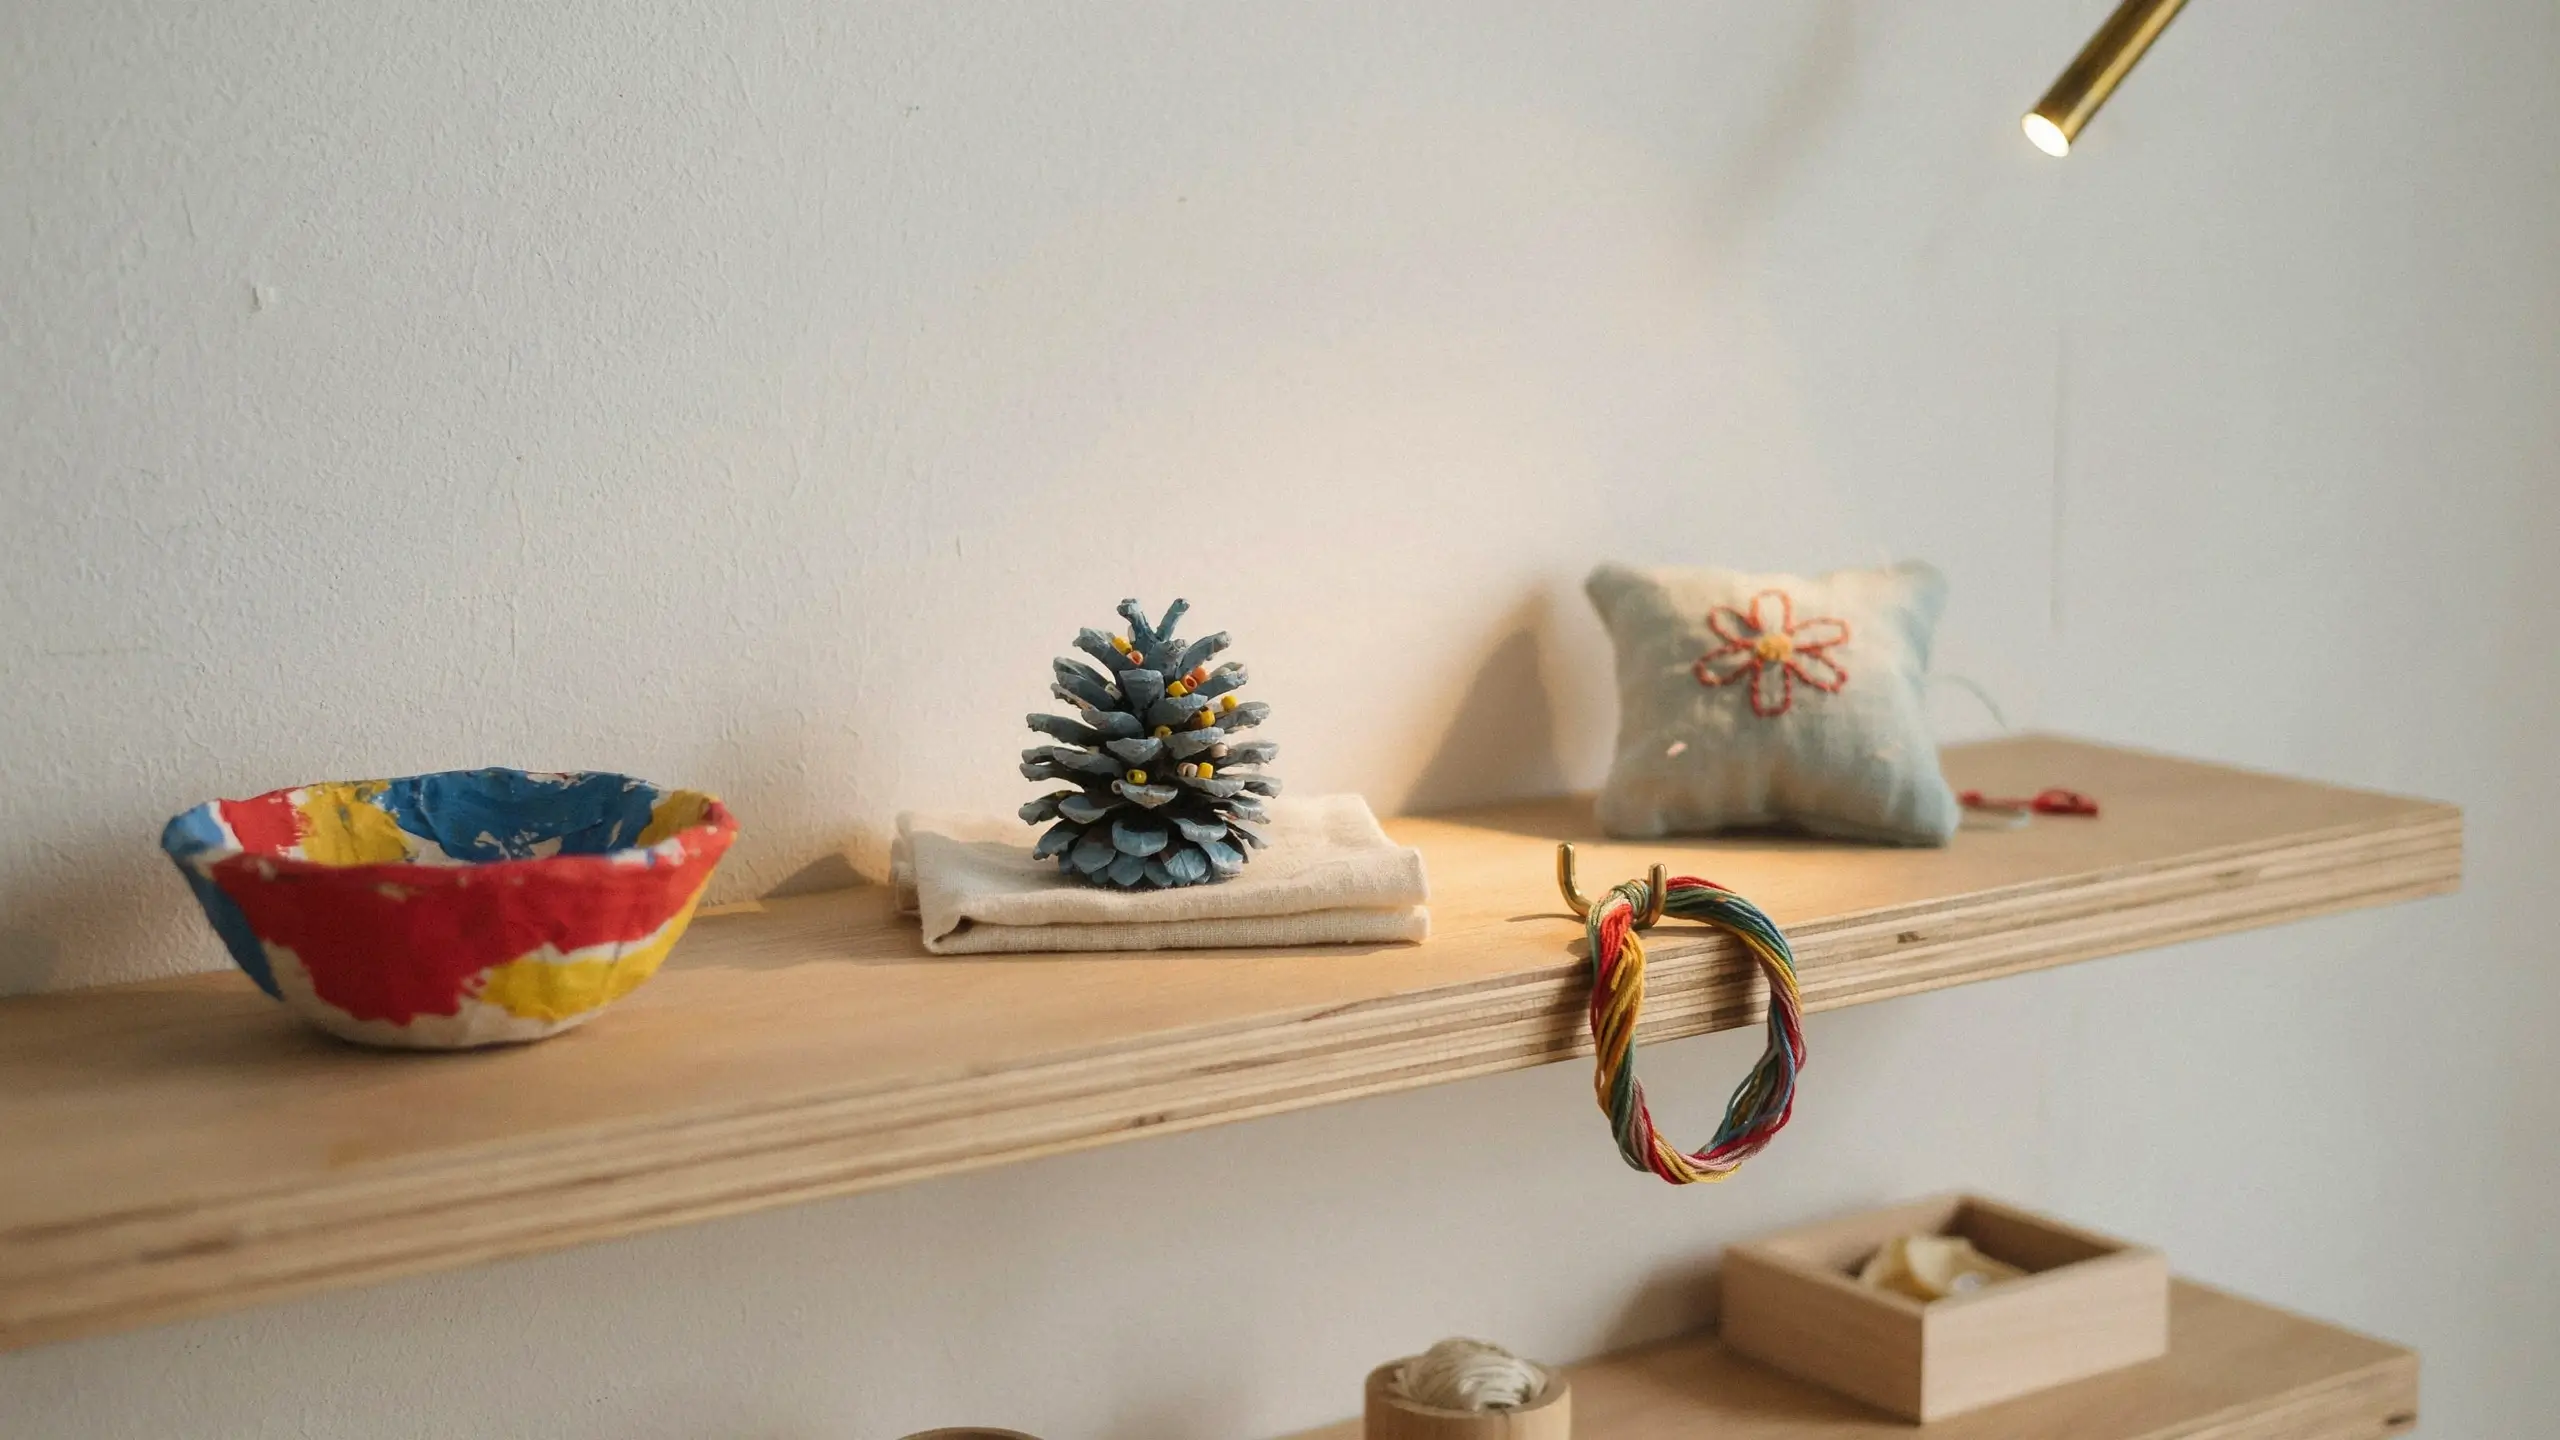
Most kids’ spaces focus on displaying flat artwork like drawings and paintings. But children who love crafts make three-dimensional things too, and those deserve to be shown off just as much.
A simple wooden display shelf at eye height becomes a rotating gallery of finished projects. A papier-mâché bowl, a friendship bracelet draped over a small hook, a painted pinecone bird feeder, a sewn pillow. These things matter to the child who made them, and giving them a proper place to live tells them their work has value.
Rotate the display regularly. When something new goes up, take a photo of the old piece before putting it in a “keepsake box” so the memory is preserved even if the object gets recycled or given away. This habit teaches kids that creativity is ongoing and that making things is its own reward, not just the accumulation of stuff.
Mistakes to Avoid When Setting Up a Kids Craft Room
- Buying too much at once. Set up the basics first, a table, a bin system, and one storage solution, and then let your child’s actual habits guide what gets added next. Most overbuilt craft rooms never get used because they feel too perfect to mess up.
- Organizing for yourself, not for your child. A beautifully styled craft room that a child can’t navigate on their own is really just decor. Think about what your child can reach, find, and put back.
- Skipping lighting. Natural light is ideal for a craft space. If the room doesn’t have a good window, add a bright LED task light. Dim lighting leads to eye strain and actually discourages kids from spending time there.
- Forgetting flooring protection. A simple vinyl floor mat or a cheap canvas drop cloth under the craft table saves the floor from paint, glue, and marker. It’s far less expensive than new flooring.
- Making it too precious. The craft room should feel like a place where it’s safe to make a mess. If it’s too curated or too styled, children intuitively hold back. Add some texture, some color, some signs of actual use. Let it feel lived in.
How to Get Your Kids Involved in the Setup
Here’s the secret to creating a craft room that actually gets used: let your children help design it.
- Walk through the space together and ask where they think things should go.
- Let them choose the color of the bins.
- Let them label the shelves.
- Let them arrange their supplies.
When kids have ownership over a space, they feel responsible for it in a way that no house rule can manufacture.
Ask them what they most want to make. Then set up the room to support that specific thing. A child who loves to sew needs different storage than a child who wants to build robots out of cardboard. Starting with their actual passions makes the room feel personal instead of generic.
Your Creative Space Is Closer Than You Think
A kids craft room doesn’t have to be a whole room, a big budget, or a Pinterest-perfect makeover completed in a weekend. It’s a table where your child can sit down and make something. It’s a bin where the markers actually live. It’s a wall where finished projects go up before they go away.
Start with one idea from this list. The rolling cart if you’re short on space. The pegboard wall if you want the most impact. The artwork display string if you want the most joy per dollar spent.
The rest can grow from there, because once a child has a space that’s truly theirs, they’ll fill it with more creativity than you could have planned for anyway.
Which of these kids craft room ideas are you most excited to try? Drop your thoughts in the comments below. I’d love to know whether you’re starting from scratch, converting a closet, or finally organizing an existing space that’s gotten out of hand.



No Comment! Be the first one.