




10 Easter Bunny Crafts Everyone Will Actually Make (Kids, Adults, and Total Beginners)
Spring is here, the pastel palette is calling, and the crafting table is officially open for business. There’s something about Easter bunny crafts that gets me every single time. Maybe...

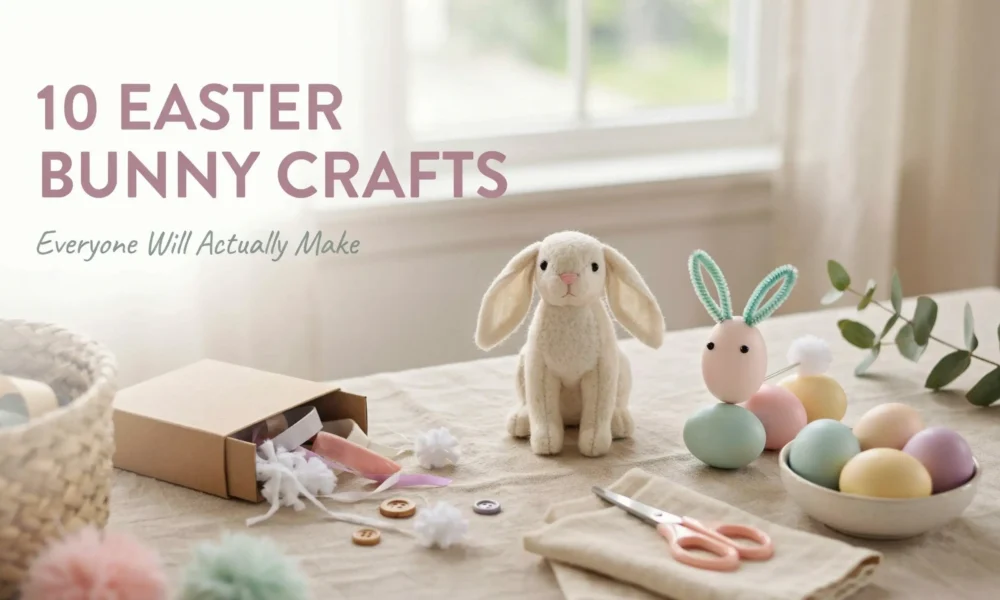
Spring is here, the pastel palette is calling, and the crafting table is officially open for business.
There’s something about Easter bunny crafts that gets me every single time. Maybe it’s the cottony tails, the floppy ears, or the fact that you can make something genuinely adorable with supplies you already have sitting in a drawer somewhere. Whatever it is, I spend the weeks before Easter pinning more bunny craft ideas than any one household could ever actually complete.
This year I wanted to do something different. Instead of another list of 40 crafts with a single vague sentence each, I pulled together the 10 Easter bunny crafts that are actually worth your time, explained exactly how to make them, and included the little details that take each one from “cute” to “I need to photograph this for my mantel.”
Some of these are for the kids. Some are pure adult home decor. Most are somewhere in the middle, which is my favorite place to be.
Before You Start: The Easter Bunny Craft Supply Starter Kit
Keep these on hand and you’ll be able to tackle almost every craft on this list without a last-minute store run:
- White and pink acrylic paint (or chalk paint for a matte finish)
- Hot glue gun and glue sticks
- Googly eyes in multiple sizes
- Pink pom poms (small and medium)
- White pom poms (large, for tails)
- Cotton balls
- Googly eyes
- Scissors and a craft knife
- Black fine-tip marker or paint pen
- Cardstock in white, pink, and light gray
- Pipe cleaners (white or light gray)
- Air-dry clay (white or natural tone)
Most of these cost only a few dollars at the dollar store or craft store. You do not need to spend a lot of money here.
1. Paper Plate Bunny
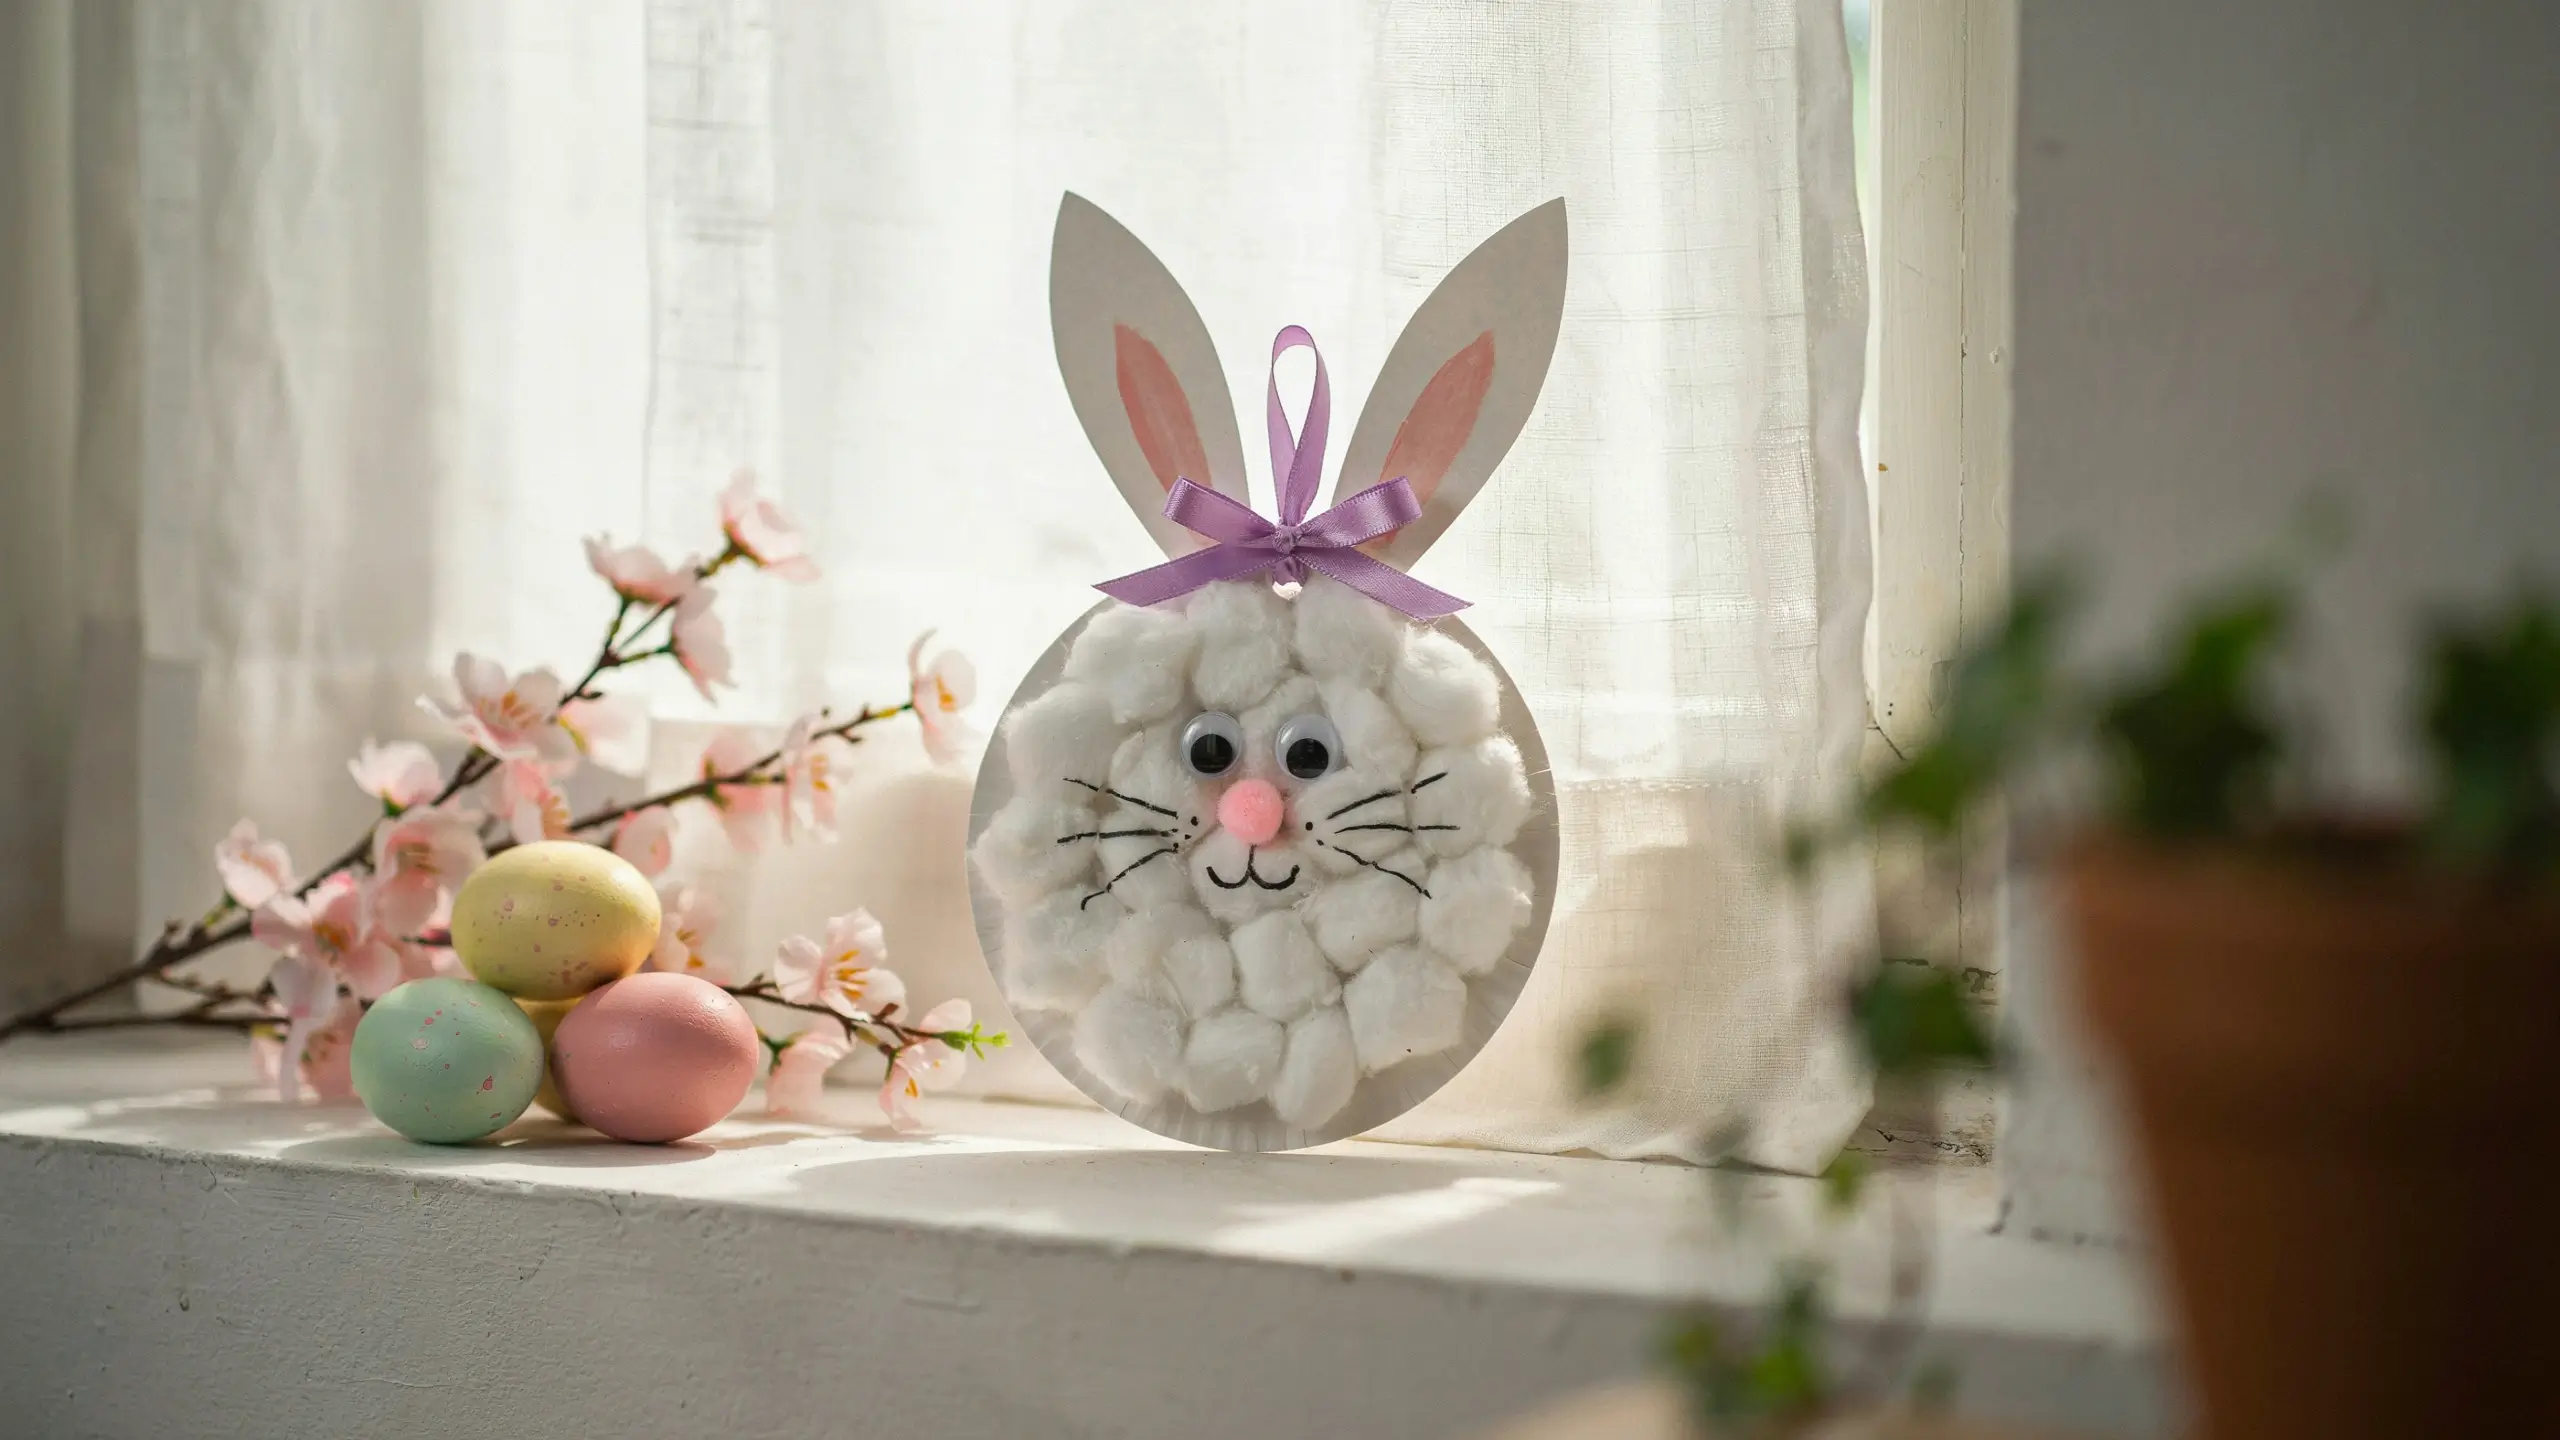
Skill level: Beginner | Time: 20–30 minutes | Cost: Under $3
This is the one for your toddlers, your preschoolers, and honestly anyone who just wants to make something cute without thinking too hard. It looks absolutely sweet displayed in a window or on the fridge, and it’s the kind of craft kids ask to make again and again.
What you need:
- 1 standard white paper plate
- Craft glue or a glue stick
- Cotton balls (about 20–25)
- 2 googly eyes
- 1 pink pom pom (small, for the nose)
- White and pink cardstock
- Black marker
- Pink marker or paint for the inner ears
How to make it:
Cover the paper plate with a thin layer of craft glue, then have your child press cotton balls all over the surface, covering every bit of white. This part alone keeps toddlers occupied for a solid 10 minutes. While that dries, cut two long oval ear shapes from white cardstock (about 5 inches tall) and a slightly smaller oval from pink cardstock for the inner ear. Glue the pink inner ear piece onto each white ear. Once the cotton balls are dry, glue on the googly eyes and pink pom pom nose, then use your black marker to draw a little curved mouth and whiskers. Attach the ears to the back top of the plate so they peek up above the edge.
Display tip: Punch a hole at the top and hang with a piece of ribbon in lavender or sage green for a sweet Easter window display.
2. Toilet Paper Roll Bunnies
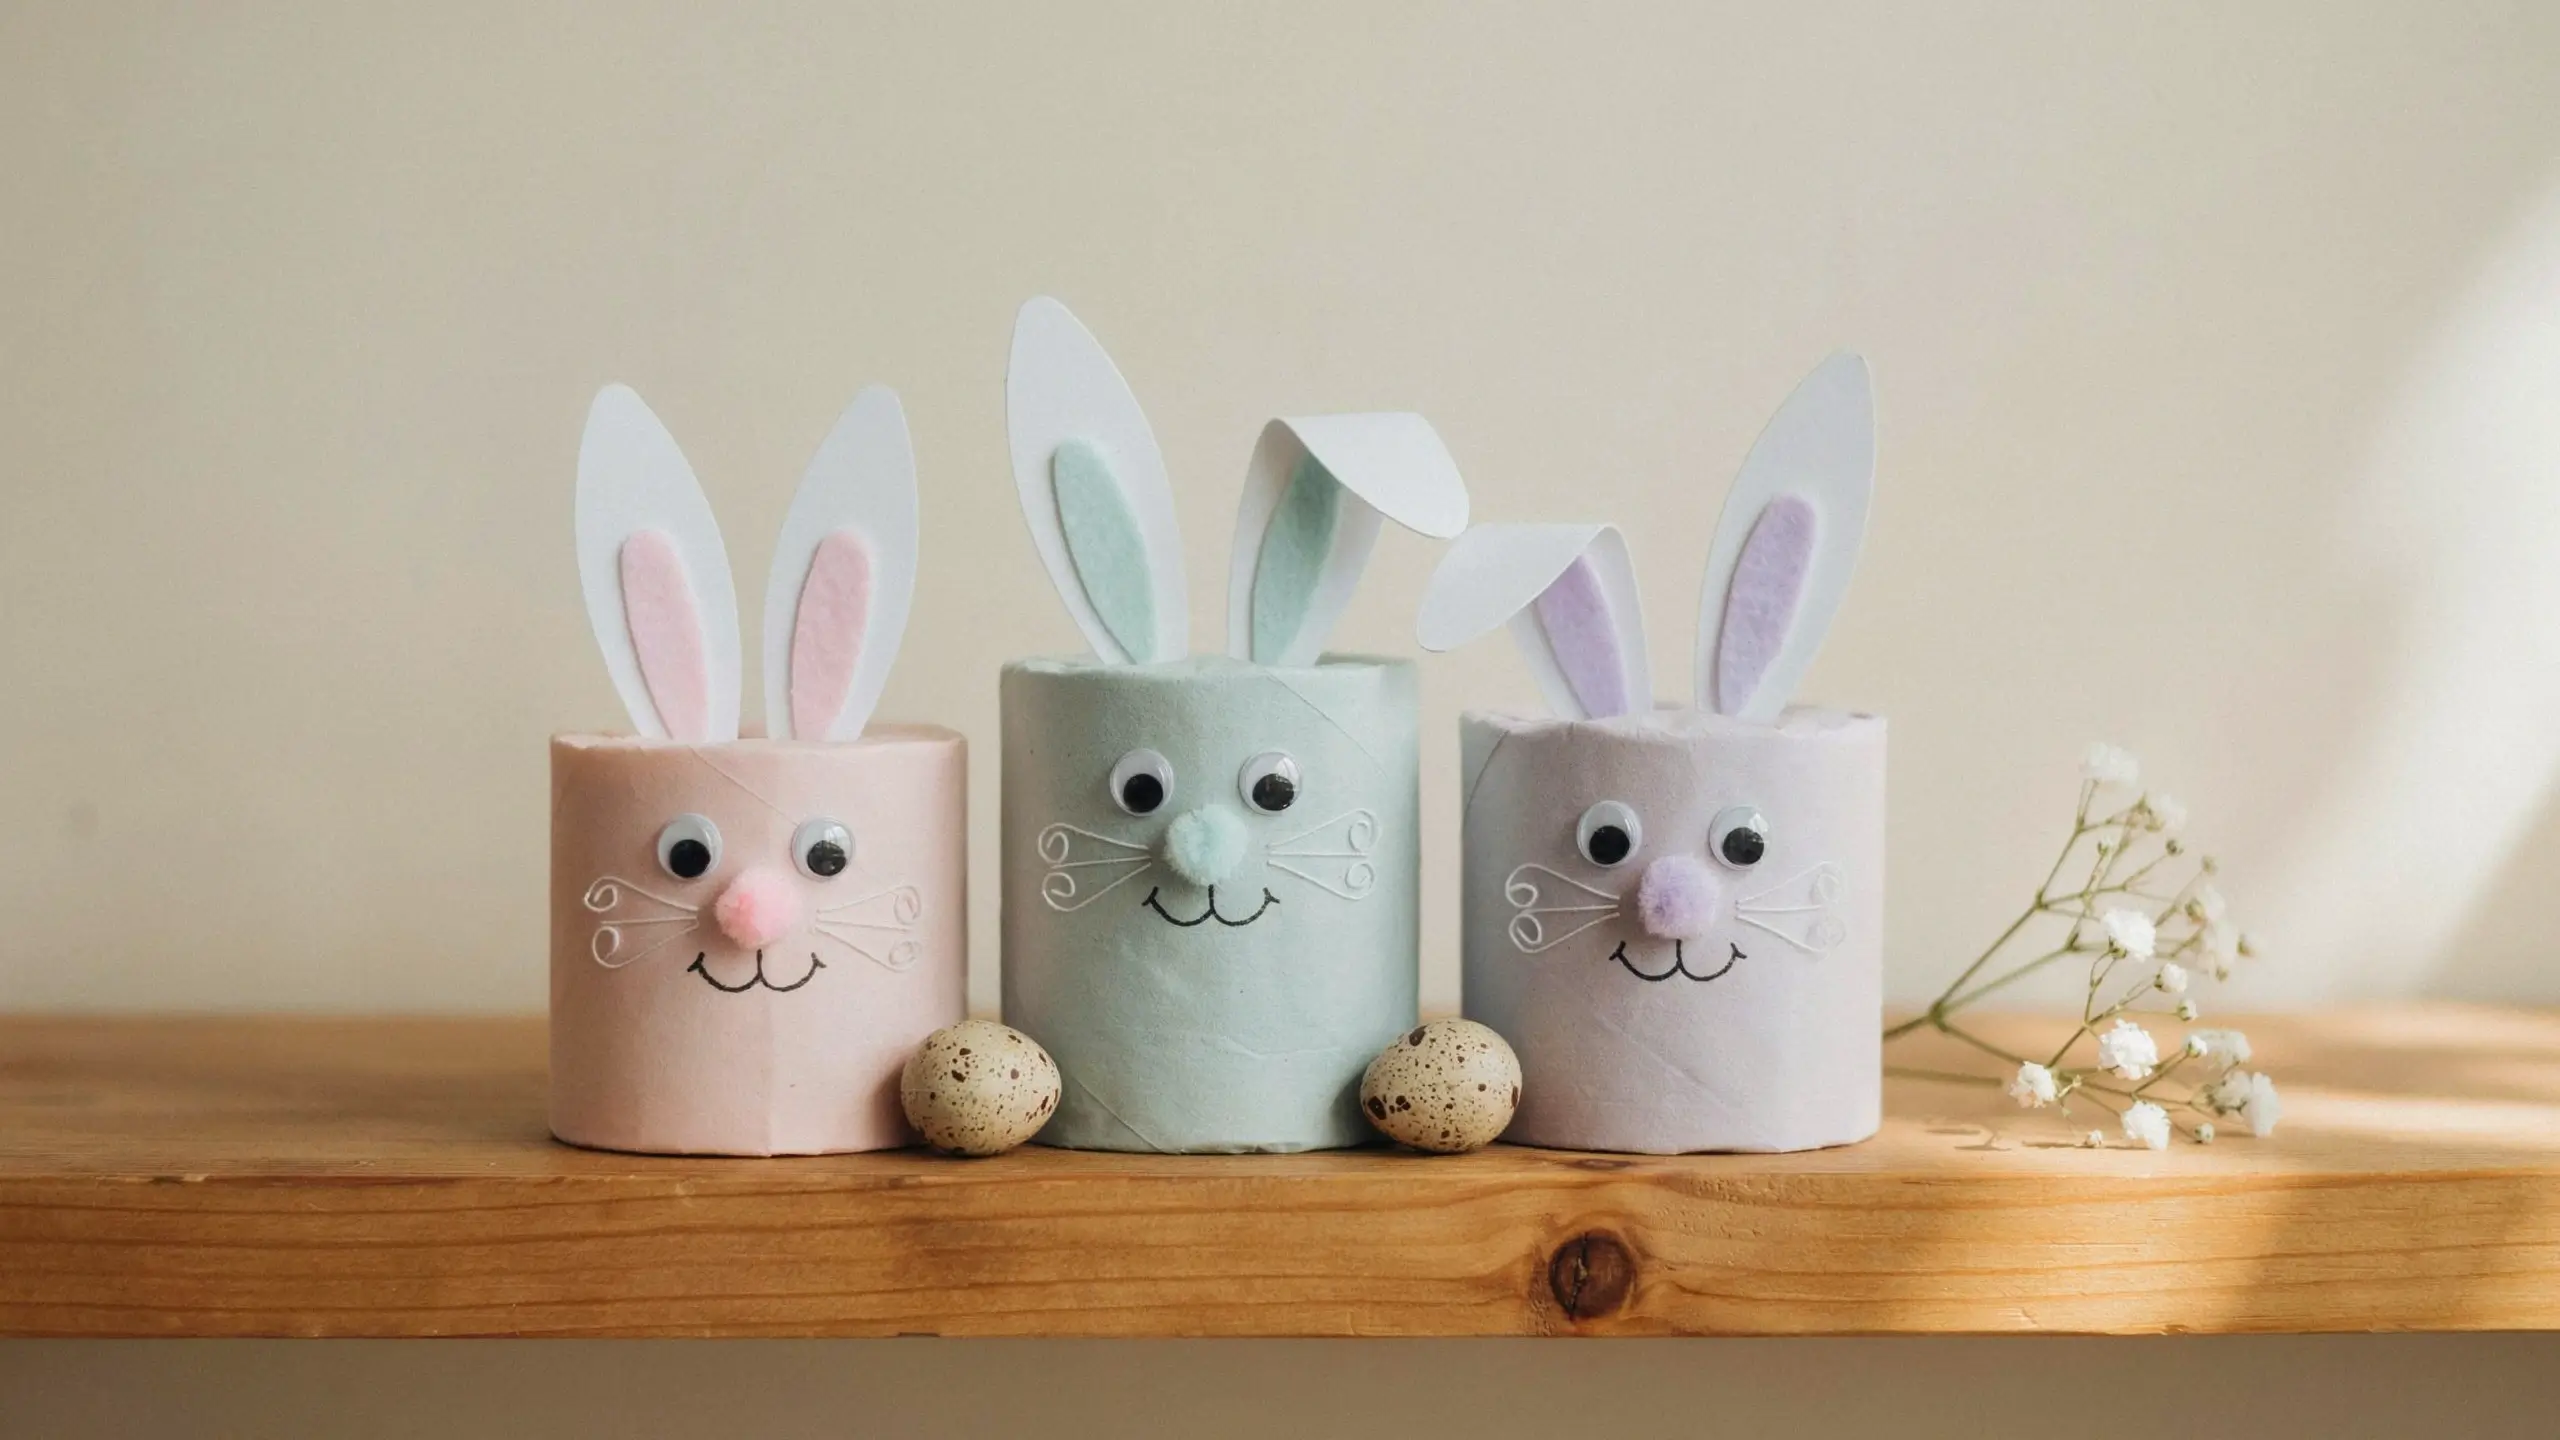
Skill level: Beginner | Time: 30–45 minutes | Cost: Free to $2
These are one of the most underrated Easter crafts around. Kids paint them wild colors, adults make a group of three in soft pastels for a little shelf vignette, and the results are charming every single time. Save your toilet paper rolls for a week or two before Easter and you’ll have a whole bundle of them.
What you need:
- Toilet paper rolls (one per bunny)
- Acrylic paint in white, lavender, mint, or blush
- White cardstock
- Pink paper
- Pipe cleaners (cut into 3-inch pieces for whiskers)
- Small pink pom pom (nose)
- 2 googly eyes
- Black marker
- Hot glue gun
How to make it:
Paint the outside of each roll with two coats of your chosen color, letting it dry fully between coats. While it dries, cut two bunny ear shapes from white cardstock (about 3 inches tall, shaped like a tall oval with a slight point at the top). Cut the same shape slightly smaller in pink paper for the inner ear. Glue the pink piece onto the white, then fold the bottom of each ear slightly and glue them to the inside top of the roll so they stand up.
Hot glue two googly eyes about a third of the way down from the top. Cut a pipe cleaner into three equal pieces and twist them together in the center, then glue the twisted section to the front of the roll as whiskers. Add a tiny pink pom pom on top of the whisker bundle for the nose. Use a black marker to draw a small curved smile.
Display tip: Stand three of them in a row in different heights (use paper towel rolls cut down for varying heights) next to some speckled faux eggs on a windowsill or bookshelf. Group them in odd numbers, always.
3. Handprint Bunny Art
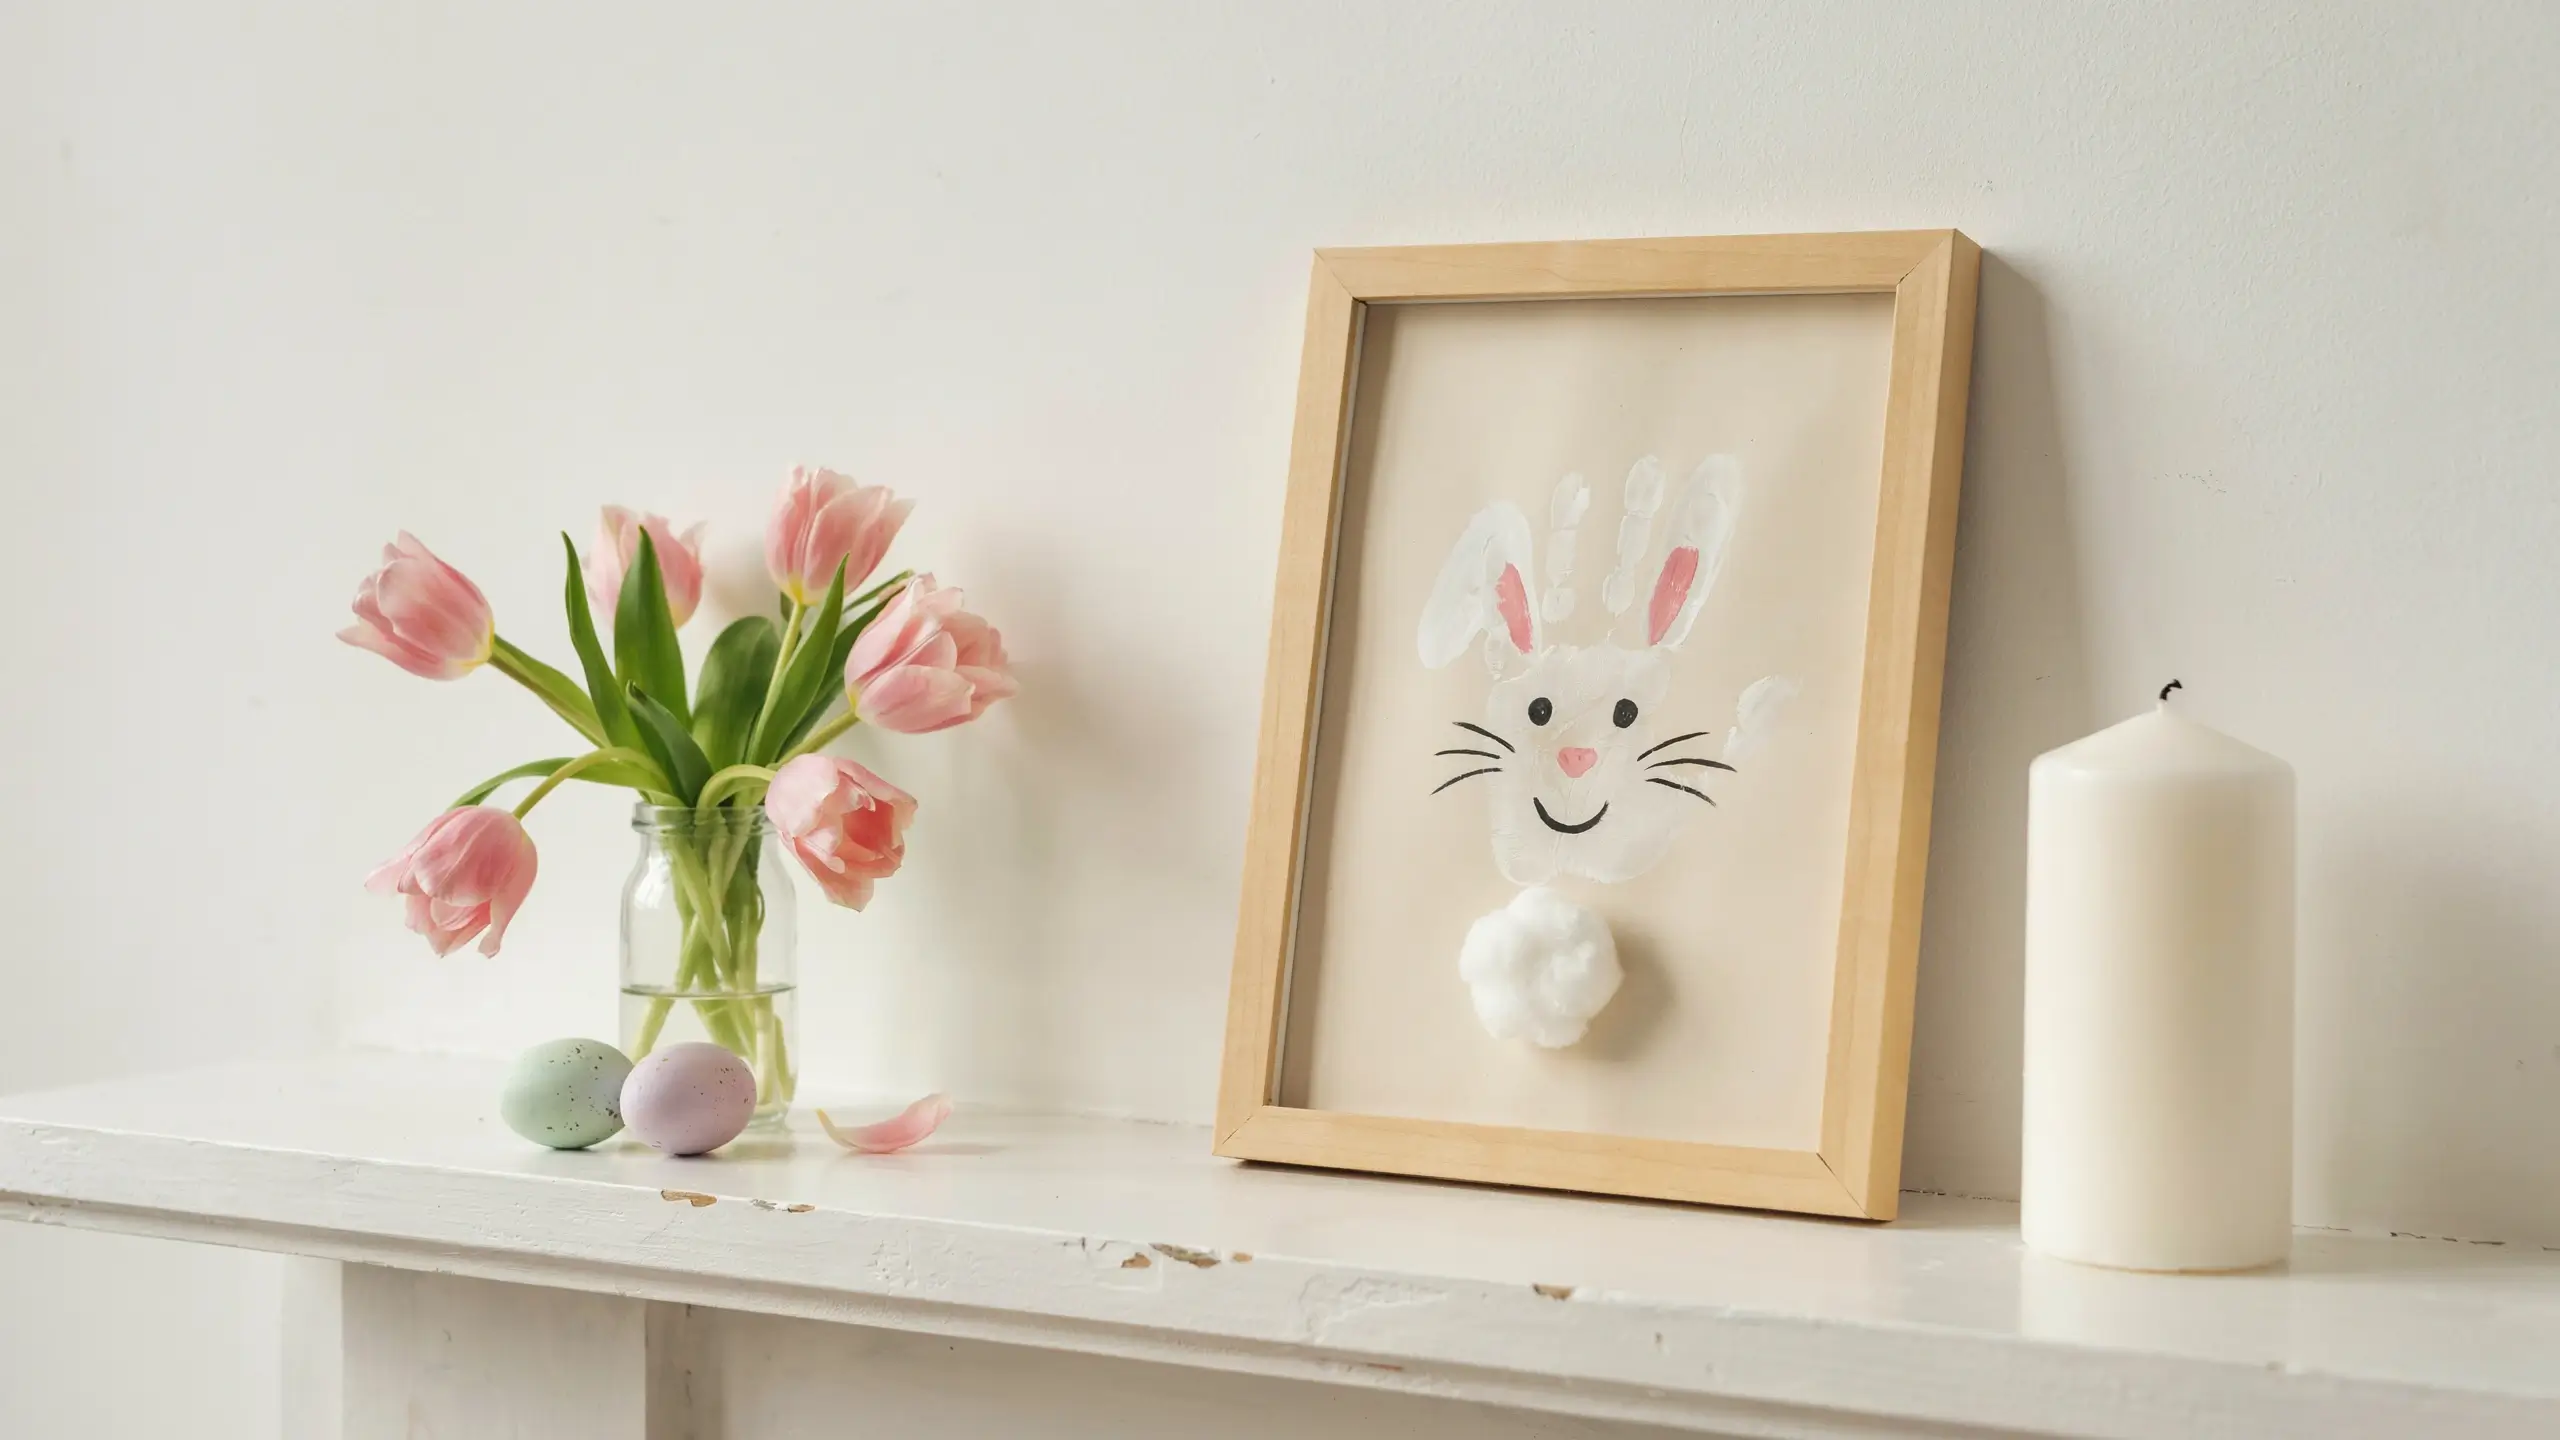
Skill level: Beginner | Time: 30 minutes plus drying | Cost: $3–$5
This one is the quiet overachiever of Easter bunny crafts. It looks like a darling piece of art, it doubles as a keepsake, and parents and grandparents go absolutely wild for it. If you frame it, it genuinely looks like something you bought at a boutique.
What you need:
- White or light cream cardstock (heavy weight, at least 65 lb)
- White paint
- Pink paint
- Small paintbrush
- Black fine-tip marker
- A small pink pom pom or cotton ball
- A frame (5×7 or 4×6 works beautifully)
How to make it:
Paint your child’s hand (or your own, no judgment) with white paint and press it firmly onto the cardstock with the fingers pointing upward. The palm becomes the bunny’s body and the two middle fingers become the ears. Let it dry completely. Once dry, add a tiny pink oval inside the “ear” fingers with pink paint. Use your black marker to draw small dot eyes, a tiny nose, whiskers, and a curved smile on the palm section of the print. Glue a small cotton ball or white pom pom at the base of the print for the fluffy tail.
Display tip: Write the child’s name and the year in small script in the corner before framing. Tuck it into a simple white or natural wood frame and lean it on a mantel shelf between some small Easter egg picks and a jar of fresh tulips. It photographs beautifully and makes one of the sweetest Easter gifts for grandparents.
4. Egg Carton Easter Bunnies
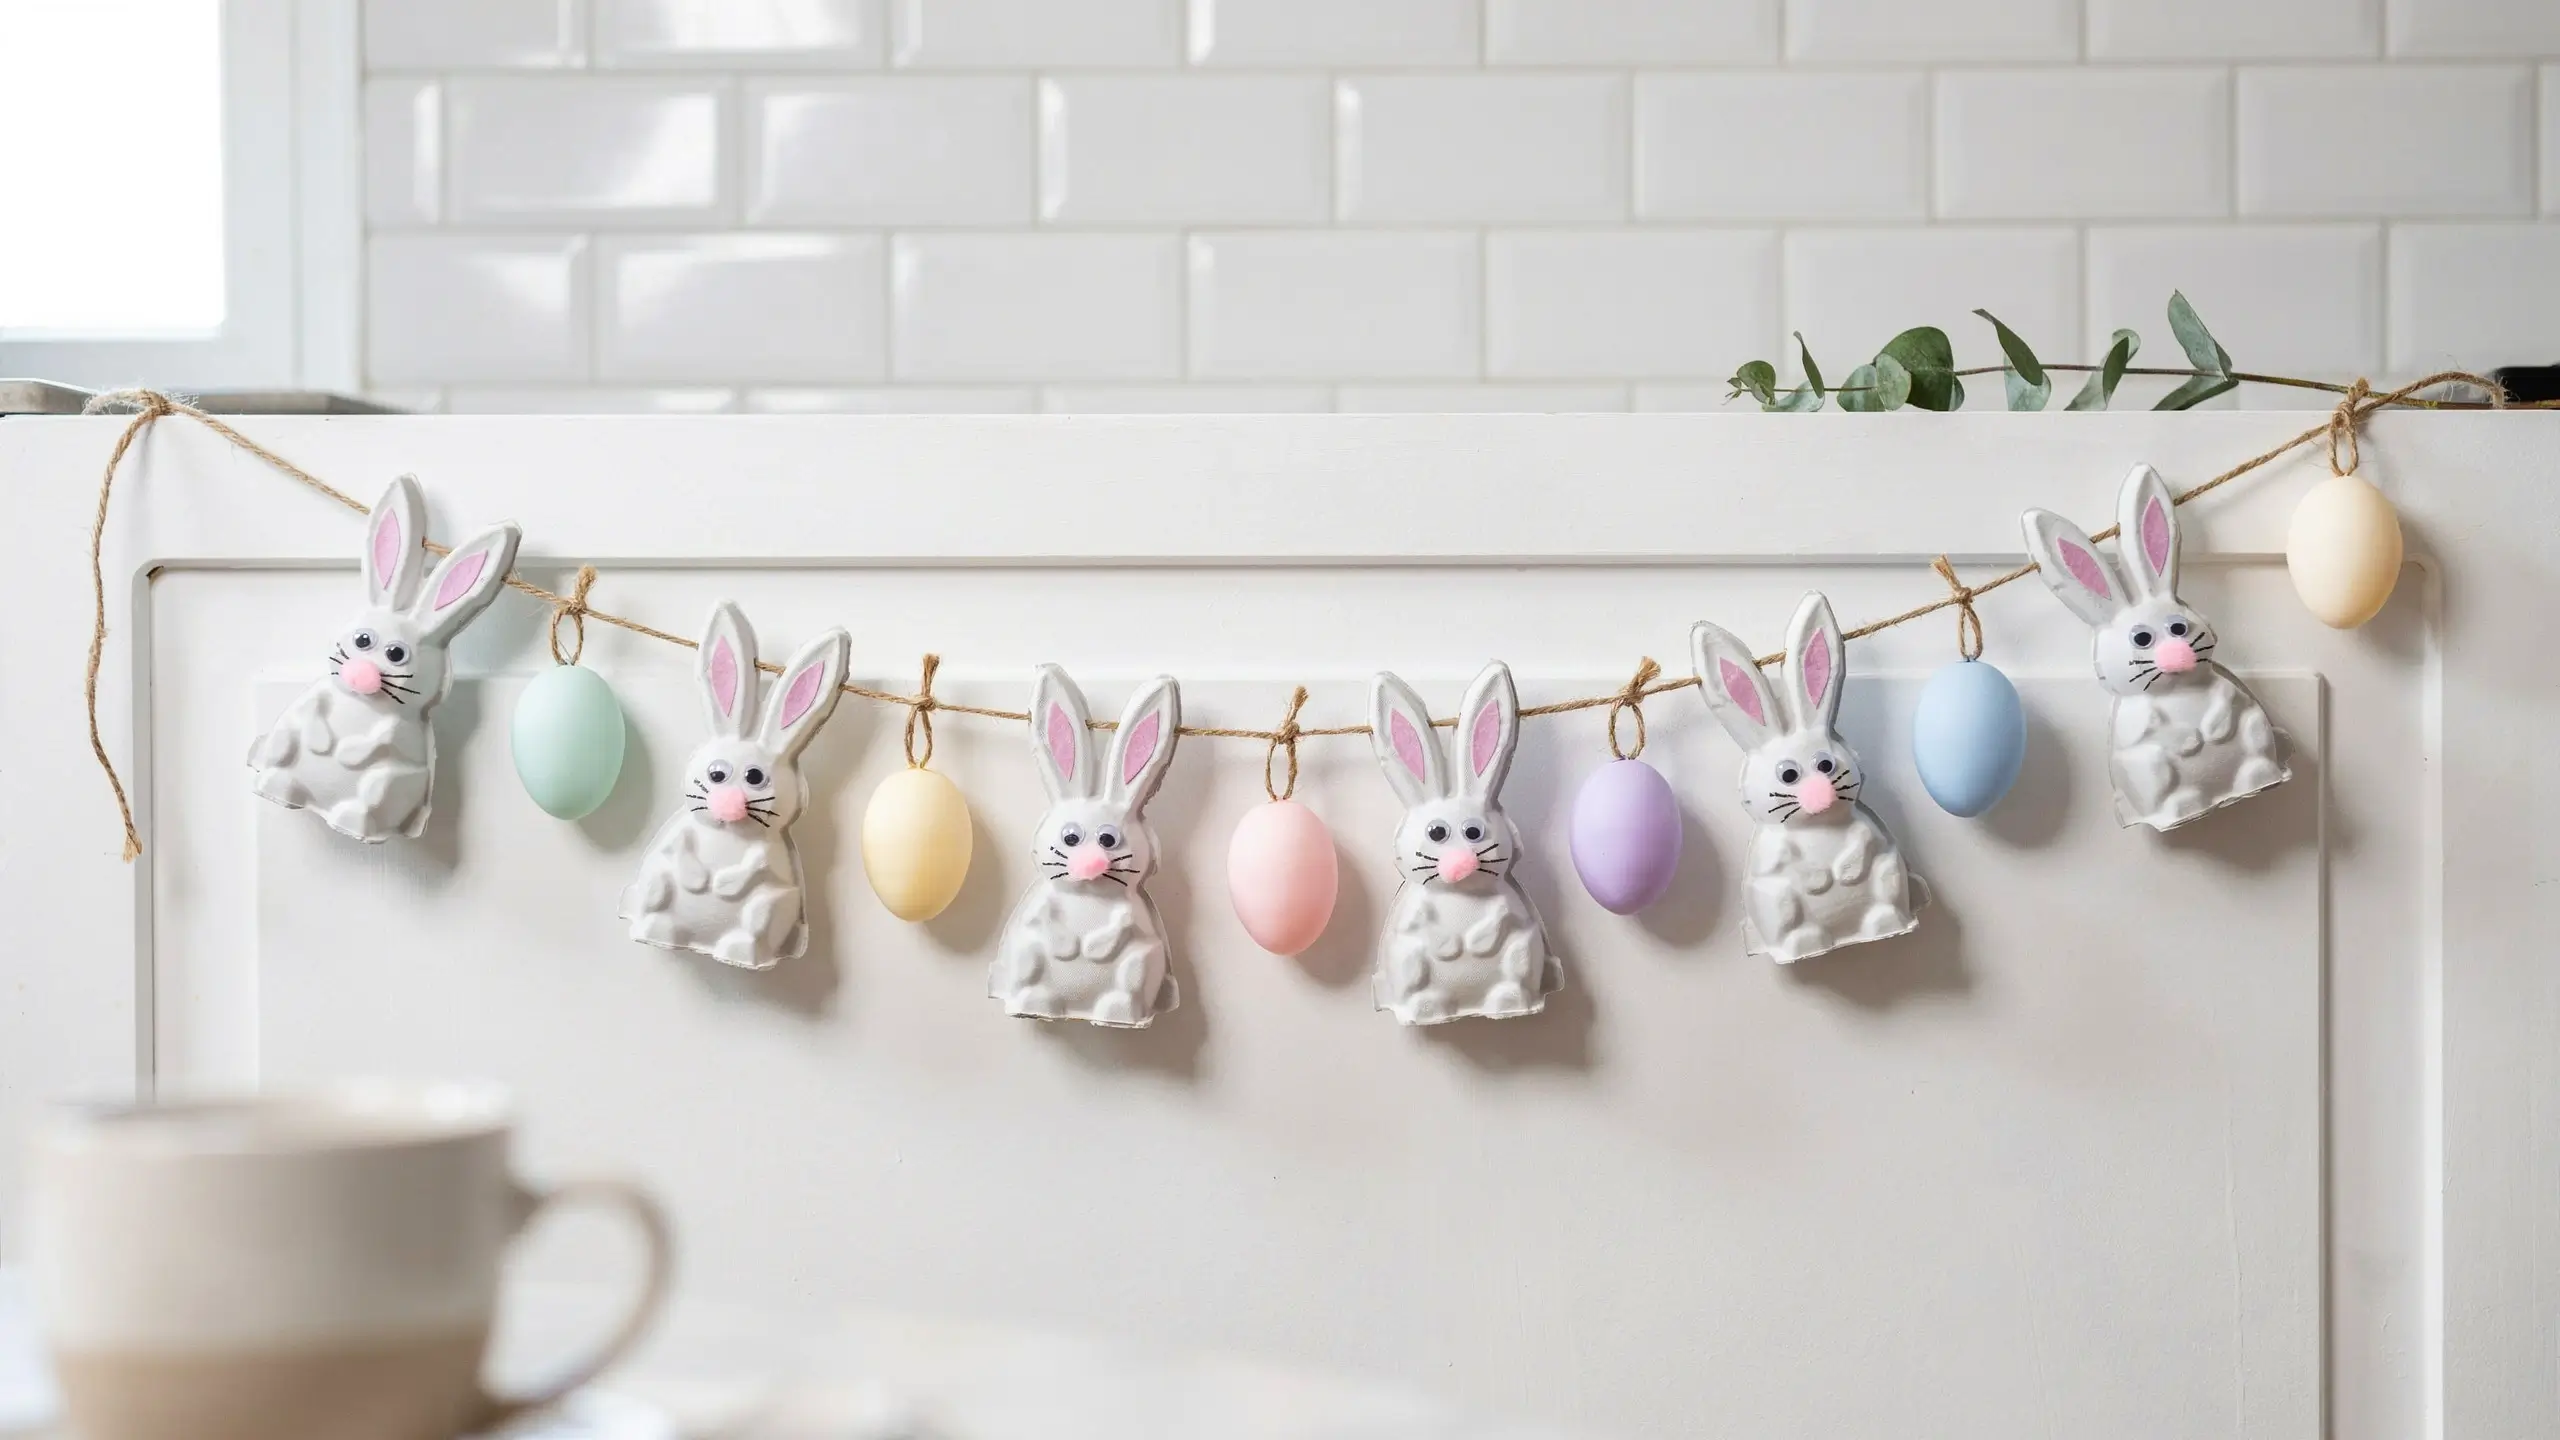
Skill level: Beginner | Time: 45 minutes | Cost: Under $4
These little recycled bunnies hit differently because they’re dimensional, they’re sturdy, and you can make a whole village of them for almost nothing. String them together and you have an adorable Easter garland. Line them along a windowsill and you have an instant Easter display.
What you need:
- Cardboard egg carton
- White and pink acrylic paint
- Googly eyes
- Small pink pom poms
- White cardstock (for ears)
- Black marker
- Hot glue gun
- Optional: twine, for stringing into a garland
How to make it:
Cut the individual egg cups apart with scissors, trimming any rough edges neatly. Paint each cup with two coats of white paint (acrylic dries fast, so this goes quickly). Cut two small pointed oval ear shapes from white cardstock and a smaller version from pink paper for each bunny. Glue the pink inner ear to the white ear, fold the base slightly, and glue them to the top back of the egg cup. Hot glue two small googly eyes and a pink pom pom nose to the front. Draw on whiskers and a little smile with a black marker.
Display tip: Use a darning needle to thread twine through the back of each finished bunny and hang them as a sweet Easter garland above a mantel, across a window frame, or on a kitchen cabinet. Alternate them with small paper eggs or wooden bead spacers for even more visual interest.
5. No-Sew Sock Bunny
Skill level: Beginner to intermediate | Time: 20–30 minutes | Cost: $2–$5
The sock bunny trend has been going strong for years on Pinterest, and for good reason. These are quick, require zero sewing, and look adorably handmade in the best way. They make wonderful Easter basket additions, shelf decor pieces, and gifts for teachers or neighbors.
What you need:
- 1 white or light gray adult sock (knee socks work especially well)
- Fiberfill stuffing or dry rice (about 1 cup)
- Rubber bands or small zip ties
- White yarn or ribbon
- Pink felt or fabric (small scrap)
- 2 small black buttons or googly eyes
- Hot glue gun
- Optional: a small ribbon bow in lavender, blush, or sage
How to make it:
Fill the sock with stuffing or rice until about two-thirds full. Close off the open end by twisting and securing tightly with a rubber band, then tie it again with white yarn for a cleaner look. That rubber band area becomes the bunny’s head. Tie another piece of yarn an inch or two below the top to cinch and define the neck. The toe end of the sock points upward and gets cut straight across to create two ears. Flatten that section slightly and separate the two sides, then use a rubber band at the base of each ear to shape them. Hot glue on button or googly eyes and cut a small oval from pink felt for the nose. Tie a ribbon bow around the neck for the finishing touch.
Display tip: Tuck a few of these in a wooden Easter basket alongside some moss and speckled eggs for the dreamiest Easter vignette. They look beautiful in natural, neutral tones next to lavender sprigs or faux baby’s breath.
6. Mason Jar Bunny Lanterns
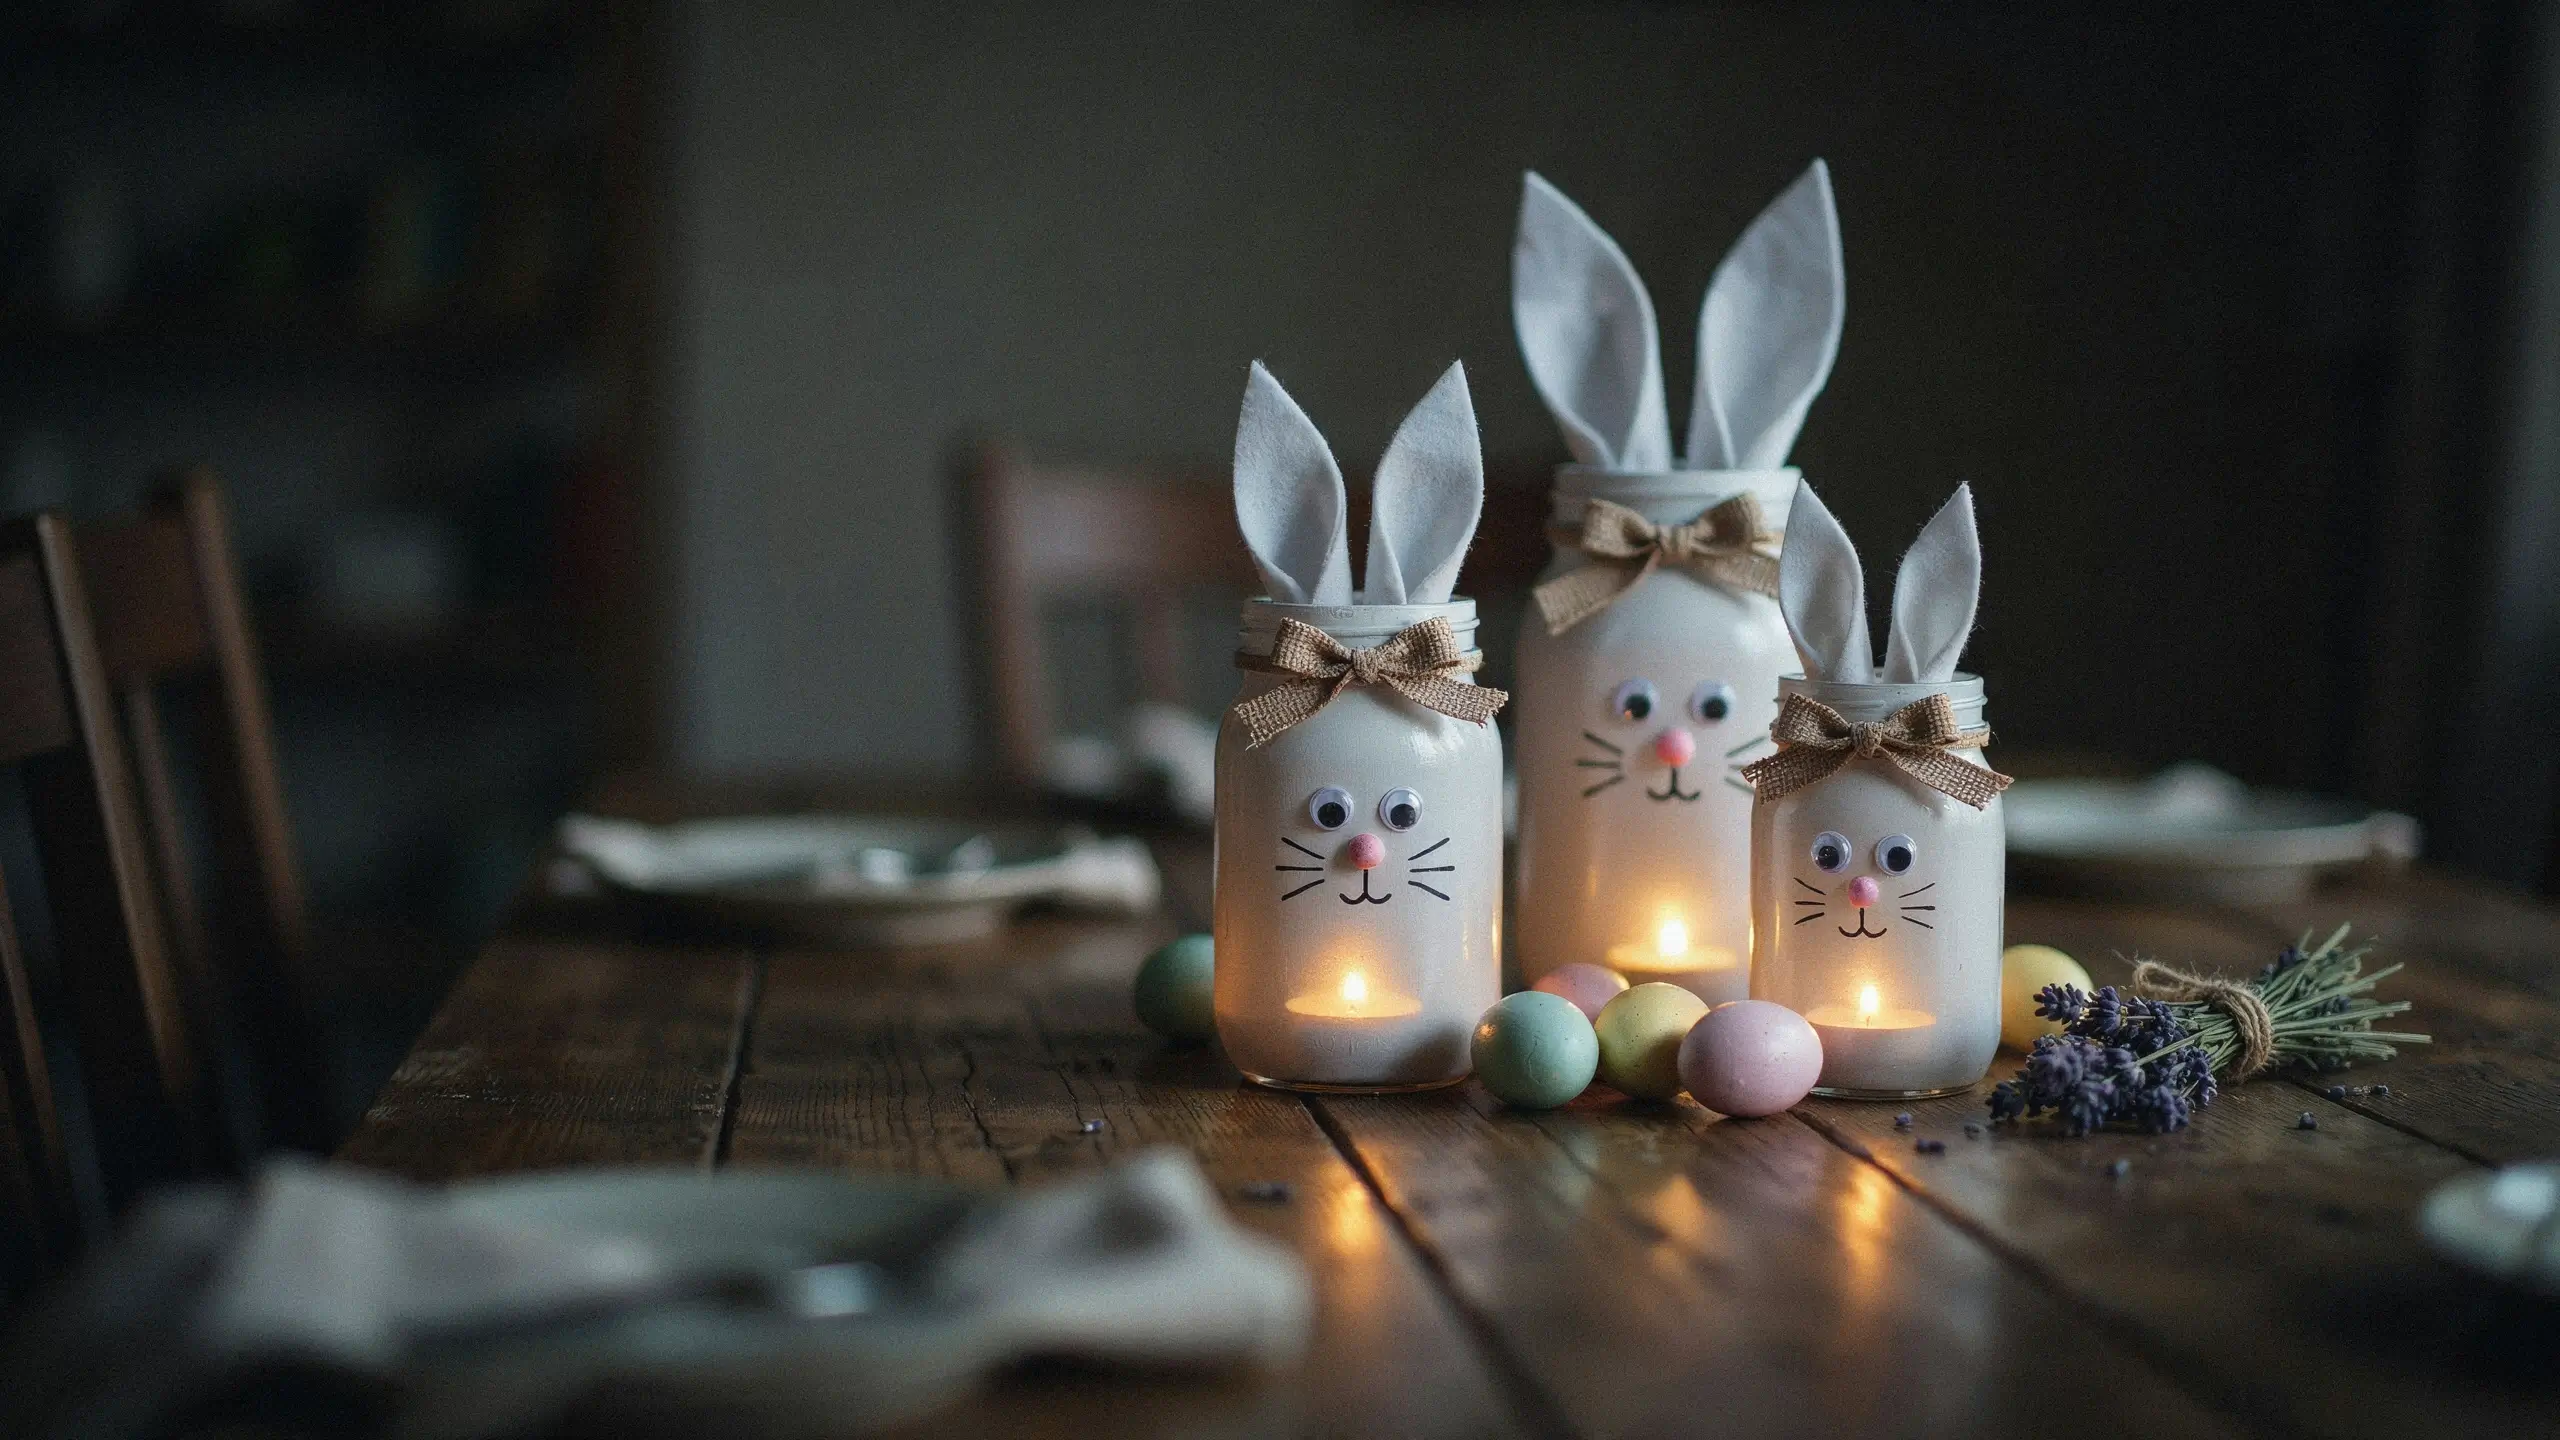
Skill level: Beginner | Time: 45 minutes plus drying | Cost: $5–$10
This is one of those Easter bunny crafts that looks like you spent a lot more effort than you actually did. Fill them with a battery tea light and they glow the most beautiful soft white on an Easter table. Fill them with candy and they double as gifts. Either way, they’re stunning.
What you need:
- Glass mason jars (any size; wide-mouth pint jars are ideal)
- White chalk paint or acrylic paint
- White or gray felt
- Pink felt (small scrap)
- Hot glue gun
- Googly eyes
- Black permanent marker
- Optional: burlap ribbon or a simple twine bow
- Battery-operated tea lights
How to make it:
Paint the outside of the jar with two to three coats of white chalk paint, letting each coat dry. Chalk paint gives a lovely matte finish and sticks to glass without primer. While the jar dries, cut two tall oval ear shapes from white felt and smaller inner ear shapes from pink felt. Glue the pink piece to the white felt ear. Once the jar is fully dry, hot glue the ears to the back rim of the jar so they stand up above the rim. Glue two googly eyes to the front of the jar, then use a tiny pink felt scrap for the nose and a black marker for whiskers and a little smile. Tie a small burlap bow or bit of twine around the jar neck if you want that farmhouse-neutral look that’s everywhere in 2026.
Display tip: Cluster three different sized bunny lanterns together, pop in battery tea lights, and set them on a kitchen table or bathroom shelf for soft, pretty Easter ambiance that requires zero maintenance.
7. Air-Dry Clay Bunny Bowls
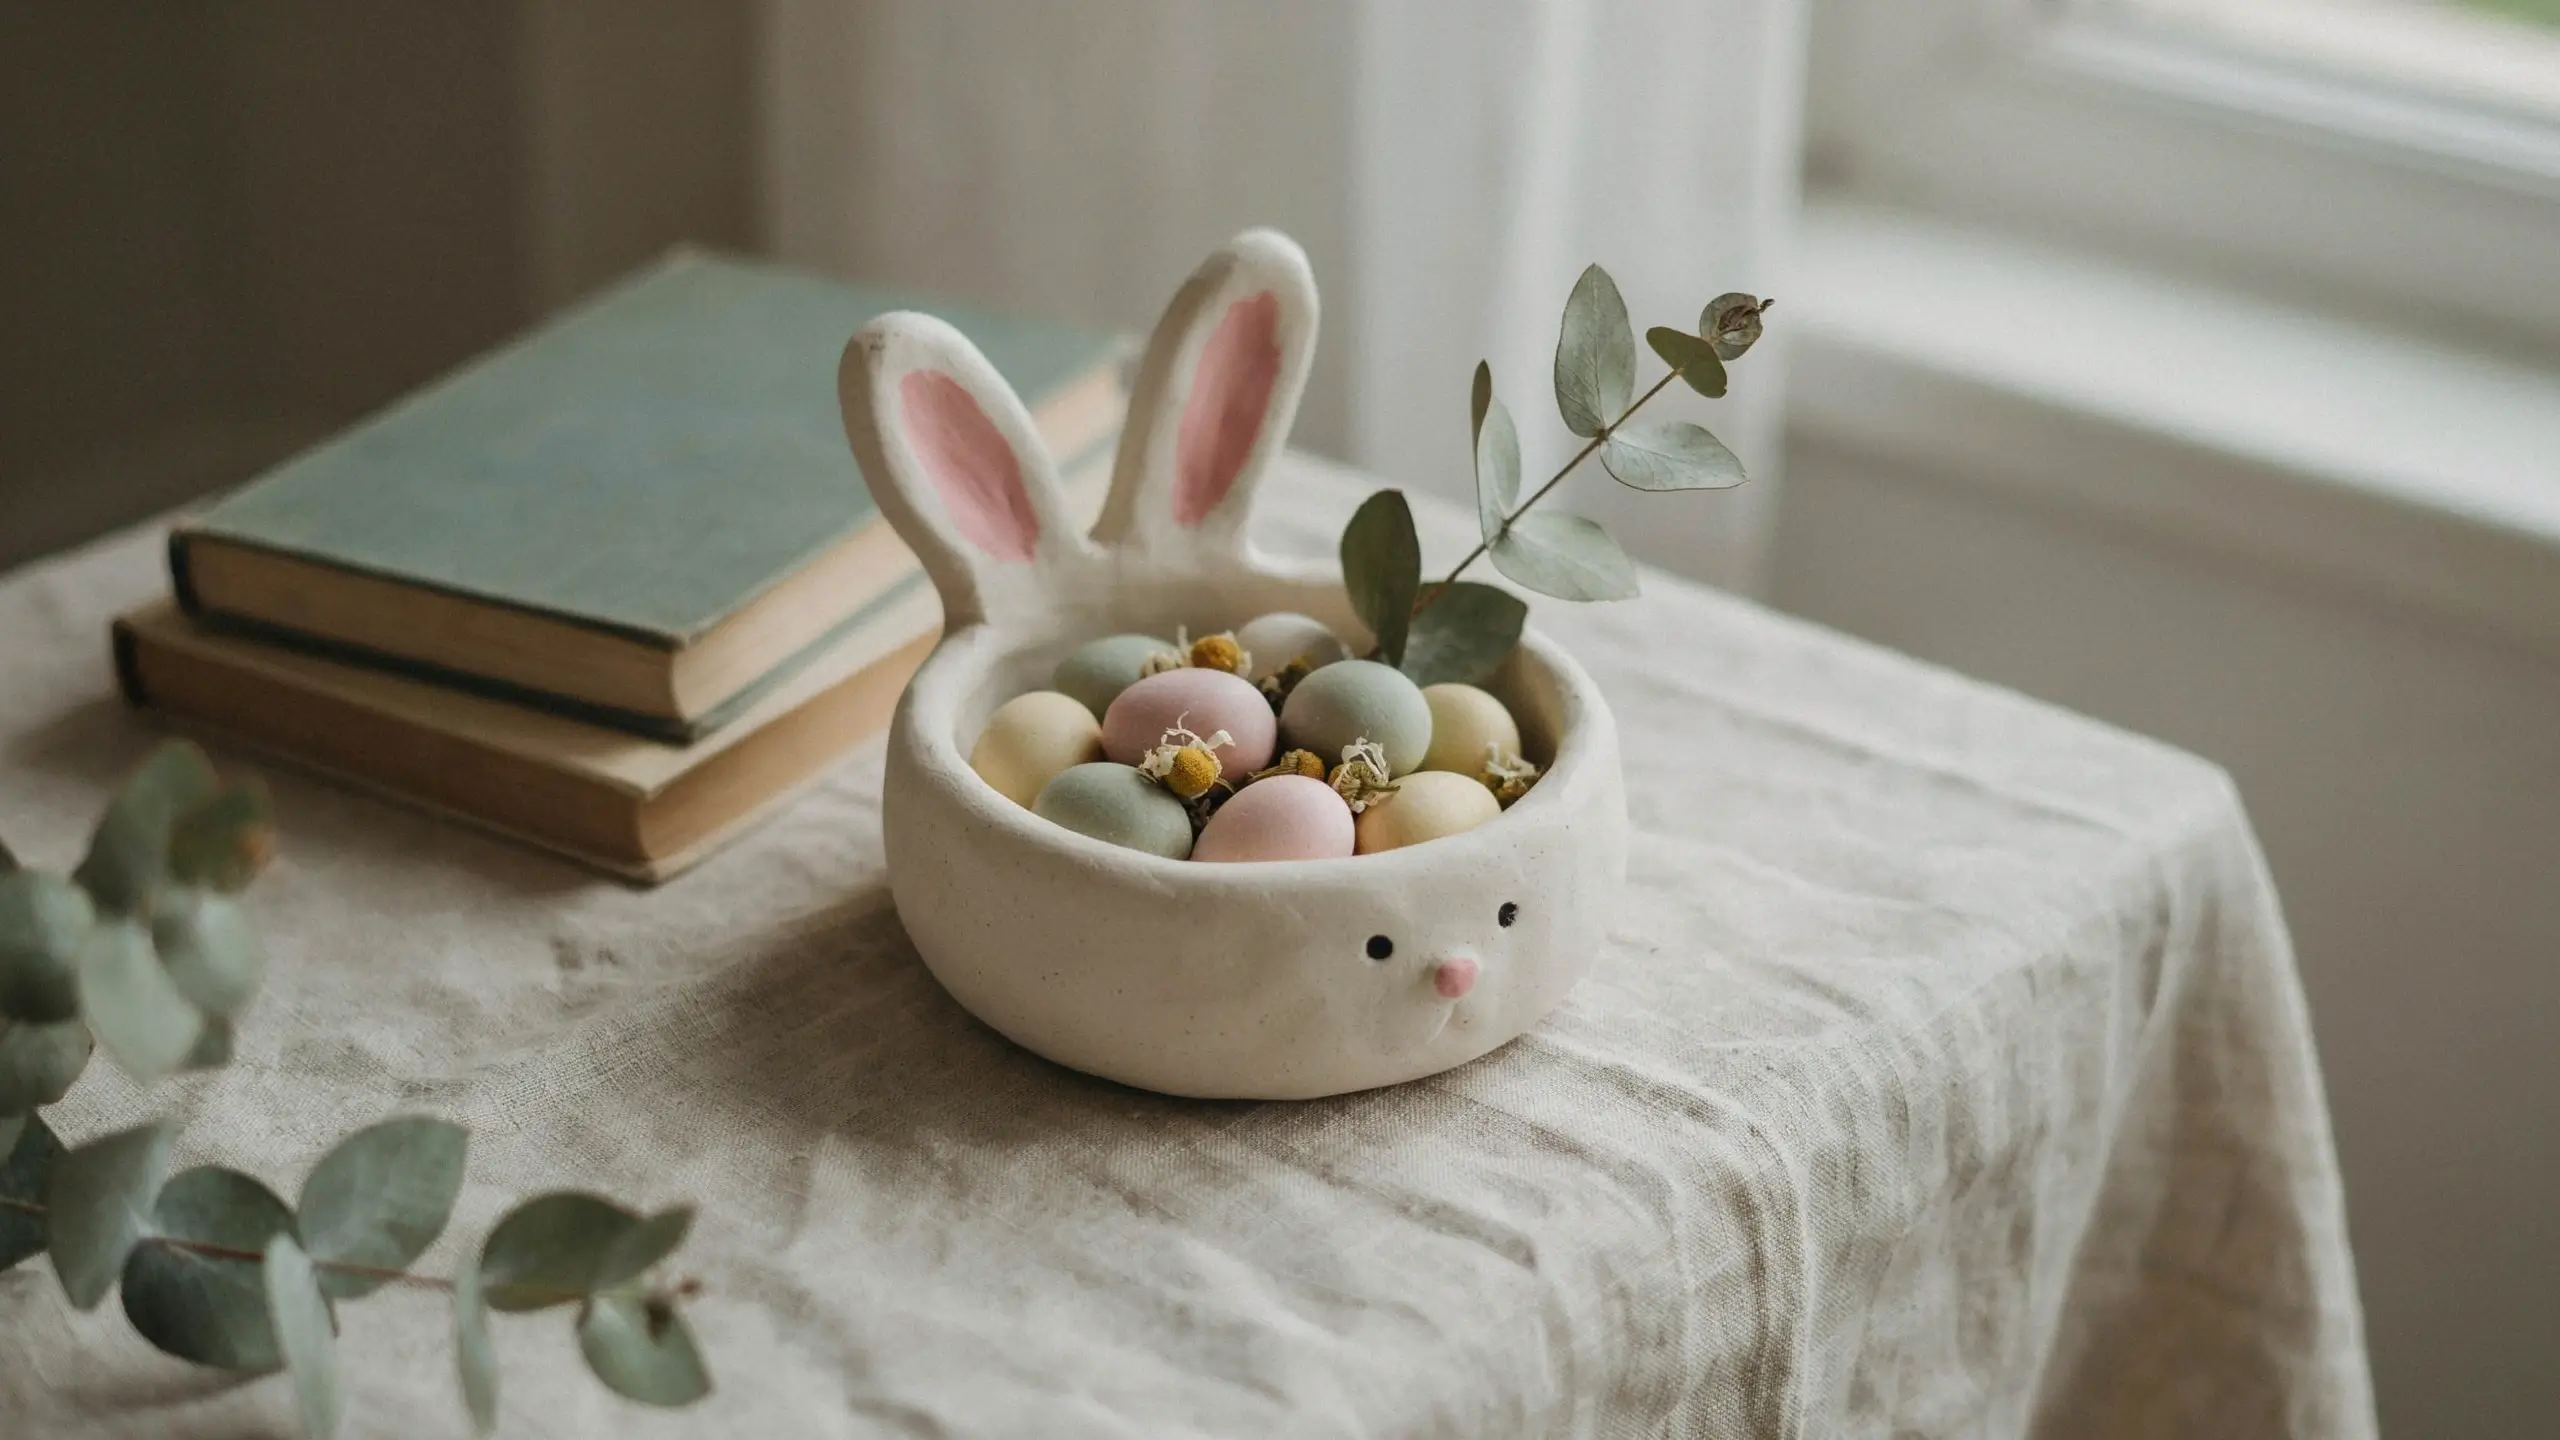
Skill level: Intermediate | Time: 1 hour active, plus 24–48 hours drying | Cost: $6–$12
These are the adult Easter bunny crafts of my dreams. Air-dry clay bunny bowls are trending hard right now for the artisan, handcrafted aesthetic that feels a million miles away from the plastic Easter decor of years past. They look genuinely beautiful on a coffee table or shelf filled with mini eggs, rings, or small dried flowers.
What you need:
- Air-dry clay (white or natural tone; Crayola or DAS brand both work well)
- Small rolling pin or smooth bottle
- Bowl or round object slightly smaller than the finished bowl you want (for shaping)
- Knife or clay cutter
- Pink paint (acrylic or watercolor)
- Fine paintbrush
- Matte sealer spray (optional but recommended)
How to make it:
Roll out your clay to about a quarter-inch thickness. Use a round cookie cutter or a cup turned upside down to cut a circle about 5–6 inches in diameter. Press the clay circle gently over an upside-down bowl and smooth it slightly to take that curved shape, then let it air-dry in place for 24–48 hours. Once fully dry and hard, remove it from the form.
For the bunny face, roll small clay pieces for ears (oval shaped with a slight point) and a tiny round nose. Attach these while the base is still slightly wet, or use a dab of water as clay glue if attaching to a dry piece. Once everything is completely dry, paint a soft pink blush inside the ears and a tiny pink nose. Add a black dot for each eye with a paint pen. Seal with matte spray to protect it.
Display tip: Fill with small pastel mini eggs or tiny dried flowers. Set on a stack of vintage books on a side table. The natural clay tone with soft pink details fits perfectly into the earthy, cottagecore spring aesthetic that photographs so beautifully.
8. Wood Block Bunnies
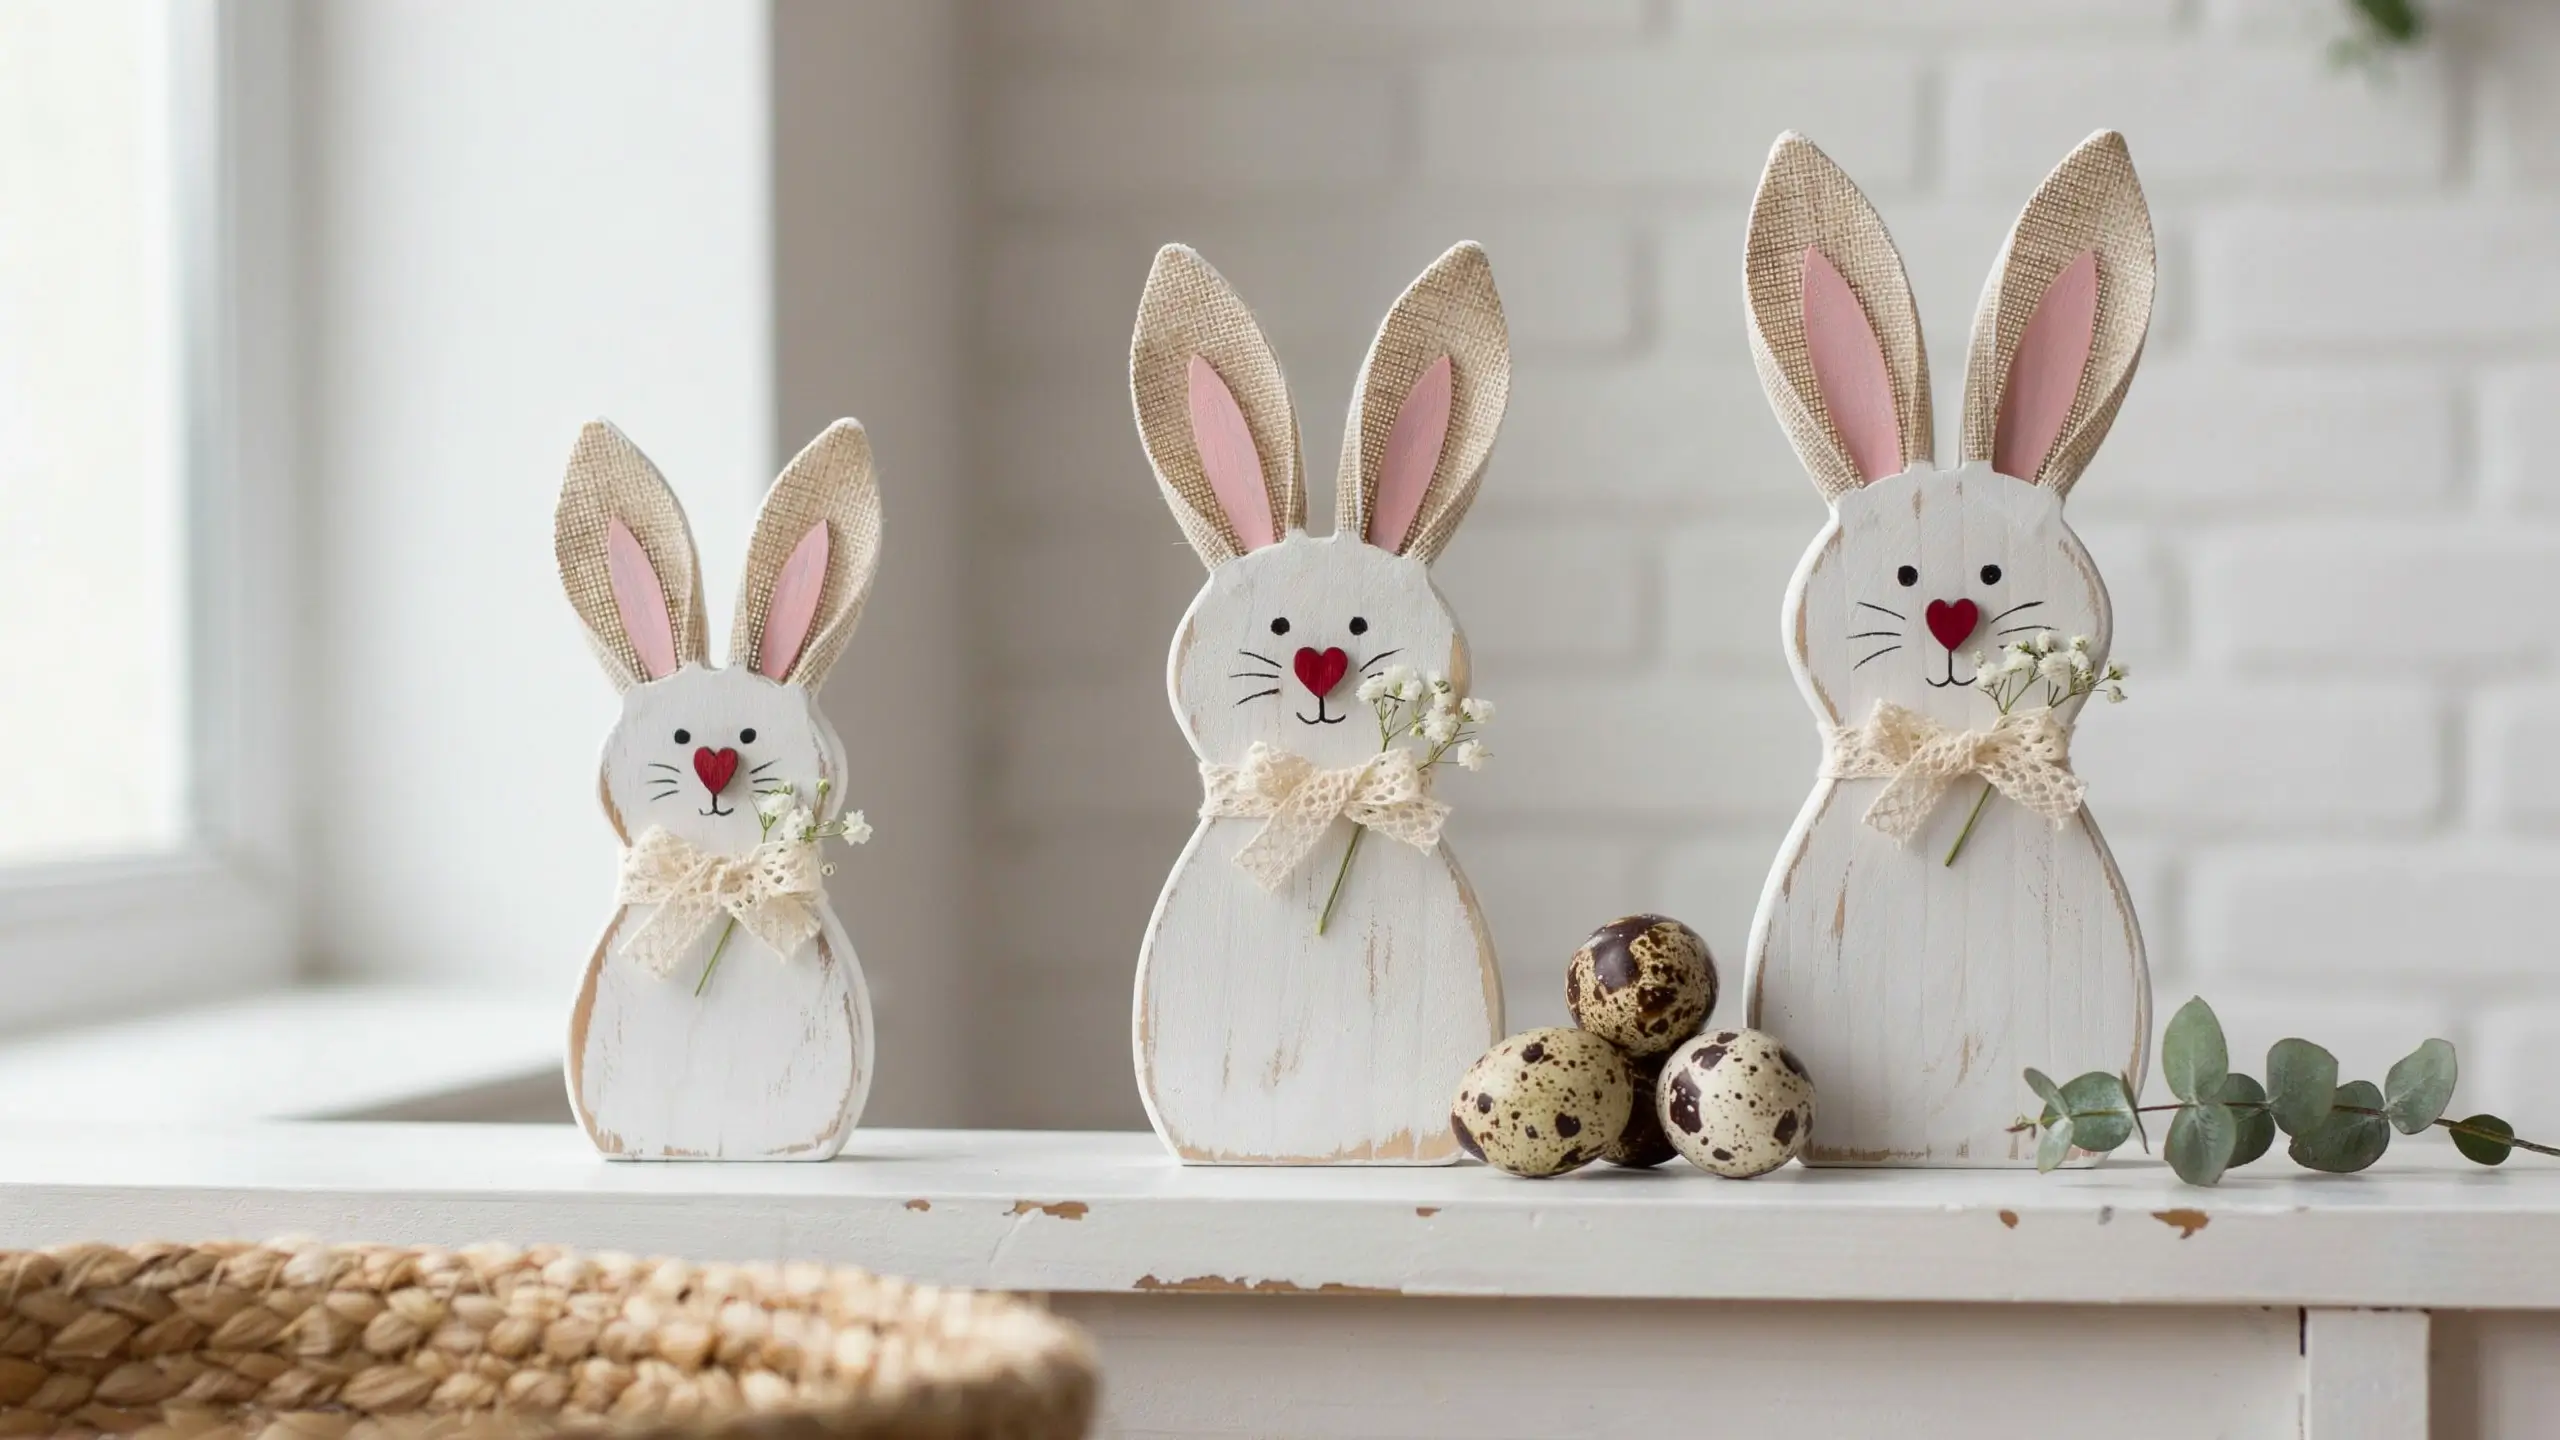
Skill level: Intermediate | Time: 2–3 hours | Cost: $10–$20
These are the Easter bunny crafts that make people stop and ask if you bought them. Lined up in a trio of different heights on a mantel, fireplace shelf, or dining table, they are genuinely beautiful. They also store flat in a bin for next year, because the ears detach easily.
What you need:
- 4×4 wood posts cut into 6-inch, 8-inch, and 10-inch lengths (any lumber yard or big box store will cut these for you)
- White chalk paint
- Fine sandpaper (220 grit)
- Burlap ribbon (about 2 inches wide) or wired ribbon in cream/natural
- Hot glue gun
- Small red wooden heart (for nose; find in craft stores)
- Black paint pen or marker
- Lace trim, raffia, or thin ribbon for the neck
- Optional: a few dried flowers or faux eucalyptus sprigs
How to make it:
Paint each wood block with two coats of white chalk paint. Once dry, lightly sand the edges and corners for that intentional distressed look. Cut ear shapes from your burlap ribbon (about 4 inches tall and 1.5 inches wide, rounded at the top). If using wired ribbon, it holds its shape better. Paint the inside of each ear a soft blush pink. Hot glue the finished ears to the top of each block. Add the small red wooden heart as a nose. Use your paint pen to draw two simple dot eyes and a small curved mouth with whiskers. Tie a piece of lace trim, raffia, or ribbon around the top of the block as a “necklace.” Tuck a tiny sprig of dried baby’s breath or eucalyptus into the bow for a sweet spring touch.
Display tip: Stand them in a row from tallest to shortest, offset by an inch or two so they stagger slightly. Set a few speckled eggs at their feet. This is genuinely mantel-worthy Easter decor you’ll want to bring out every single year.
9. Burlap Bunny Banner
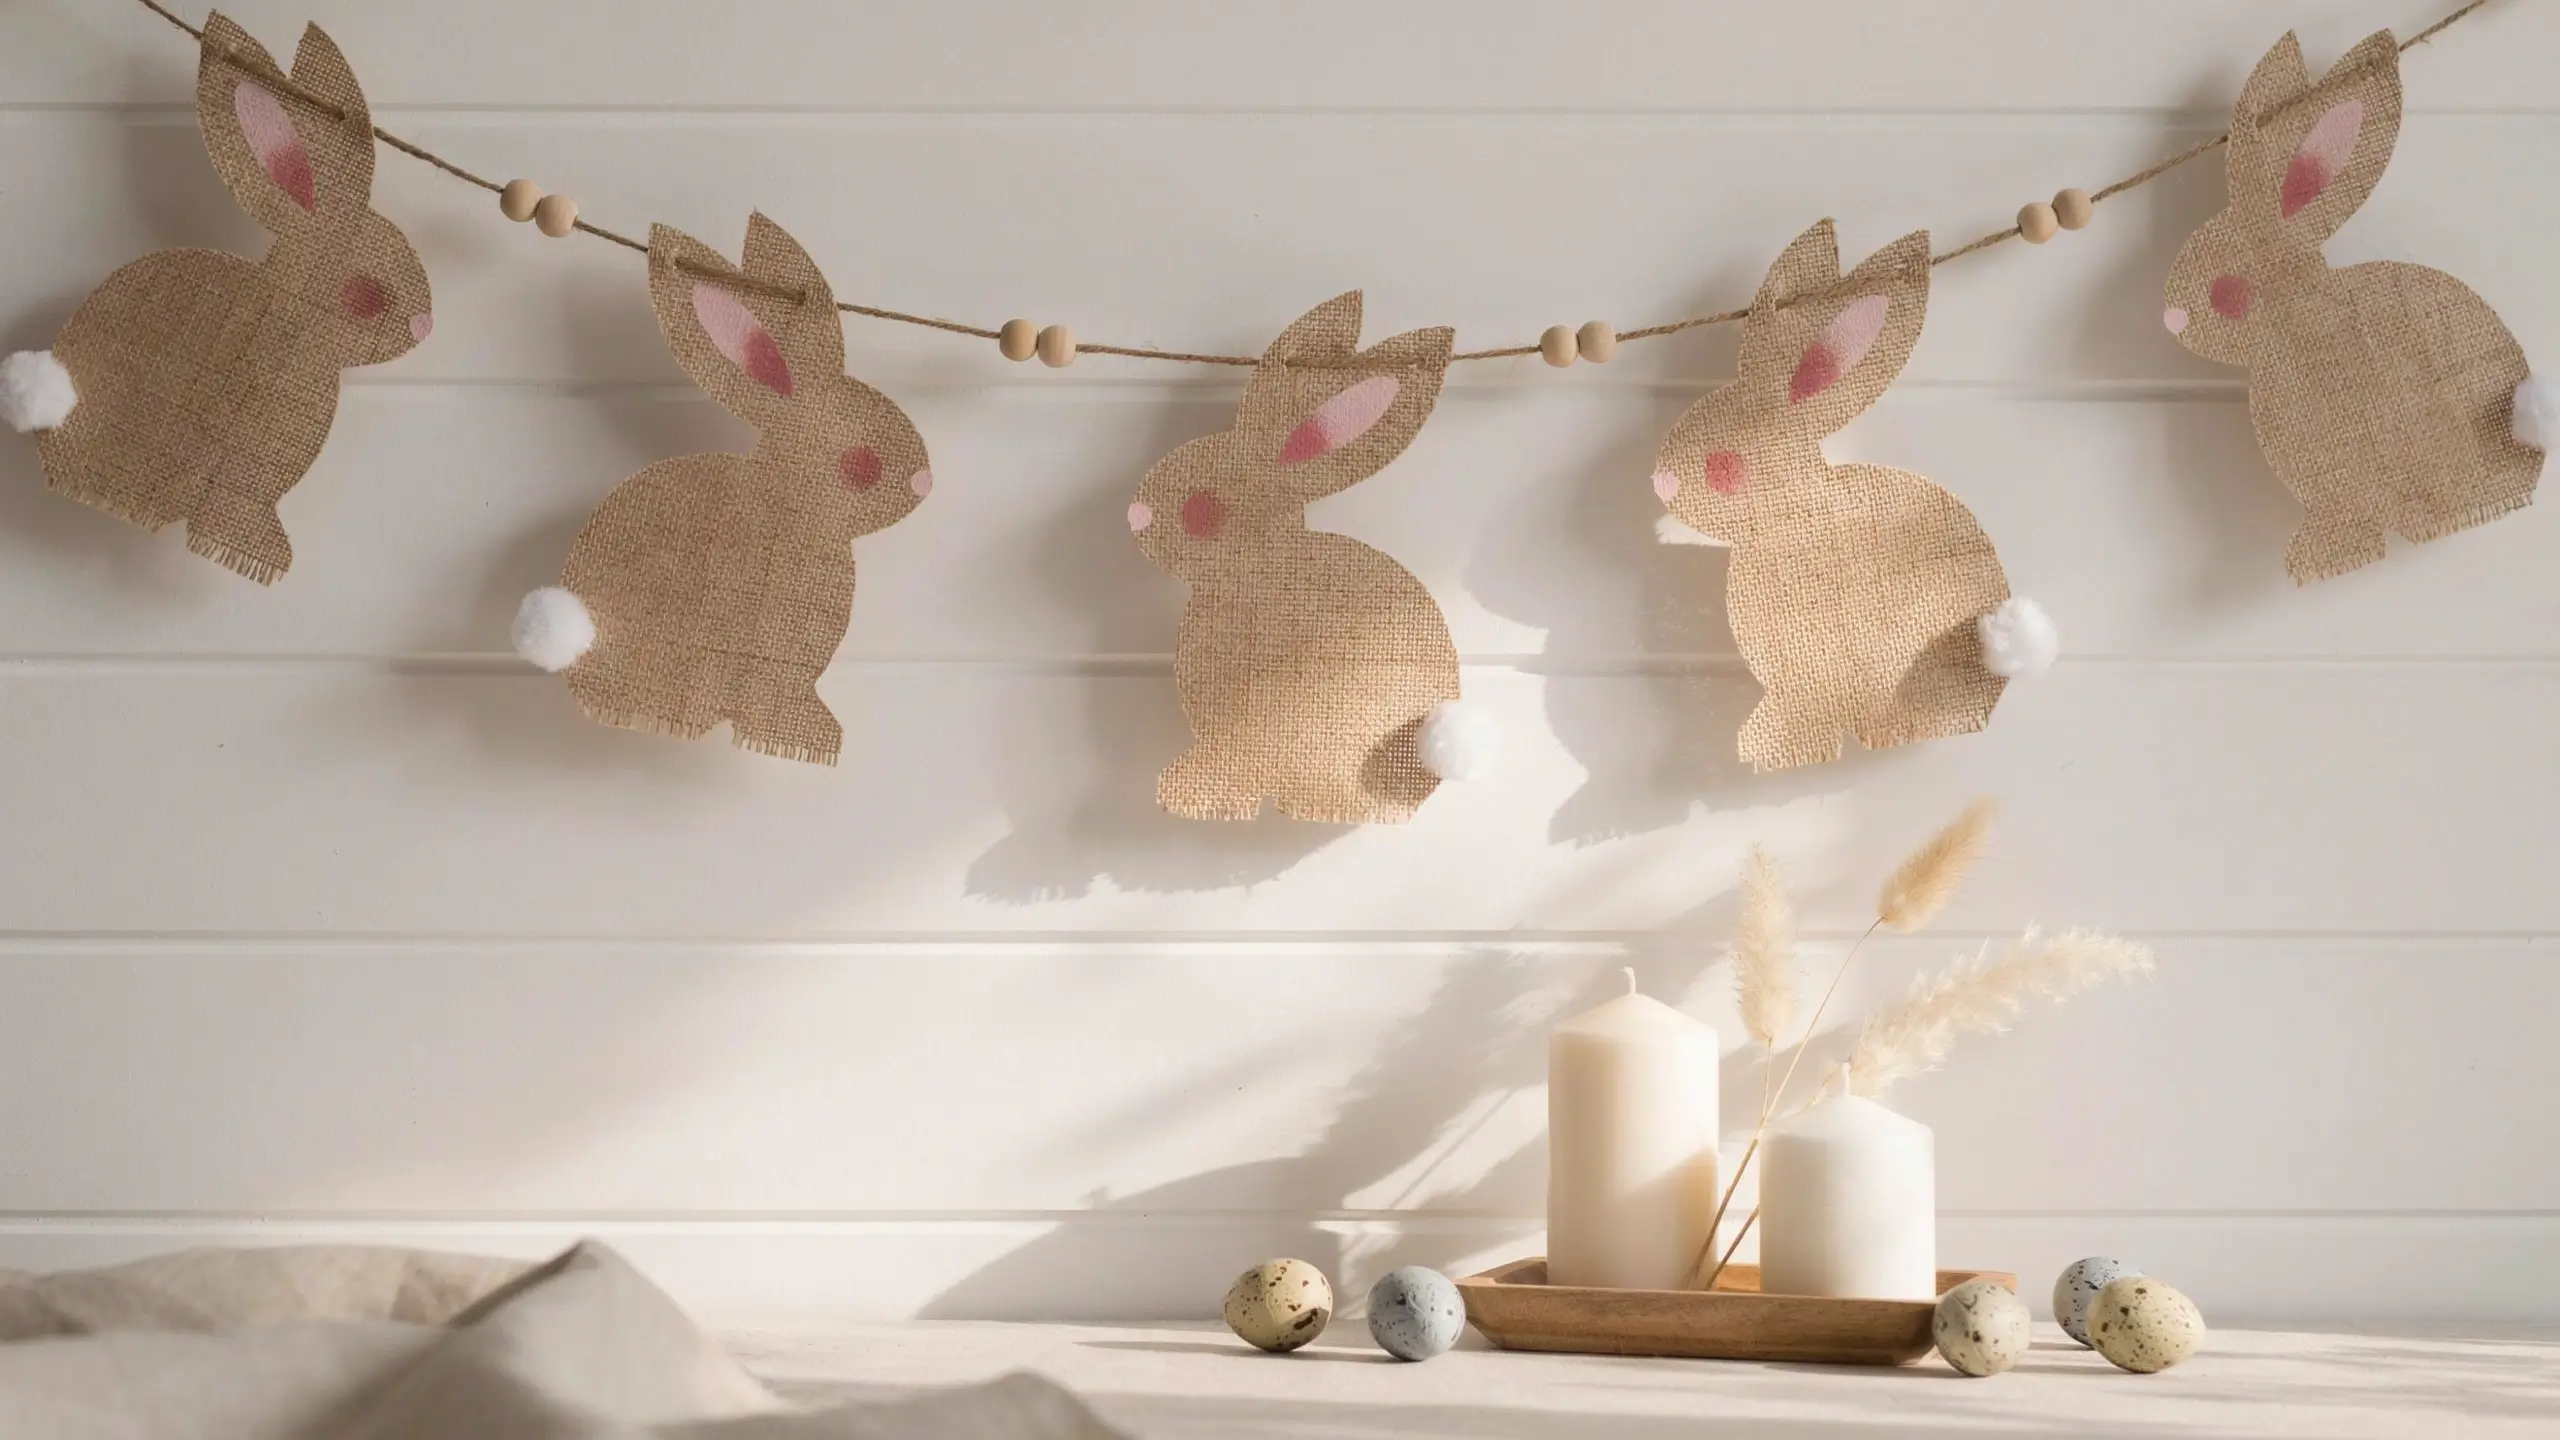
Skill level: Beginner | Time: 1 hour | Cost: $5–$12
Banner and garland crafts are perennially popular on Pinterest because they do so much visual work without taking up shelf space. This burlap bunny banner has a neutral, farmhouse feel that looks as good in an apartment as it does in a farmhouse, and the no-sew version means you can make it in an afternoon with just scissors, a hot glue gun, and a handful of supplies.
What you need:
- Natural burlap (a fat quarter from a craft store works well)
- Bunny template (print one from any free resource online or trace a simple silhouette freehand)
- Hot glue gun
- Jute twine (about 3 feet)
- Small wooden dowel or twig (optional, for the top rod)
- Pink acrylic paint and a small brush
- Scissors
- Optional embellishments: small dried flowers, mini white pom poms, washi tape
How to make it:
Cut 4–6 bunny shapes from your burlap using your template. If the edges fray, that actually adds to the rustic look. Fray-check spray will stop it if you prefer cleaner edges. Use pink paint to add a small nose and ear blush to each bunny, let dry, and hot glue a tiny white pom pom tail to the back of each one. Cut a 3-foot length of jute twine and hot glue each bunny along it at even intervals. Tie the ends to a small wooden dowel, a twig, or create small loops at each end for hanging.
Display tip: Hang it above a fireplace mantel, along a kitchen window, or layered over a wreath form for a dimensional spring door decoration. The natural burlap reads beautifully against white shiplap walls, brick, or simple painted surfaces.
10. Pom Pom Bunnies
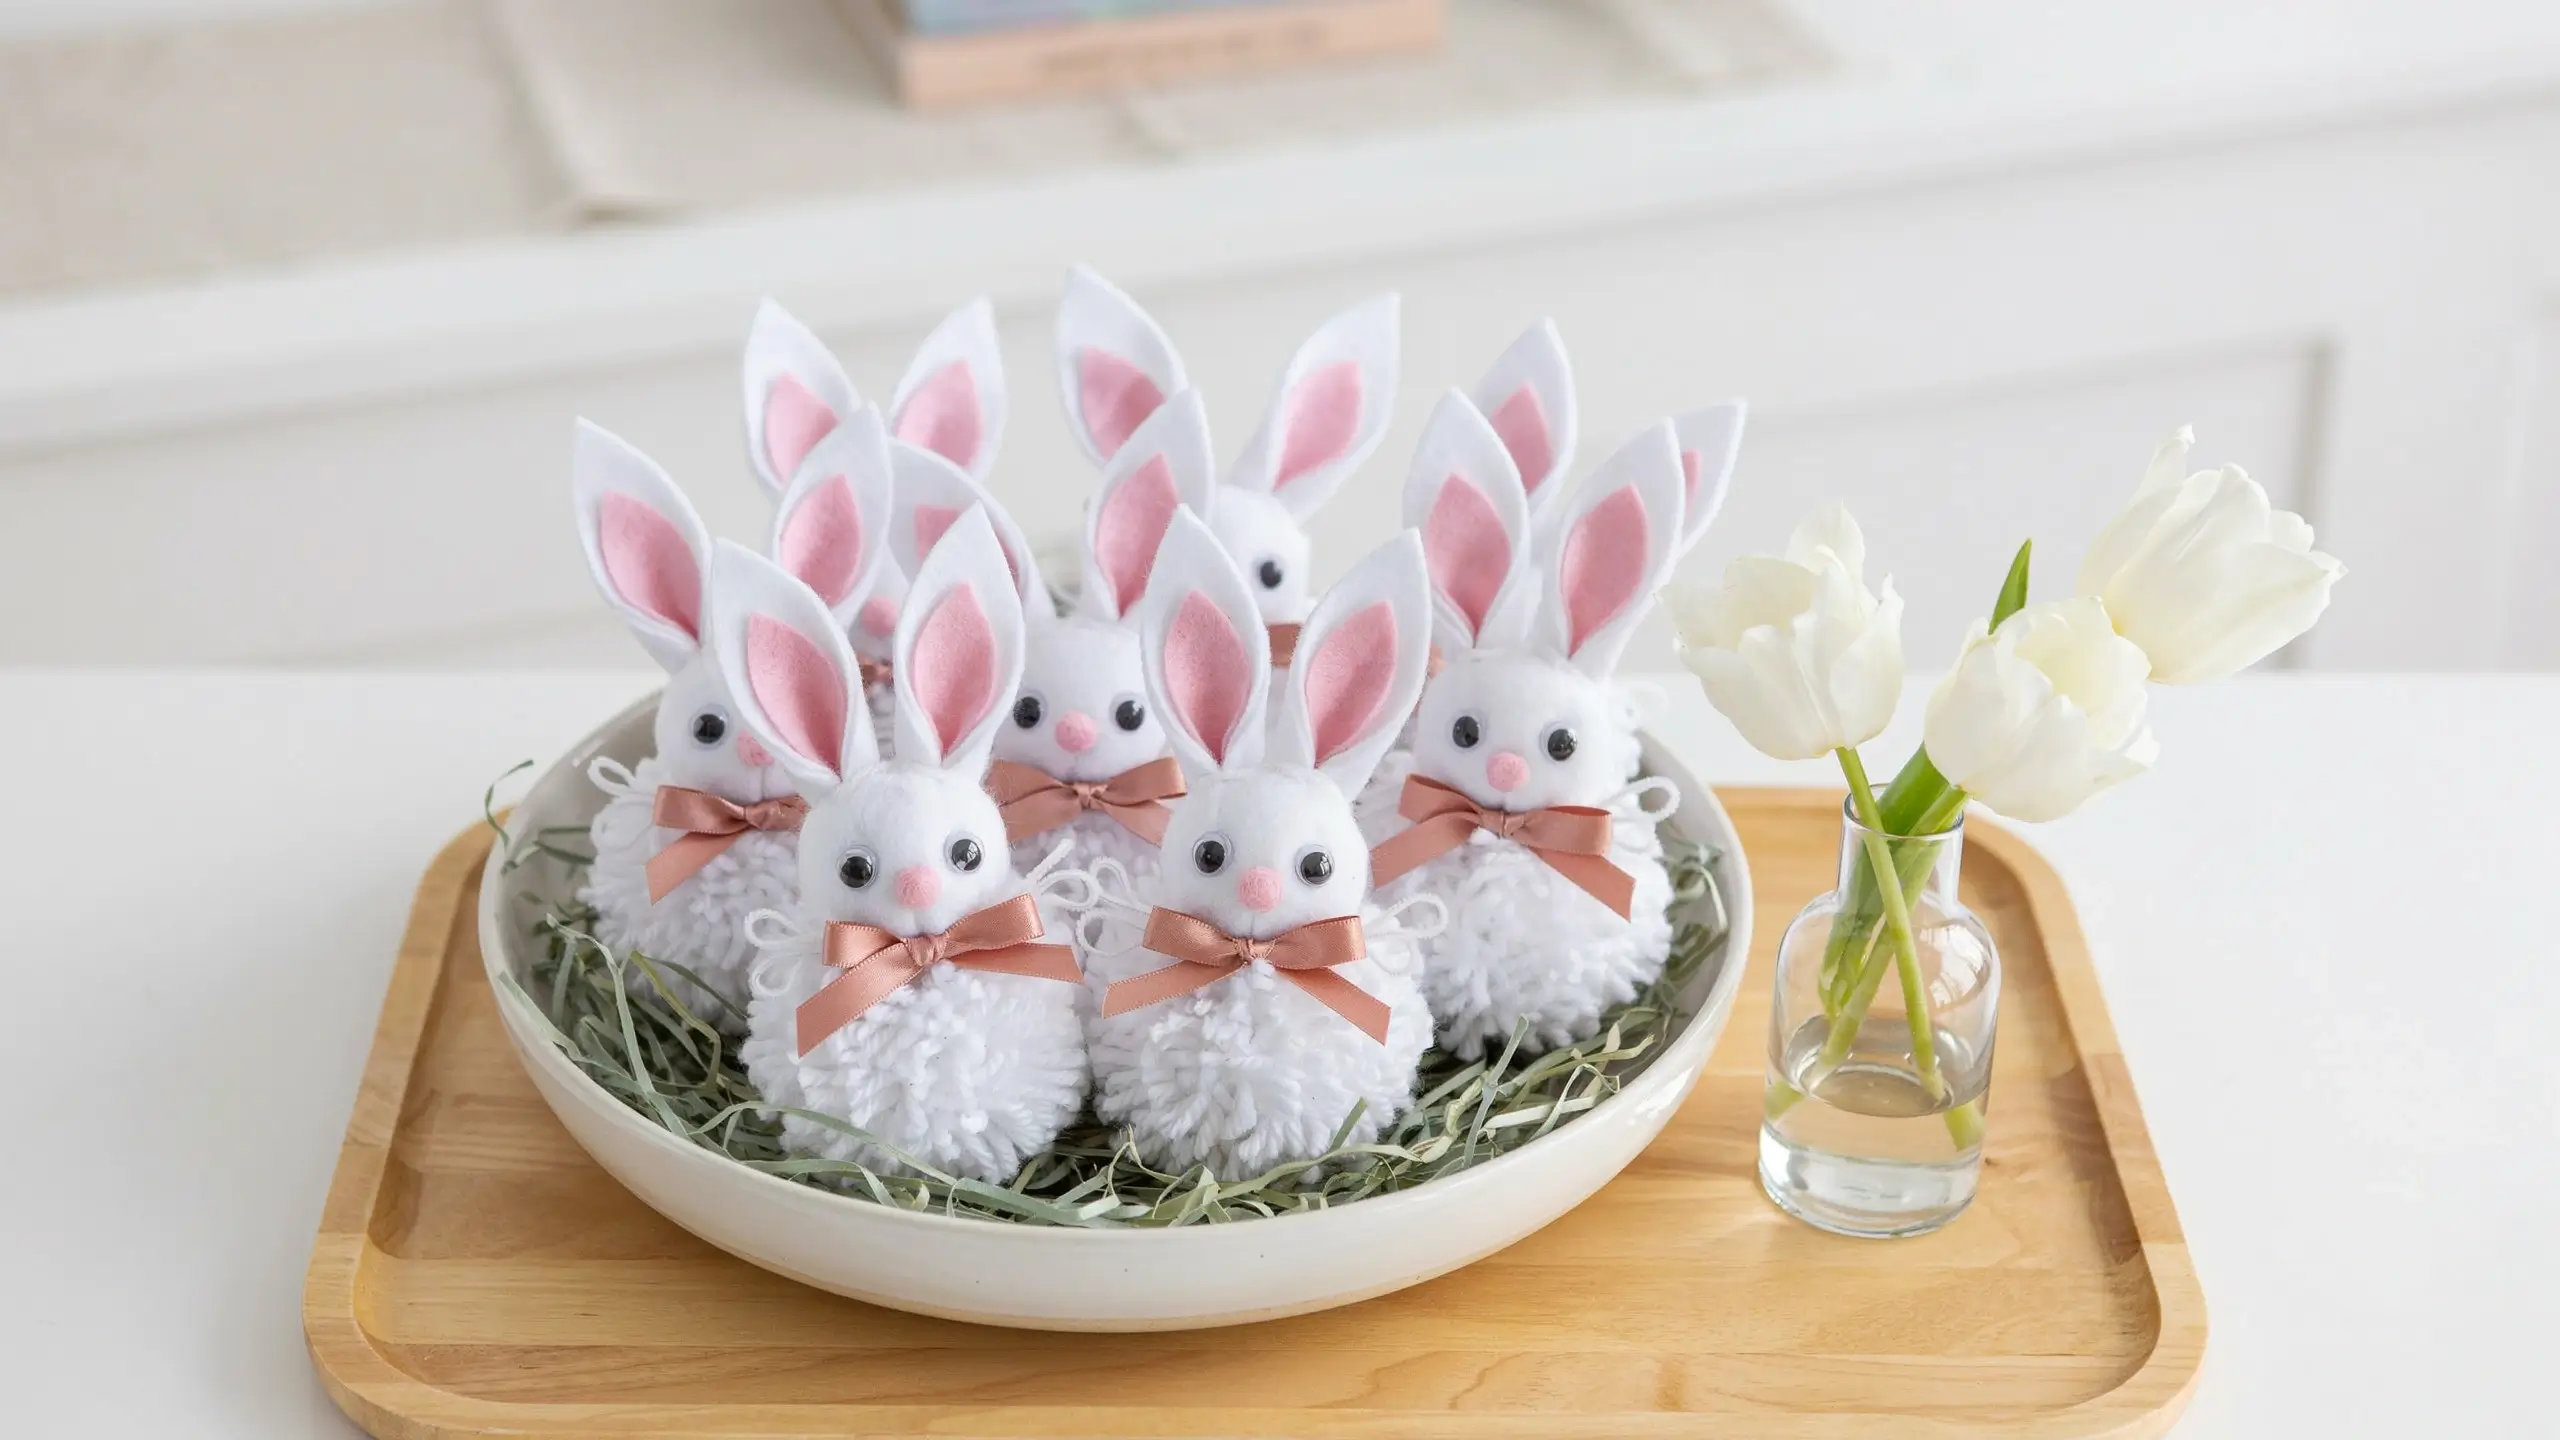
Skill level: Beginner | Time: 15–20 minutes per bunny | Cost: $3–$6
These are little and joyful and fast to make, which puts them in a special category of crafts. Pom pom bunnies work as Easter basket fillers, package toppers, ornaments on a Spring tree, bowl fillers for a tiered tray, or just scattered around an Easter table for the cutest casual decor.
What you need:
- 2 white pom poms per bunny (1 large about 2 inches, 1 medium about 1 inch)
- Pink pom pom (tiny, for nose)
- White pipe cleaners
- Googly eyes (small)
- Pink felt (tiny scrap for inner ears)
- White cardstock (for ears)
- Hot glue gun
- Optional: a tiny bit of ribbon for a bow
How to make it:
Hot glue the smaller pom pom on top of the larger one to form the head and body. Cut two small ear shapes from white cardstock (about 1 inch tall) and smaller inner ear shapes from pink felt. Glue the felt onto the cardstock ears, then glue the ears to the top of the head pom pom. Hot glue two small googly eyes and the tiny pink nose pom pom to the face. Cut a white pipe cleaner into tiny pieces for whiskers and glue them in a bundle below the nose. Add a small ribbon bow just below the head if you like.
Display tip: Make a bowlful and set them in a white ceramic bowl or a nest of Easter grass on a side table or entryway console. You can also glue a loop of ribbon to each one and hang them from an Easter branch or small tabletop tree for a whimsical Spring display.
Mistakes to Avoid When Making Easter Bunny Crafts
A few things that trip people up, so you don’t have to learn them the hard way:
- Not letting paint dry fully before gluing. Hot glue does not stick well to tacky or wet paint. Always let your base coat dry completely before adding any embellishments. Setting it in front of a small fan speeds this up significantly.
- Using regular school glue on glass or nonporous surfaces. If you’re making the mason jar bunnies, use chalk paint, not regular craft paint, and give it at least two full coats. Regular paint will peel off glass after handling.
- Making ears too small. Bunny ears are what make the silhouette recognizable. When in doubt, cut them slightly larger than you think they need to be. You can always trim down, but you can’t add back what you’ve cut.
- Skipping the sealer on clay pieces. Air-dry clay is porous and will absorb moisture over time. A quick spray of matte sealer makes a huge difference in how long your clay bunny bowls last.
- Rushing the assembly on sock bunnies. The shape of a sock bunny is all about where you tie the sections. Take an extra minute to really pinch and define the neck area before tying. That small step makes the bunny look intentional instead of lumpy.
How to Display Your Easter Bunny Crafts
Making the craft is only half the fun. Here’s how to style your creations so they look like Pinterest came to life in your actual home.
On the mantel: Use the rule of three. Group your wood block bunnies, mason jar lanterns, or clay bowls in trios. Add height variation, a few speckled eggs, and one small vase of fresh or faux tulips. That’s it. You’re done.
On a bookshelf or console table: Line up toilet paper roll bunnies or pom pom bunnies on a small wooden tray or a shallow woven basket. Nestle them among Easter grass and a few egg picks.
As a garland: Egg carton bunnies and burlap banner bunnies both make beautiful garlands. Hang them on a mantel, a staircase railing, above a window, or along the front of a dining table with a few clips.
In an Easter basket: Sock bunnies and pom pom bunnies both tuck into Easter baskets beautifully as a handmade gift alongside the usual chocolates and small toys.
Framed on the wall: Handprint bunny art in a simple frame looks stunning on a gallery wall for the season. Group two or three if you have multiple kids.
The Bottom Line on Easter Bunny Crafts
You don’t need a craft room full of supplies or a background in art to make any of these. The paper plate bunny and the sock bunny take less than 30 minutes. The wood block bunnies and clay bowls take a little more time but result in something genuinely beautiful that you’ll want to keep for years.
What I love most about Easter bunny crafts is the range. There’s always something for a two-year-old with paint on their hands, something for a teenager who wants a more polished result, and something for an adult who wants a gorgeous seasonal decoration that doesn’t look like it came from a dollar bin.
Pick one, pick three, or work your way through the whole list over a few afternoons. Either way, your home will feel like spring arrived the moment you set them out.
Which Easter bunny craft are you most excited to try? Drop a comment below and let me know. I’d especially love to hear if you try the clay bunny bowls or the wood block bunnies. Those are my two personal favorites this year, and they photograph beautifully.
Happy crafting, and happy Easter!
Loved this post? Save it to your Easter or Spring Crafts Pinterest board so you can find it later!


No Comment! Be the first one.